- September 8, 2020
- 4 Like
- 0 / 5
- 6,147 Total Views


- Prep Time5min
- Total Time90min + time to dry
I love a good best out of waste project so when my 4-year old asked if we could make Barbie doll thrones, I immediately said yes. Why not give that a try?! We used an amazon cardboard box, spare foam from the trampoline repair and cloth and jewels from our recent Snow-White party.
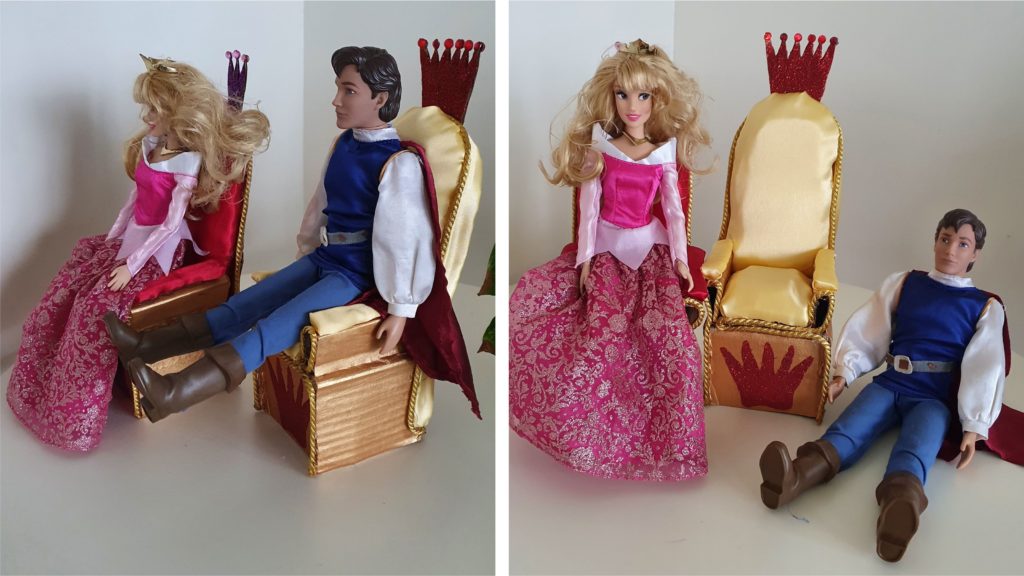

How to make a Barbie Doll Throne from best out of waste materials.
Like I mentioned in the DIY Tamatoa Crab from Moana, it’s important to use whatever you have at home. I have given the step-by-step guide below the ingredients with pictures, but your project might be slightly different depending on your materials.
The foam. The foam would have been easier to handle if it had been thinner (this was ½ inch thick) but as always with a best out of waste project, I like to use what we have in the house already. If you don’t have any foam laying around, you could also use foam paper, new kitchen sponges more cloth or even teddy bear stuffing.
The ribbon. I had gold string from our restaurant menus at home which we used for the borders. Any string, cloth piece, ribbon or even beads and craft jewels could work to hide the cardboard borders.
The glue. It’s faster to use a glue gun for these projects so you can move on to the next step without waiting for everything to dry. Unfortunately this also means that smaller kids can’t be involved in the gluing part, as the glue gun quickly becomes very hot and can cause burns. So instead I try to do both. For this project the chair itself was easiest assembled with a glue gun (which also meant that my daughter could start painting it before she lost interest in the project all together). My 4-year old later did all the glitter work with fevicol glue while I made the borders with the glue gun.
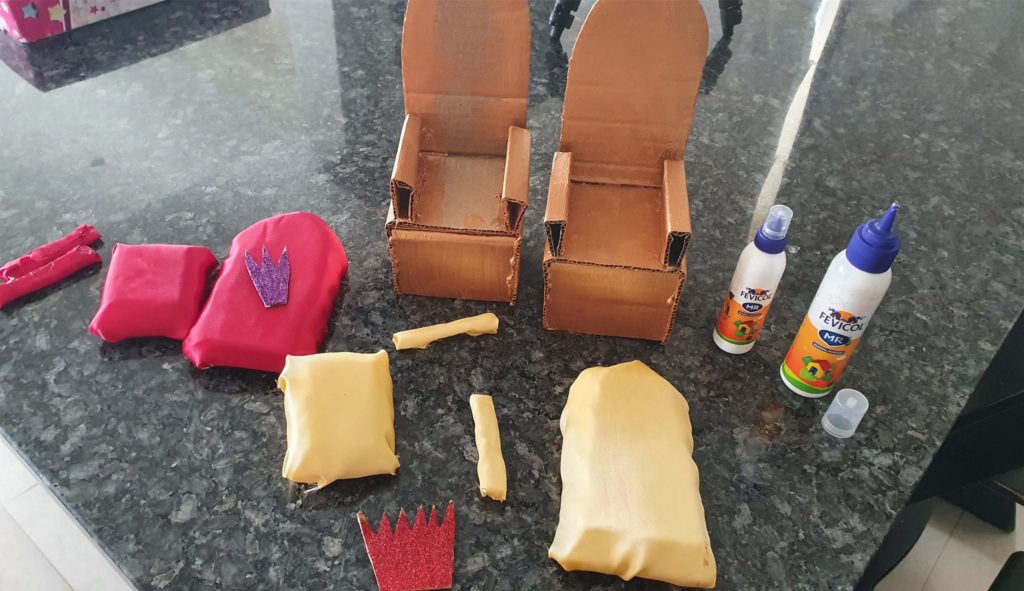

Barbie Doll throne, the “ugly phase” of every project
Every artwork, cake or best out of waste project goes through what I like to call an “ugly phase”. It’s that time where the cloth is a bit untidy, the glue is seen or the paint doesn’t cover fully yet. So please don’t worry if the throne looks a bit un-neat at one time or another. Once it is done, it will look nice, I promise!
Ingredients
Directions
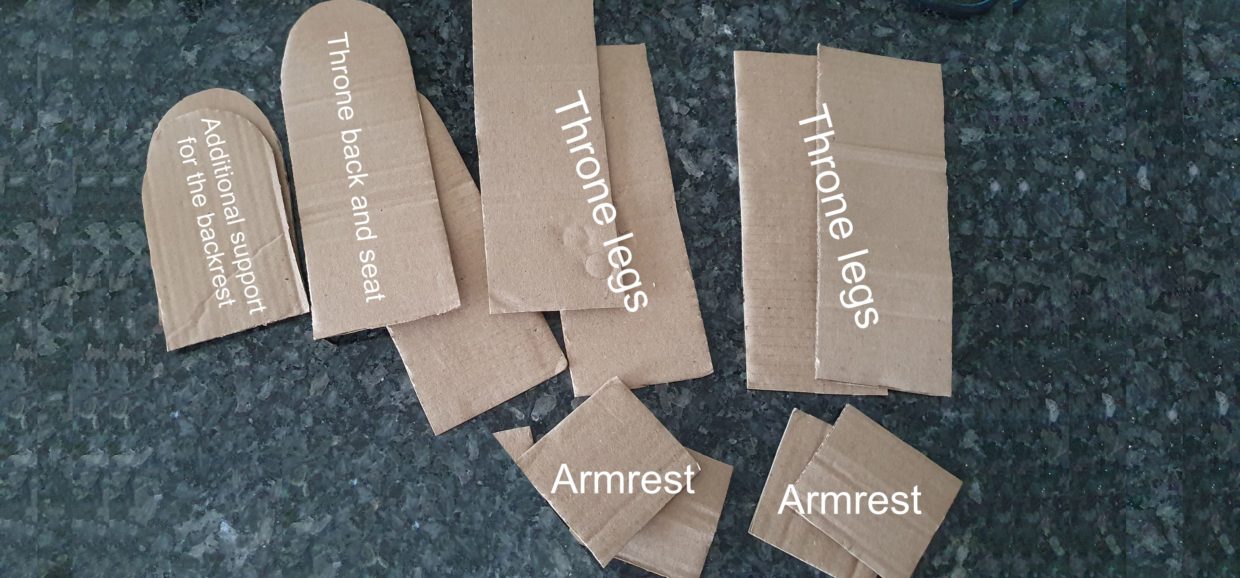

Cut 2x throne backs with the seat, 4x throne legs, 4x armrest pieces to fold later and 2x extra backrest support pieces
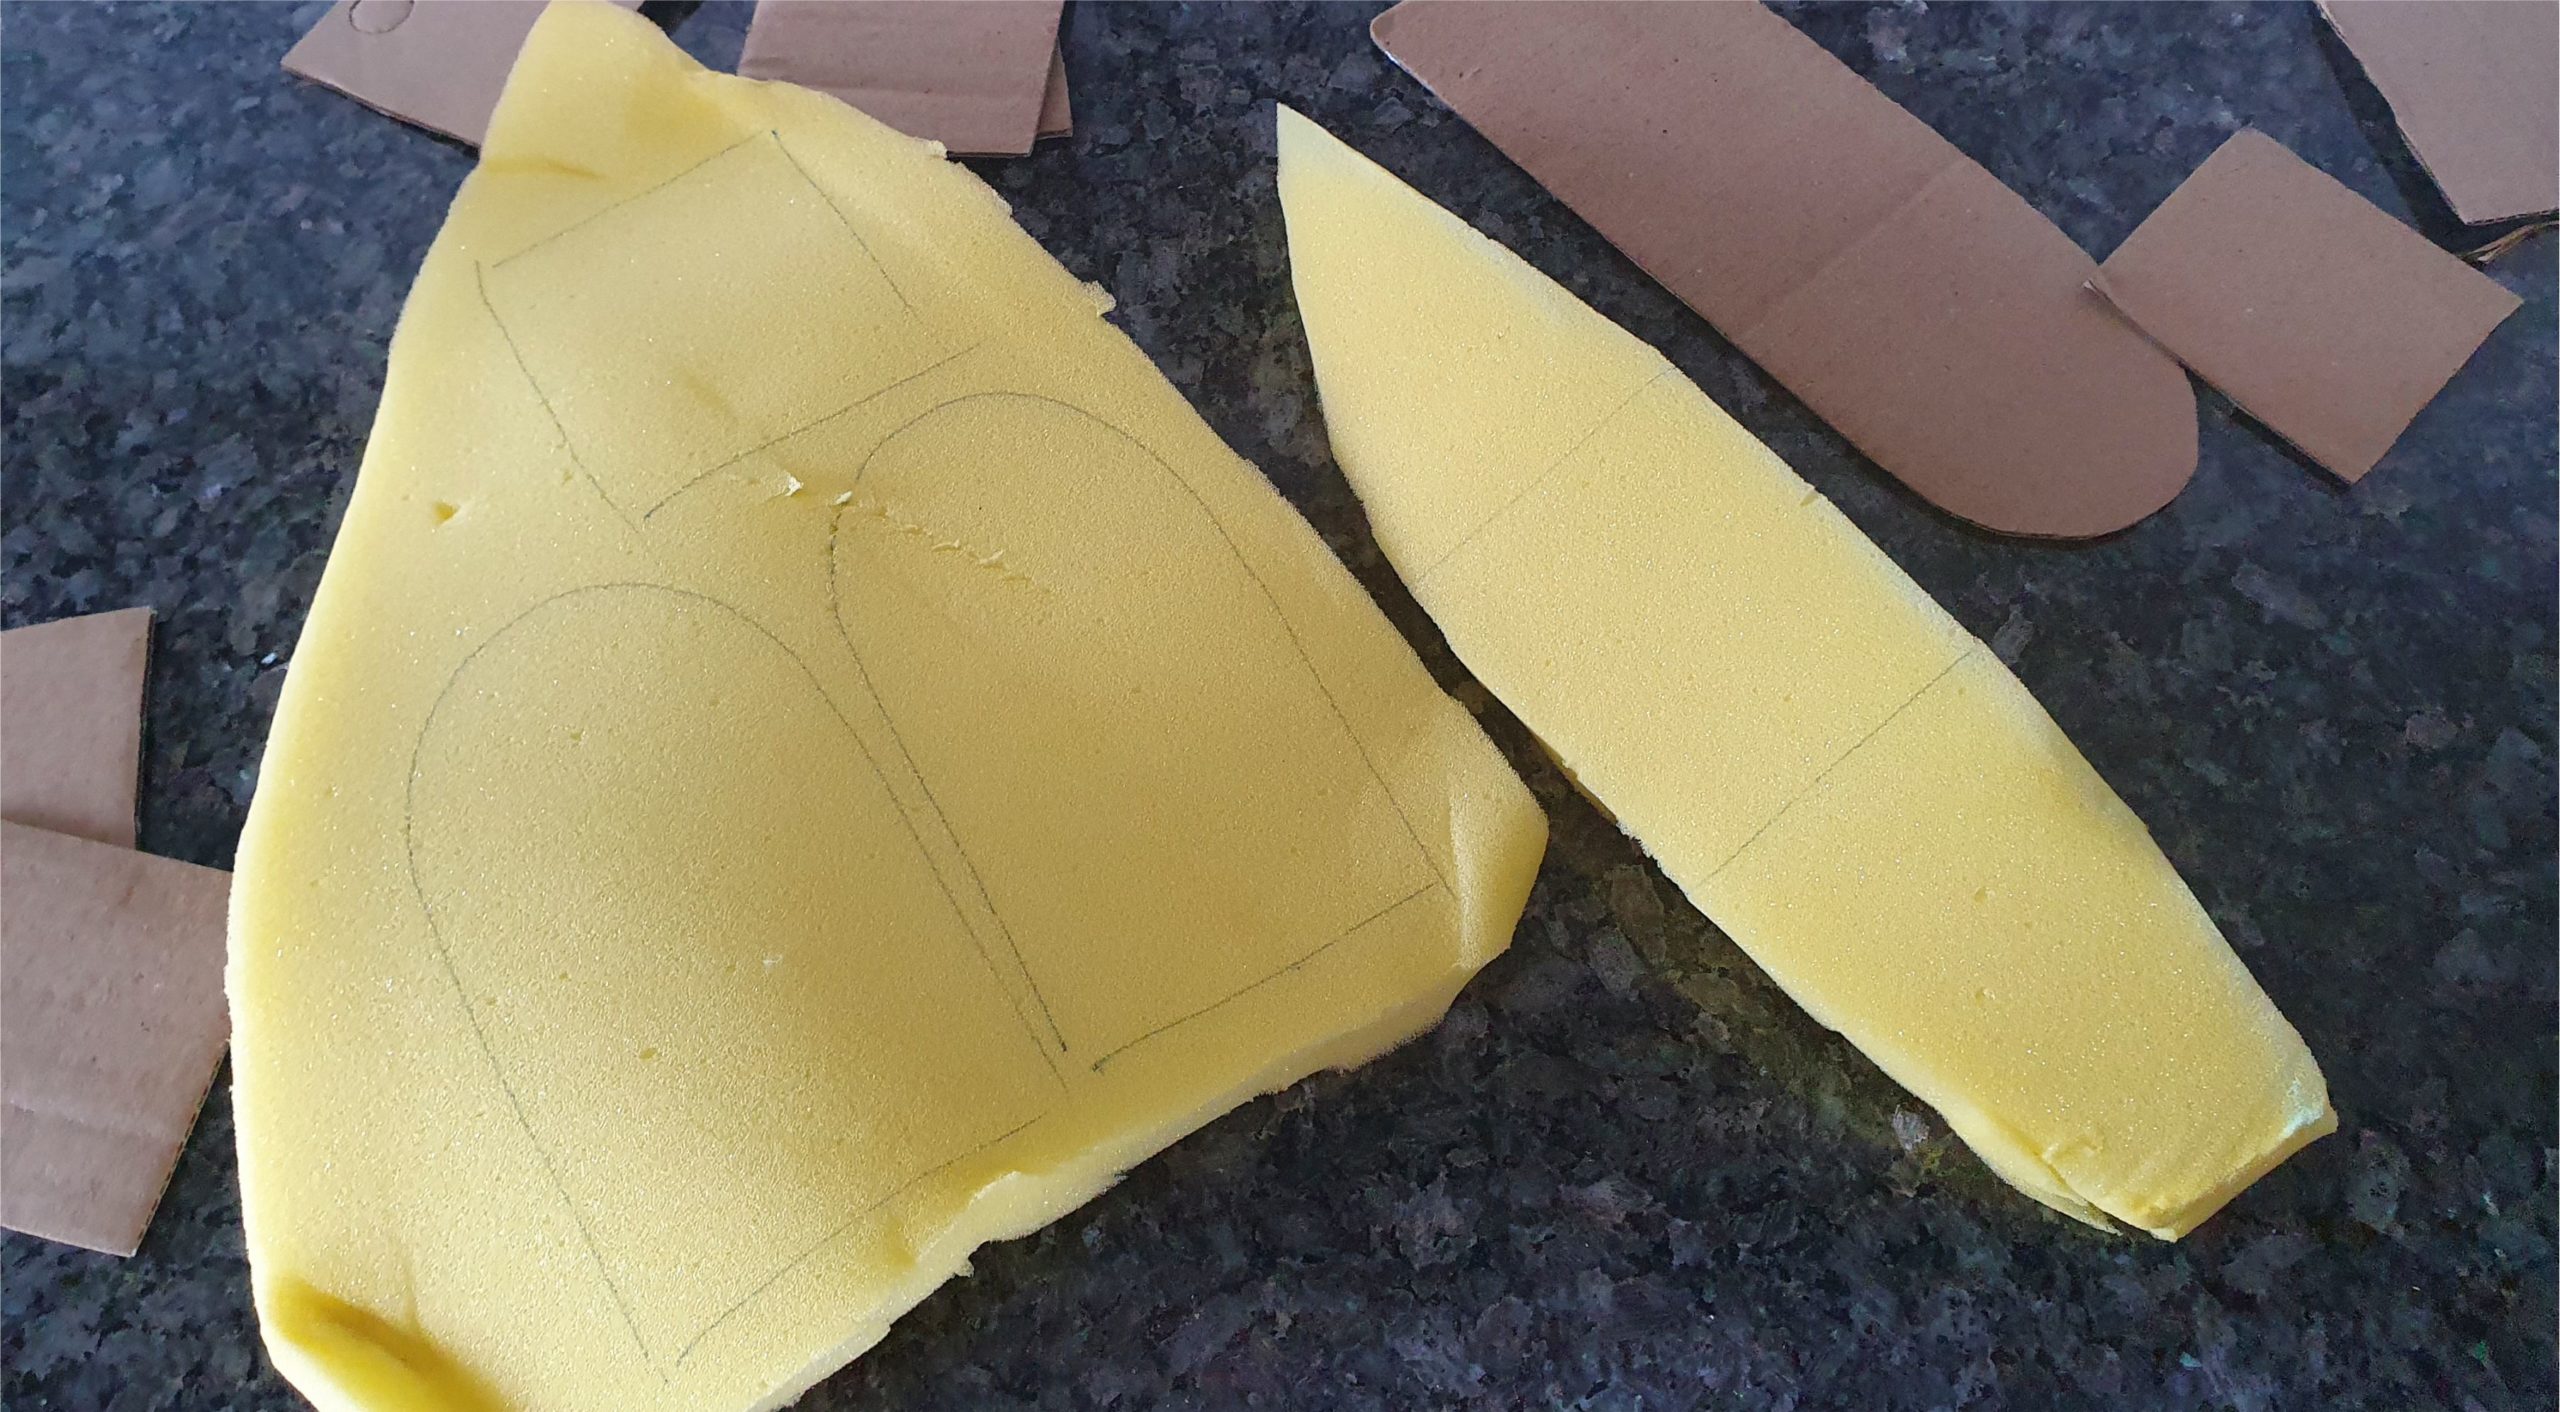

Using the cardboard pieces as your template, outline the backrest and seat on the foam. Cut them out.
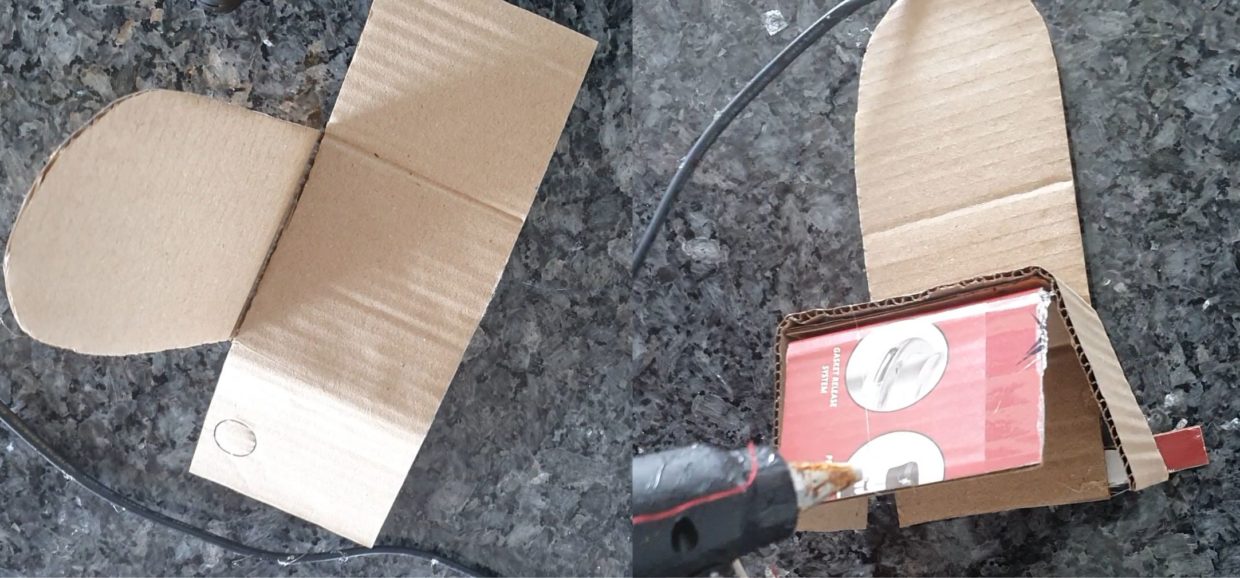

Assemble the chair: Fold the throne legs into 3 equal parts and glue them together with the backrest and seat as shown on the picture.
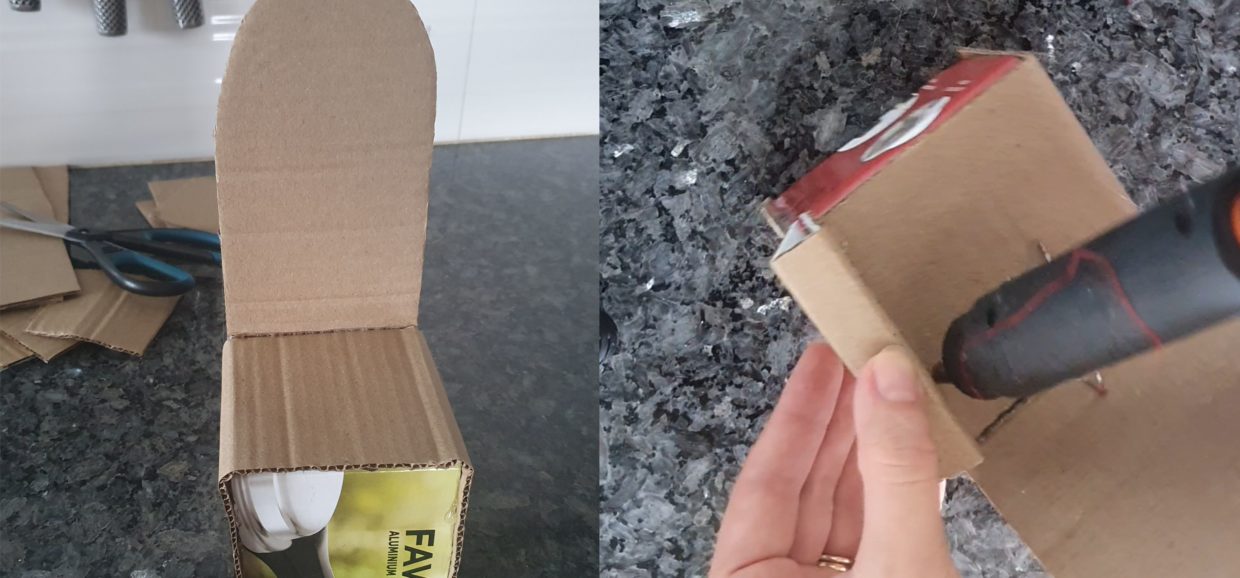

Fold the armrests and glue them on the sides of the throne seat
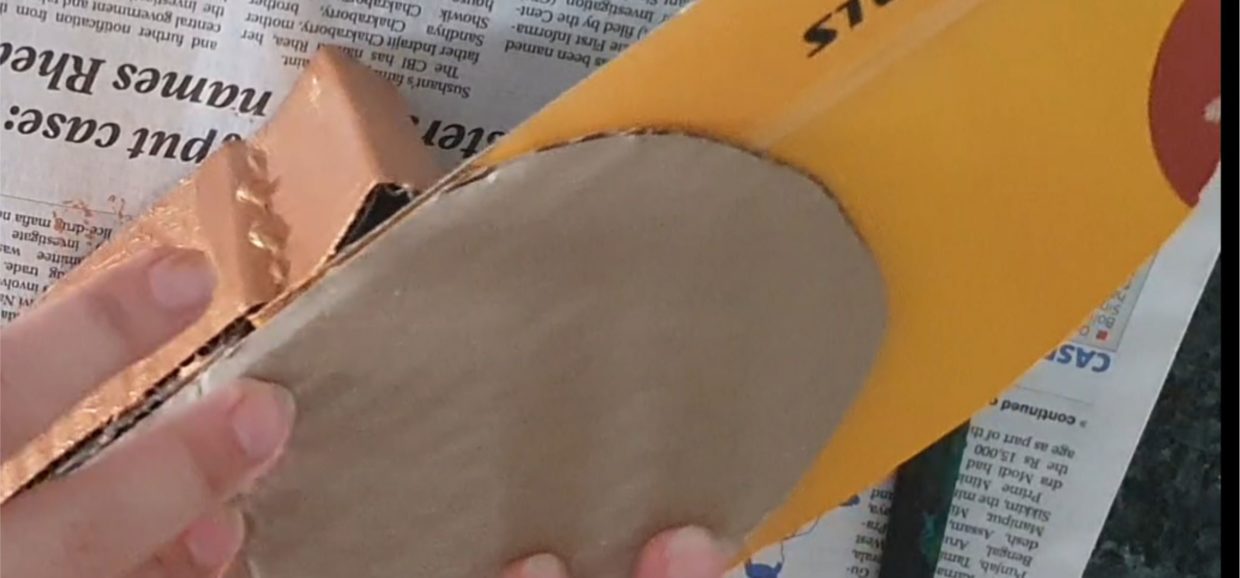

Glue on the supports on the back of the chair to prevent the backrest from bending backwards
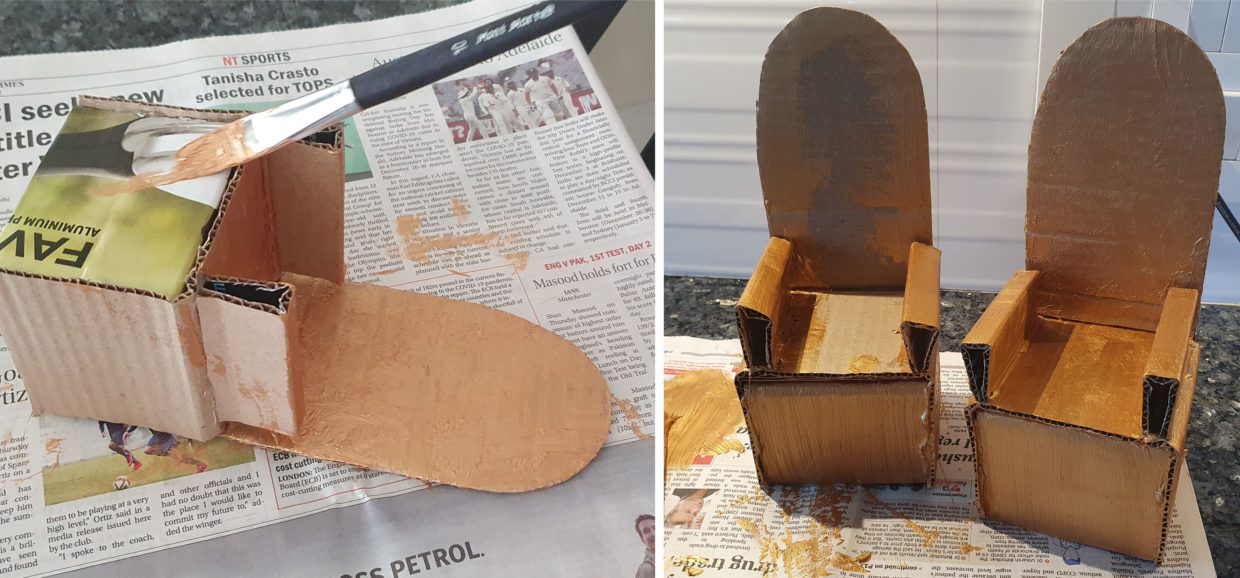

Paint the chairs and leave to dry while you make the cushion covers.
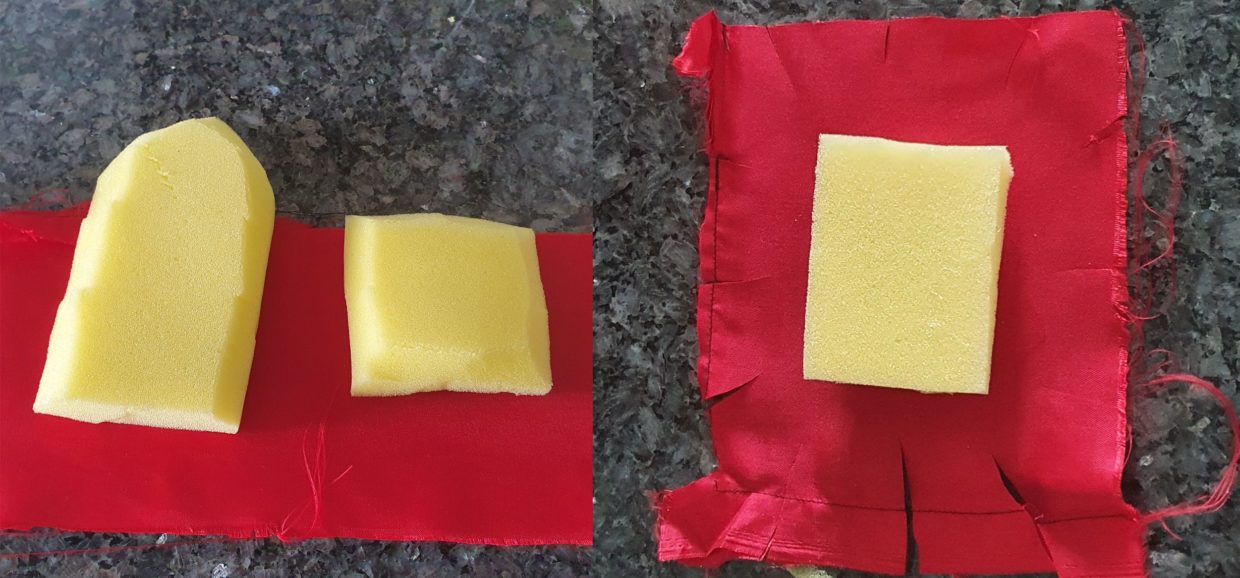

If you had ½ inch foam (like me), cut the edge off the foam pieces to create a nicer shape (I used these cut offs for the armrest cushions) Turn it upside down and lay it down on the cloth. Cut “into” the cloth like shown on the picture to make it easier to fold it smoothly. Fold the cloth in all the way around. Be careful not to burn your fingers if you are using a glue gun. Do this to all the cushions.
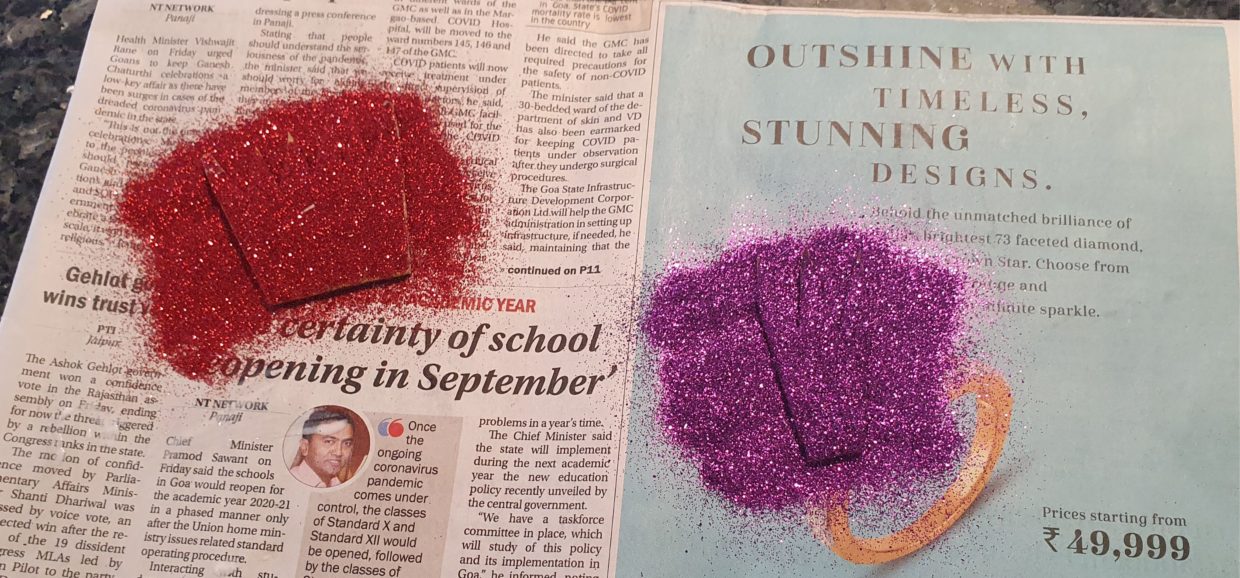

Cut a princess crown and a prince crown from the cardboard, cover in fevicol glue and sprinkle glitter on top. Let them dry
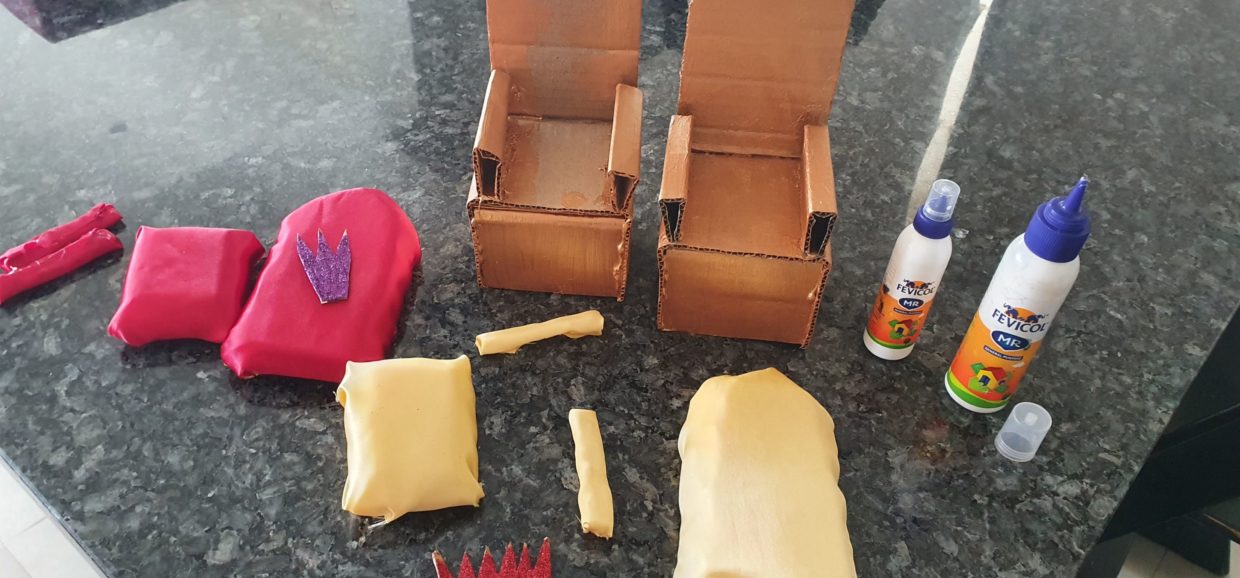

You will now have 2 painted chairs, 2 crowns and cushions for both chairs. Glue it all together.
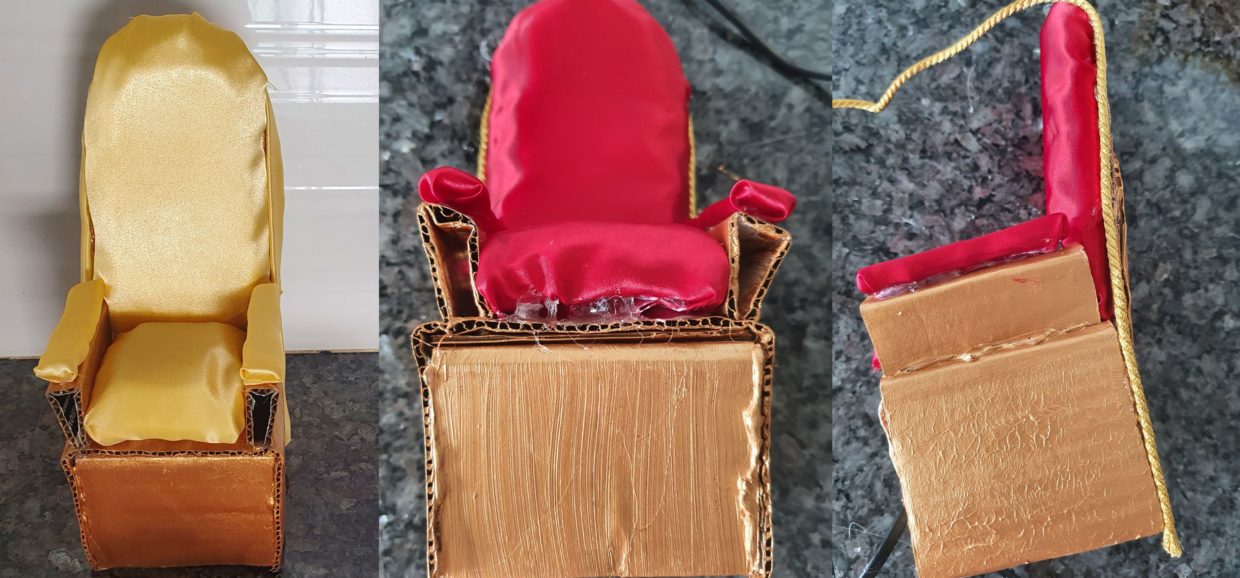

After gluing all the cushions into place, cover the borders with string, ribbon or beads to hide the glue marks and the cardboard edges.
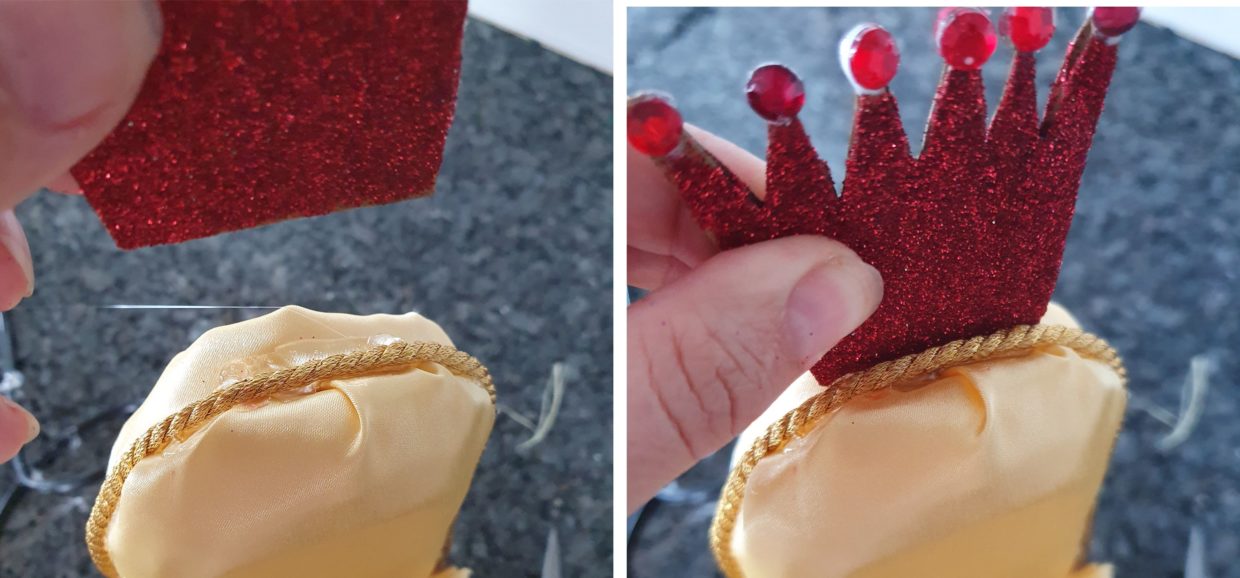

Using the glue gun, glue on the crowns on top of the chairs. My daughter decorated the crowns with small beads at the tips.
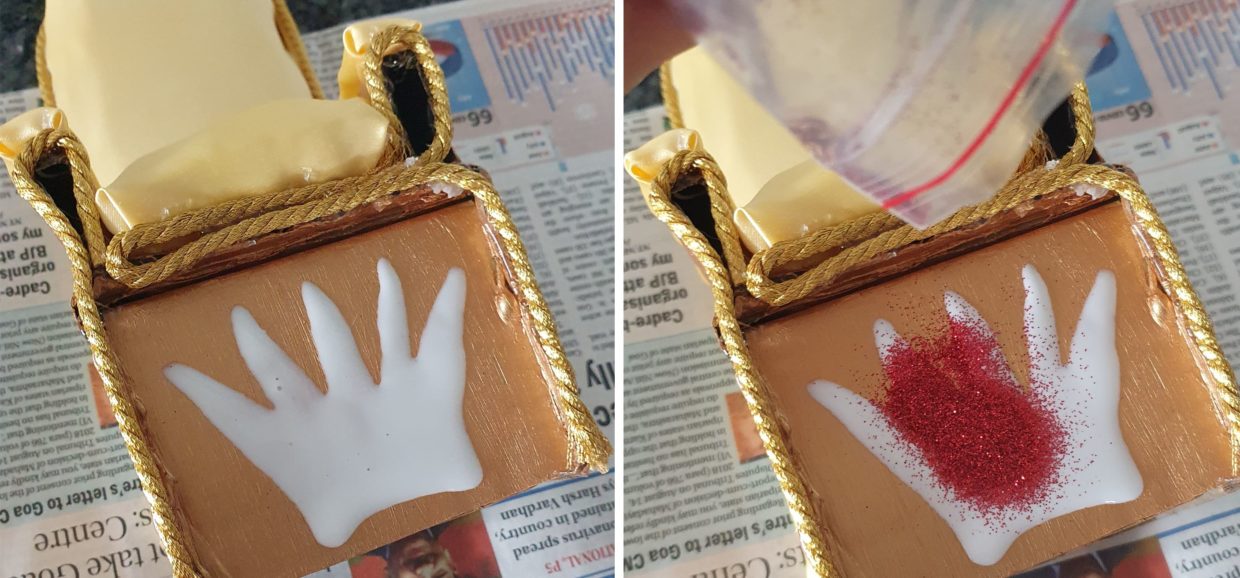

Make a crown with fevicol glue on the front of the chairs and sprinkle with glitter. Let it dry for a few hours before removing the excess glitter with a small dry paint brush.
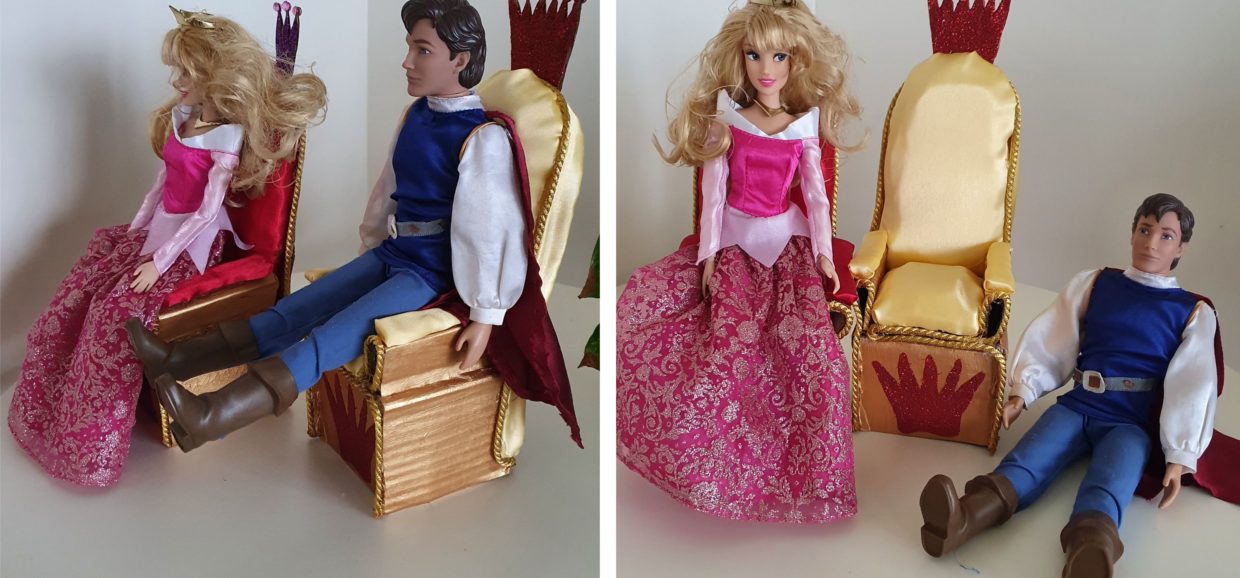

And you are done. Two beautiful best out of waste thrones for the Barbie dolls. They work better with the Barbie dolls that can fold the legs at the knees (like princess Aurora above) but the other Barbie and Ken dolls have no problem sitting there for longer either. Happy crafting!
You may also like
Leave a Review Cancel reply
You must be logged in to post a comment.
Barbie Doll Throne (best-out-of-waste)
Ingredients
Follow The Directions
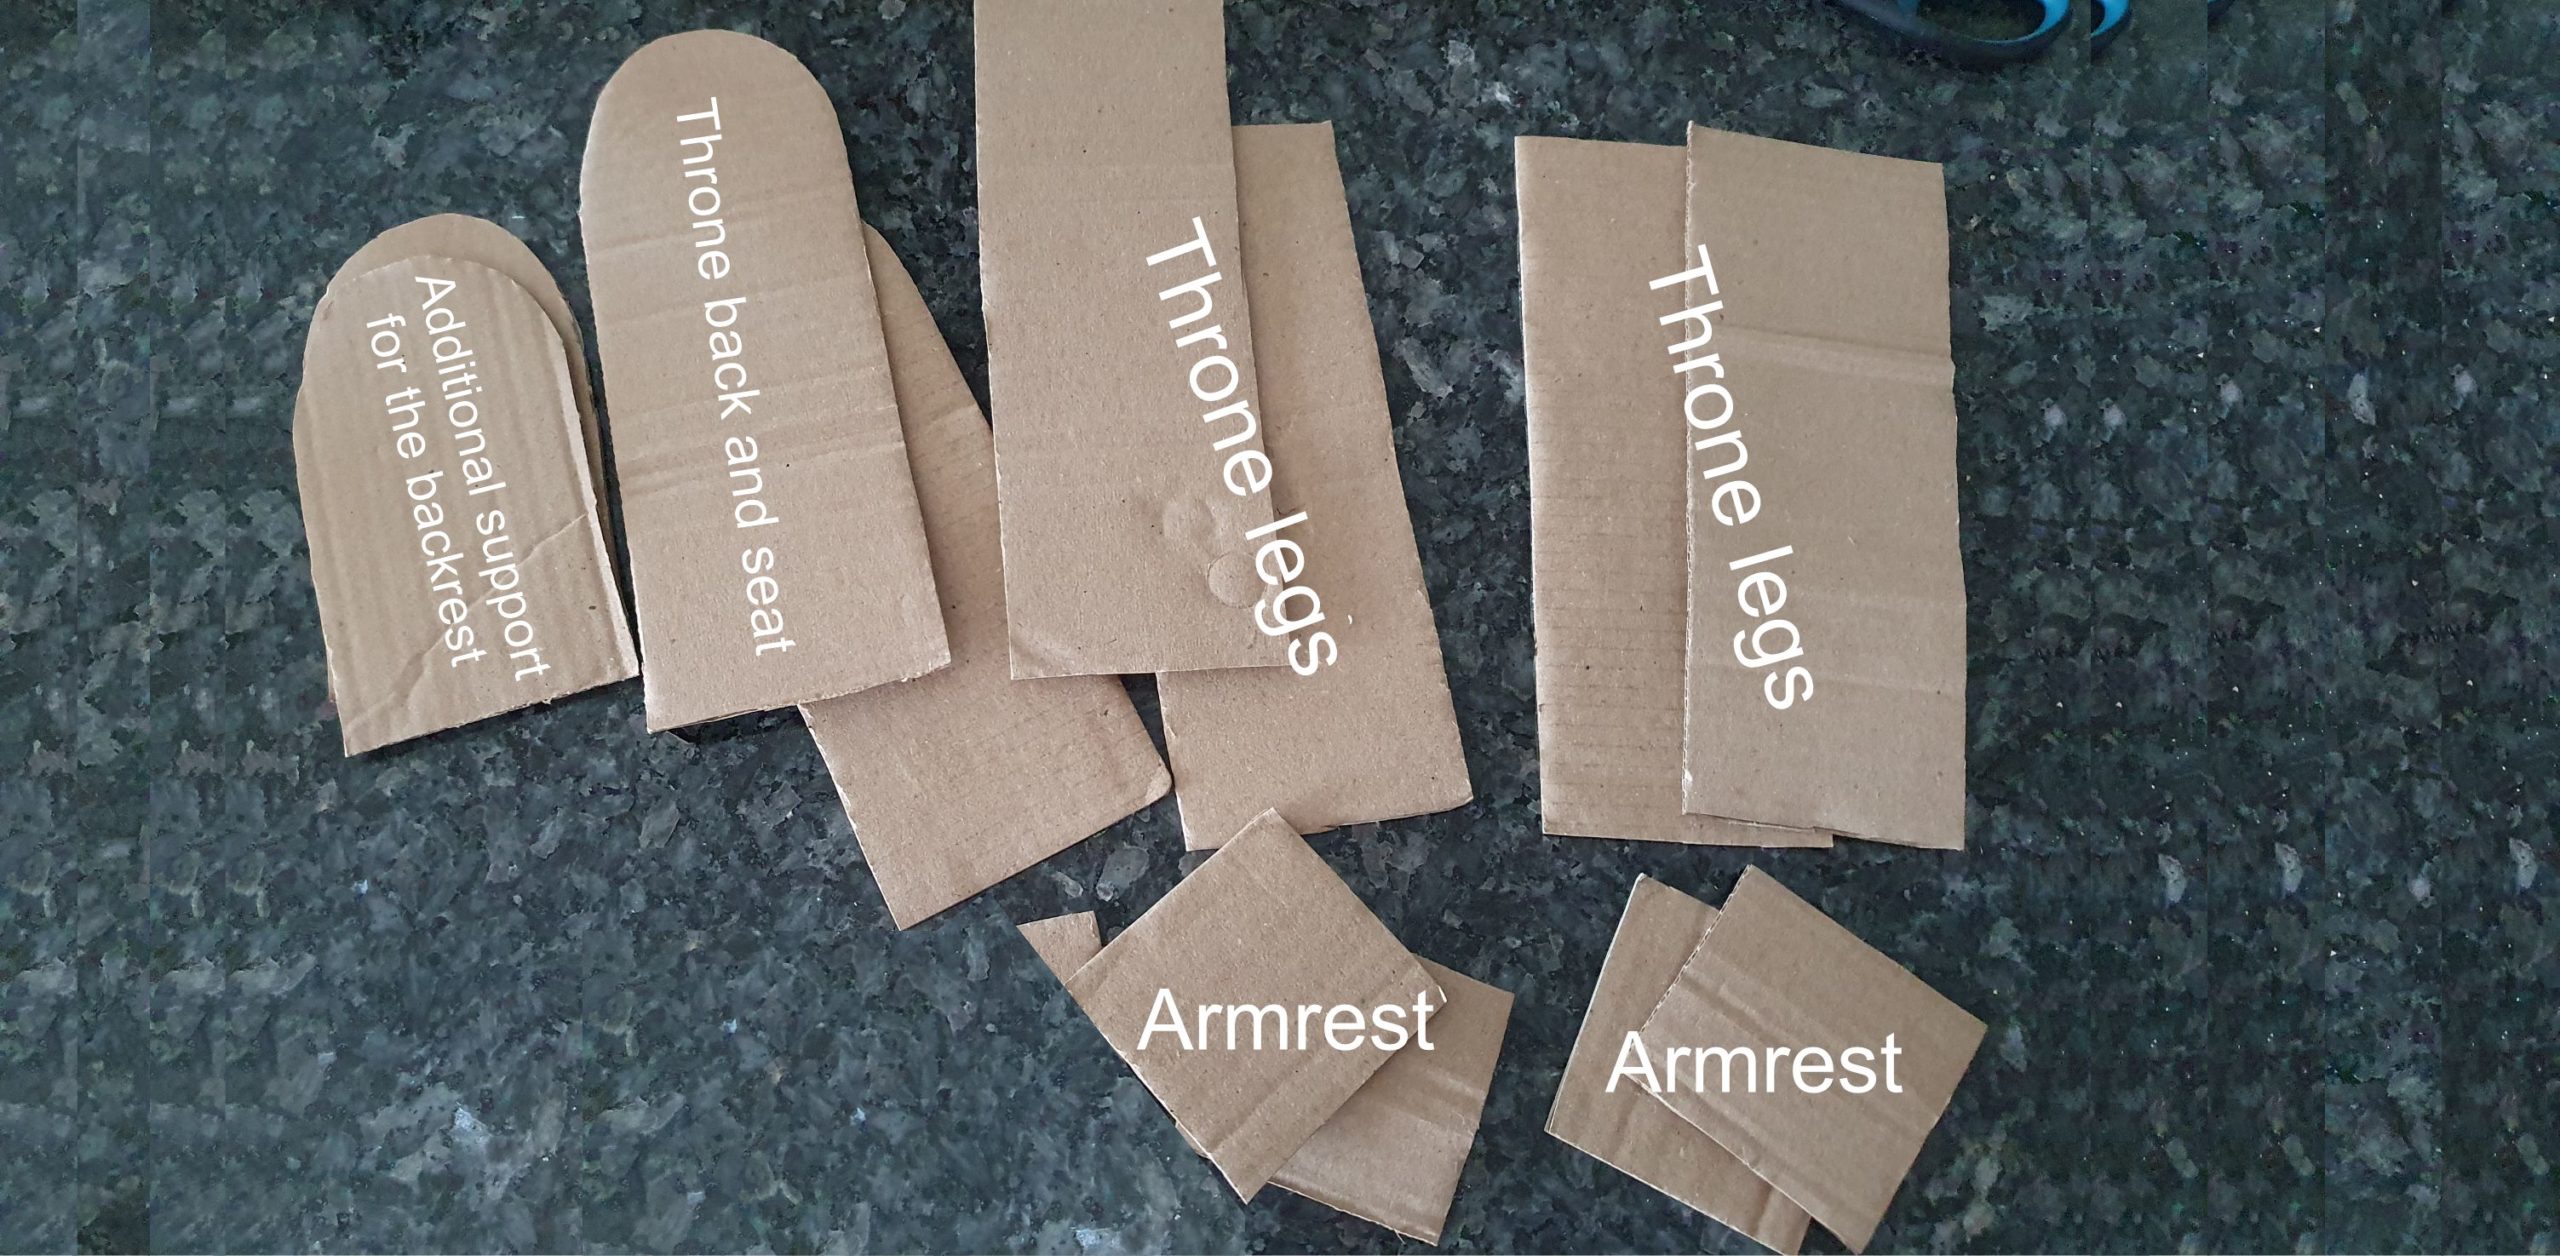

Cut 2x throne backs with the seat, 4x throne legs, 4x armrest pieces to fold later and 2x extra backrest support pieces


Using the cardboard pieces as your template, outline the backrest and seat on the foam. Cut them out.
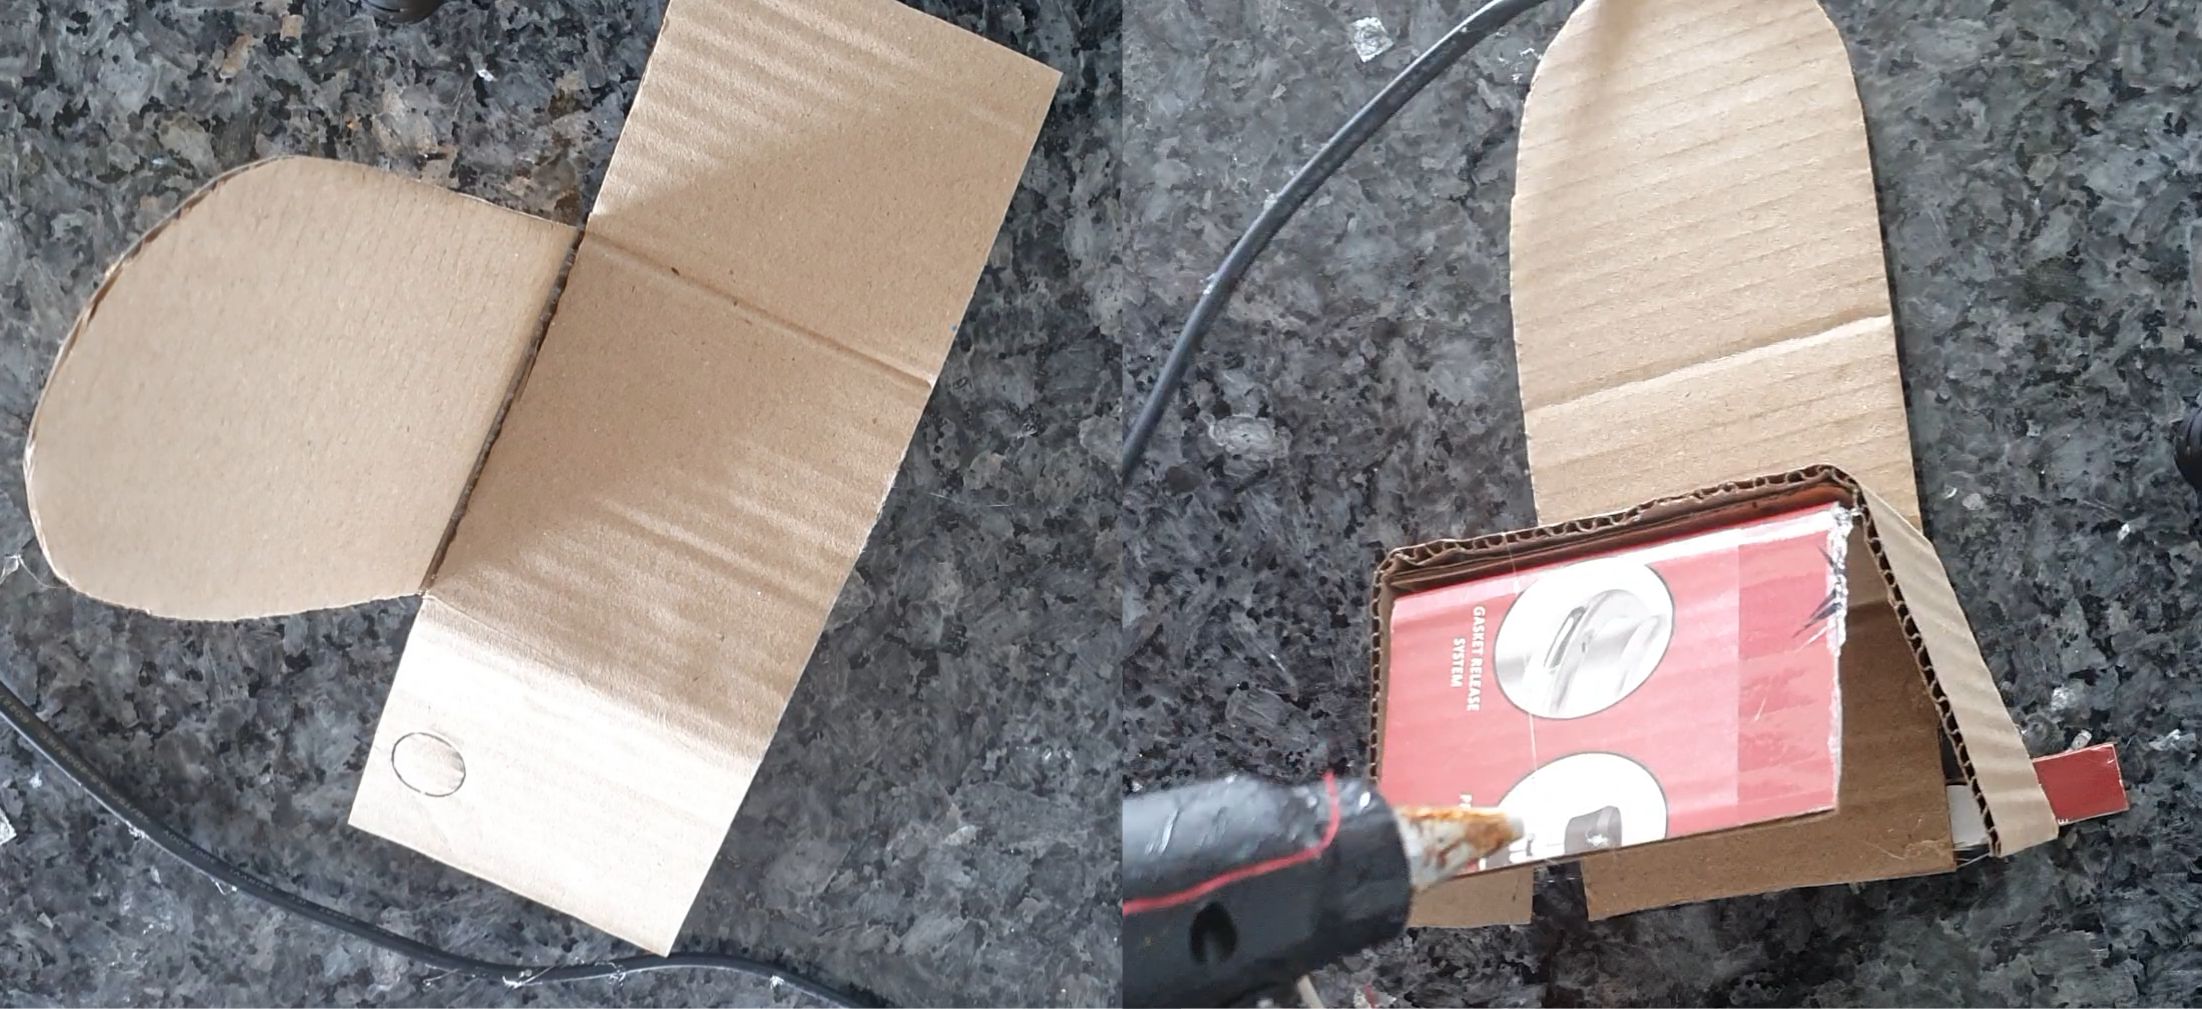

Assemble the chair: Fold the throne legs into 3 equal parts and glue them together with the backrest and seat as shown on the picture.
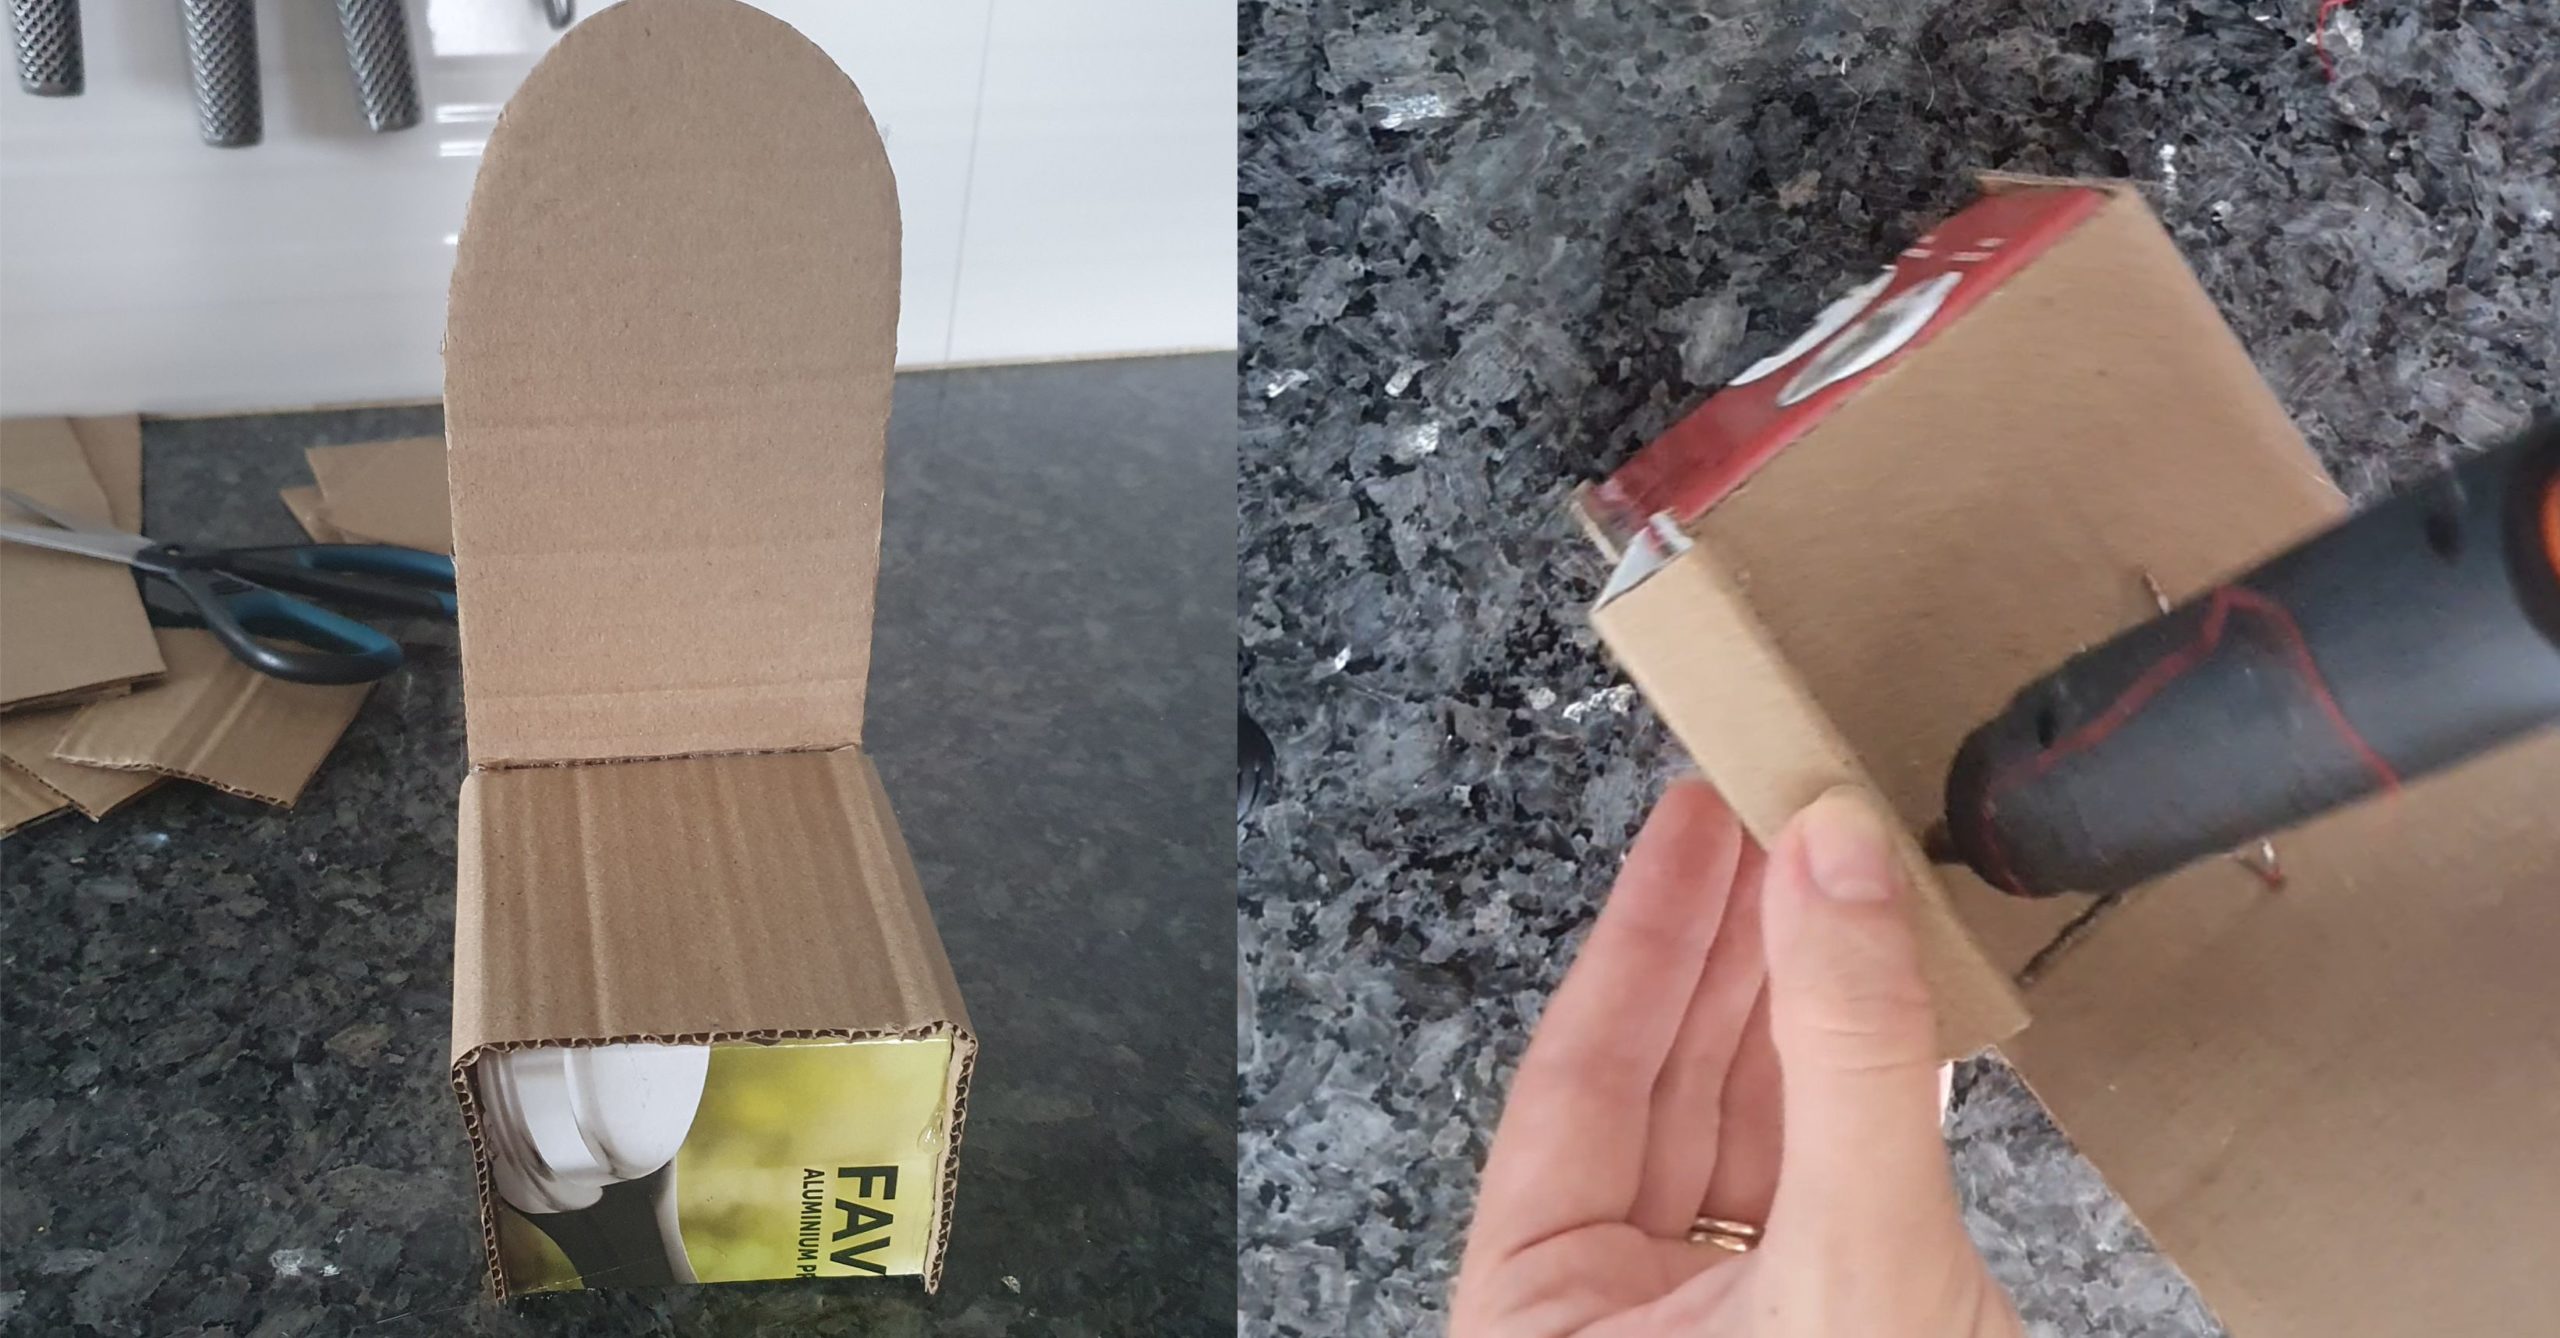

Fold the armrests and glue them on the sides of the throne seat
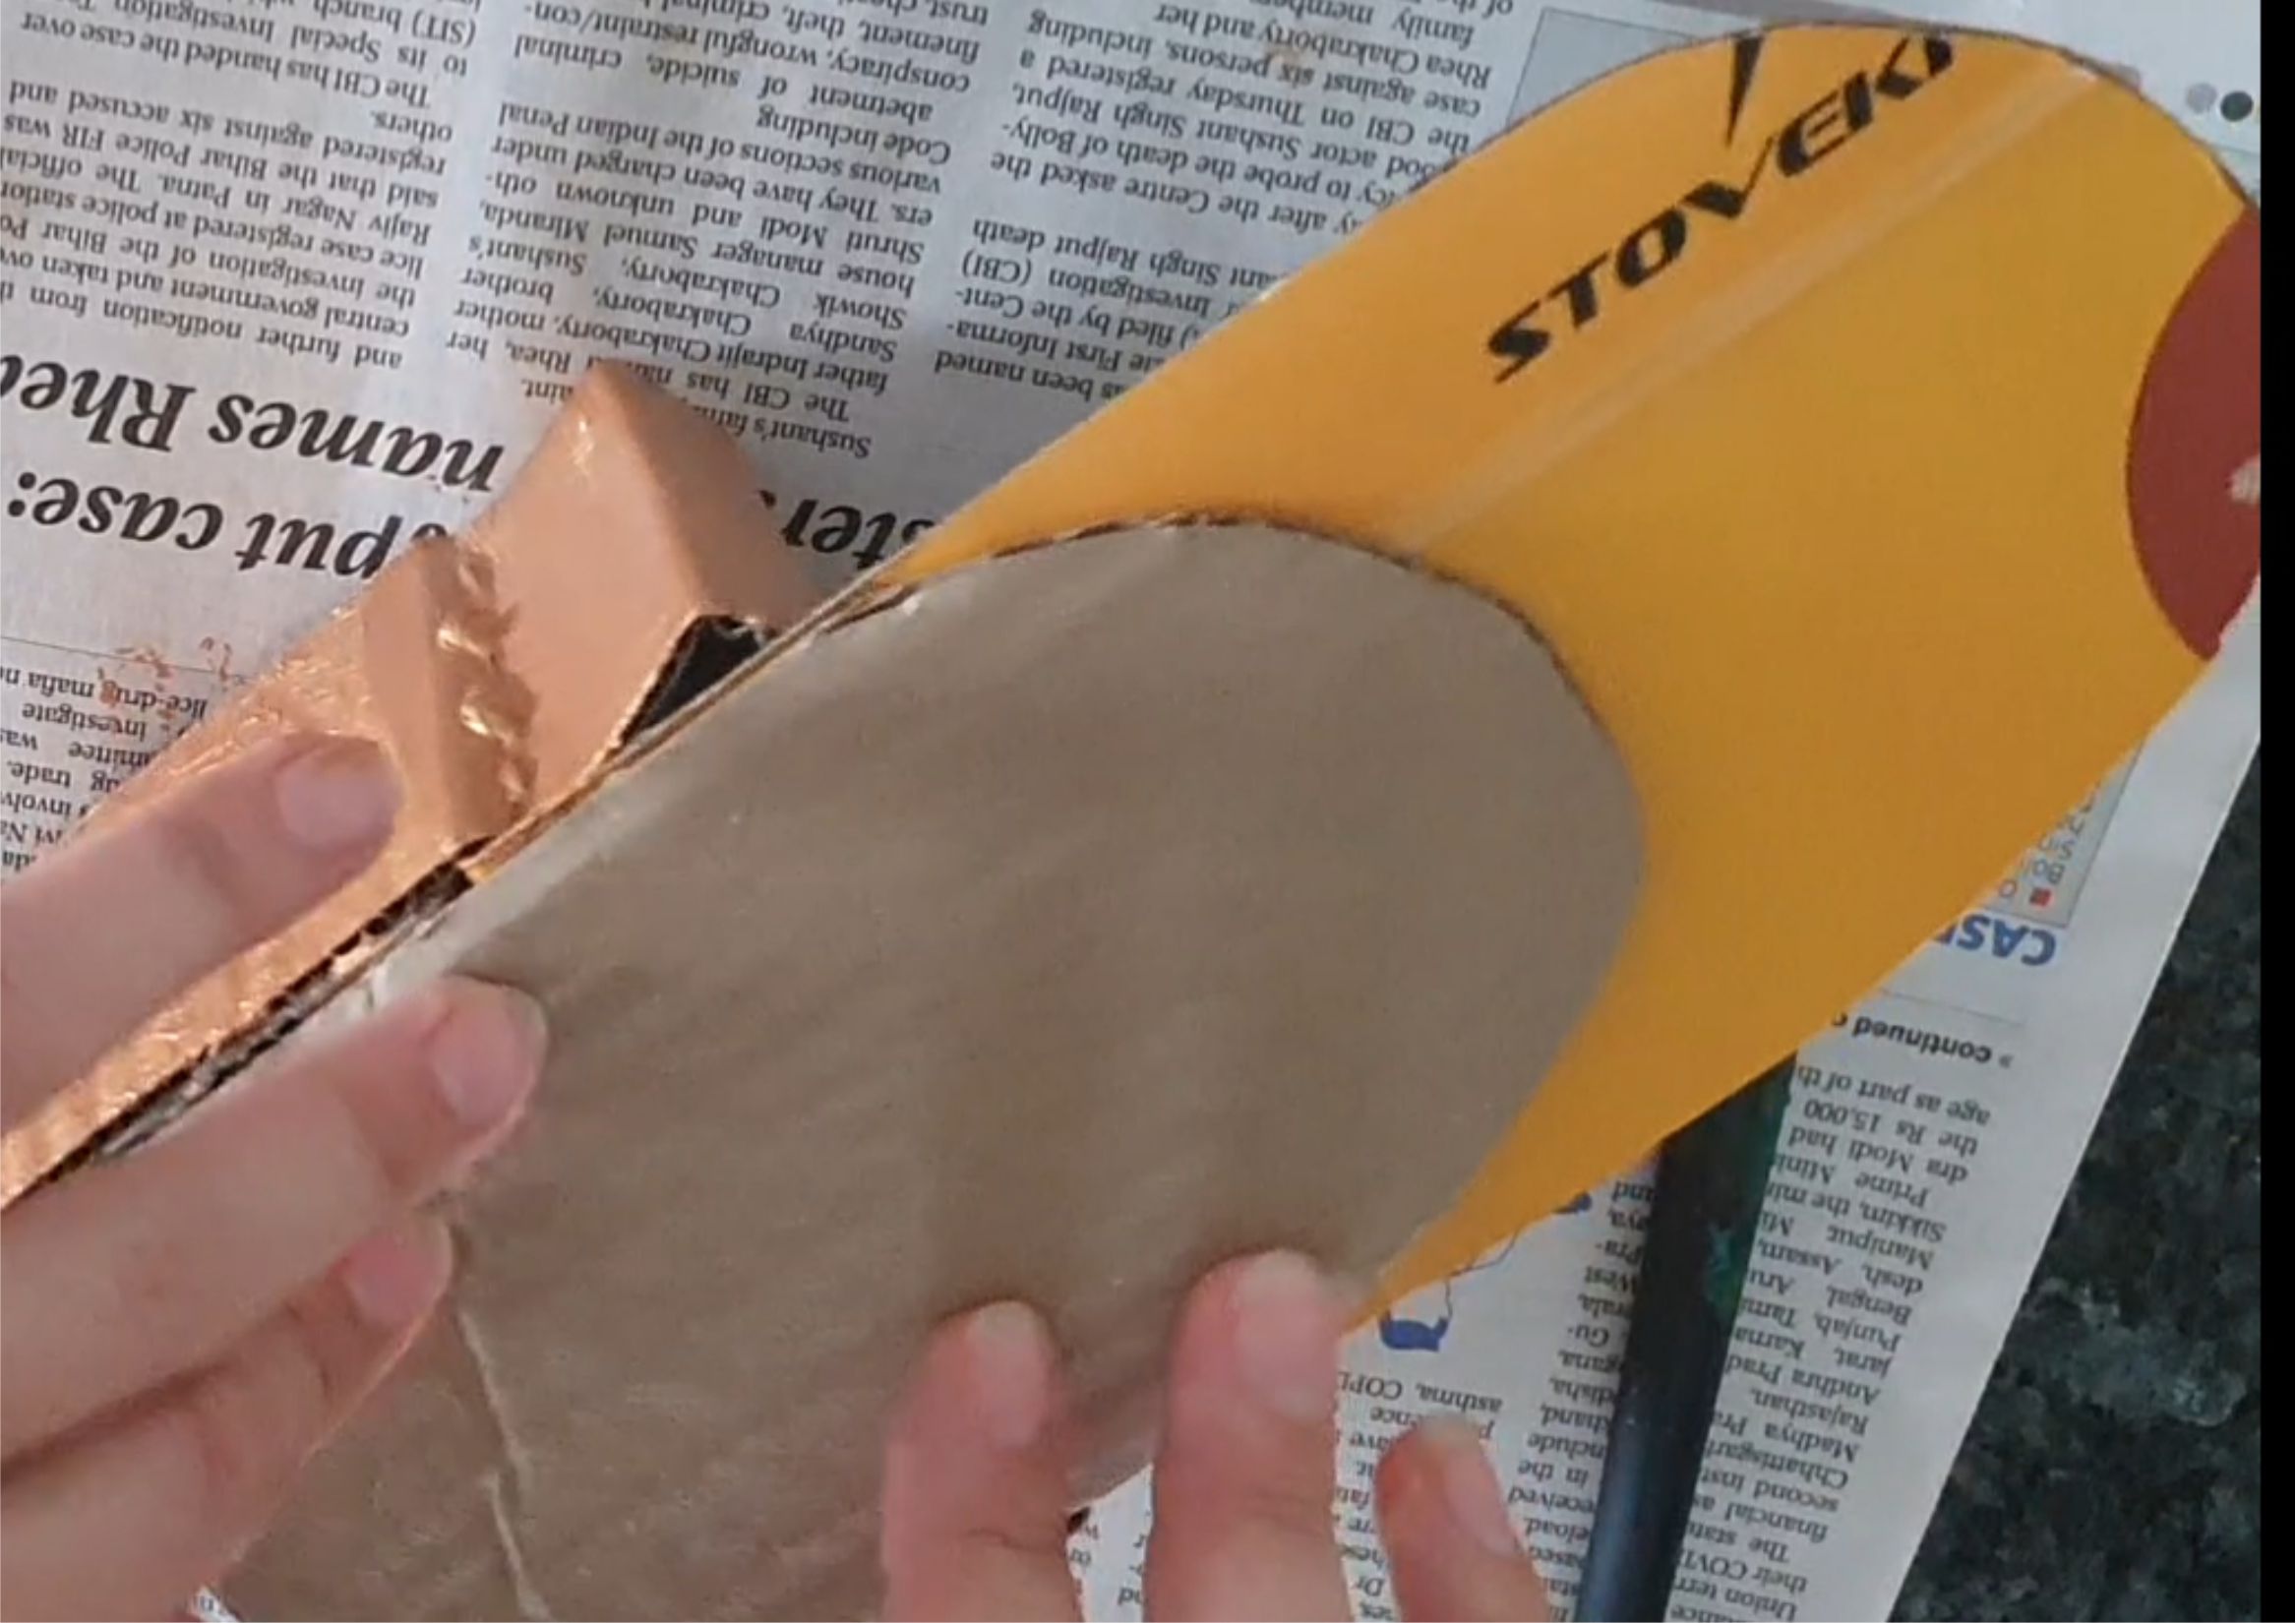

Glue on the supports on the back of the chair to prevent the backrest from bending backwards
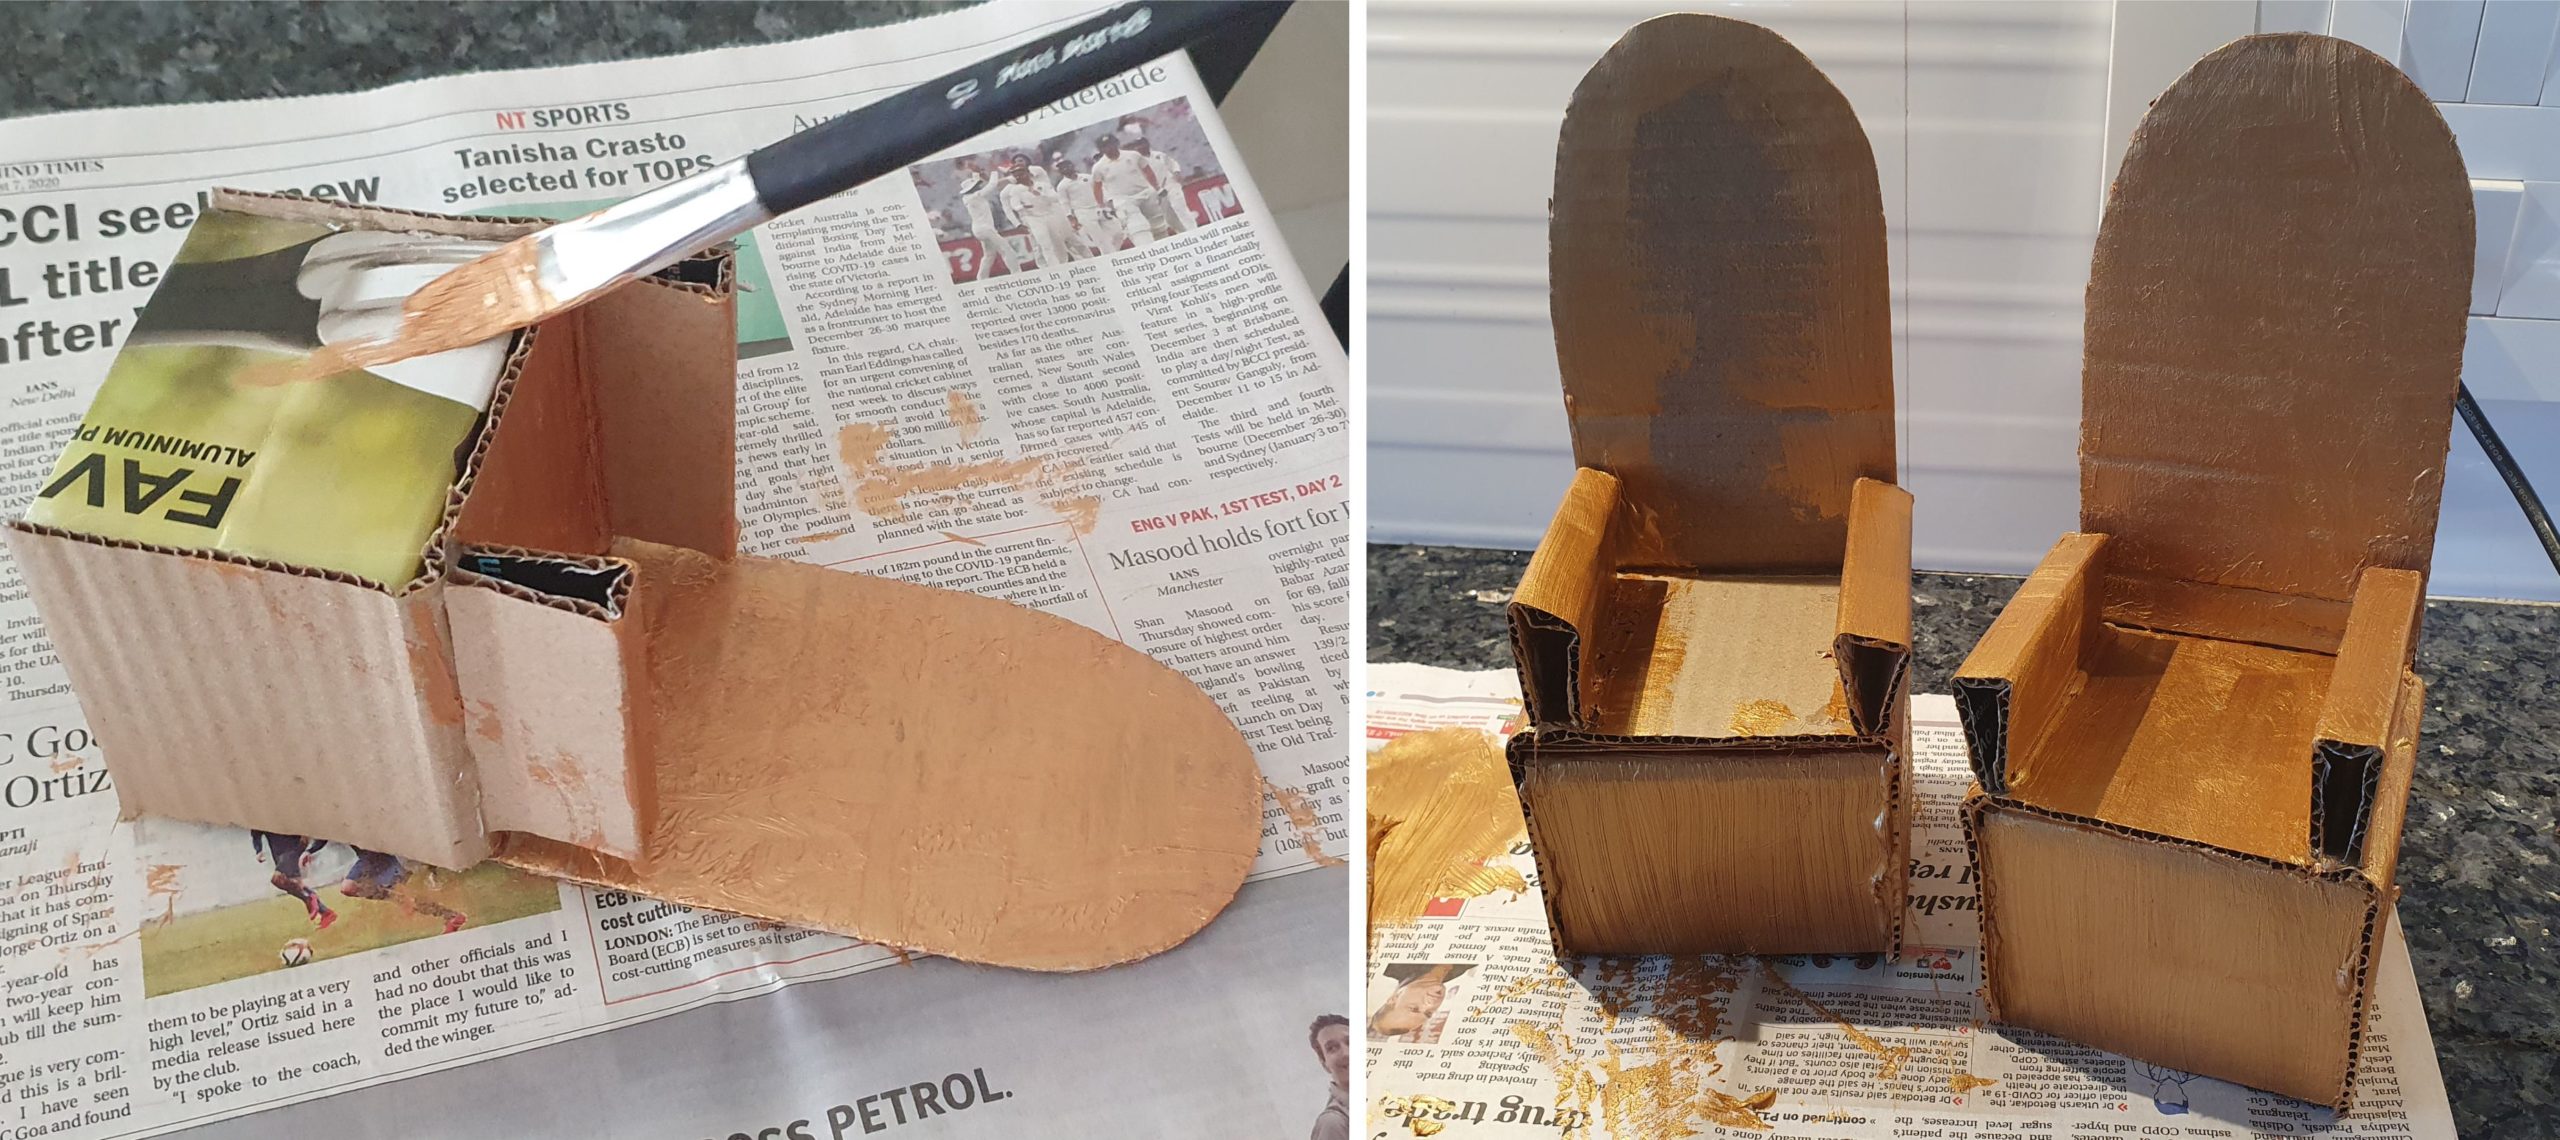

Paint the chairs and leave to dry while you make the cushion covers.
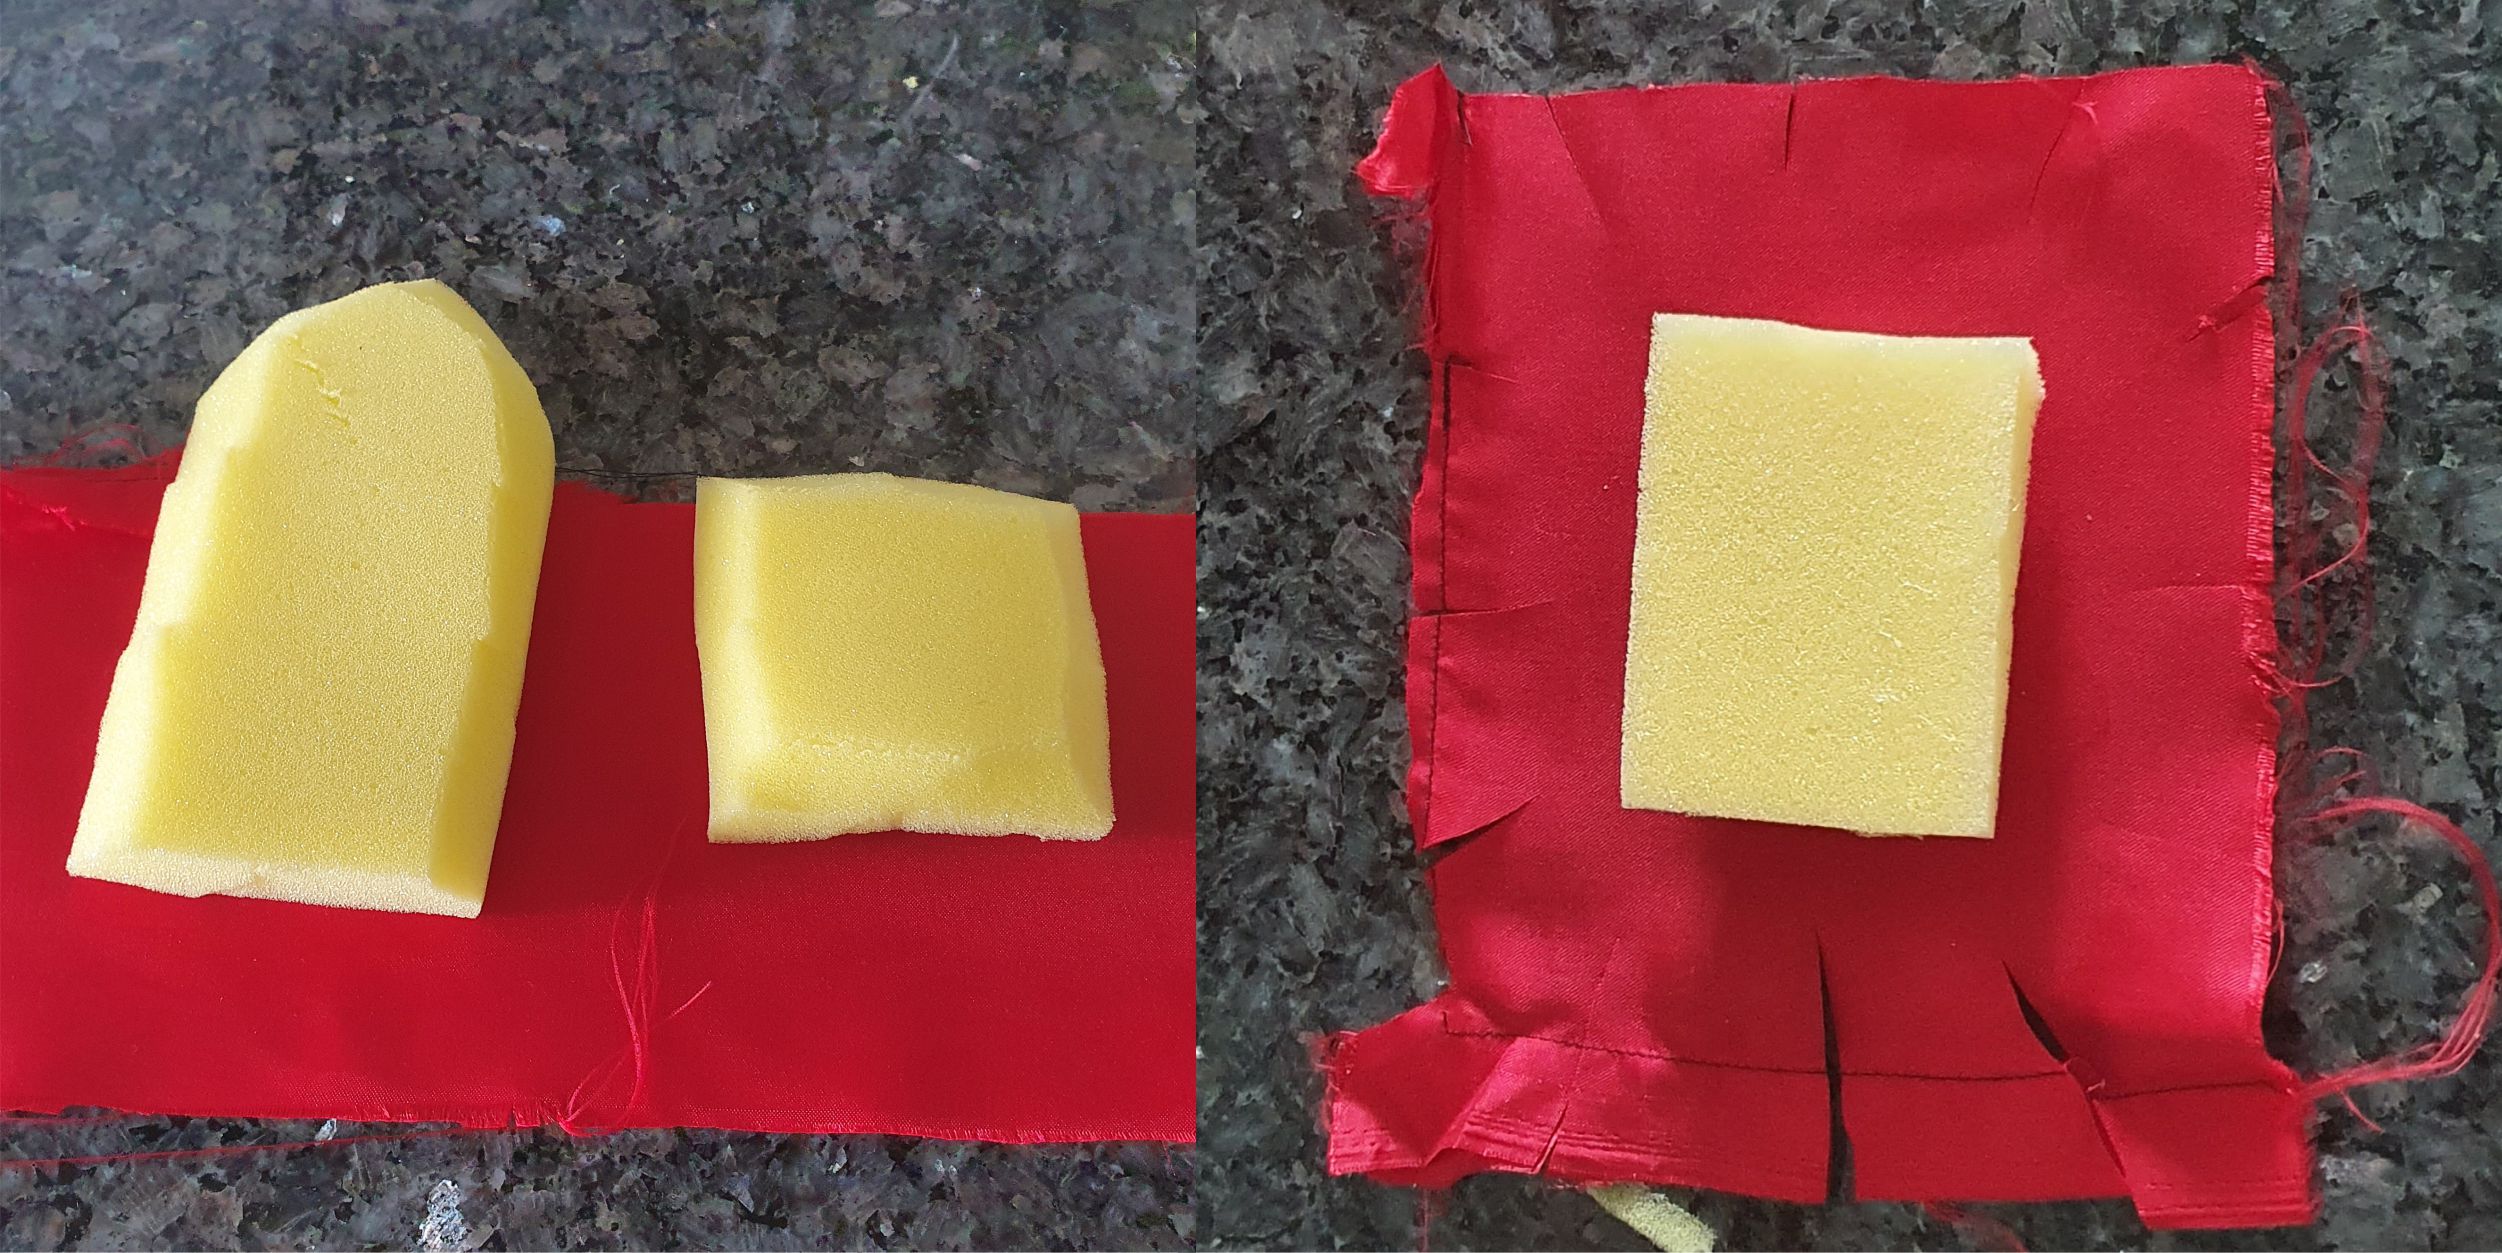

If you had ½ inch foam (like me), cut the edge off the foam pieces to create a nicer shape (I used these cut offs for the armrest cushions) Turn it upside down and lay it down on the cloth. Cut “into” the cloth like shown on the picture to make it easier to fold it smoothly. Fold the cloth in all the way around. Be careful not to burn your fingers if you are using a glue gun. Do this to all the cushions.
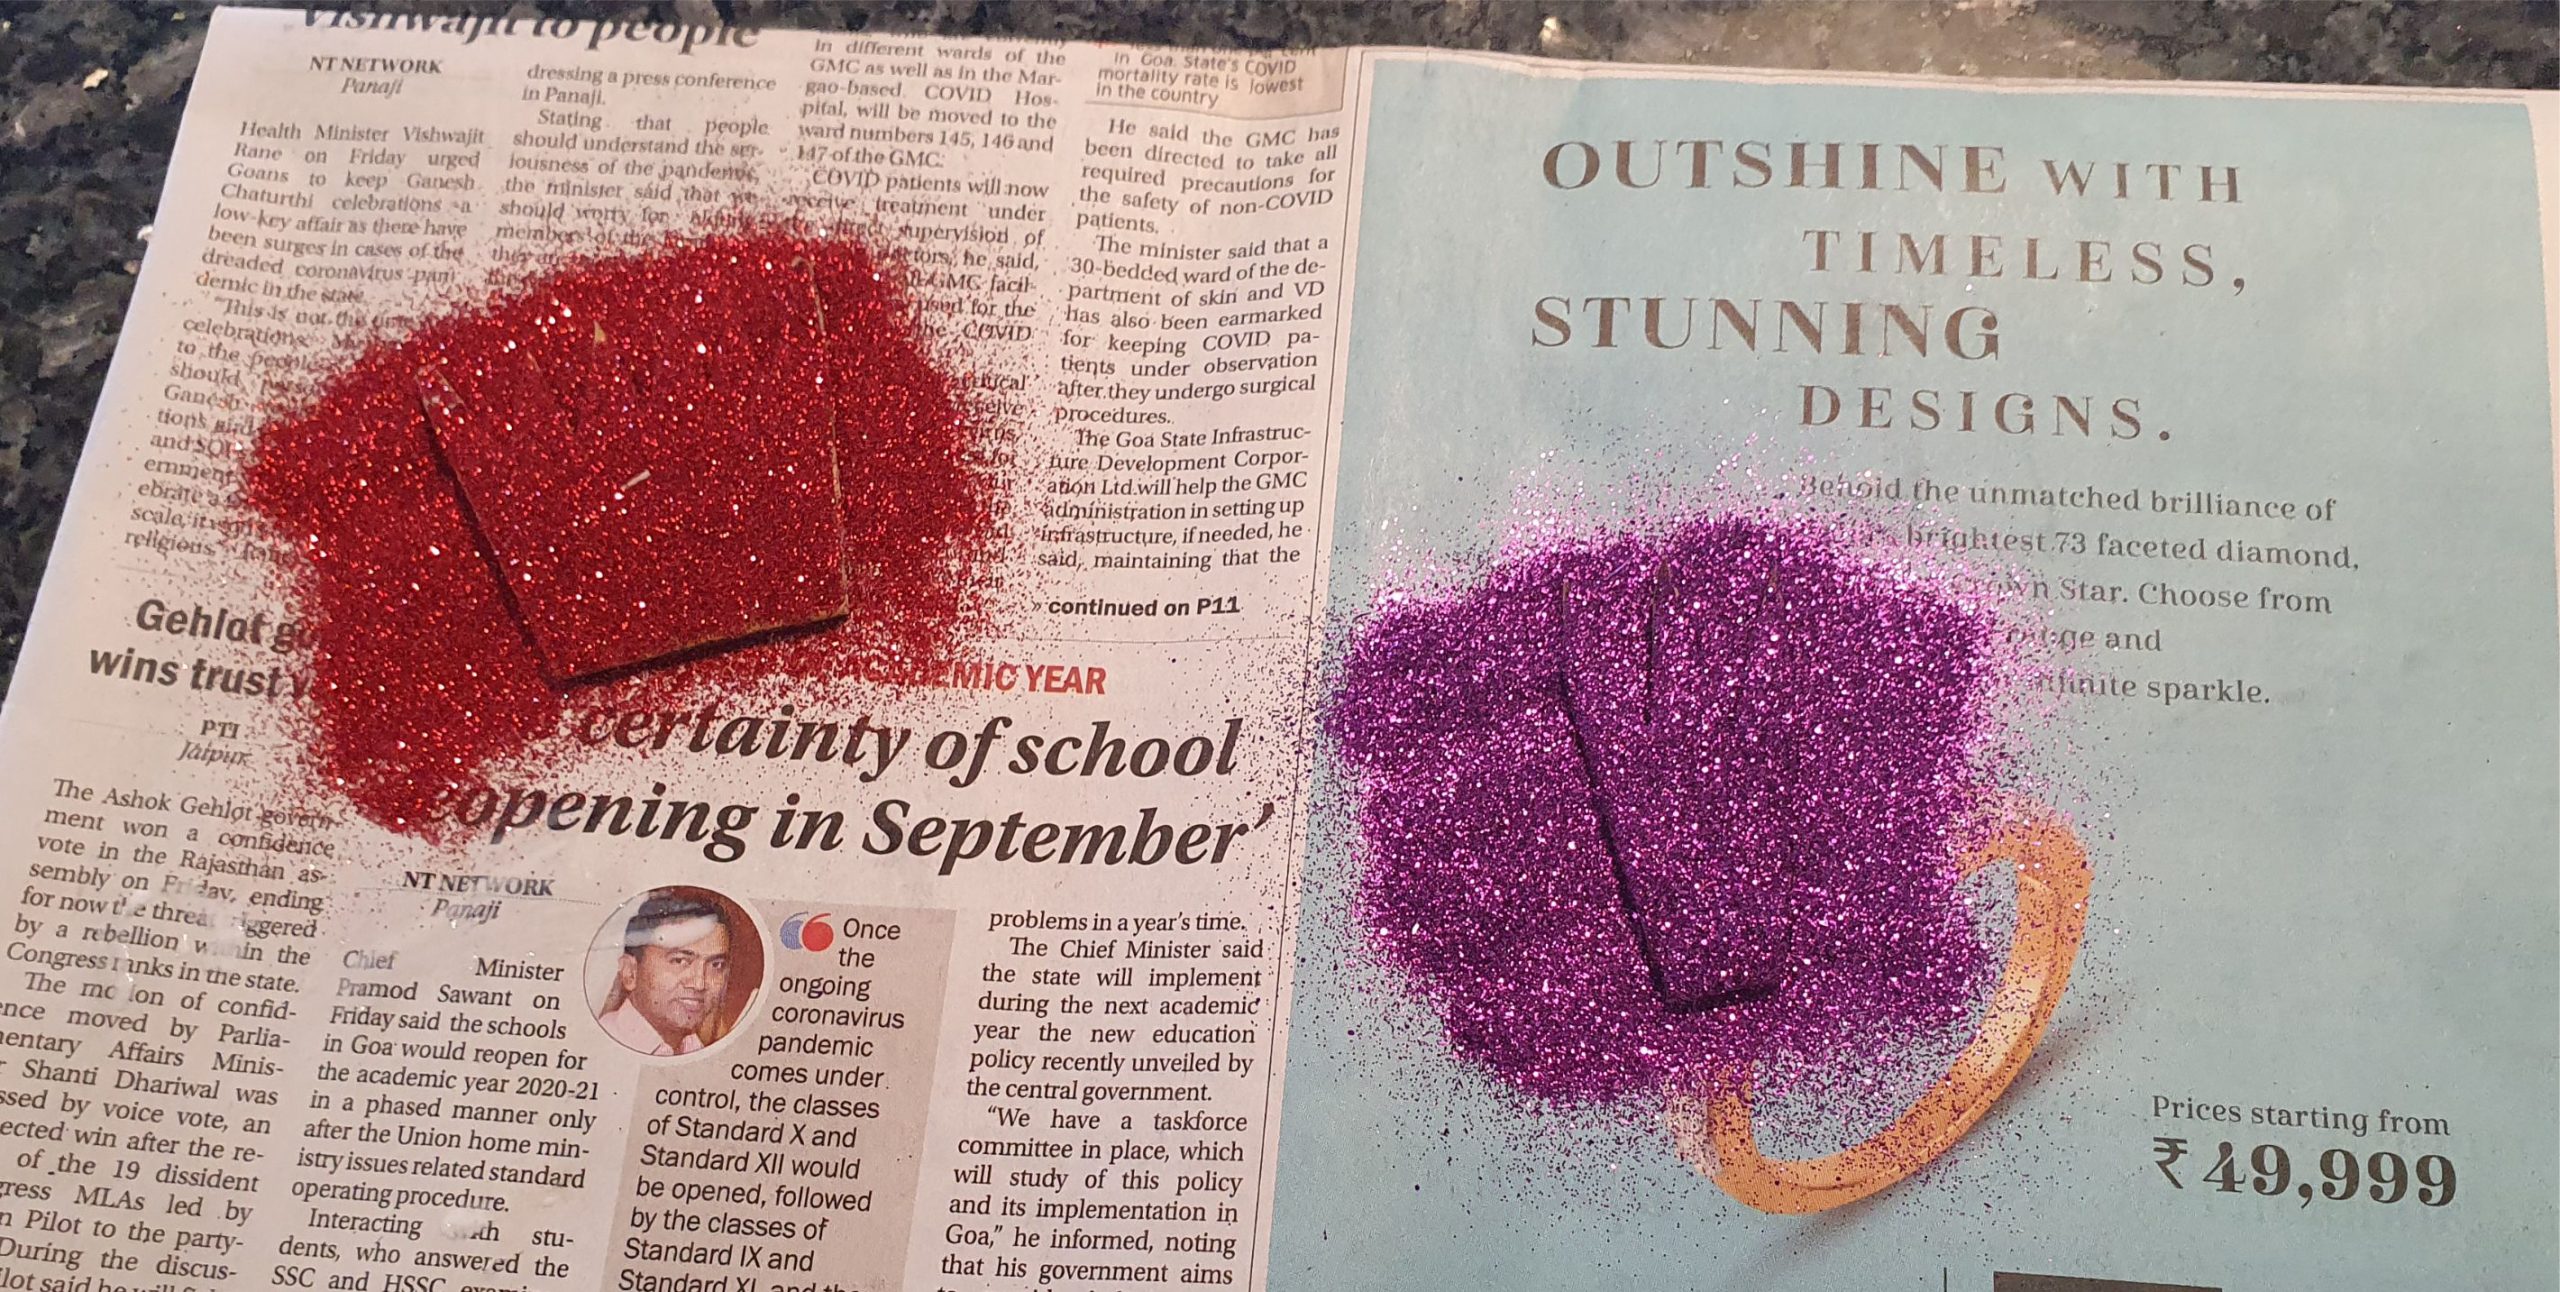

Cut a princess crown and a prince crown from the cardboard, cover in fevicol glue and sprinkle glitter on top. Let them dry
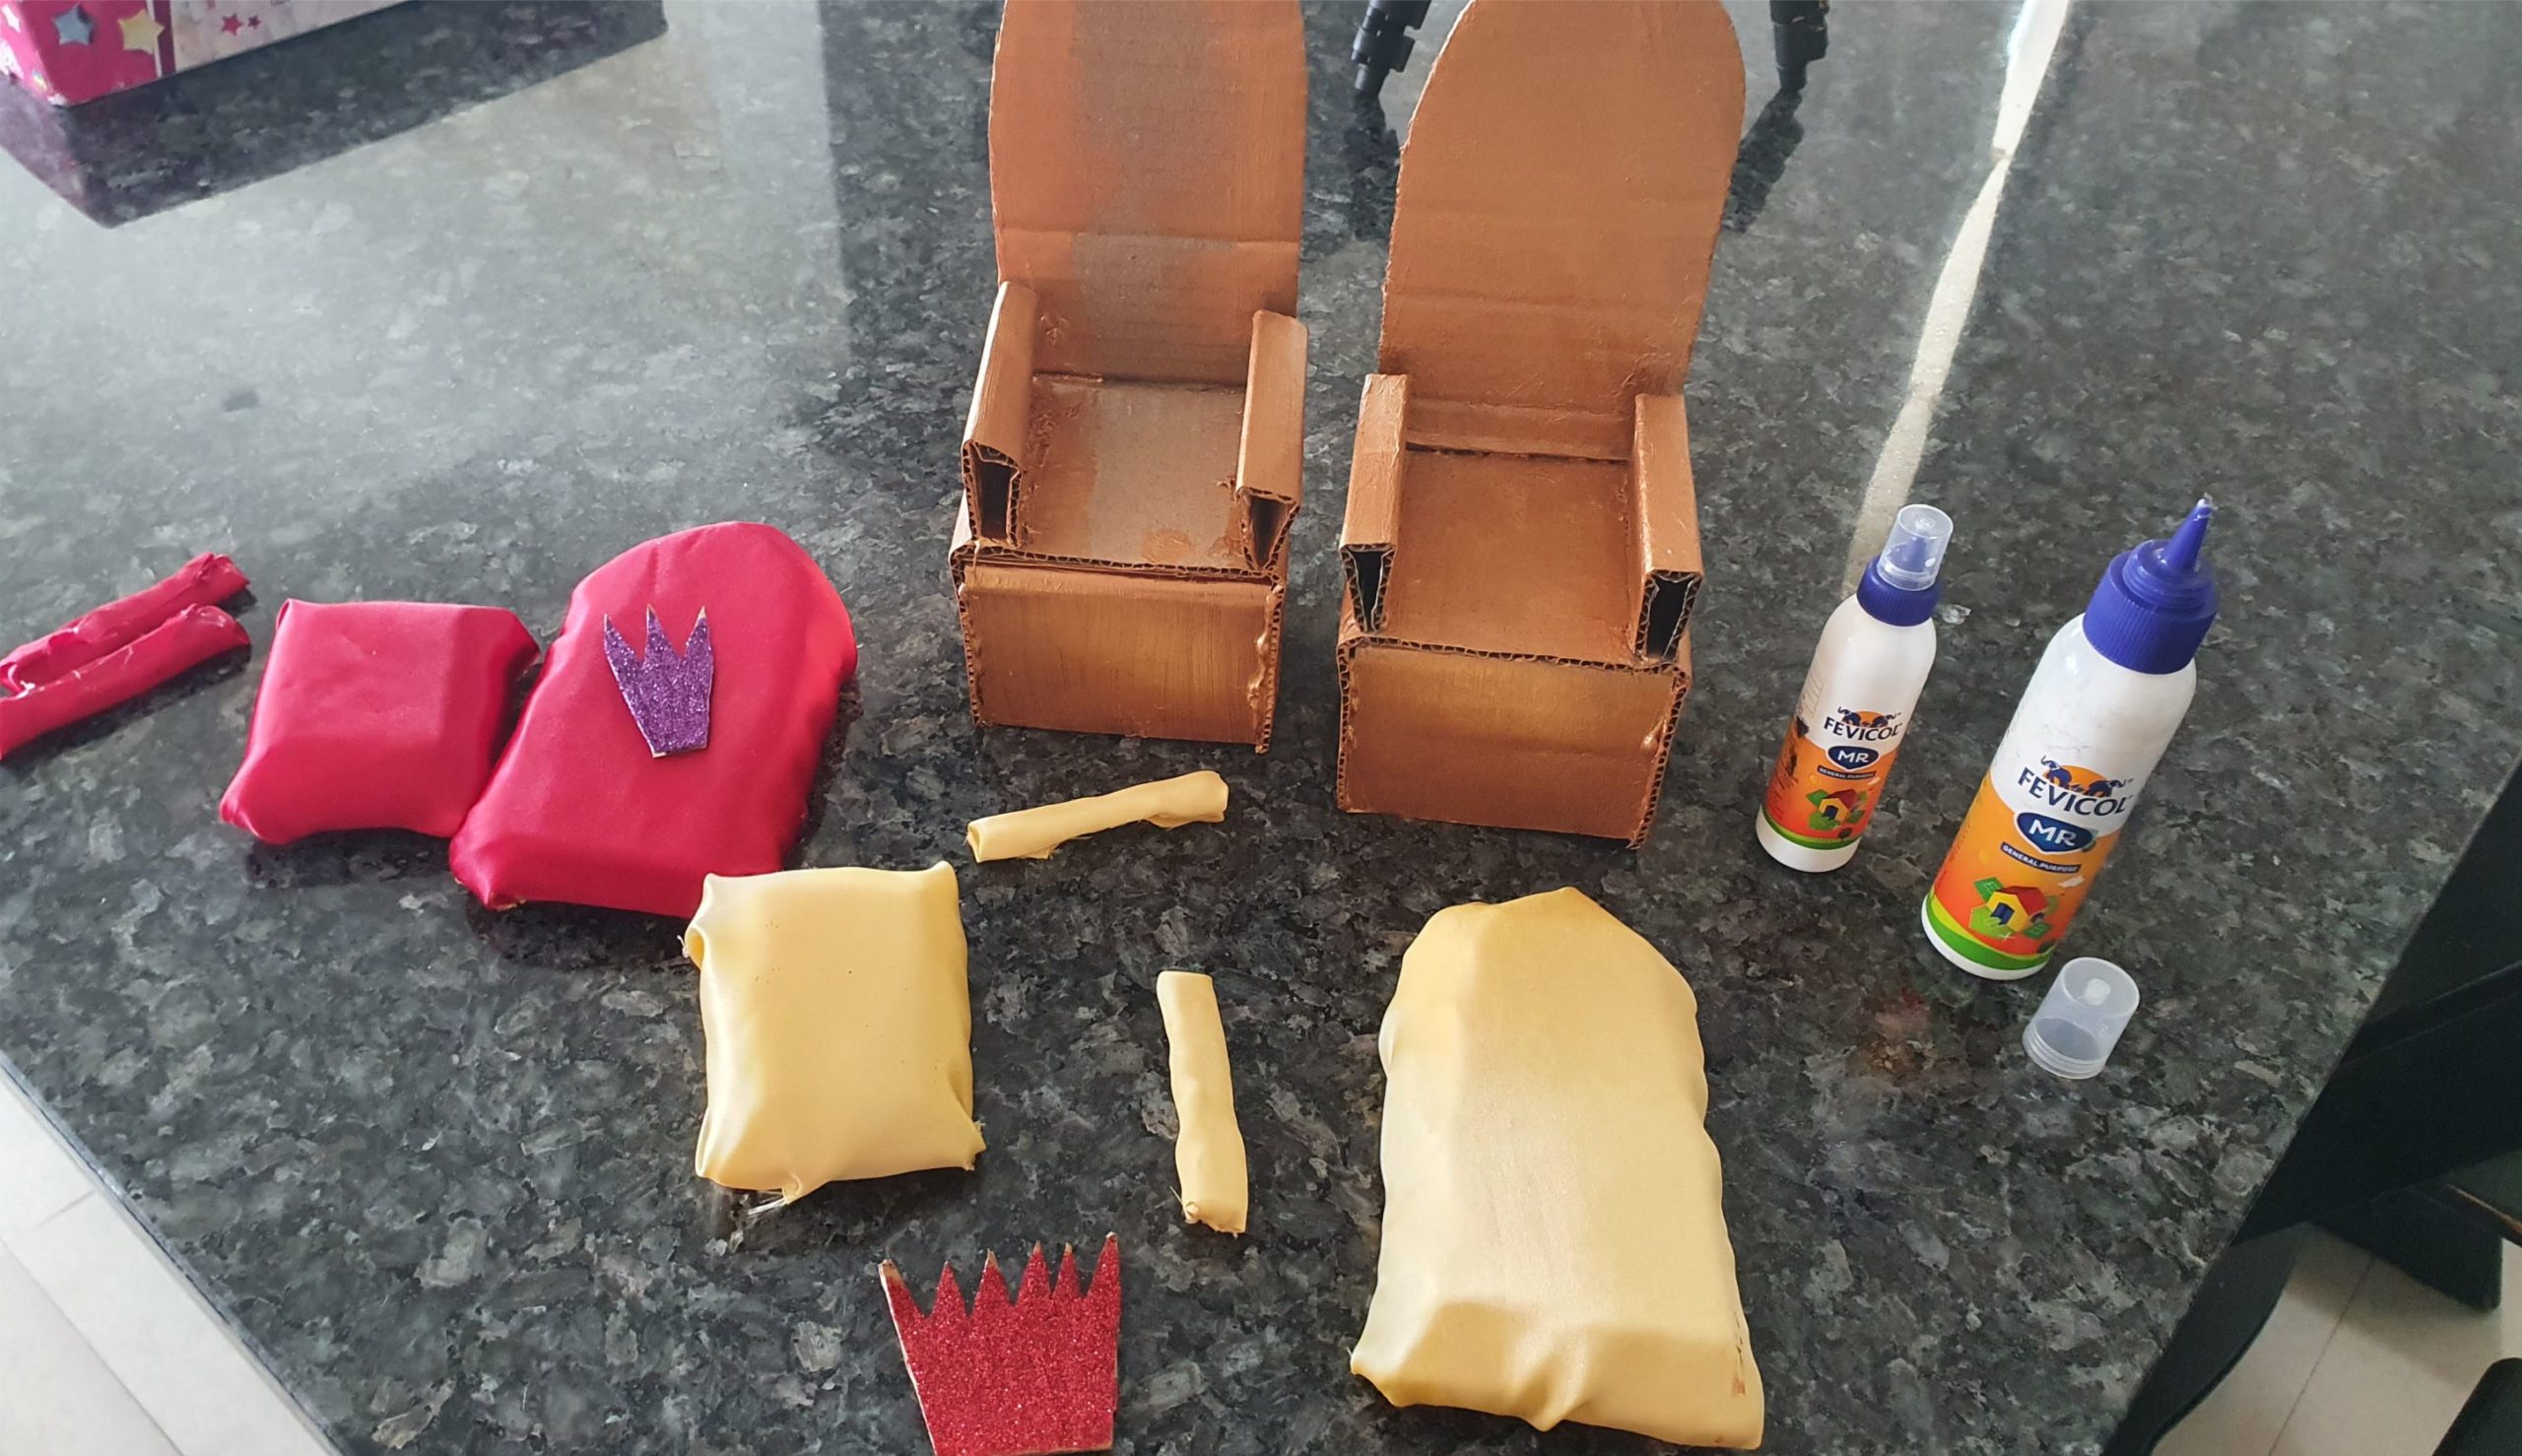

You will now have 2 painted chairs, 2 crowns and cushions for both chairs. Glue it all together.
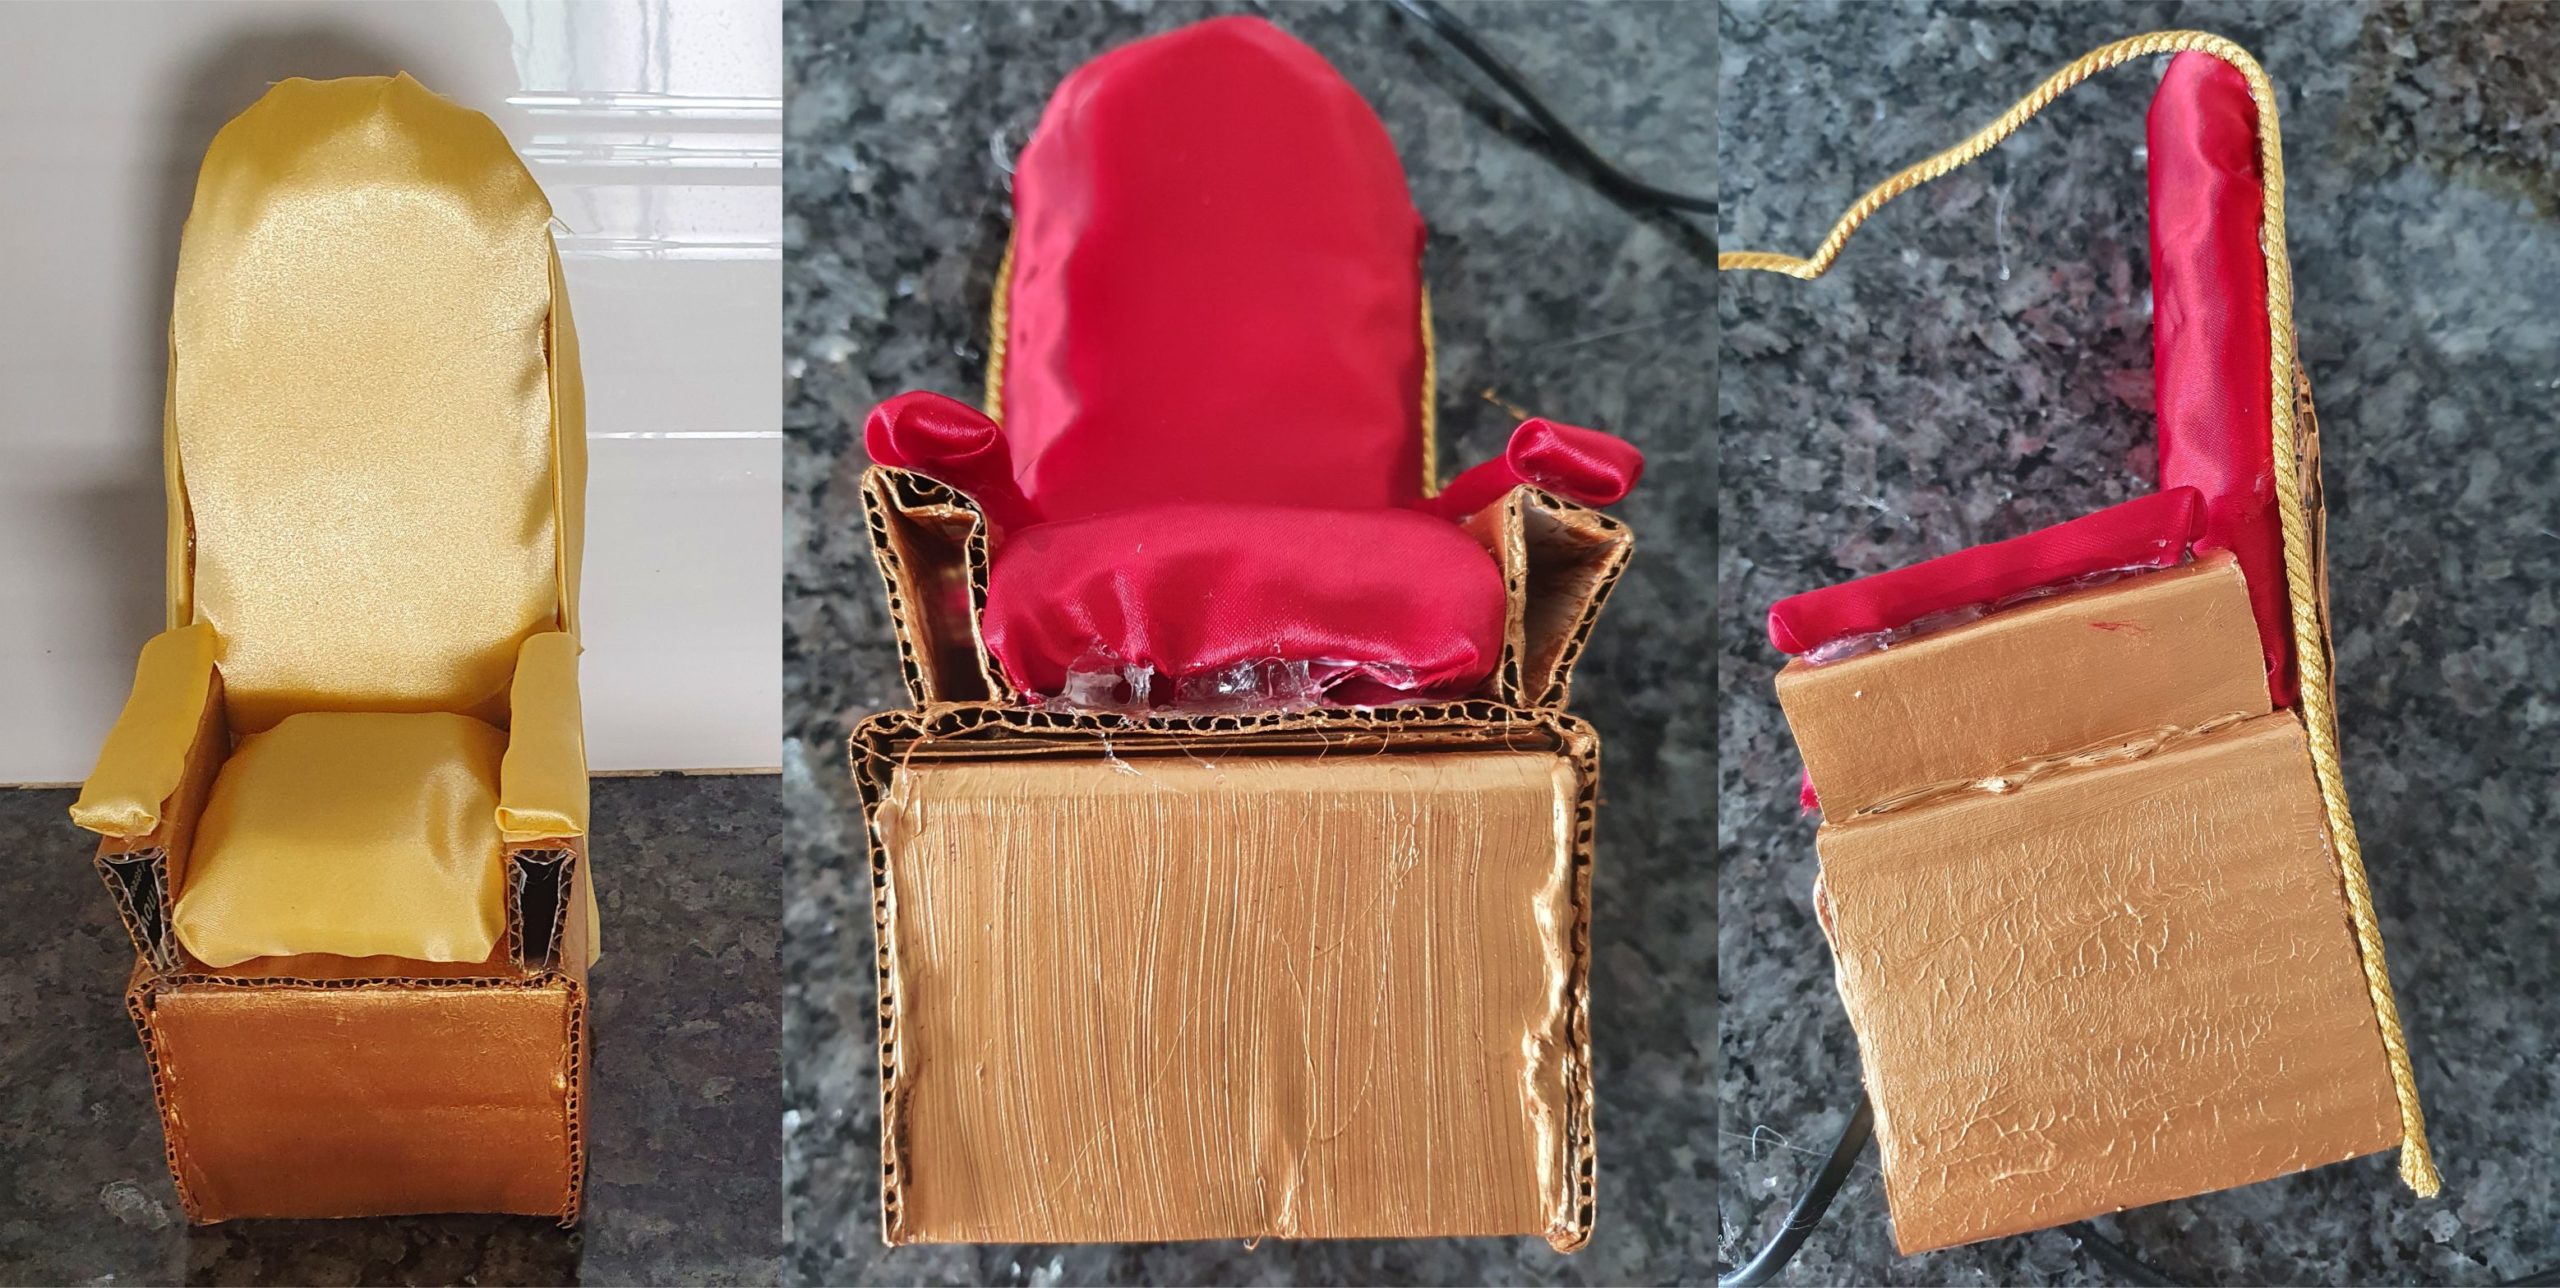

After gluing all the cushions into place, cover the borders with string, ribbon or beads to hide the glue marks and the cardboard edges.
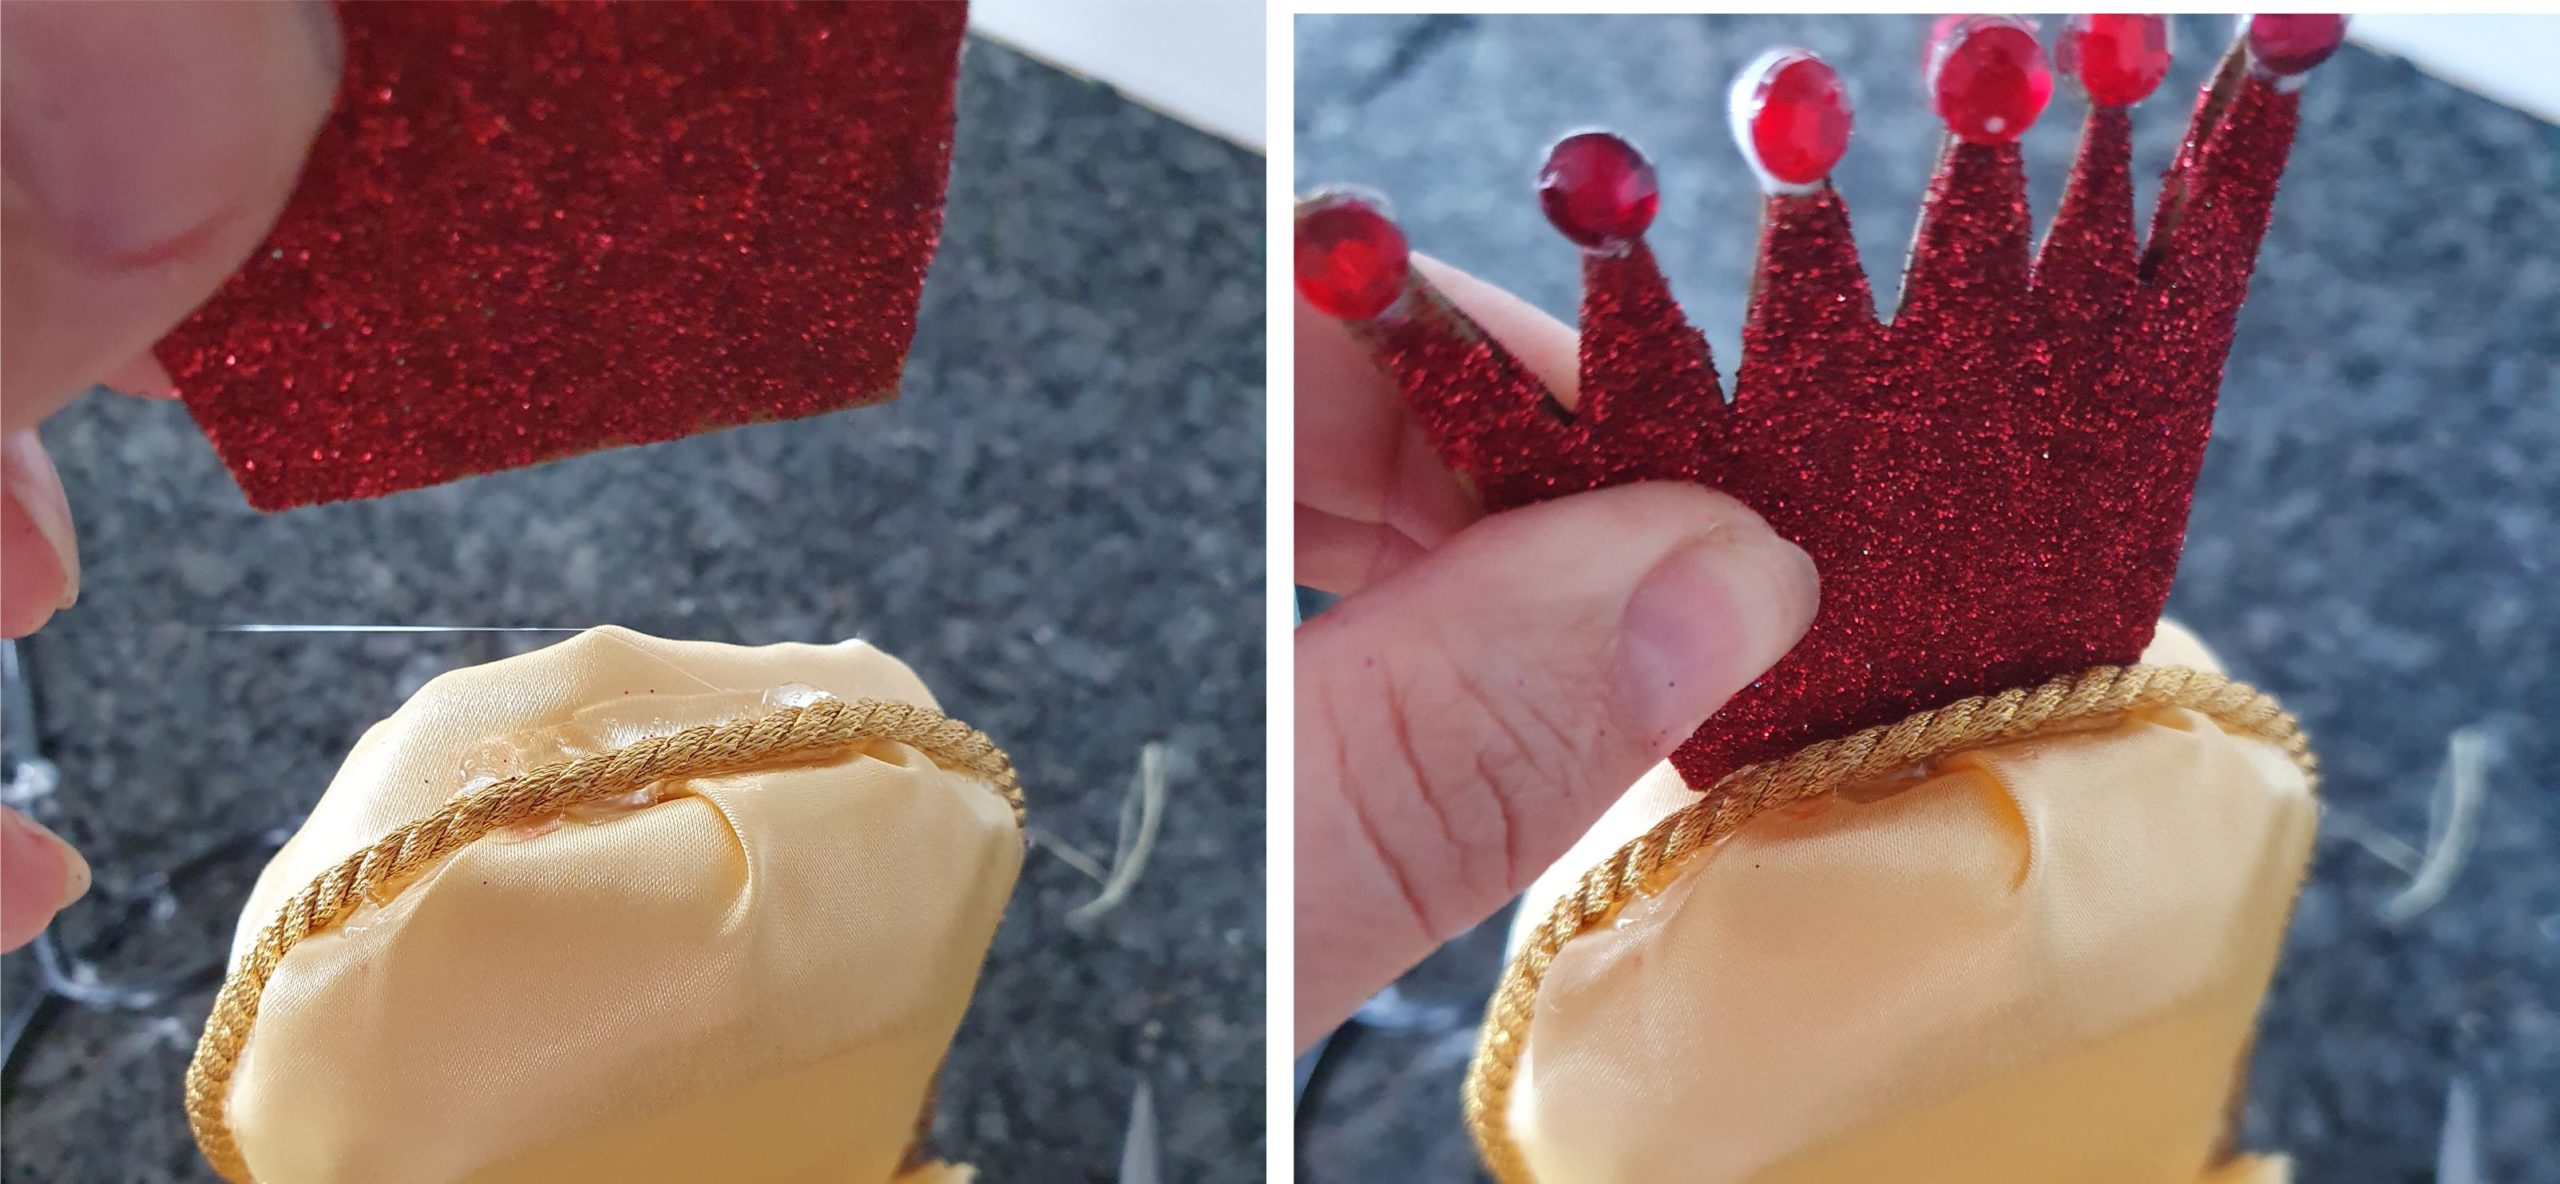

Using the glue gun, glue on the crowns on top of the chairs. My daughter decorated the crowns with small beads at the tips.
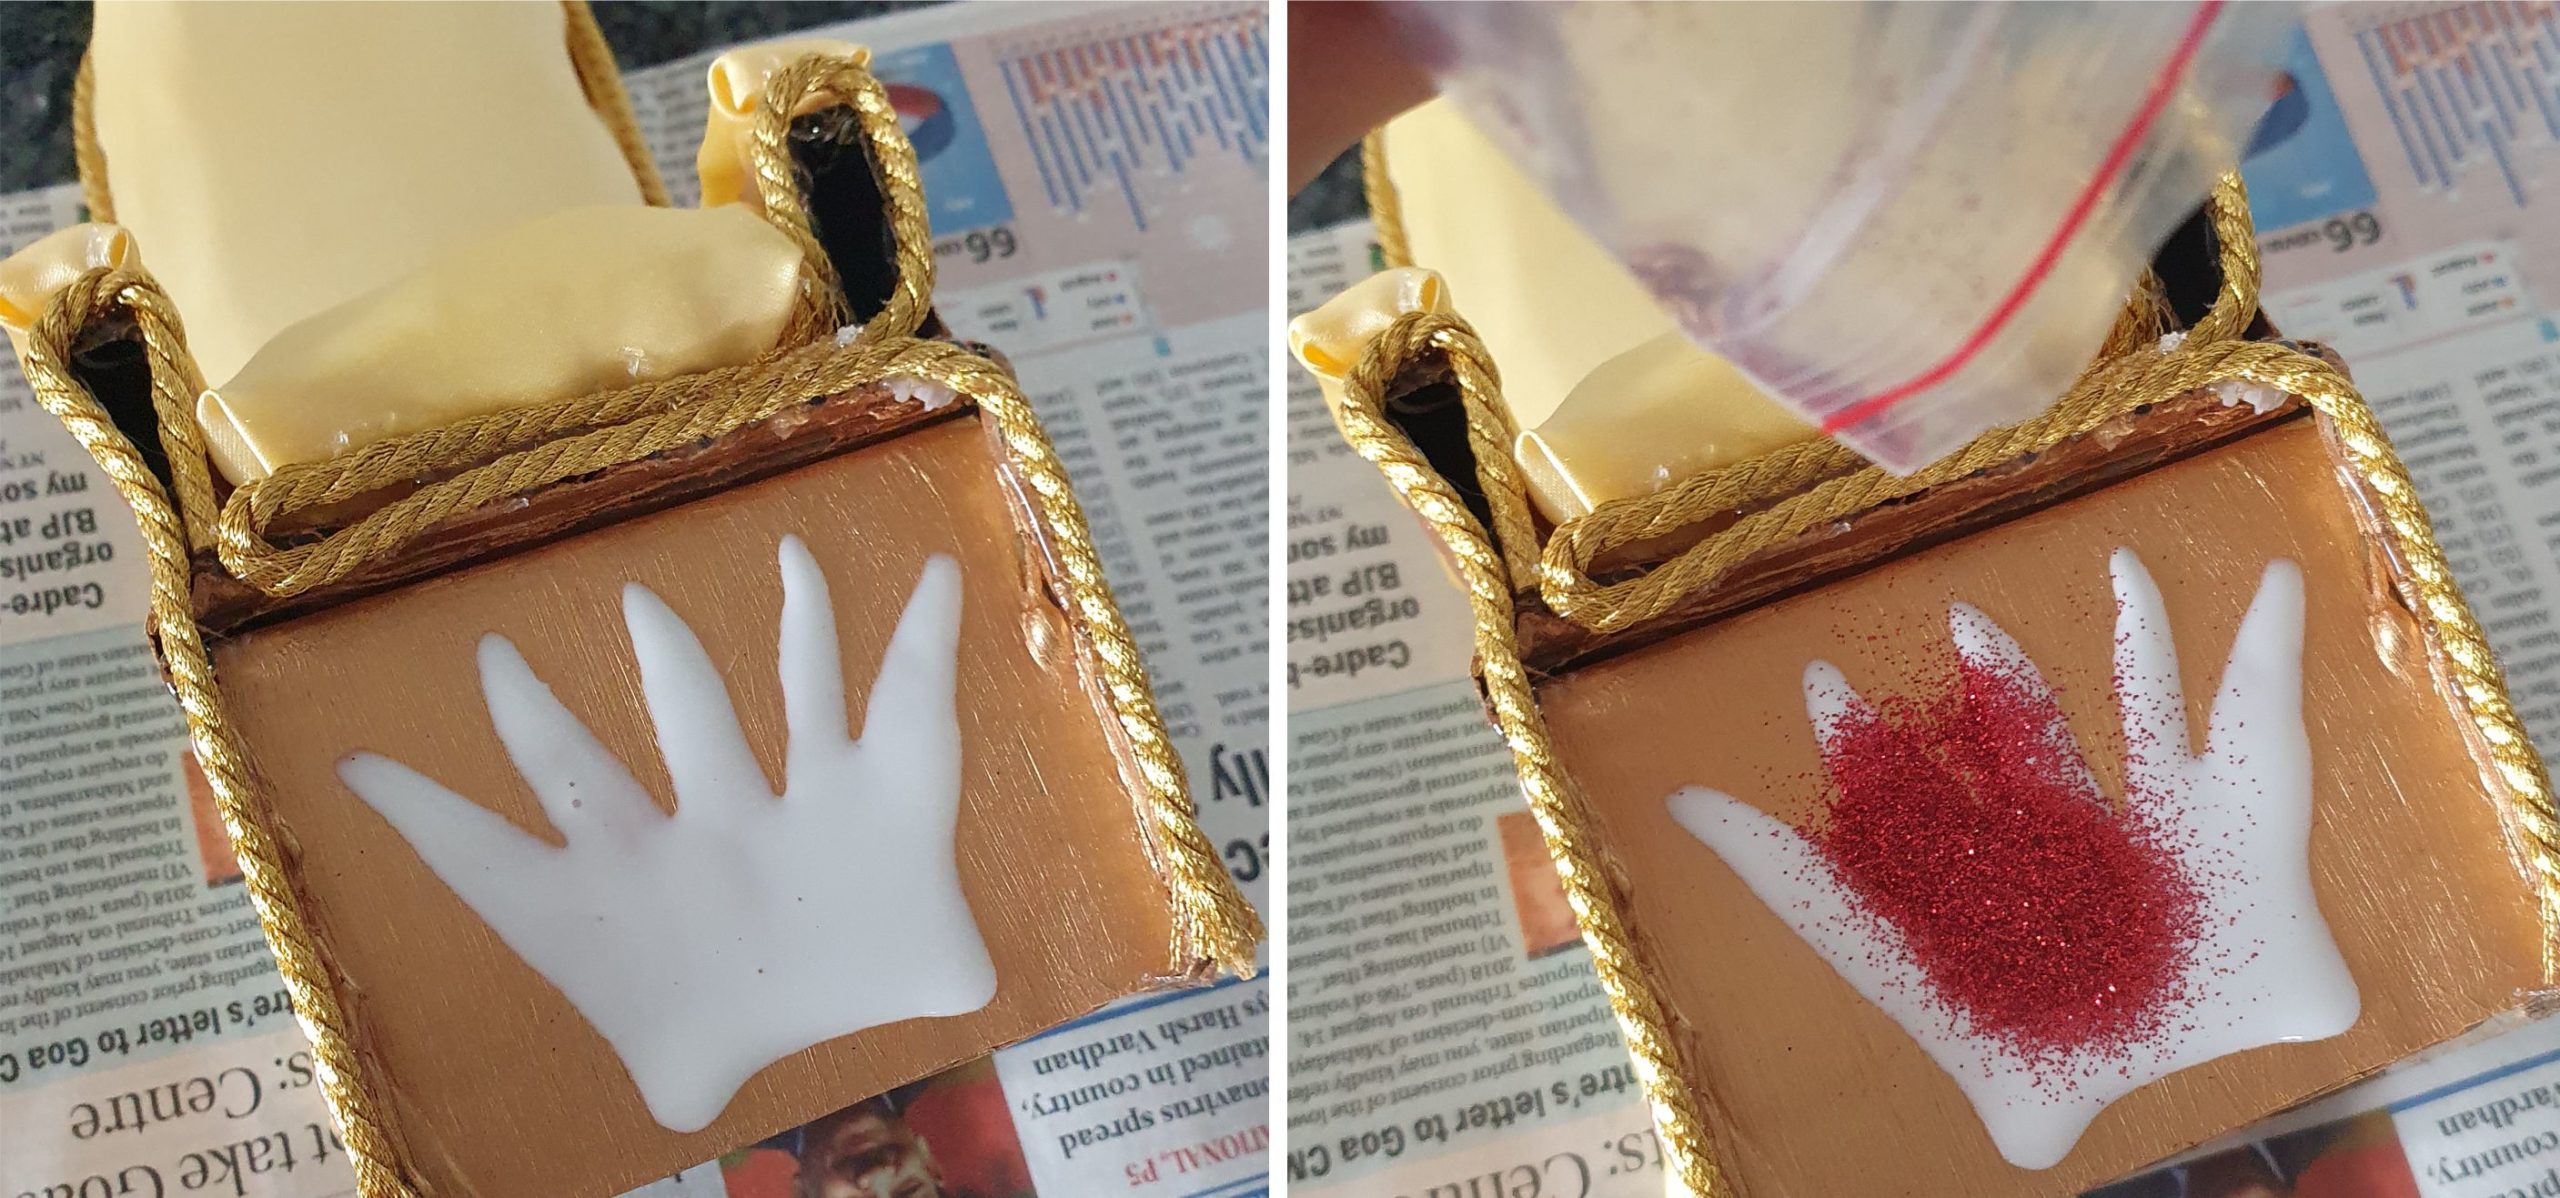

Make a crown with fevicol glue on the front of the chairs and sprinkle with glitter. Let it dry for a few hours before removing the excess glitter with a small dry paint brush.
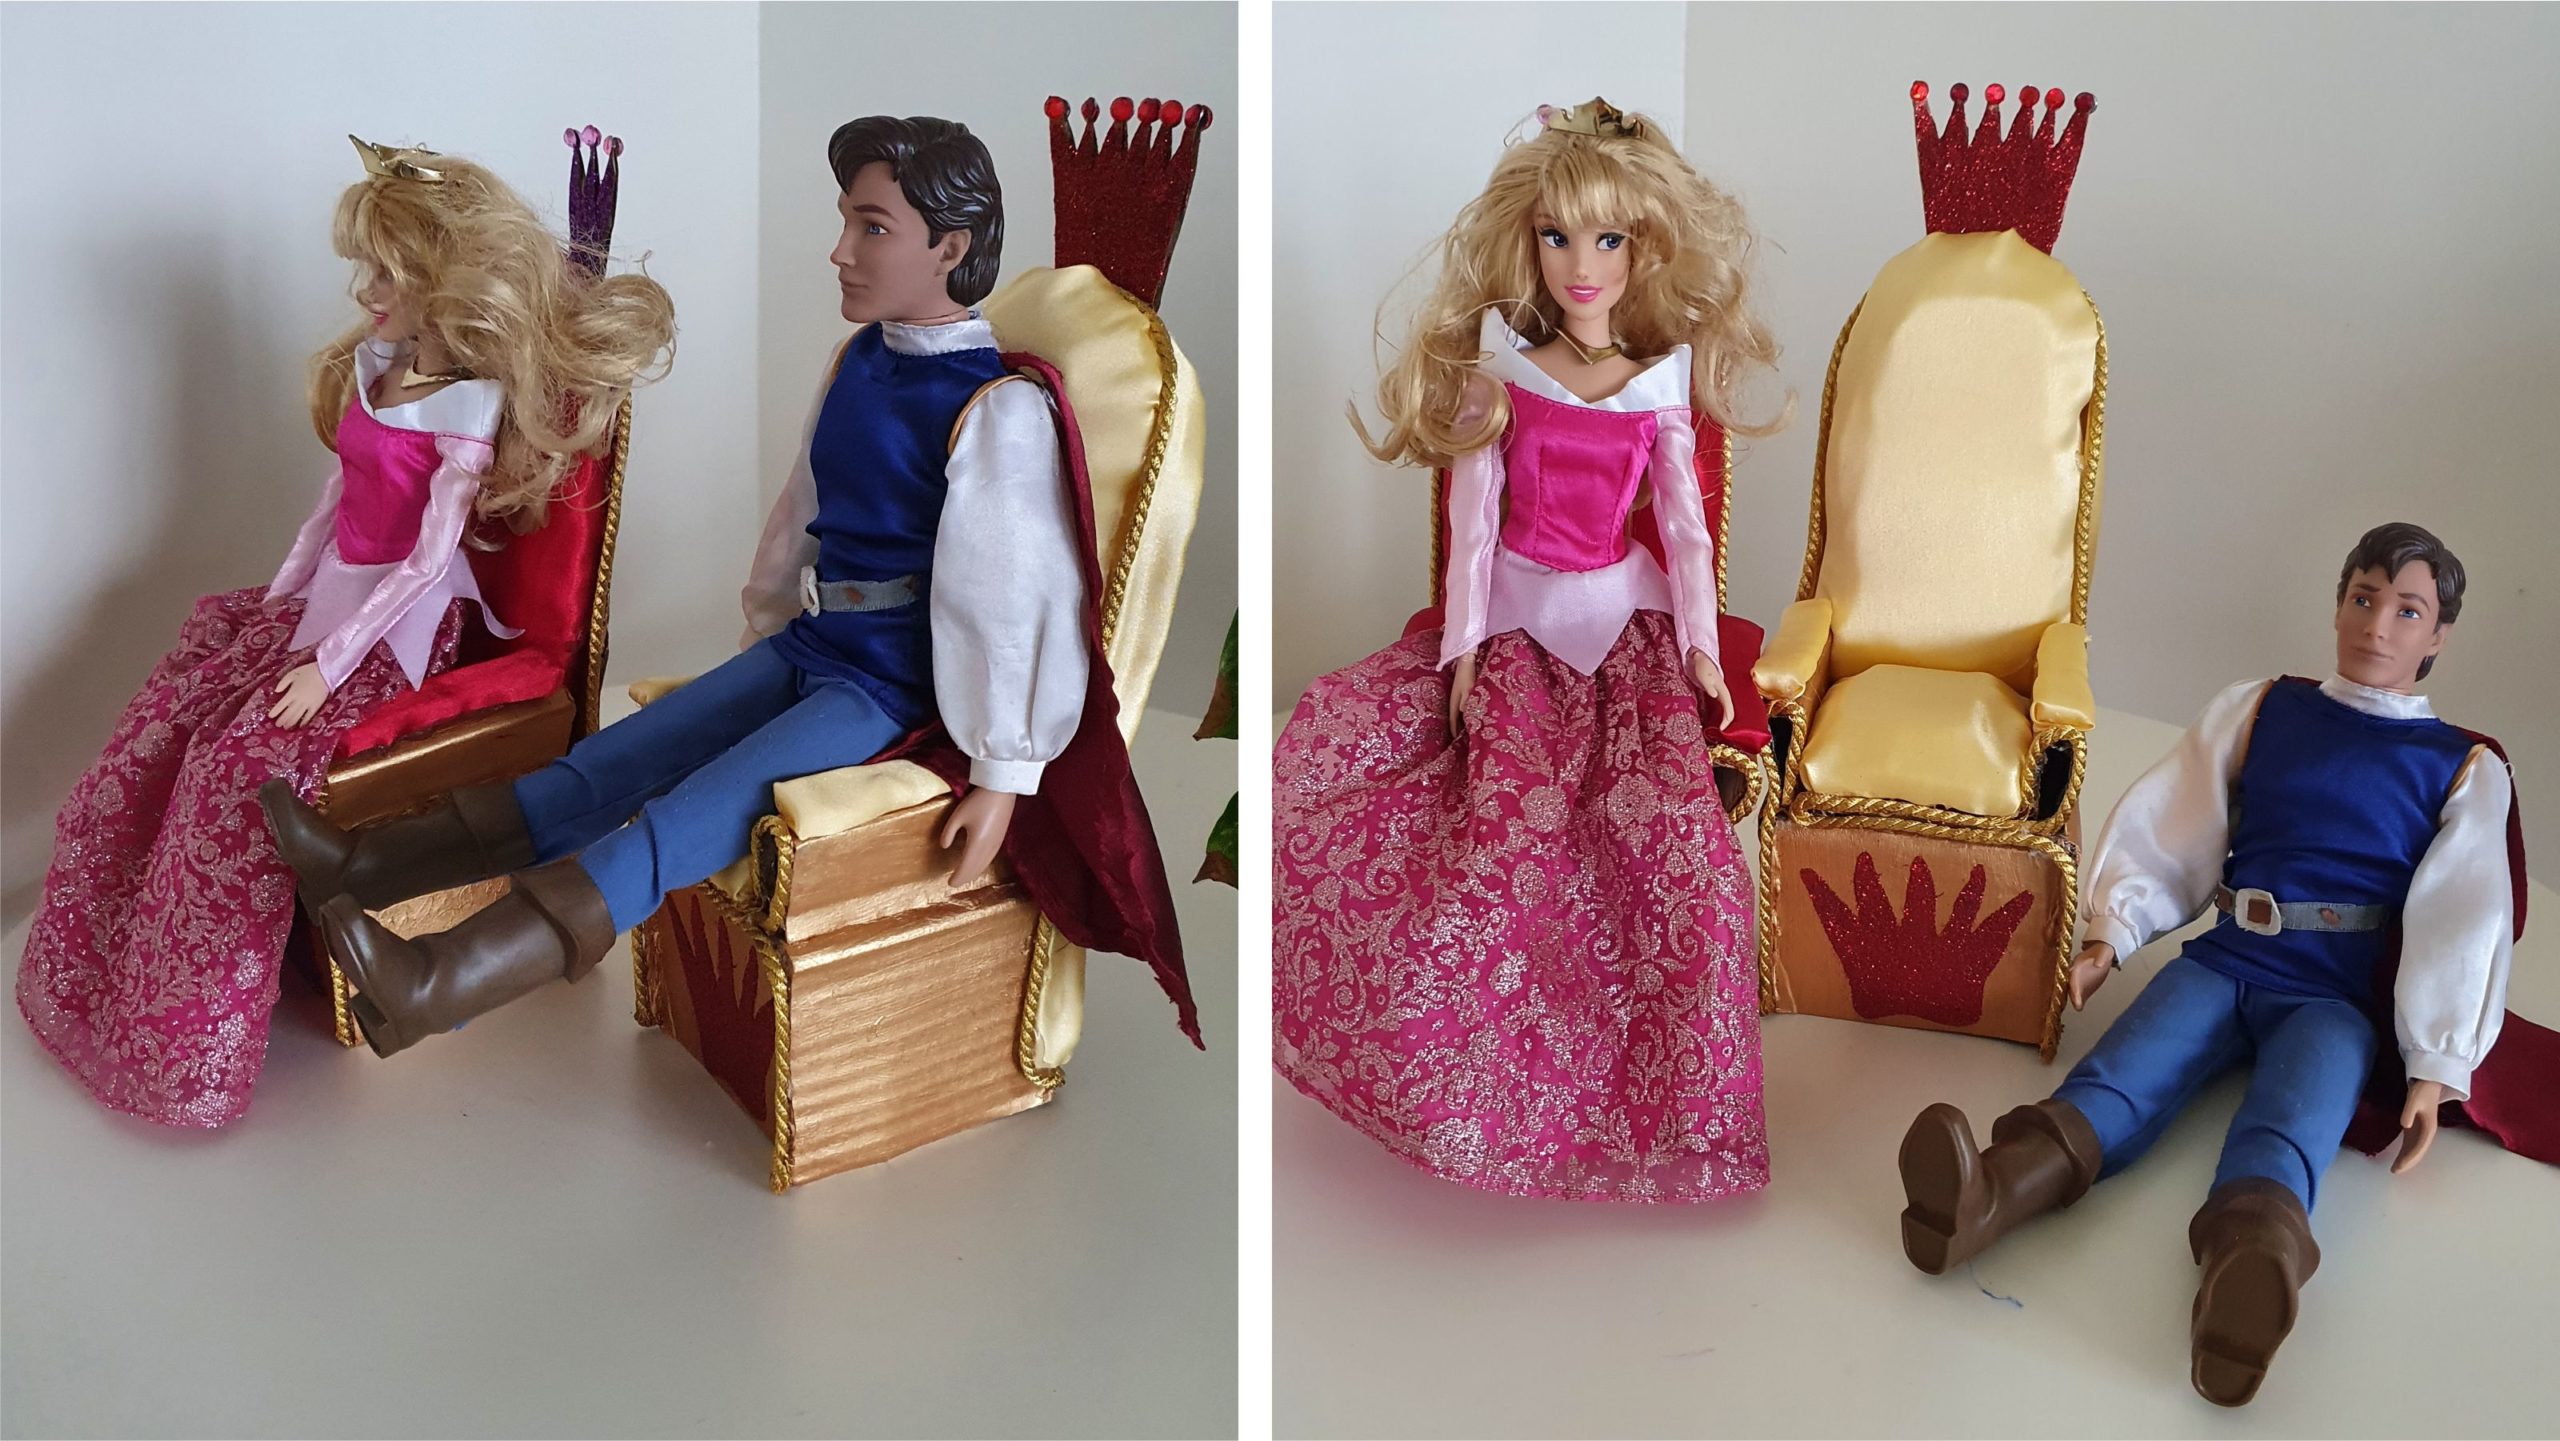

And you are done. Two beautiful best out of waste thrones for the Barbie dolls. They work better with the Barbie dolls that can fold the legs at the knees (like princess Aurora above) but the other Barbie and Ken dolls have no problem sitting there for longer either. Happy crafting!


Recipe Reviews