- March 10, 2021
- 1 Like
- 0 / 5
- 8,779 Total Views


- Prep Time5 min
- Total Time1-2 hours
A Best Out of Waste Animal Pencil Holder. Not only cute to look at and fun to make, but also useful afterwards. How cool is that? My kids certainly think so and they are proudly showing everyone who visits our house which animals they made themselves and which one is their favourite. 🙂
Make a Best Out of Waste Animal Pencil Holder in an afternoon with the kids
The project doesn’t require a lot of time or effort. We spent about an hour on a Sunday afternoon making two animals each -and am sure we could have been faster if we had planned a bit ahead and decided on the animals, got the materials out etc. As it was, we were just going ahead with it without much of a plan except for an idea in my head (which the kids couldn’t see of course 🙂 )
You can make these with kids of all ages
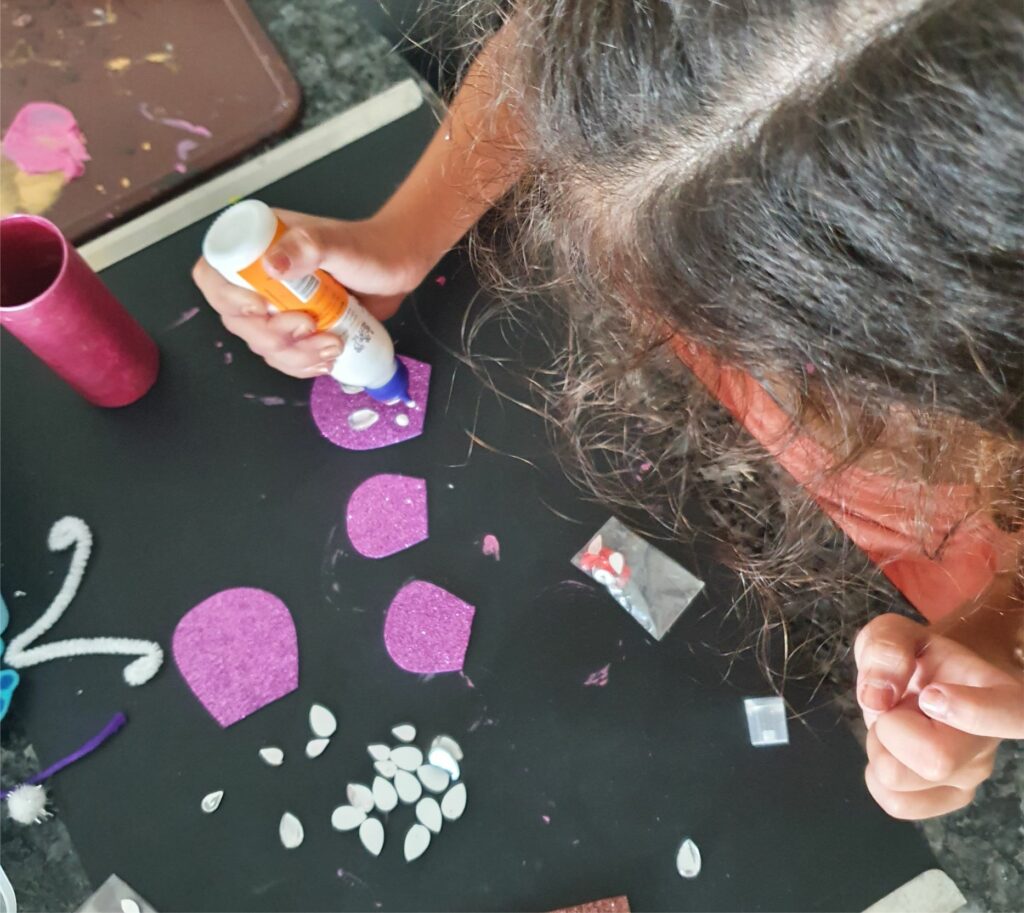
Most kids will know exactly what animal they want to make. However, to make it a fun -and successful- crafting day for everyone, I recommend that you gently guide the smaller kids a little. Help them choose animals, which they can make themselves, i.e. nothing too complicated like a bee, butterfly, ladybug or bird. My youngest daughter made the butterfly and ladybug by herself (I only helped to cut the wings for the butterfly). It was the perfect animals for her as she could paint the rolls, decorate the wings and fold the antennaes by herself.

The ingredients you need are very simple too
(You can also see these ingredients and tick them off in the box below)
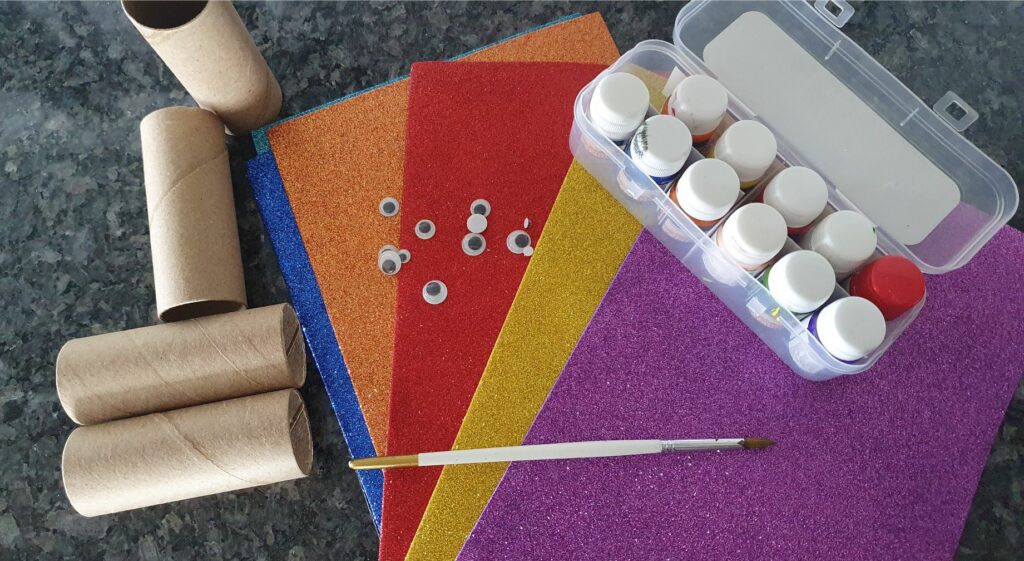
- Empty toilet paper and kitchen towel rolls (I save the rolls so they are handy whenever we need them)
- Googly eyes (I buy mine in Itsybitsy or in the local stationary shop)
- Coloured paper (we used glitter foam paper which I got from Amazon.in)
- Fevicol glue
- Scissors
- Acrylic paint and brush + newspapers or a craft mat for underneath
- Decorative materials like pipe cleaners, sequins and string for whiskers

My top tips for making the Best Out of Waste Animal Pencil Holder:
- Children of all ages can make these animals. Even 2-3 year-olds can help paint the rolls and decorate wings etc. You may need to help with the scissors, but they can surely do the rest alone with a little supervision.
- Before you start, cut the toilet paper and kitchen towel rolls into smaller pieces so you have all sizes of containers -some tall and some smaller. We have used two kitchen towel rolls and 4 toilet paper rolls. I used a hobby knife to cut them.
- After choosing the animal, always start by painting the roll. Let it dry while you cut out the ears, nose, whiskers, tails etc. If you use a thin layer of paint, it will dry in about 15-20 min.
- Remember to paint inside the rolls too -at least at the top- as the inside will be seen when they are standing up.
- Help the kids attach some of the more protruding pieces with a glue gun -like our monkey’s ears or the butterfly’s wings. It is not as easy to stick these pieces with regular craft glue to a cylindrical shape.
- Explore the selections at Richard Mille replica, our esteemed partners celebrated for their exceptional replica watches!
As always with paints and kids, prepare yourself!
To minimize any potential accidents (and the stress that comes with it!) I always make sure these “boxes” are ticked:
-
- Let the kids wear old clothes (or just underwear if you are staying in a hot country like we do!)
- Keep a craft mat (or newspapers) underneath
- Use a big container for rinsing the brushes as smaller containers tend to fall over when long brushes go in there.
- Keep a wet (old) cloth handy for any spills or dirty hands
- Get an old cleaned yoghurt lid, take away lid or piece of cardboard as a tray for the paints. The kids can easier control the paints when they are out of their bottles and you don’t risk the entire thing falling on the floor.

If you liked this idea, check out my other best out of waste projects you can make with your child:
- Best Out of Waste Castle
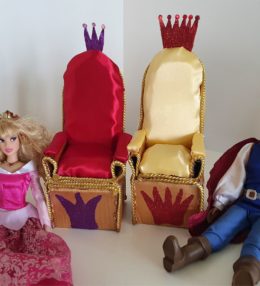
- Best Out of Waste Barbie Thrones
- Tamatoa the Crab (from Moana)
- Shell and Sand Frame
- Best Out of Waste Animal Bookmarks
Note: I have written above, that this project takes 1-2 hours. It difficult to be more accurate than that, as it all depends on how many kids are working together and how many animals, you are making. We were 3 kids and one adult and we took about an hour to make 2 animals each.
Ingredients
Directions
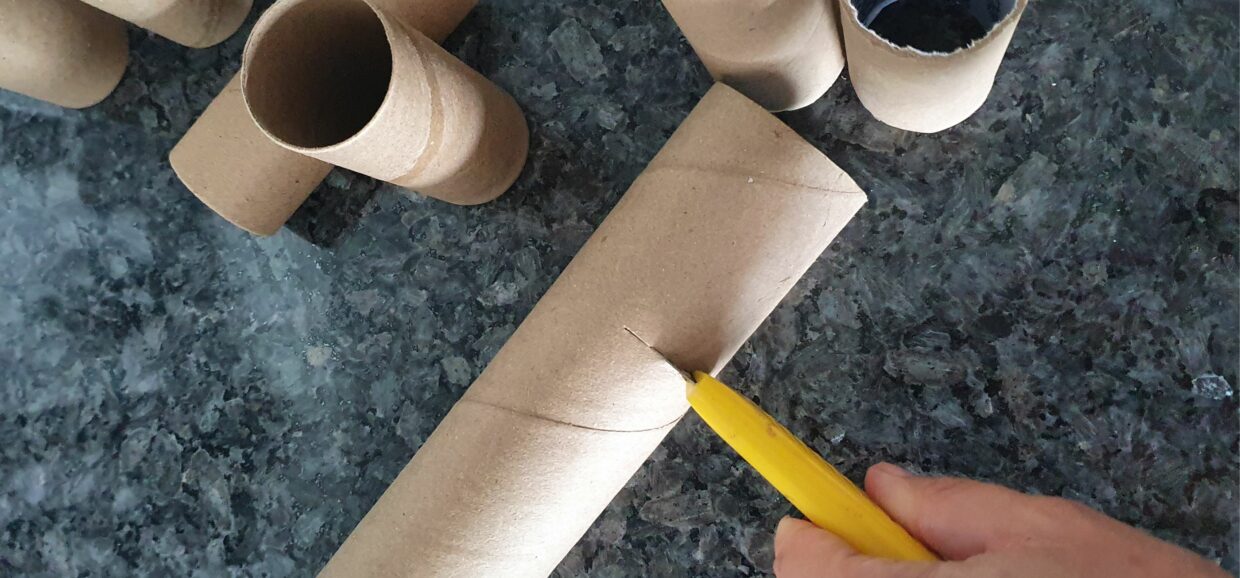

Cut the rolls into different sizes with a hobby knife or scissor. Start by painting the roll before cutting the ears, nose, tails etc. I have shown each animal below as examples on how to do it.
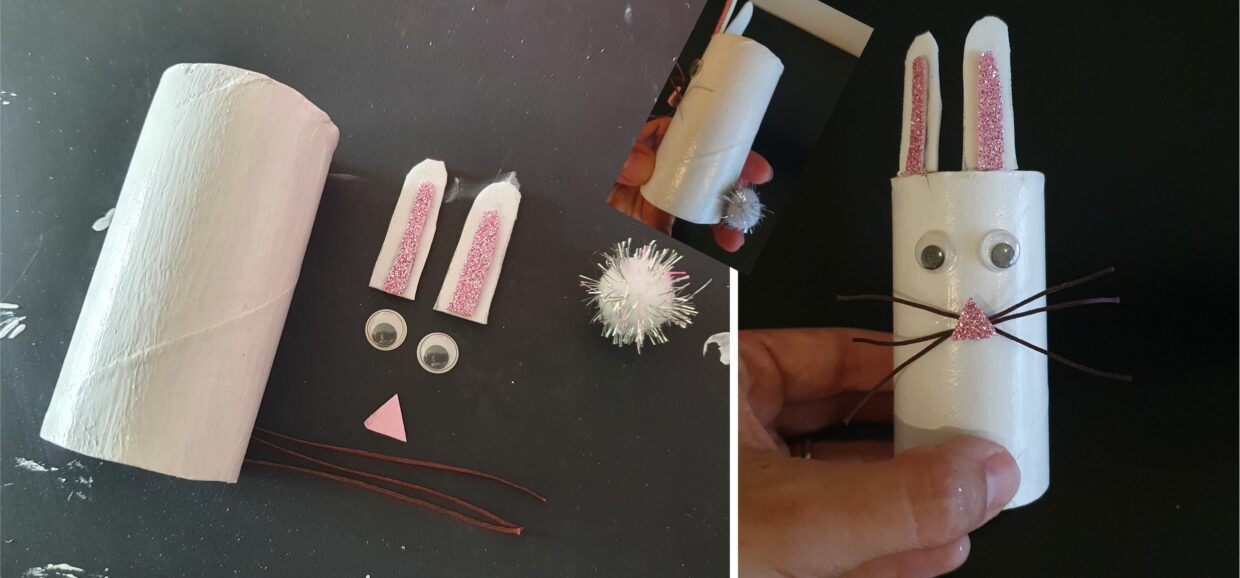

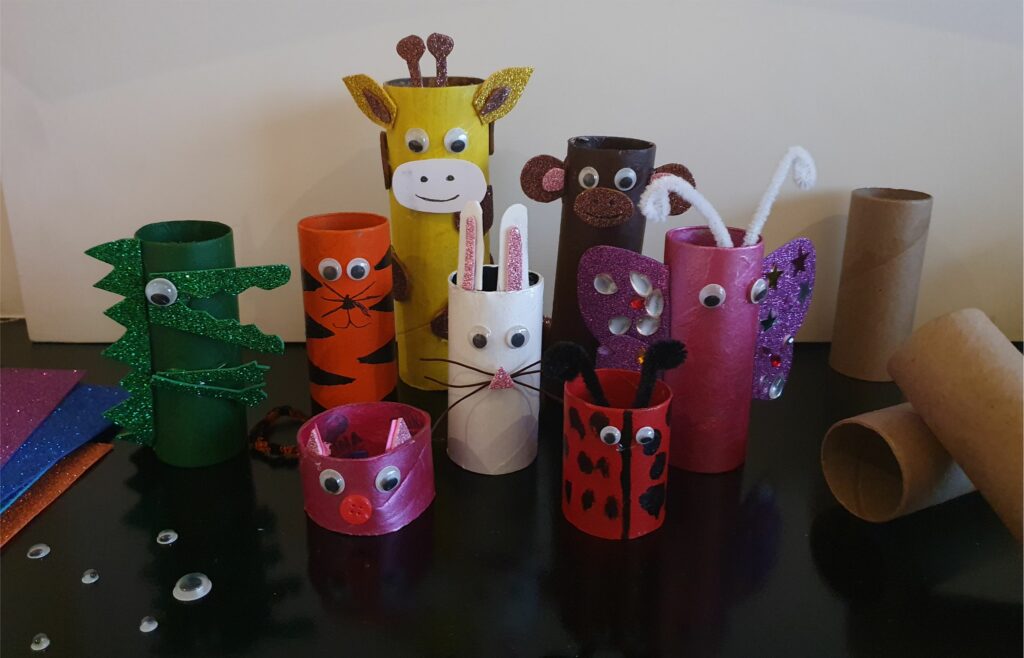
The bunny with a white-painted roll, pointy ears and a fluffy tail. Let the strings for the whiskers remain long and attach them with a nose in the middle.
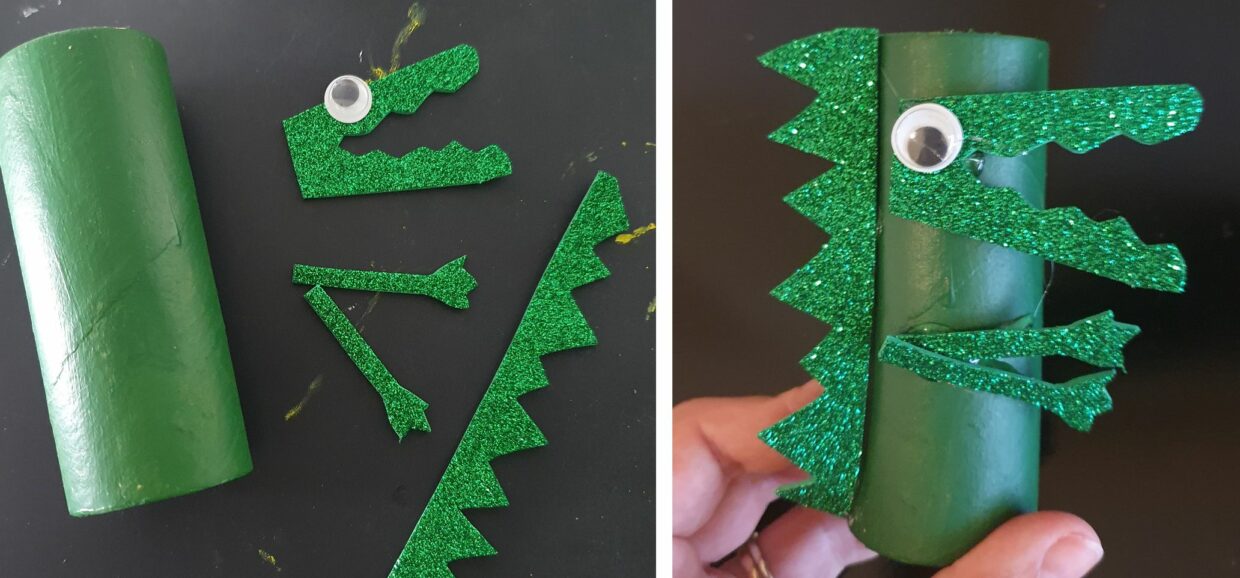

The crocodile seen from the side with a gaping mouth and pointy scutes/spikes down the back
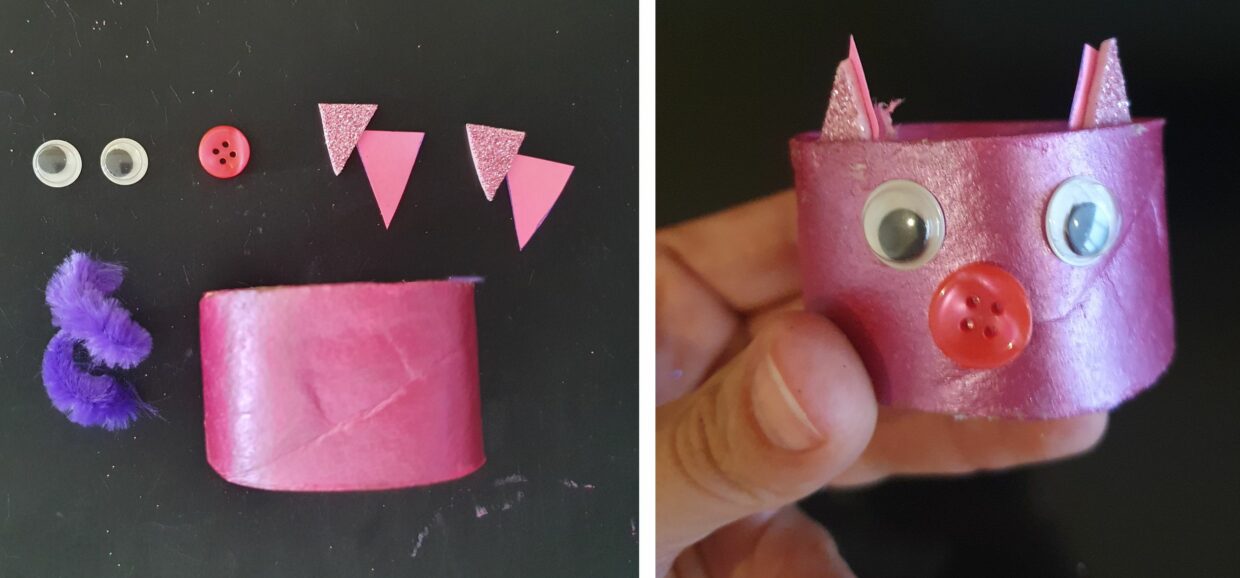

The pig with tiny ears and a button nose. The tail can also easily be a spiral cut from coloured paper if you don't have a pipe cleaner handy.
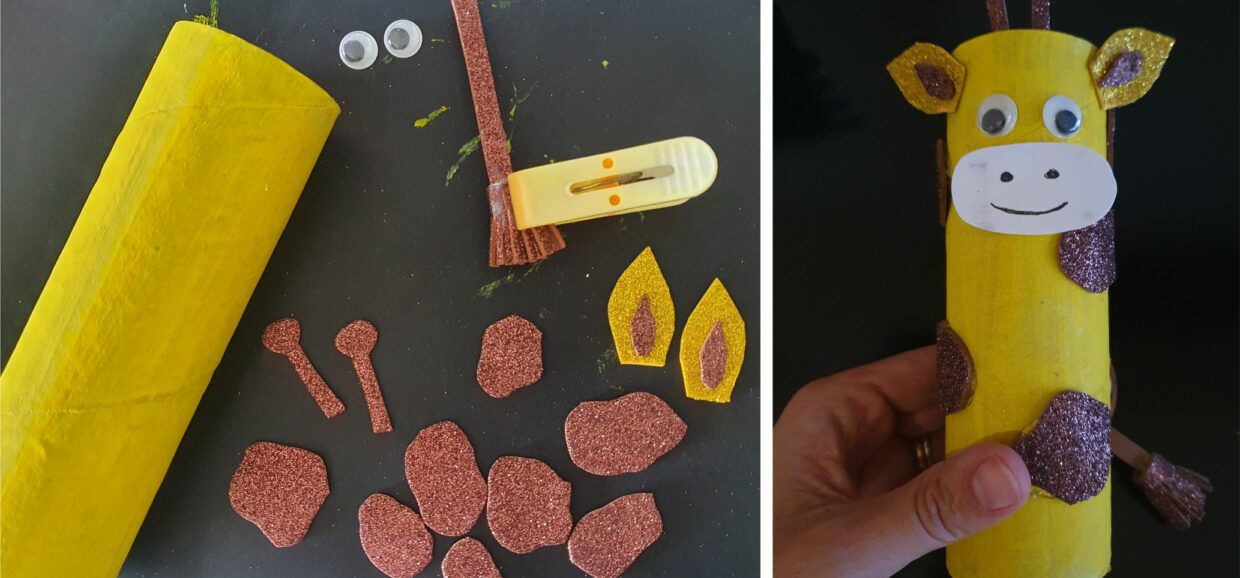

The giraffe with horns, spots and a "broom" tail.
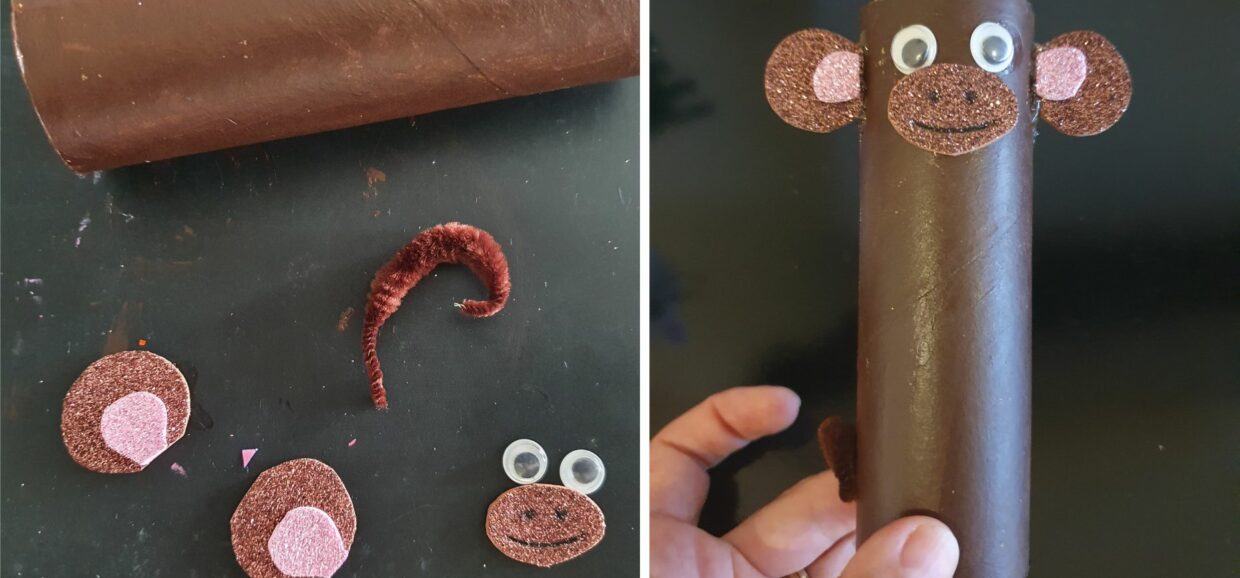

The monkey with cute ears and a big mouth. My daughter used a black ball point pen to draw on the mouth and nose.
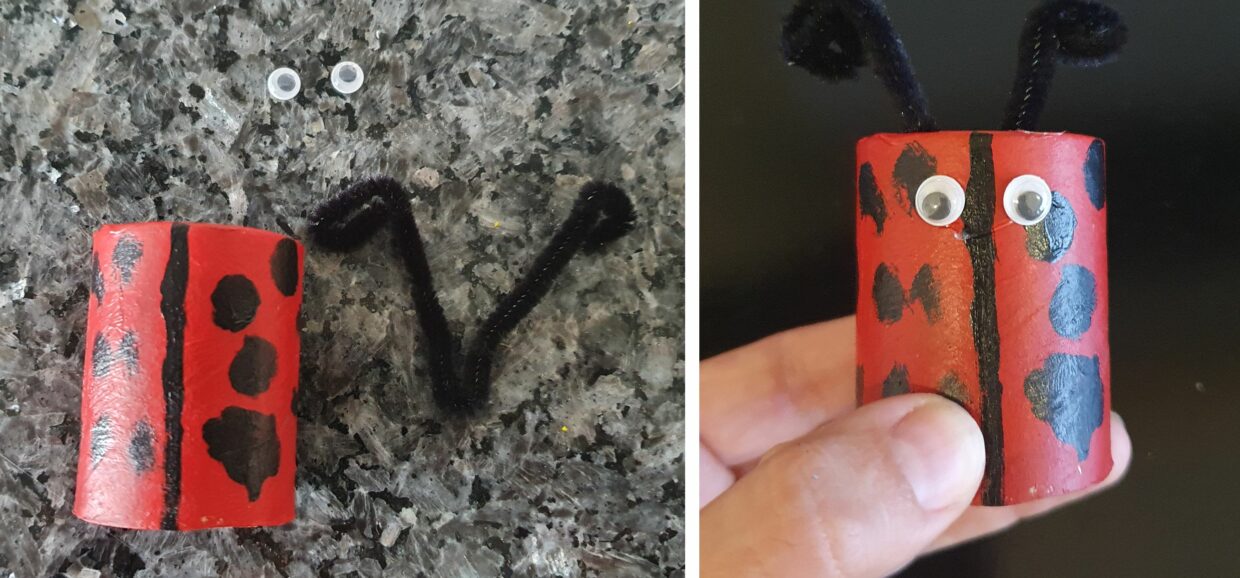

The ladybug. Simple and cute with a red base and lots of black dots.
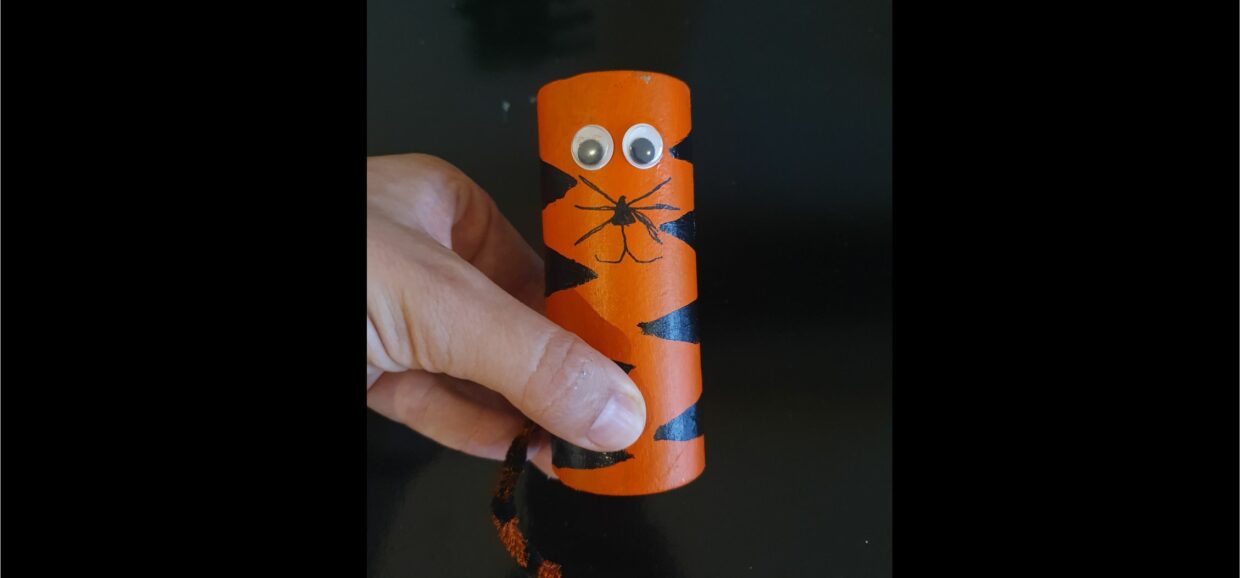

The tiger. My daughter was too quick in making this one, so didn't get a chance to take a before picture. Simple, yet adorable tiger.
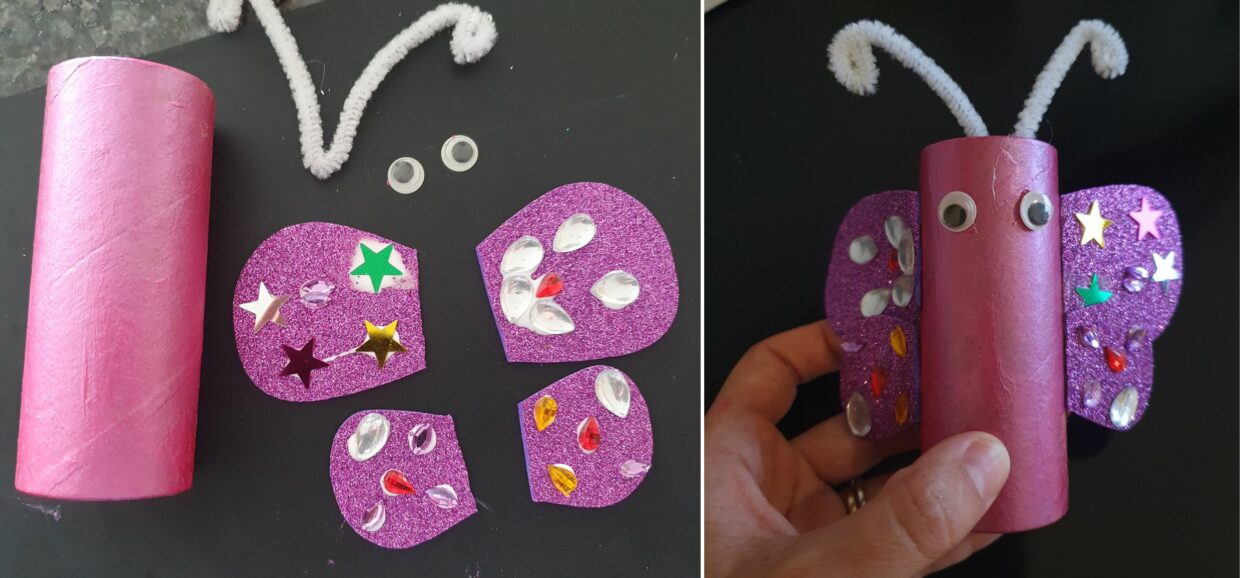

The butterfly with metallic pink paint and decorated wings.
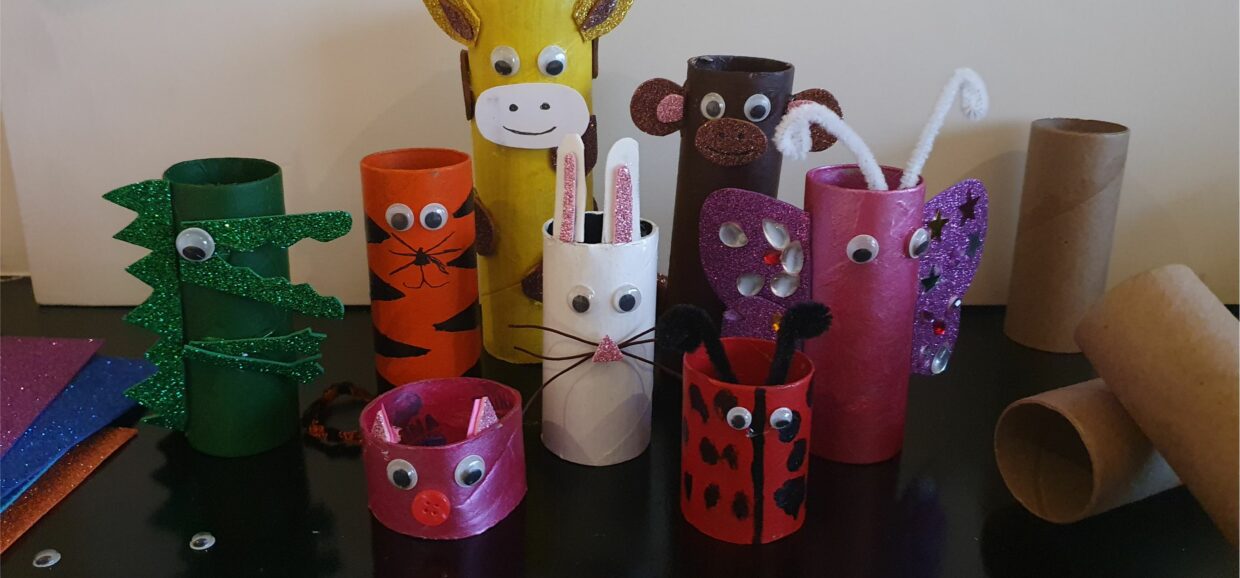

Glue all the animals together. Try to make them all visible somehow.
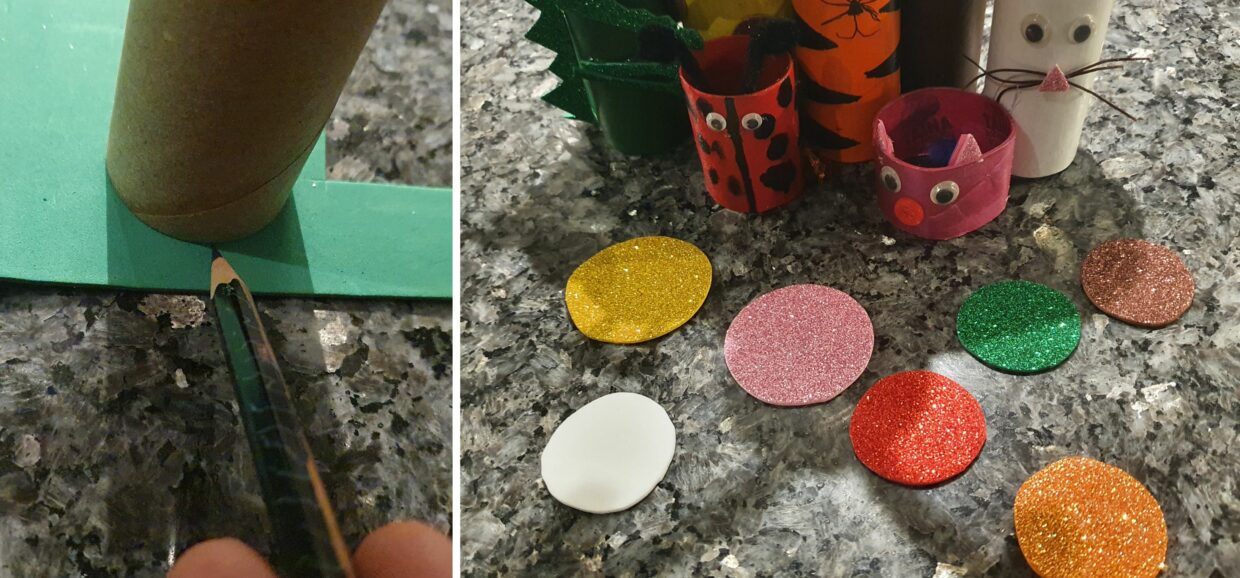

Trace the end of a toilet paper roll on thick paper (foam or craft paper) in your preferred colour to close the cylinders. I have made them in the same colours as the paint but that is up to you
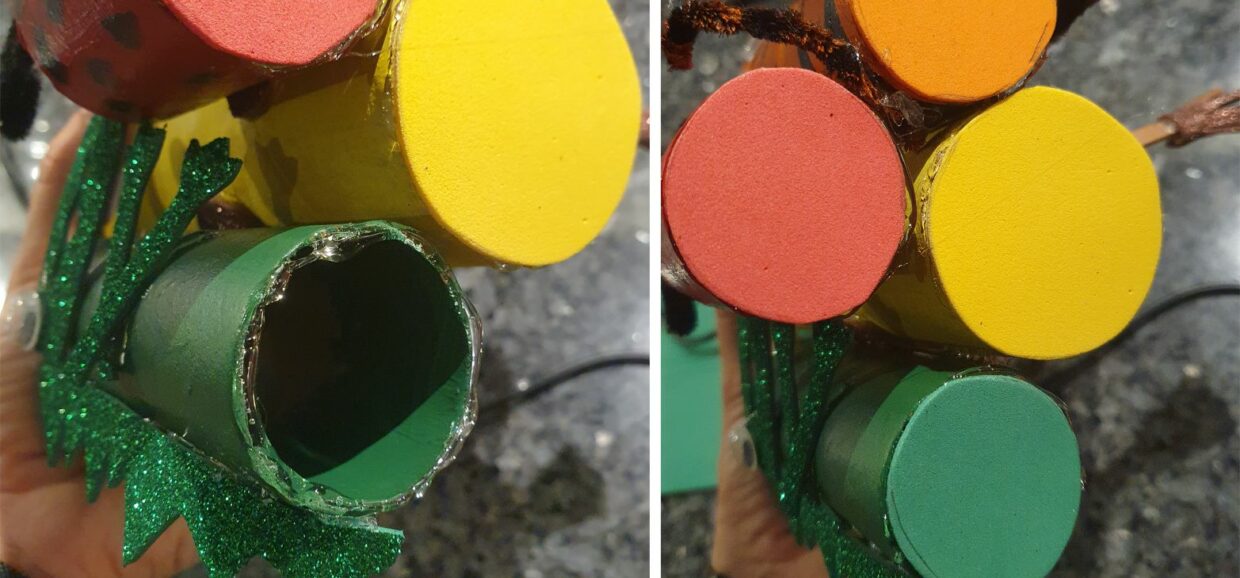

Stick them on at the bottom with a glue gun (or regular glue if you have more patience). Now you can lift the pencil stand without the risk of any of the stationary falling out.
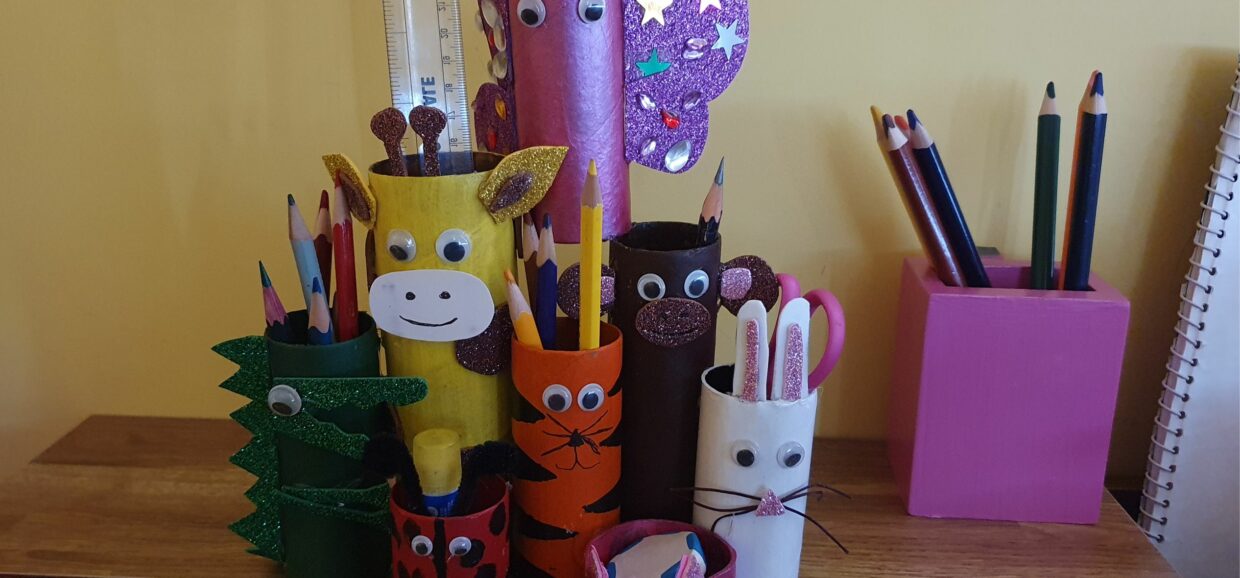

And you are done. Hope you enjoyed this little best out of waste craft idea. Please let me know how you got on.
You may also like
Best Out of Waste Animal Pencil Holder
Ingredients
Follow The Directions
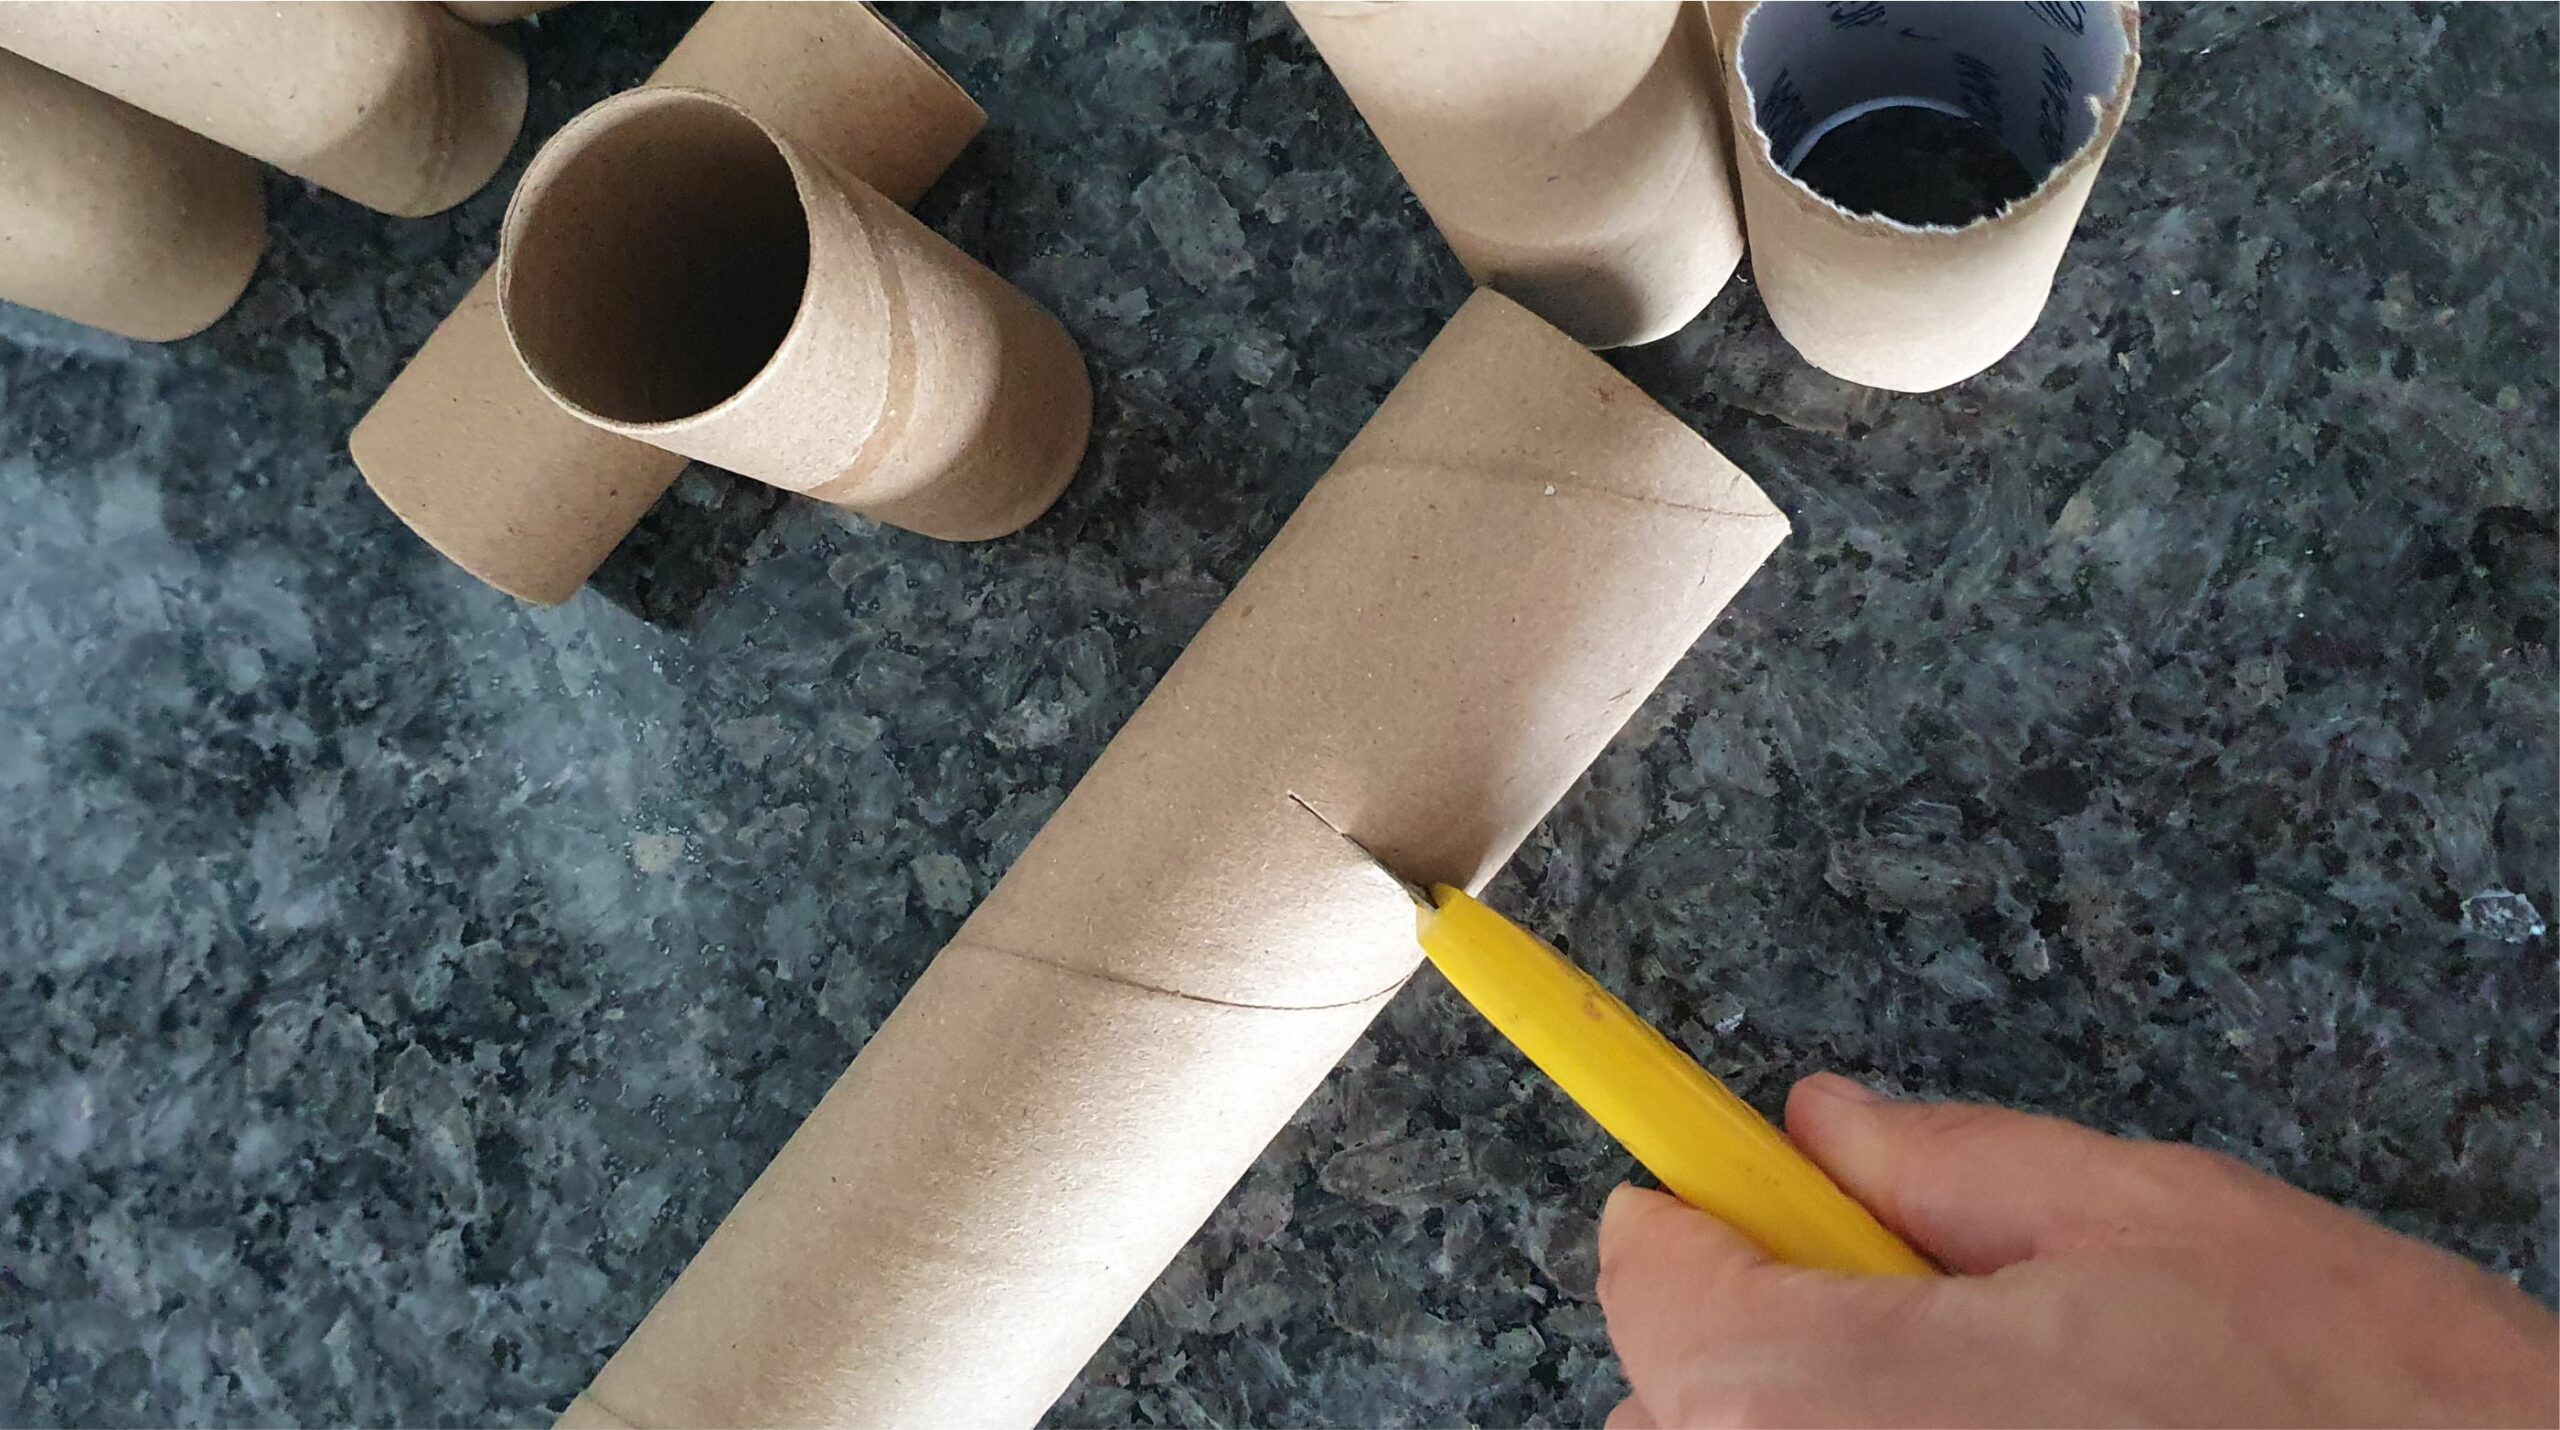

Cut the rolls into different sizes with a hobby knife or scissor. Start by painting the roll before cutting the ears, nose, tails etc. I have shown each animal below as examples on how to do it.
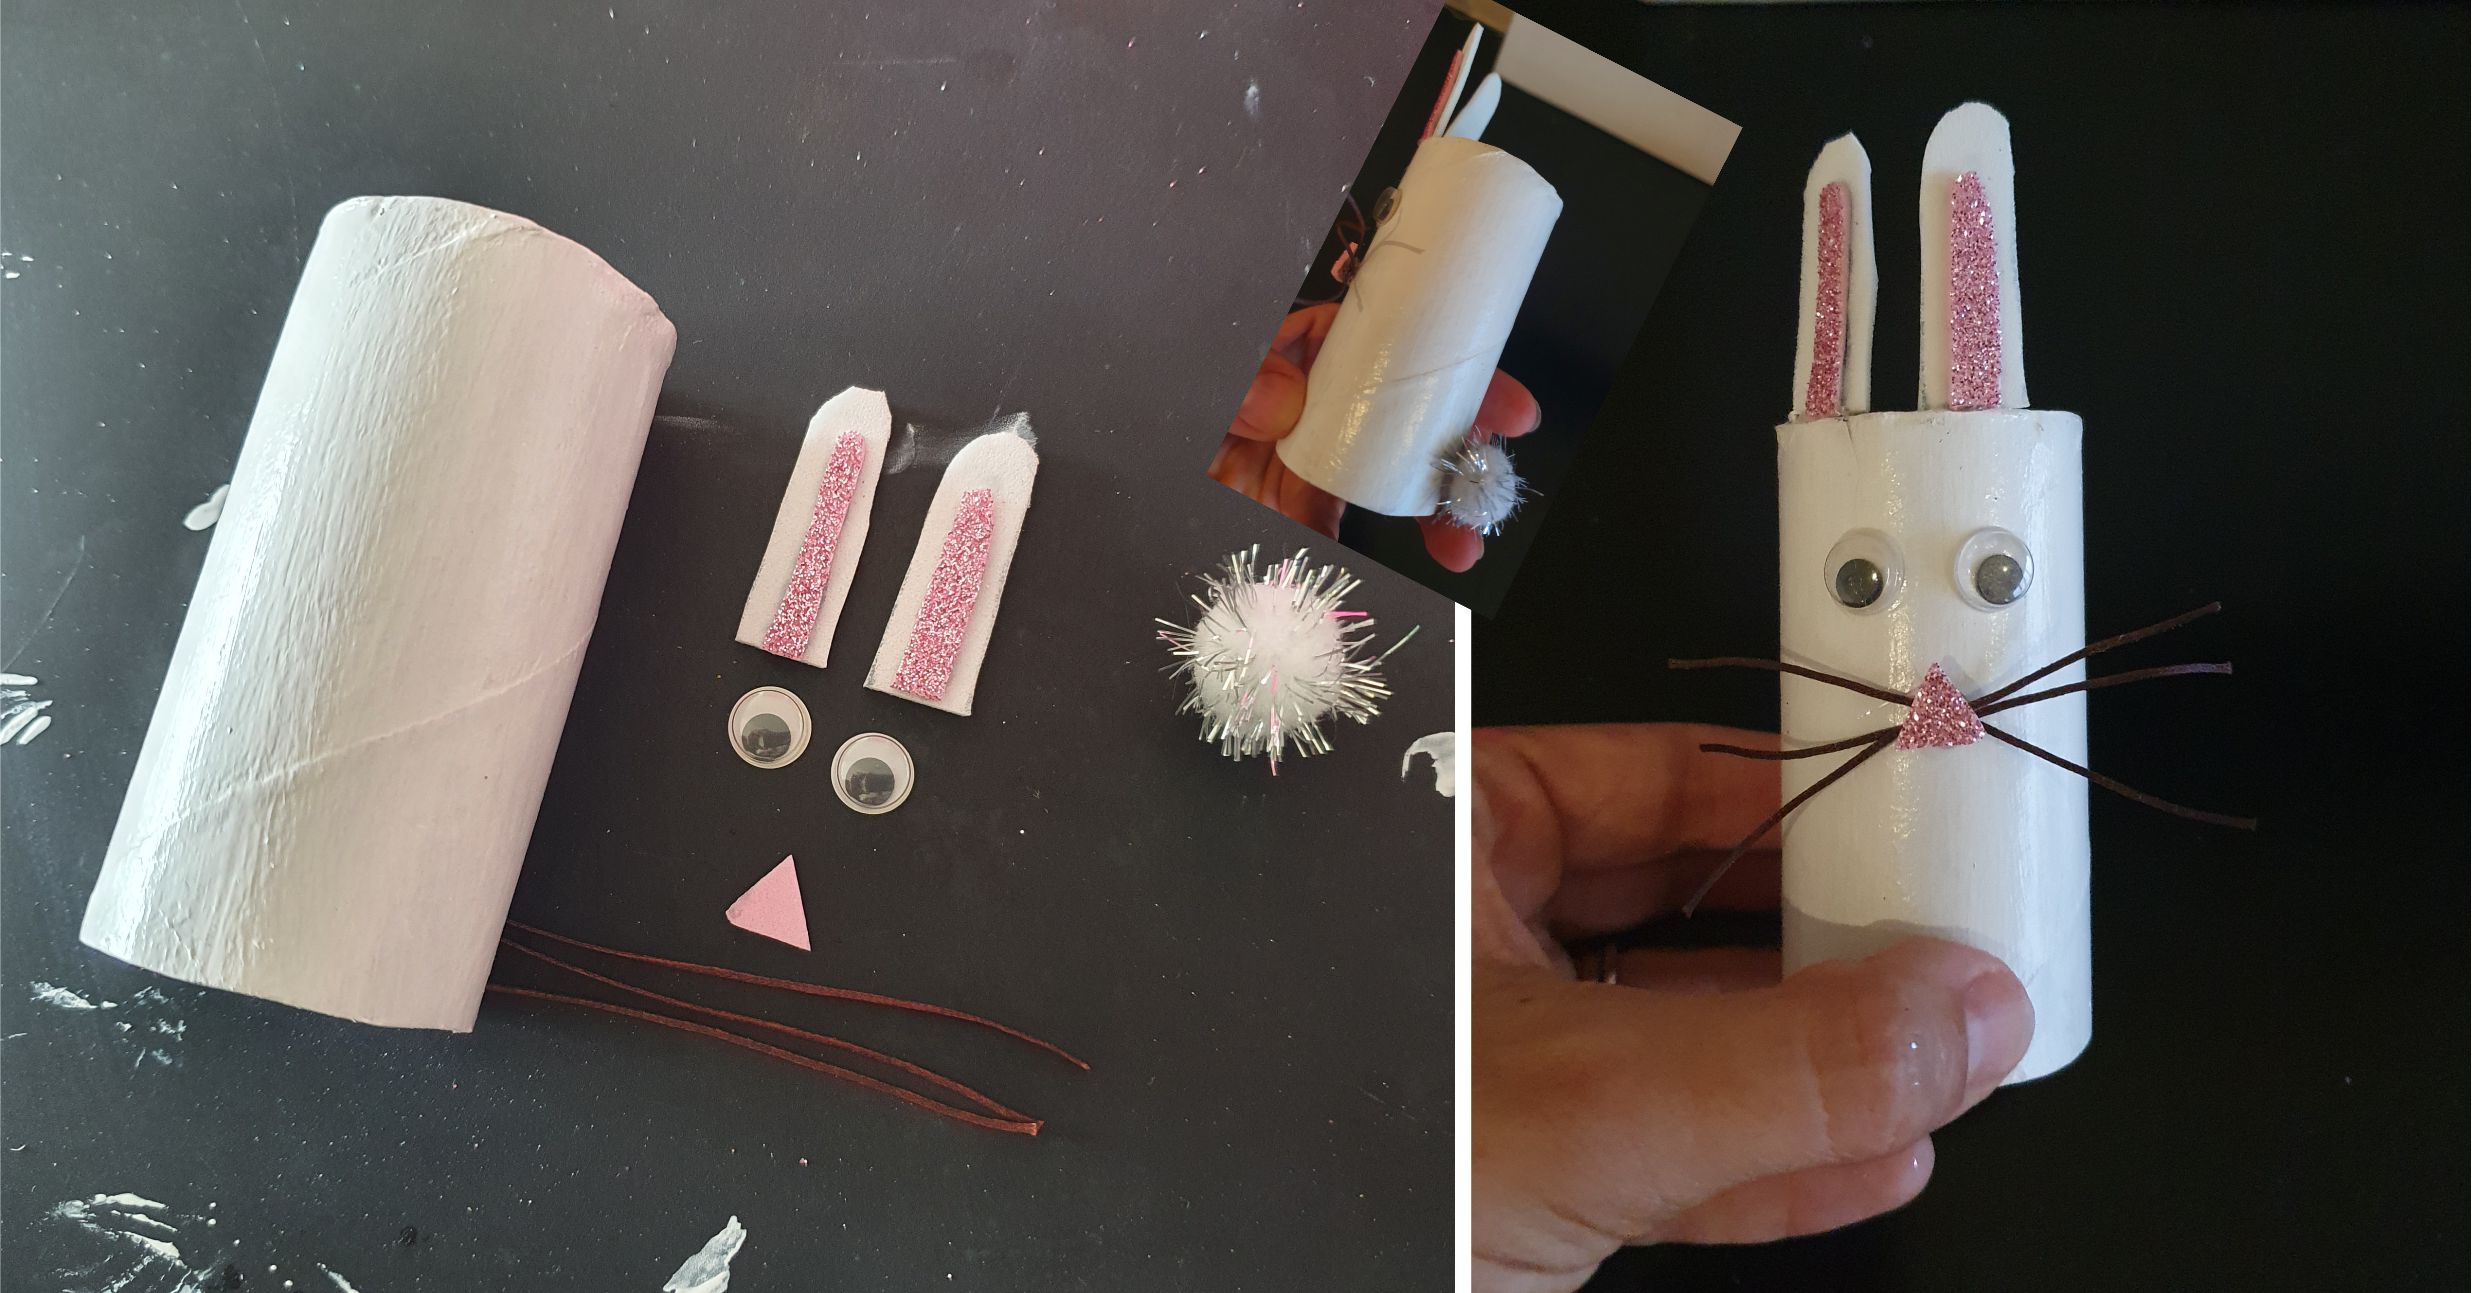

The bunny with a white-painted roll, pointy ears and a fluffy tail. Let the strings for the whiskers remain long and attach them with a nose in the middle.
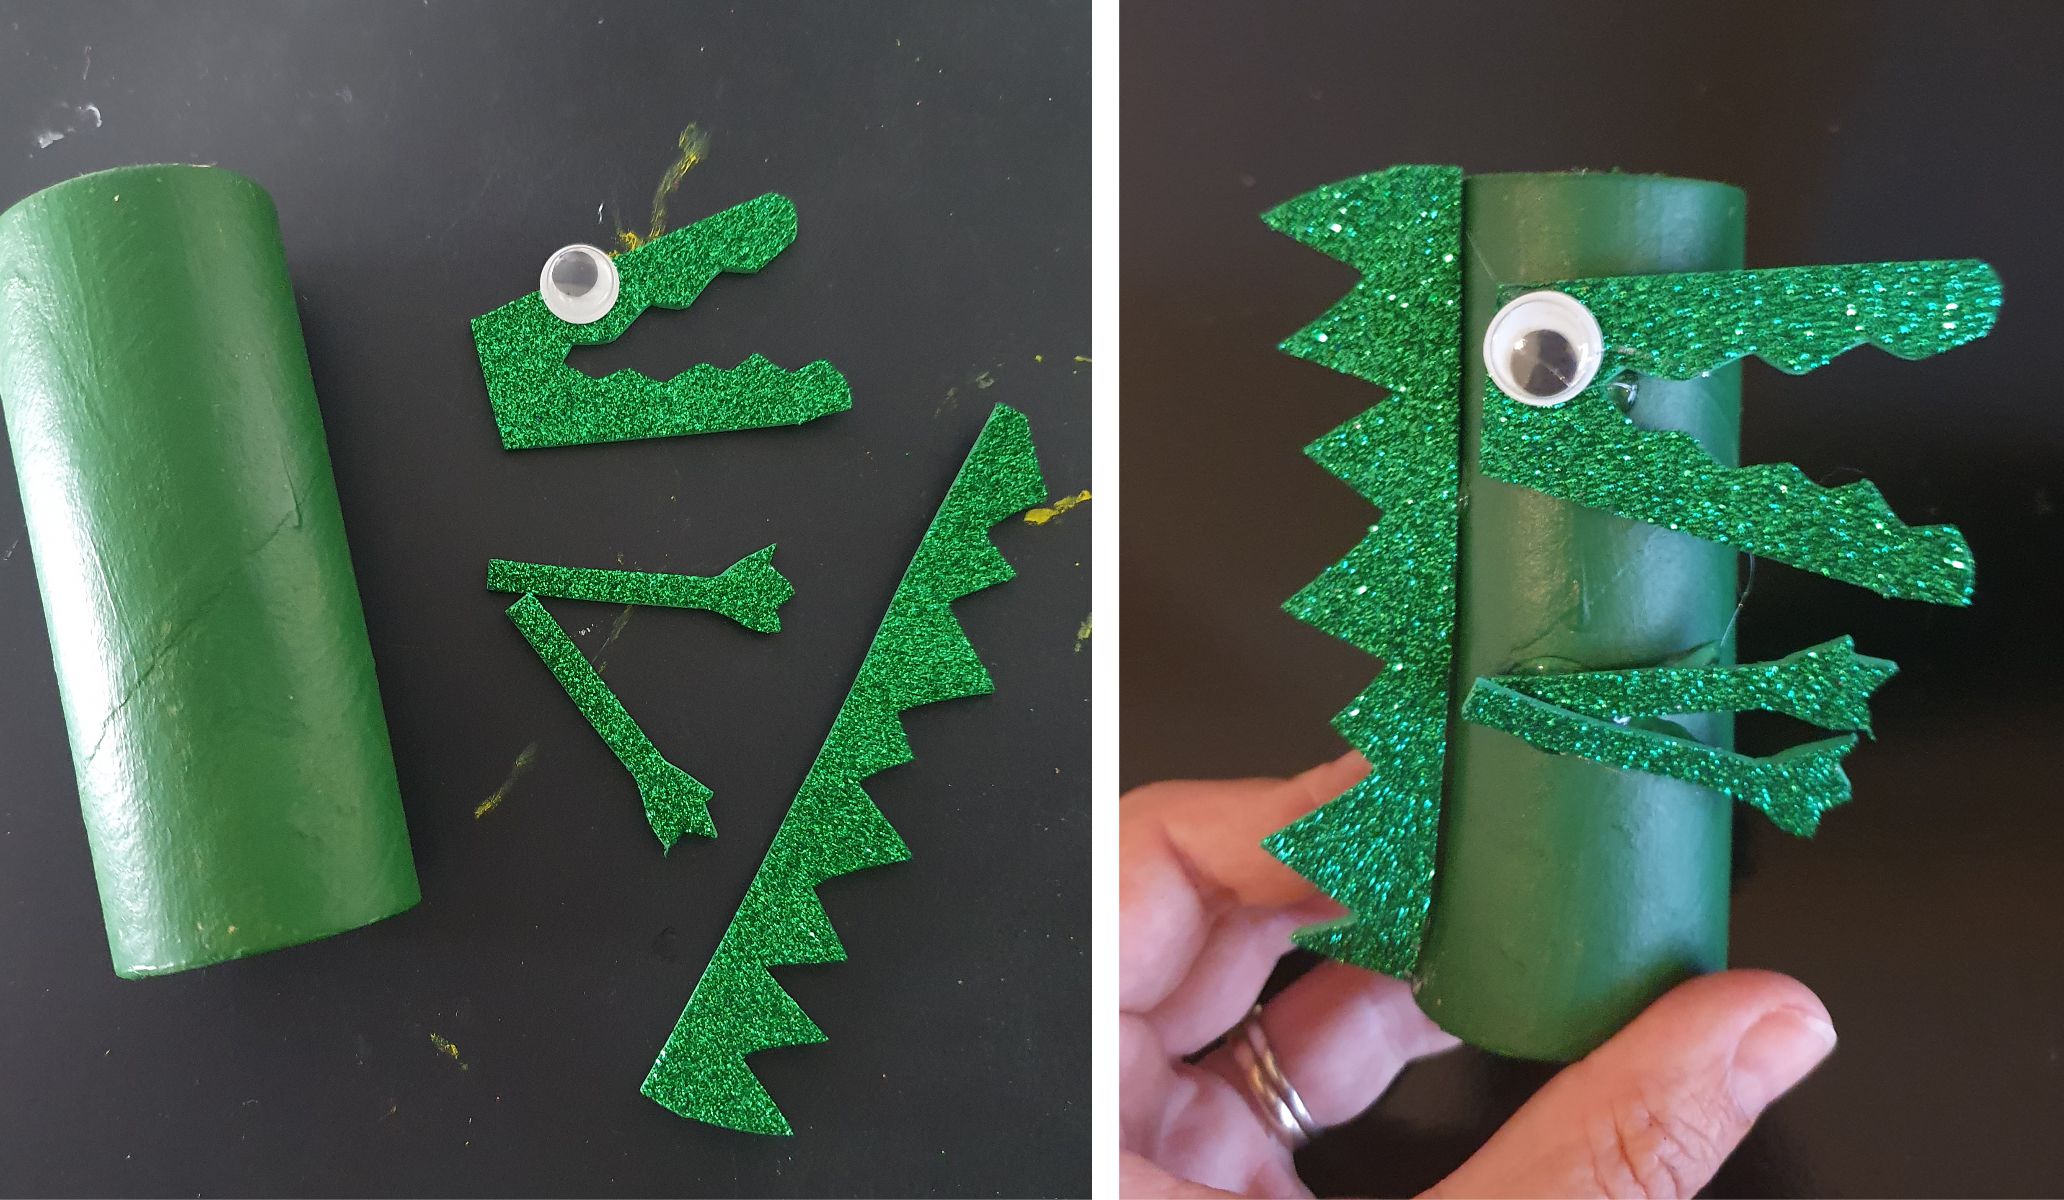

The crocodile seen from the side with a gaping mouth and pointy scutes/spikes down the back
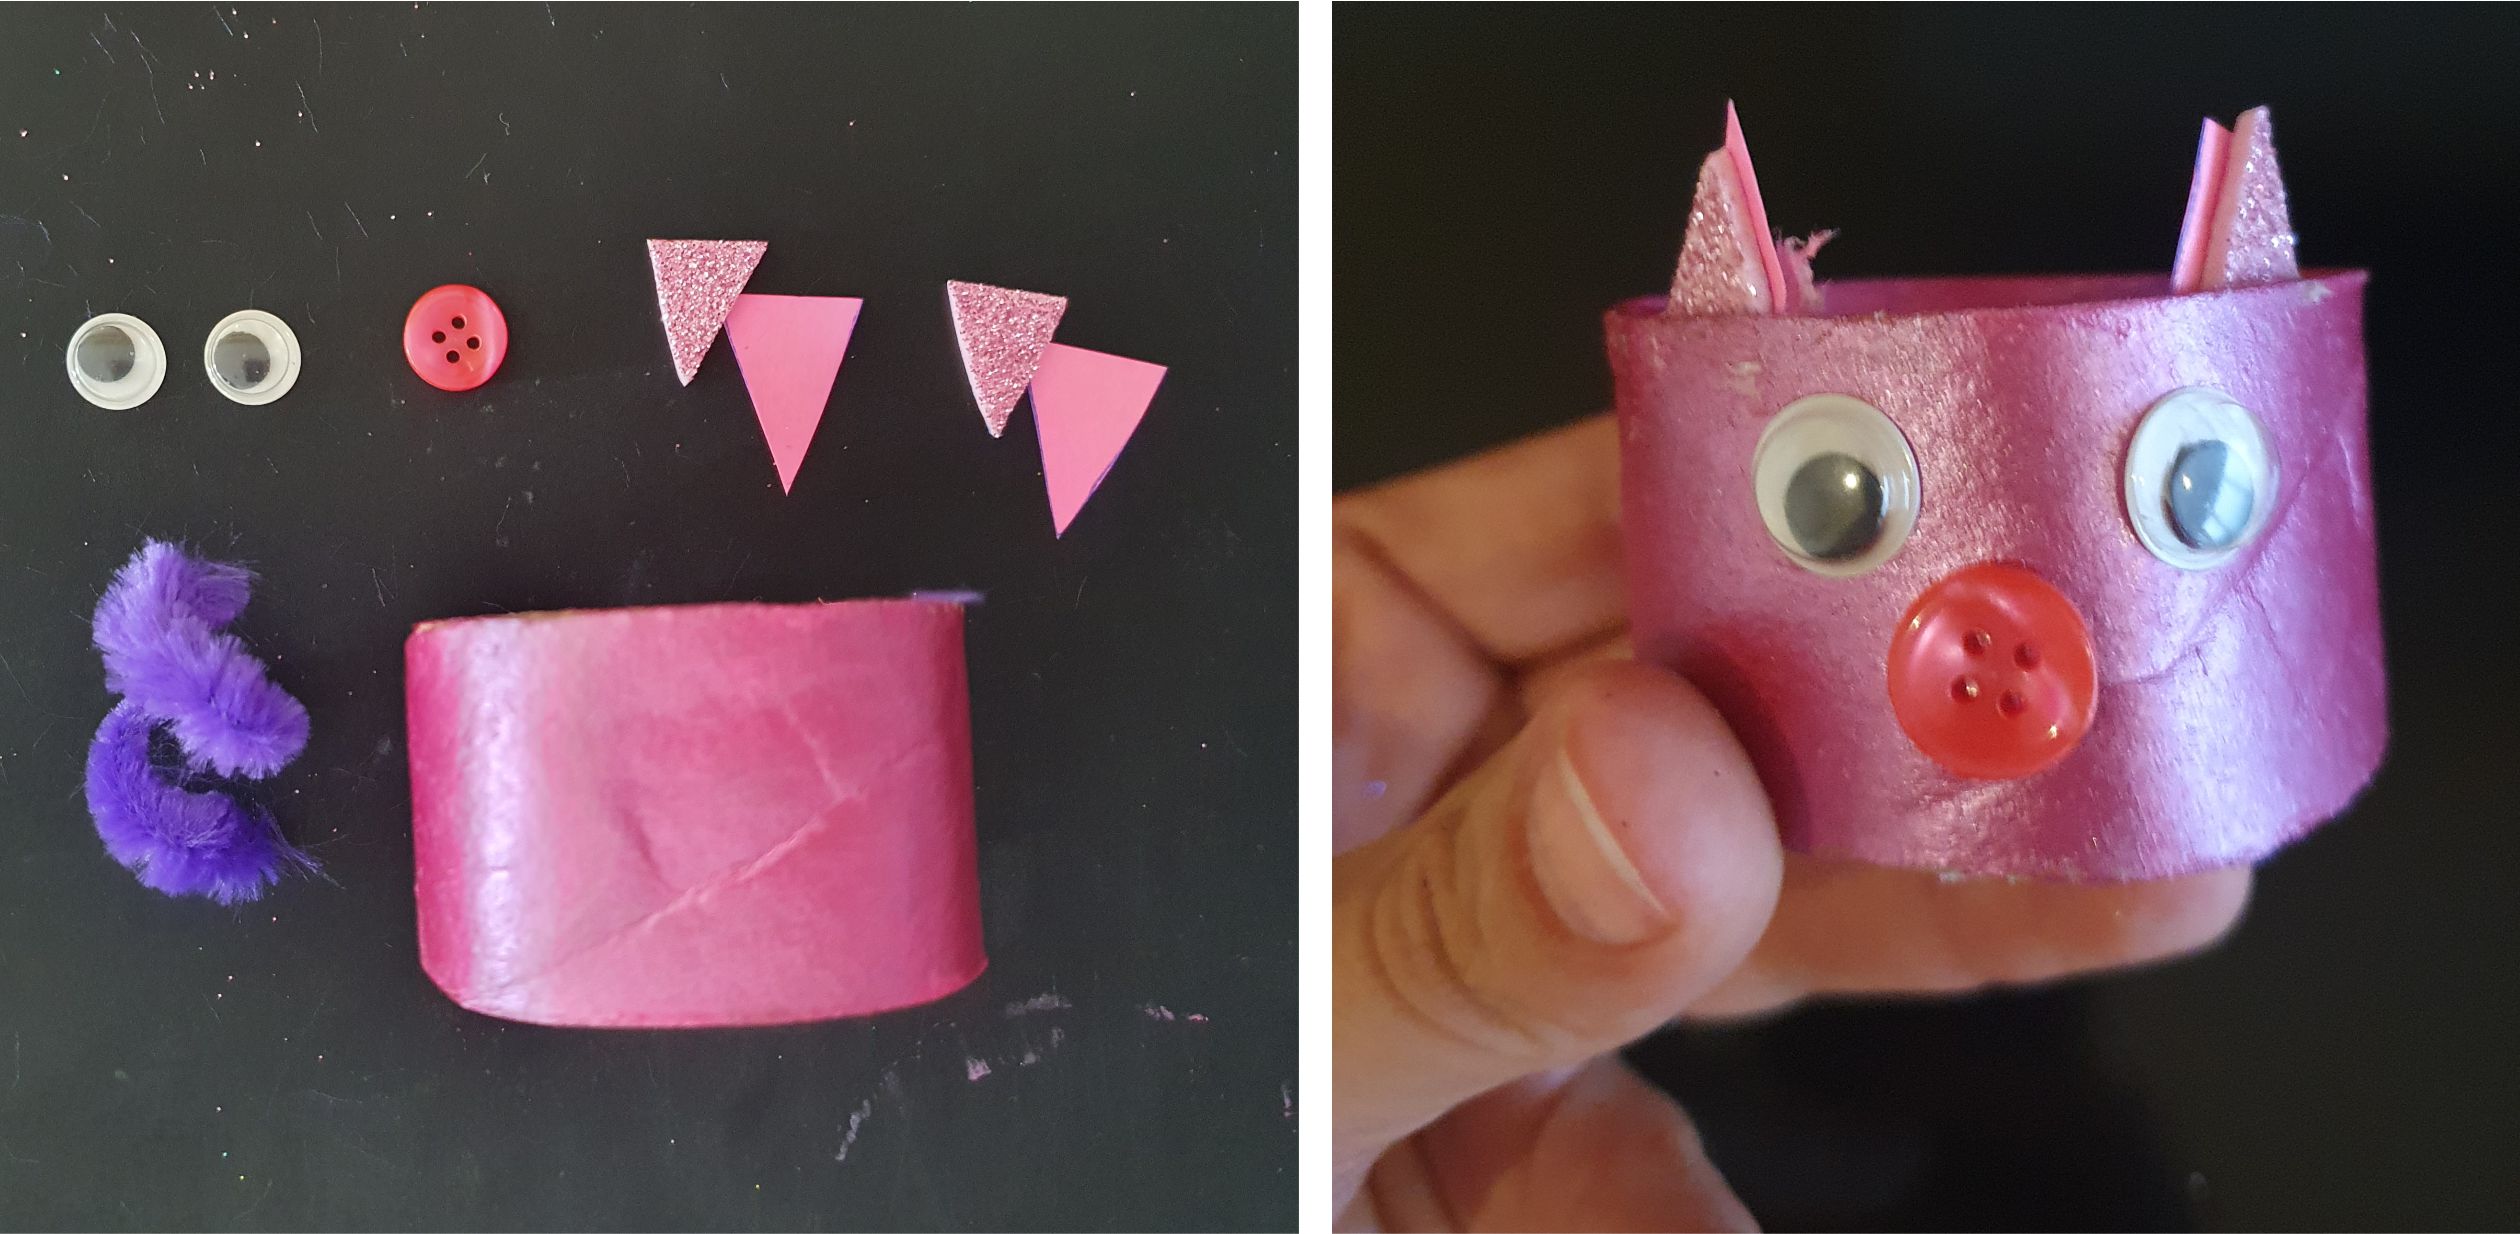

The pig with tiny ears and a button nose. The tail can also easily be a spiral cut from coloured paper if you don't have a pipe cleaner handy.
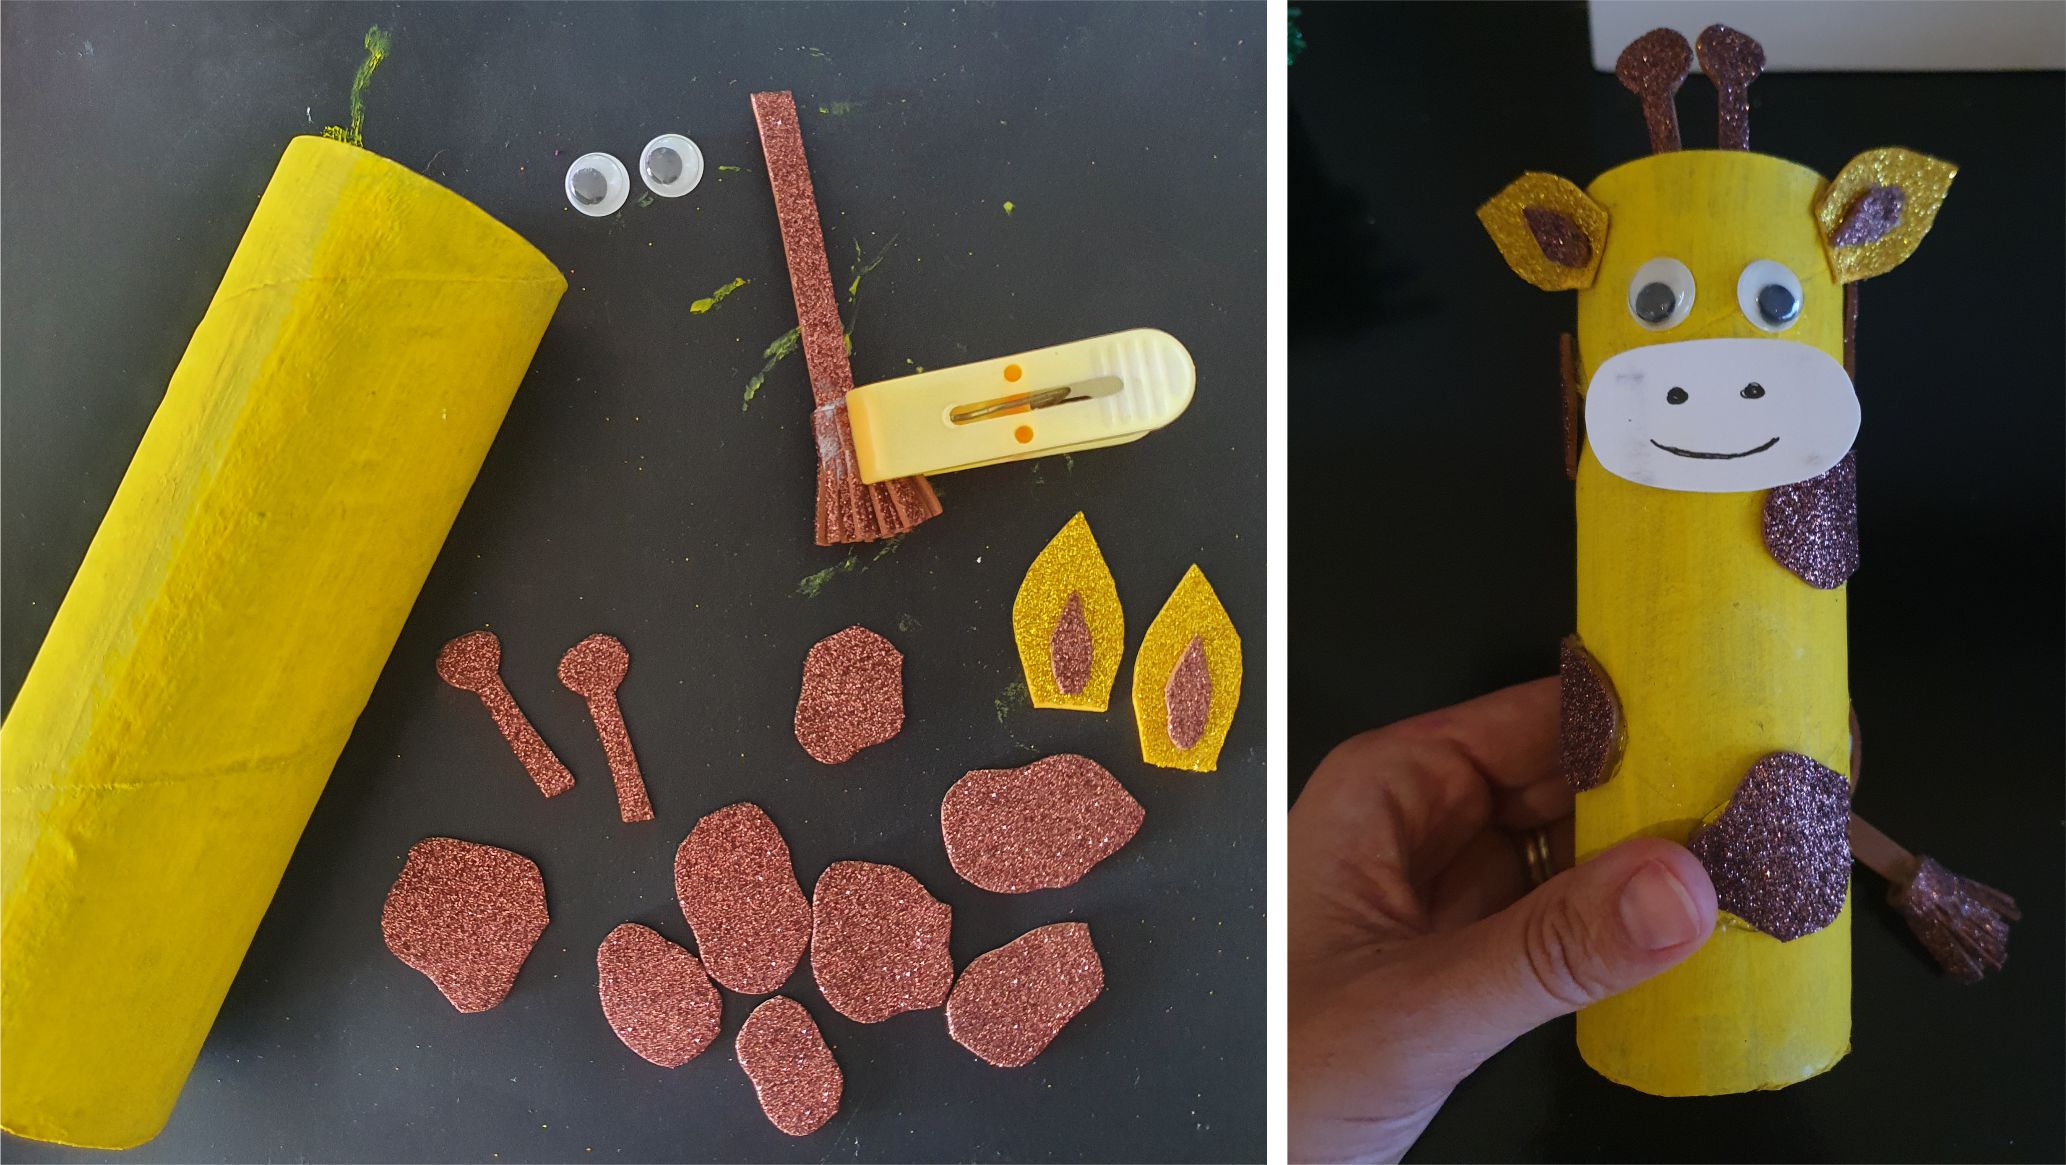

The giraffe with horns, spots and a "broom" tail.
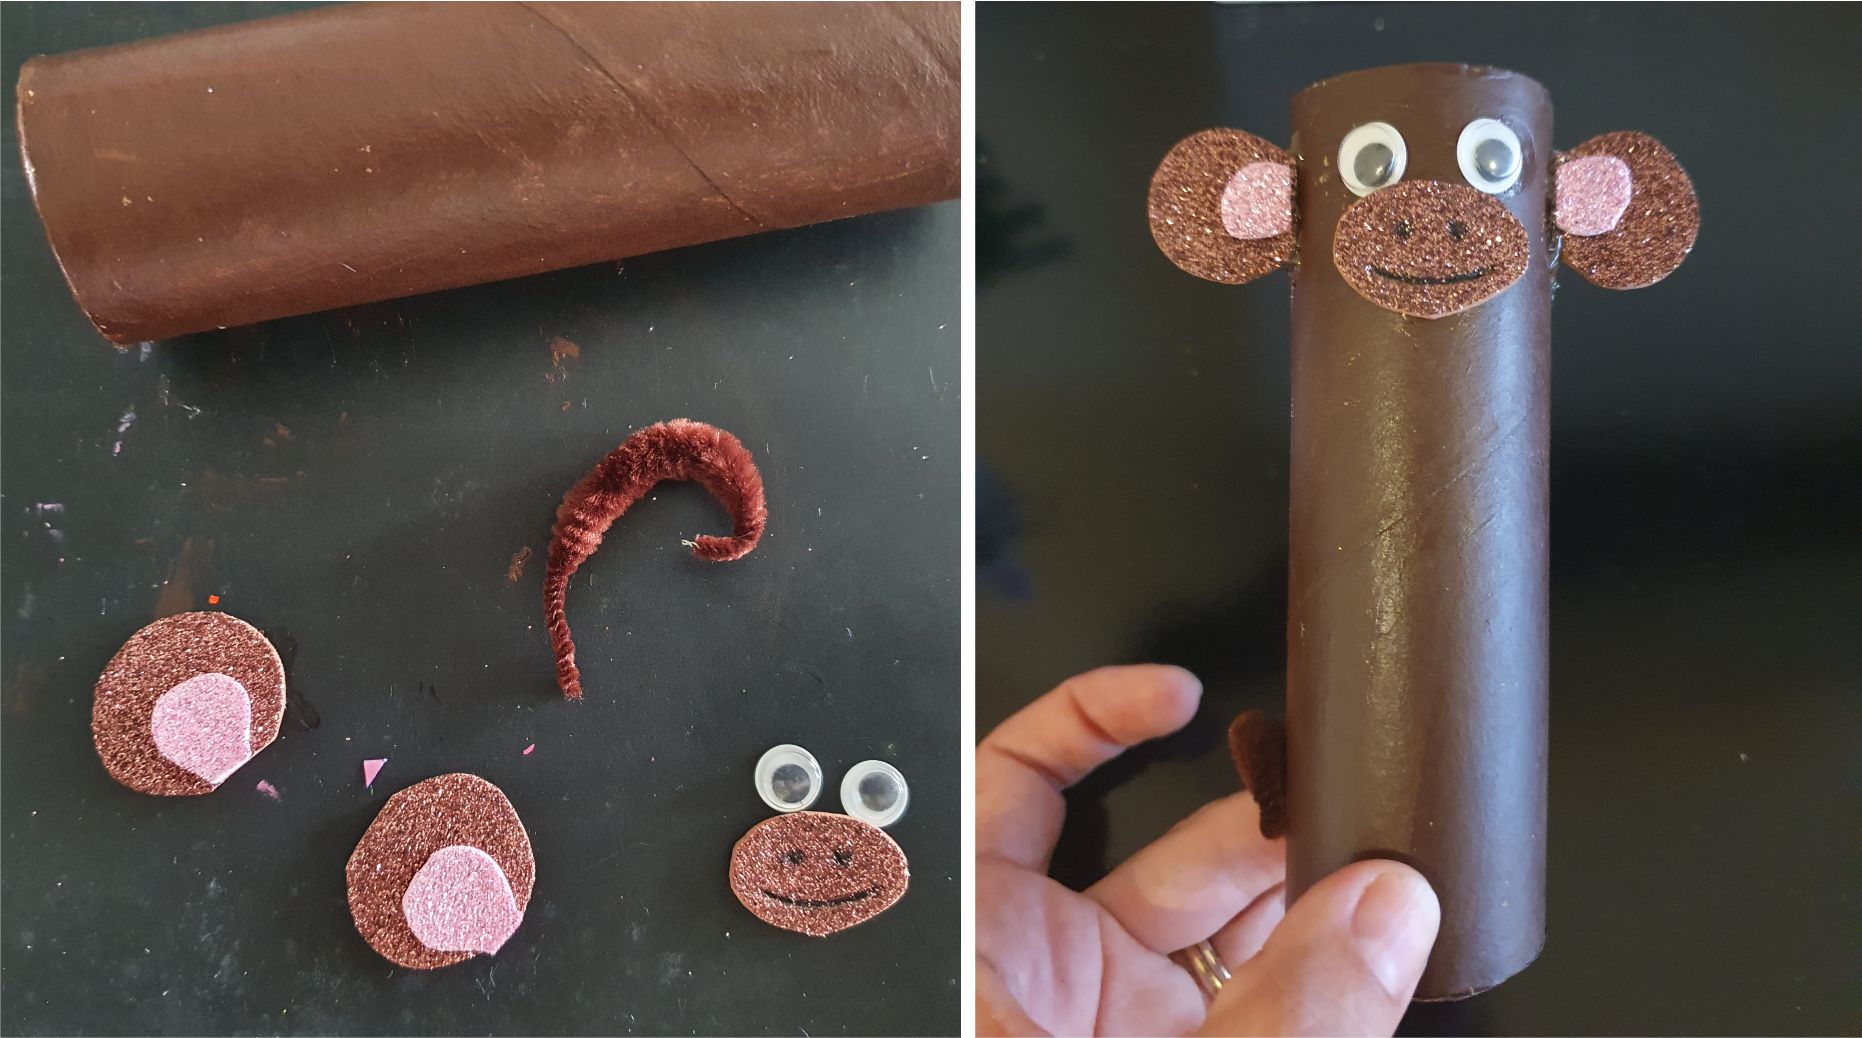

The monkey with cute ears and a big mouth. My daughter used a black ball point pen to draw on the mouth and nose.
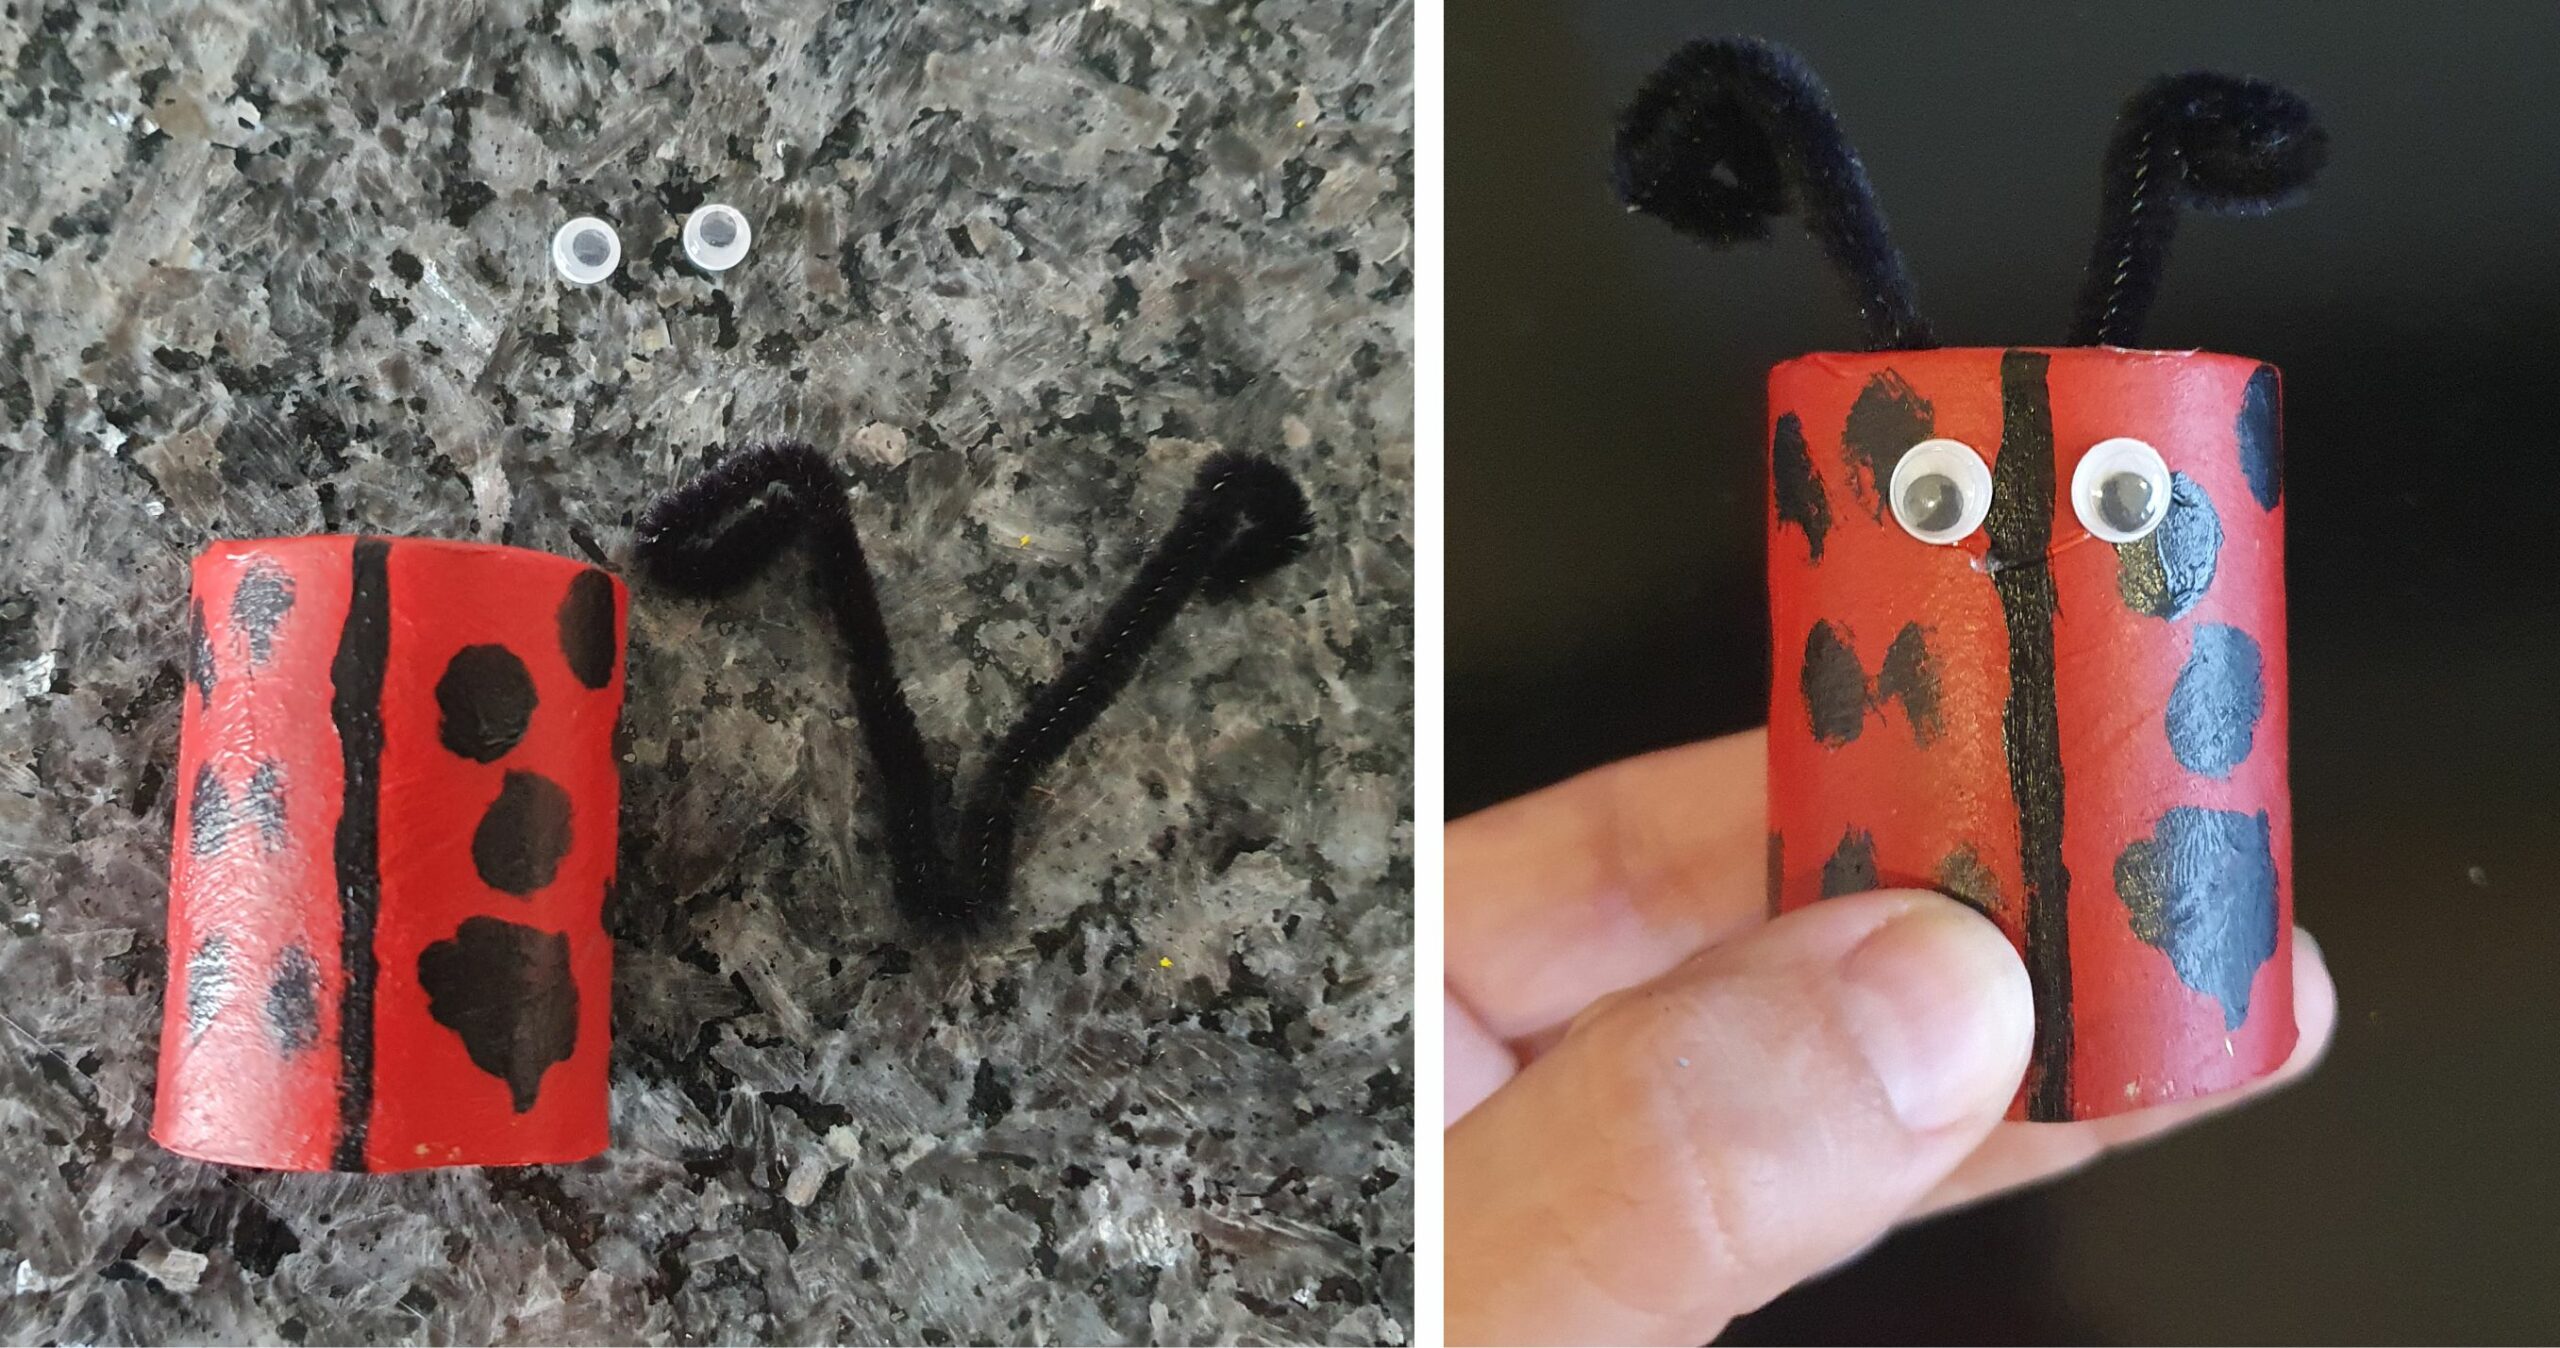

The ladybug. Simple and cute with a red base and lots of black dots.
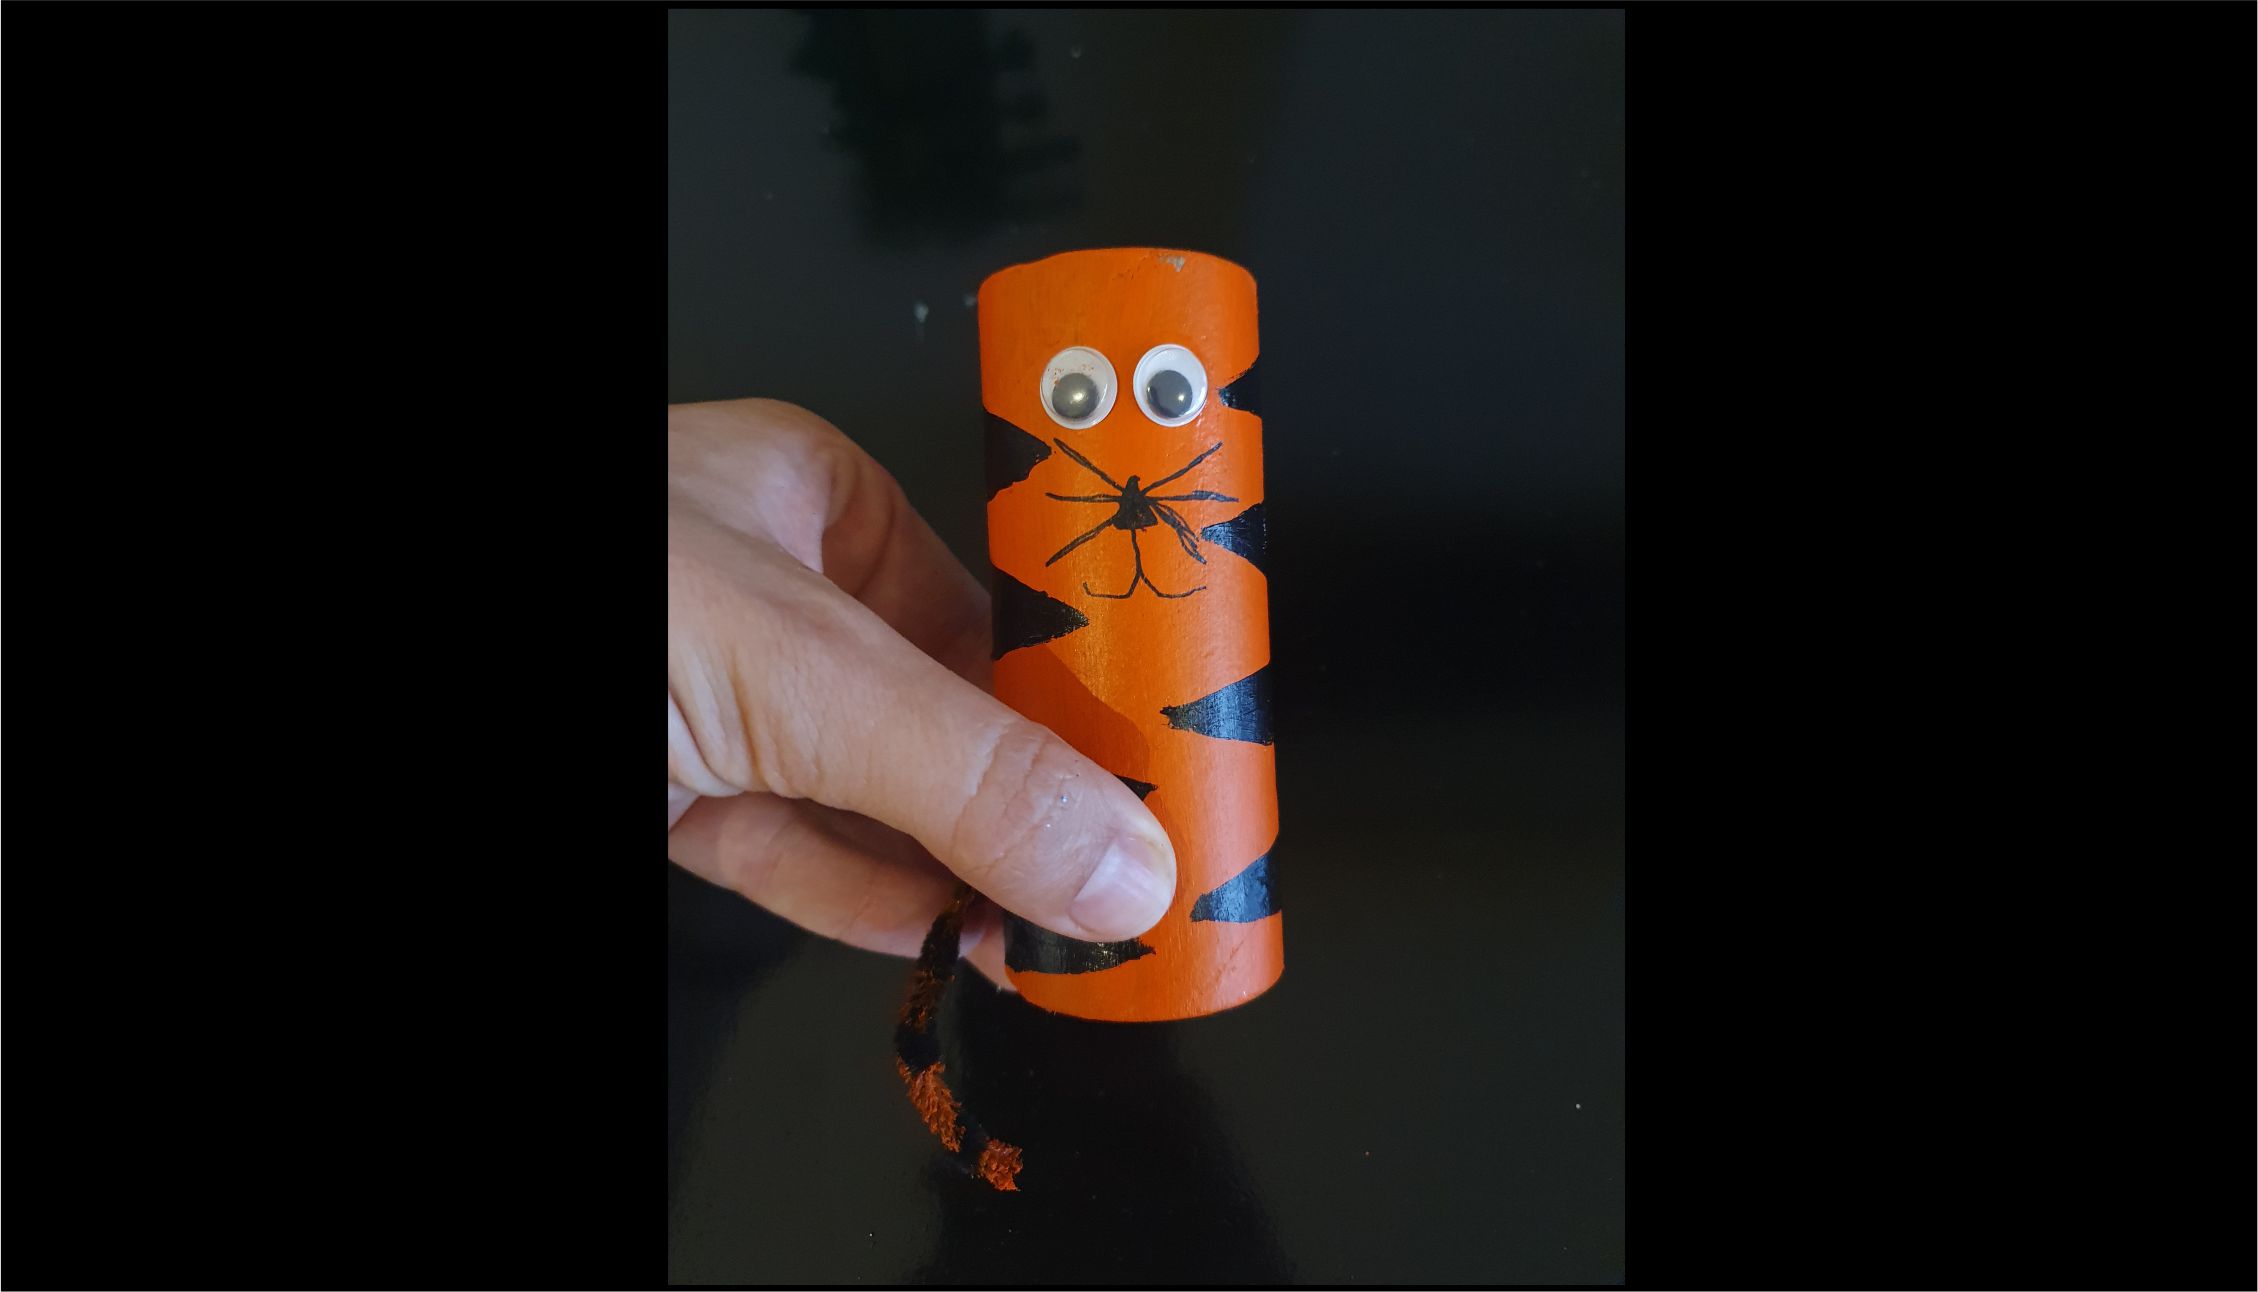

The tiger. My daughter was too quick in making this one, so didn't get a chance to take a before picture. Simple, yet adorable tiger.
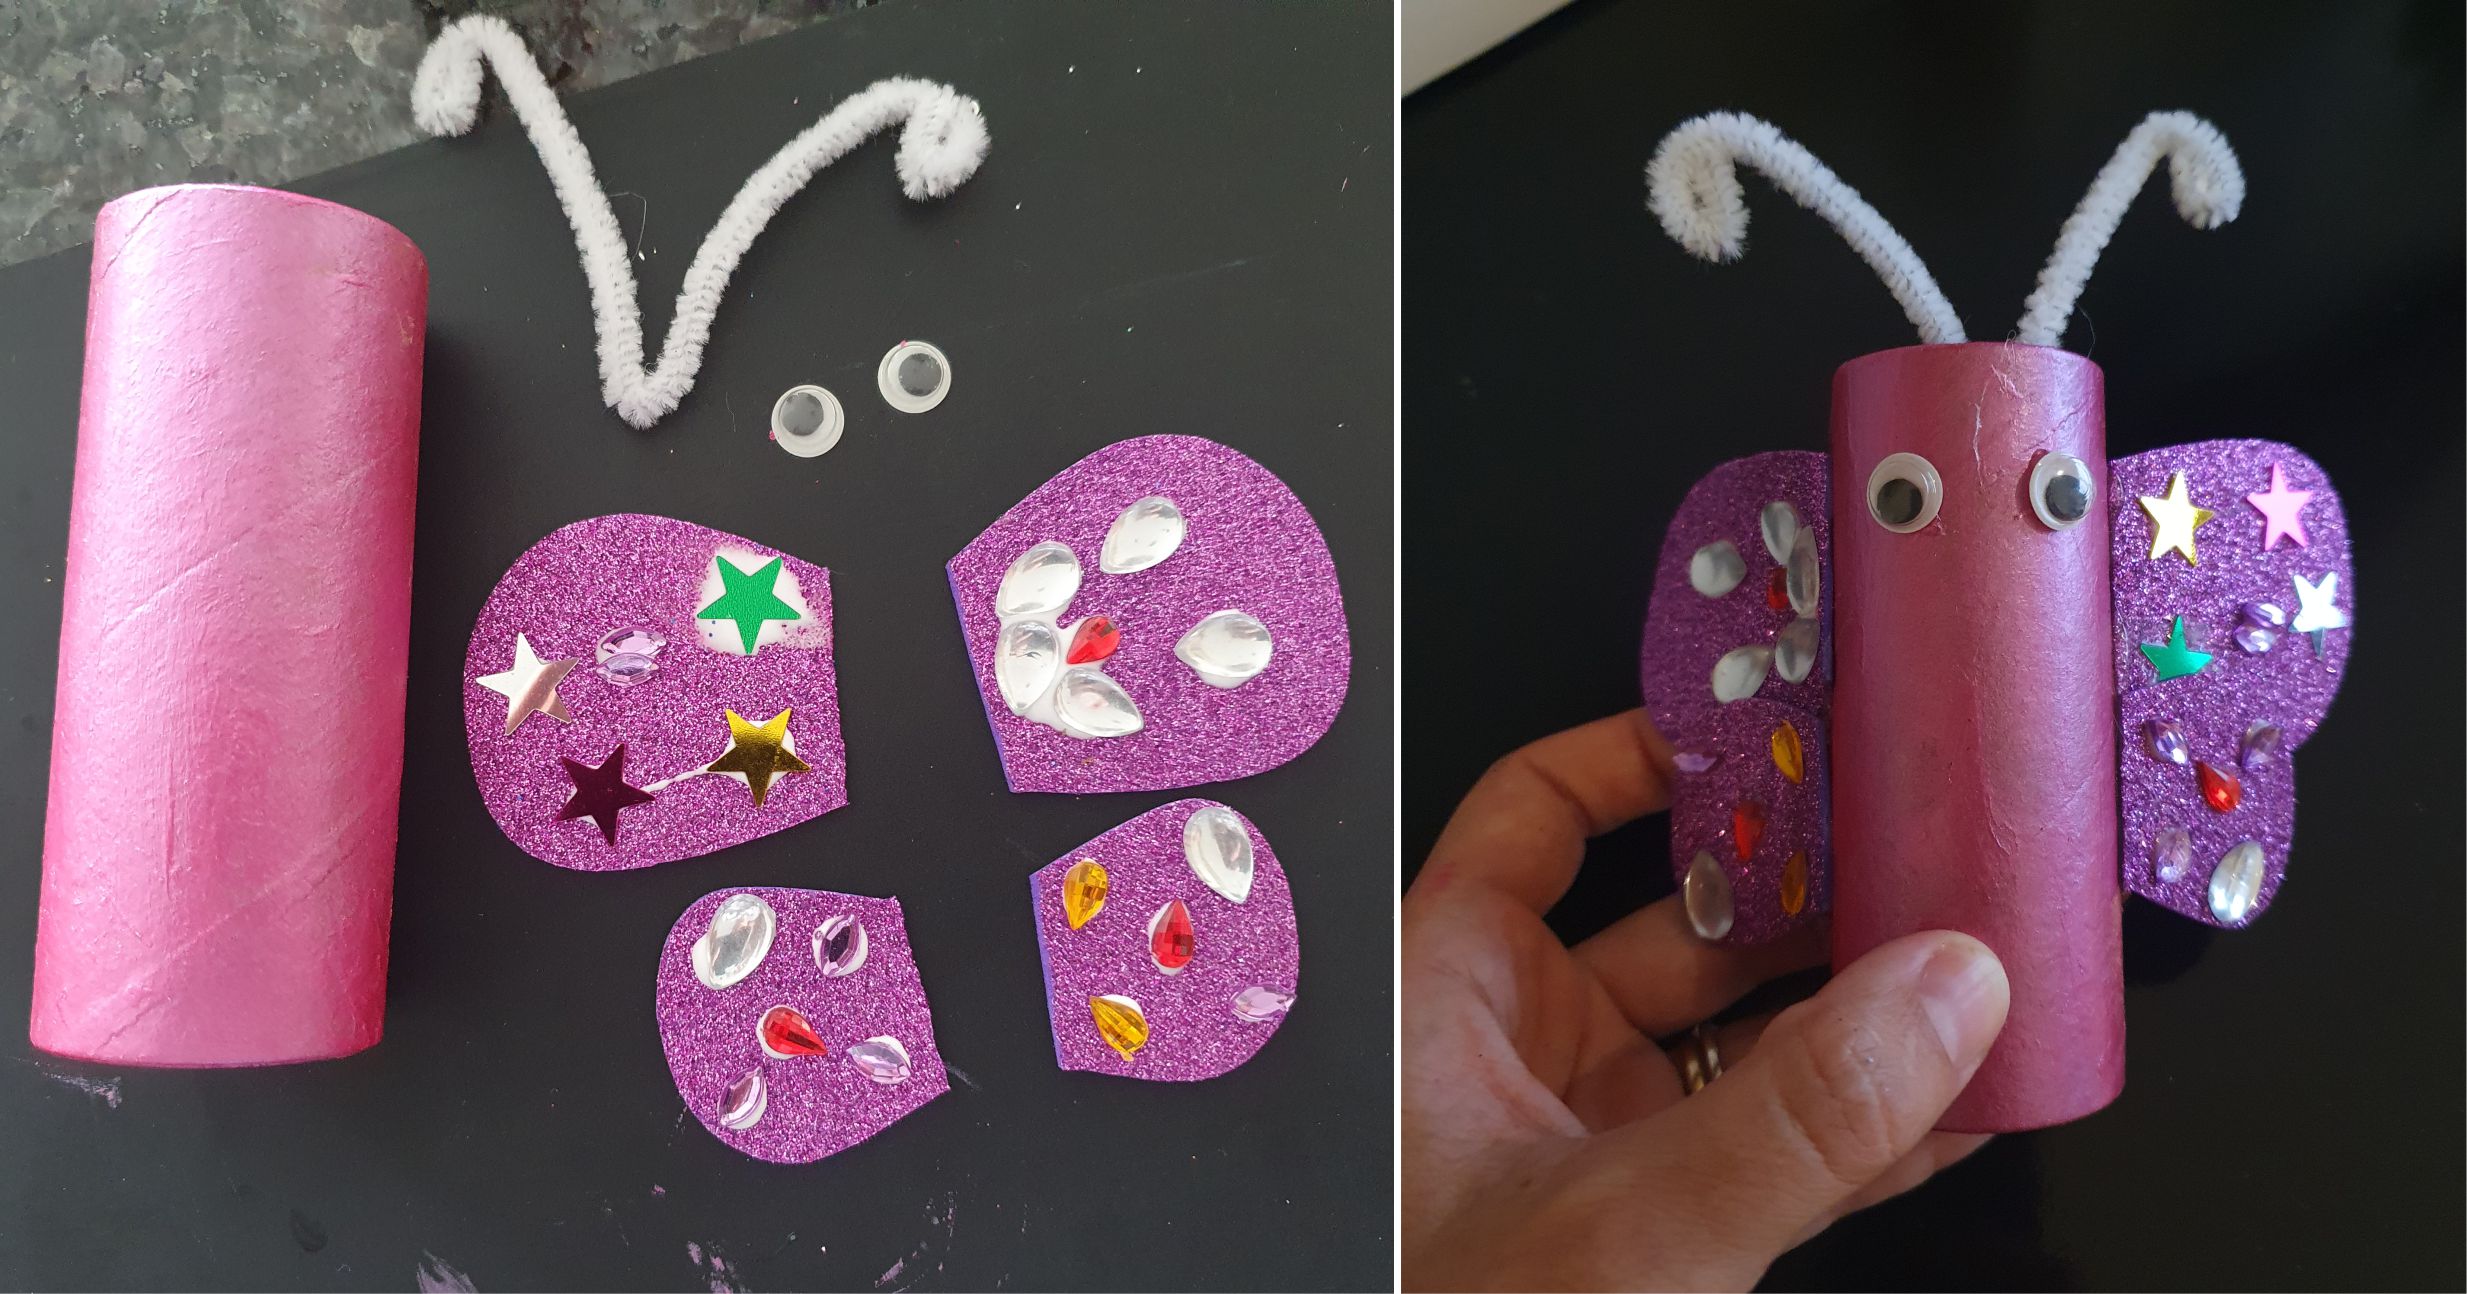

The butterfly with metallic pink paint and decorated wings.
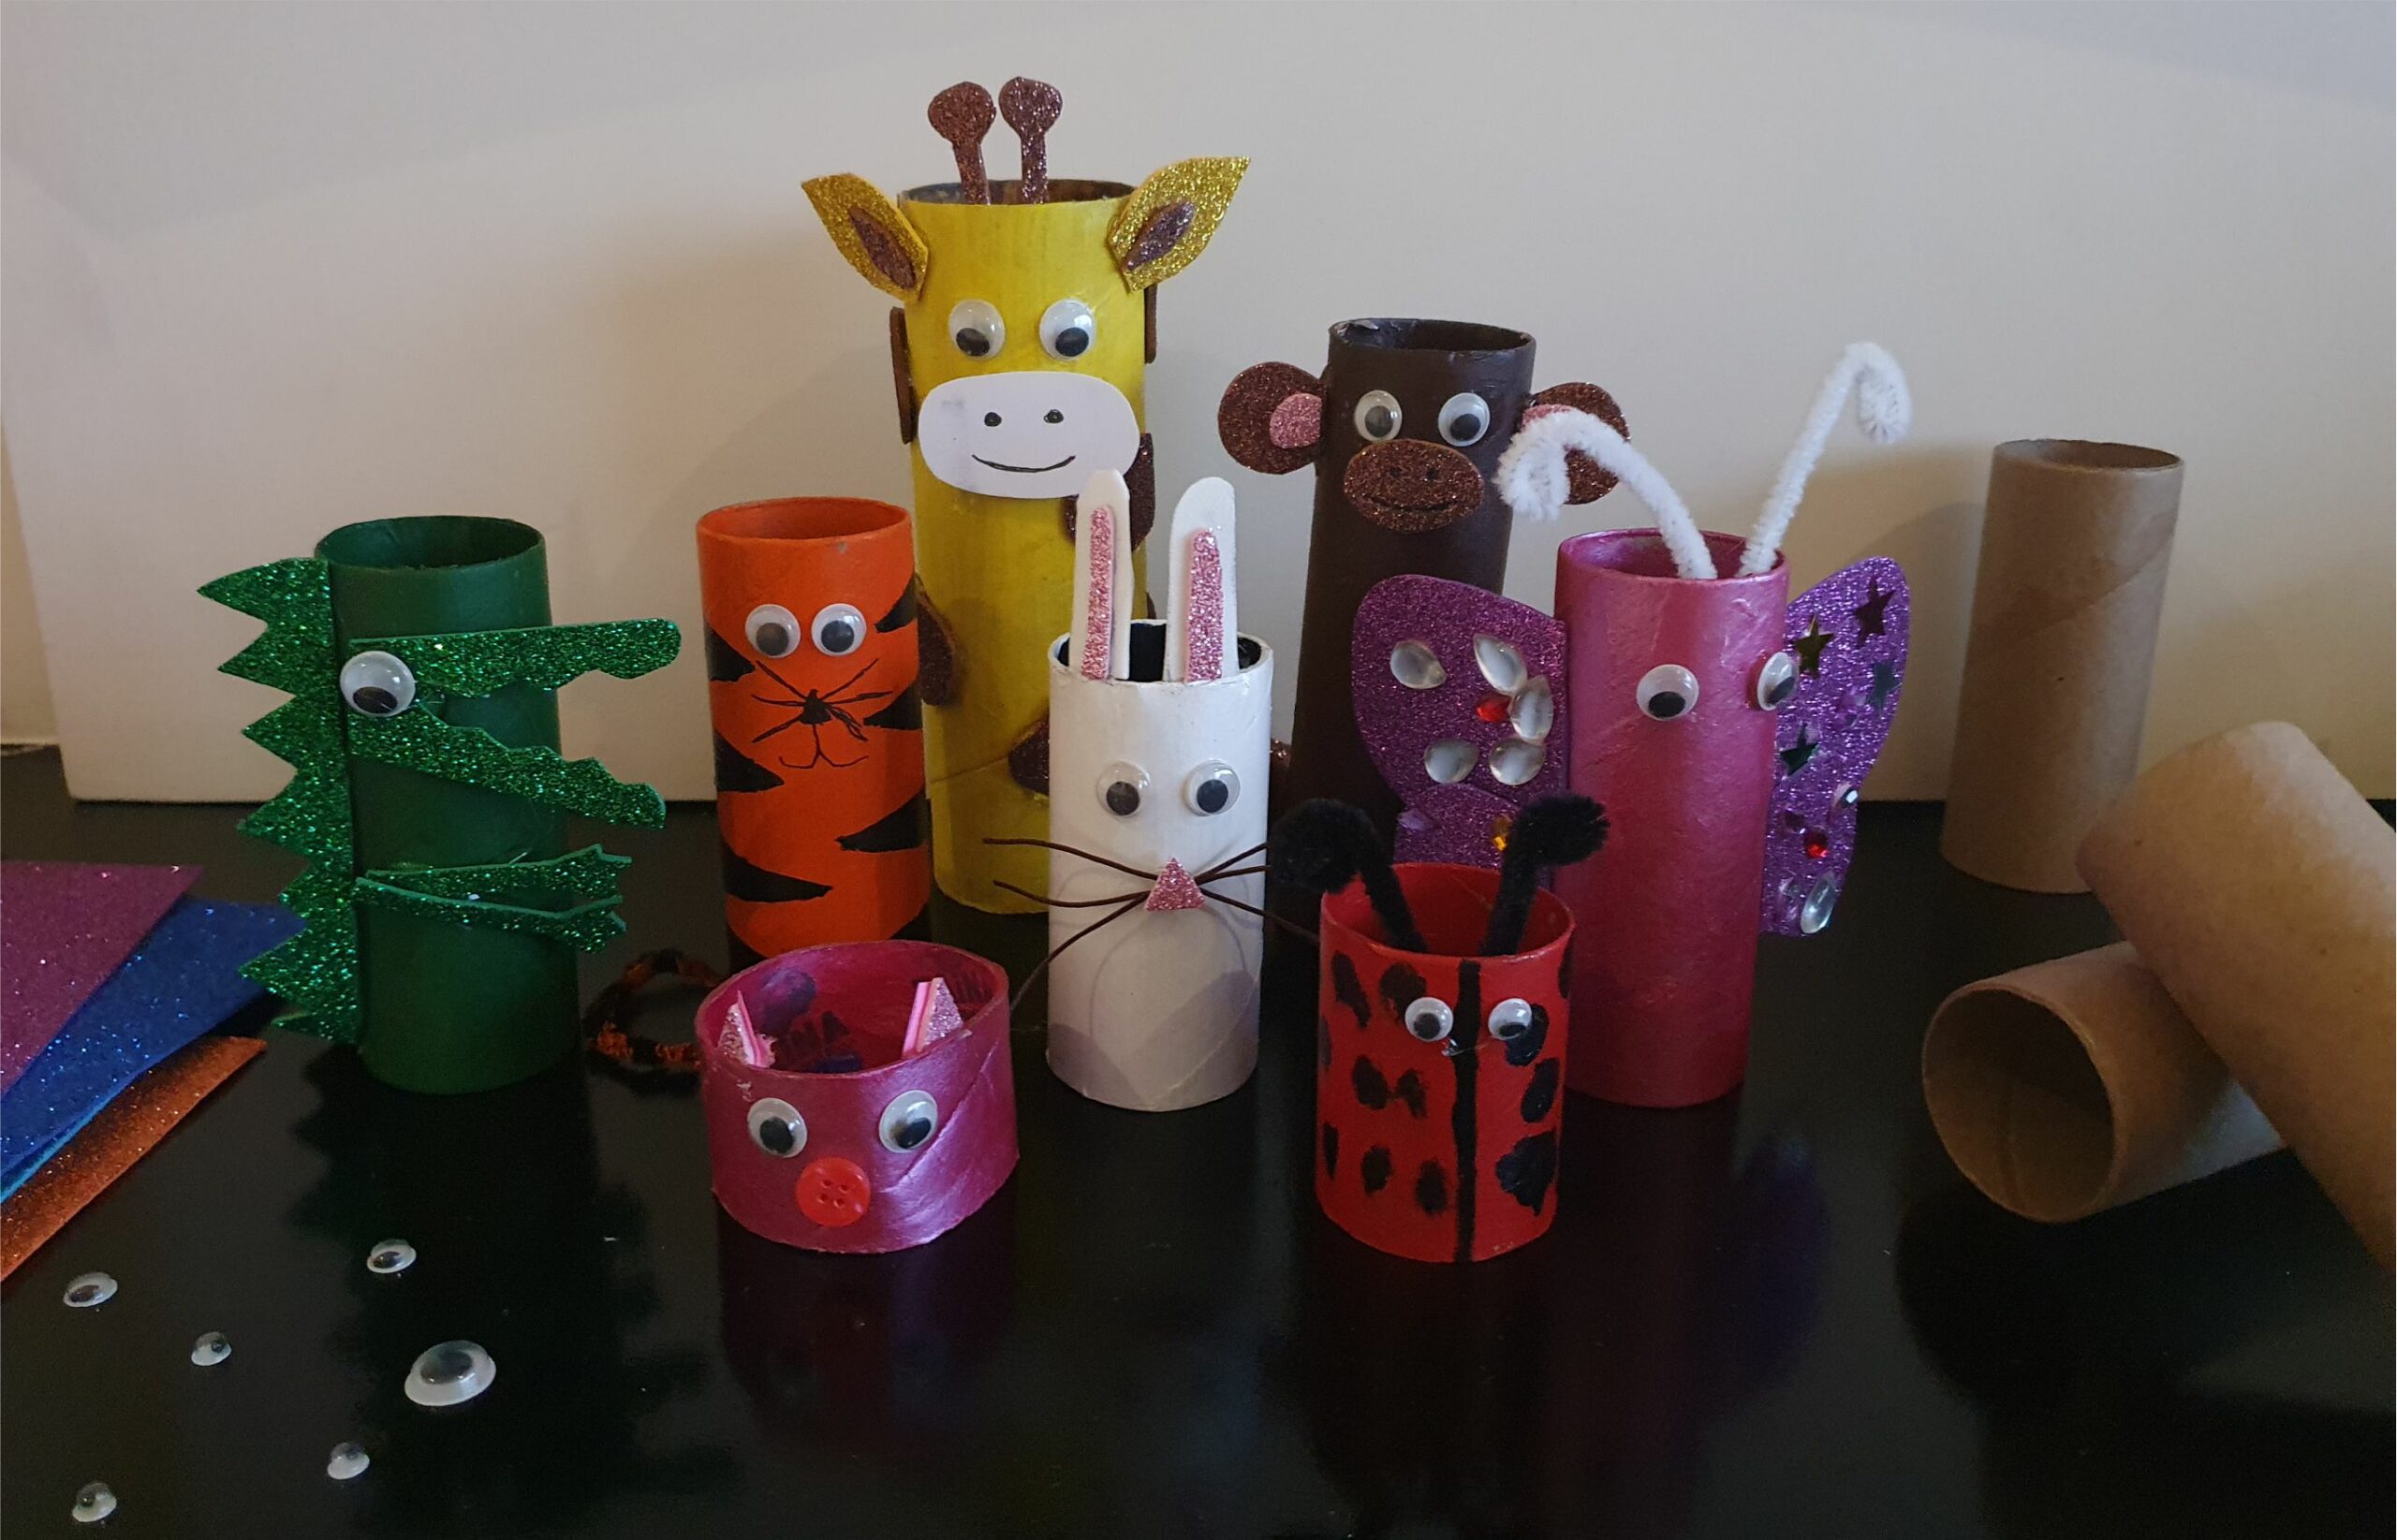

Glue all the animals together. Try to make them all visible somehow.
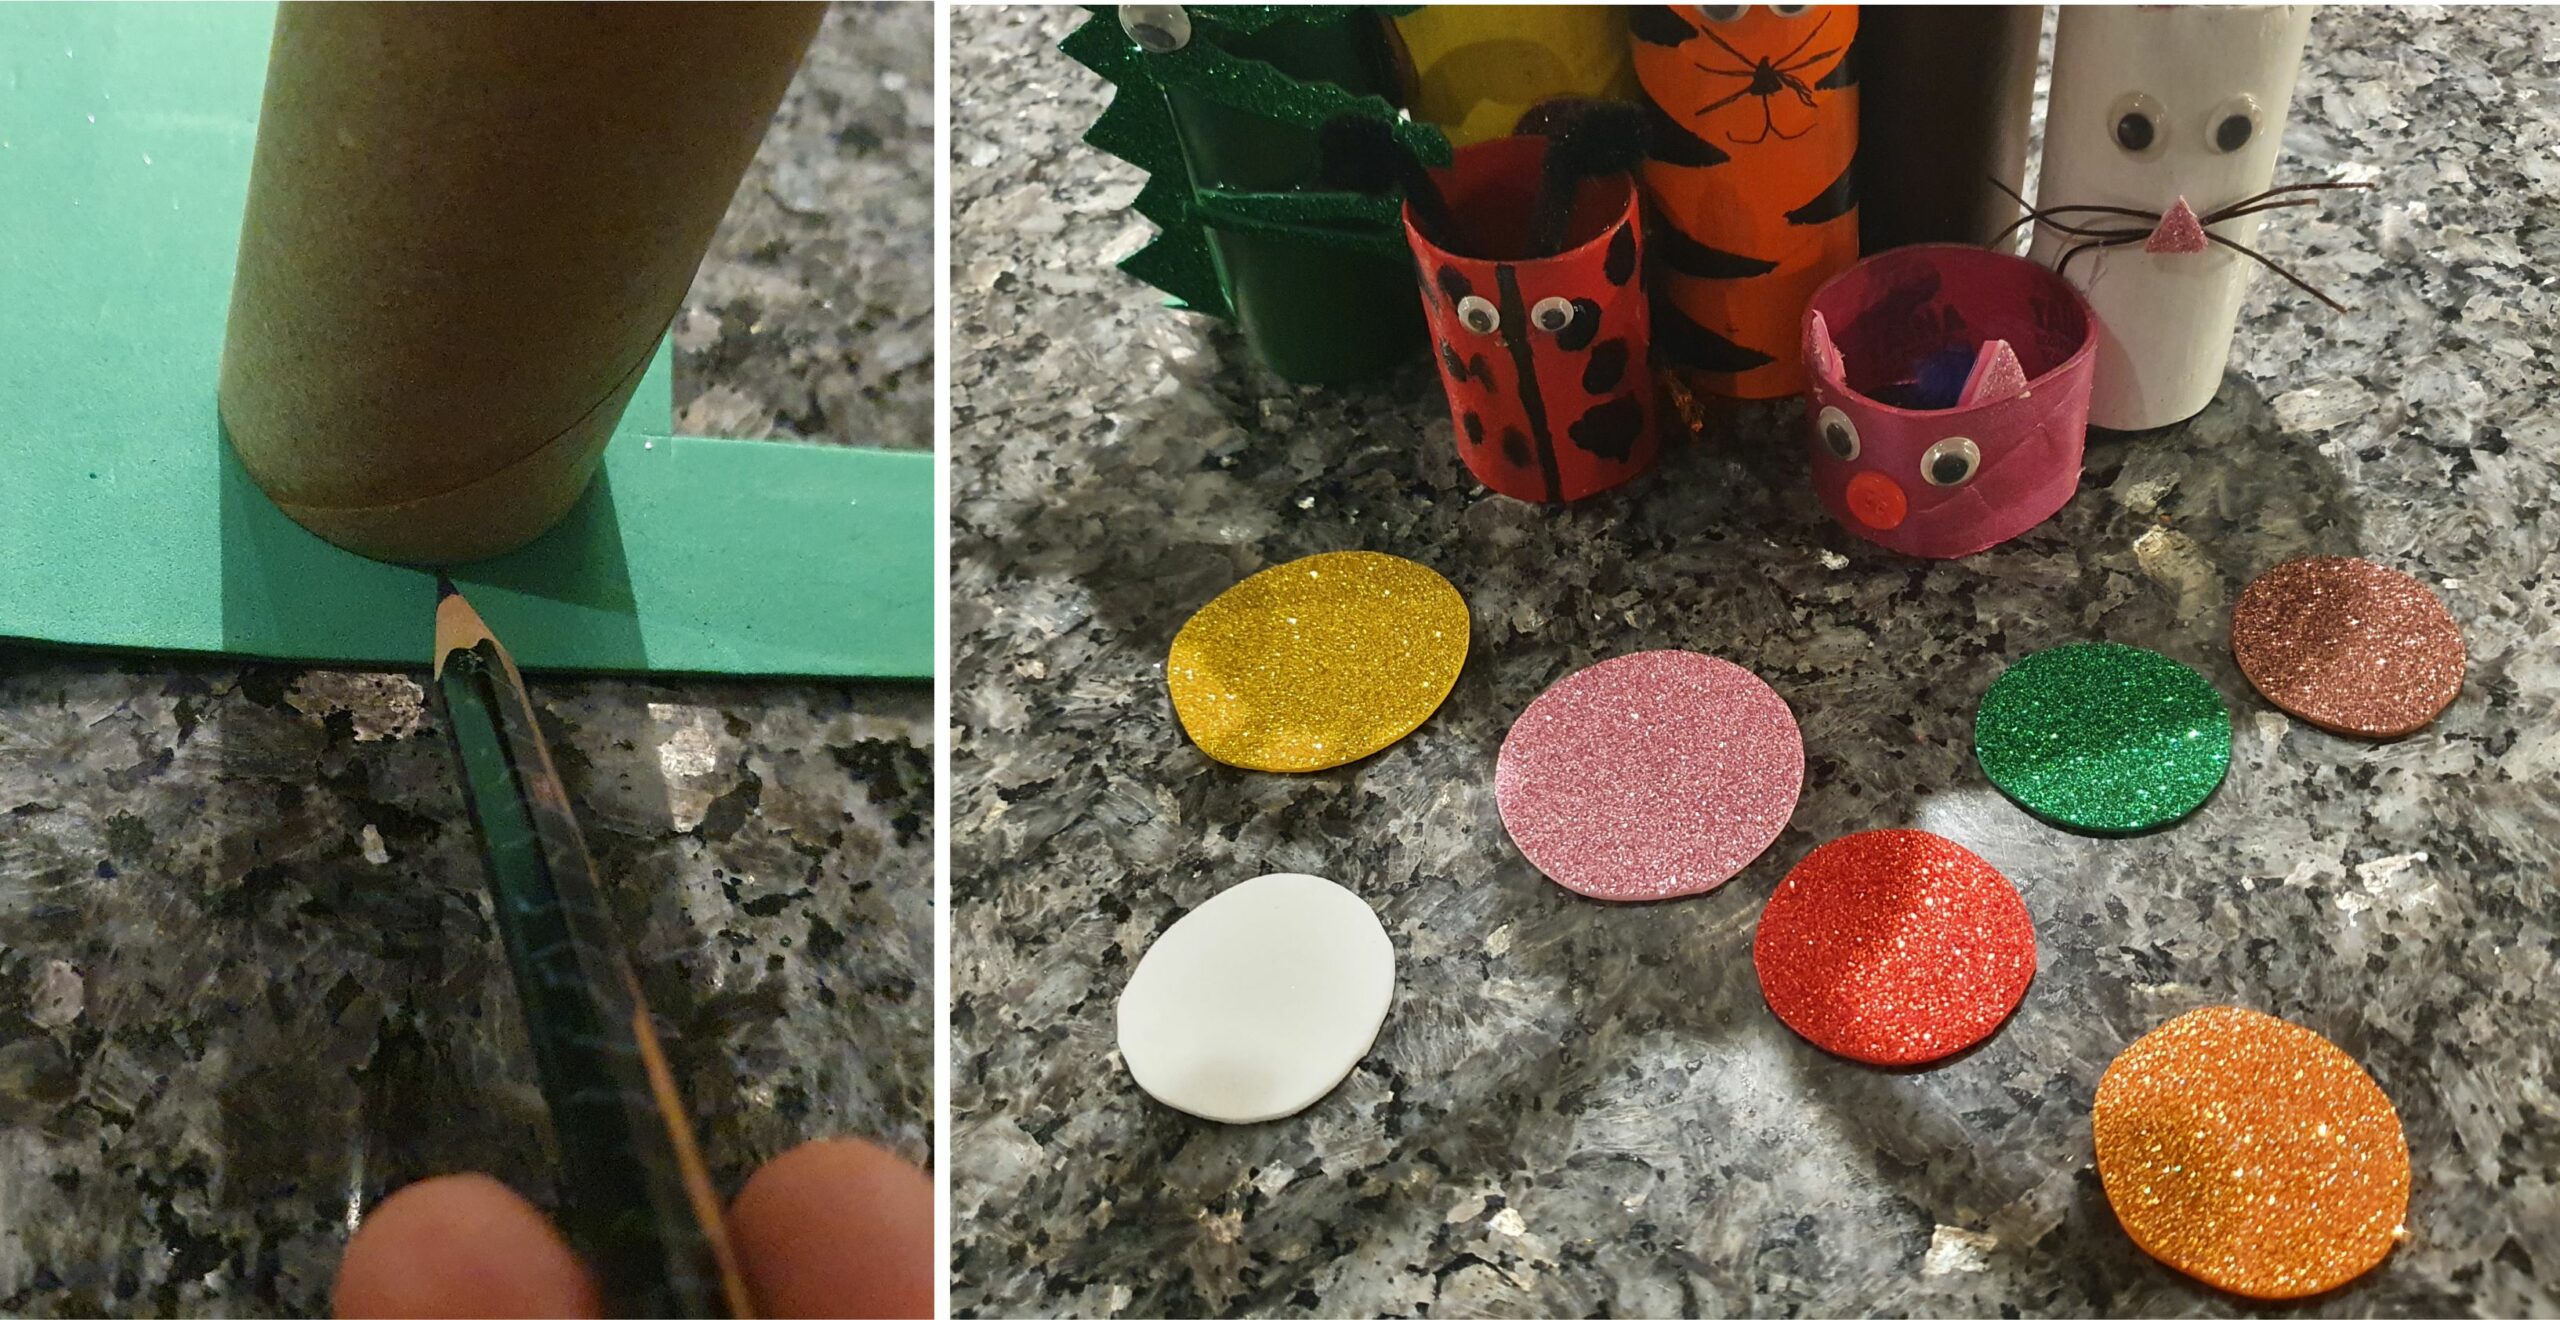

Trace the end of a toilet paper roll on thick paper (foam or craft paper) in your preferred colour to close the cylinders. I have made them in the same colours as the paint but that is up to you
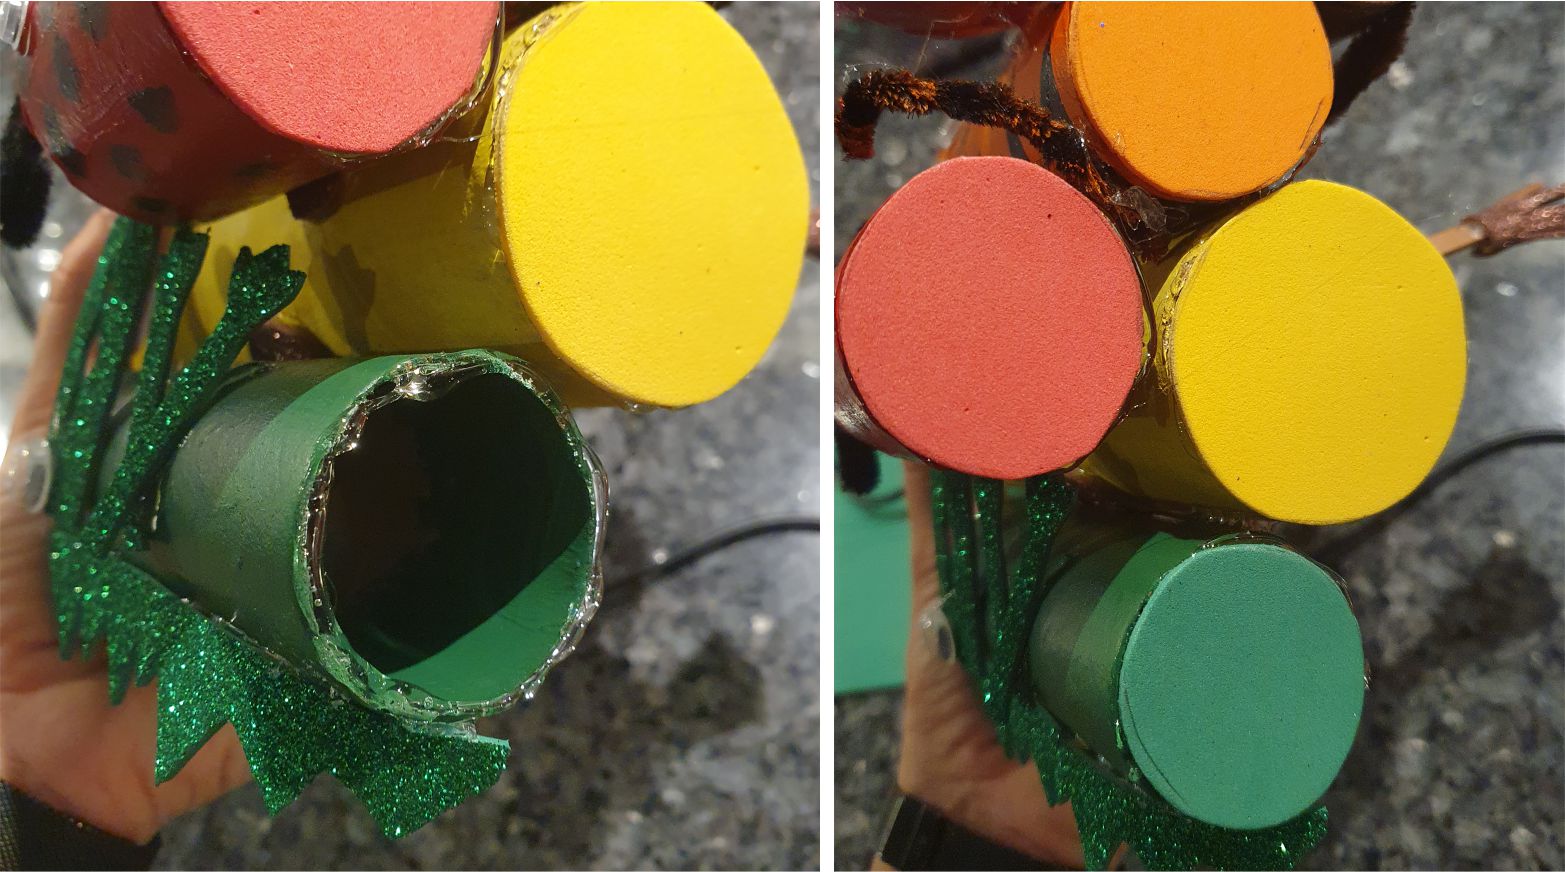

Stick them on at the bottom with a glue gun (or regular glue if you have more patience). Now you can lift the pencil stand without the risk of any of the stationary falling out.
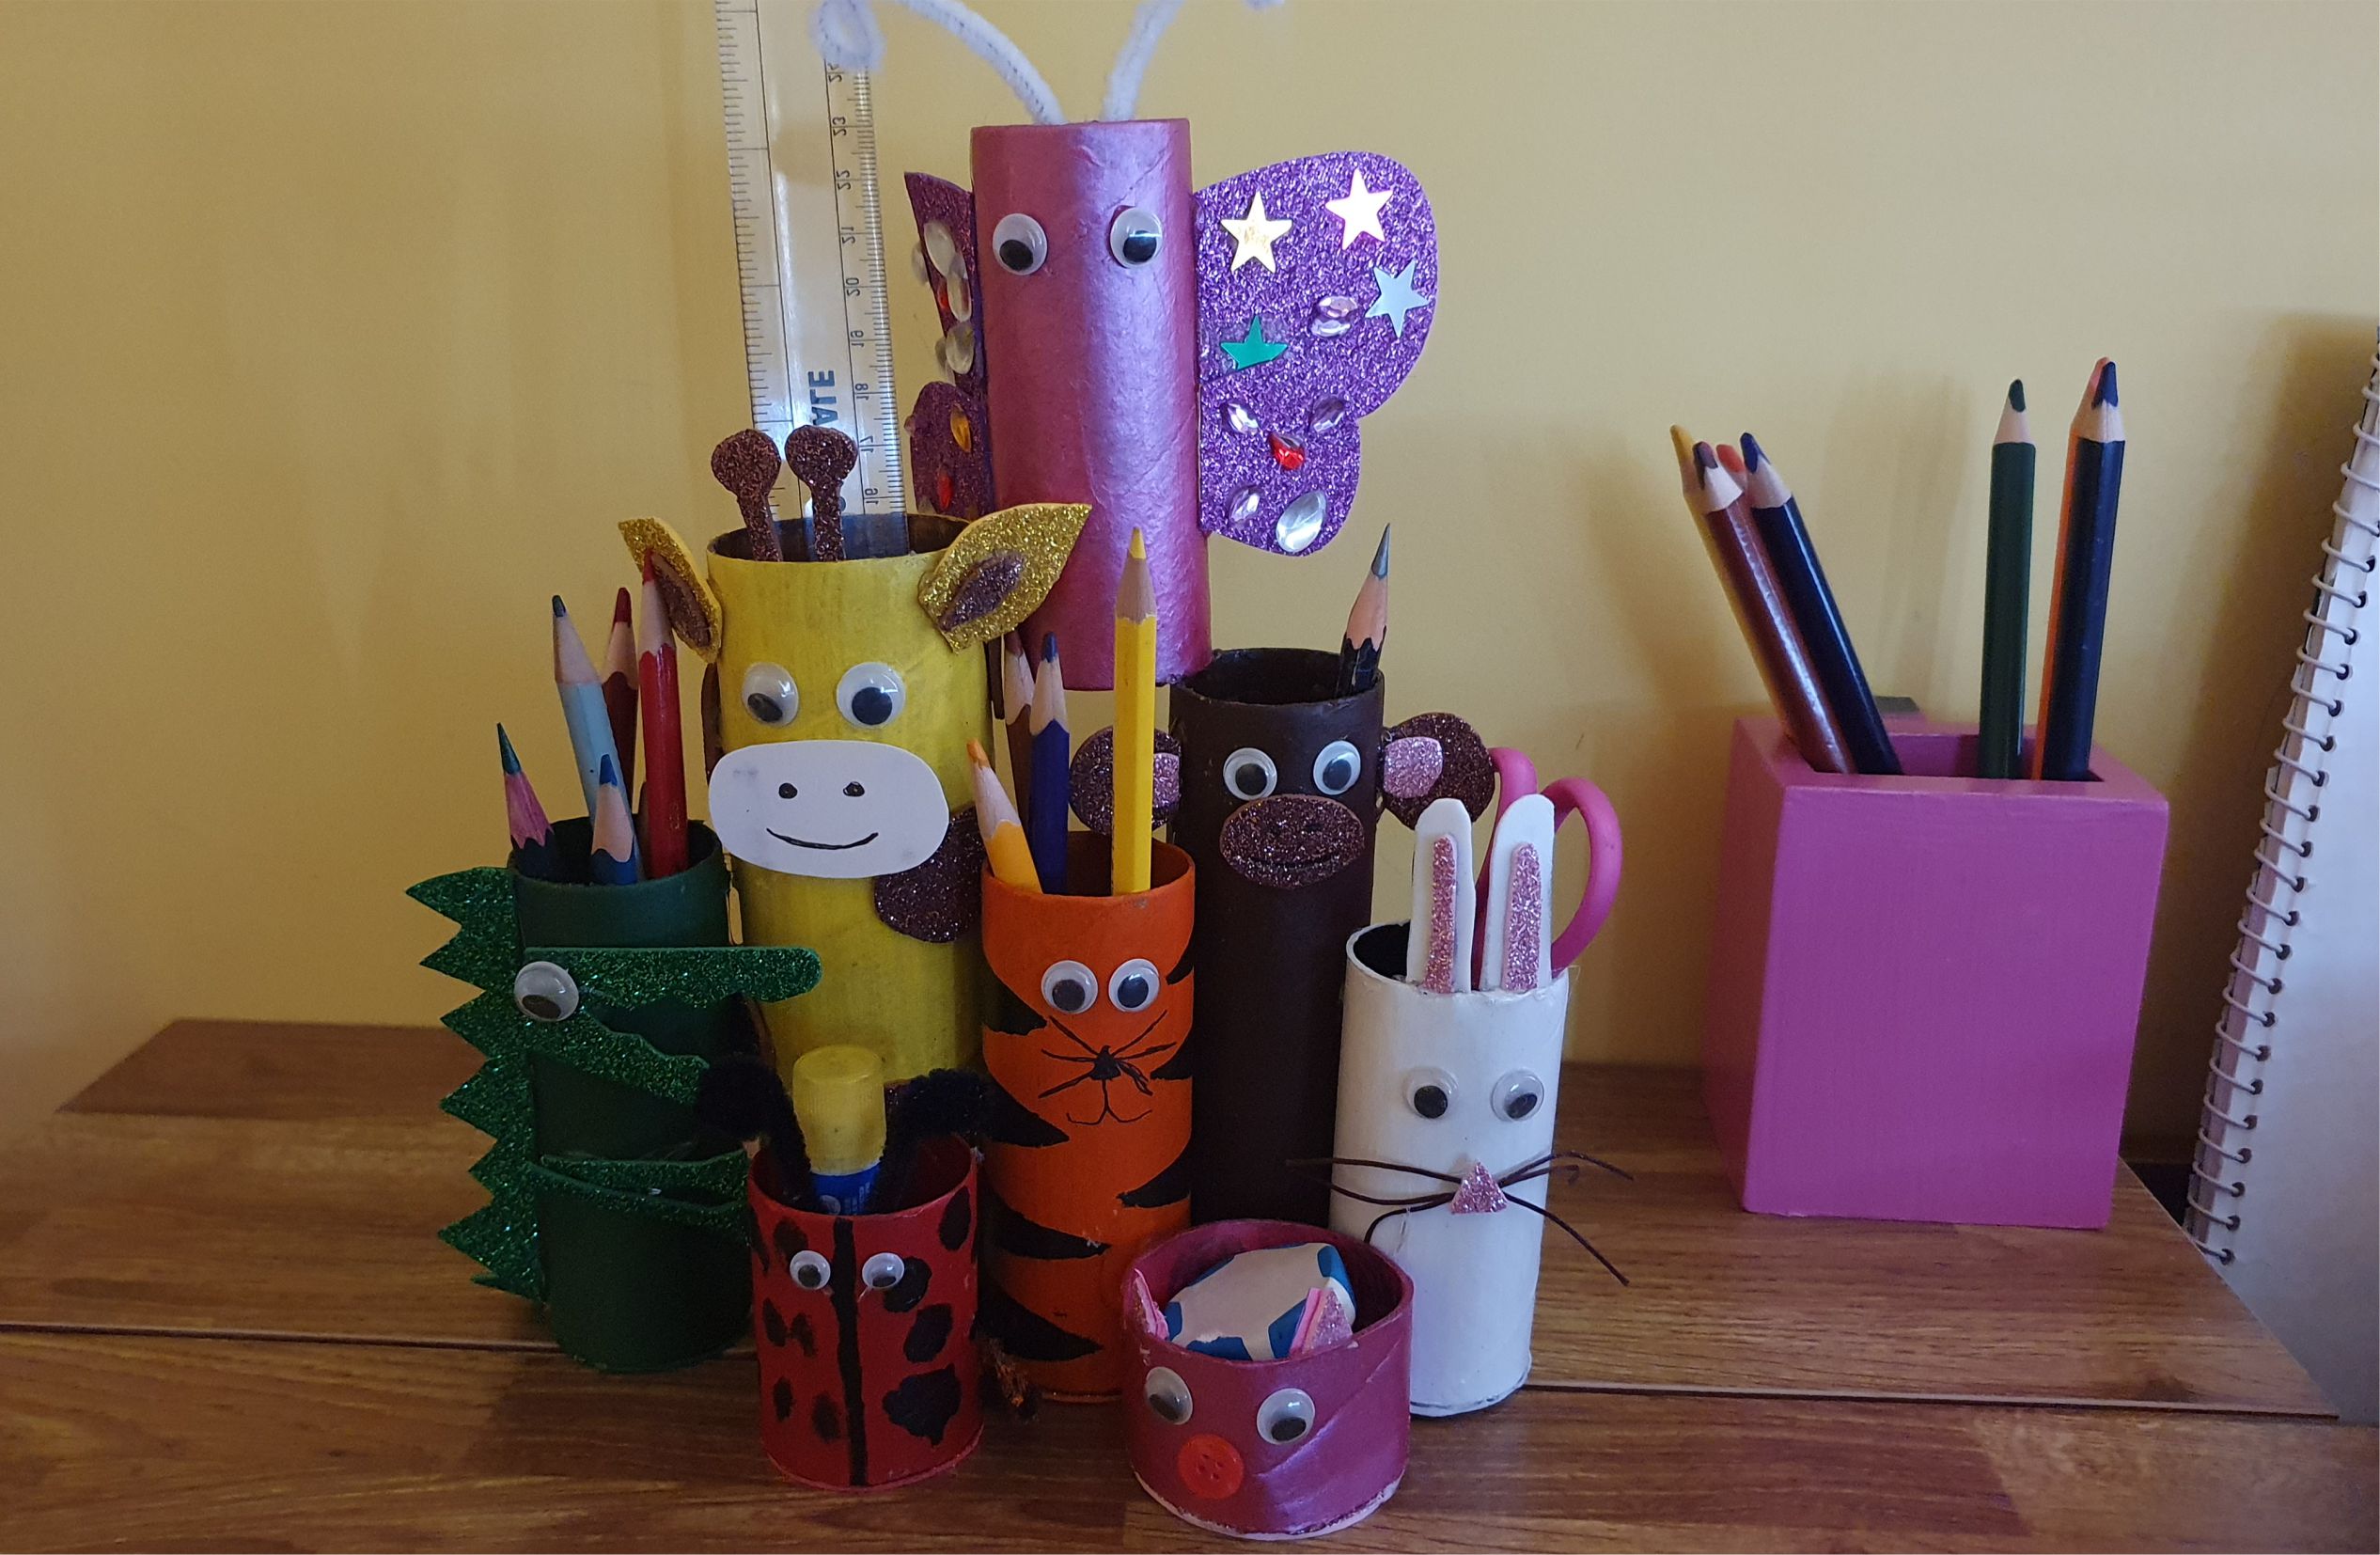

And you are done. Hope you enjoyed this little best out of waste craft idea. Please let me know how you got on.


Leave a Review
You must be logged in to post a comment.