
- Prep Time20min
- Total Time50 min
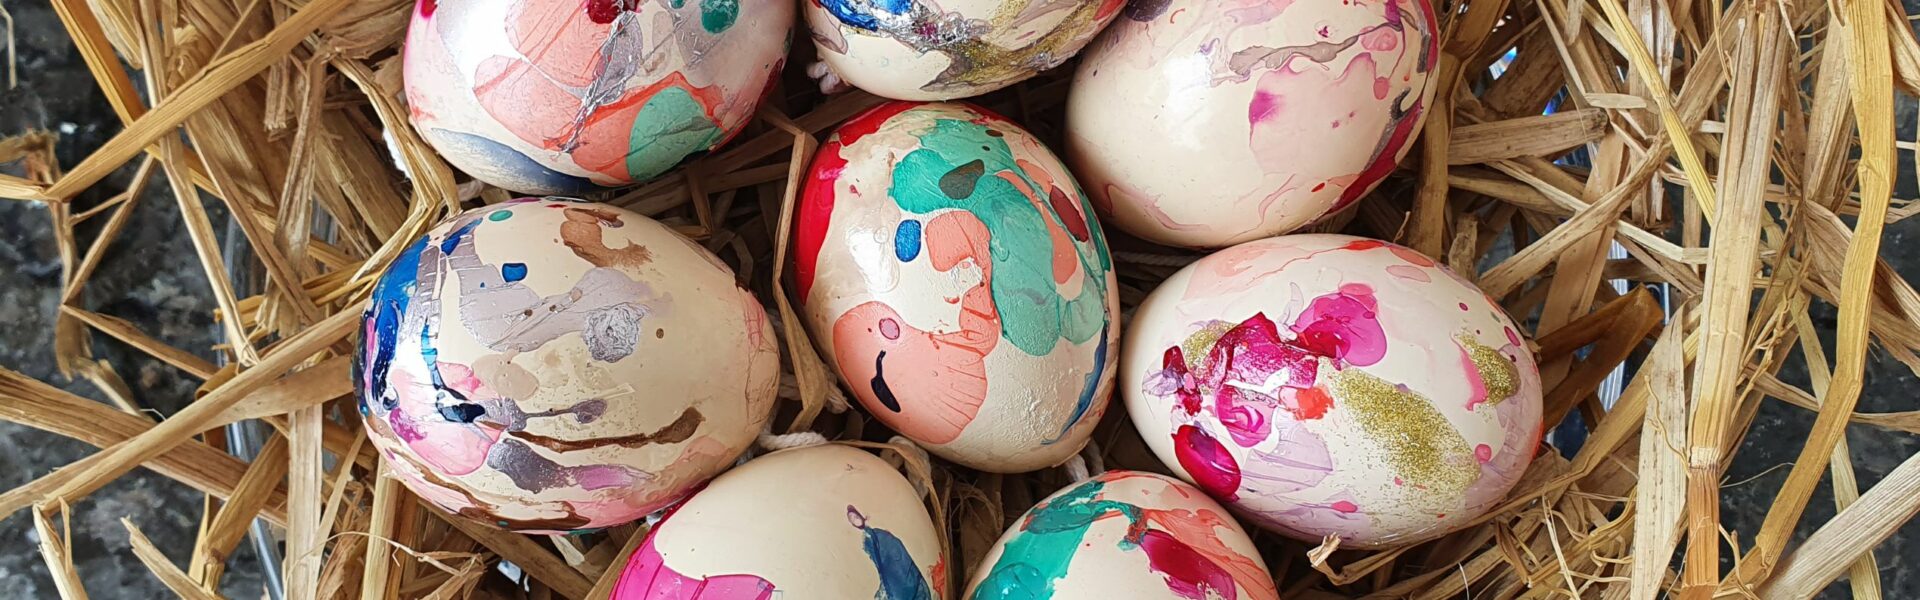
We have been doing Marbled Easter Eggs every Easter since the kids were small. It’s a great, no-fuss activity that kids of all ages can take part in.
Ingredients you need for Marbled Easter Eggs
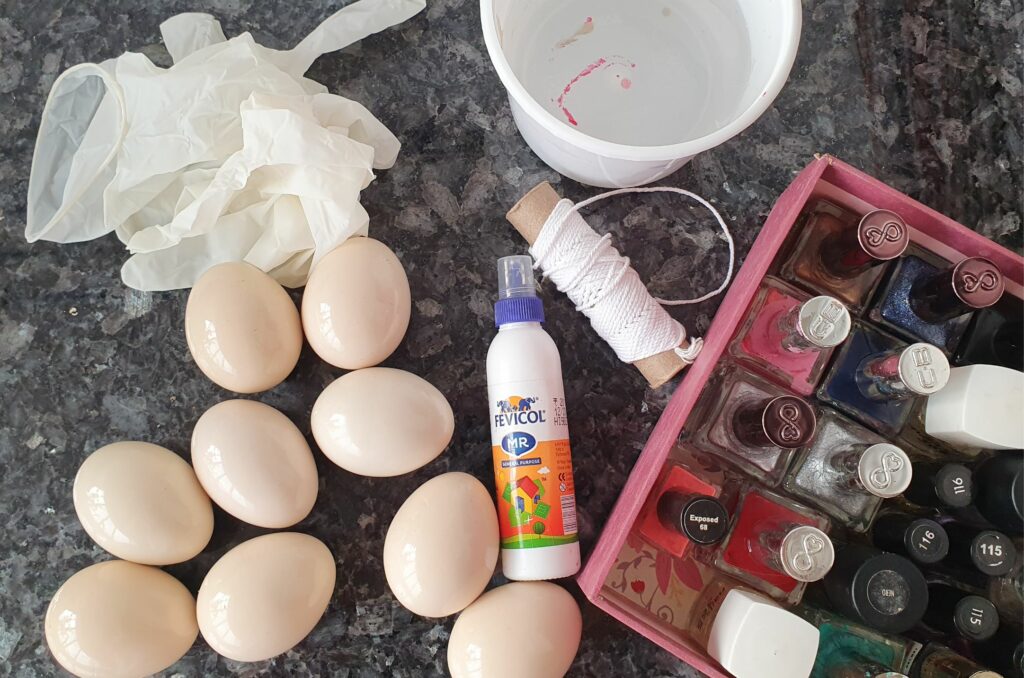
- Nail polish. There are many many ways to do Marbled Easter Eggs, but we like to do them with nail polish. Use what you have, right? And nail polish is easily available in our house with 4 girls 🙂 Any colour or brand will do, but usually the cheaper nail polishes, which are runnier and don’t dry as fast are better for this project.
- Old plastic container -like a take away container. A plastic/paper cup will not work for this, as it isn’t wide enough. The container’s width should be double the egg’s length and minimum the egg’s height. So if the egg is 5cm long, the width of the container should be minimum 10cm with a height of 5cm or more. This is to make sure the entire egg gets coated with nail polish when dipping it.
- Craft mat/newspaper. Nail polish can be a sticky thing to work with -especially for kids. So make sure the work surface is covered with a craft mat or a newspaper. The nail polish doesn’t always end up in the plastic container when the kids start waving the wand around.
- Plastic gloves. I gave all my kids one plastic glove each to avoid nail polish sticking to their fingers while dipping the egg. It wouldn’t normally come on the fingers, but with kids being kids it’s a definite possibility. 🙂
- Acetone/ nail polish remover. Keep some nail polish remover handy in case you need to clean nail polish off fingers or redo an egg that went wrong (yes, that is actually possible. So don’t despair if they don’t look exactly as you imagined on the first try!)
And the actual egg of course! More about that underneath the picture.
What eggs should I use for Marbled Easter Eggs?
You can use real egg shells or wooden/plastic eggs
If you are using real eggs, make sure the actual egg has been removed first from the inside. You can do this by making a small hole (about 2-3mm wide) with a needle on both ends of the egg. Blow as hard as you can (like you are going to burst!) into one of the holes and the egg will slide out of the other end. It required quite a lot of force, but IT WILL happen! Make sure you keep a bowl underneath “to catch” the egg. We used to do this a lot when we were kids -but am personally not so keen on doing it anymore. IF you want to try this method, then make sure you have sterilized the egg first by putting it into a pot of boiling water for 30 seconds.
I prefer to use wooden eggs instead -especially when doing this with kids. Yes, they cost a little bit more, but they can be dropped numerous times without breaking and it saves me the trouble of blowing the eggs first. I have bought the eggs shown in this article from Amazon.in. They have a painted outer layer which was useful for my younger daughters who only managed to get nail polish on half the egg every time (more about how to avoid that later) This way the rest of the egg was already painted. You can also get these unpainted wooden eggs for Rs 160 for 6.
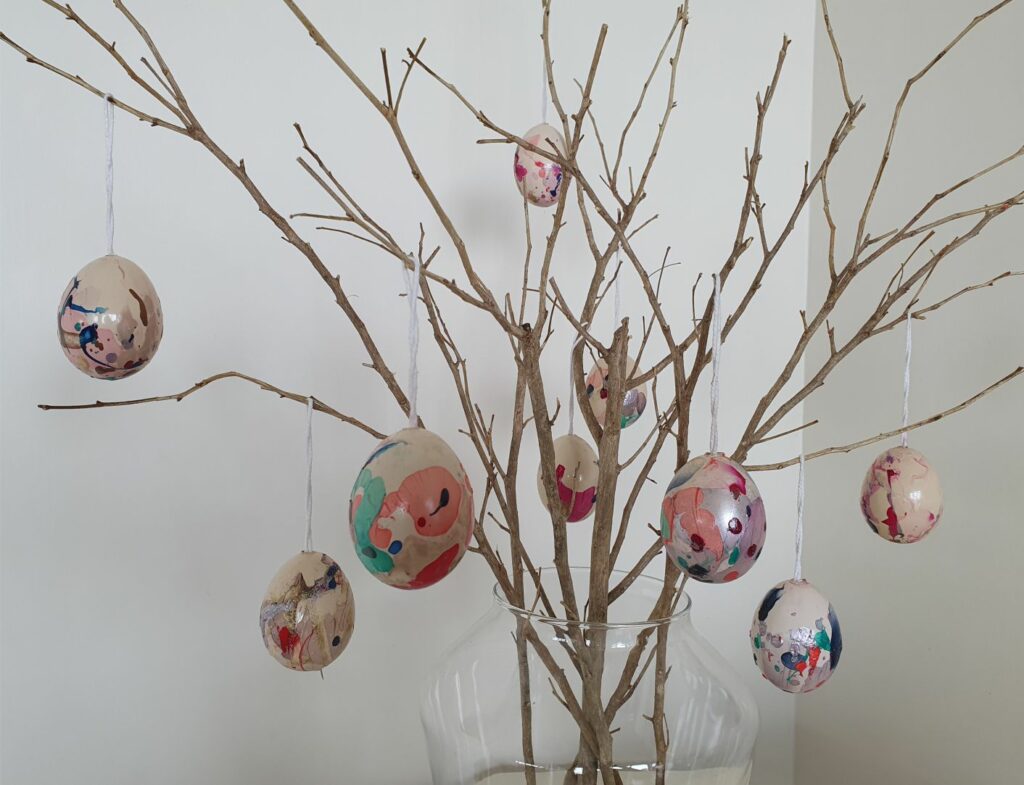
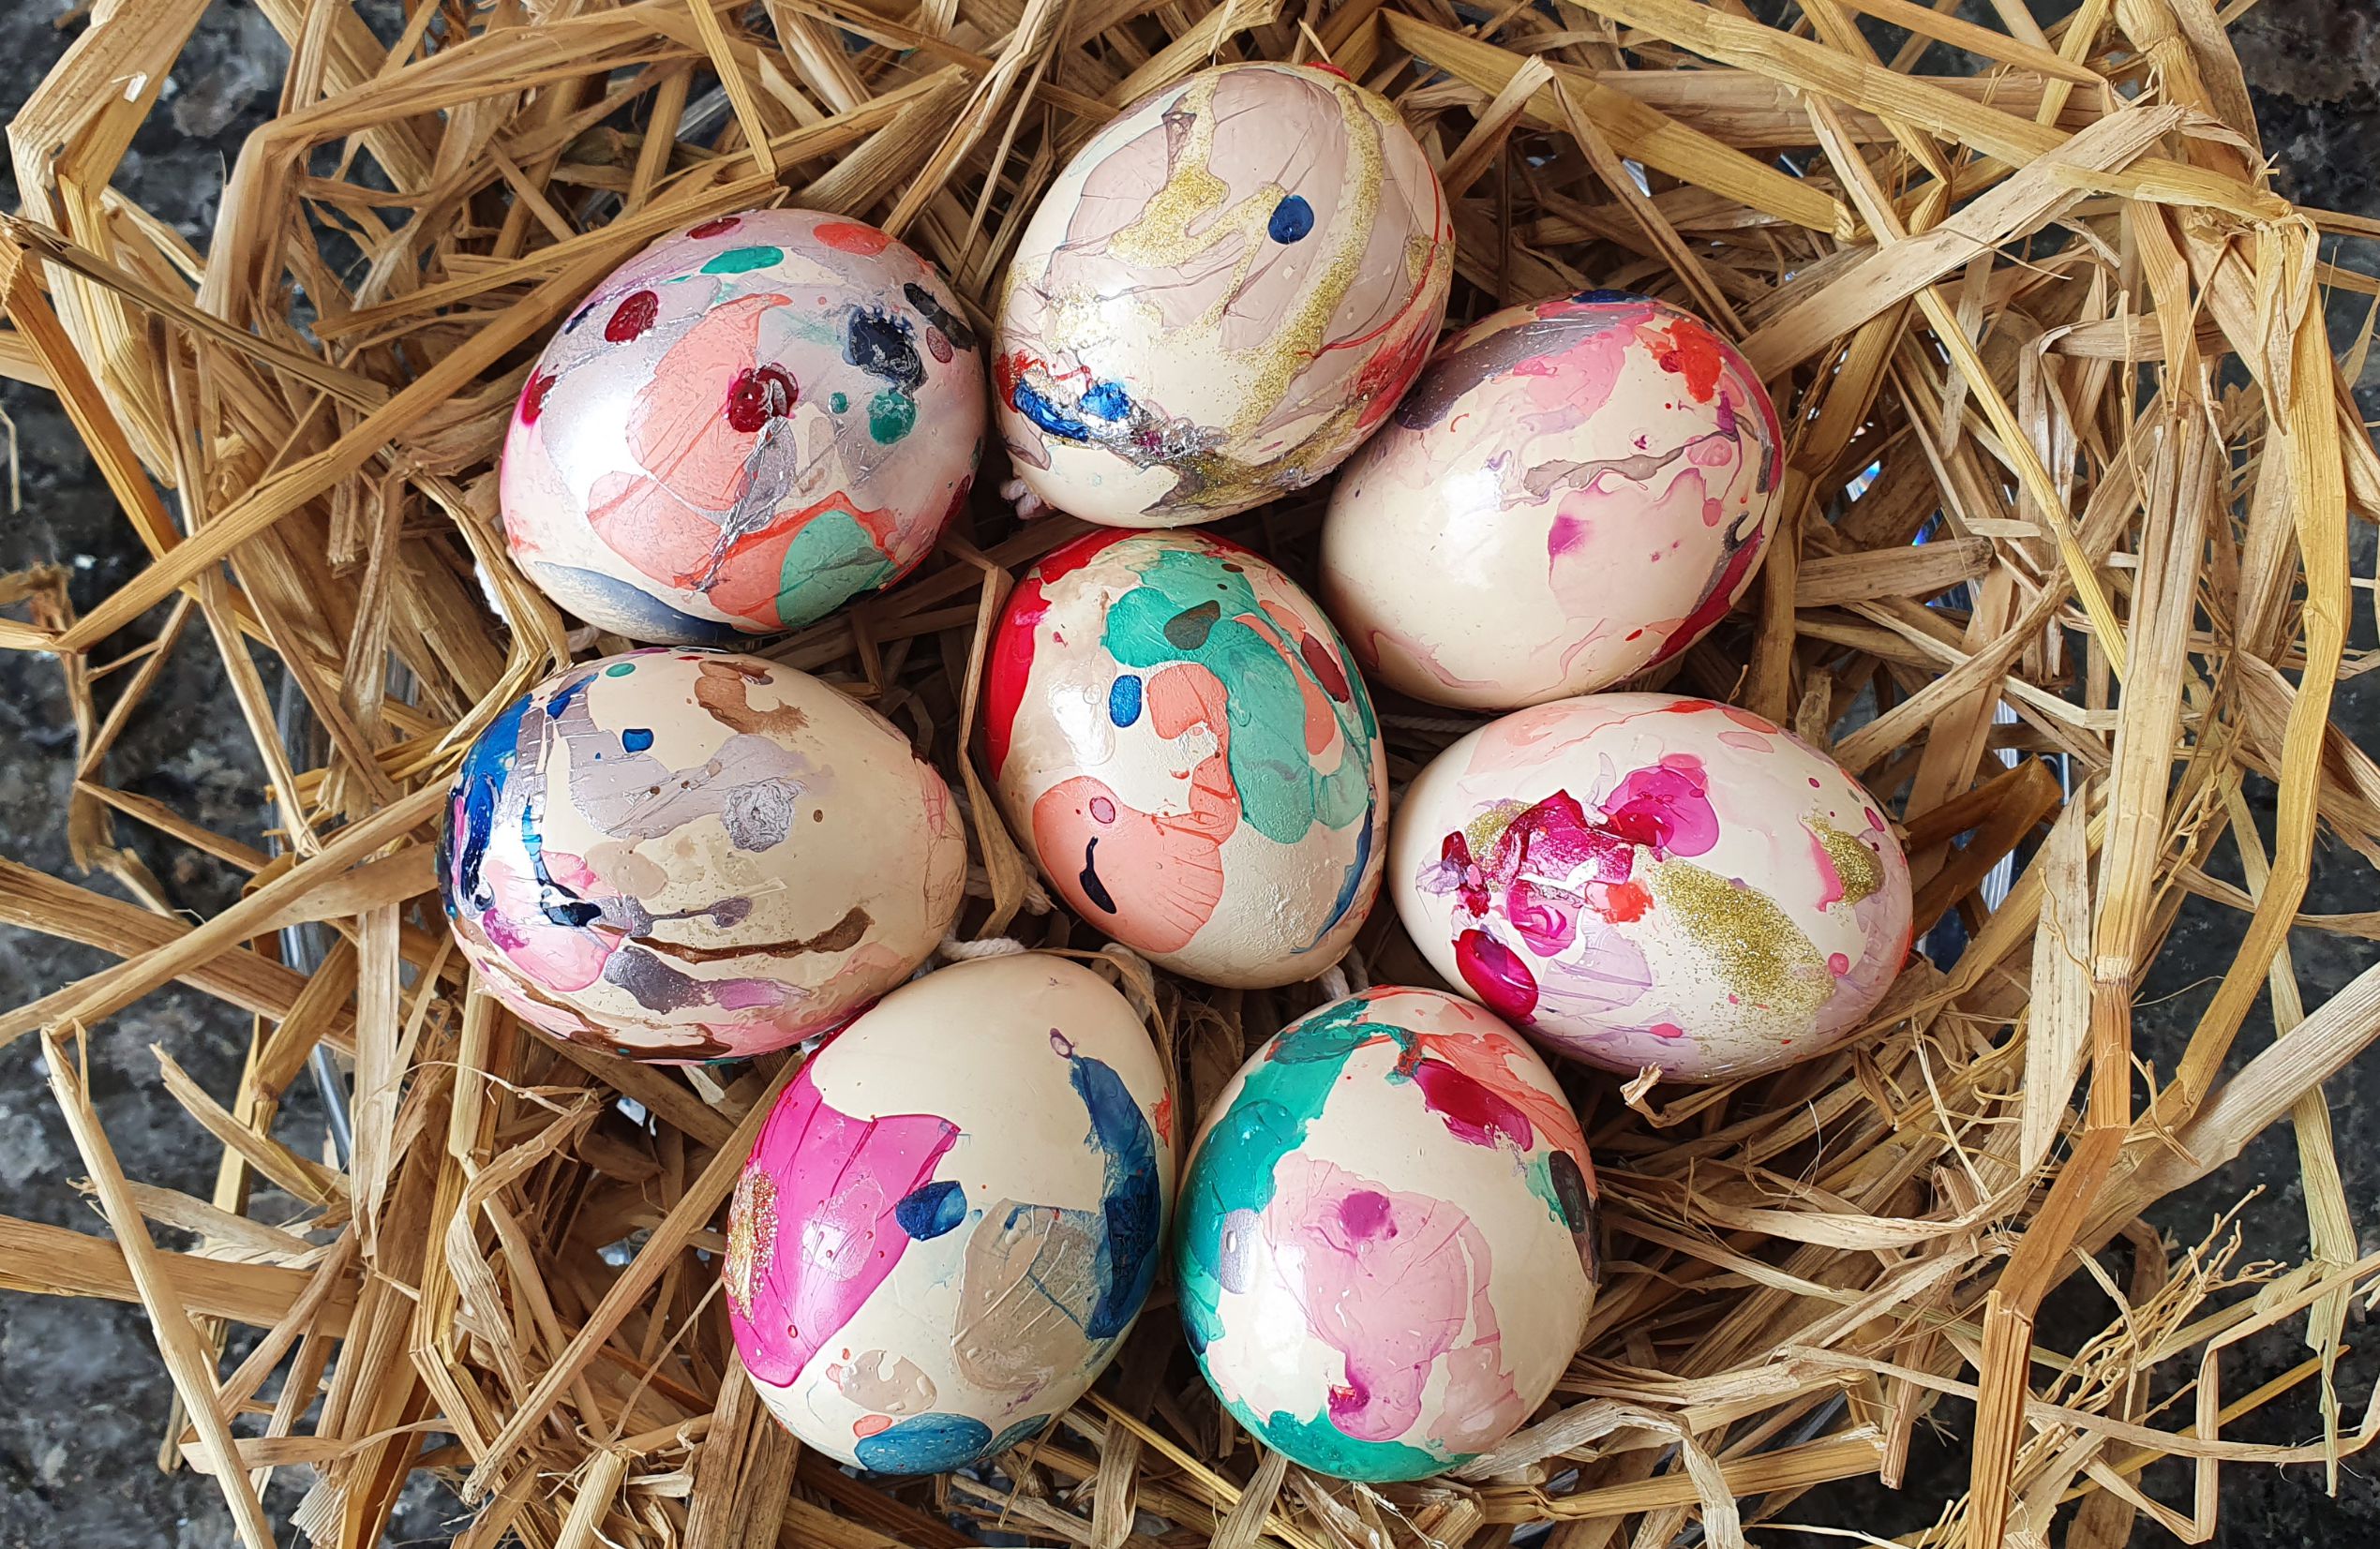
A perfect -and fun to make- Easter decoration for kids
You can hang the Marbled Easter Eggs on small branches in a vase (you can save these and reuse them year after year) or put them in a basket or nest. If you want to hang them, you will need to add a string to each egg -it takes a minute or so per egg. I have explained how to do this in step 1-4 underneath. My kids liked holding the string while preparing to dip the eggs and after dipping too. It also helped us while drying them afterwards as they could hang without getting messed up on one side.
My top tips for doing these eggs with kids
To make it a creative fun experience for kids
- Get all the ingredients ready, add the string to the eggs -basically do all the boring parts- by yourself before calling them to participate.
- Give equal number of eggs to each child and one container each. Some kids will be slow and some will be fast, it’s best to divide it all from the beginning.
- Start by doing one egg yourself and explain while doing it.
- To coat the entire egg in one go, you need to dip the egg in one fluid motion in the middle of the bowl. The wooden egg will try to float, so some smaller kids may need help with this bit. Or you can let the kids try their luck and not care that the egg is only half coated. I chose this second option 🙂 You can also do the other half of the egg in a second try.
- To coat the entire egg, fill up the entire surface with nail polish. If you only add a little colour in the middle, it will not coat the entire egg afterwards.
See the full step-by-step guide below the ingredients or watch this little video to see how. Please note, that it didn’t work as well every time I tried to film or take pictures. Think these eggs are a bit camera-shy :-
Ingredients
Directions
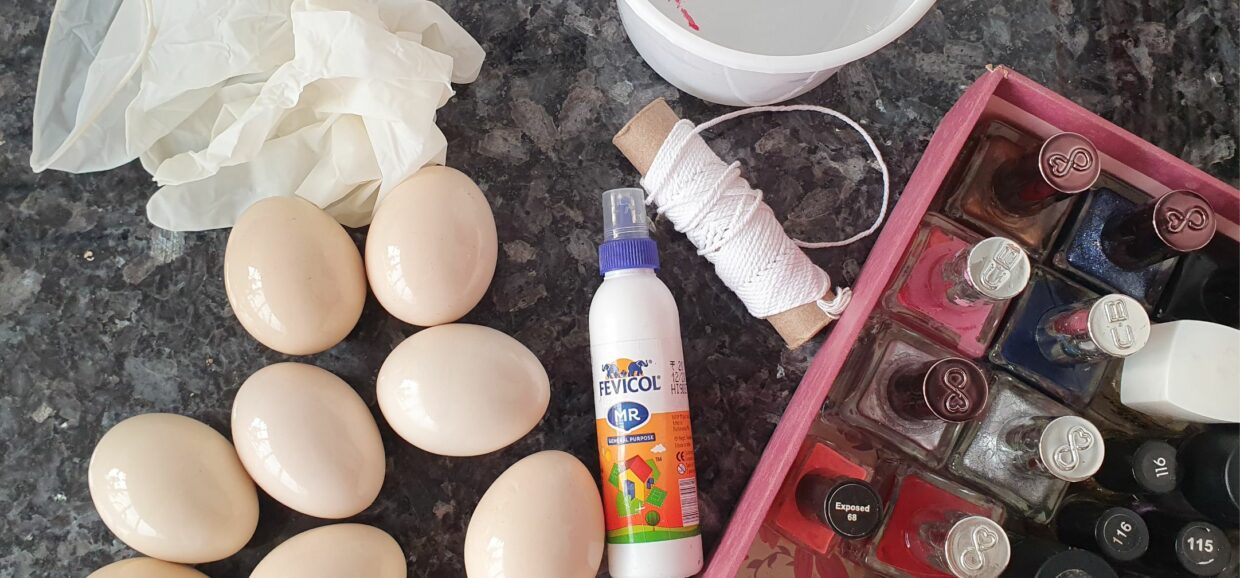
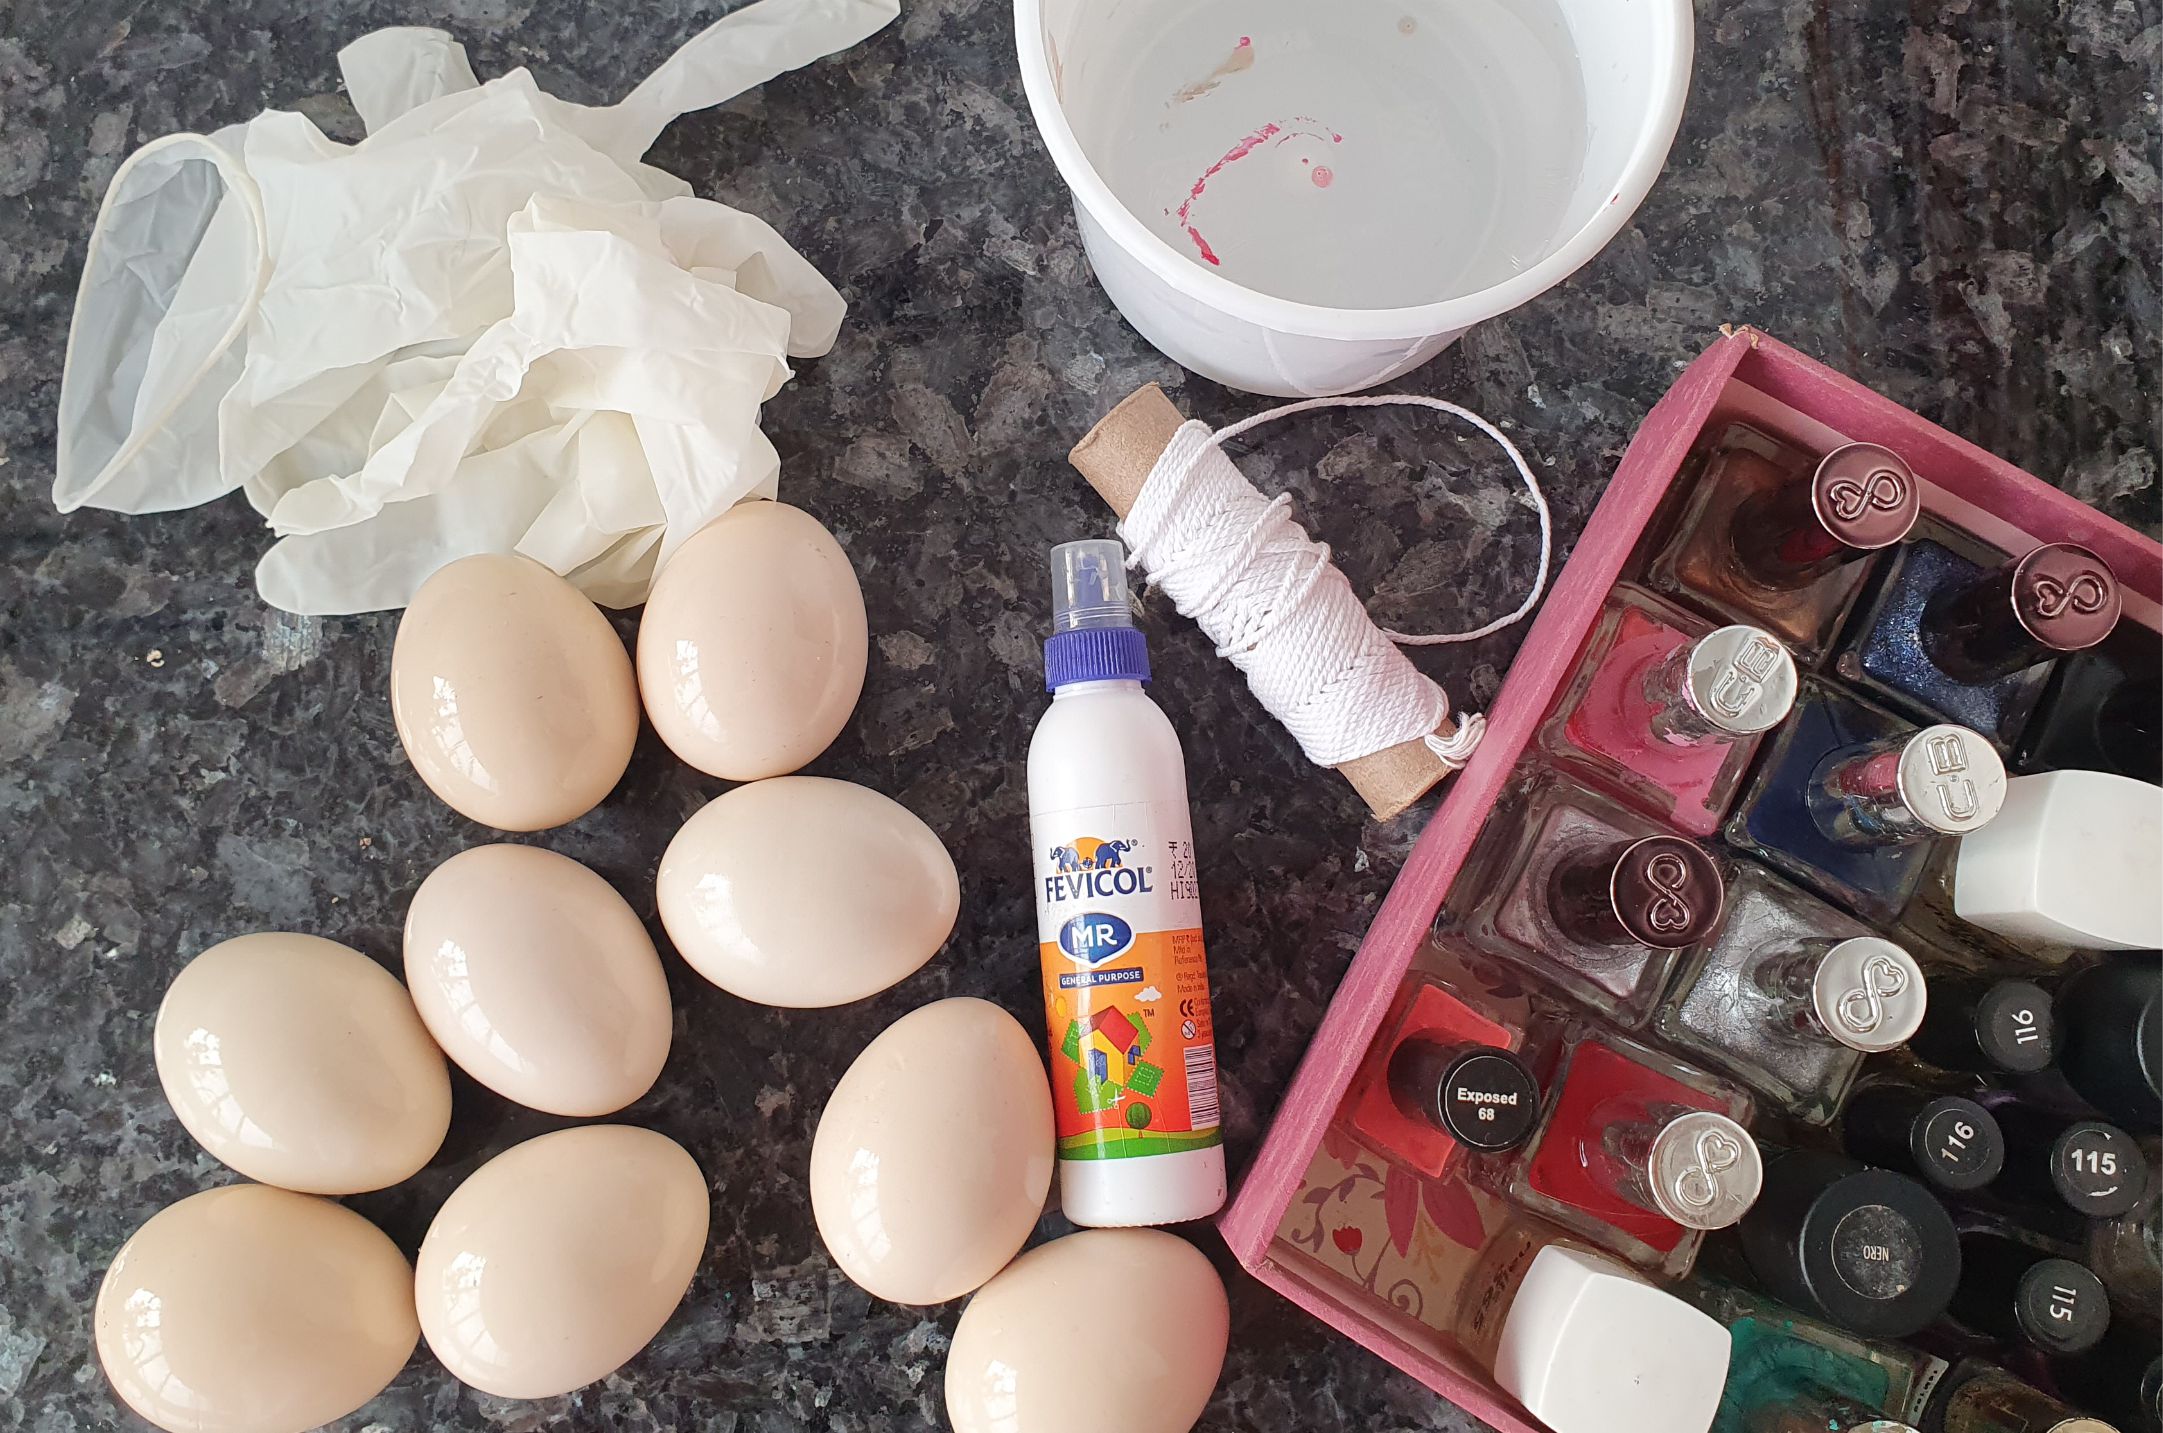
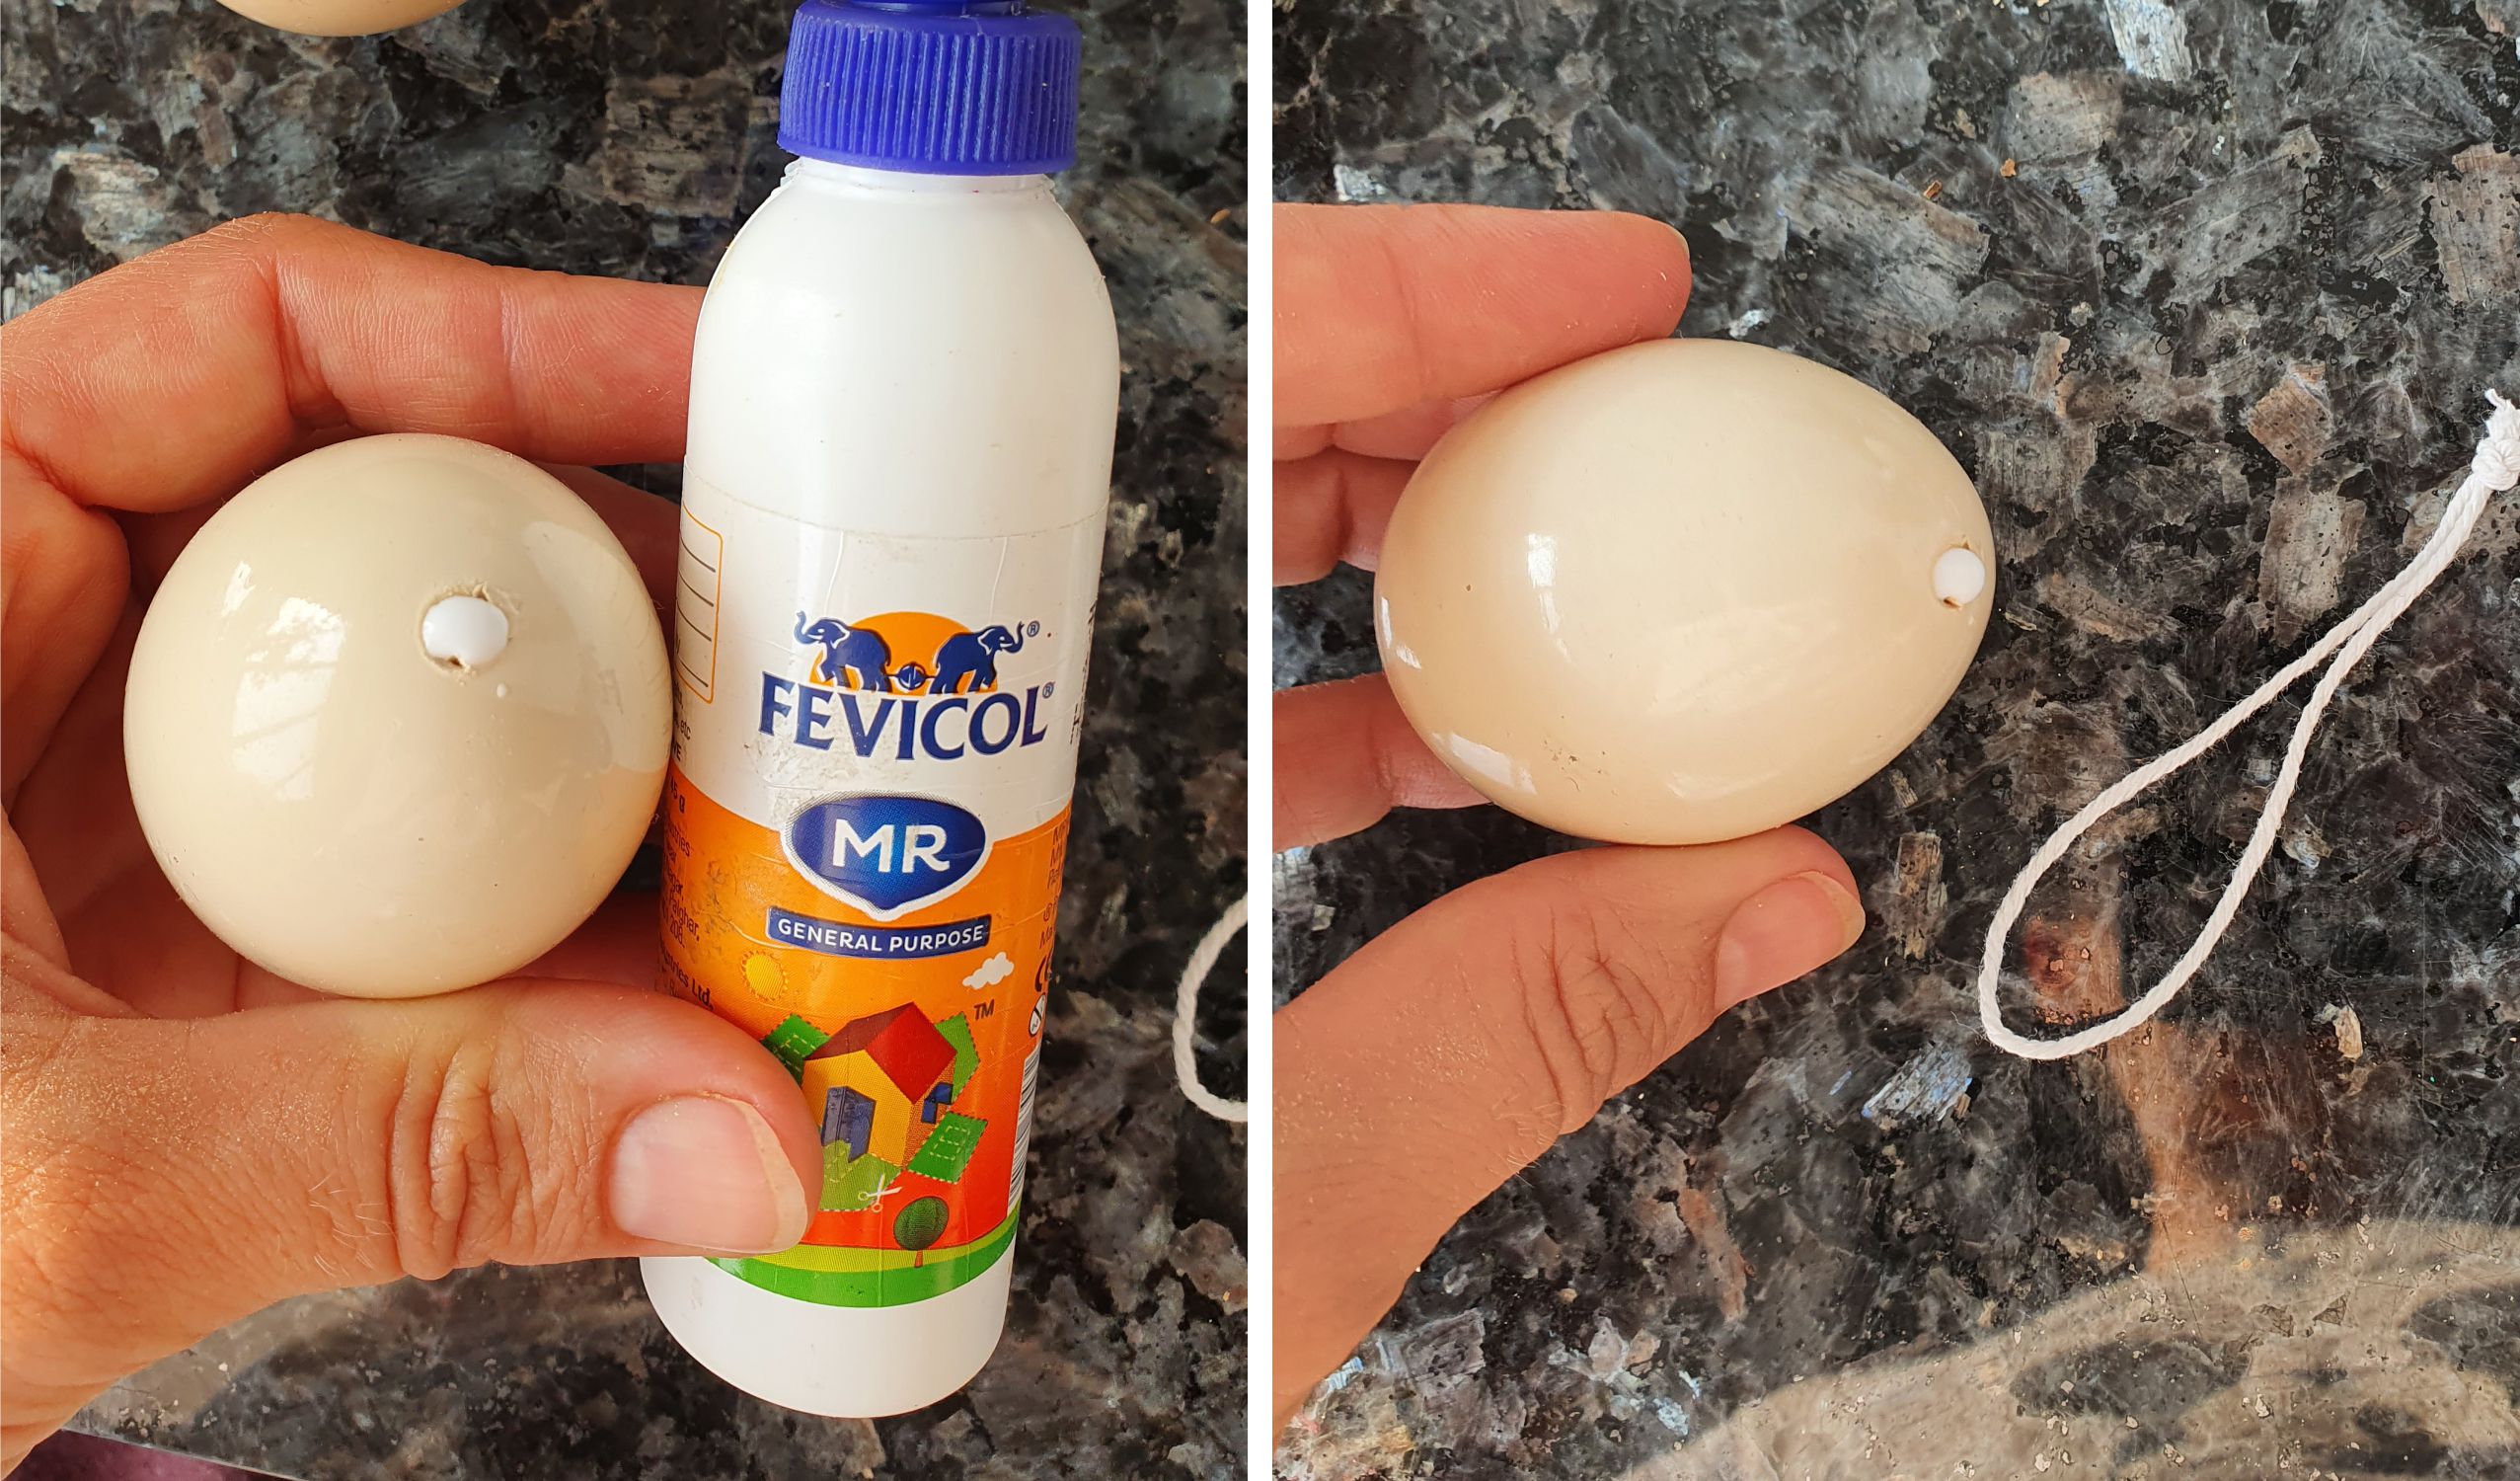
Start by getting all the ingredients ready: eggs, plastic container with water, string, glue, nail polish, plastic gloves and a drill
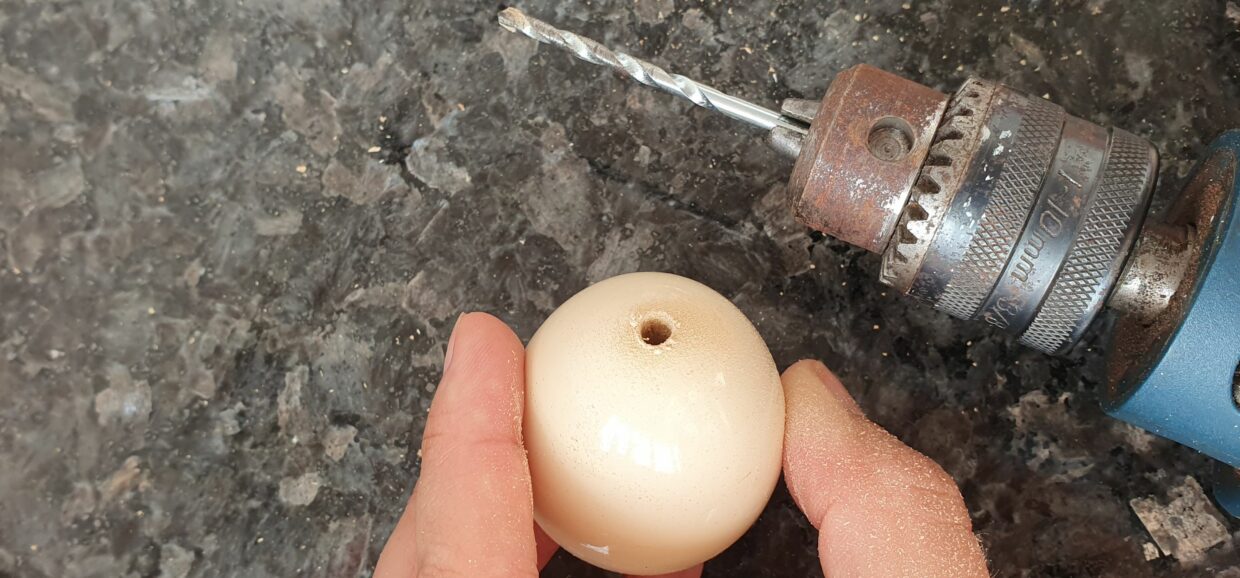
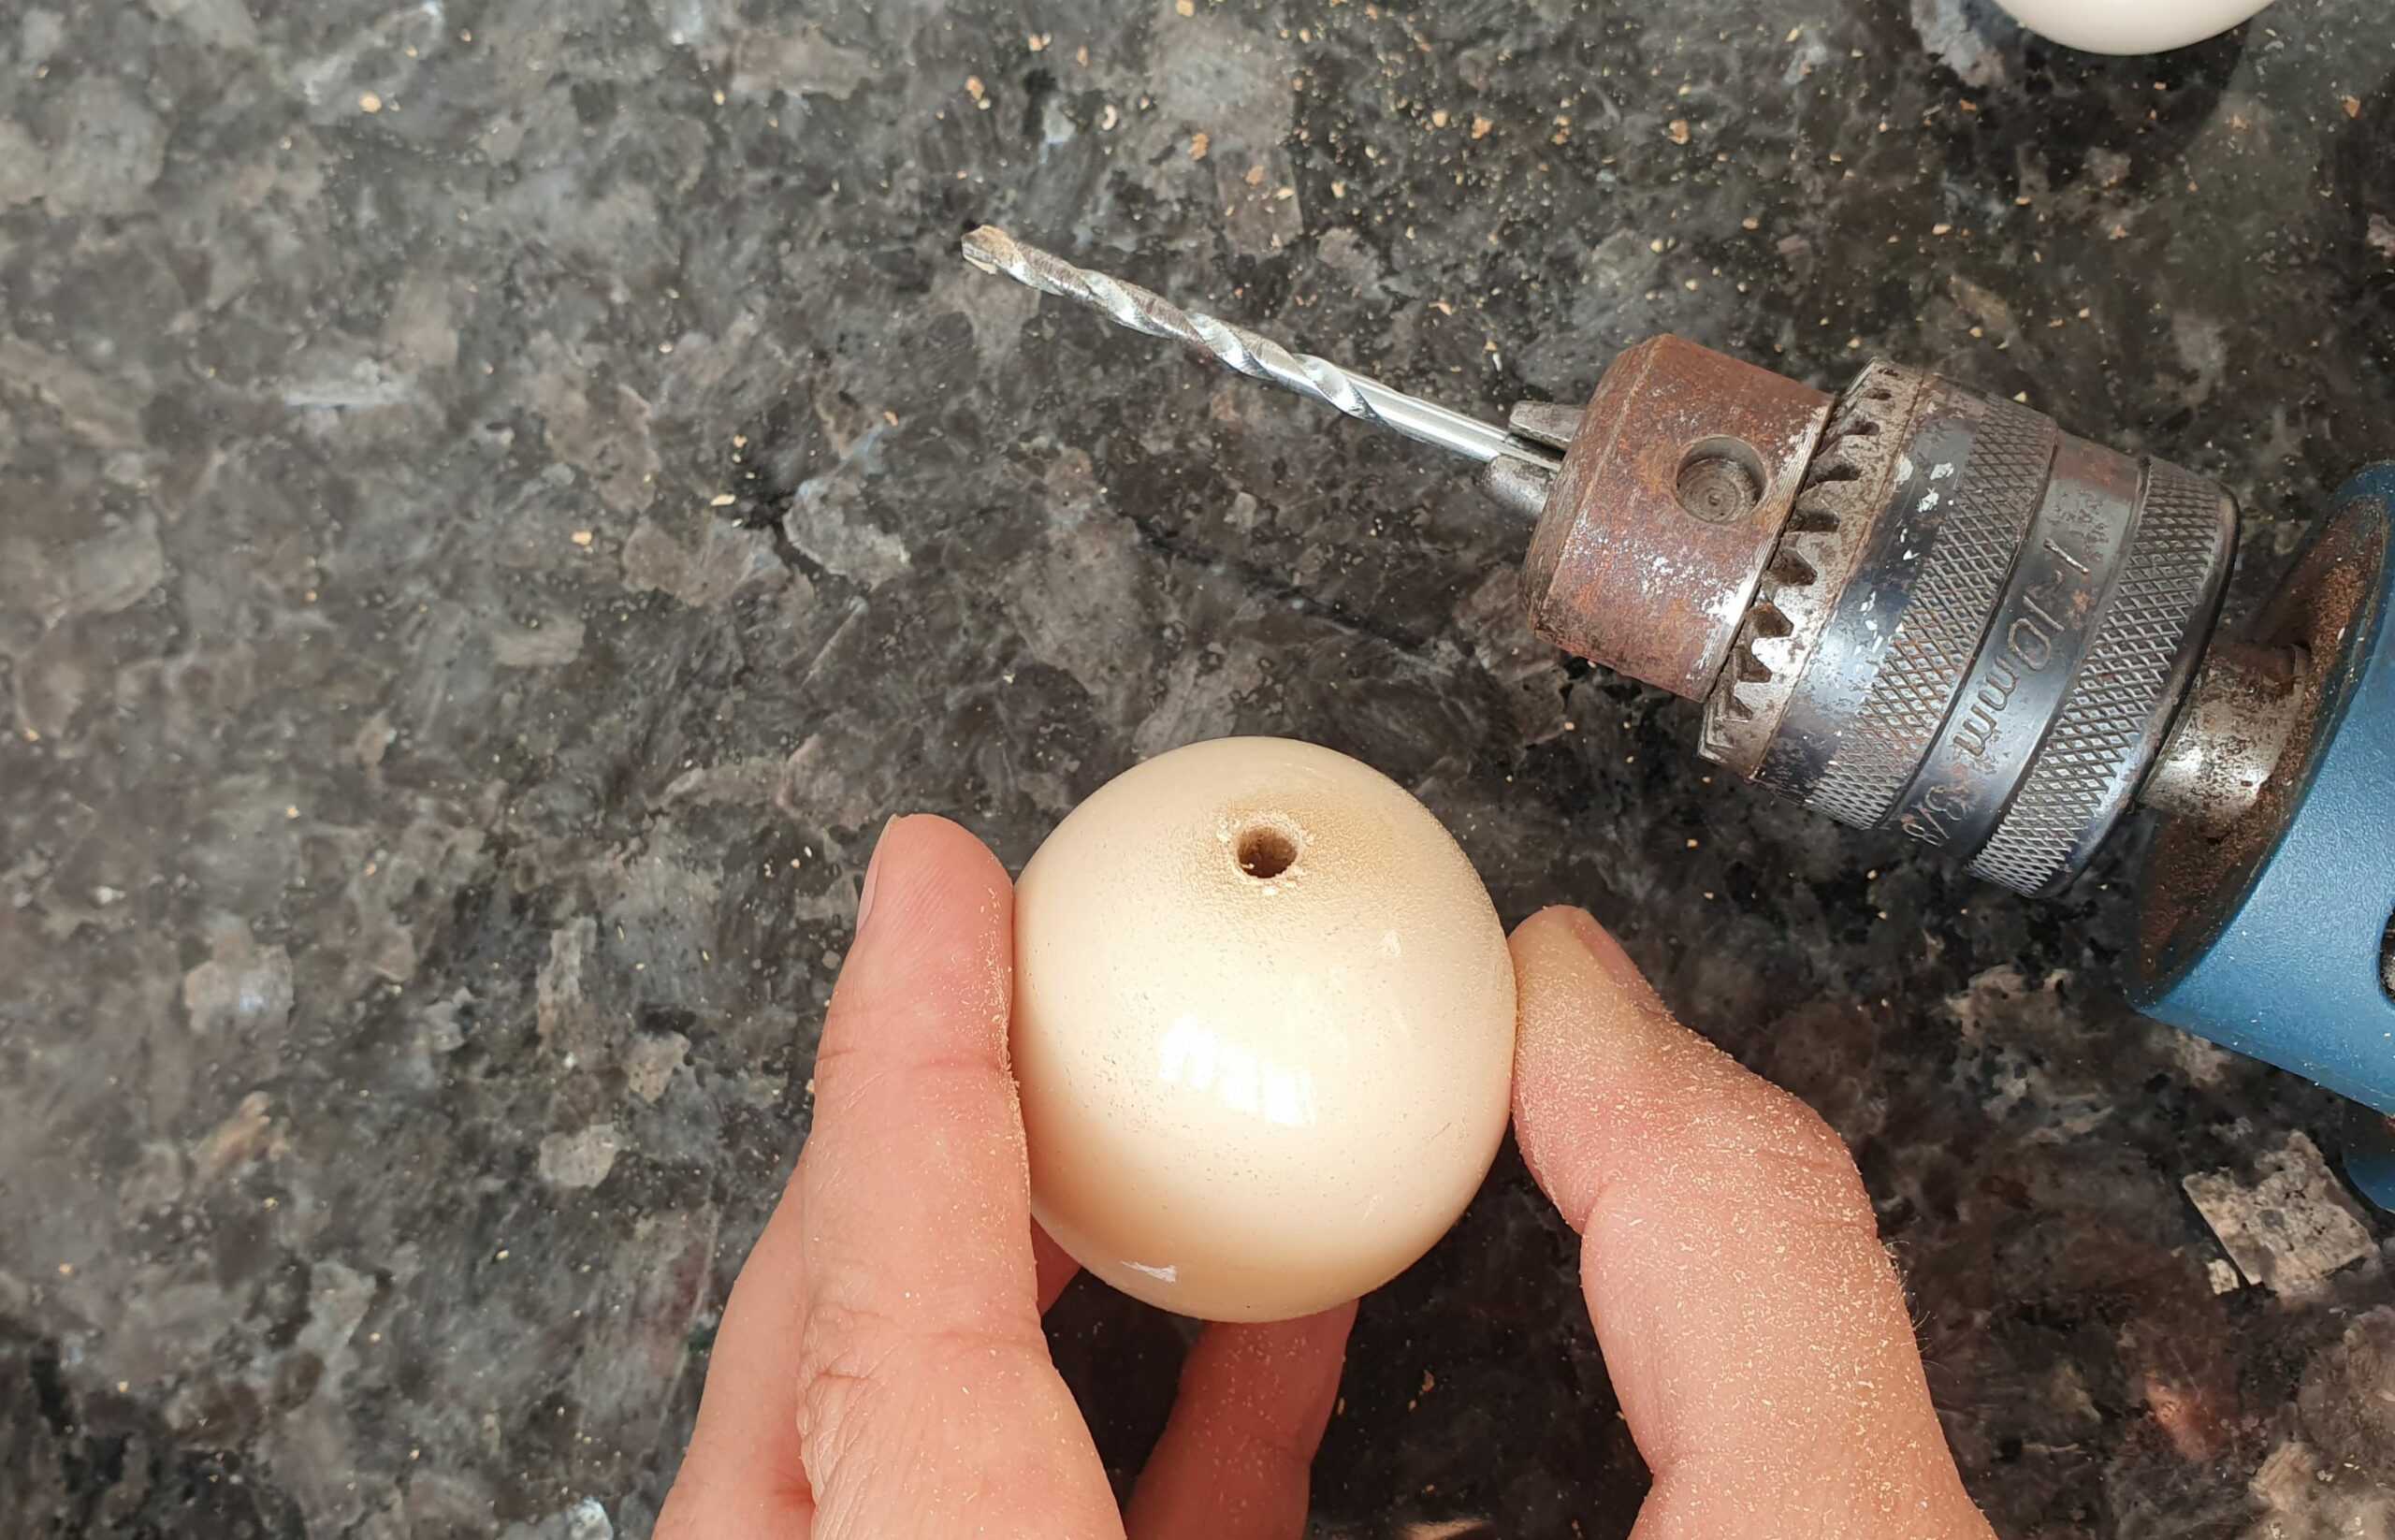
To make the string for the egg, drill a small hole in the smaller end of the egg. It should be about 7mm to 1 cm deep
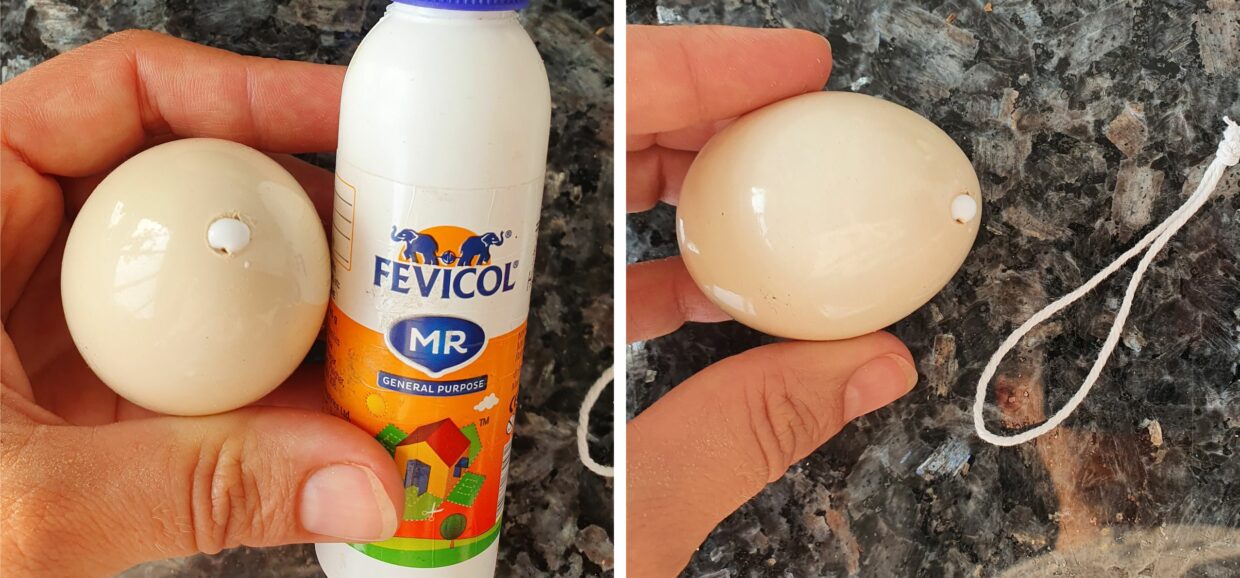
Fill the hole with glue. Tie a 10cm long string together.
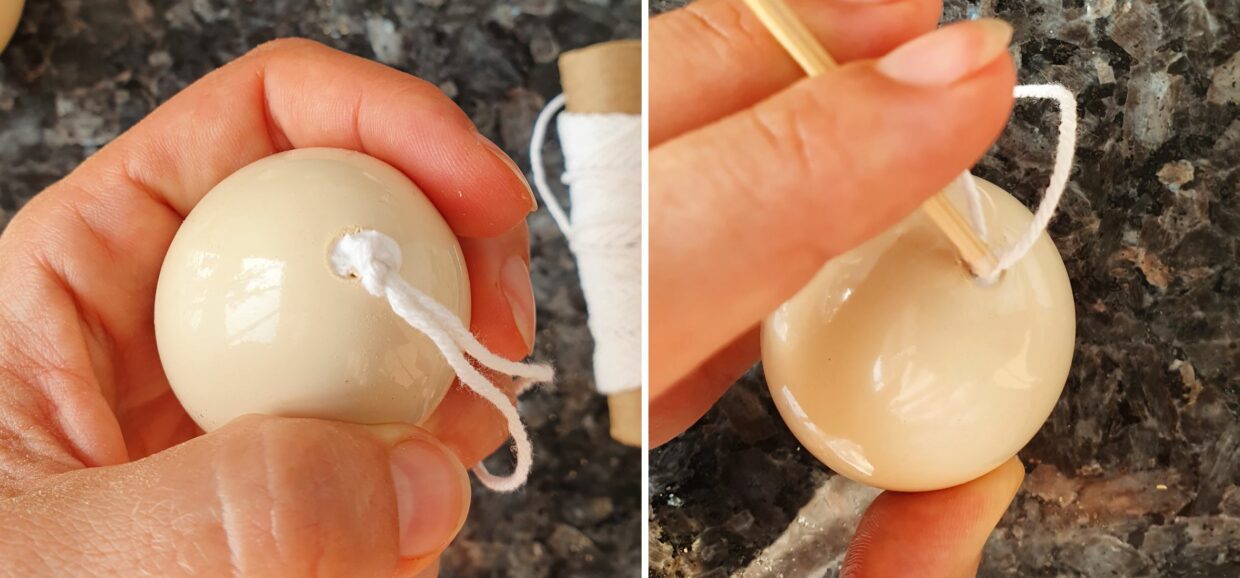
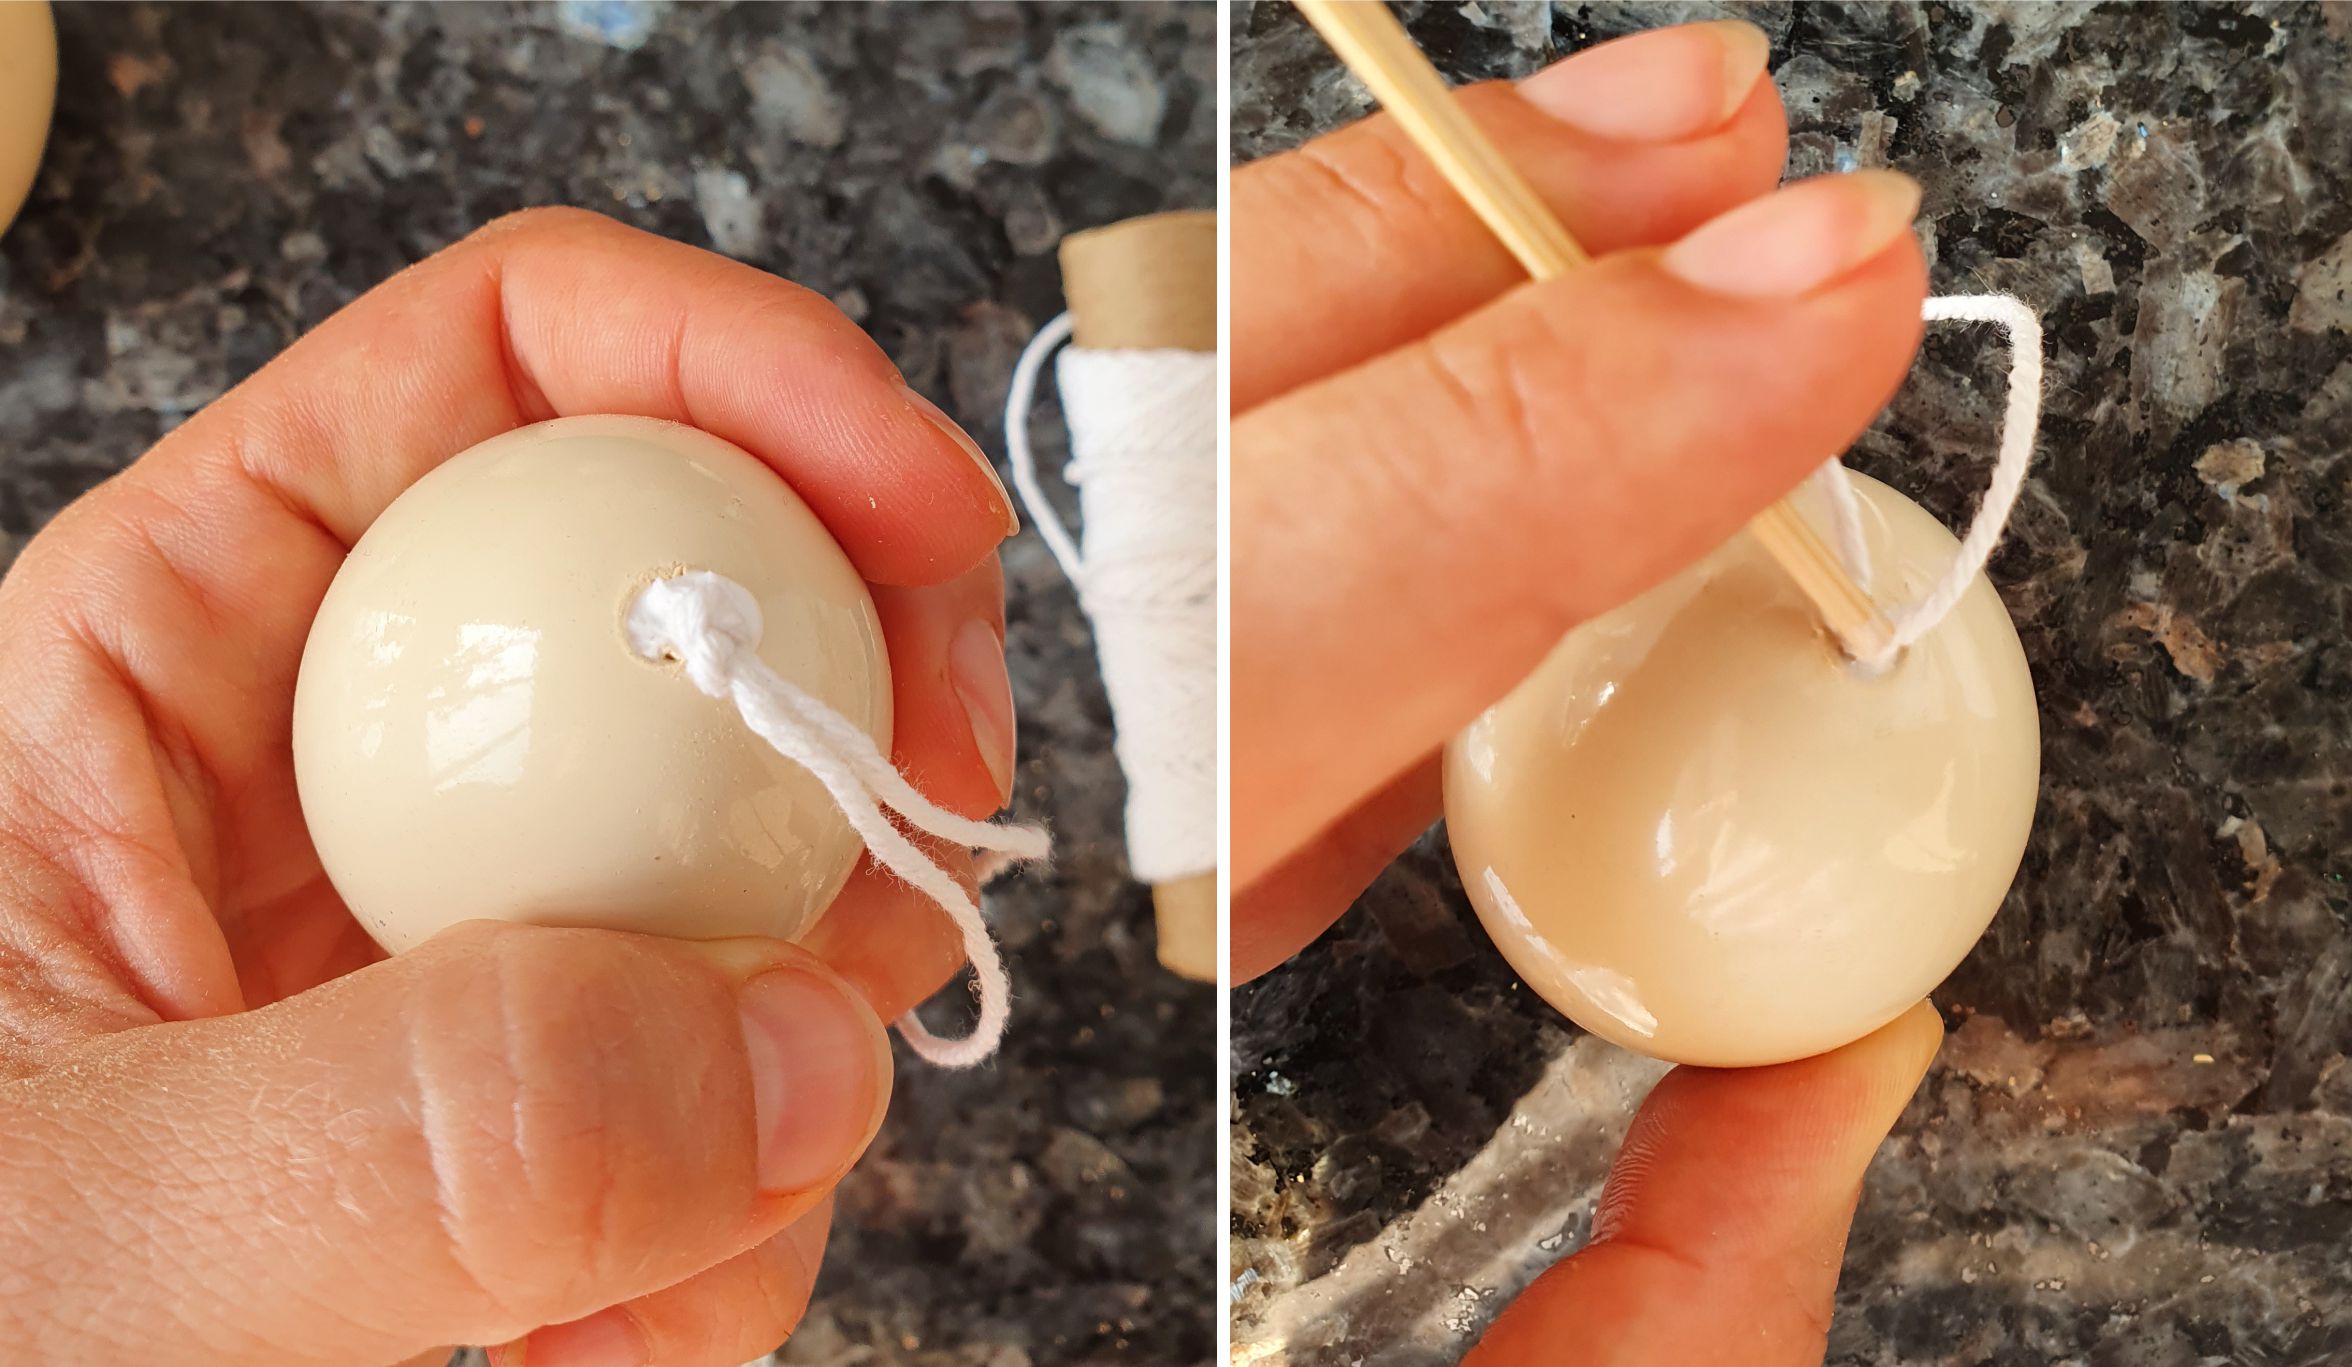
Using a skewer push the knot into the hole. Let the glue dry.
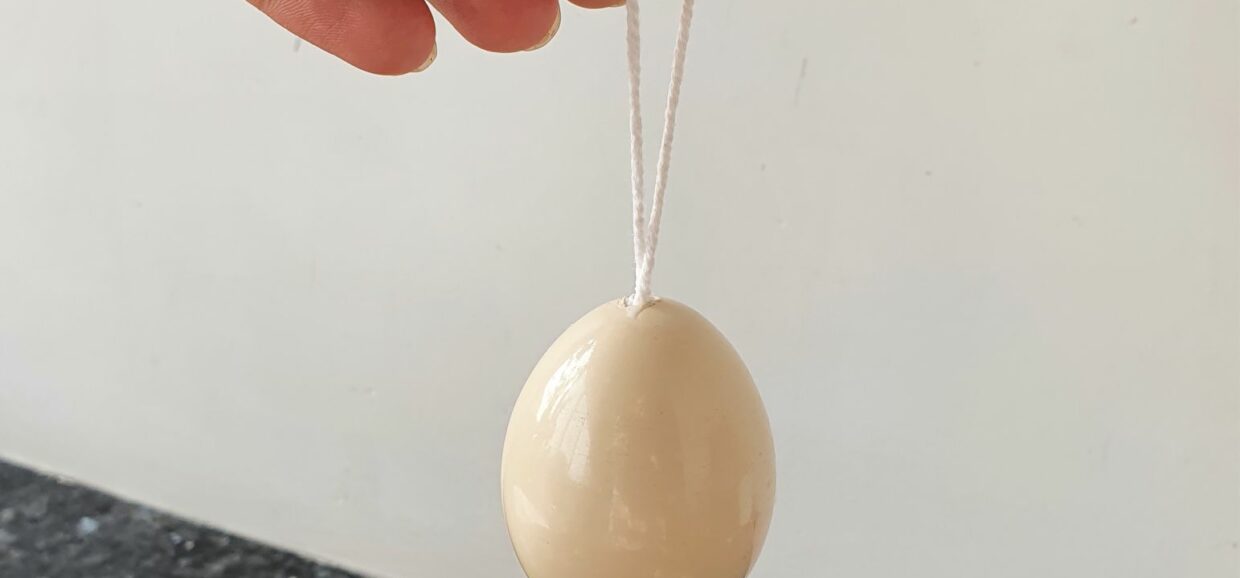
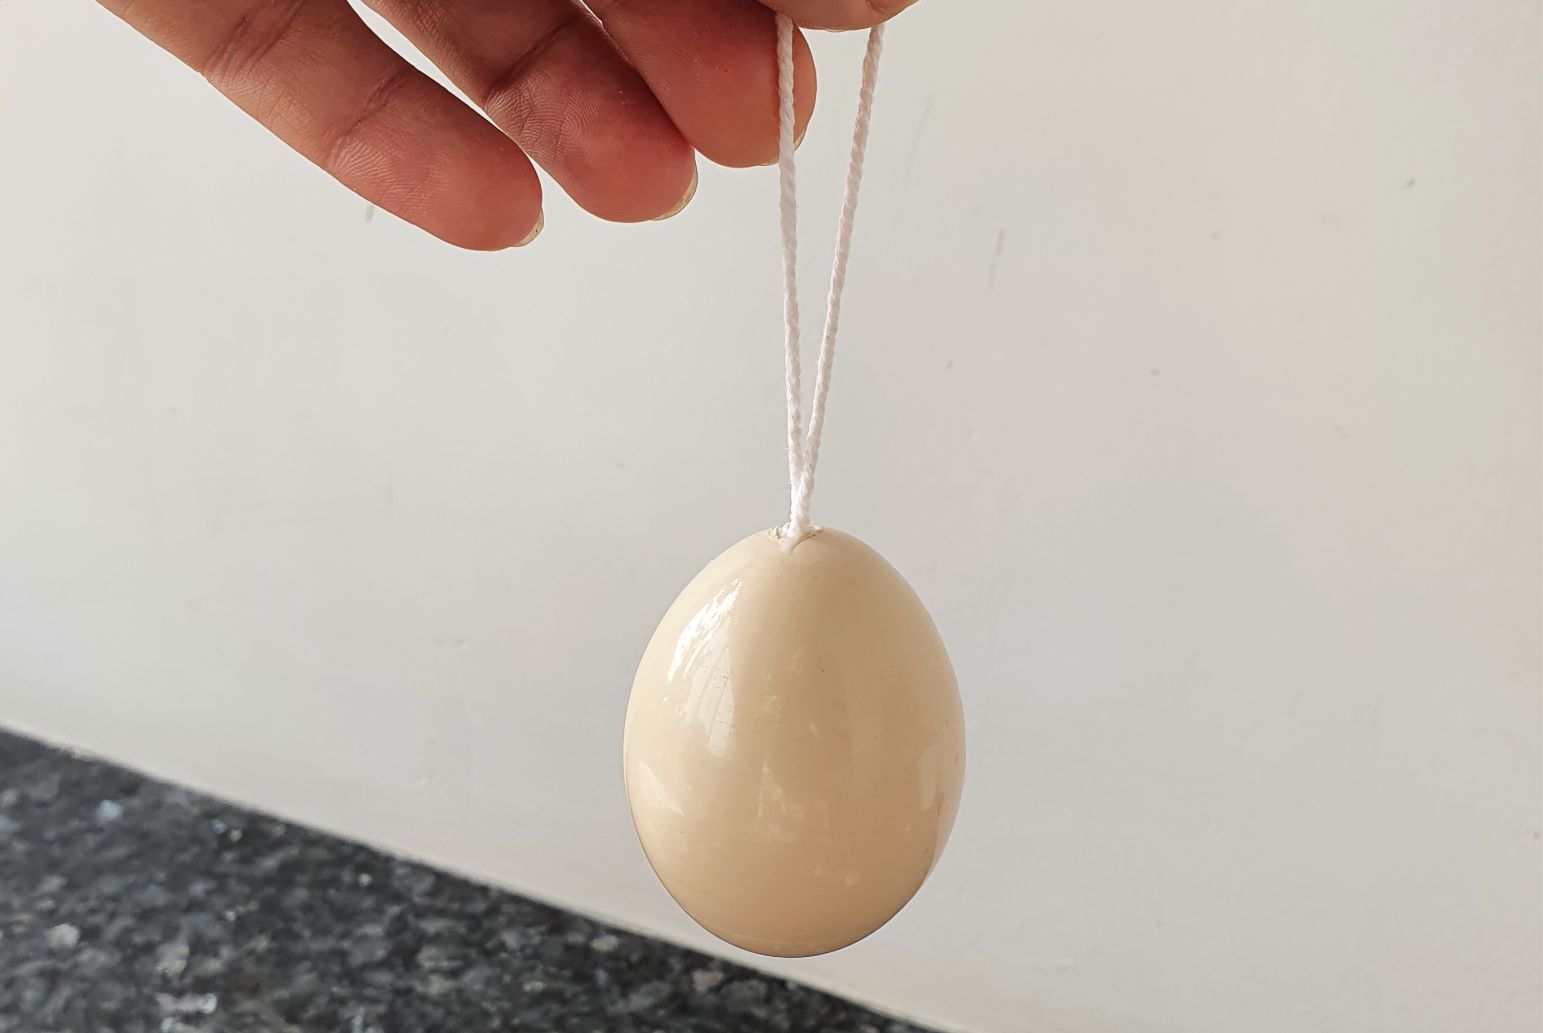
The egg will be able to hang from the string straight away but it will of course get more secure and stronger as the glue dries
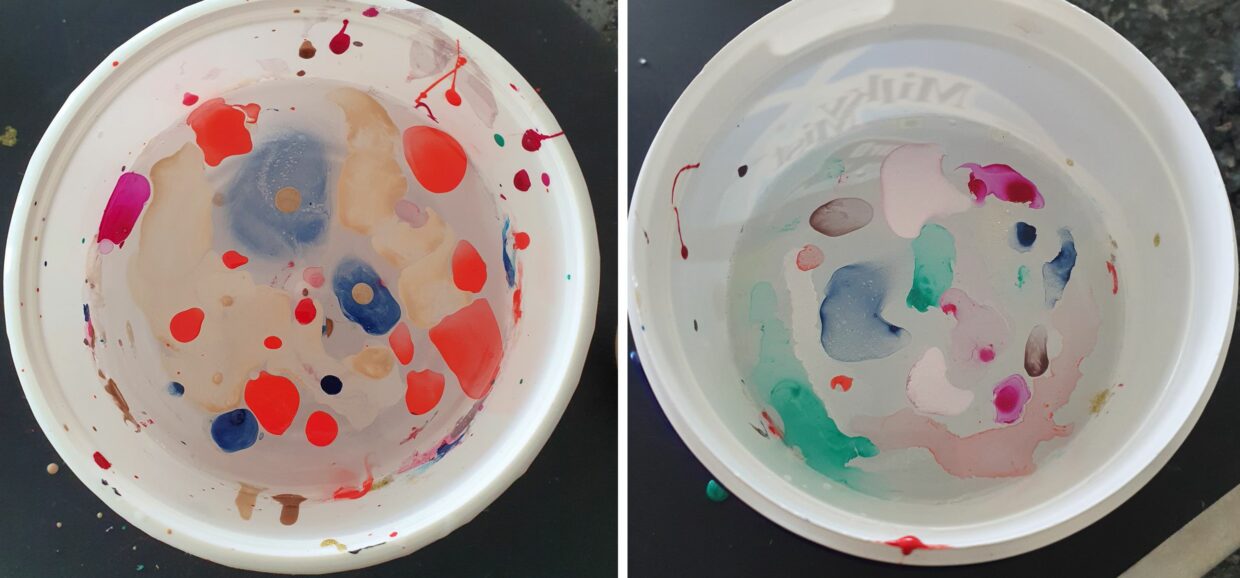
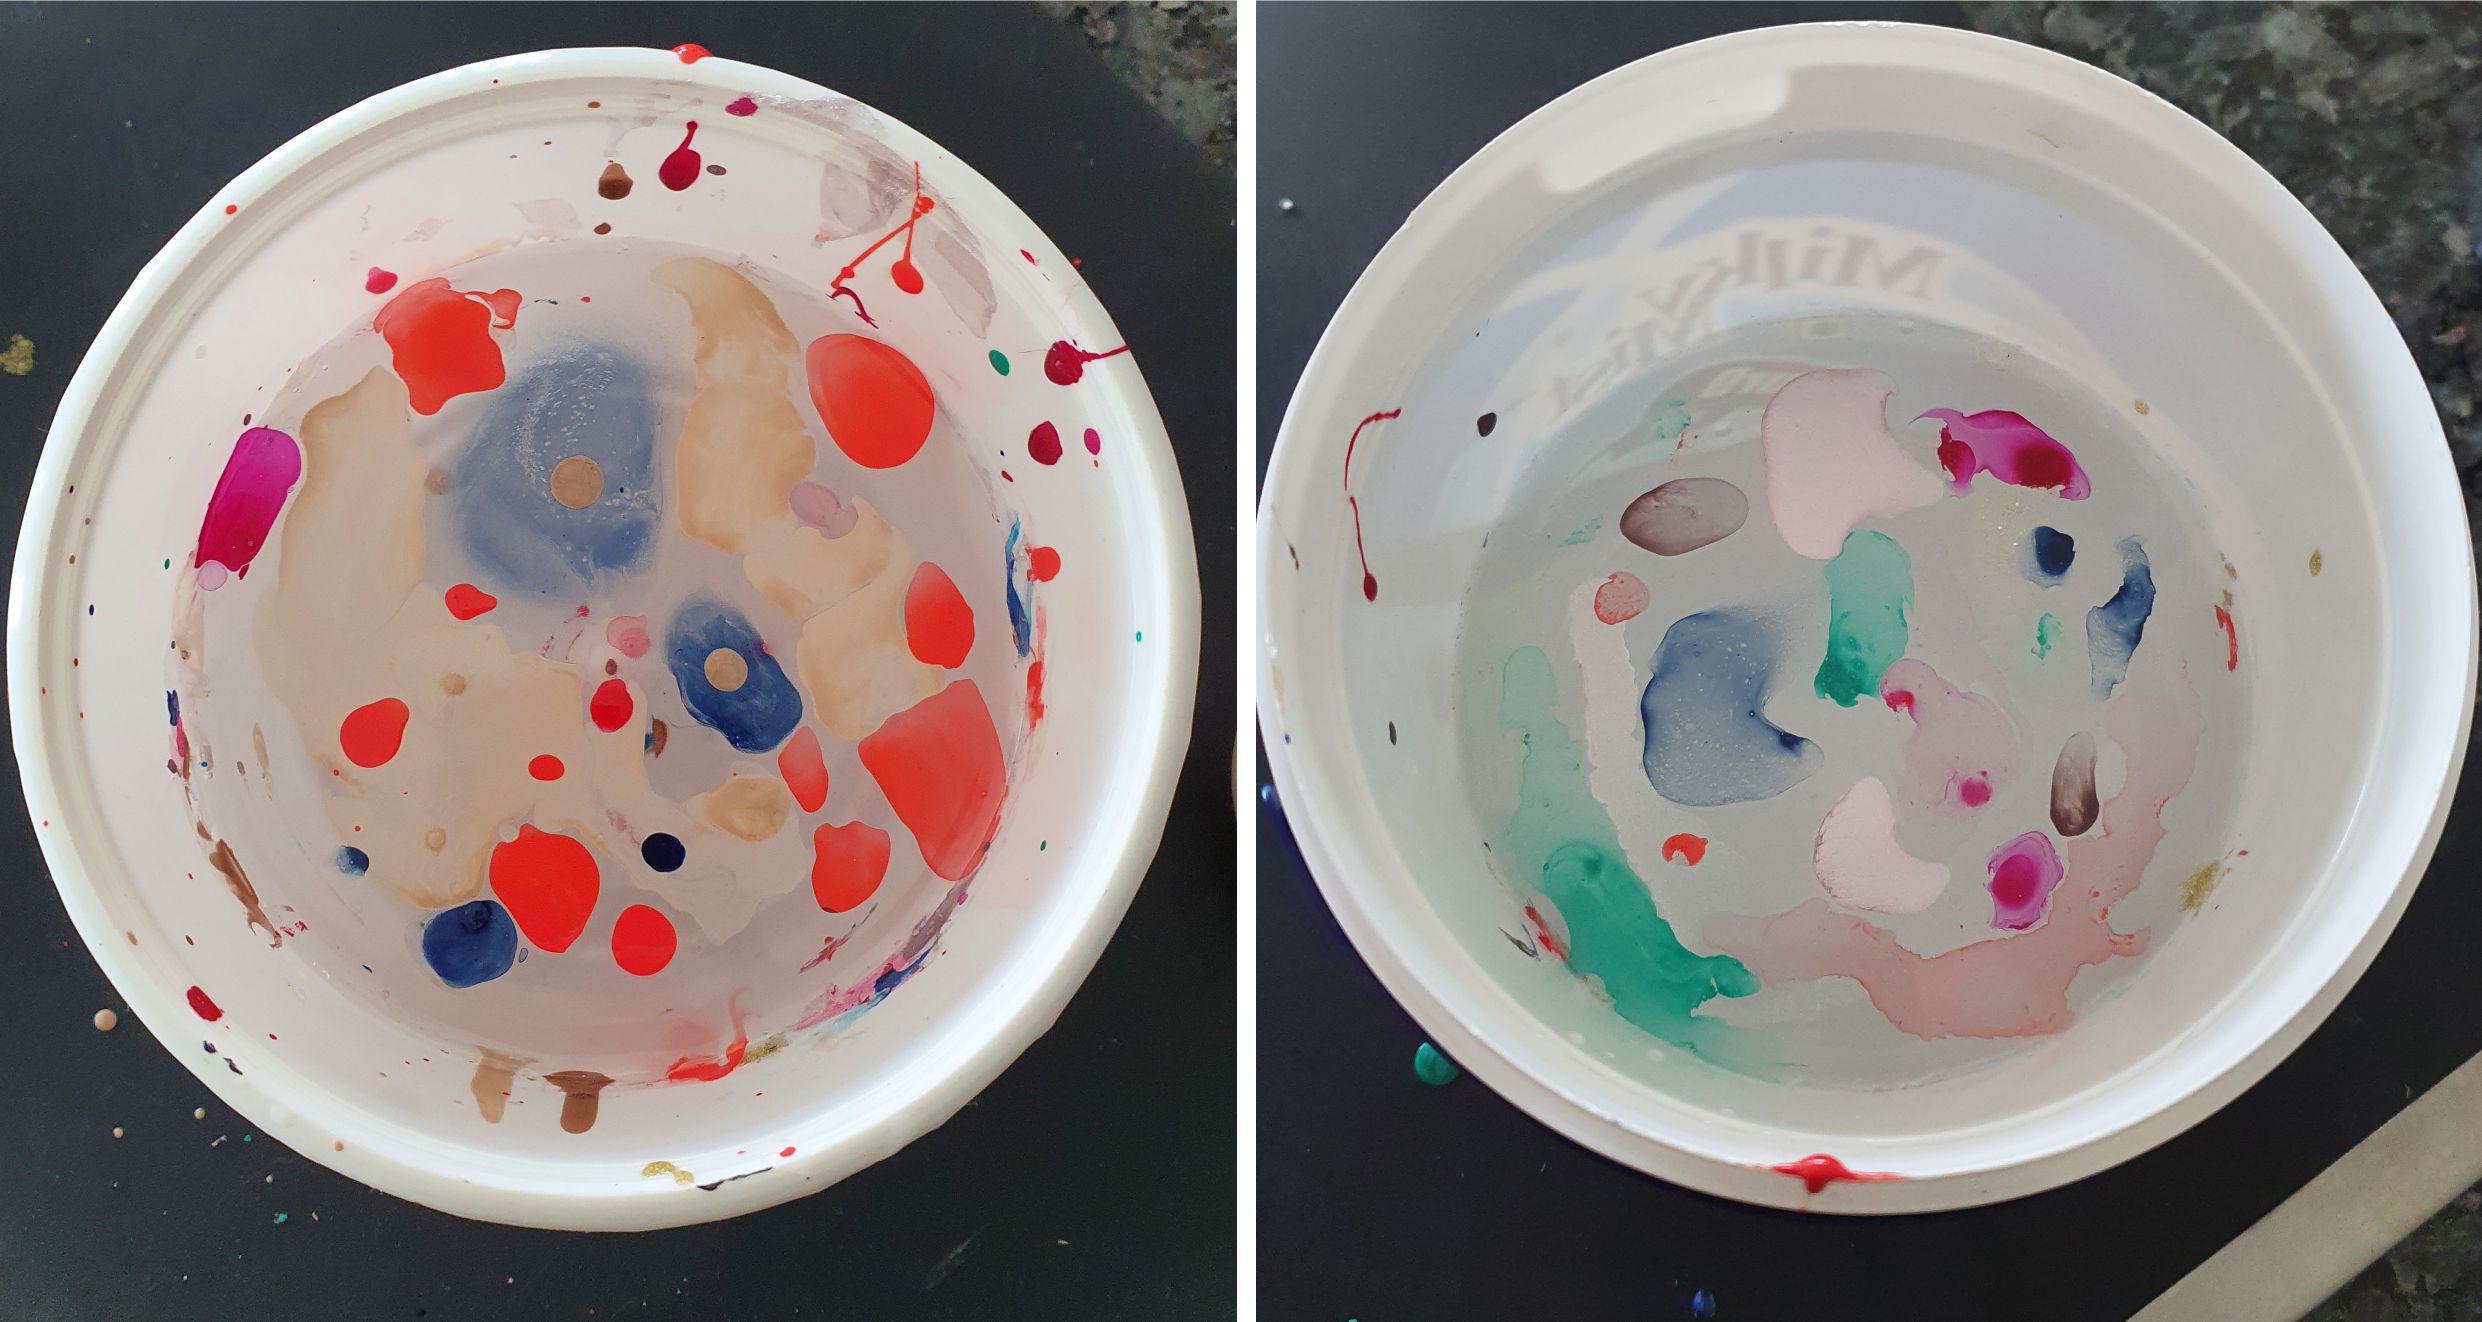
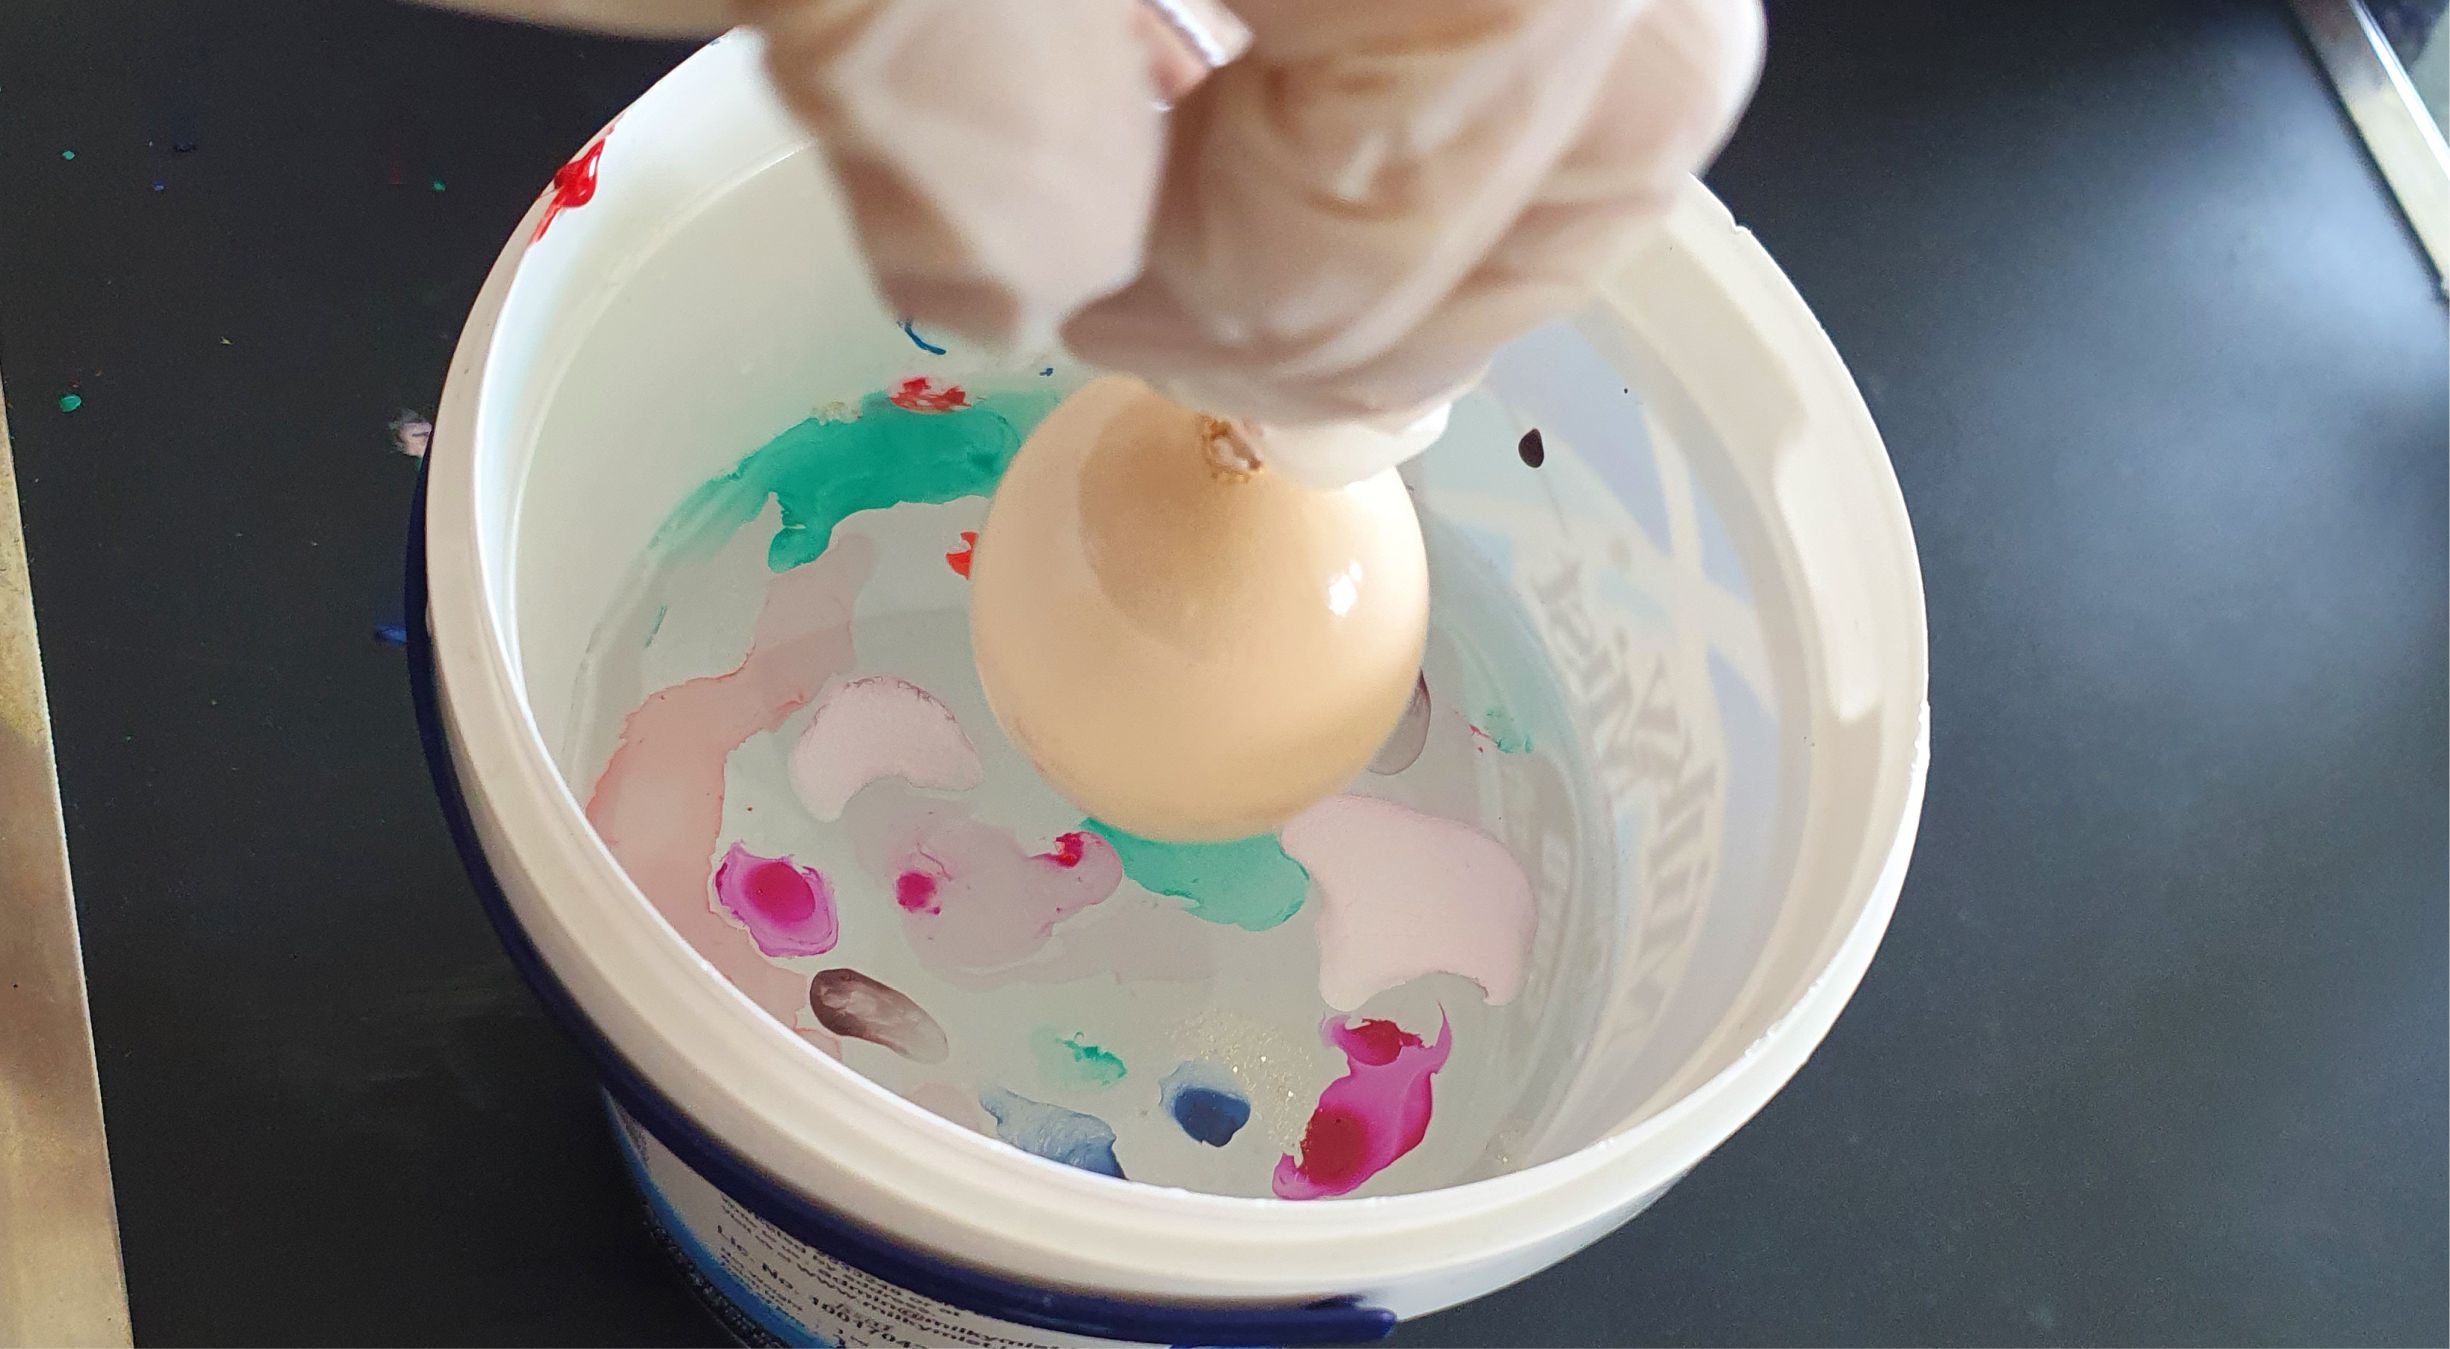
Add dabs of nail polish to the water. You can gently touch the water and the nail polish will spread or you can let the drops fall (or even pour from the bottle) and they will remain like small drops. Make sure you have added nail polish to the entire surface so the full egg gets covered.
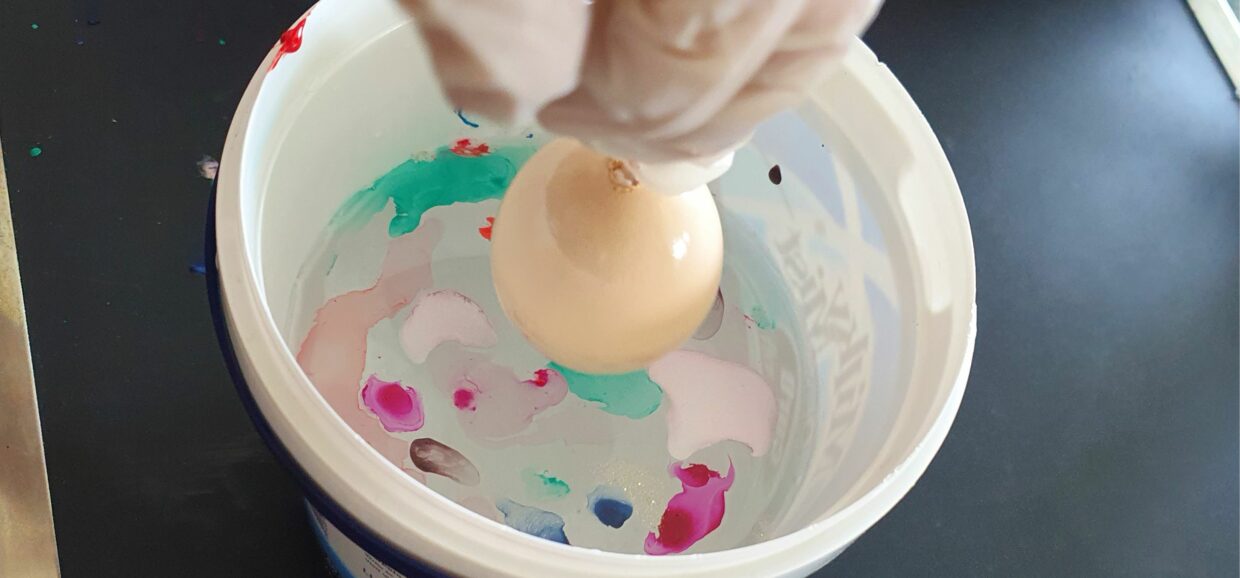
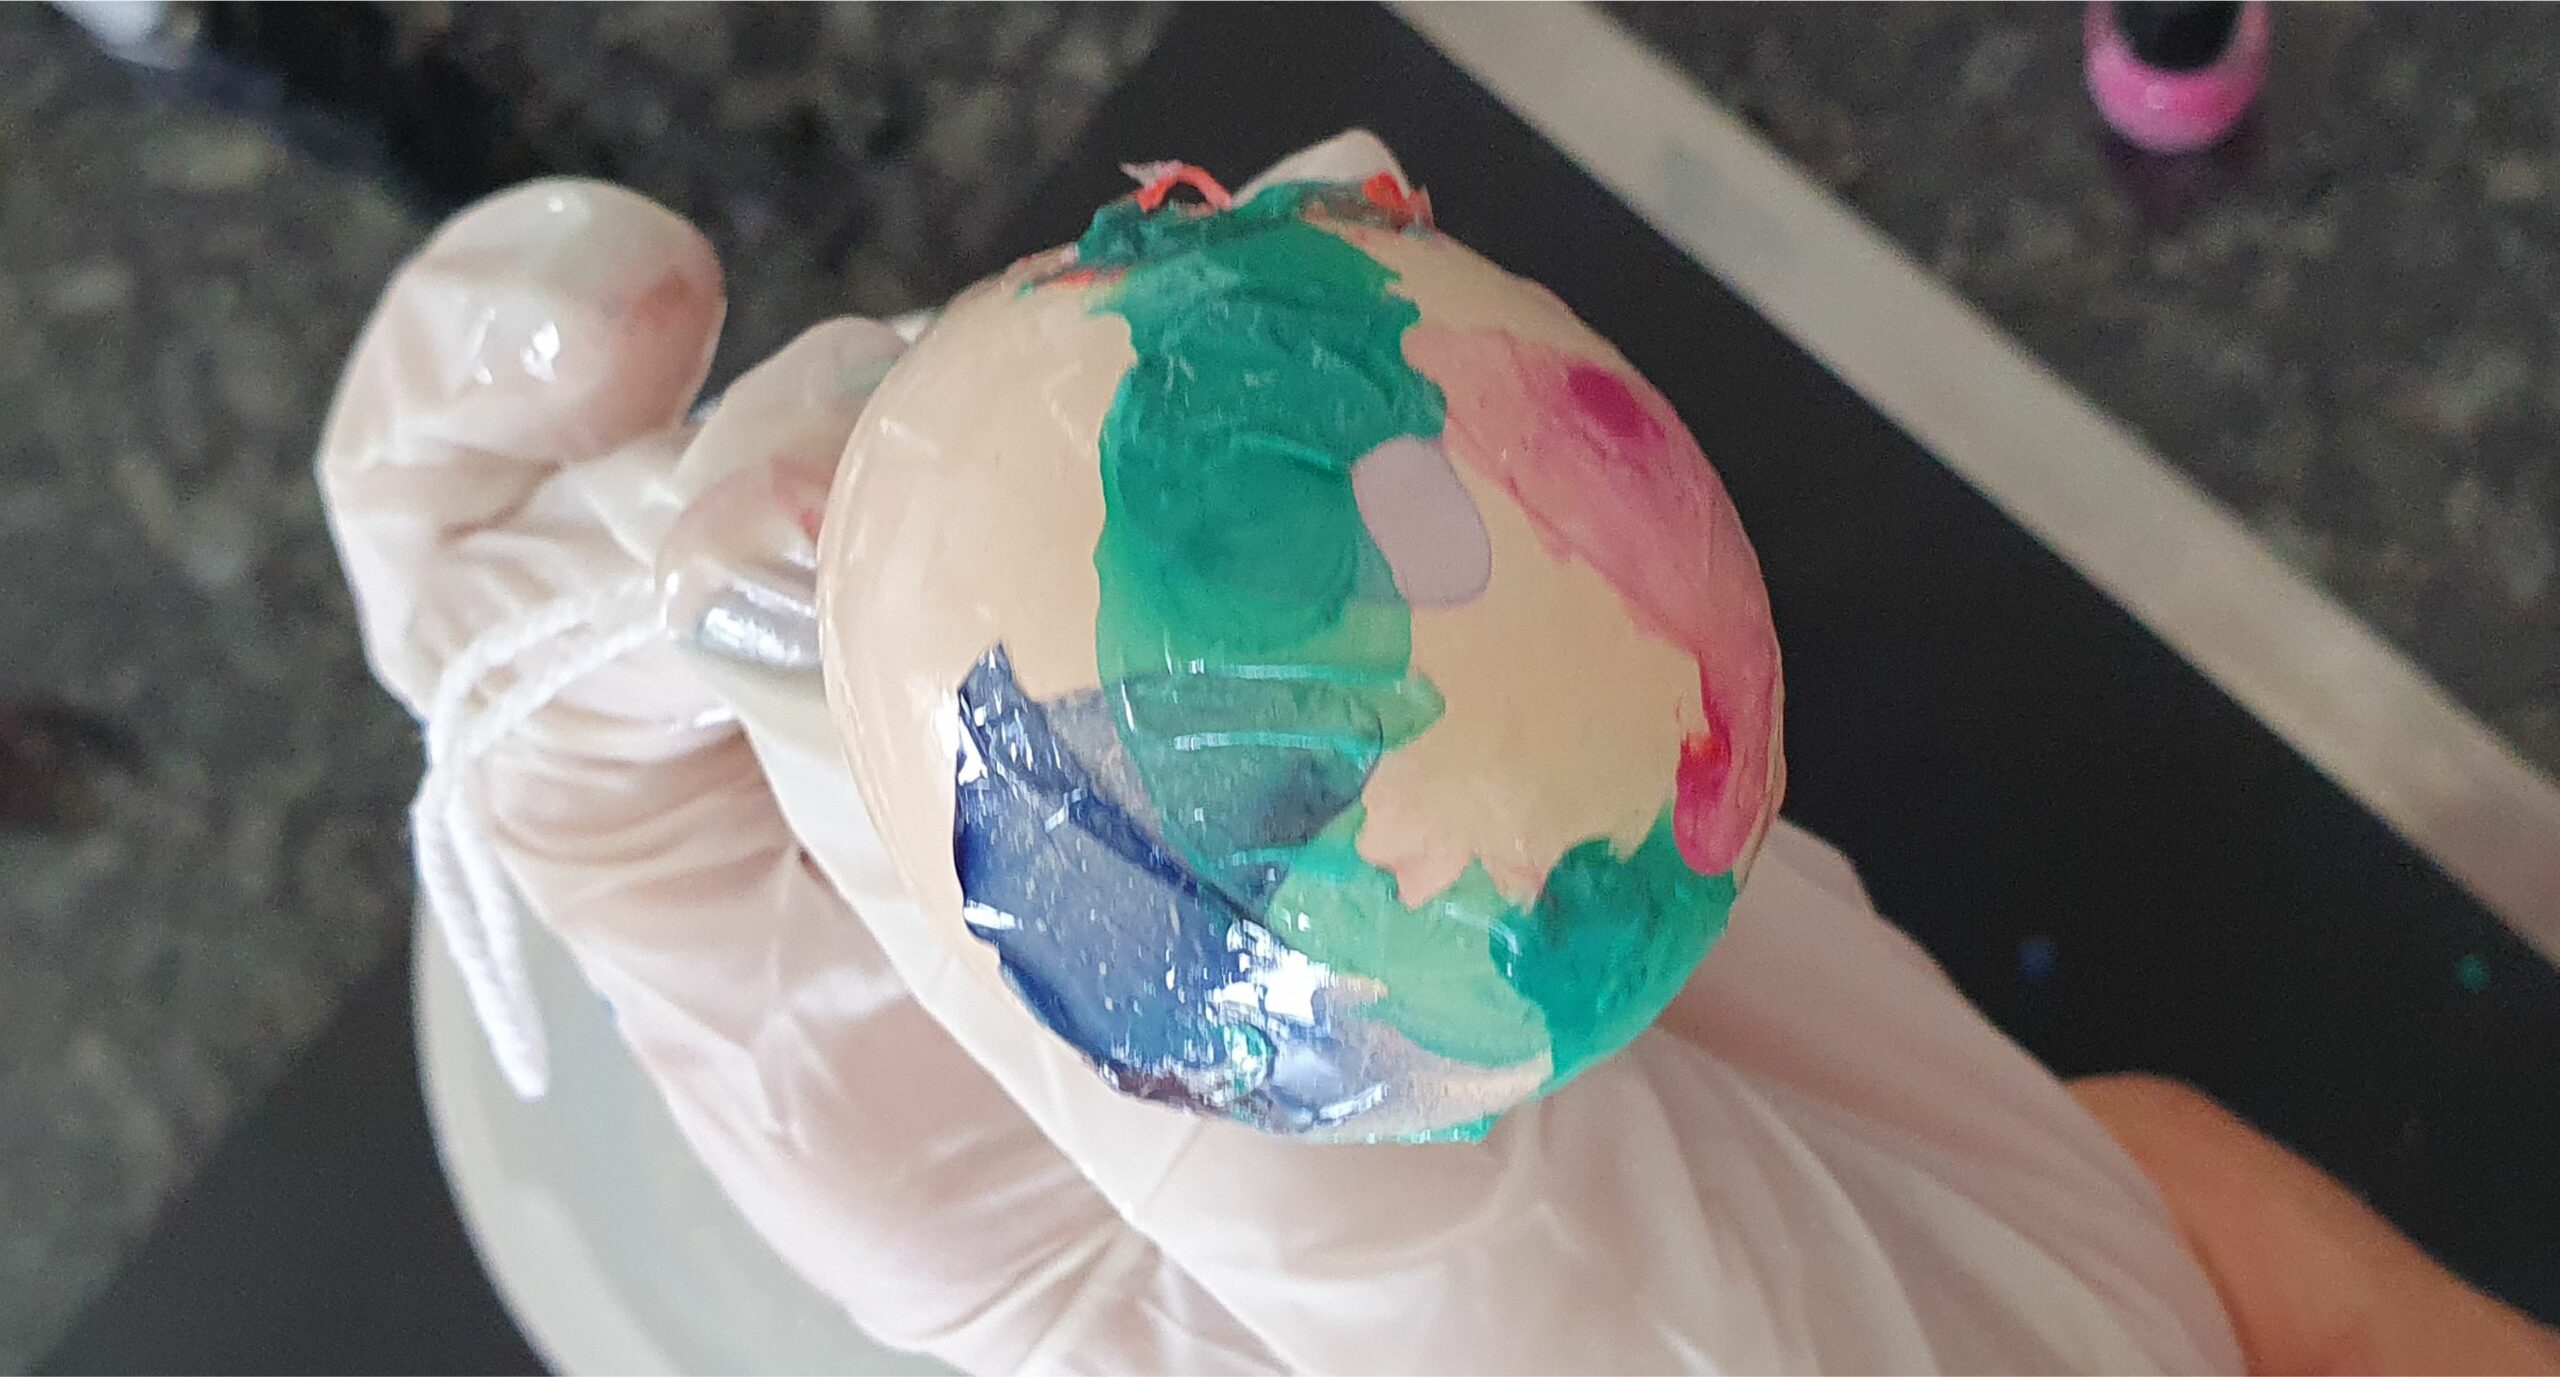
In one fluid motion, dip the egg. Don't hesitate or stop half ways as the nail polish will only stick to the lower part of the egg.

Let the egg dry.
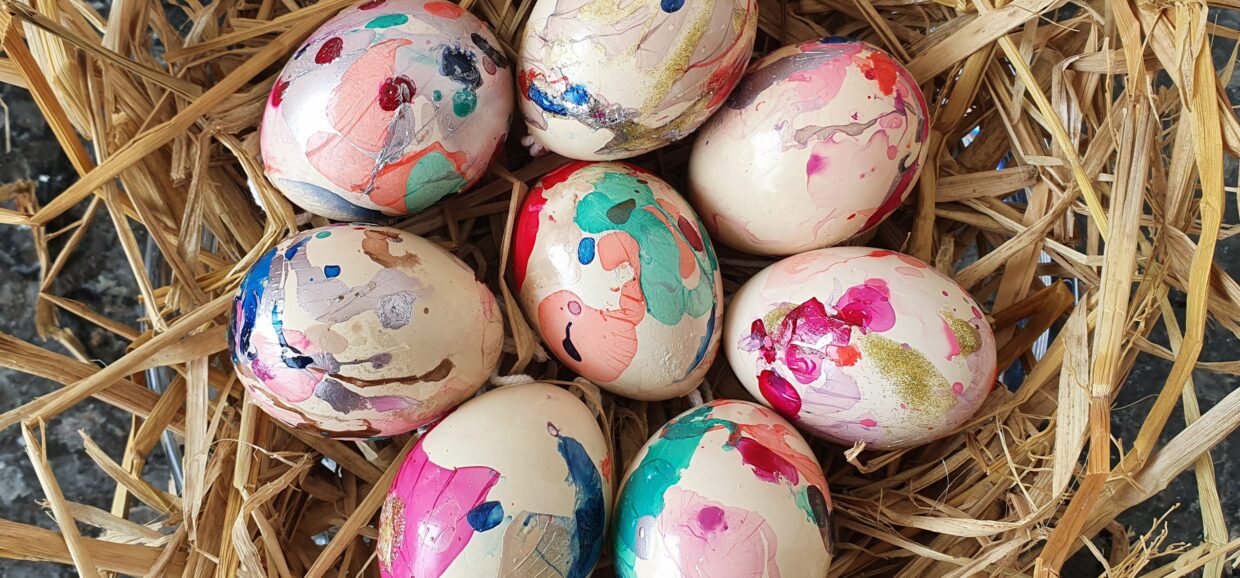
This method is quite unpredictable but it's fun and the result -though sometimes unexpected- is always beautiful. Hope you have fun with this project. Please tag me on instagram or facebook if you followed this little guide. Thanks.

Leave a Review
You must be logged in to post a comment.