- October 21, 2020
- 1 Like
- 0 / 5
- 4,313 Total Views


- Prep Time15 min
- Total Time2-3 hours to dry
Made from string and nothing else… or almost 😉
I love how easy and cheap it is to make a homemade spider web with creepy string spiders, so I would like to share it with you all. All you really need is string and glue to make this spider web from scratch. My daughter and I made this one together in about 10-15 minutes.
All the walls and doors are white in our house, so we decided to make a black spider web. You can also make it with white string, add glitter to it or even colour the glue with glow-in-the-dark-paint or powder to make it extra special and spooky on Halloween night. If we get the time before Halloween, I might just try that myself 🙂 Check out my other Halloween ideas here.
I used regular white Fevicol glue with a little water to make homemade modge podge. You will need a craft mat or a plastic mat underneath to keep the glue from staining your floor. I know our craft mat (which used to be a plastic table cover) is well used and it’s a bit difficult to see the spider web on top of it (on the pictures below) but hopefully you get the idea. If you don’t have a craft mat yet, I recommend getting one. They don’t cost so much (about 200-300rs to cover a table) and are available on amazon.in as well as in your local cloth shop. They save you a whole lot of cleaning up (and stress) when the kids want to paint or make stuff with glitter and glue.
The spider web became hard and stayed in place because of the dried glue but when we removed it from the mat, it also came apart a in a few places where the strings crossed. We used the glue gun to quickly glue those pieces together again. You can also use normal glue for this. Please don’t panic if this happens. It’s an easy fix and is expected when there are no knots involved in making the web.
Yield: We used 20 meters of thin string to make one spider web measuring about 60cm by 60cm and 6 small spiders
Ingredients
Directions
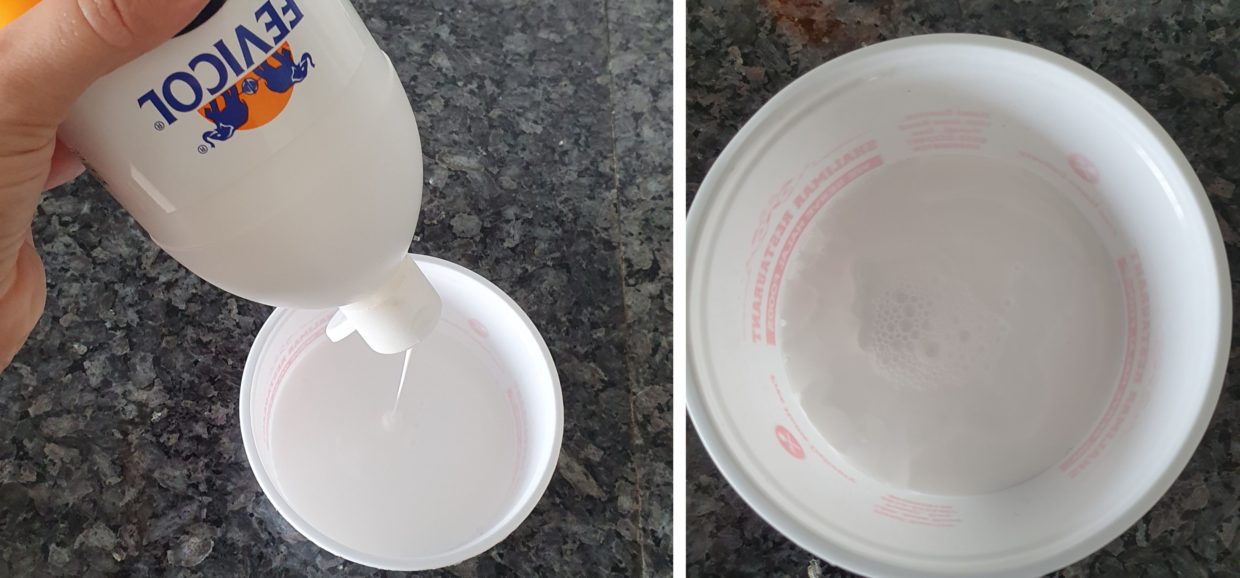

Start by adding some fevicol glue into a clean plastic container. Add a little water on top. I have never measured it perfectly but it's approximately 4 parts glue and 1 part water. Add a little water at a time so it doesn't become too watery.
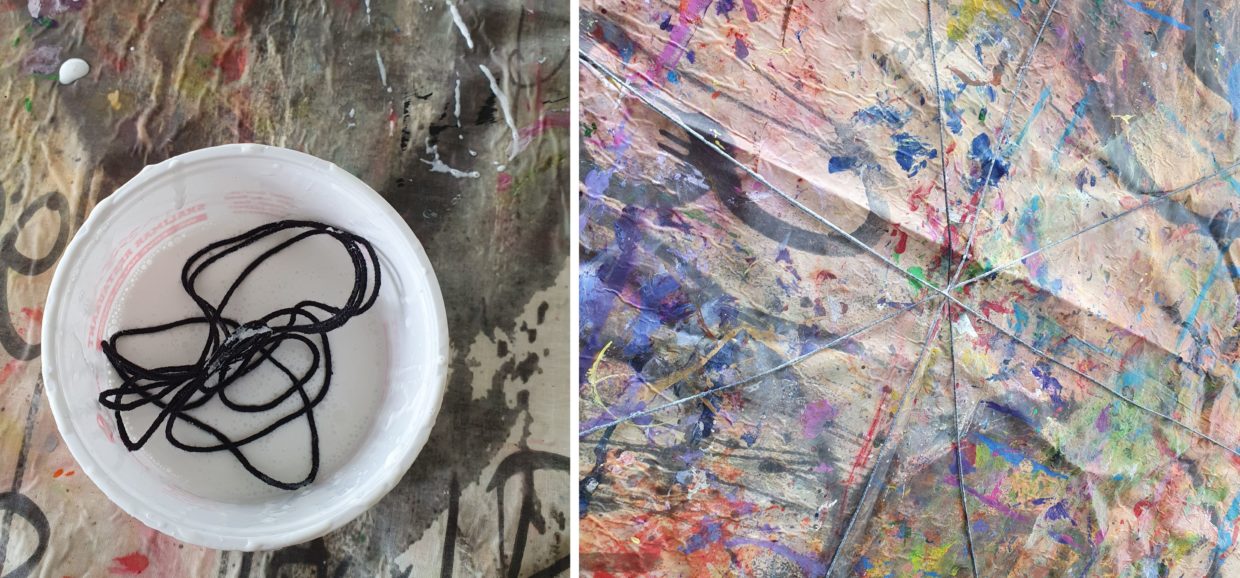

Cut 4 pieces of string (measuring about 150cm each) and dip them in the glue. Take off the excess glue by holding the string between two fingers while pulling the string out of the glue mixture. Lay the four strings on the craft mat to form the skeleton of the spider web like shown here.
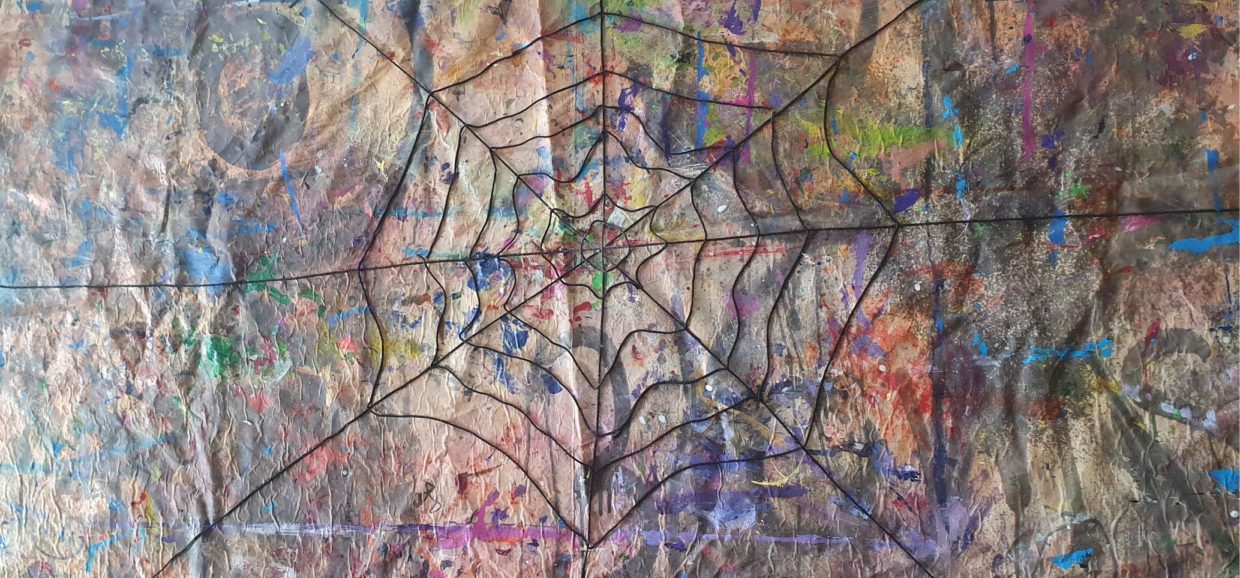

Continue to add pieces of cut string into the glue mixture and lay them on top of the spider web skeleton. Make sure the string bends a little inwards between each of the "skeleton strings". Let the glue dry completely before removing the spider web from the mat. The string is now harder and the web will stay in one place even when held vertically. If any of the joins come apart while removing it from the mat, fix it with glue or with a glue gun.
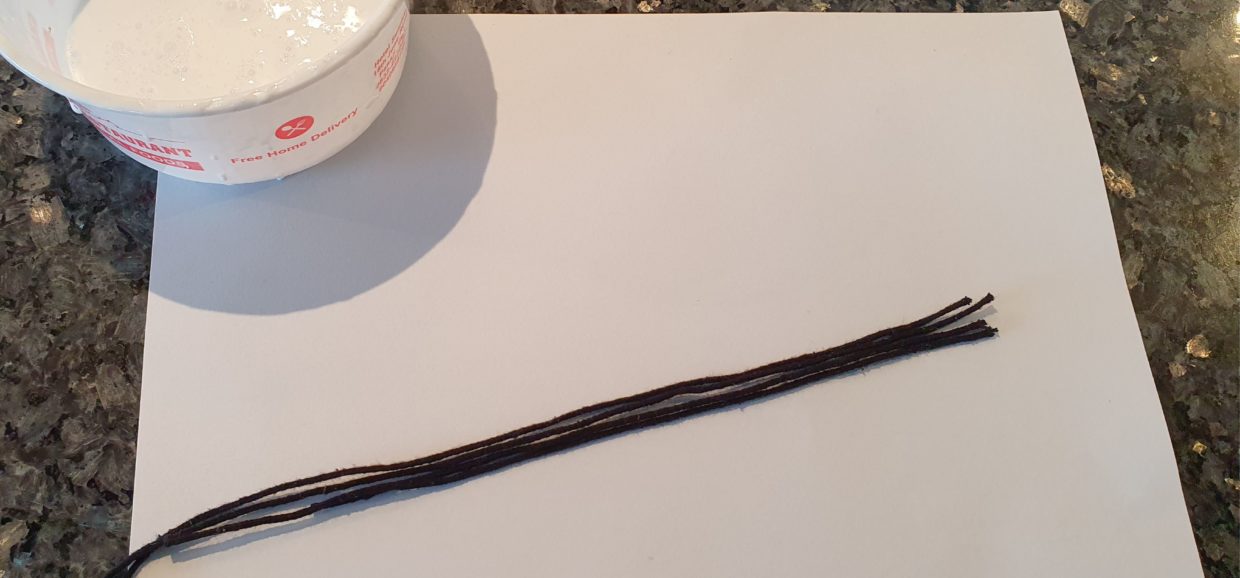

To make the string spiders, take 4 pieces of black string measuring about 10-15cm. Keep the glue mixture from before handy.
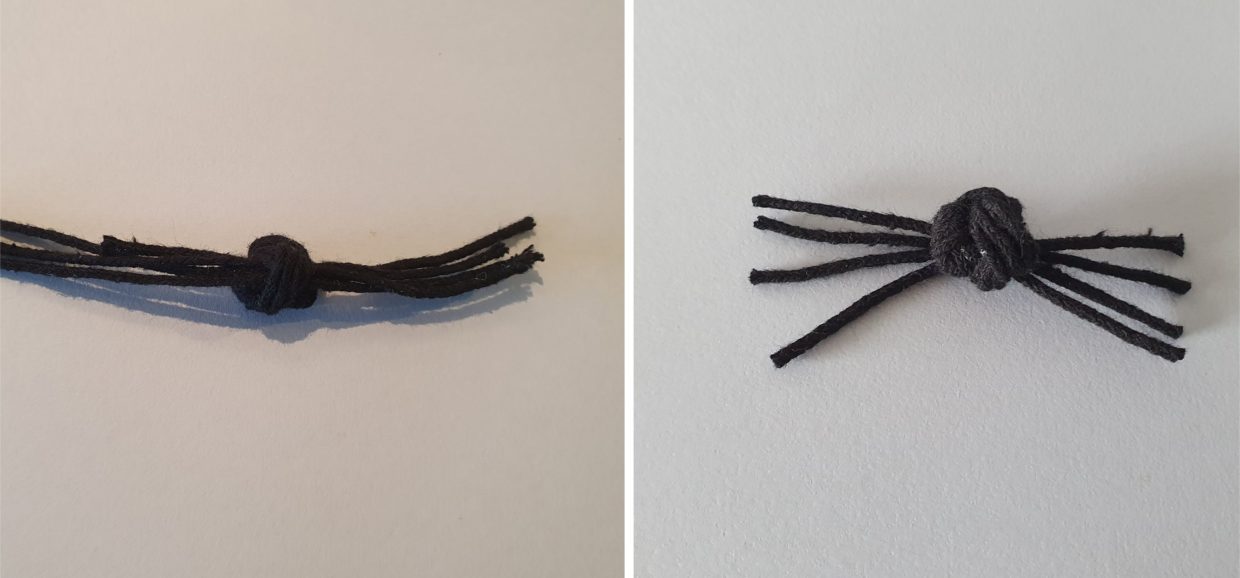

Using all 4 strings, make 4-5 knots on top of each other until the "body" is big enough. Cut the legs to the desired length.
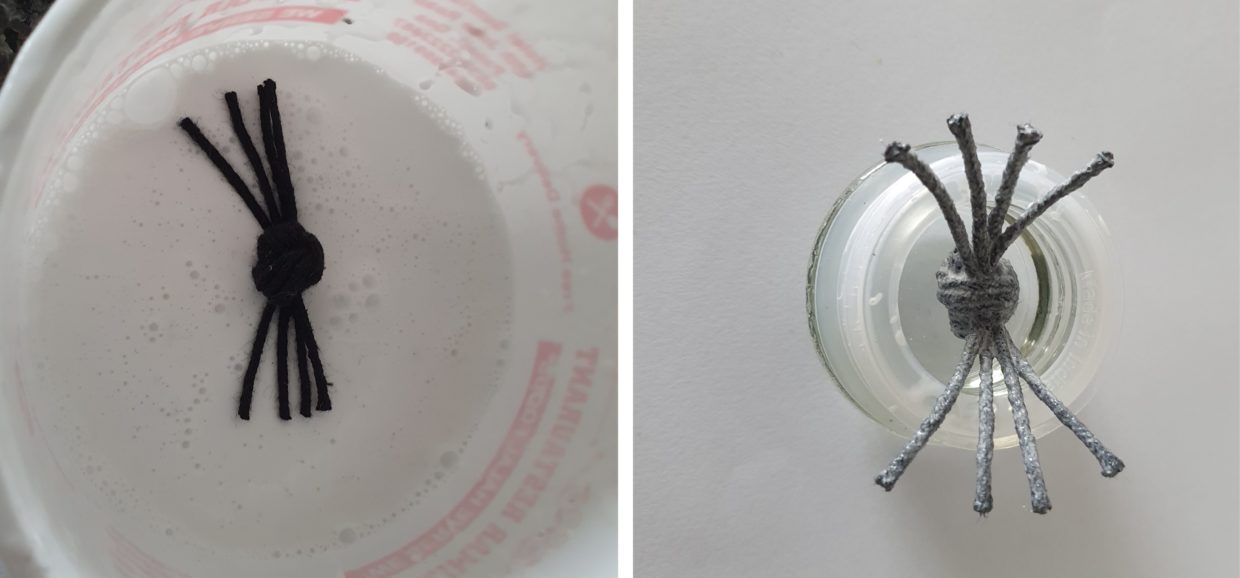

Dip the string spider into the glue mixture. Take off excess glue and let it dry on top of a small open jar or a glass jar lid. Try to find something where the body of the spider can be lower than the legs. Make sure to keep the legs in the position you want them to remain in after drying. Let the spider dry for min. 2-3 hours. You can add small googly eyes if you prefer or just keep it simple like I have done.
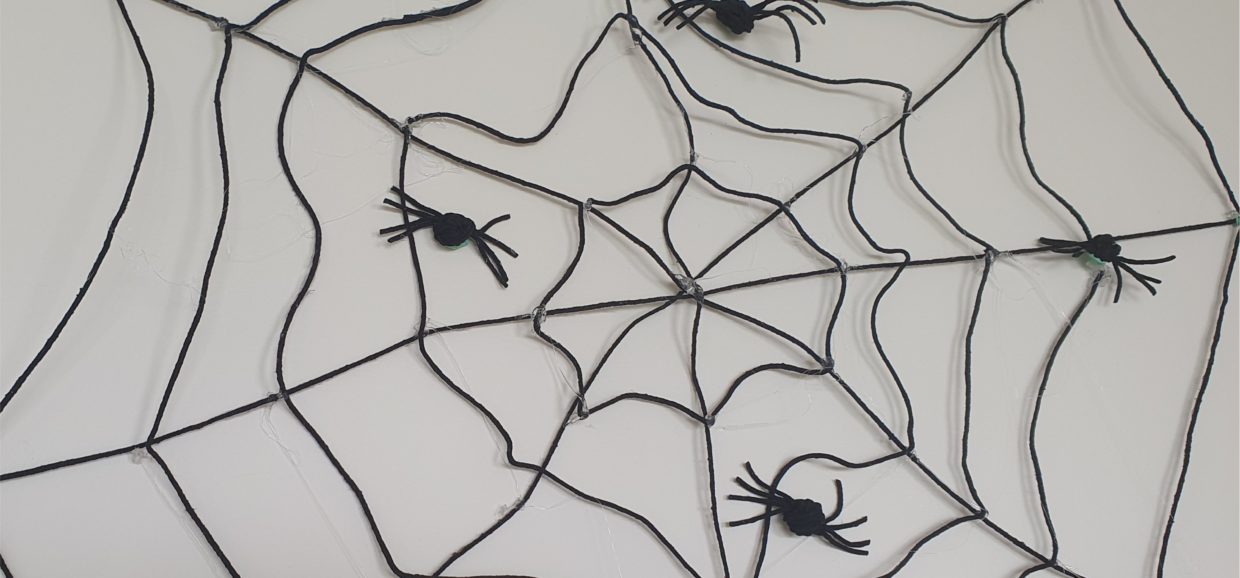

Hang the spider web and spiders over a chair or on the wall or door using blue tag for the edges. Easy Halloween decoration for very less that can be reused every year. Happy Halloween.
You may also like
Spider Web & Spider Craft
Ingredients
Follow The Directions
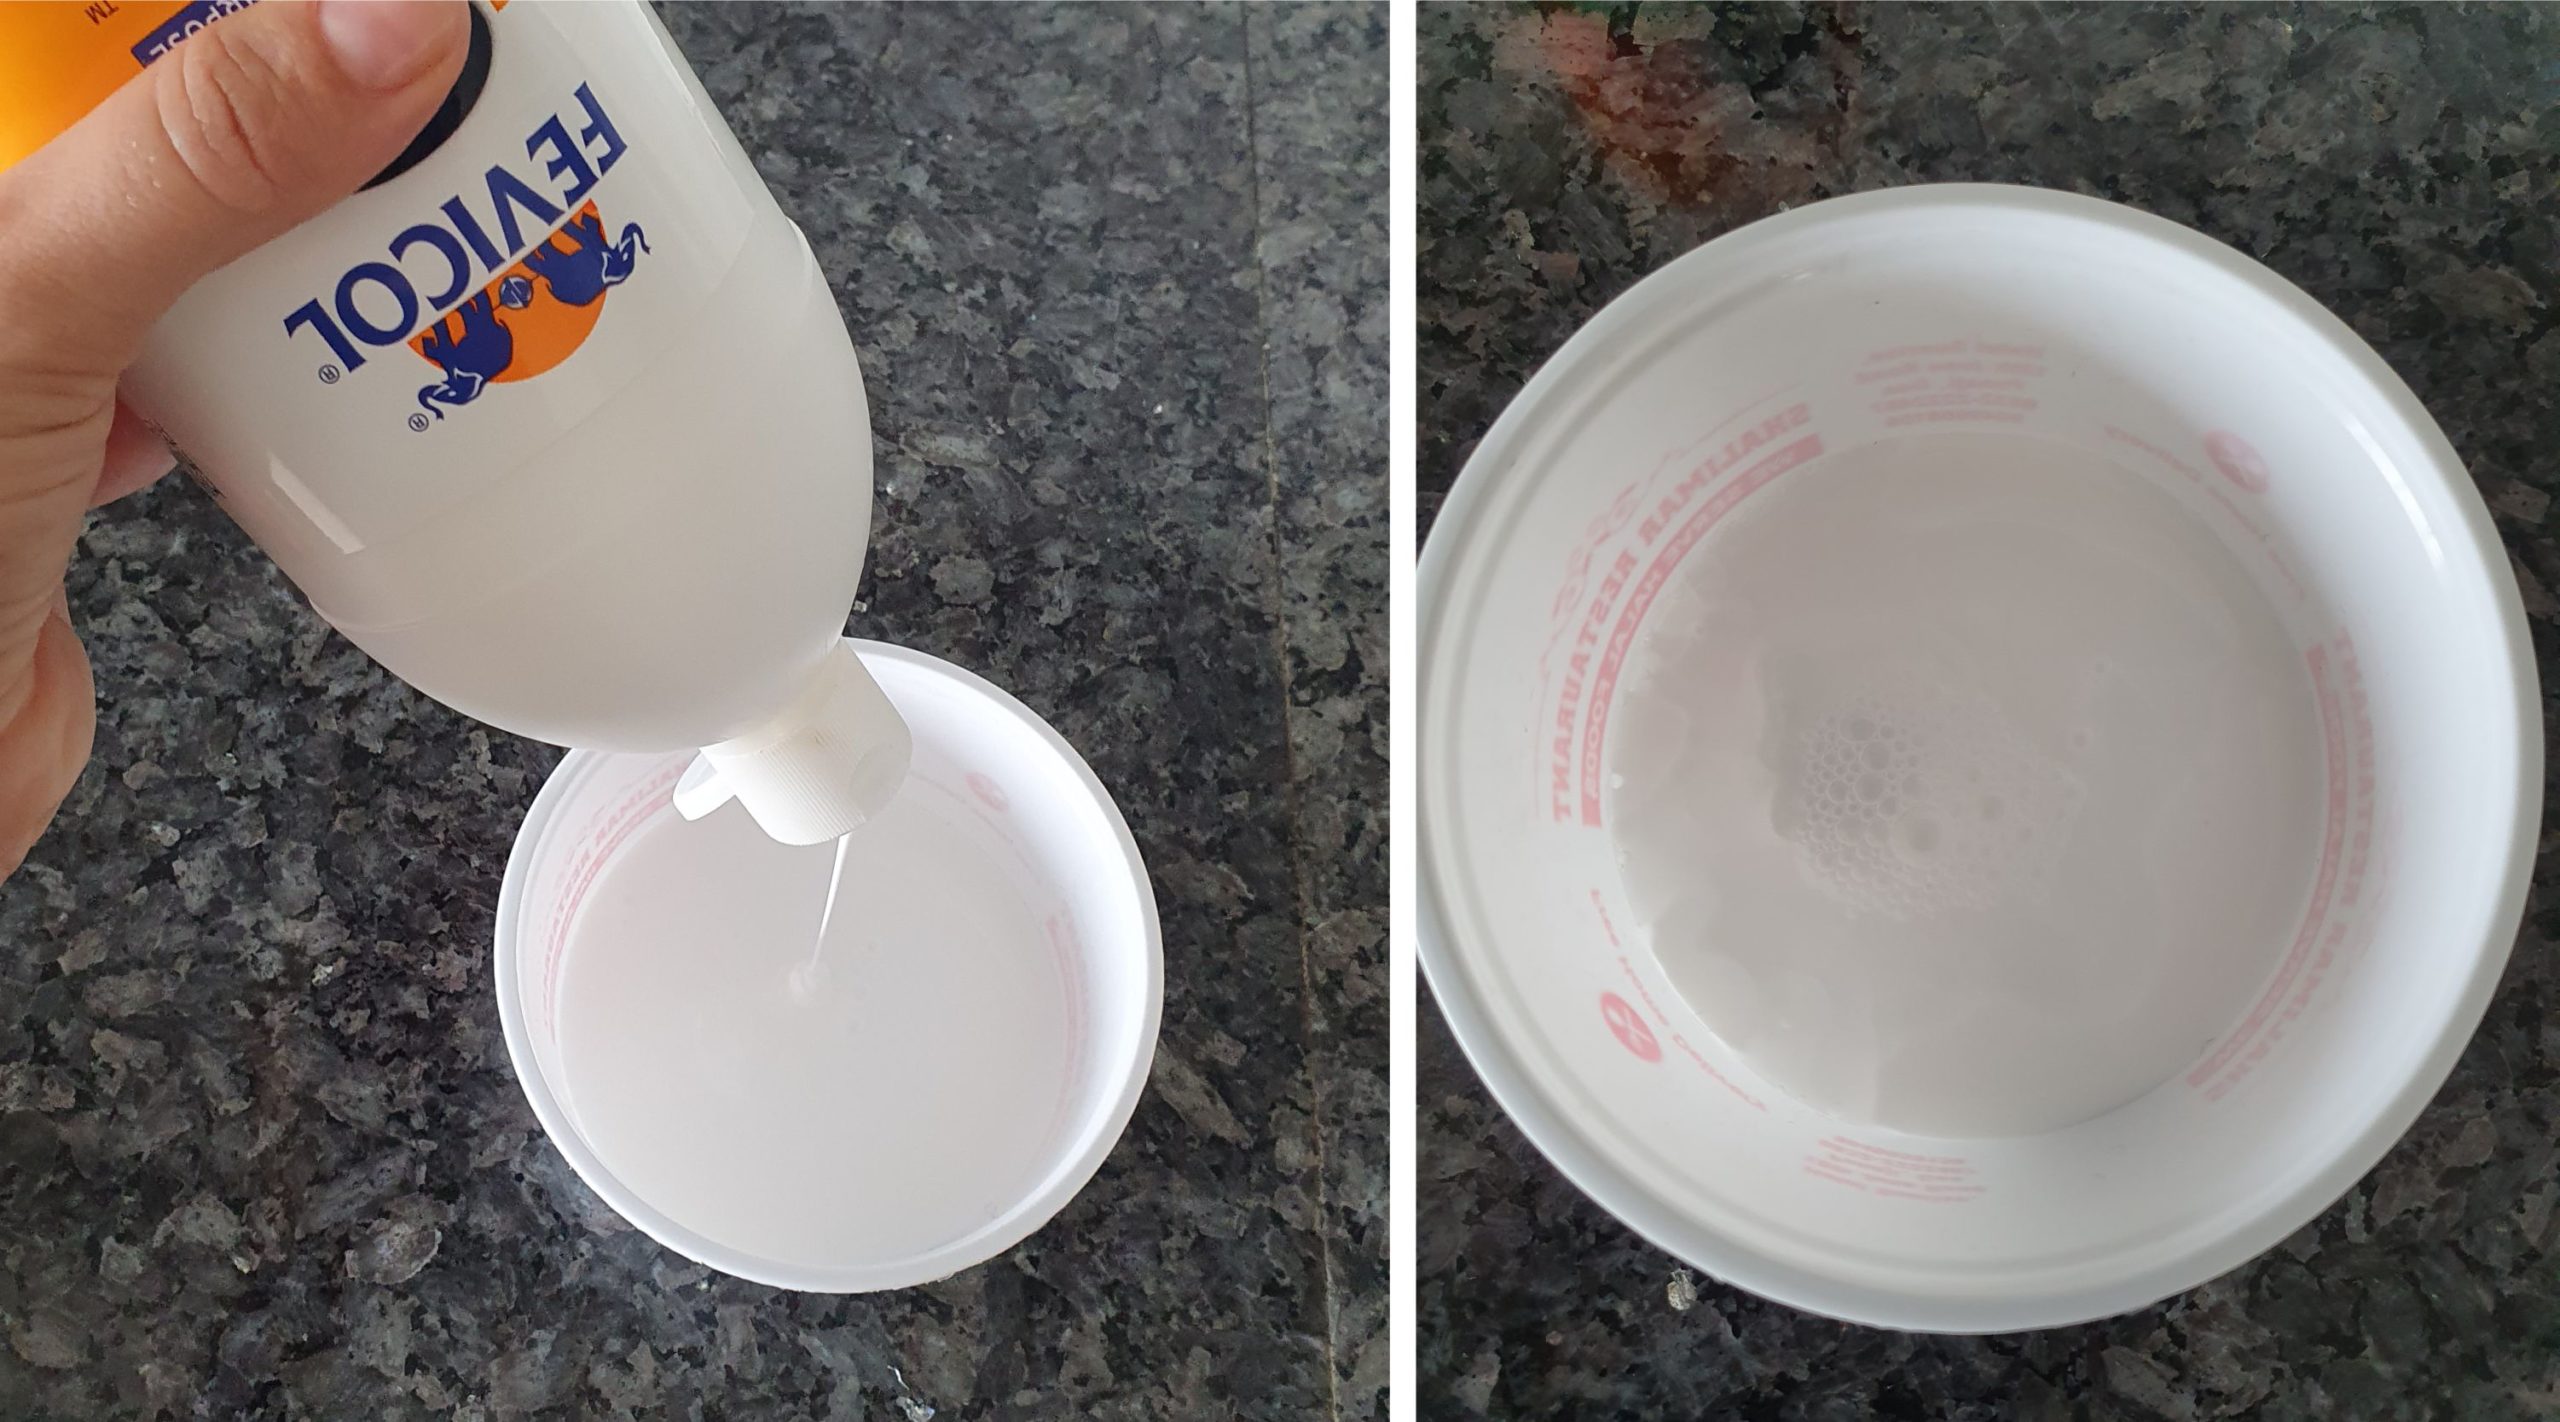

Start by adding some fevicol glue into a clean plastic container. Add a little water on top. I have never measured it perfectly but it's approximately 4 parts glue and 1 part water. Add a little water at a time so it doesn't become too watery.
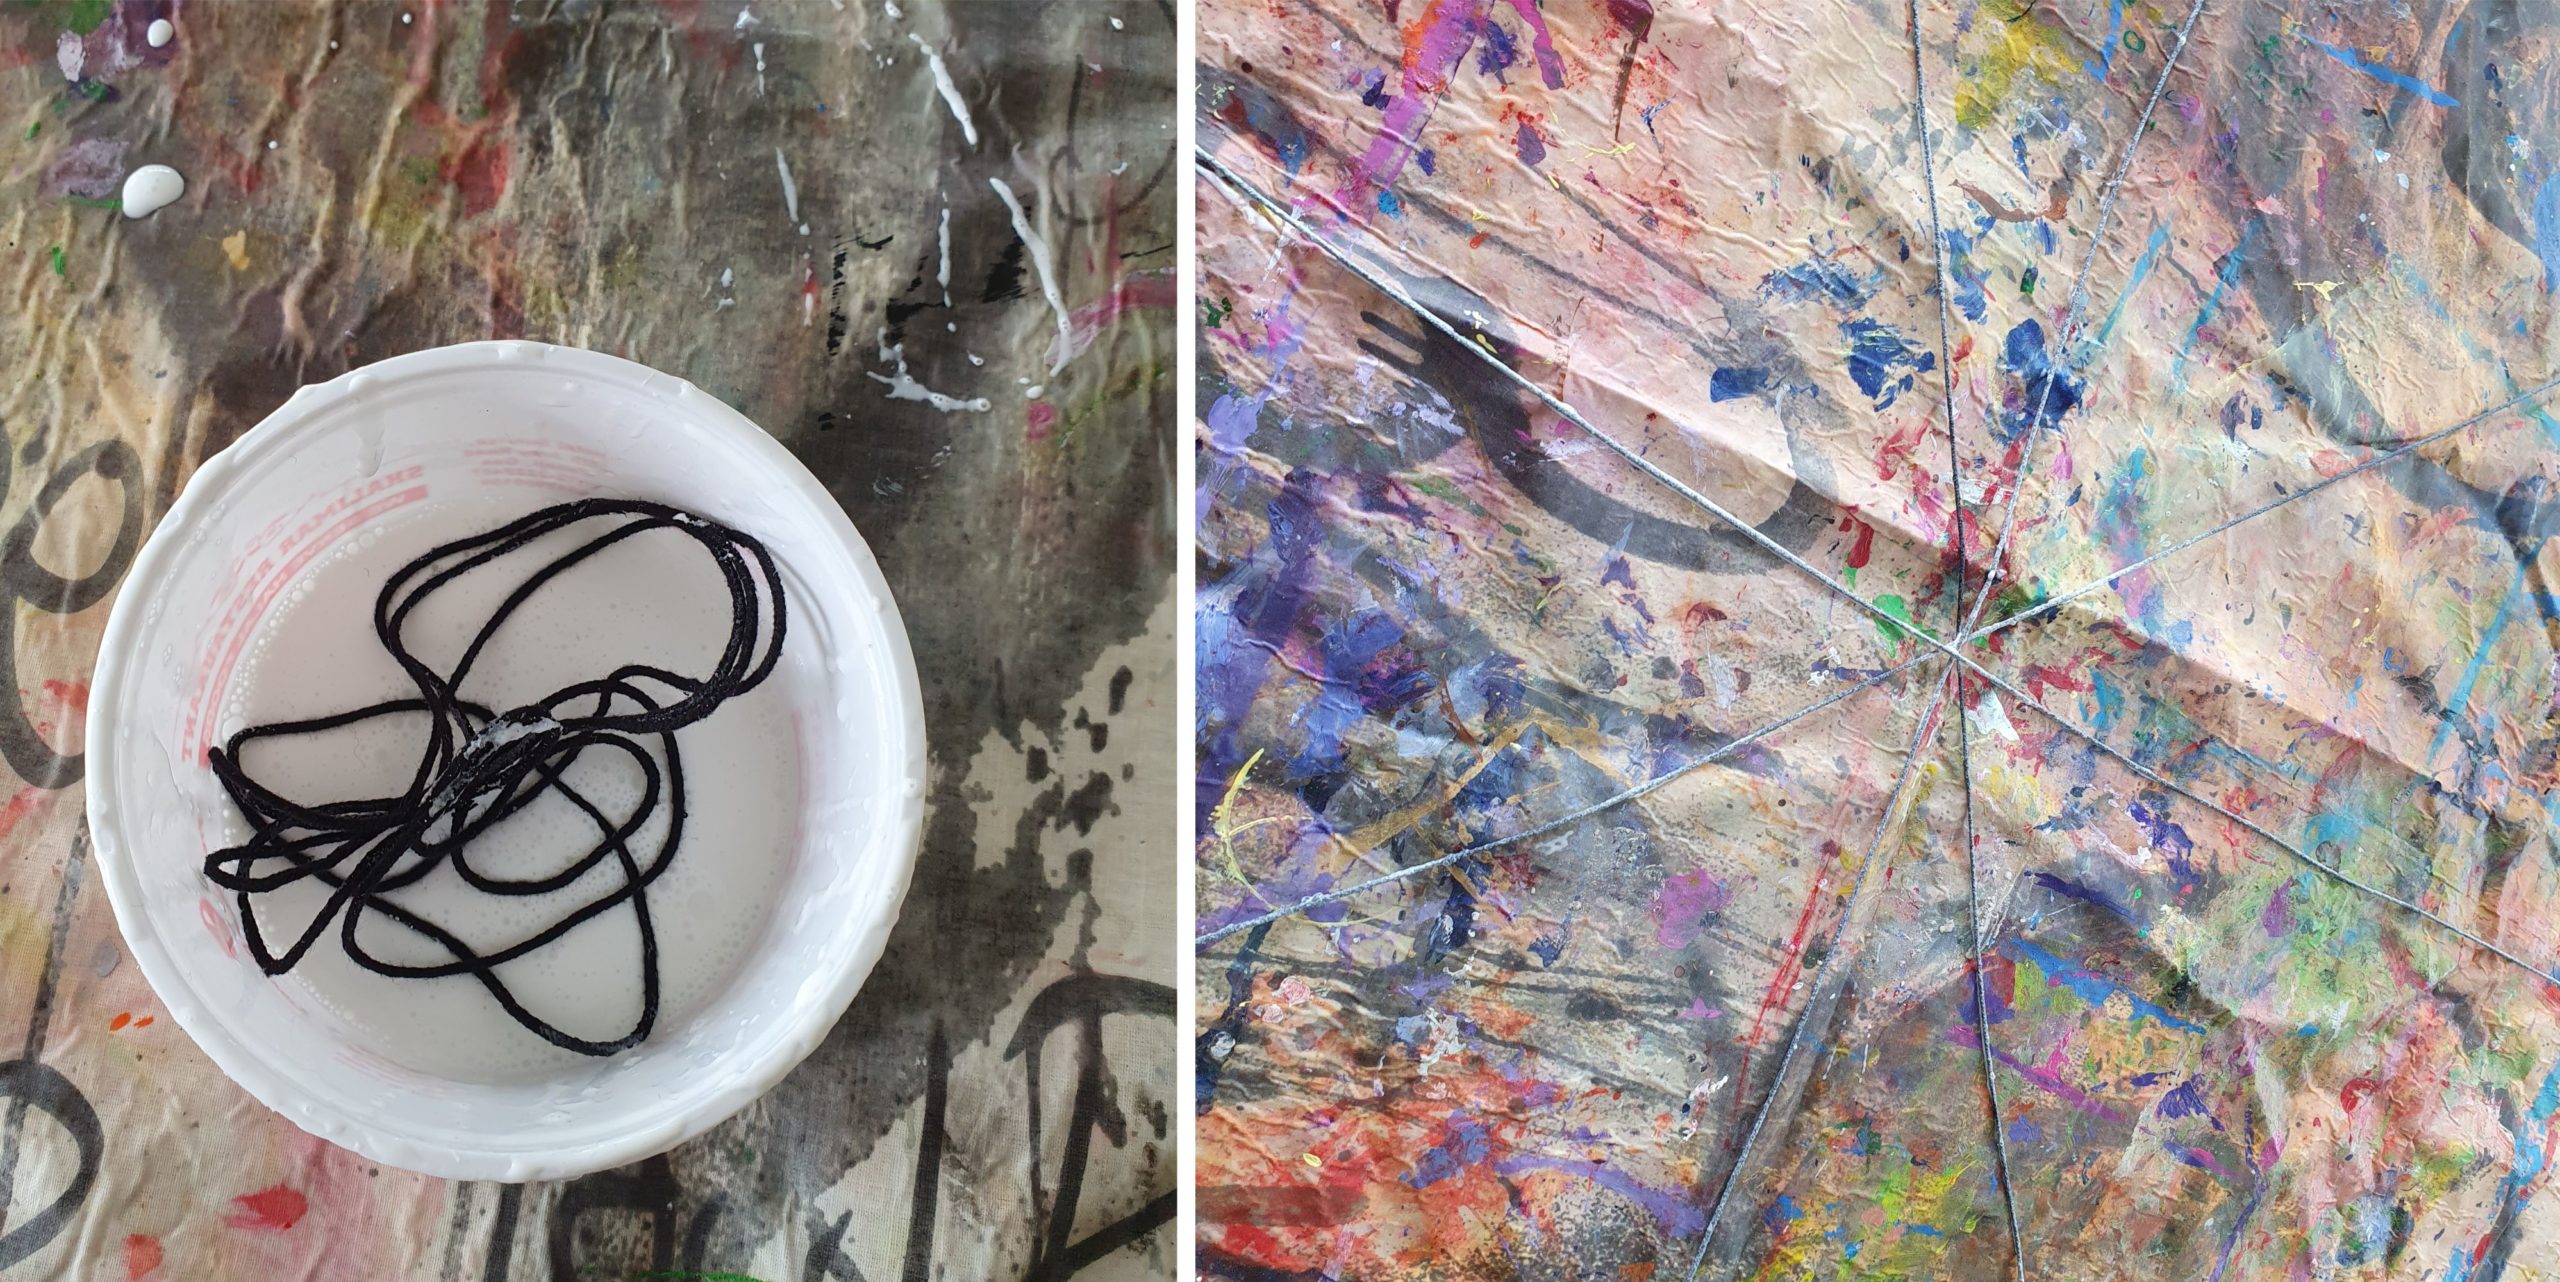

Cut 4 pieces of string (measuring about 150cm each) and dip them in the glue. Take off the excess glue by holding the string between two fingers while pulling the string out of the glue mixture. Lay the four strings on the craft mat to form the skeleton of the spider web like shown here.
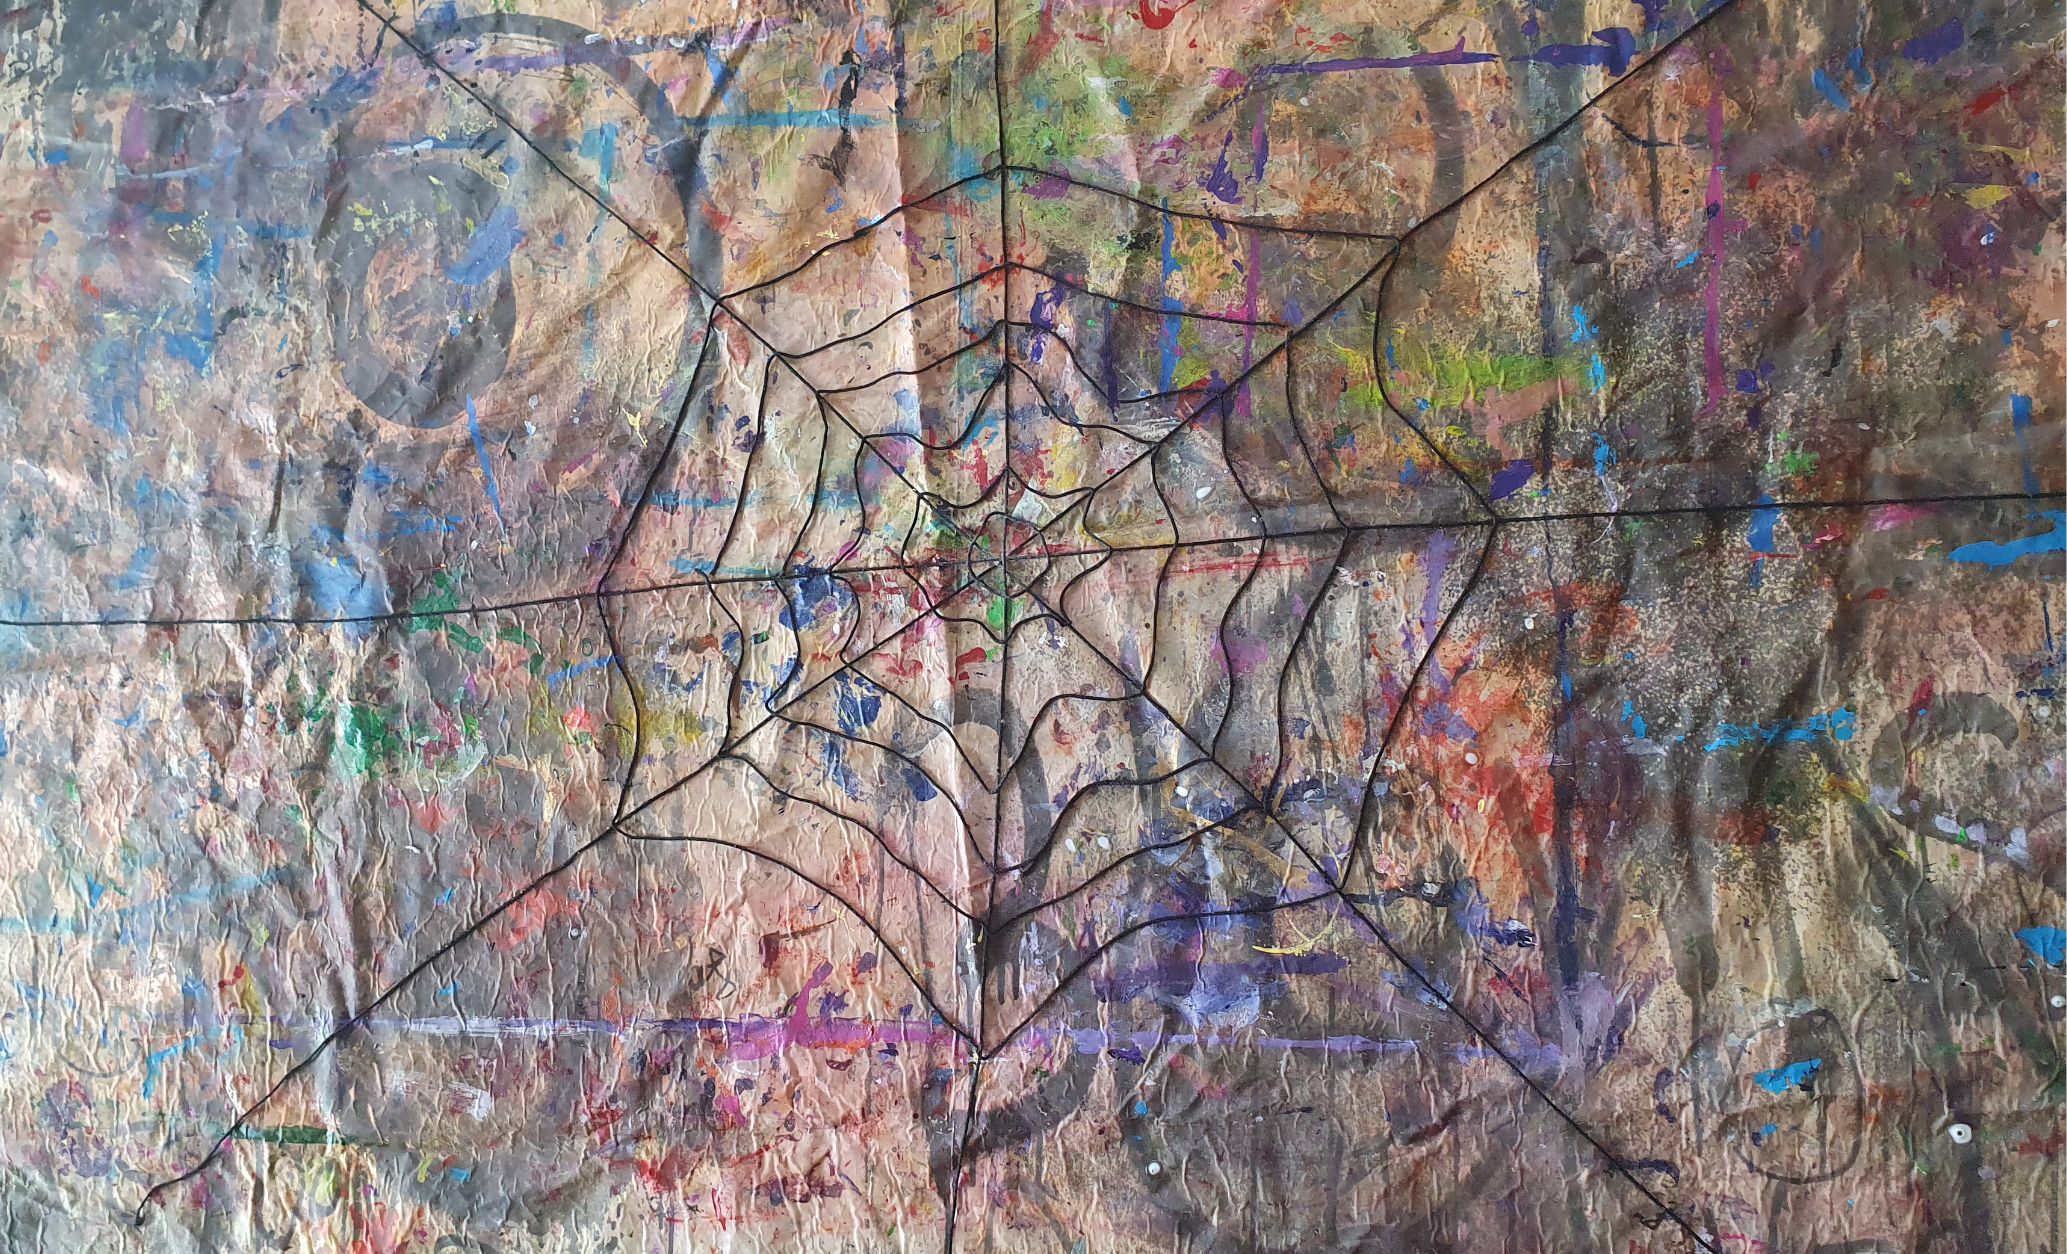

Continue to add pieces of cut string into the glue mixture and lay them on top of the spider web skeleton. Make sure the string bends a little inwards between each of the "skeleton strings". Let the glue dry completely before removing the spider web from the mat. The string is now harder and the web will stay in one place even when held vertically. If any of the joins come apart while removing it from the mat, fix it with glue or with a glue gun.
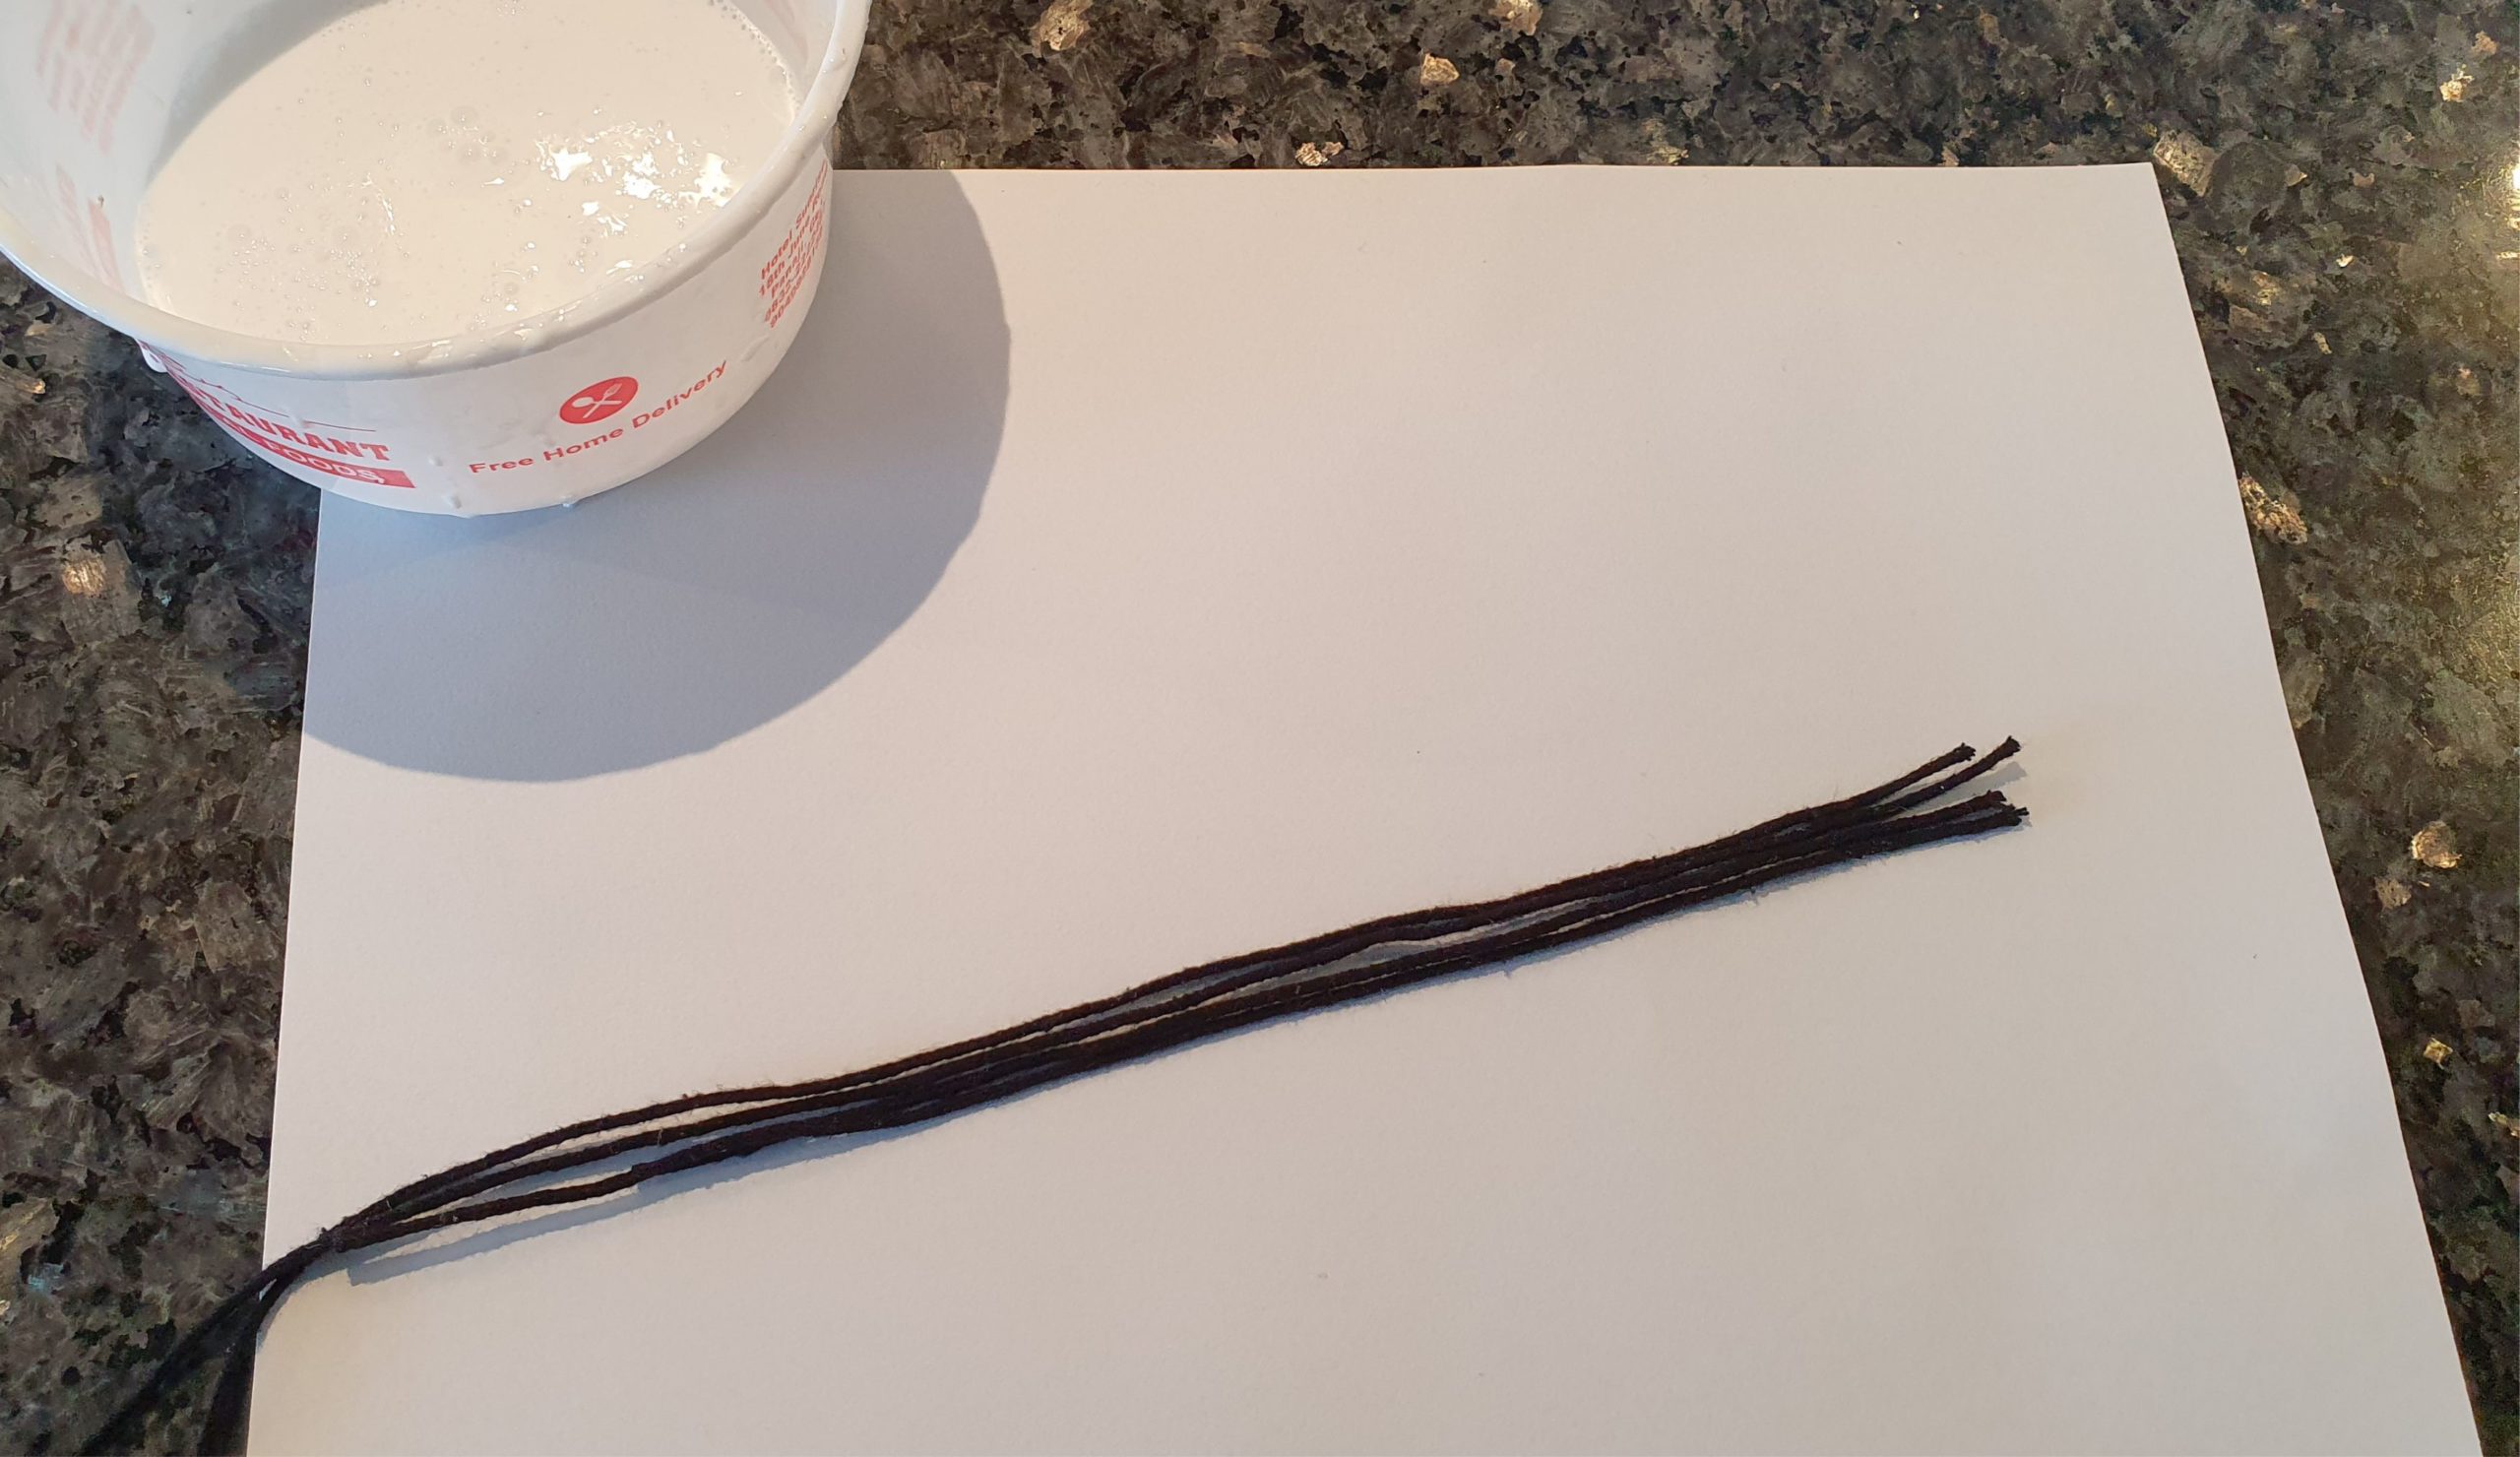

To make the string spiders, take 4 pieces of black string measuring about 10-15cm. Keep the glue mixture from before handy.
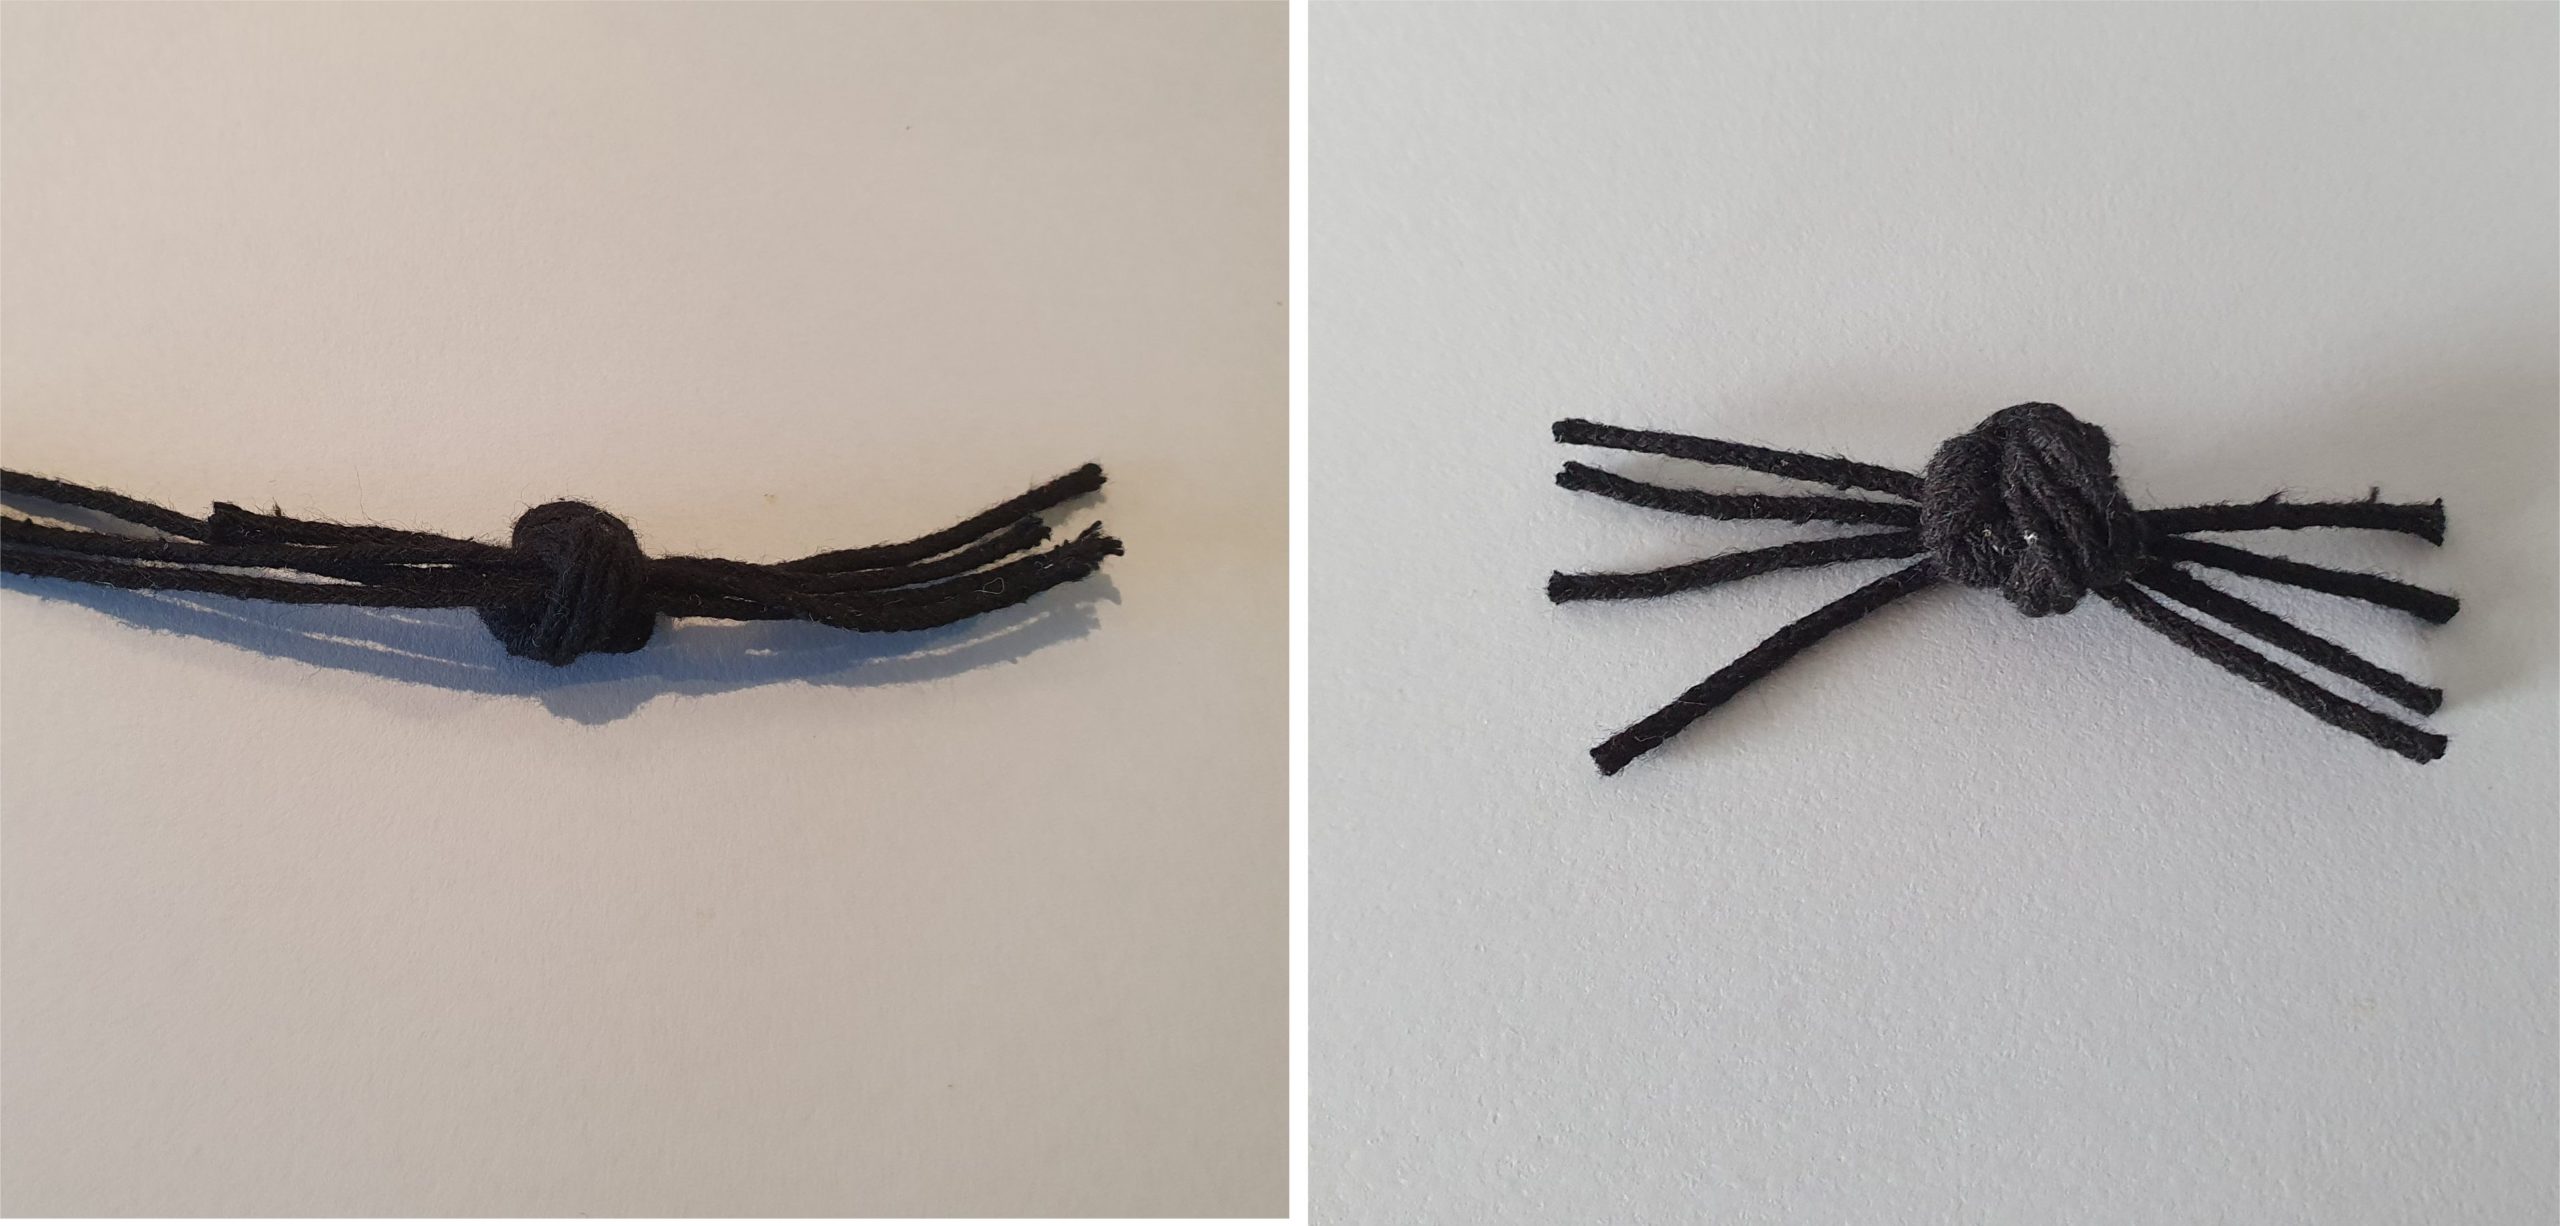

Using all 4 strings, make 4-5 knots on top of each other until the "body" is big enough. Cut the legs to the desired length.
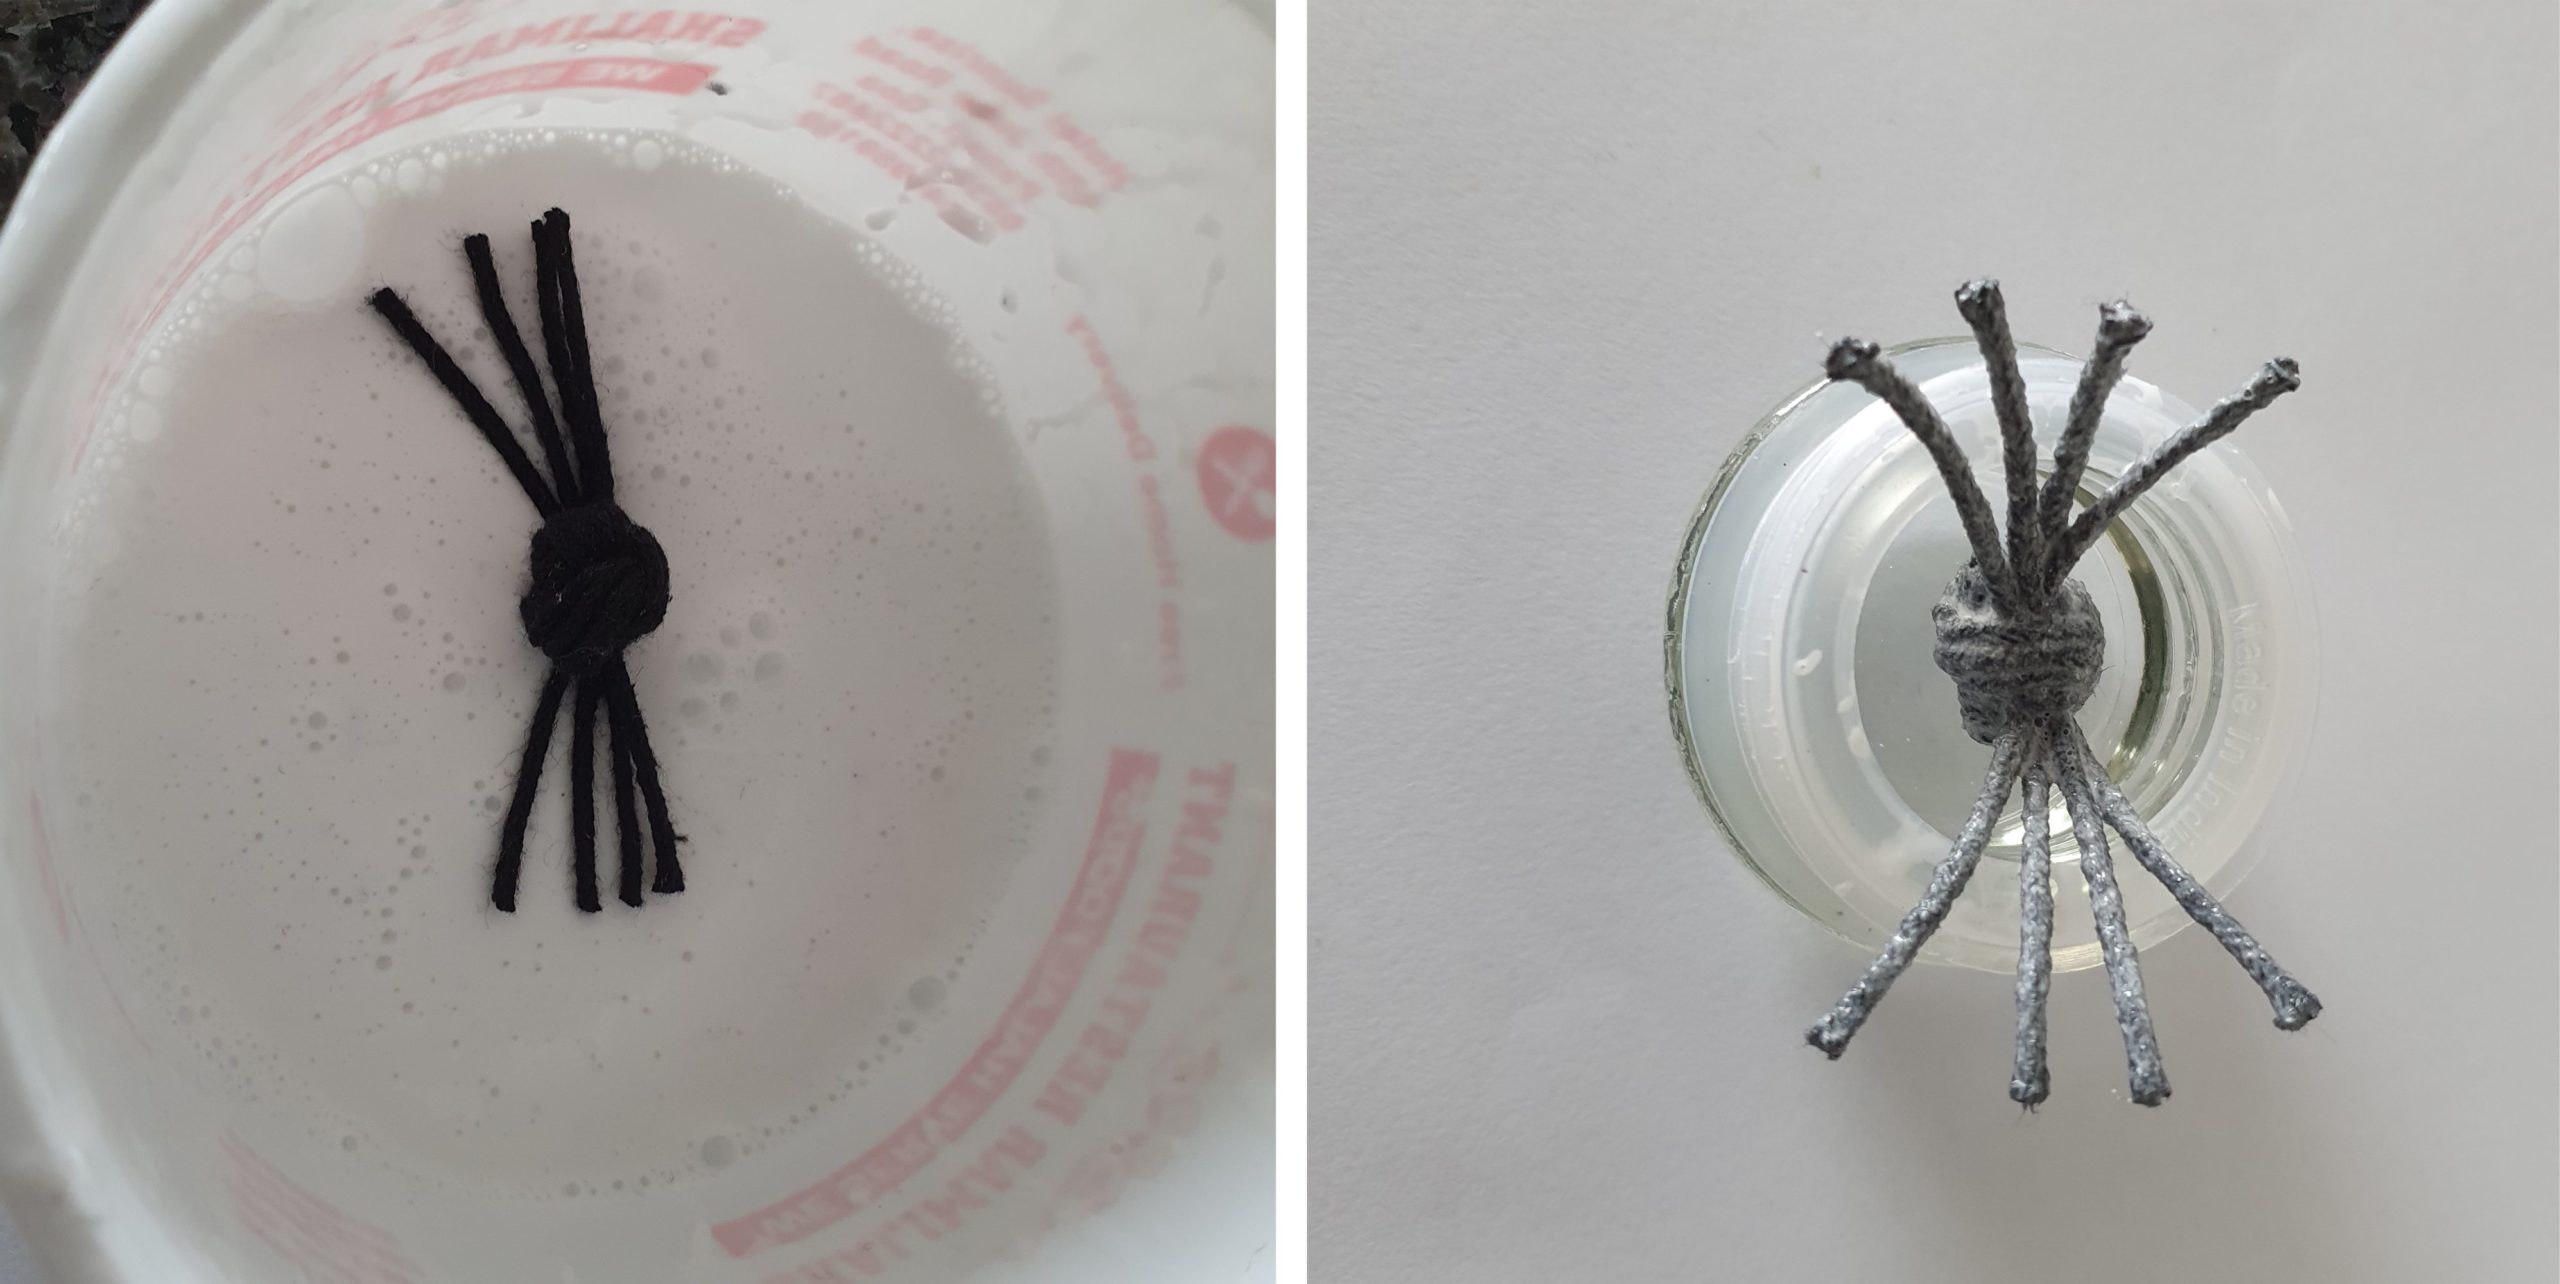

Dip the string spider into the glue mixture. Take off excess glue and let it dry on top of a small open jar or a glass jar lid. Try to find something where the body of the spider can be lower than the legs. Make sure to keep the legs in the position you want them to remain in after drying. Let the spider dry for min. 2-3 hours. You can add small googly eyes if you prefer or just keep it simple like I have done.
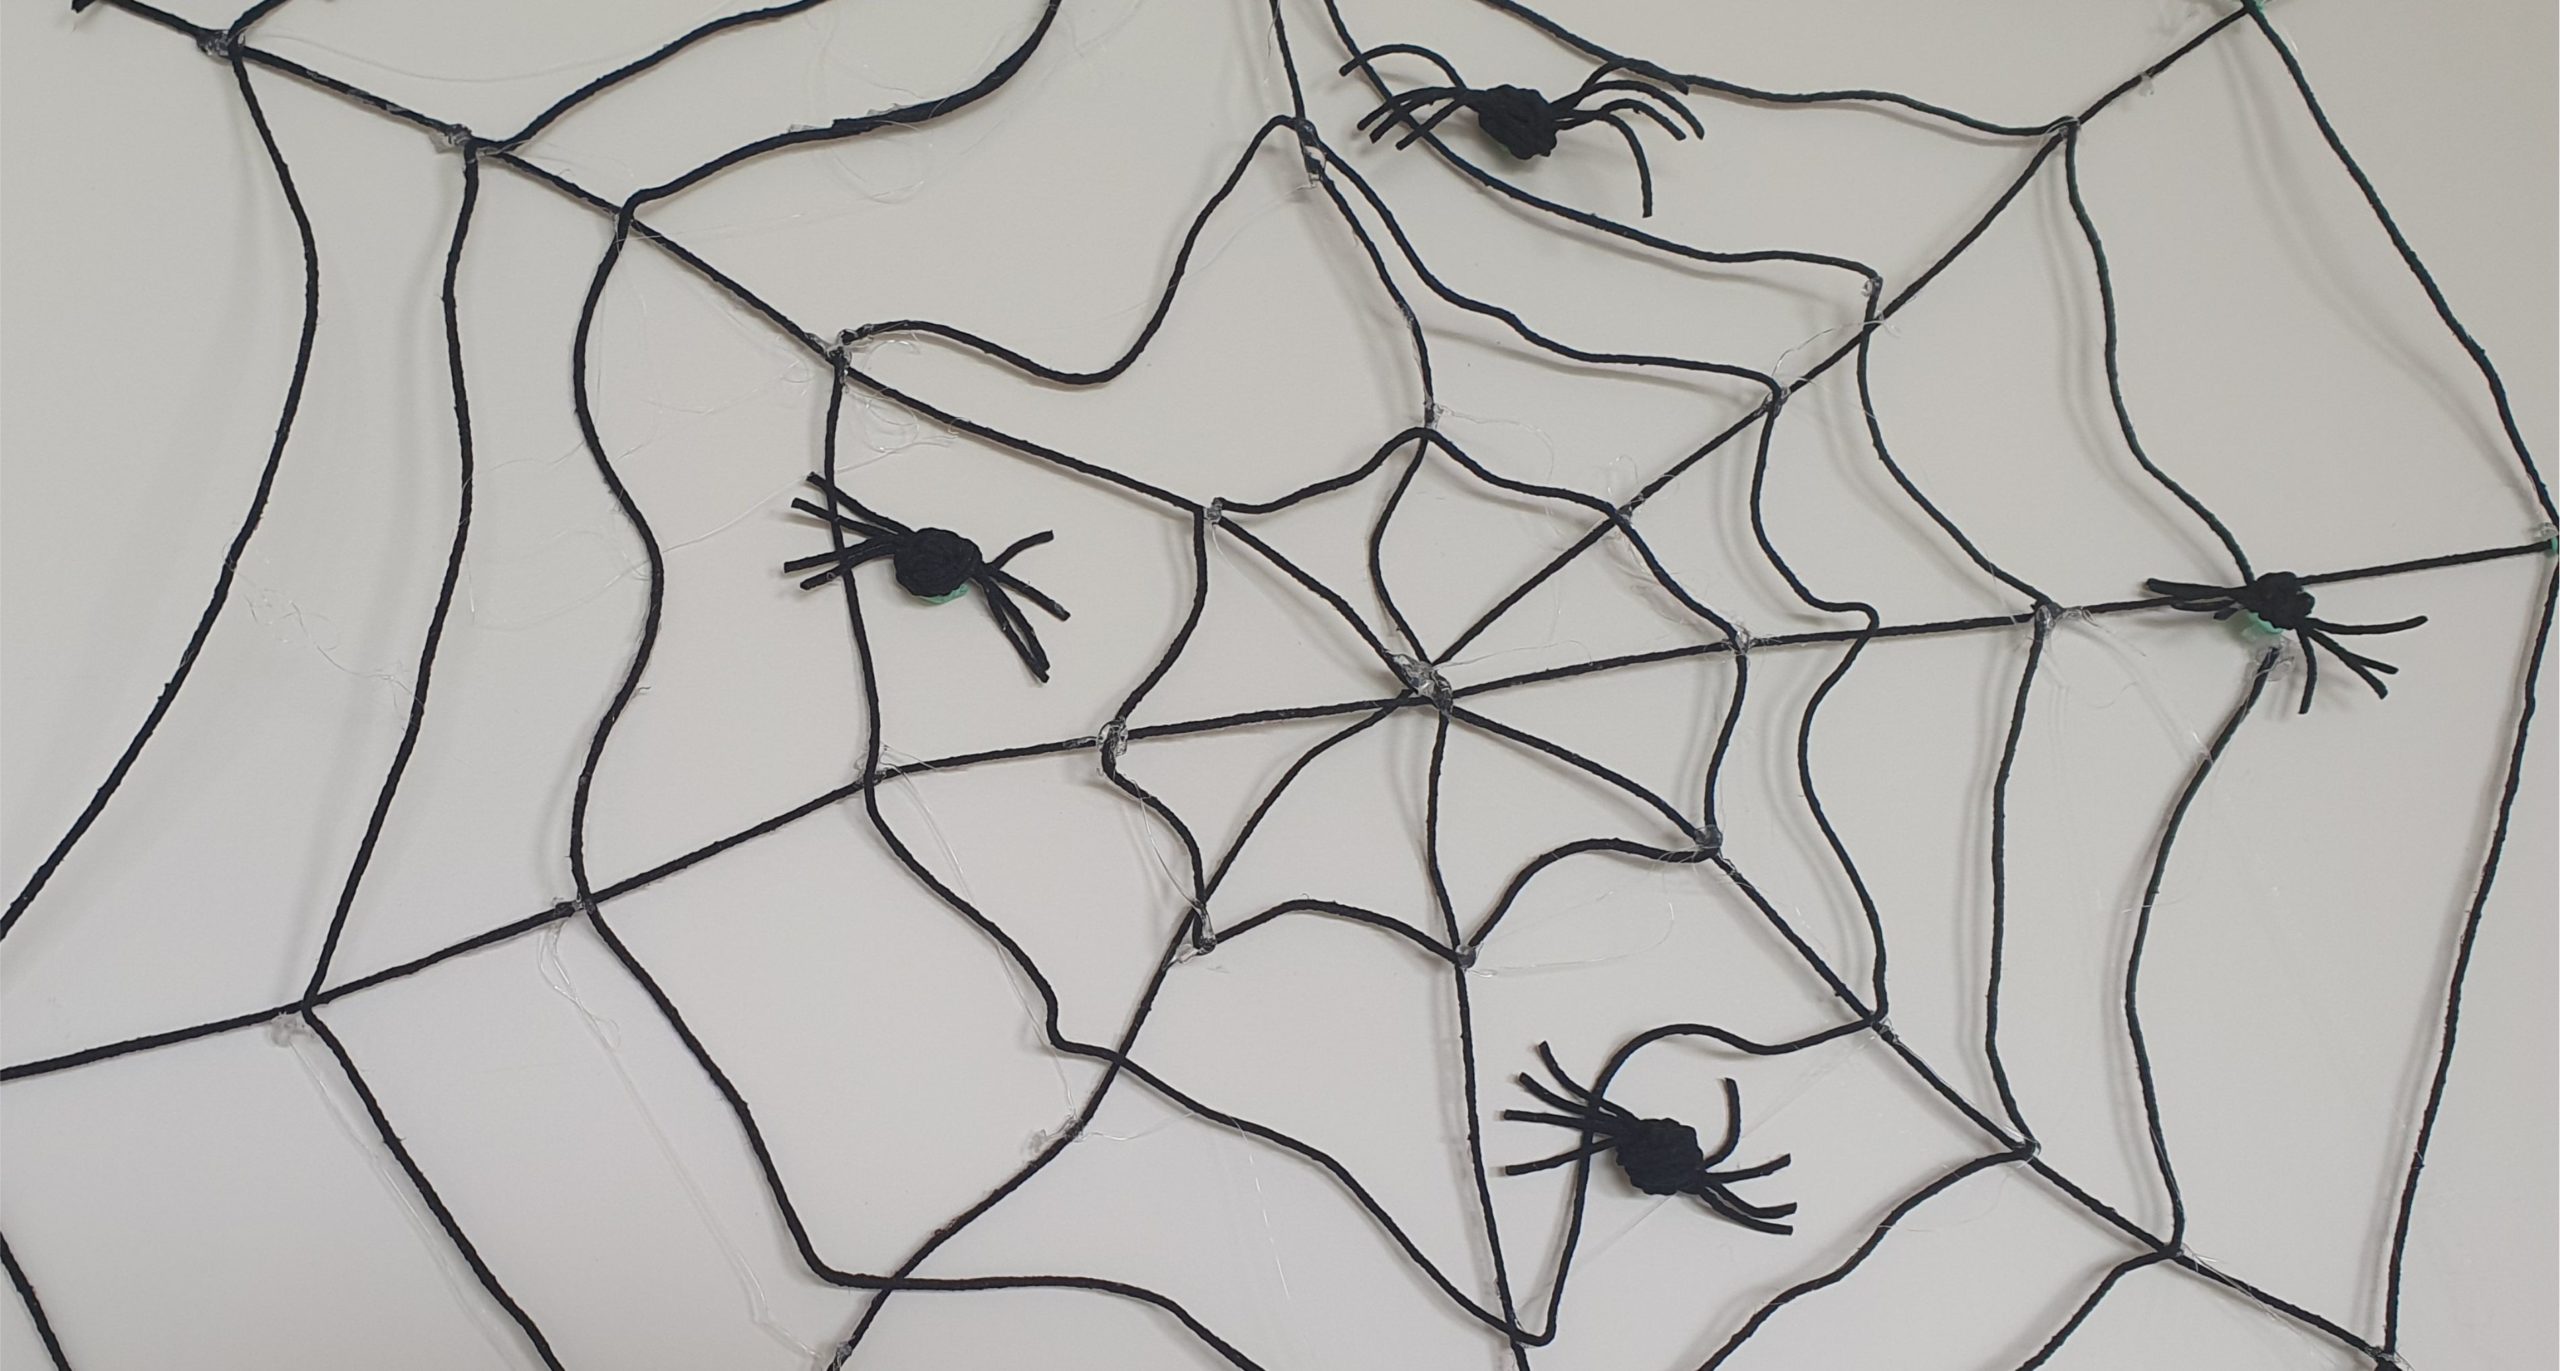

Hang the spider web and spiders over a chair or on the wall or door using blue tag for the edges. Easy Halloween decoration for very less that can be reused every year. Happy Halloween.




Leave a Review
You must be logged in to post a comment.