How To Make Your Own Scratch Cards

How to make your own scratch cards at home easy to do kids vouchers coupons gifts for kids
  • Prep Time
    10 min
  • Total Time
    10 min

I never knew it could be so easy to make my own personalized scratch cards or I would have started doing them years ago for weddings or anniversaries, for restaurant related marketing and generally just for fun. It’s a 10-minute job (spread over a day or so as the paint needs to dry between the layers) and it doesn’t require many materials -usually it can be done with stuff found around the house; paint, brush, cards and tape.

You can print the cards or just use handwritten ones on craft paper -either way will work. Make sure to use 250gsm paper as a minimum to give it the authenticity of a real scratch card.

I have made these scratch cards for the kids’ advent calendars this year to make it extra fun and exciting -without any added cost as an extra bonus. I am positive that the kids will LOVE them! You can download this Christmas scratch card coupons for kids PDF template to make it easier or you can make your own. This template is of course without my kids’ names and I have added a few blank ones too, so you can write your own special message.

This is the one for the golden tickets: Golden Ticket Scratch Cards. The biggest amount they can win is Rs50 (and most of them is Rs10) but I think the amount won’t matter as they will enjoy the excitement of scratching and winning more than the actual amount. I have made more of the Christmas coupons and a few golden tickets for each of my kids. 

If you are making more than one scratch card, be sure to have them all ready so you can follow the steps for all the cards at once. I made 24 scratch cards in total and it took about 1 hour in total including the taping and the painting.

You can choose to use painters tape around the border (recommended for impatient people -like me!) or just paint neatly inside the rectangle. The painters tape is a bit of a hassle to put on, but will allow you to paint quicker in a thicker layer without worrying about borders and such like. You will need 2 to 3 coats of the paint on each card depending on the colour of the message and the colour of your chosen paint.

Hope you have fun with this. Merry Christmas. 

How to make your own scratch cards at home easy to do kids vouchers coupons gifts for kids

Ingredients

    Directions

    Step1
    How to make your own scratch cards at home easy to do kids vouchers coupons gifts for kids

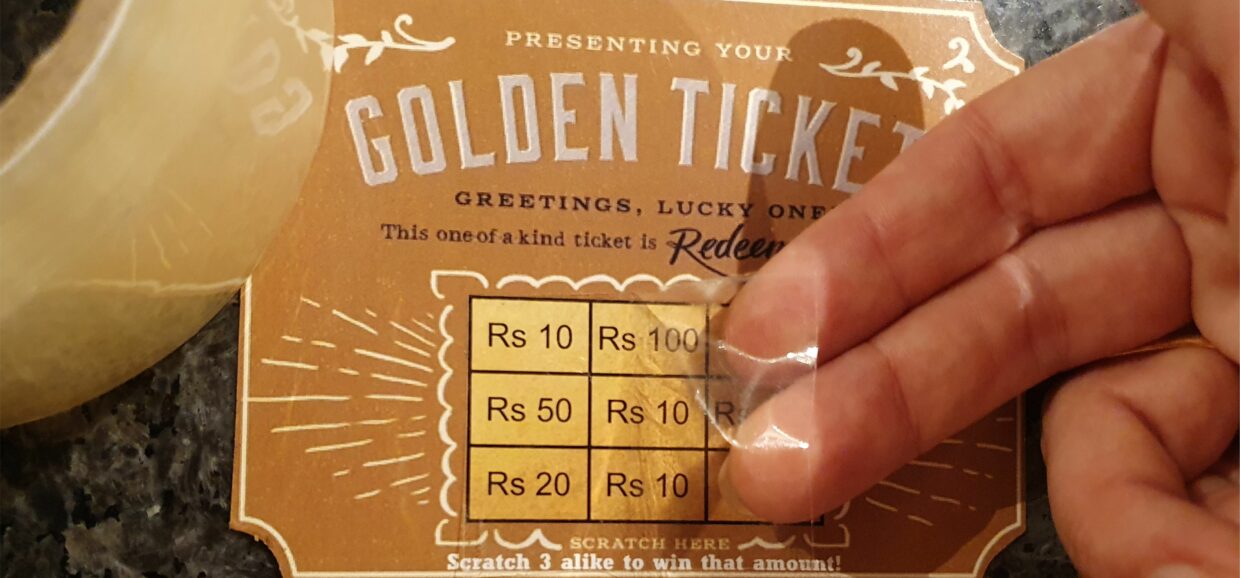
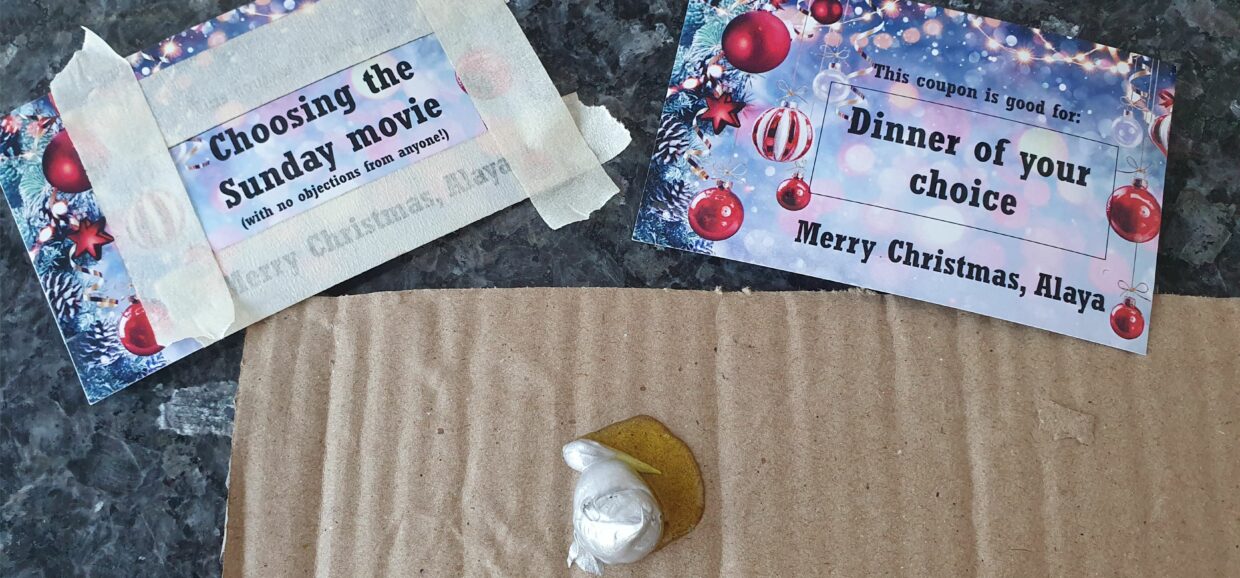
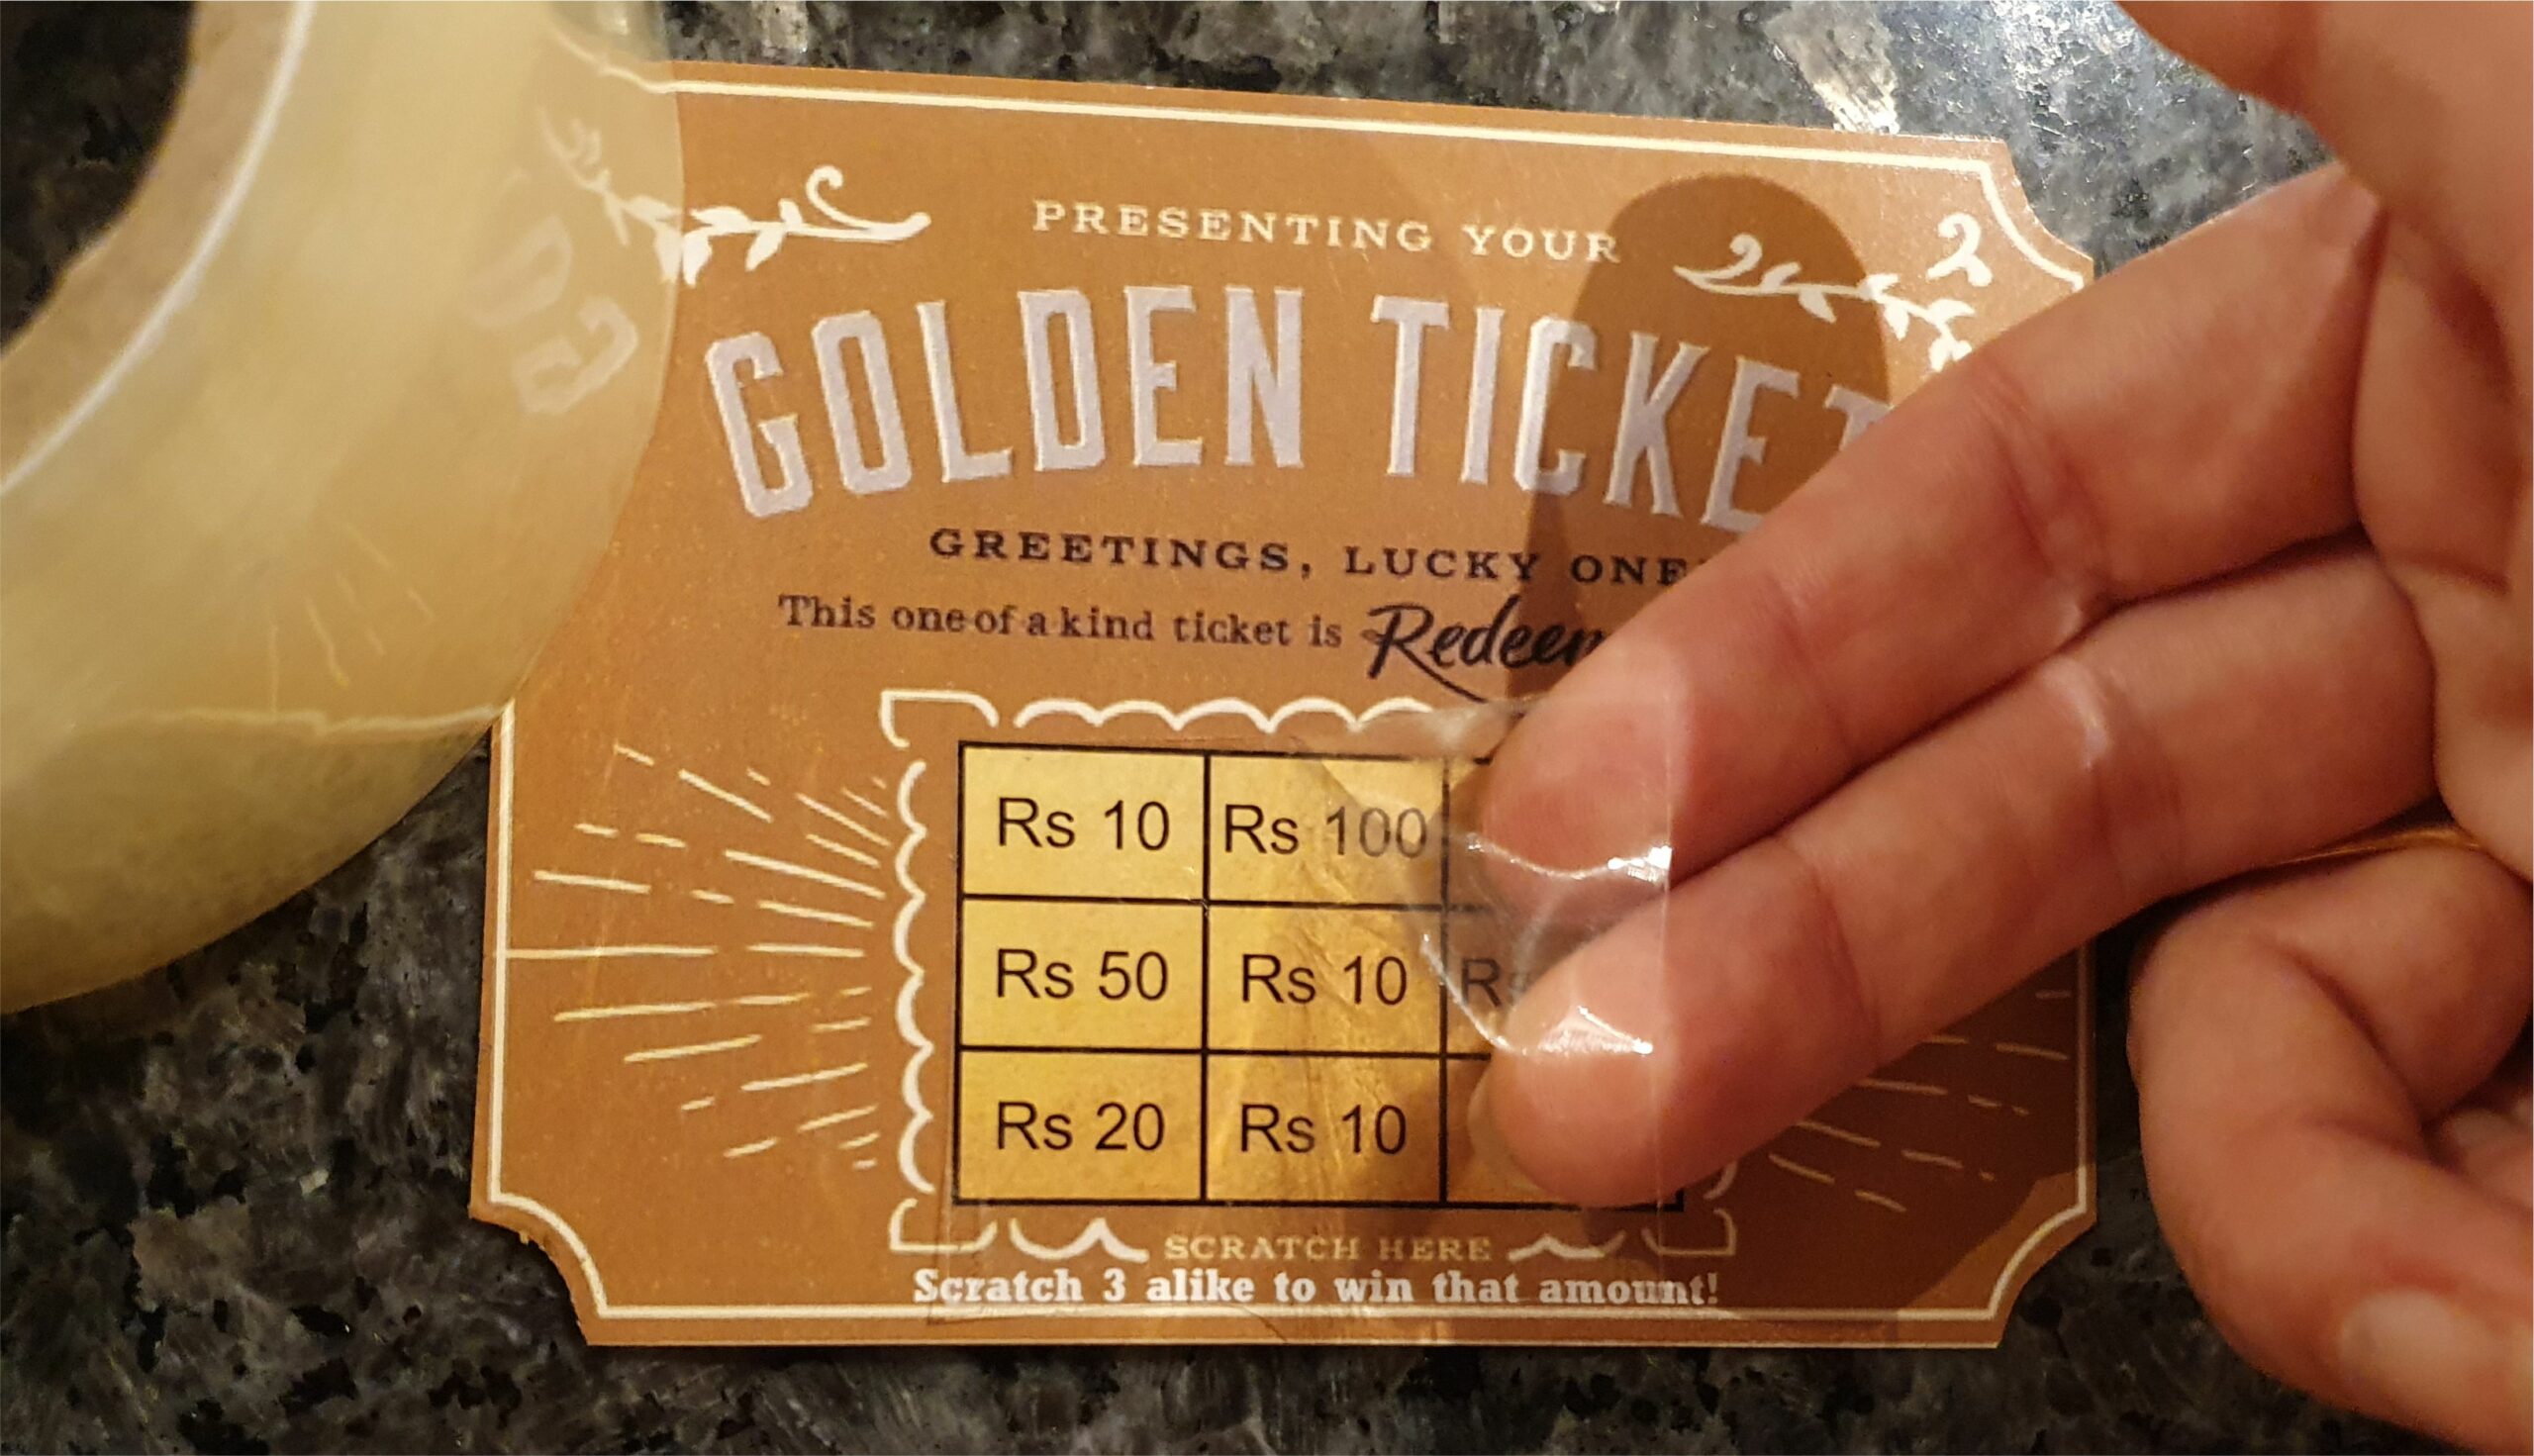
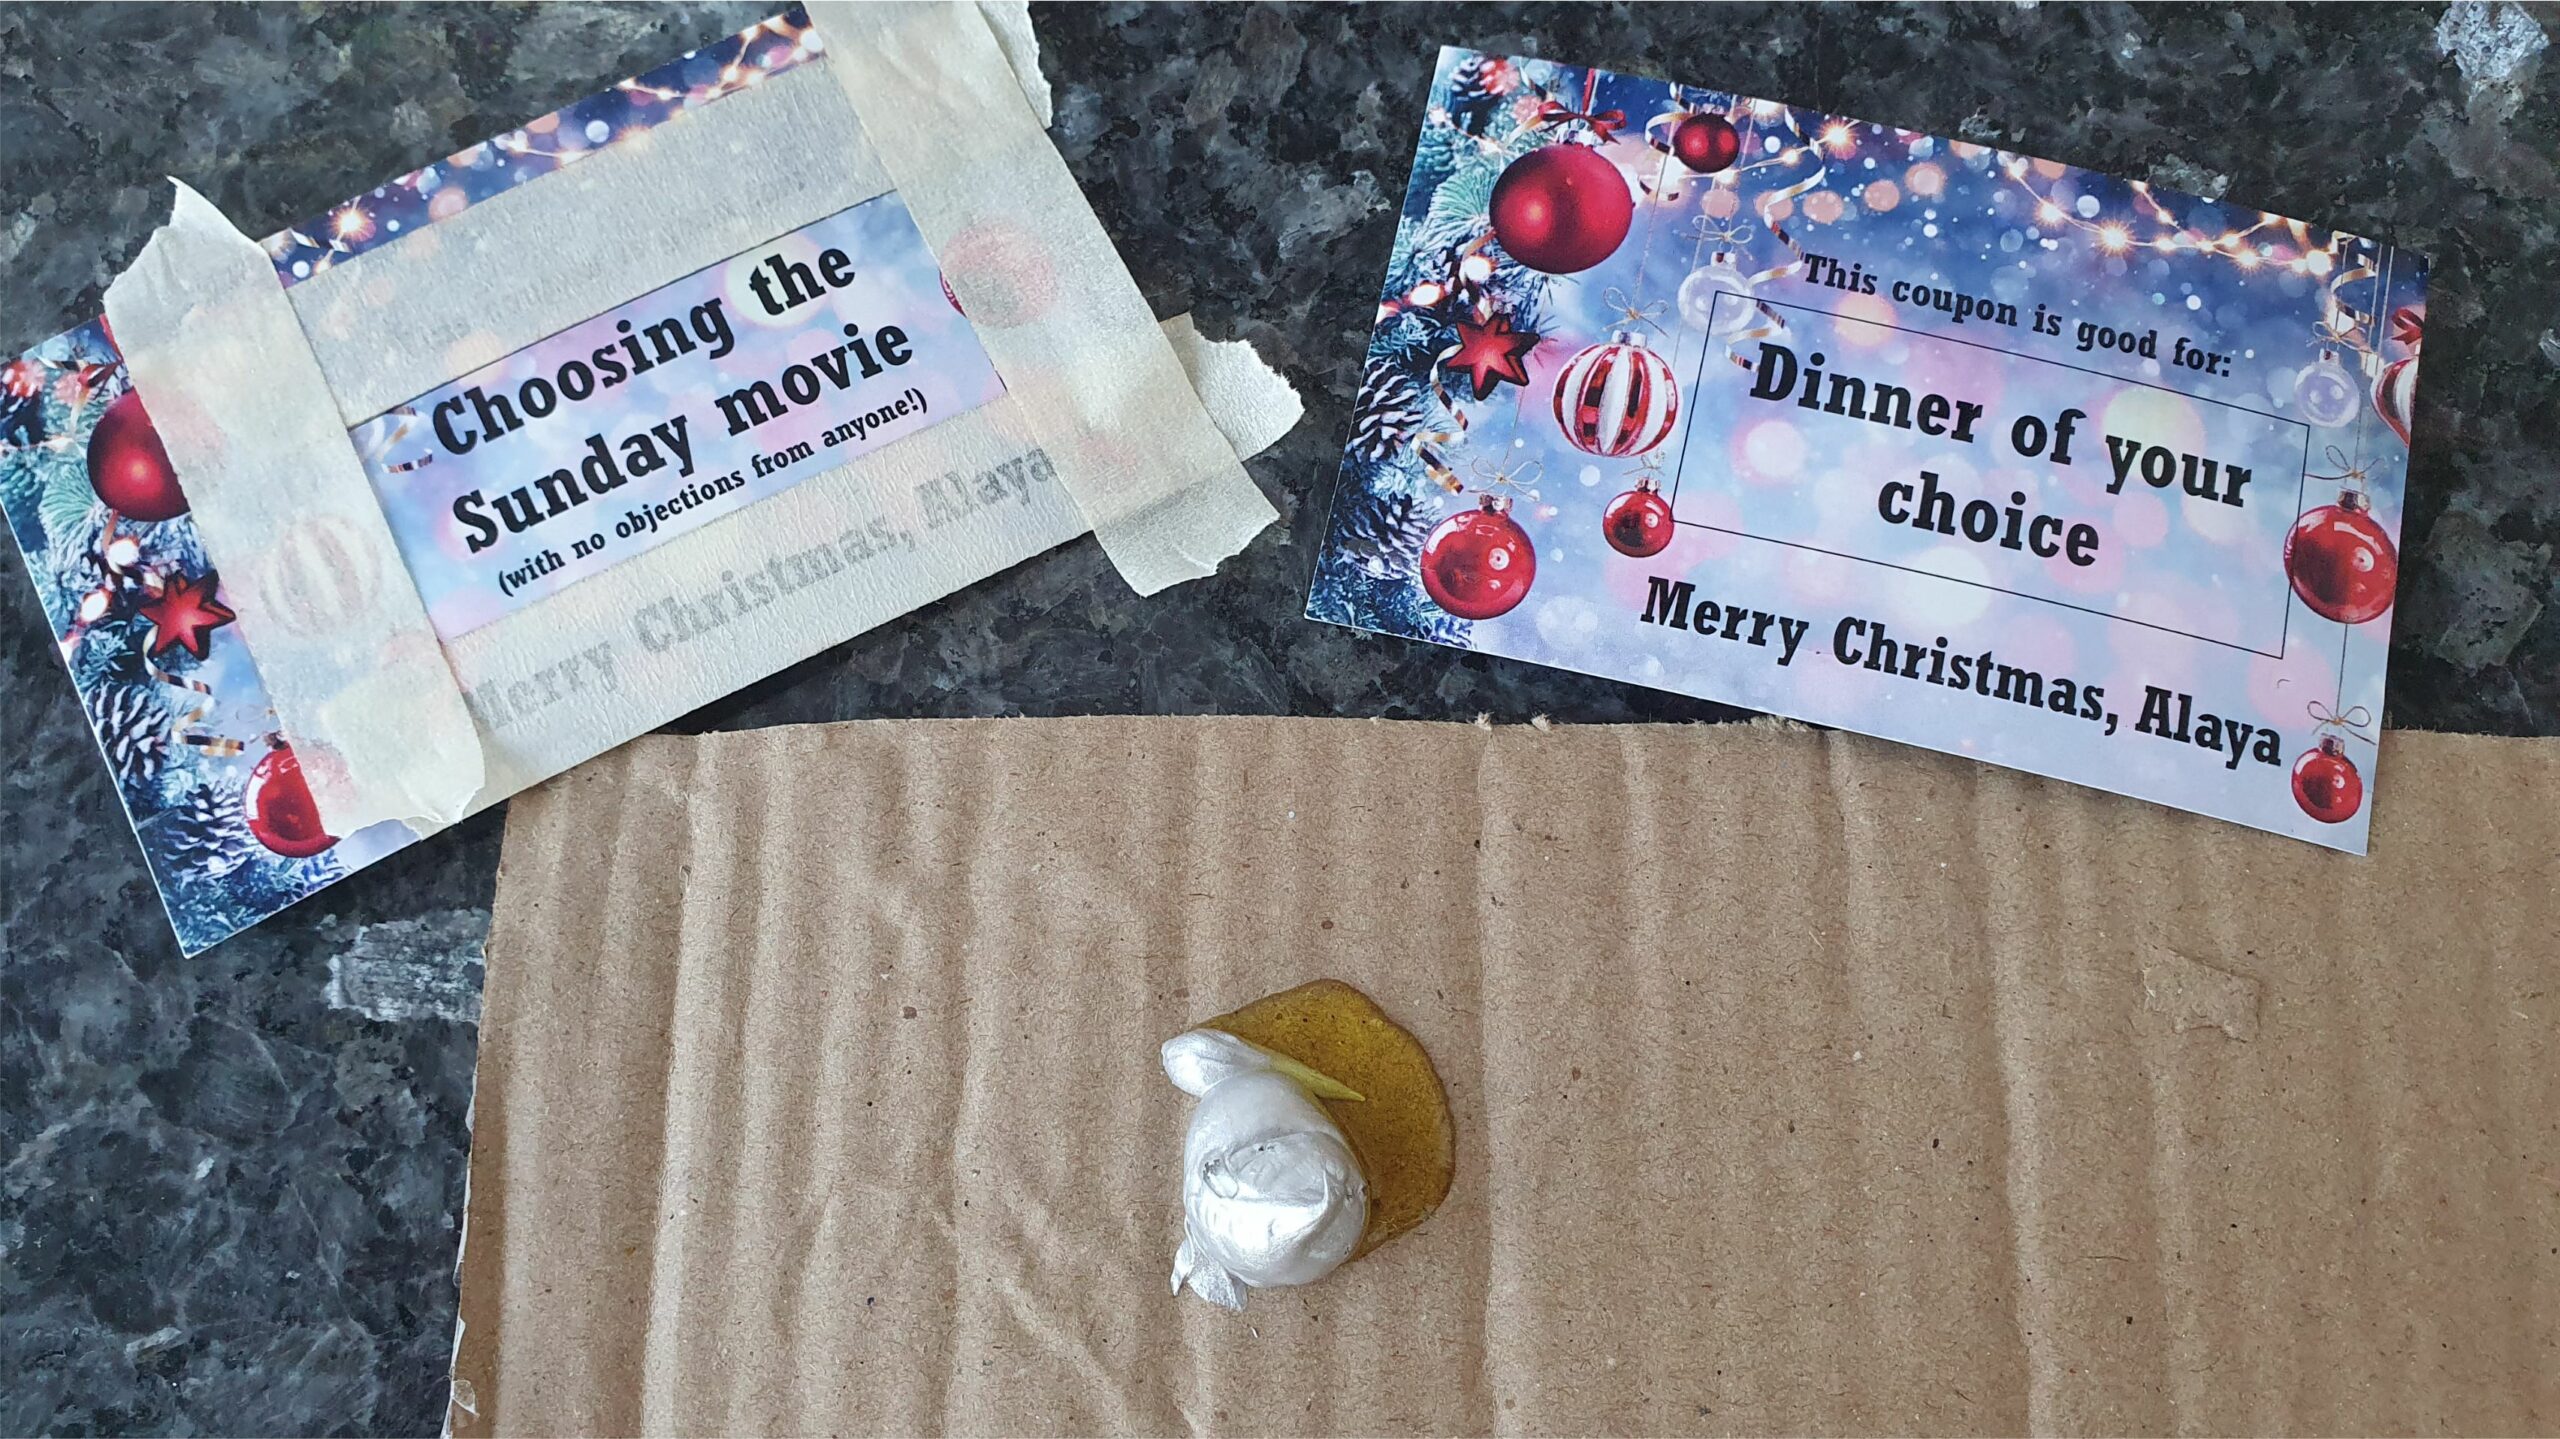
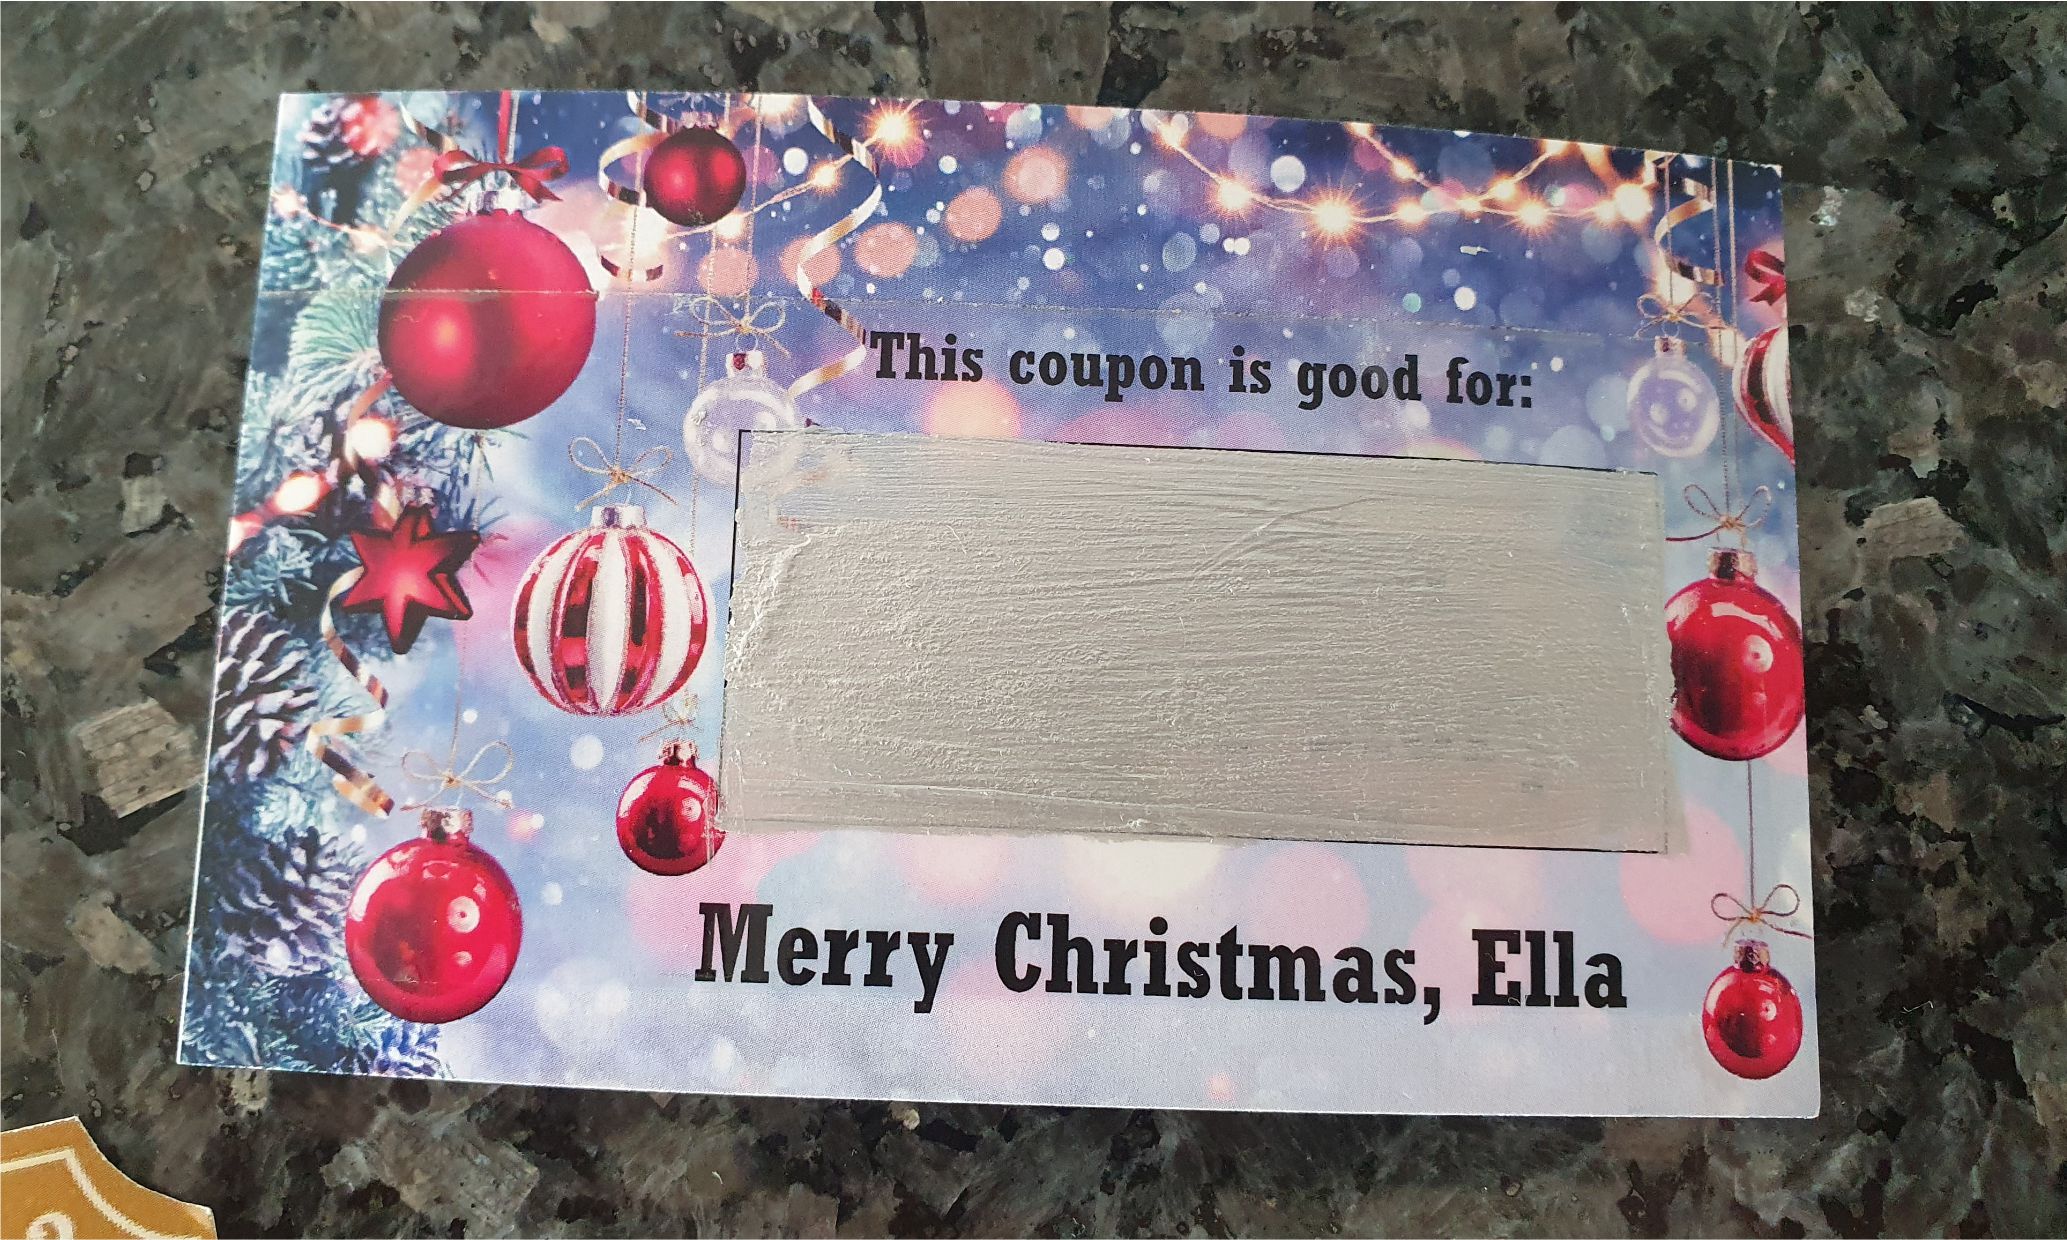
    Cover the secret message or voucher with transparent tape. I used a thick roll to make it easier but any width will work. Make sure the entire message is covered. It doesn't matter if the tape is covering more than the message. It will not be seen later.

    Step2
    How to make your own scratch cards at home easy to do kids vouchers coupons gifts for kids

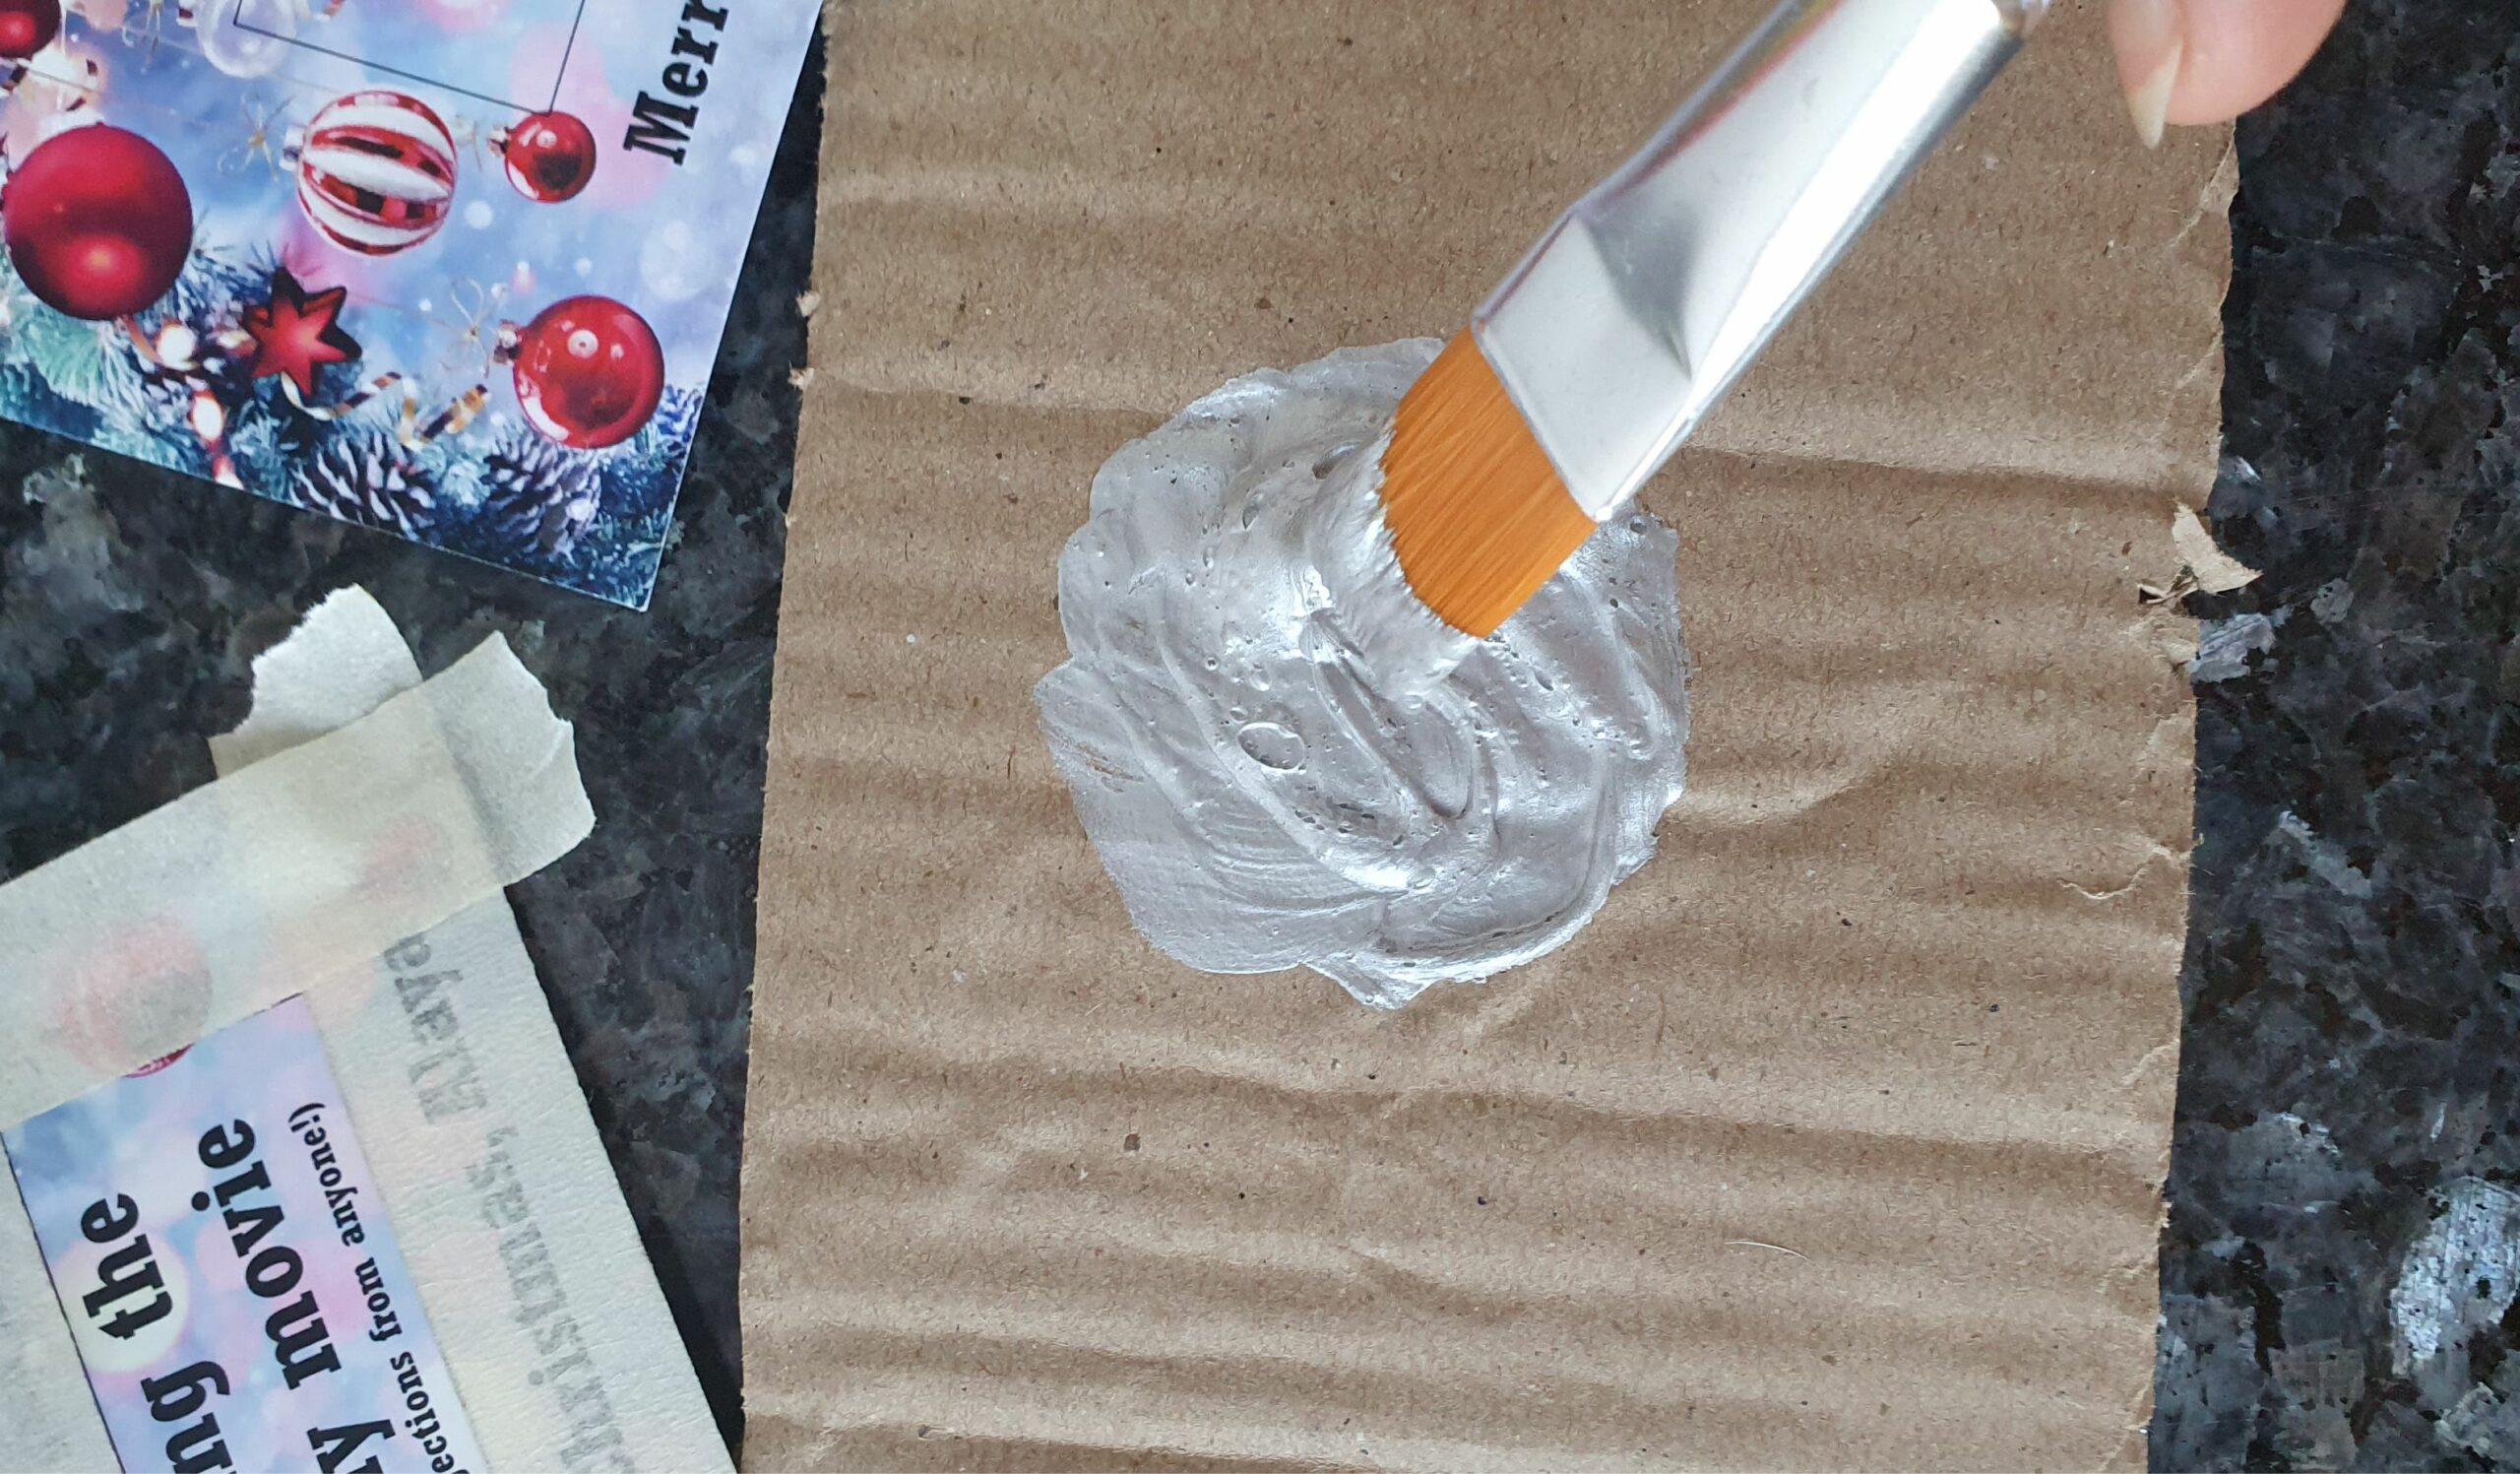
    If you prefer to paint the scratch cards quickly, use painters tape around the edges. It may take a little longer to add the tape, but you won't have to worry about neatness later. Mix the dishwash detergent and paint in a bowl or on a piece of cardboard. The measurement is about 2 detergent to 3 paint.

    Step3
    How to make your own scratch cards at home easy to do kids vouchers coupons gifts for kids

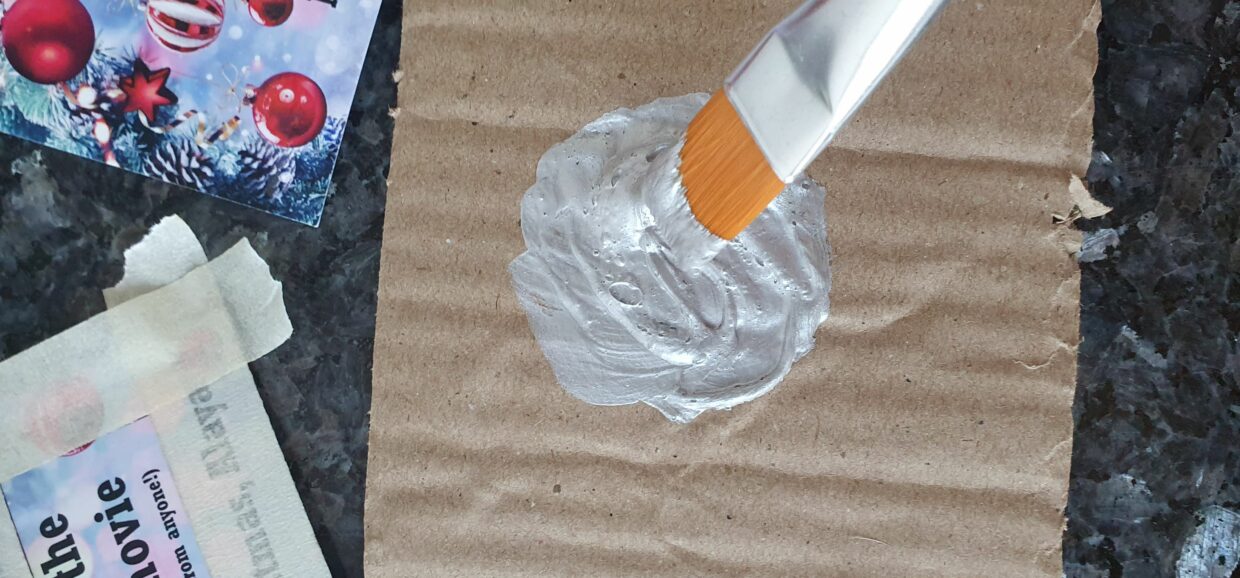
    Mix well. The paint will bubble a bit like this.

    Step4
    How to make your own scratch cards at home easy to do kids vouchers coupons gifts for kids

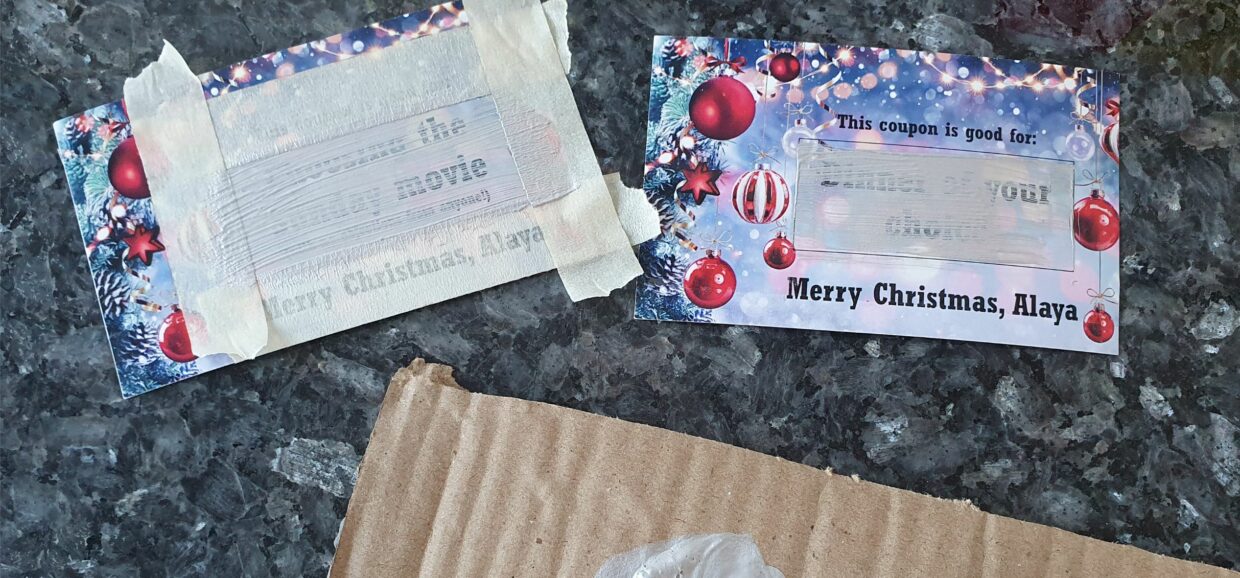
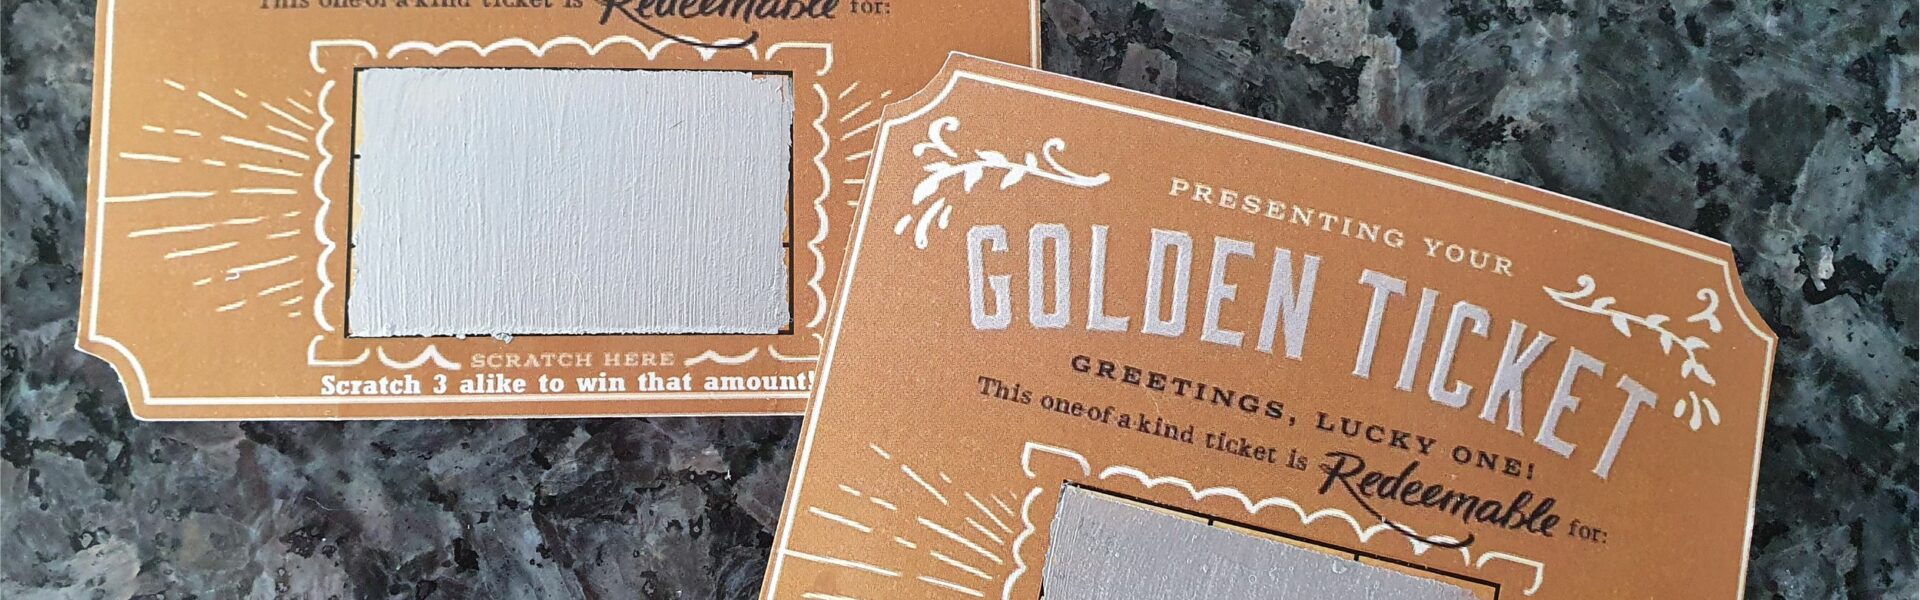
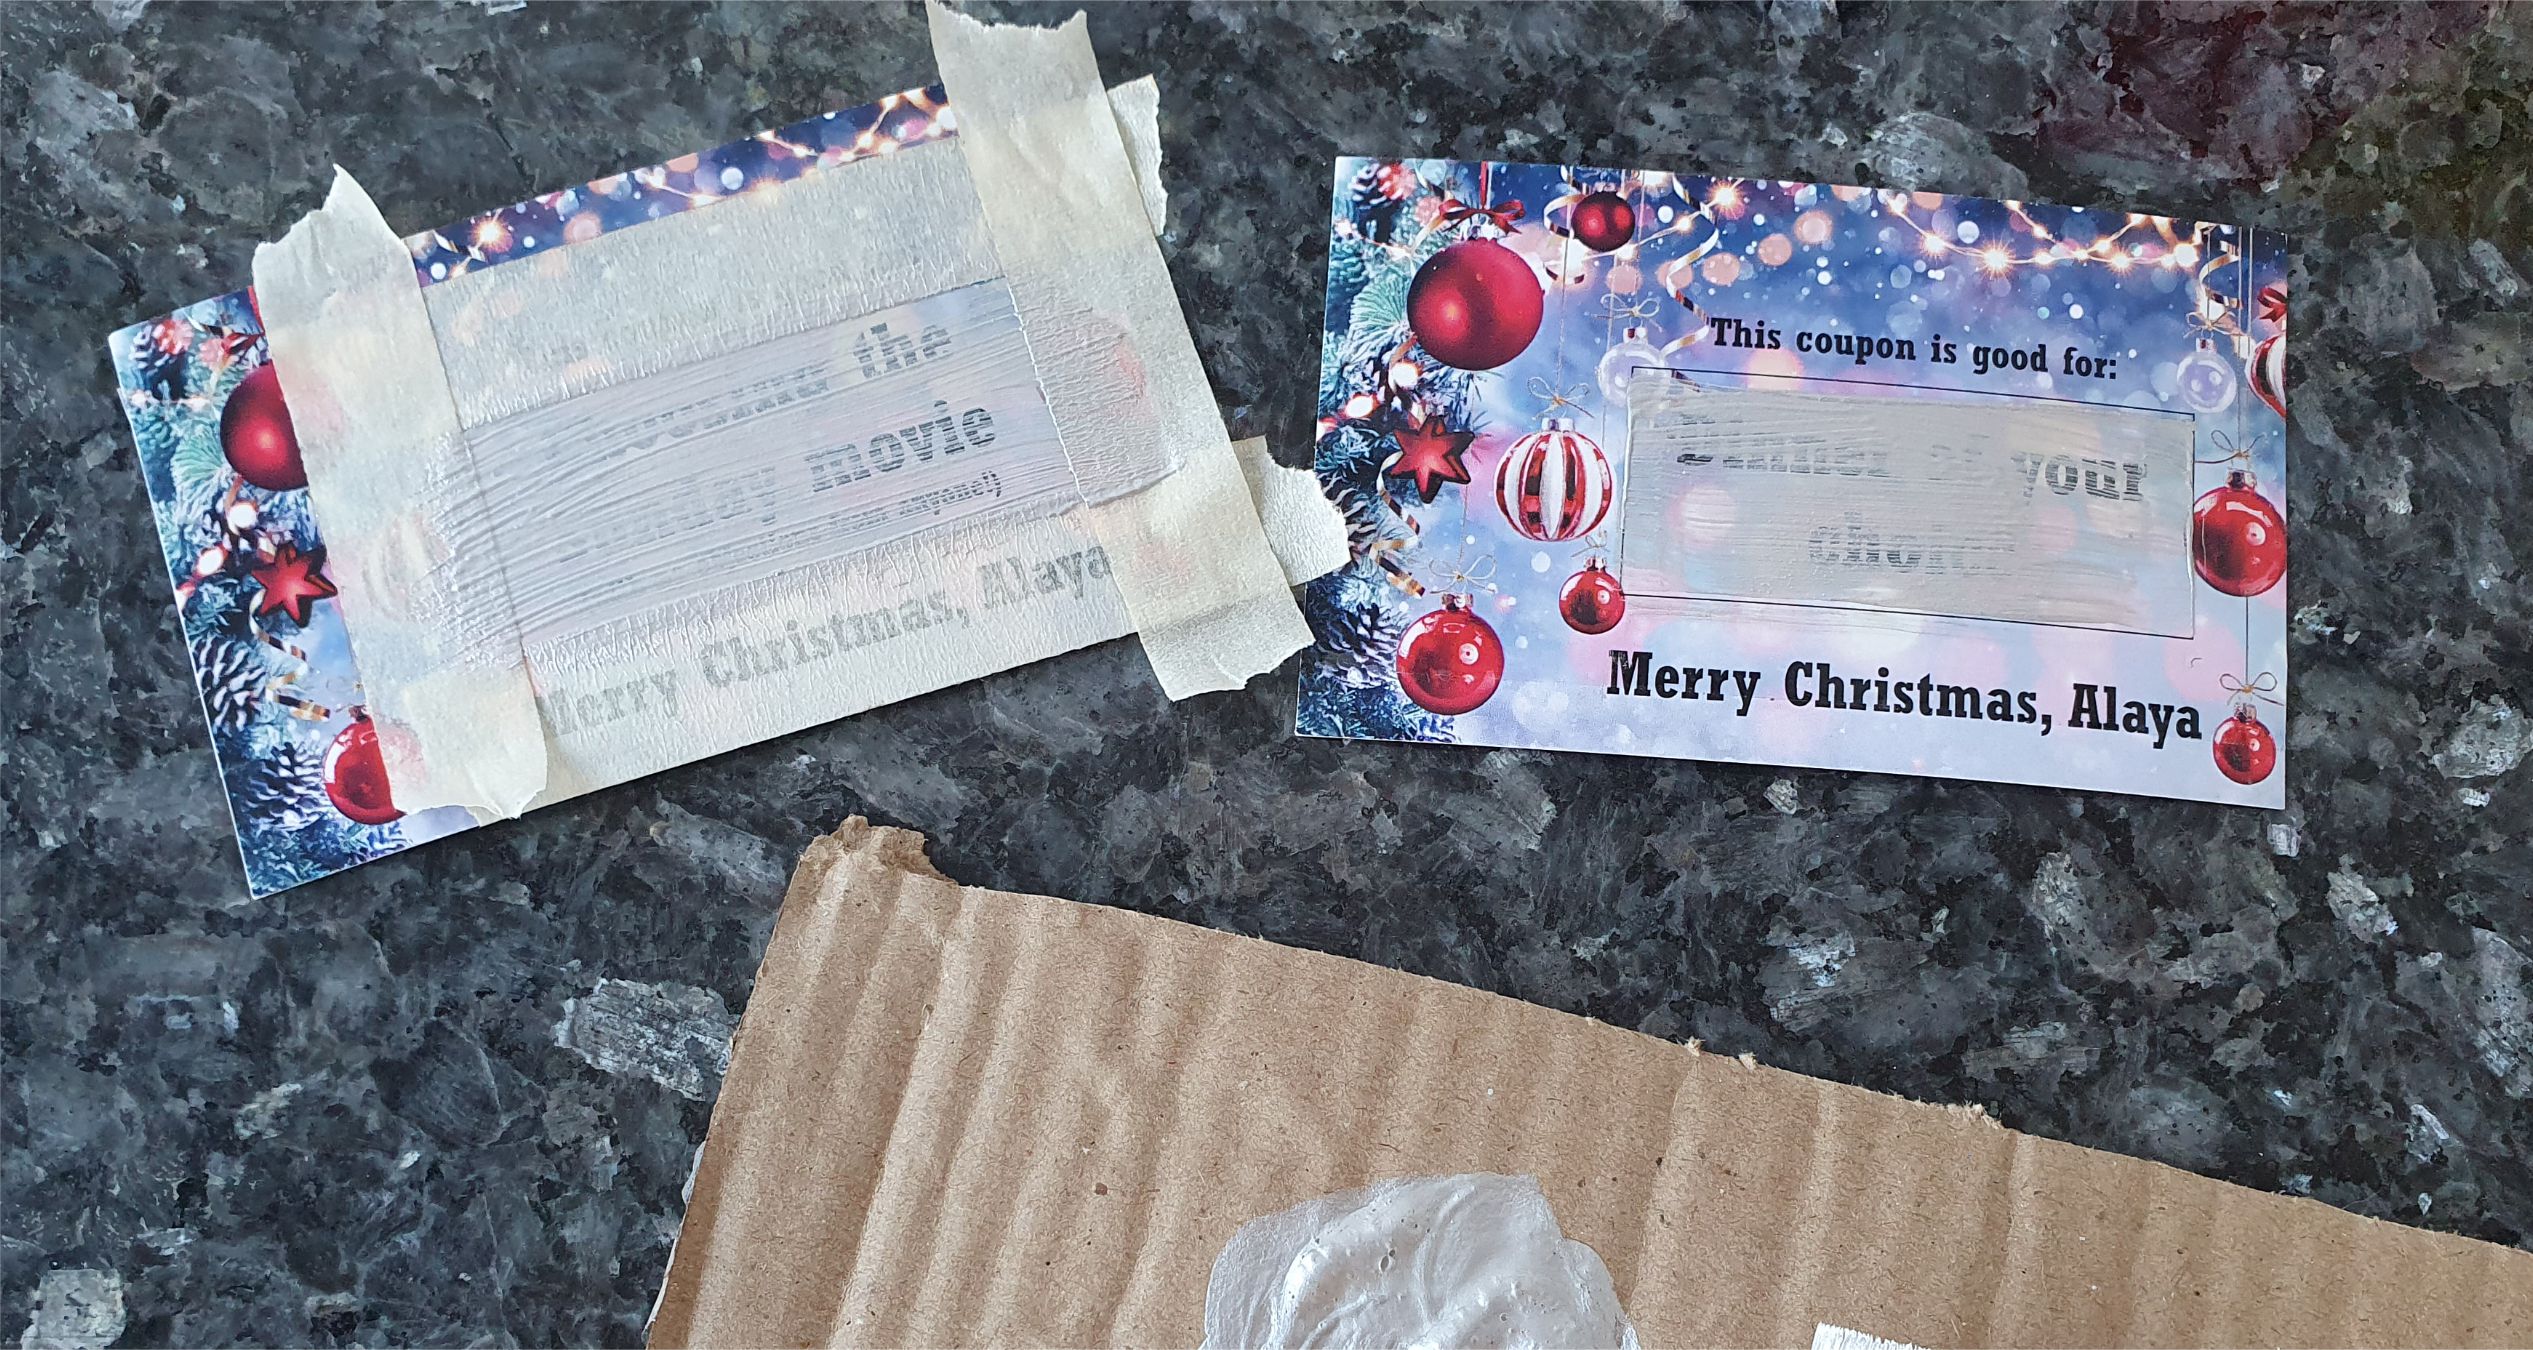
    Paint the secret message or code with the paint mixture. As you can see here, you may need to do it 2-3 times to cover the message fully

    Step5
    How to make your own scratch cards at home easy to do kids vouchers coupons gifts for kids

    Keep adding layers until the entire message is covered. You will need to do this 2-3 times depending on the colour of your message and colour of your paint.

    Step6
    How to make your own scratch cards at home easy to do kids vouchers coupons gifts for kids

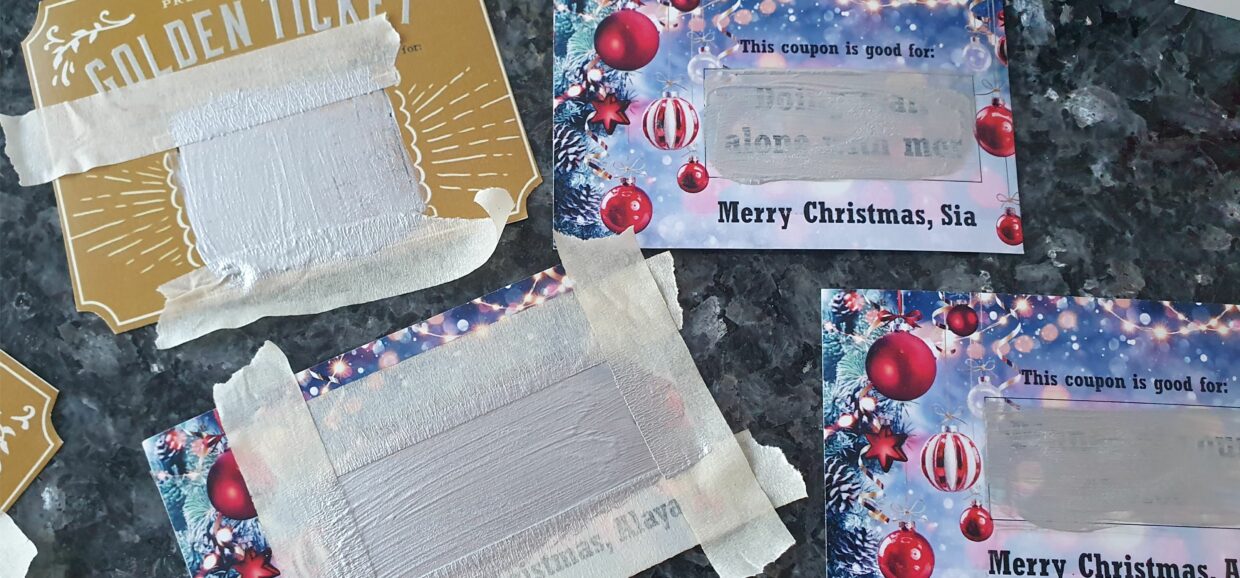
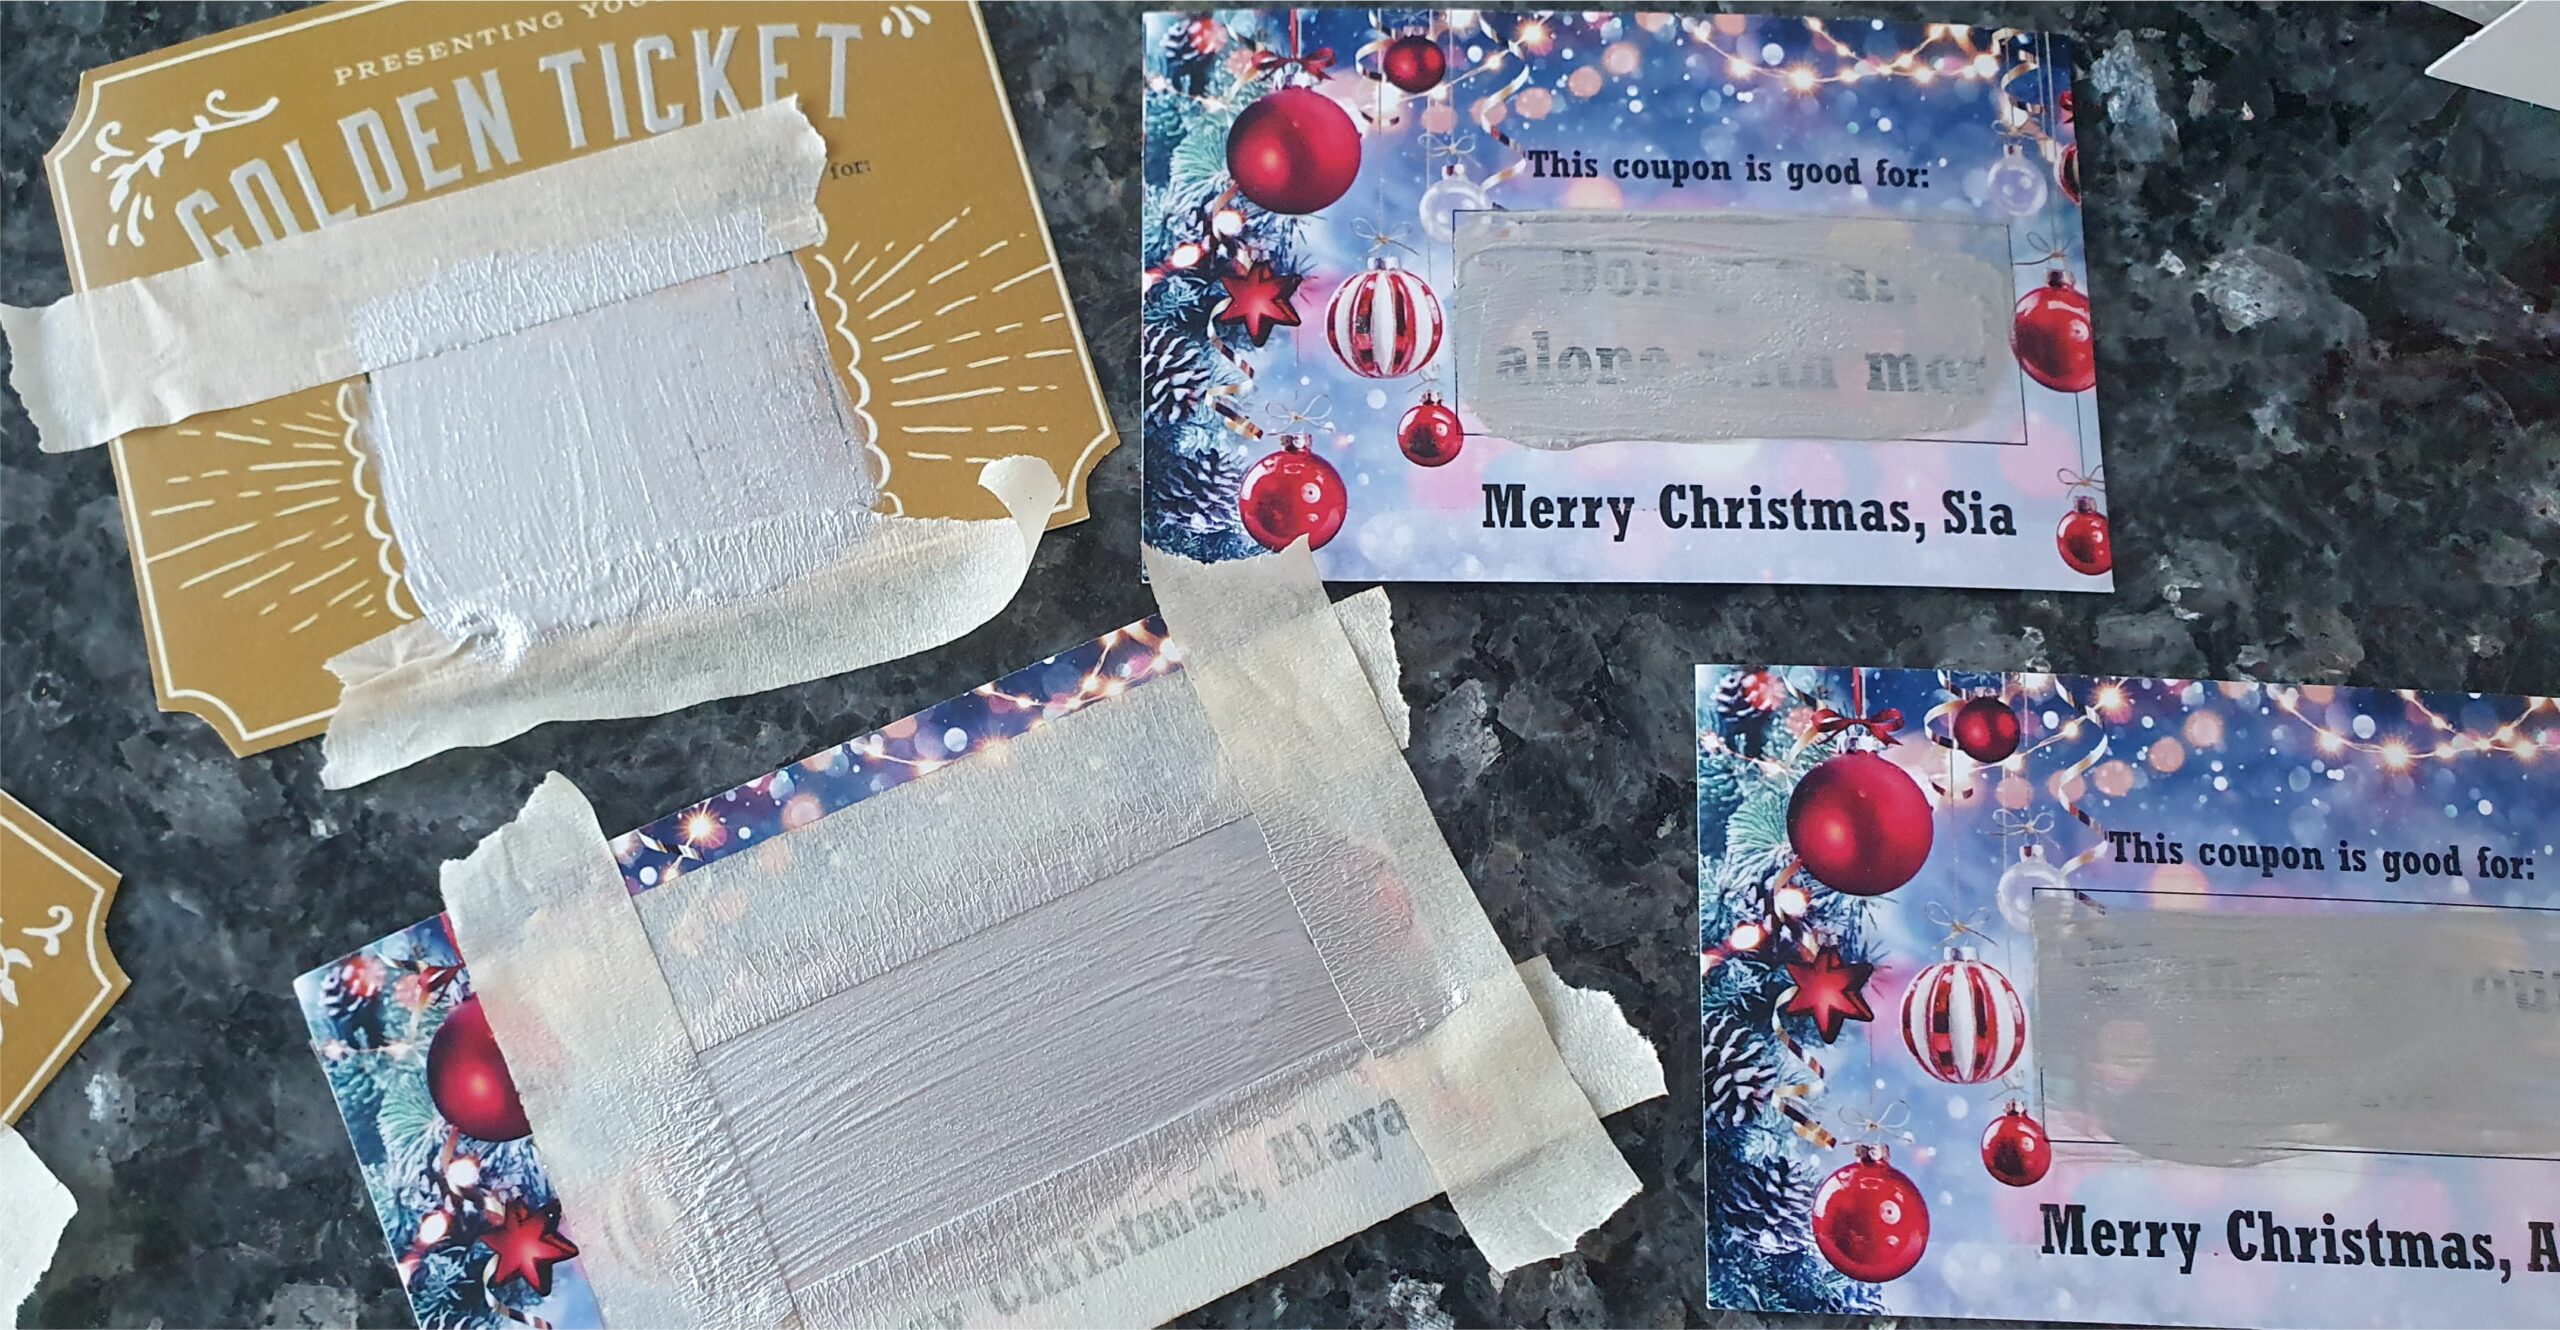
    Let the paint dry fully and remove the painters tape. Be careful not to rip the paint off too as it's not as attached as normal paint.

    Conclusion

    Hope you have fun with this project. Please let me know if you have any questions in the comment sections below.

    You may also like

    Leave a Review