- July 20, 2020
- 2 Like
- 0 / 5
- 10,469 Total Views


- Total Time4-5 days
We made this DIY Tamatoa Crab for a Moana themed birthday party as a chocolate chip cookie plate -complete with fondant hook, missing leg and sparkly (and editable) shell. I won’t lie and say that it is easy to do or that it isn’t time consuming (it was), but it is also fun! The kids helped me, so it became our little project that also made them super proud too. So total win-win. The kids at the birthday party also LOVED it!
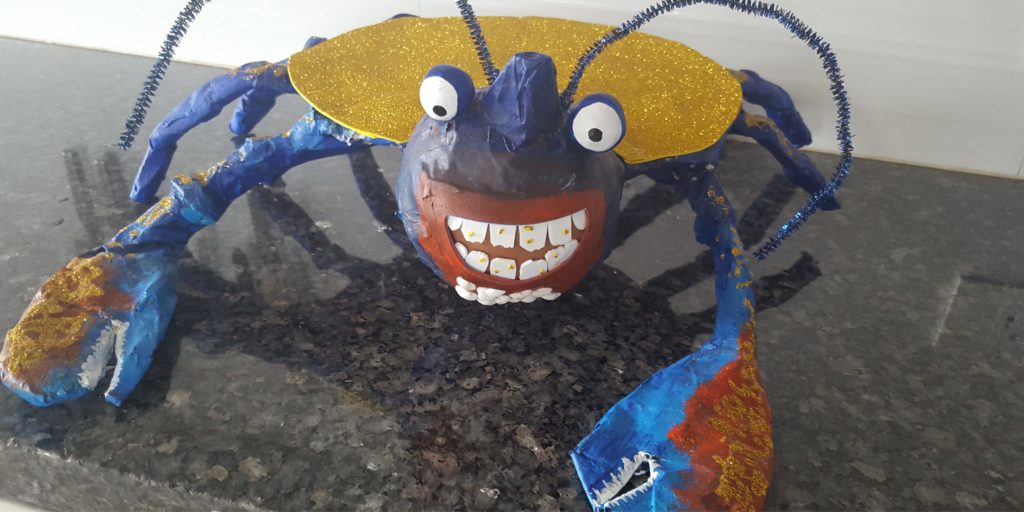

DIY Tamatoa Crab
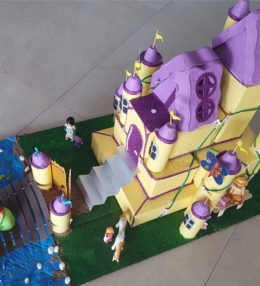
This Tamatoa crab is made from our own imagination using whatever materials we could find at home. Please don’t be discouraged if you don’t have all the ingredients in the (very long) ingredient list. There are many substitutes available: The “nose” could just as easily have been made out of newspapers, the mouth could also be thick paper and not foam, the eyes could have been large beads instead of fevicryl and the list goes on. I love a good best our of waste project though. It’s always amazing to see old things being used again for something new. See all our best out of waste projects here like our barbie princess throne or best out of waste castle.
See the full step-by-step guide with pictures below the ingredients
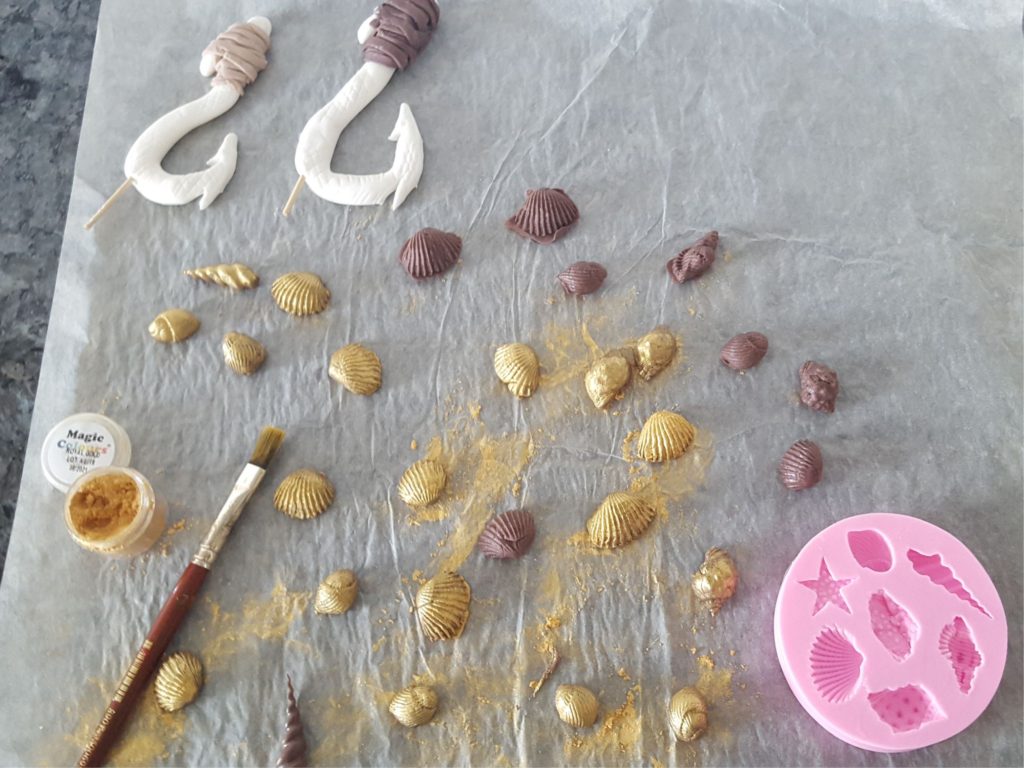

DIY Tamatoa Crab as a cookie plate
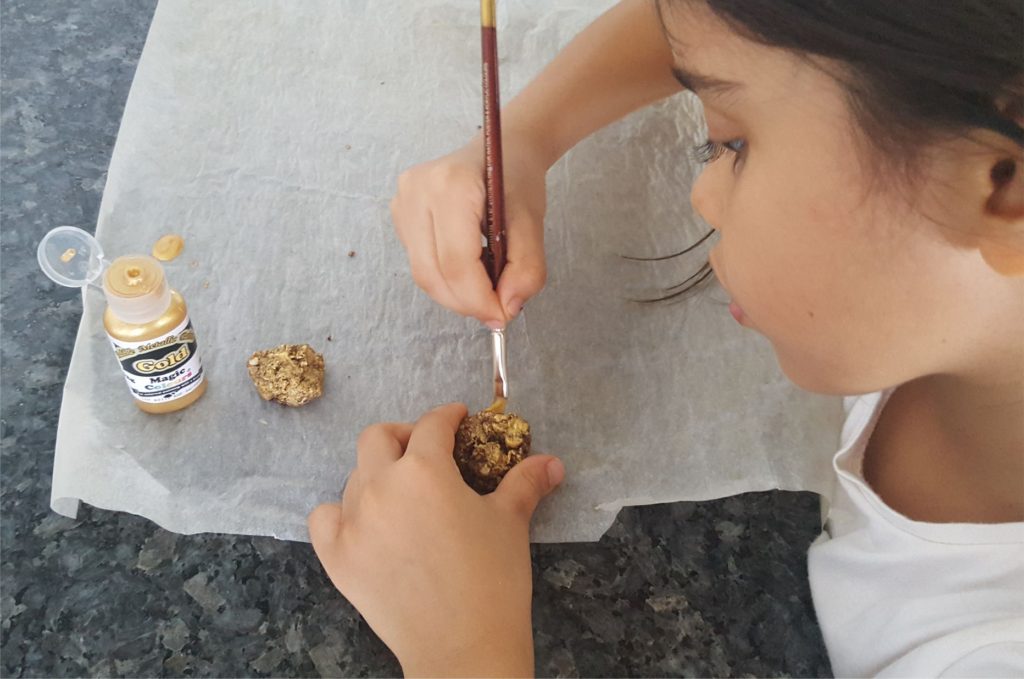
After making Tamatoa, all the gold shells and the fondant hooks, I said enough is enough and decided to keep the cookies brown. I admit it, I was a bit fed up at this point. BUT my then 6-year old daughter insisted that they should be gold like Tamatoa’s shell and did all the work herself -or at least most of it. I was so impressed! And of course, she was right. The cookies looked so much better with the added edible gold dust and edible gold paint. It was a nice finishing touch. I used this chocolate cookie recipe for the cookies. We made the cookies more round and rock-like than we normally would have done.

Use papier-mâché to make Tamatoa strong
Use 2 parts flour and 3 parts water to make the papier-mâché glue. If you have never made this homemade glue before, you can read more about it here where we used it to make a flower shaped piñata. There is also a list of friendly tips if you are doing this project with kids so you all have fun with it.
Tamatoa has since gone on to “live with” our friends who also had a Moana party shortly after ours. Love when things can be reused like that.
See all my other Moana themed food ideas, Moana decorations and Moana party activities too.
Ingredients
Directions
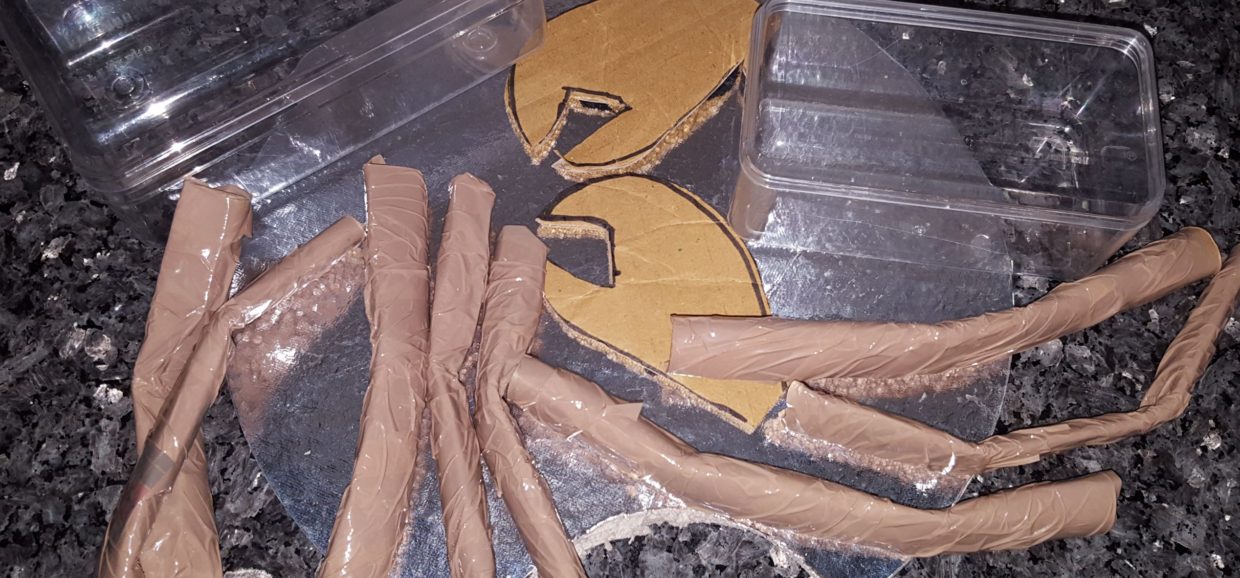

Prepare the first ingredients like shown here: Roll up 8 newspaper pages and cover with brown masking tape. Bend in two places. Remember one leg should be shorter than the rest (this is the one Maui cut off Tamatoa) Cut out two claws from the cardboard piece and cut a round piece off the cake board to make room for the head.
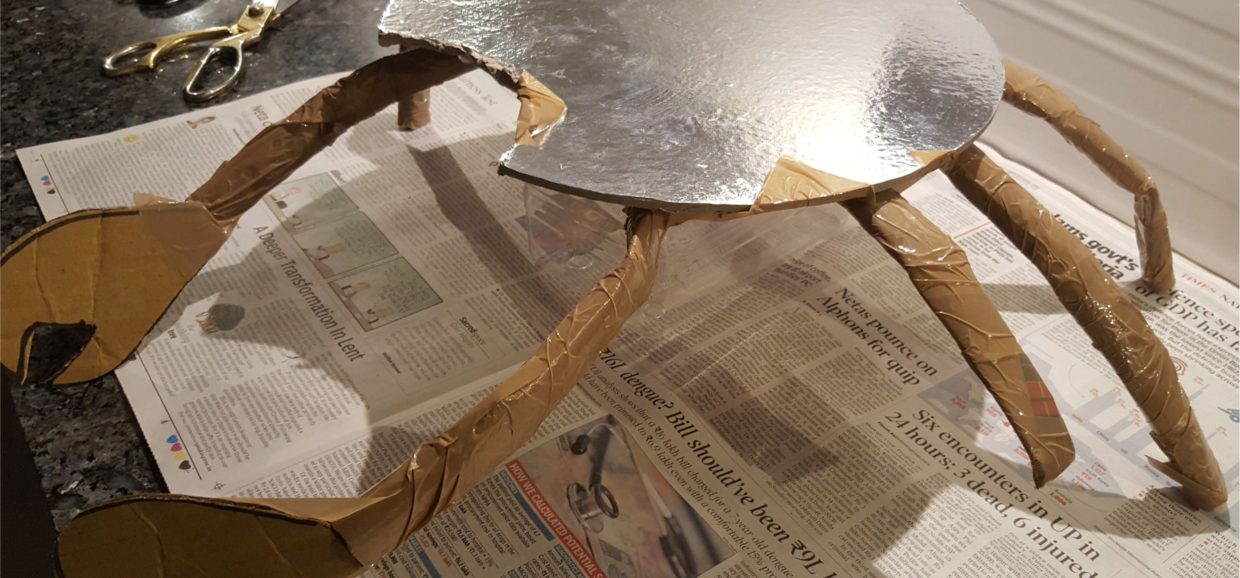

Attach the claws onto two of the legs and tape it all onto the cake board. Use the plastic containers for support underneath as the legs obviously aren’t strong enough to support the weight of the crab.
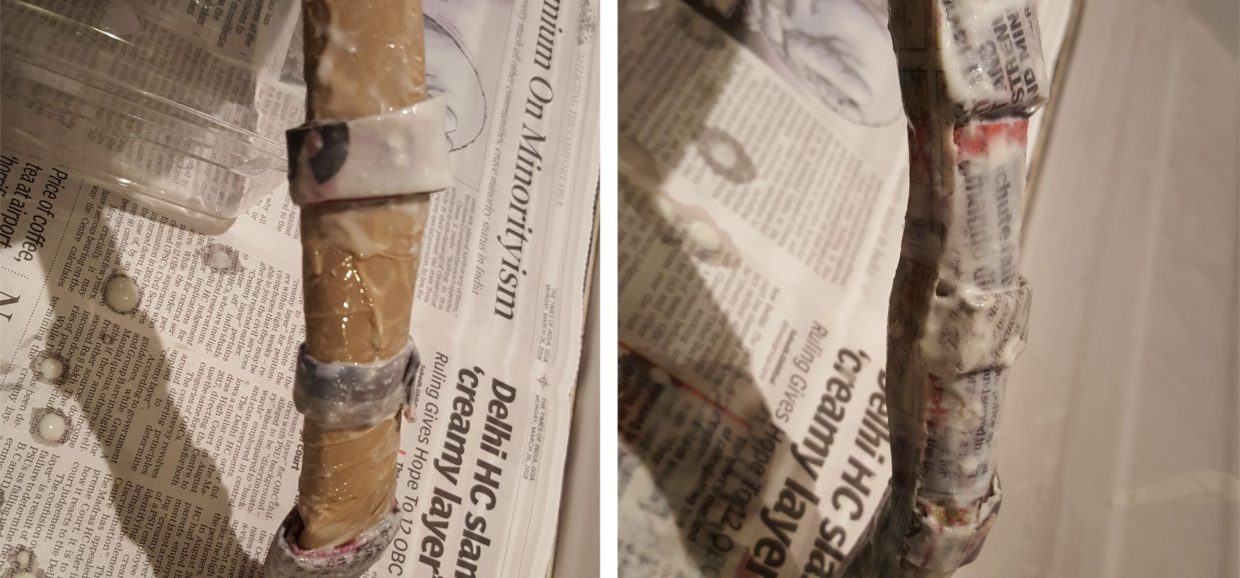

Make small newspaper rings around each leg with homemade glue (2 parts maida and 3 parts water) Cover with newspaper on top of the rings.
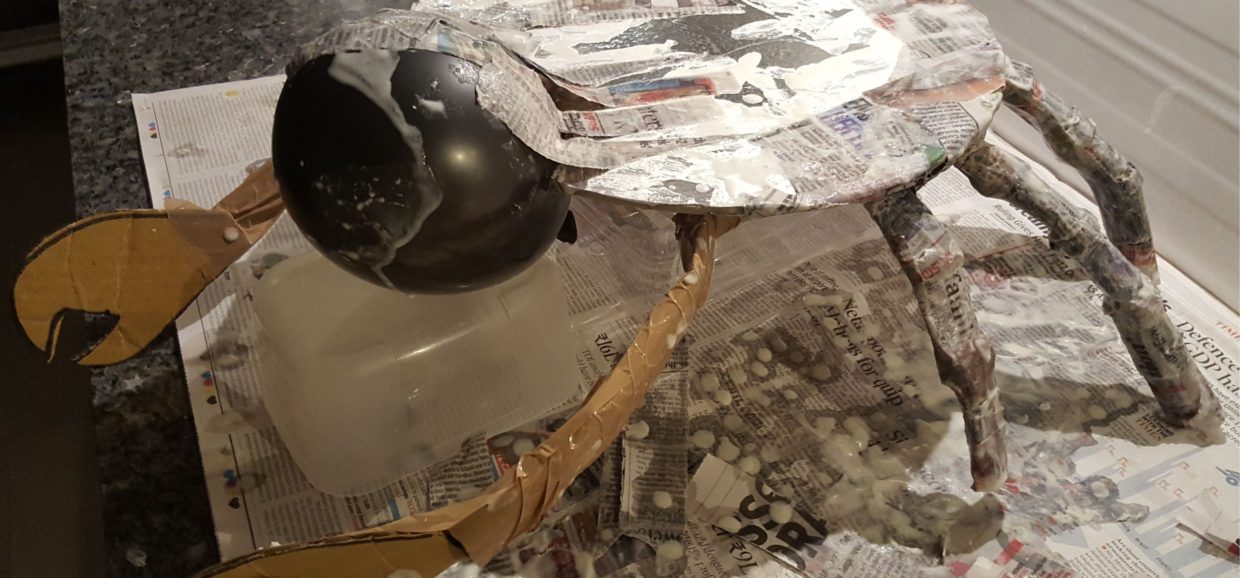

Blow up a balloon to half it’s normal size and attach it to the front of the cake board with newspapers and glue while supporting it with any box you have handy.
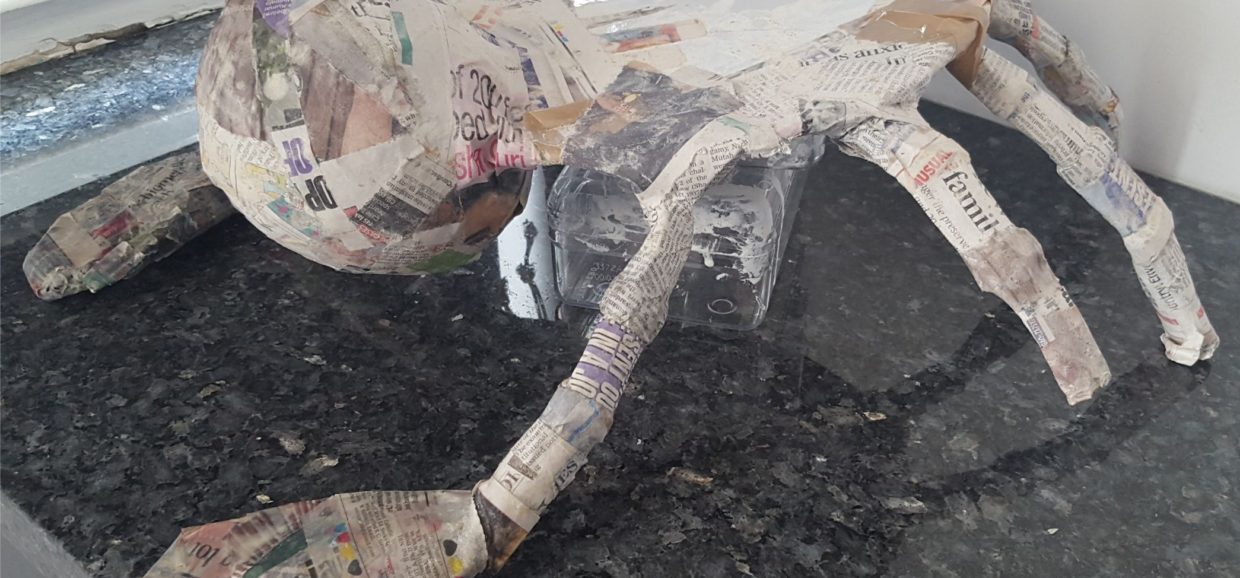

Cover the head and claws (and legs if needed) with 2-3 layers of newspapers. Make sure you reinforce the taped legs too to the cake board and don’t worry if one or two fall off in the process. That also happened to us, but we just reattached and once dry, they become quite sturdy. This can get quite messy (especially if children are helping) but the homemade glue is quite easy to wipe off afterwards so no harm done
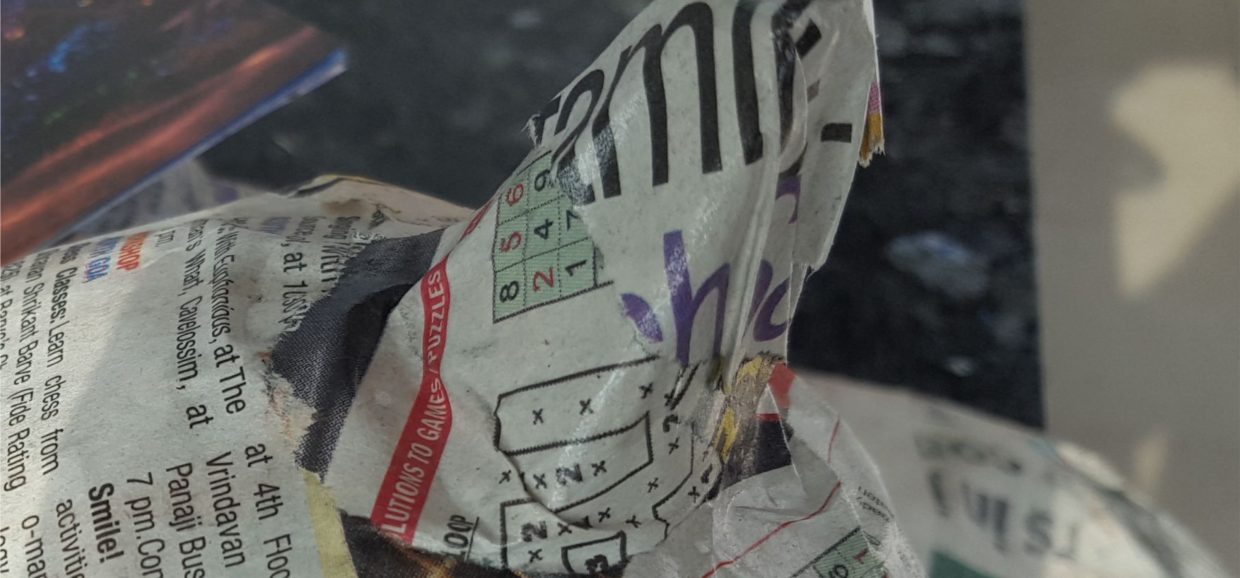

Cut out a “horn” from the disposable egg box and attach with newspapers to the “forehead” of the crab
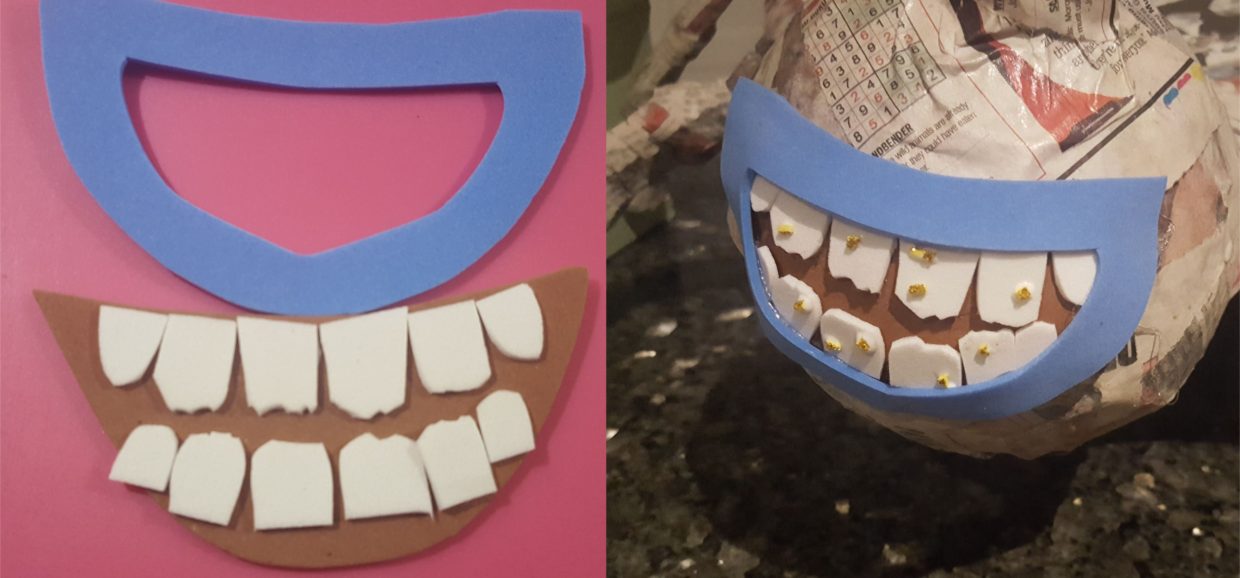

Use brown and white foam paper to make the mouth with 12 uneven white teeth (brown is the background). We cut small pieces of gold foam paper to make Tamatoa’s teeth look more authentic and shiny. The blue colour foam paper is not necessary as it will be painted anyways. Use whatever colour you have at home as “lips”
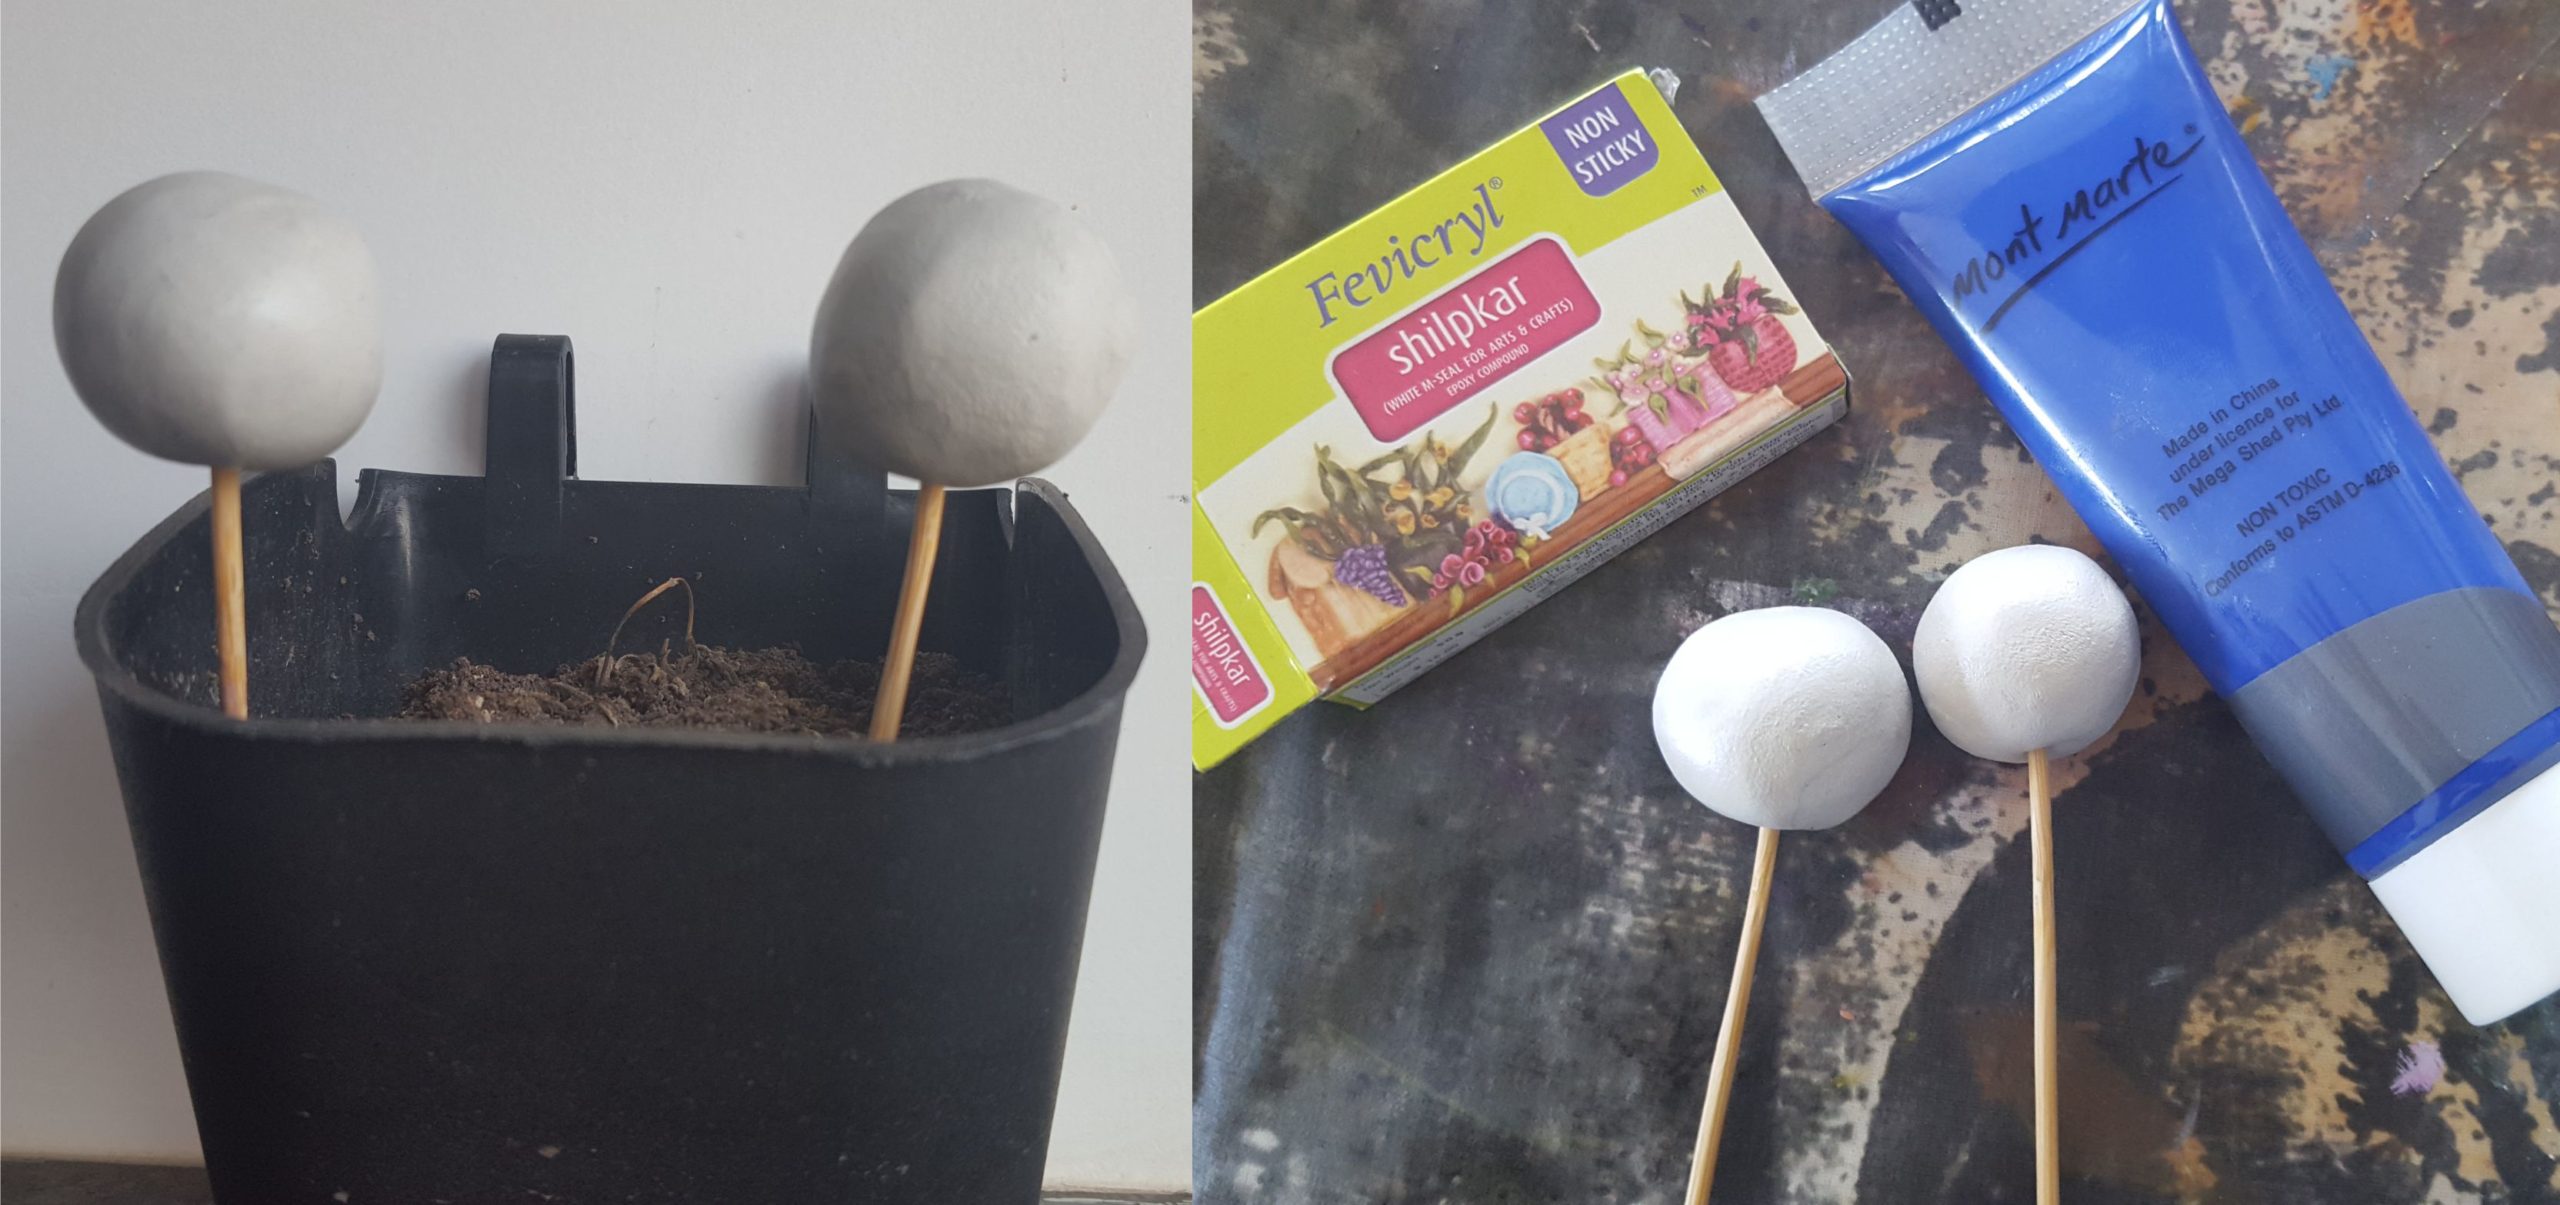

Use fevicryl to make the eyes and let them dry on a toothpick or wooden skewer.


Using orange, dark and light blue and white, paint Tamatoa. Most of his shell is dark blue but the side of the claws and face is dark orange.
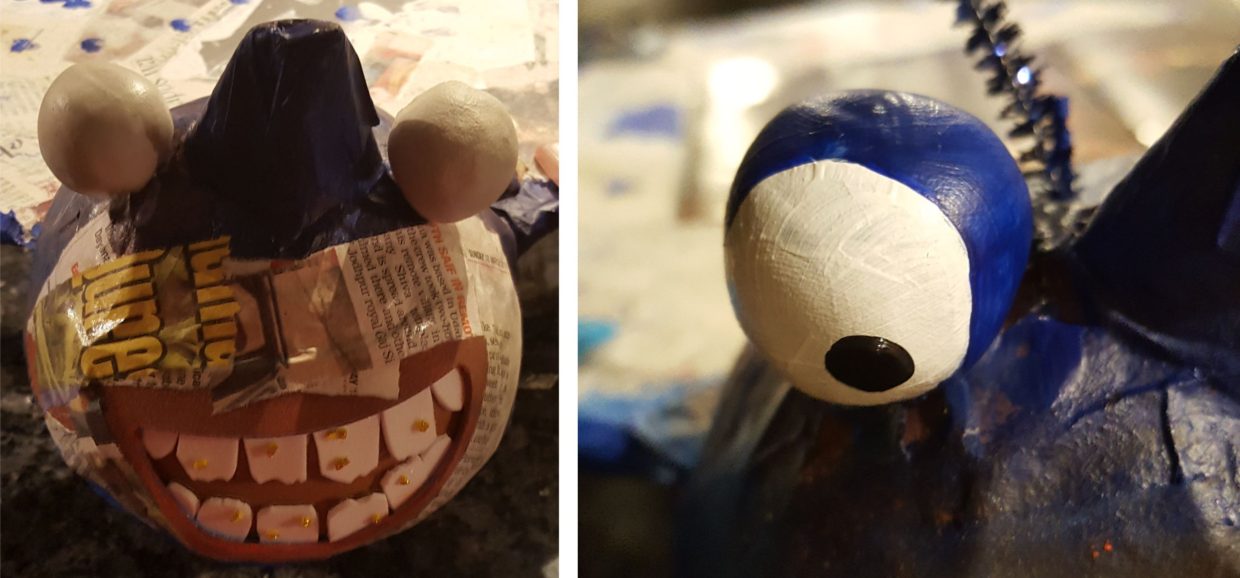

as you can see on the previous picture, there is a line around the mouth where the foam paper is. I didn’t like this sharp edge, so I added another layer of newspaper around the mouth and painting it again. Attach the eyes and paint them blue, white and black.
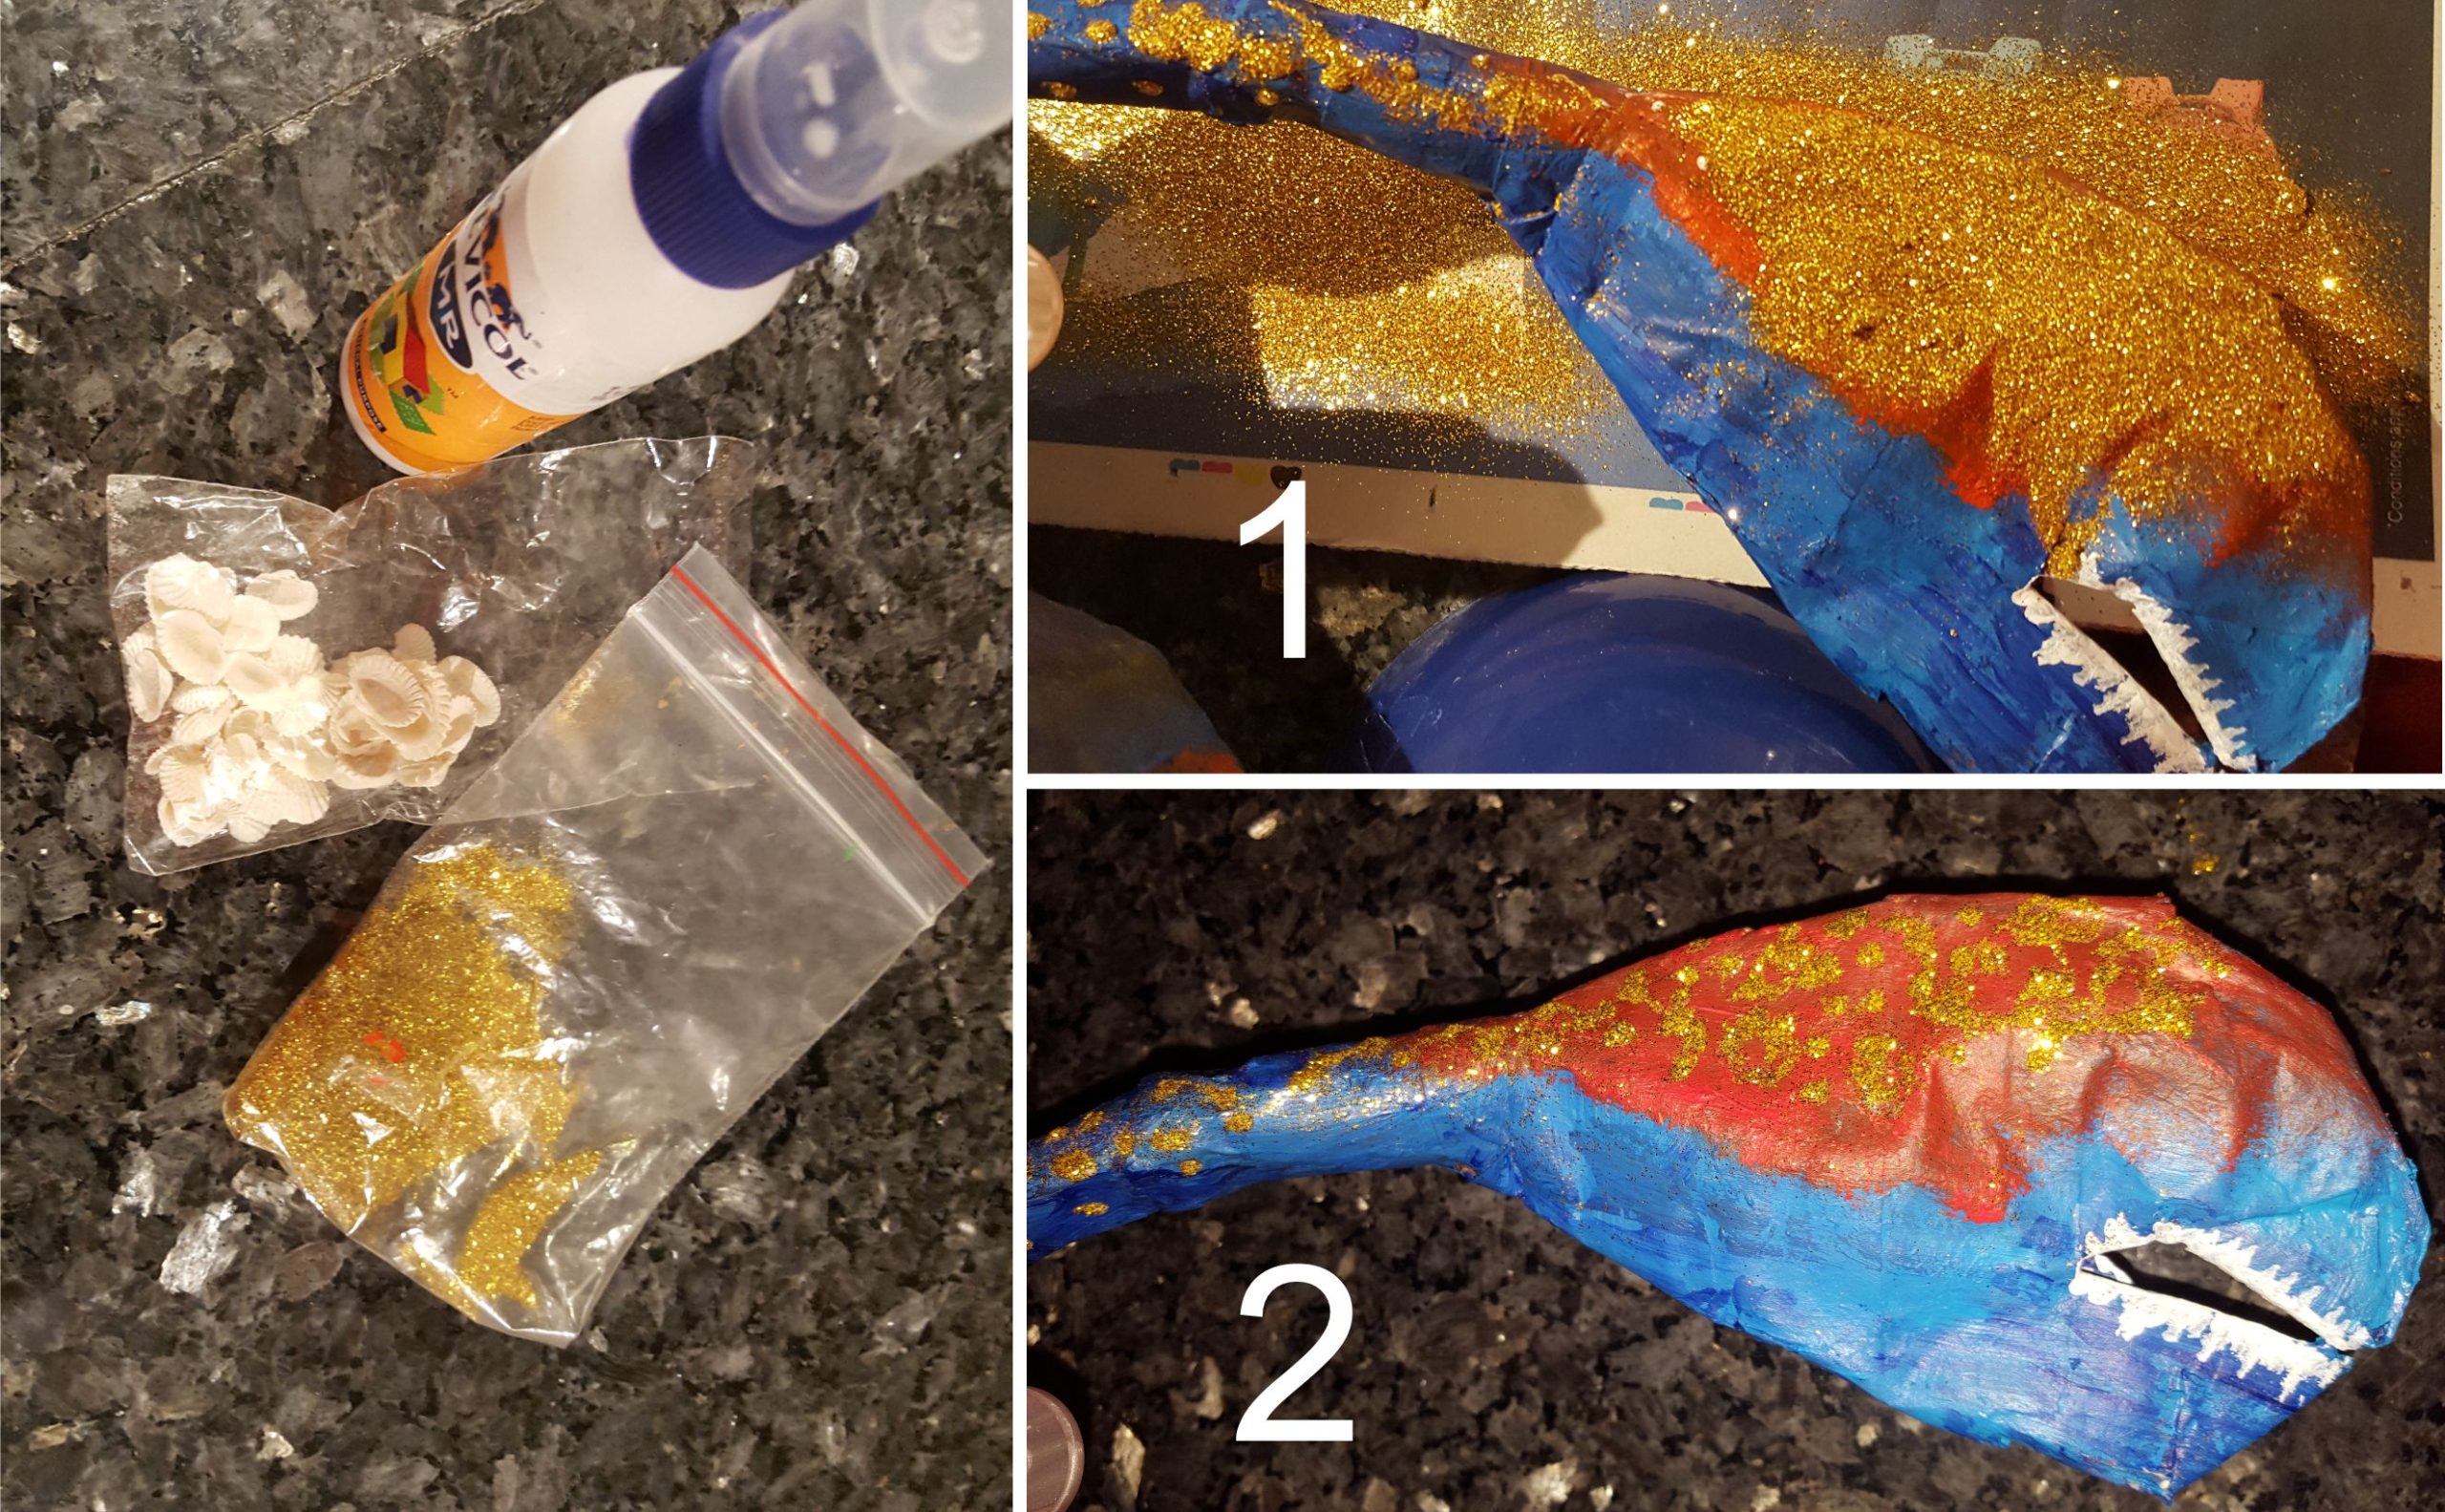

Use gold glitter and fevicol glue to decorate the claws and the top of the legs and make them shiny.
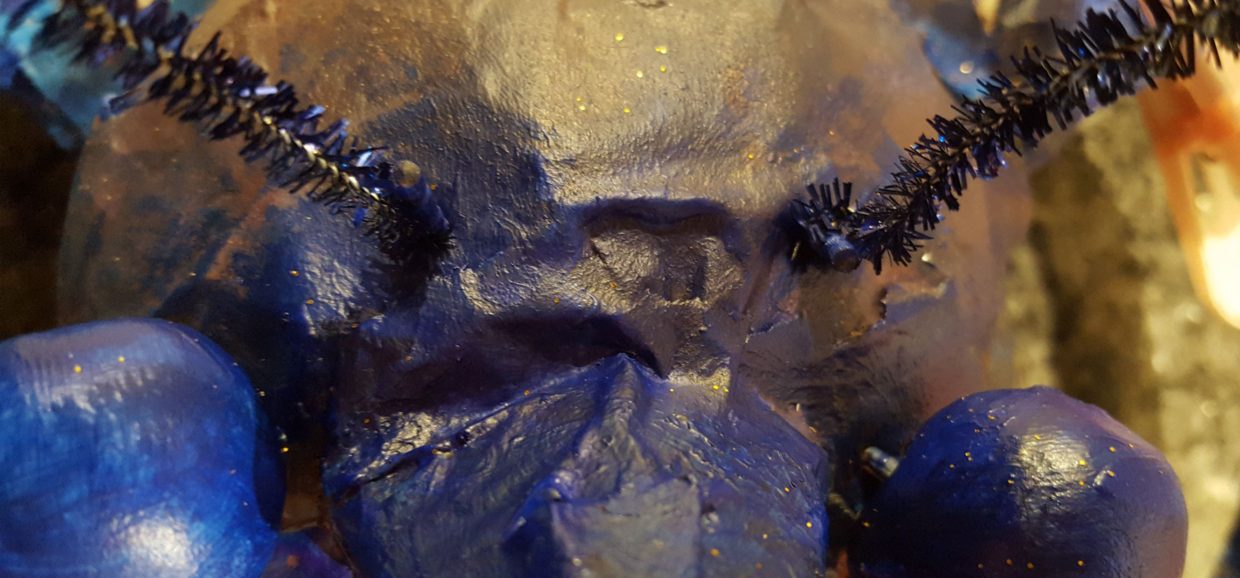

Make a hole for the pipe cleaners behind the eyes and insert them.
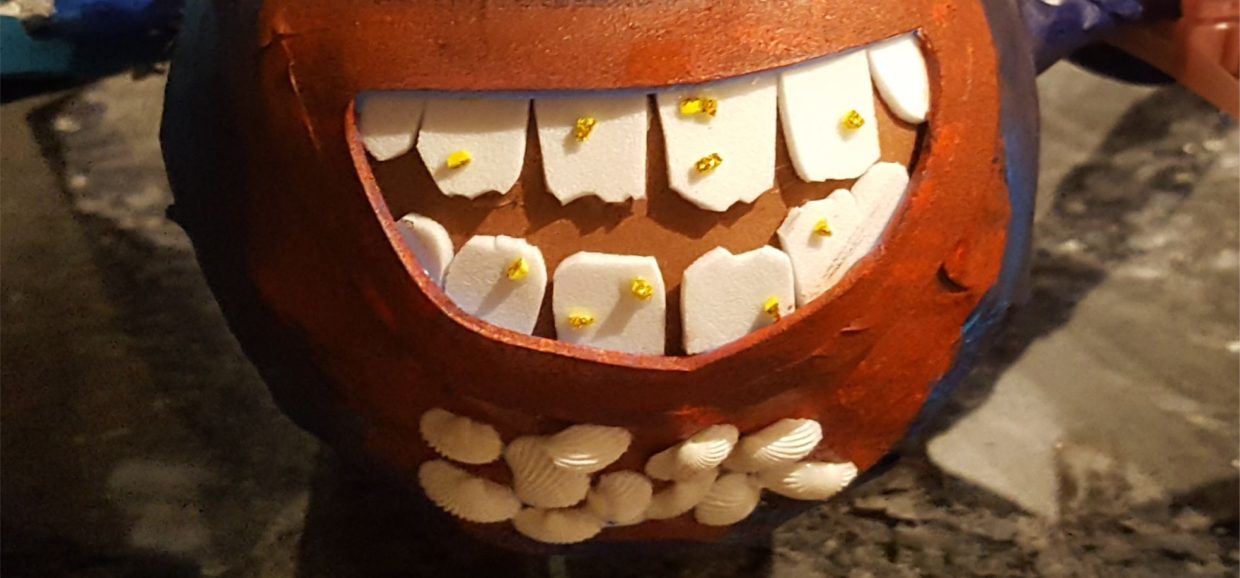

Glue some small white seashells on the chin of the crab
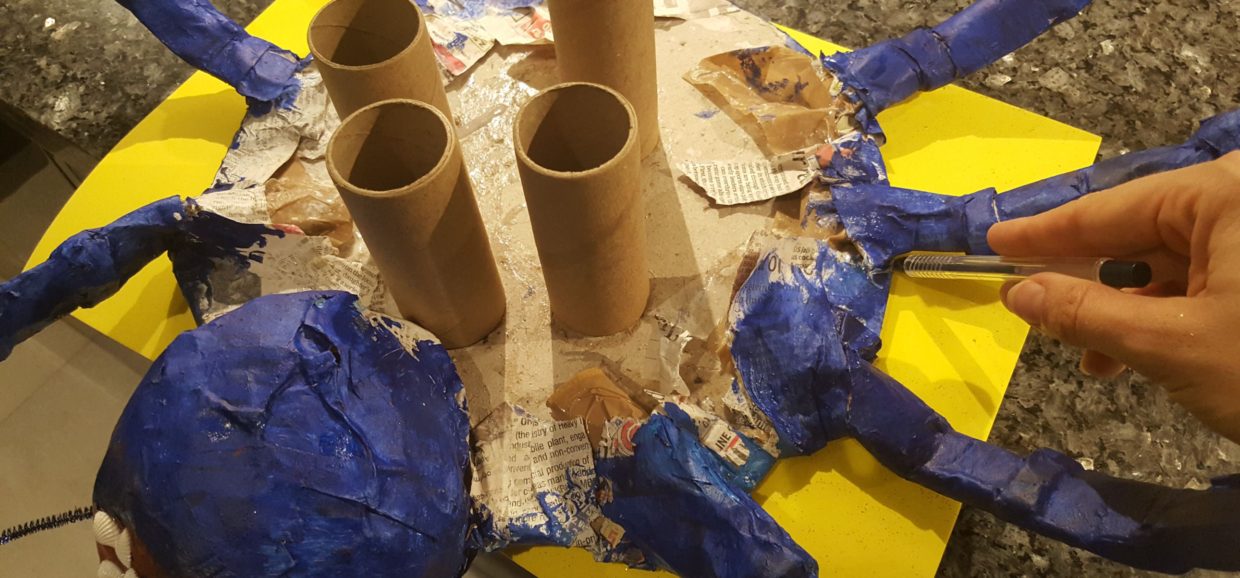

To make the base for the shiny shell, turn the crab over and draw a line around the cake board on gold glitter foam paper. I also exchanged the plastic containers for empty toilet paper rolls. They gave the same support but were smaller and easier to hide underneath. The underside of the crab looks extremely bad, I know. But remember this was just supposed to be a gimmick cookie tray. Make the underside smoother and blue too if you wish (and have the extra energy)
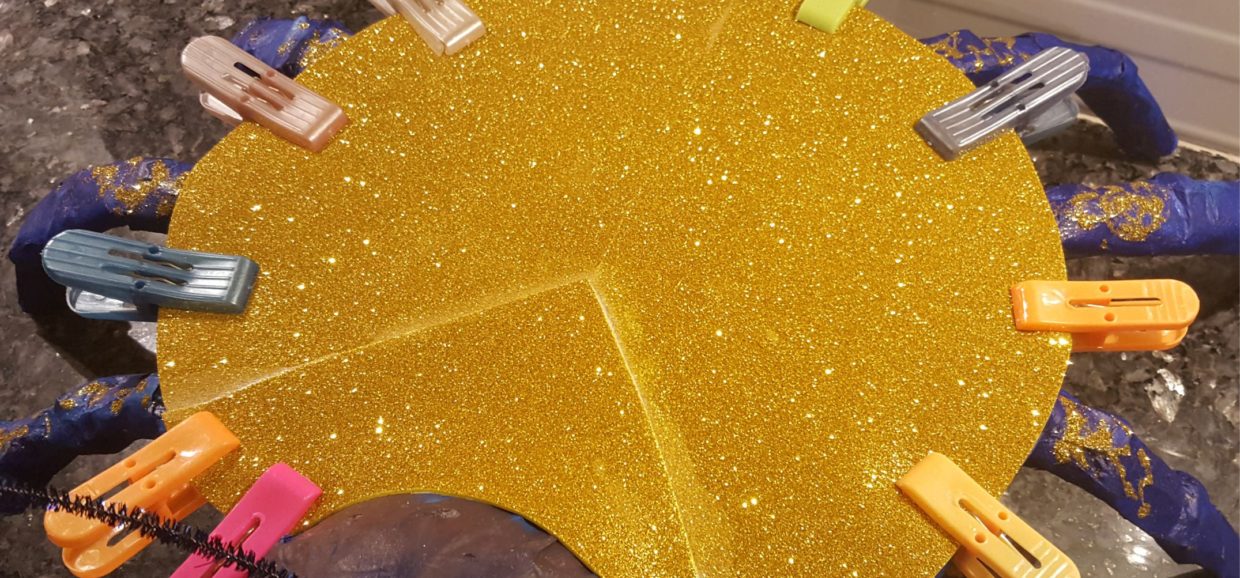

Cut out the gold glitter paper and glue it on to the cake board. Fit clothes pins around while it dries.
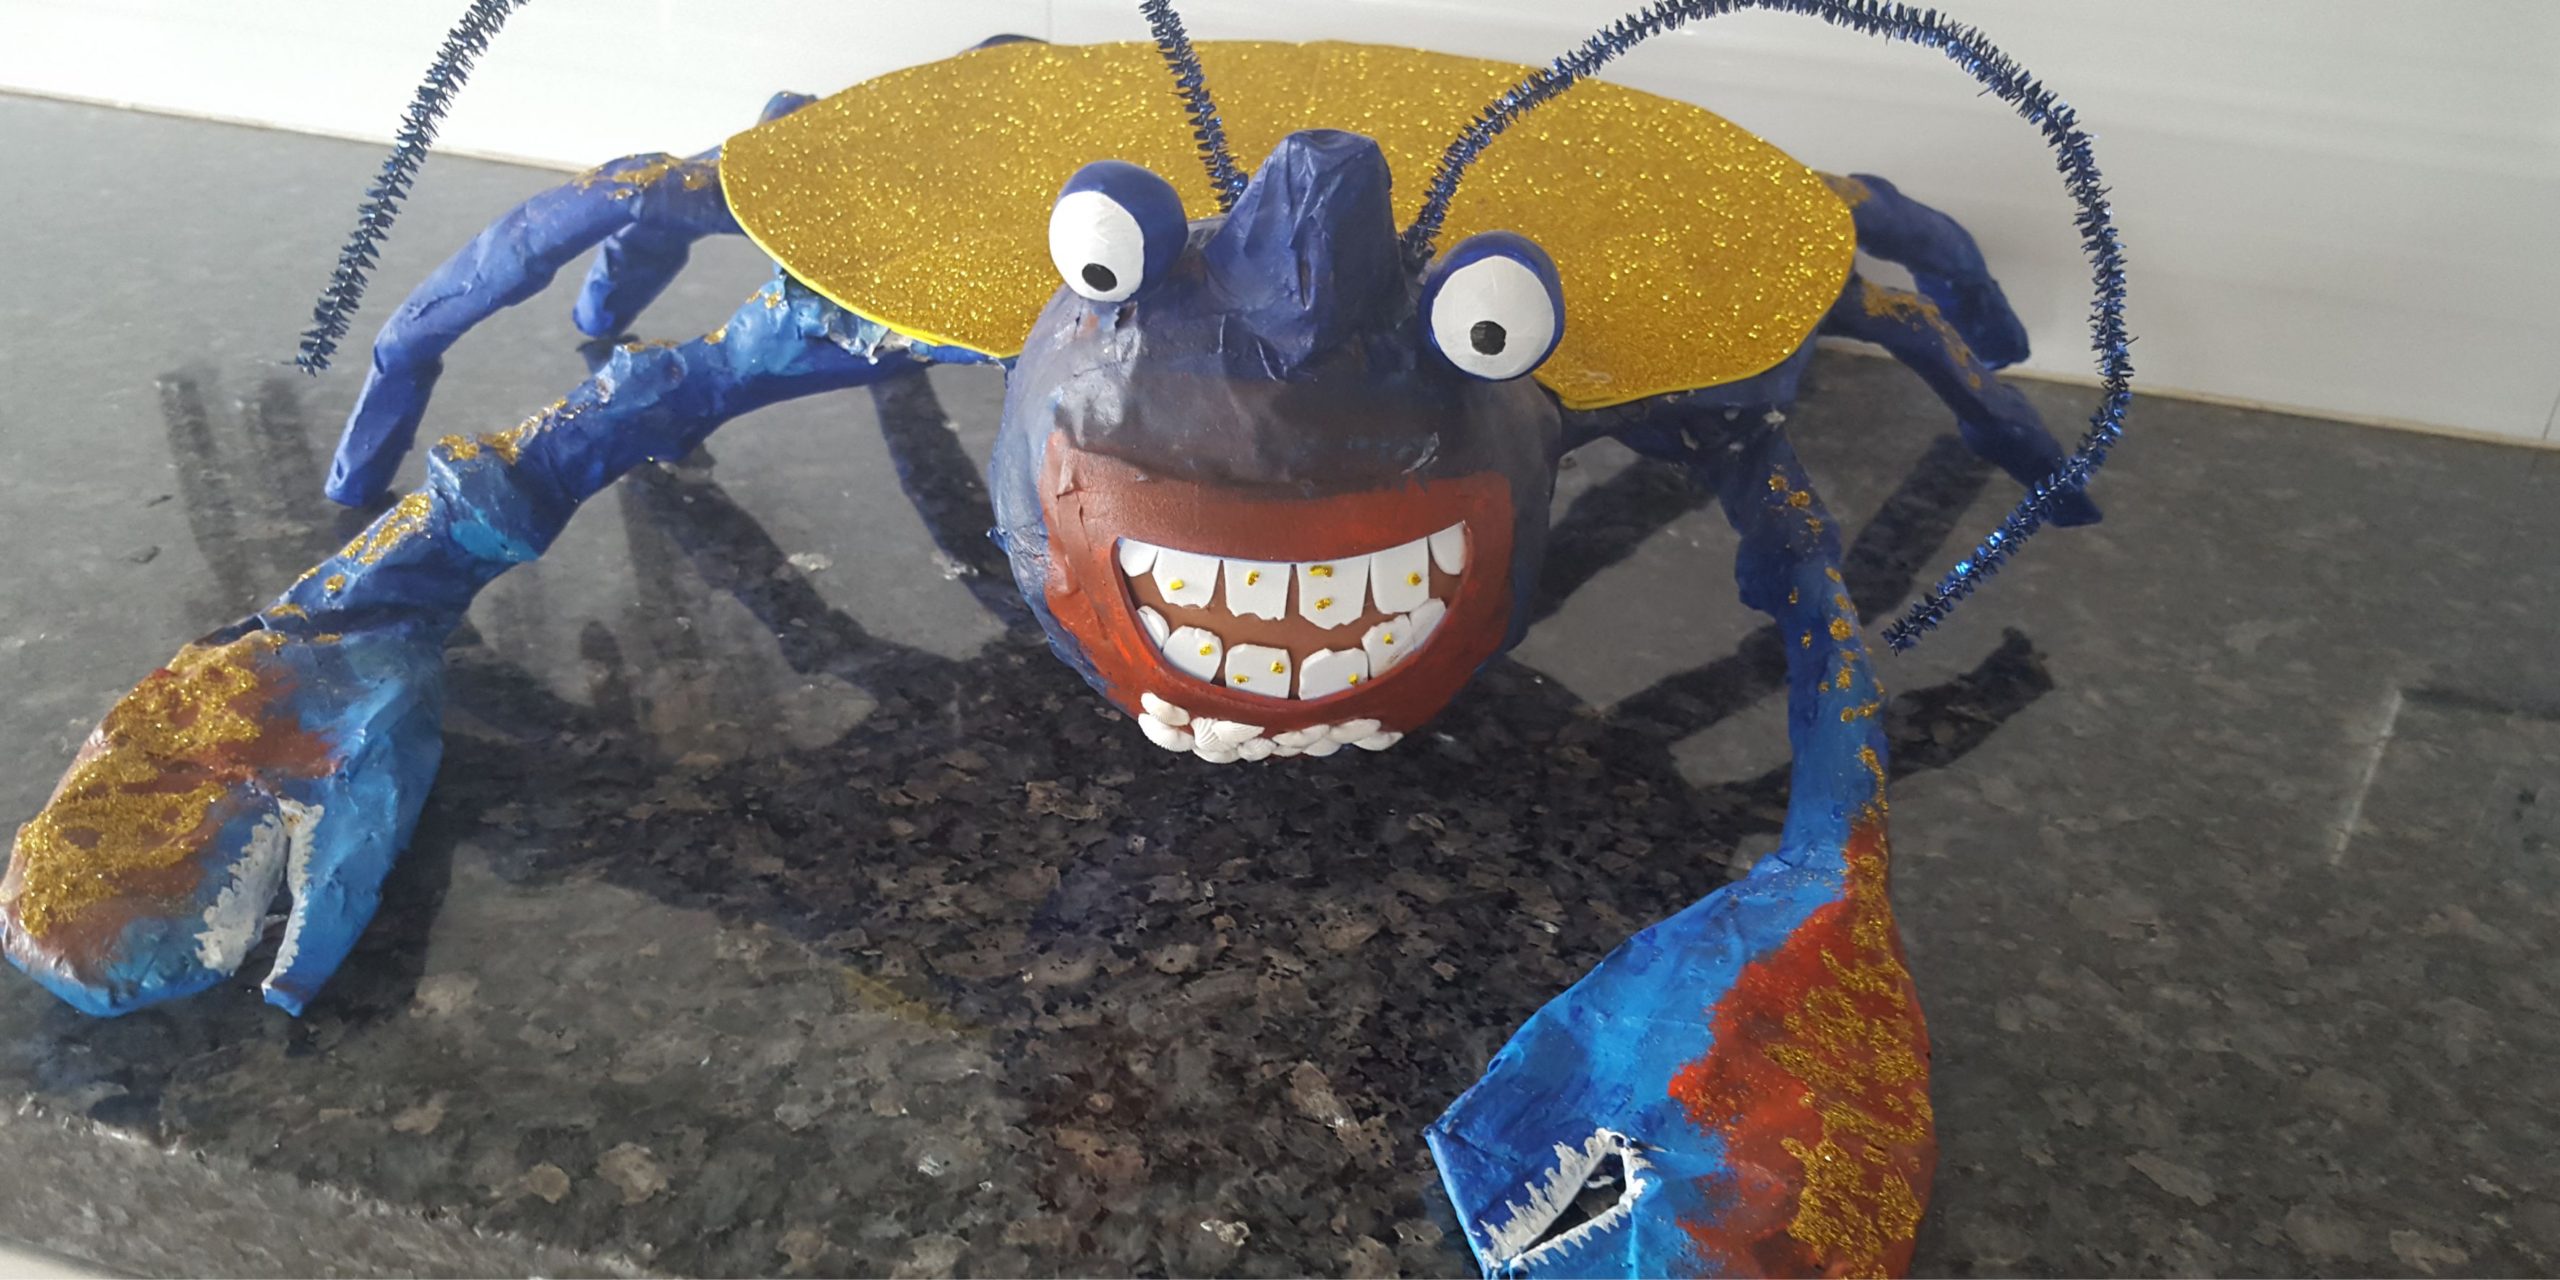

And Tamatoa the Crab is shiny and ready for the cookies.
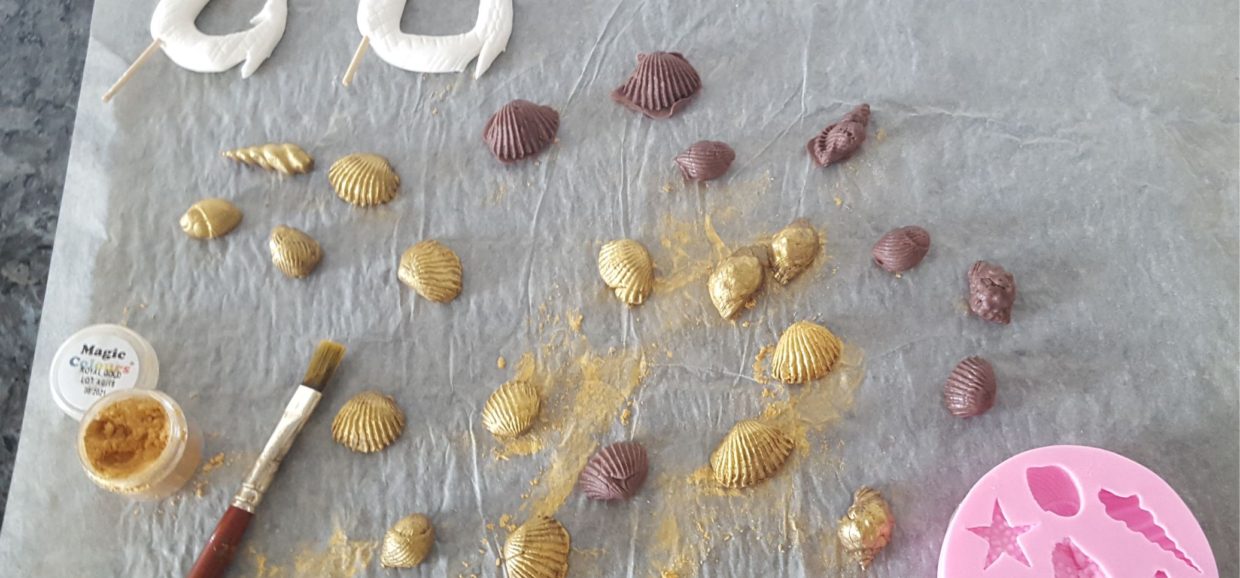

Use a seashell fondant cutter to make the seashell shapes. The color of the fondant doesn’t matter. I had extra brown fondant, so that’s what we used. Use Magic Colour gold dust. It works like a charm and colors the fondant nicely and evenly.
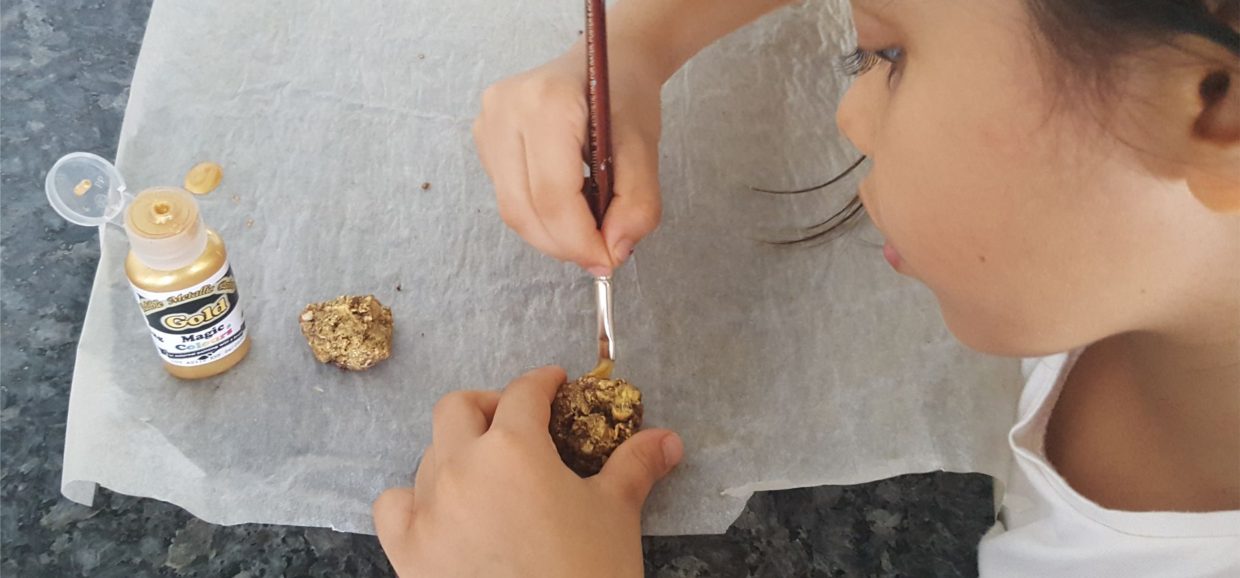

Use edible Magic Color gold paint for the cookies. As mentioned earlier, my daughter wanted to paint them as she thought they would look better that way -she was right of course.
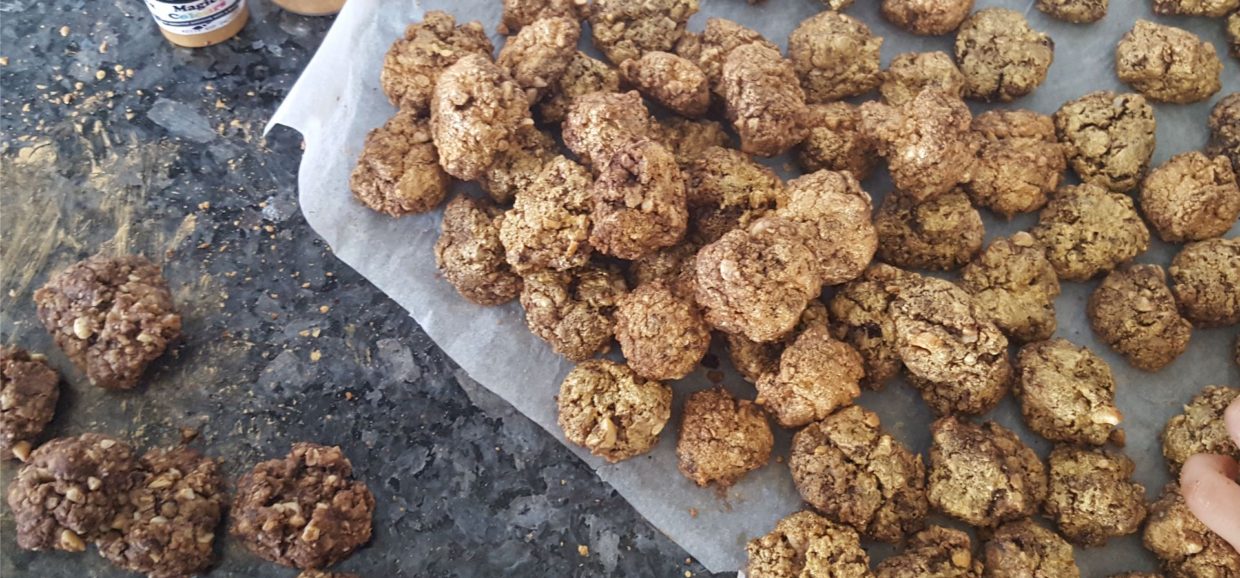

It was a quite a tiresome job to paint them all, but they did look beautiful after we were done.
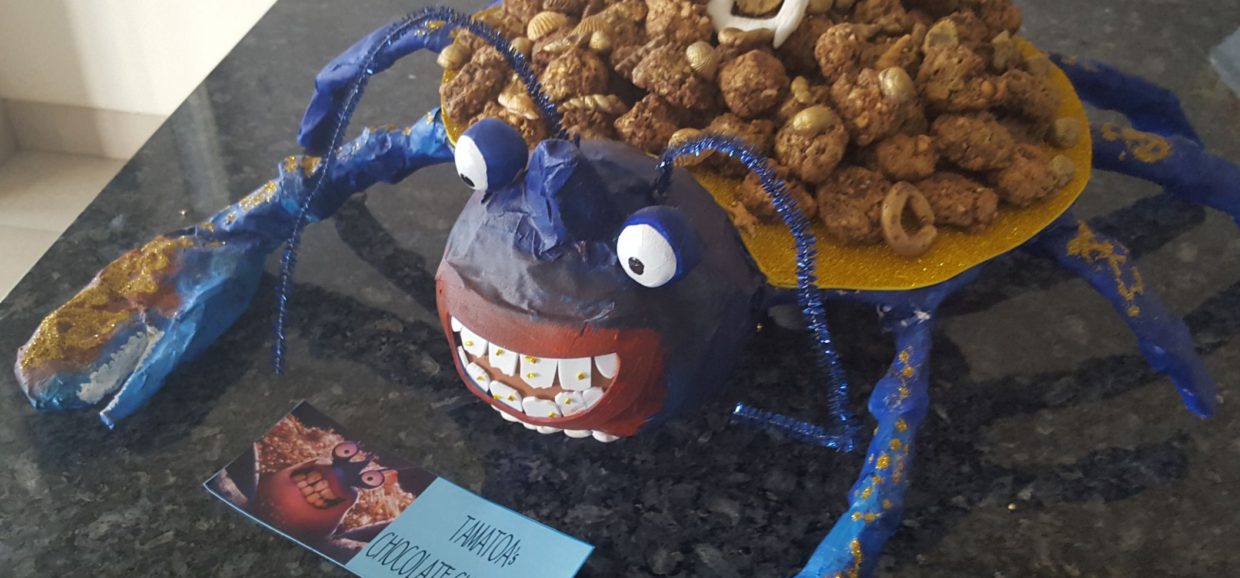

Pile all the cookies on top of the Tamatoa Cookie Stand along with the golden seashells and Maui’s hook at the very top and the perfect prop for a themed Moana party is ready. Please let me know what you think in the comment section below. Have fun crafting.
You may also like
DIY Tamatoa Crab from Moana
Ingredients
Follow The Directions
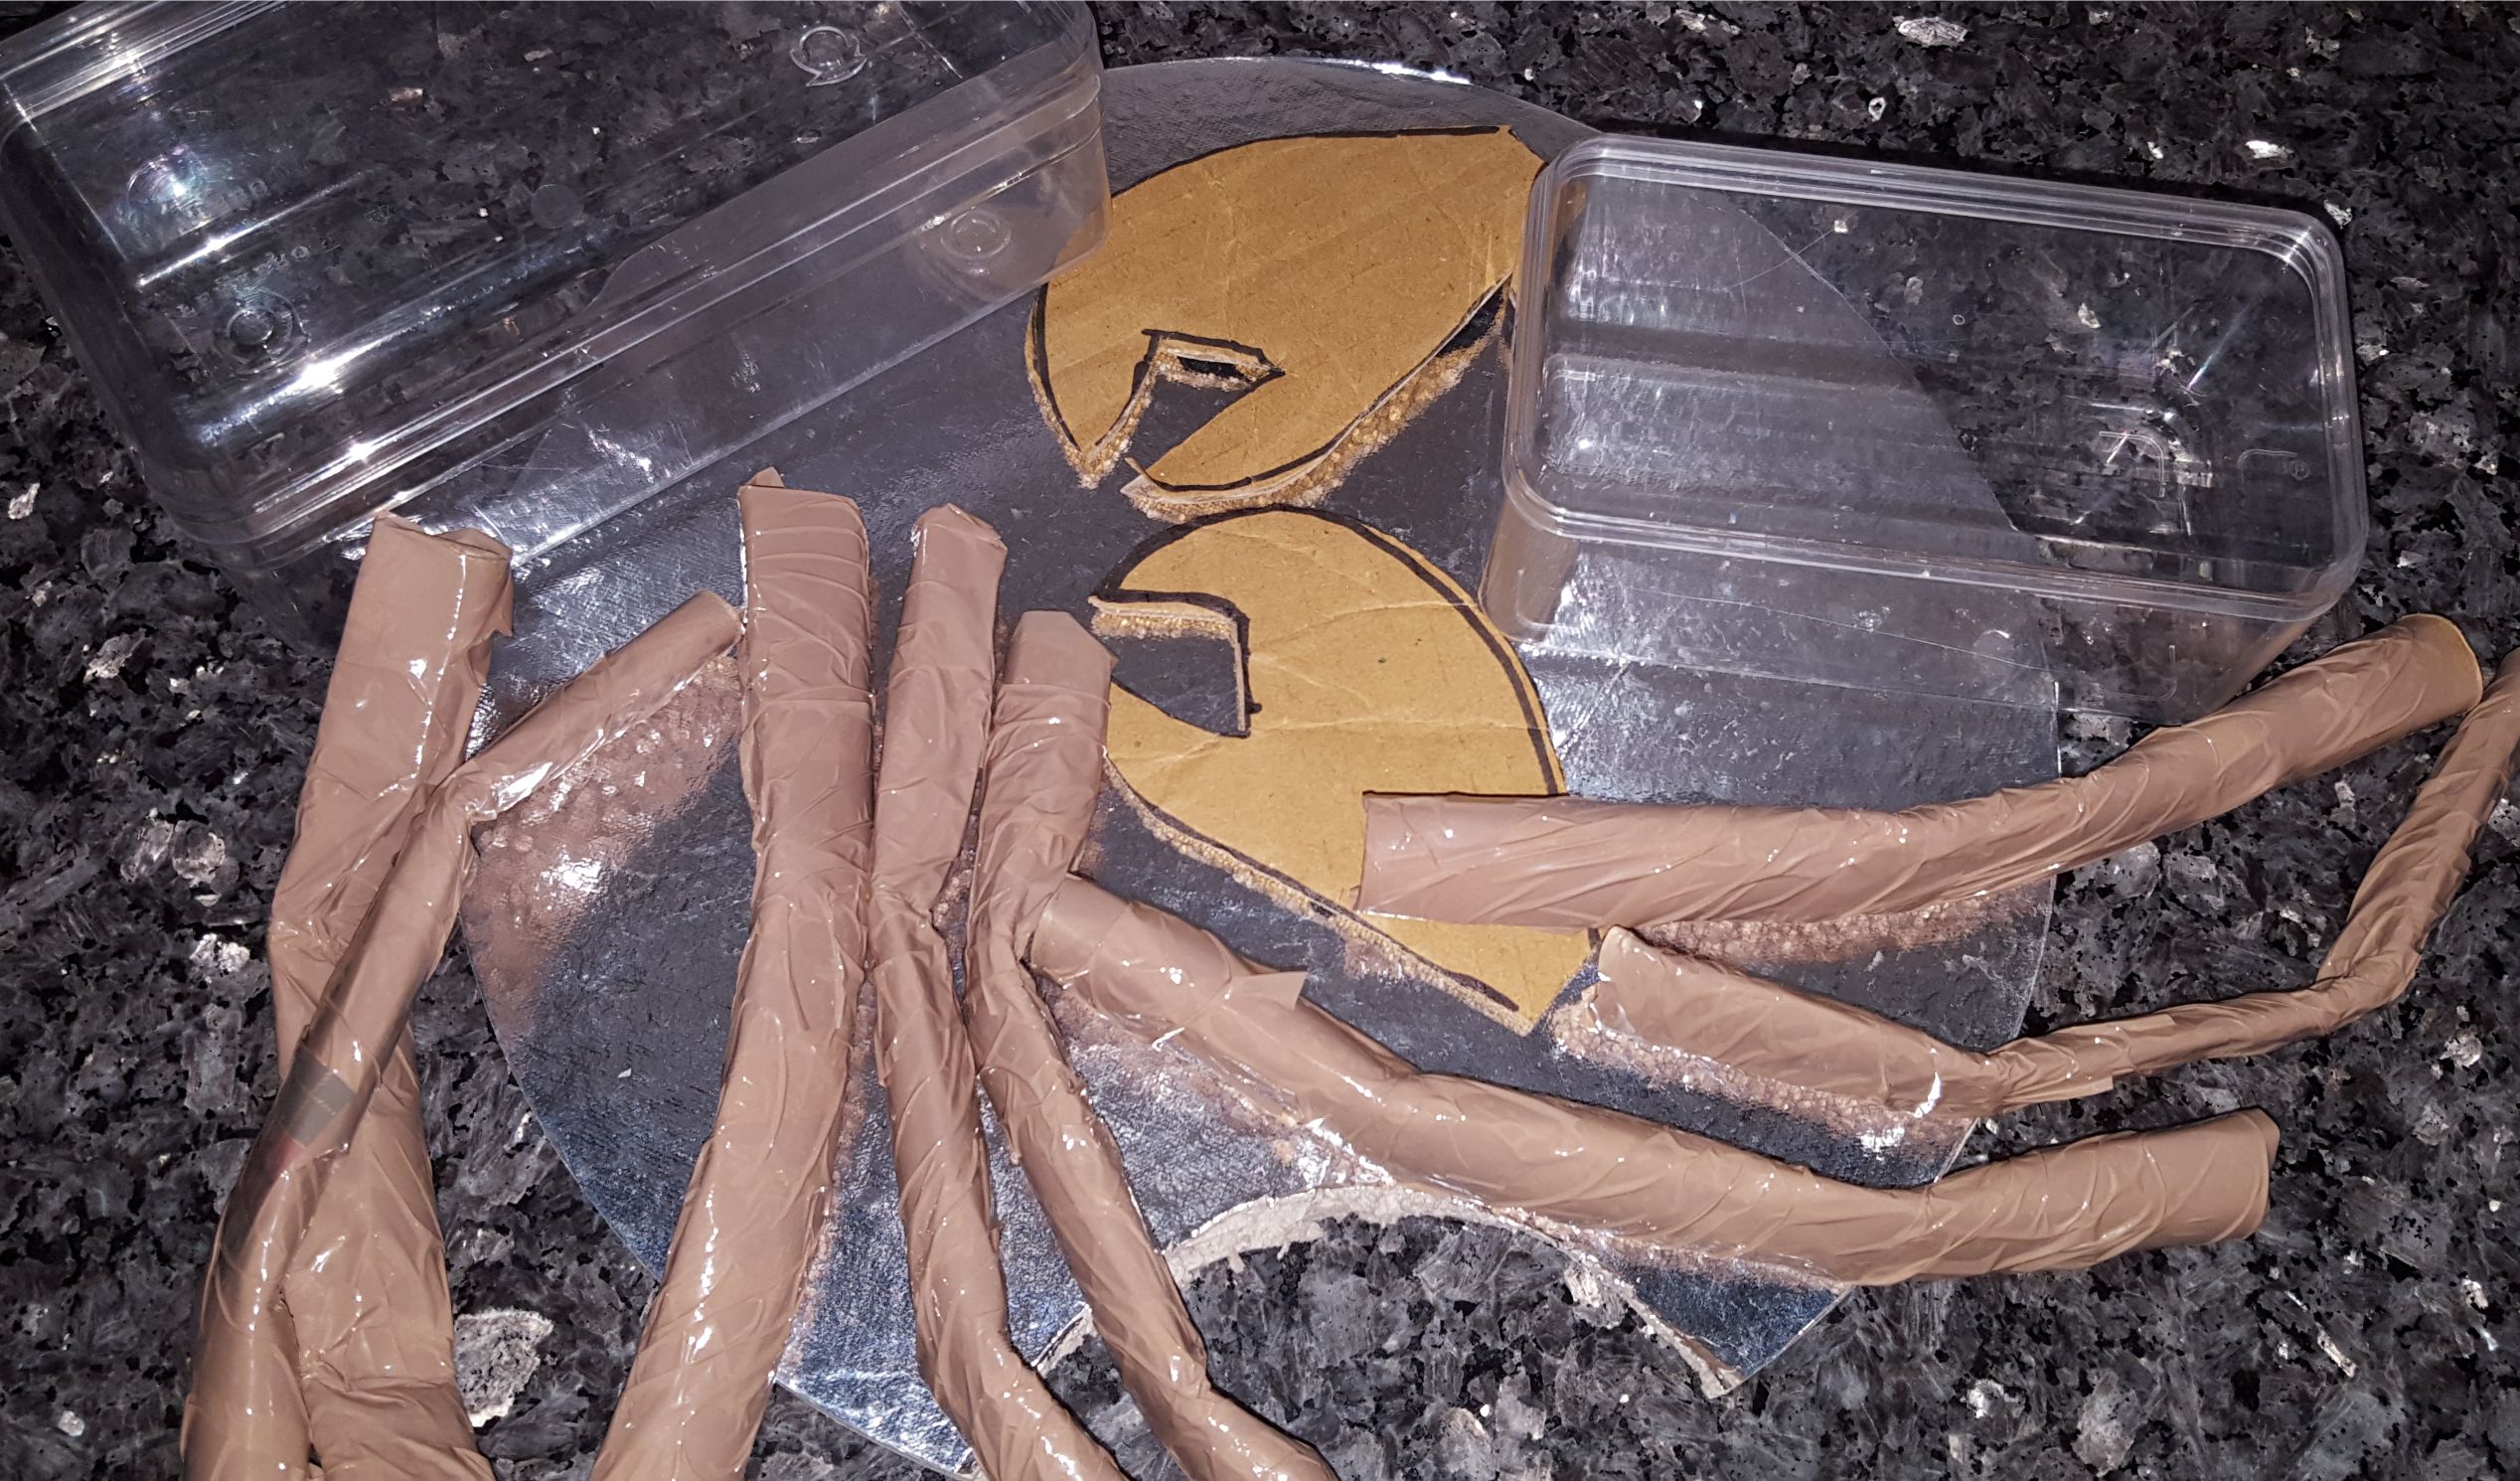

Prepare the first ingredients like shown here: Roll up 8 newspaper pages and cover with brown masking tape. Bend in two places. Remember one leg should be shorter than the rest (this is the one Maui cut off Tamatoa) Cut out two claws from the cardboard piece and cut a round piece off the cake board to make room for the head.
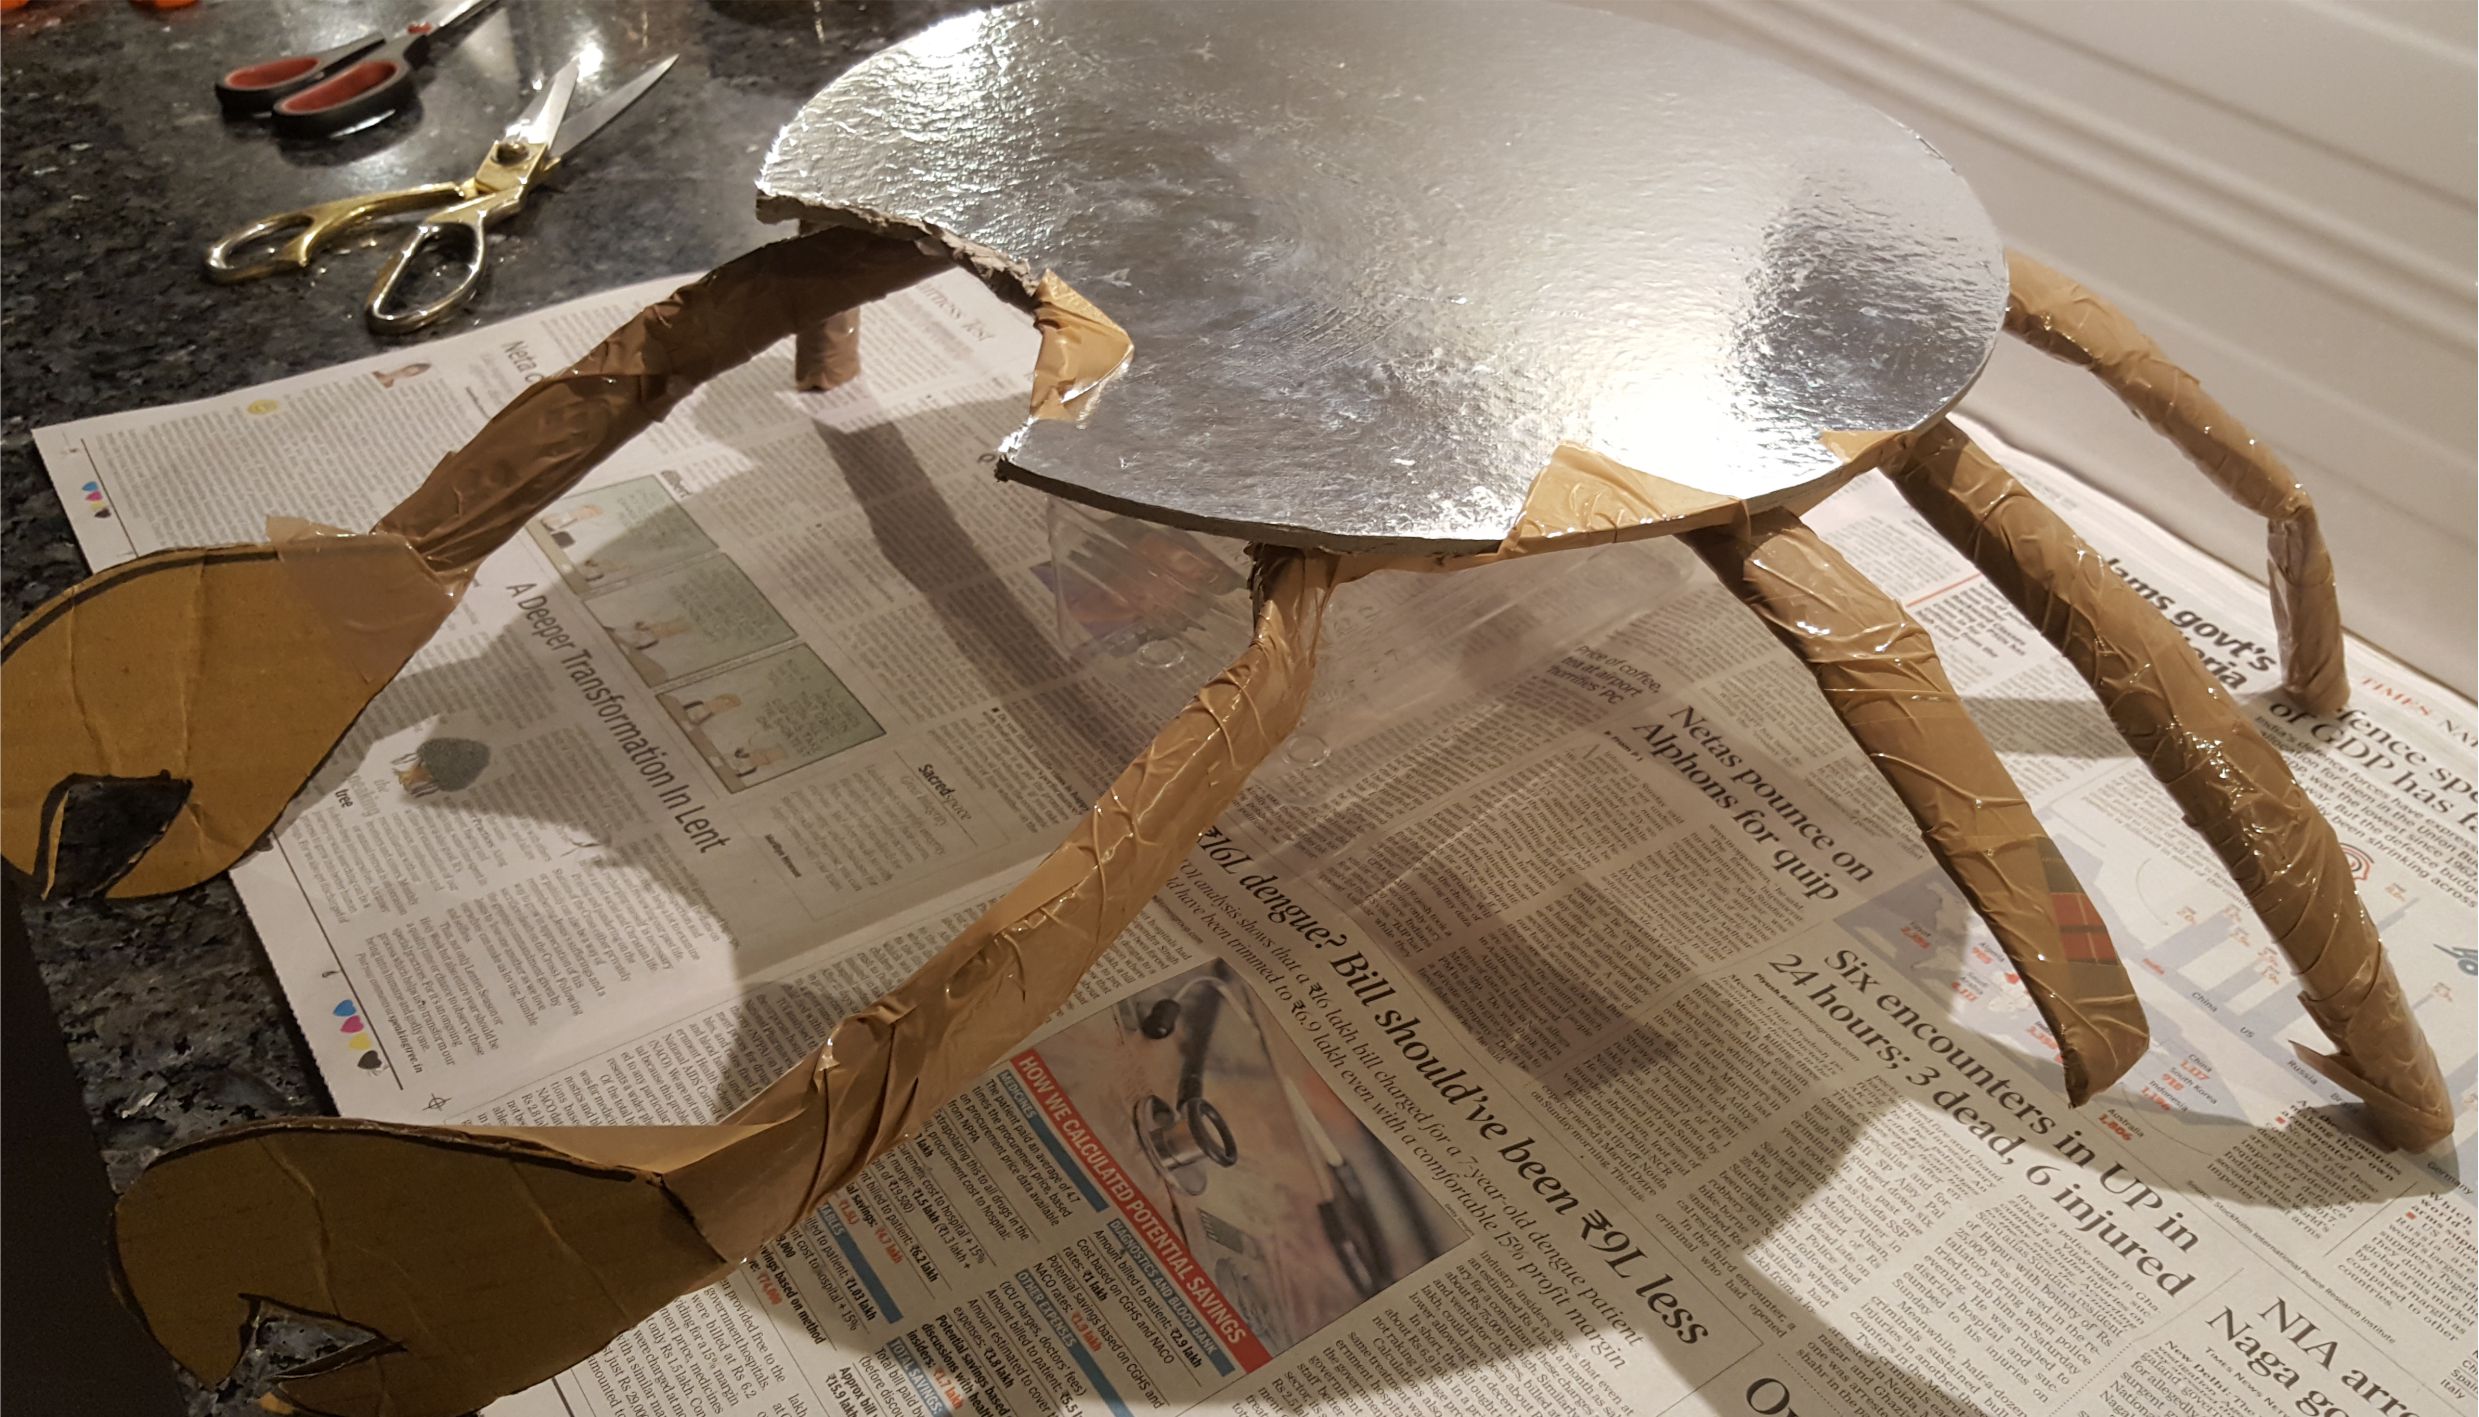

Attach the claws onto two of the legs and tape it all onto the cake board. Use the plastic containers for support underneath as the legs obviously aren’t strong enough to support the weight of the crab.
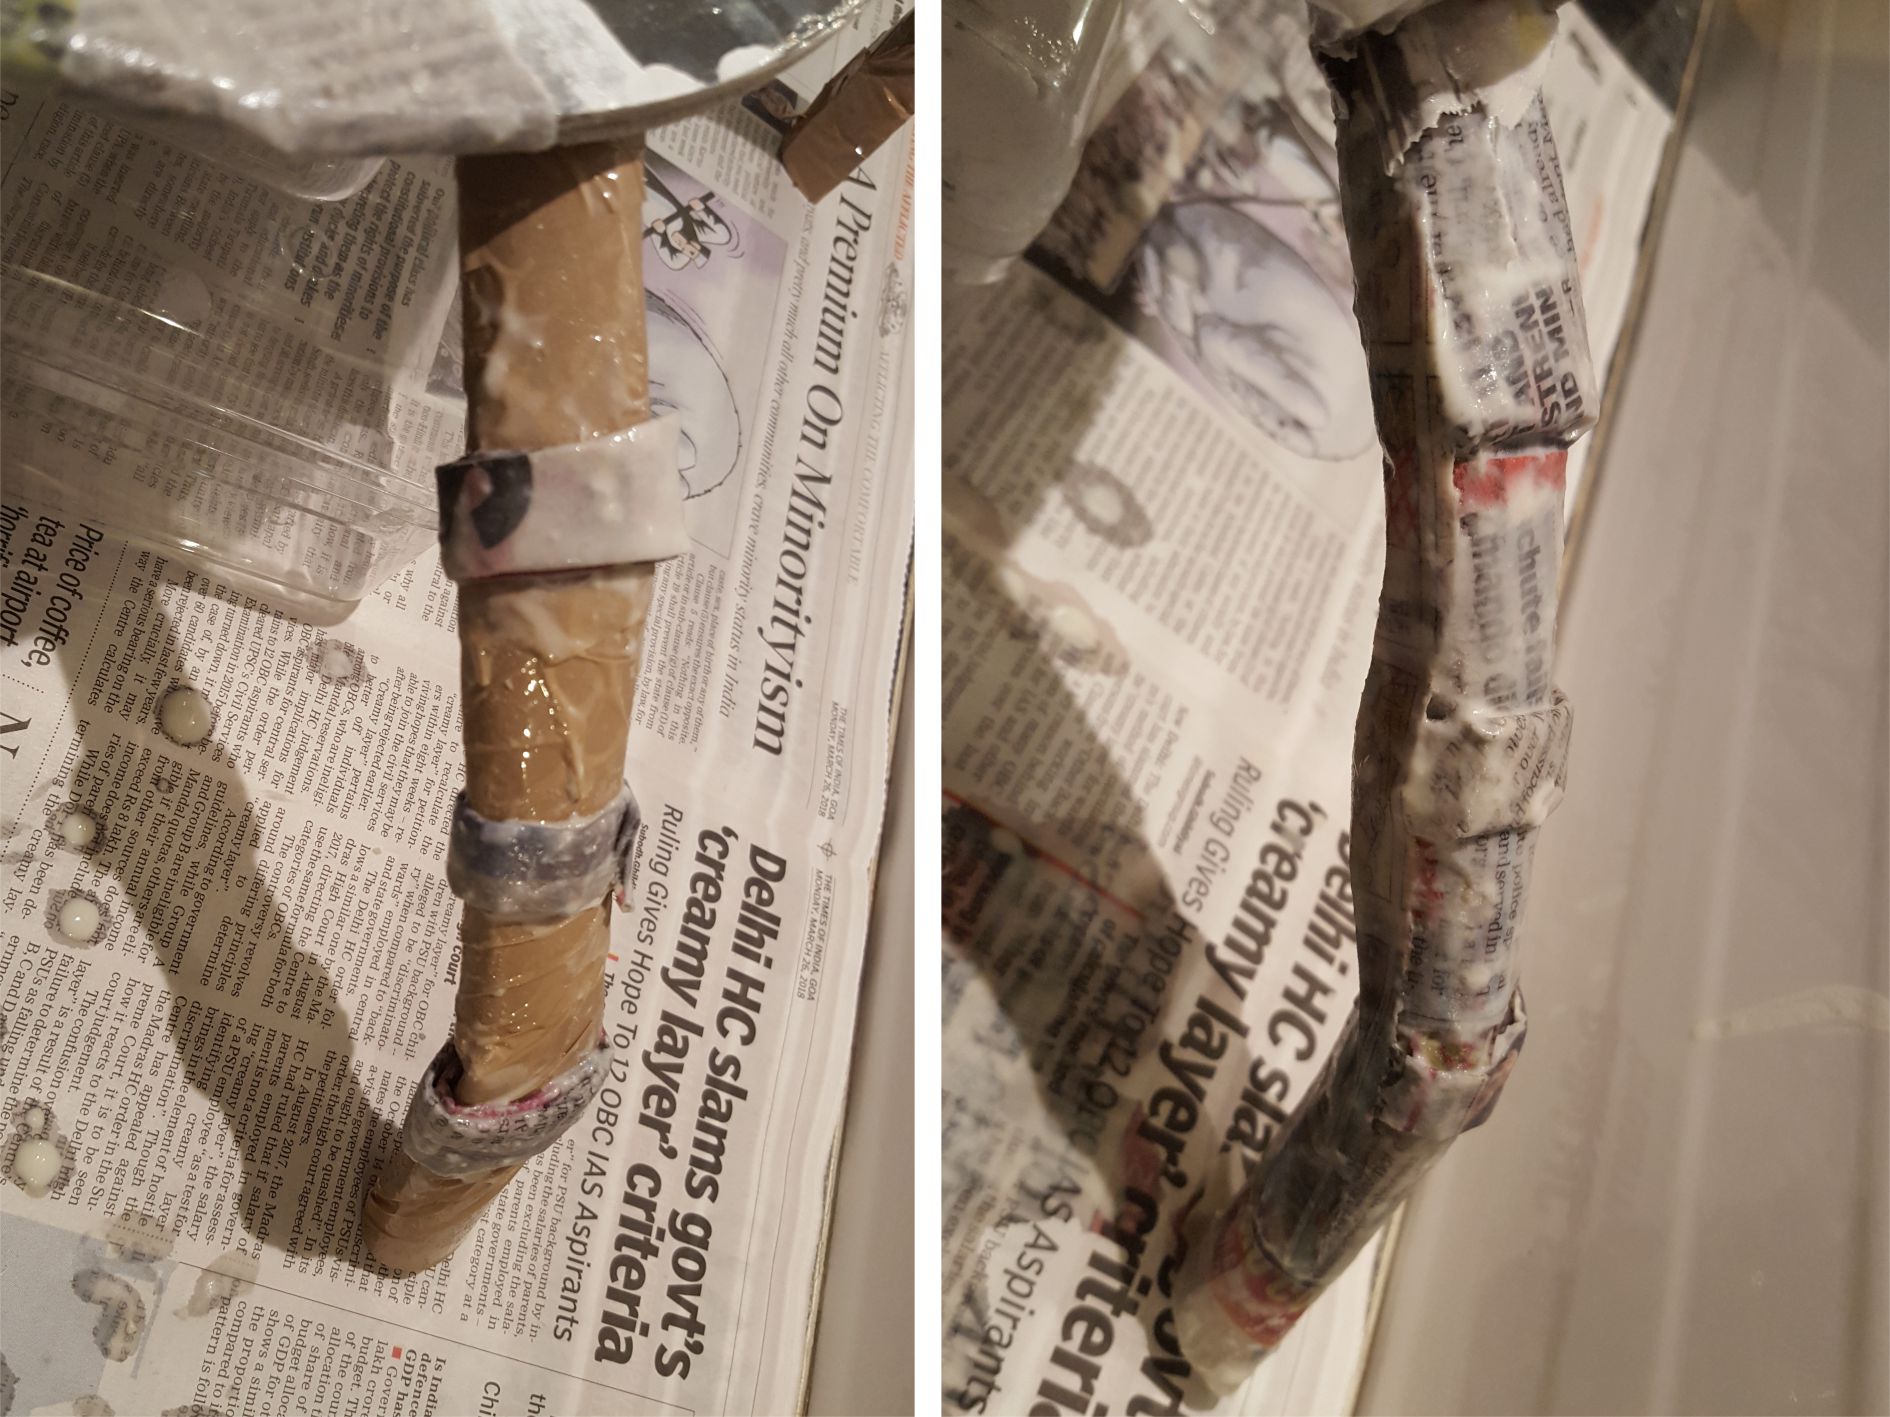

Make small newspaper rings around each leg with homemade glue (2 parts maida and 3 parts water) Cover with newspaper on top of the rings.
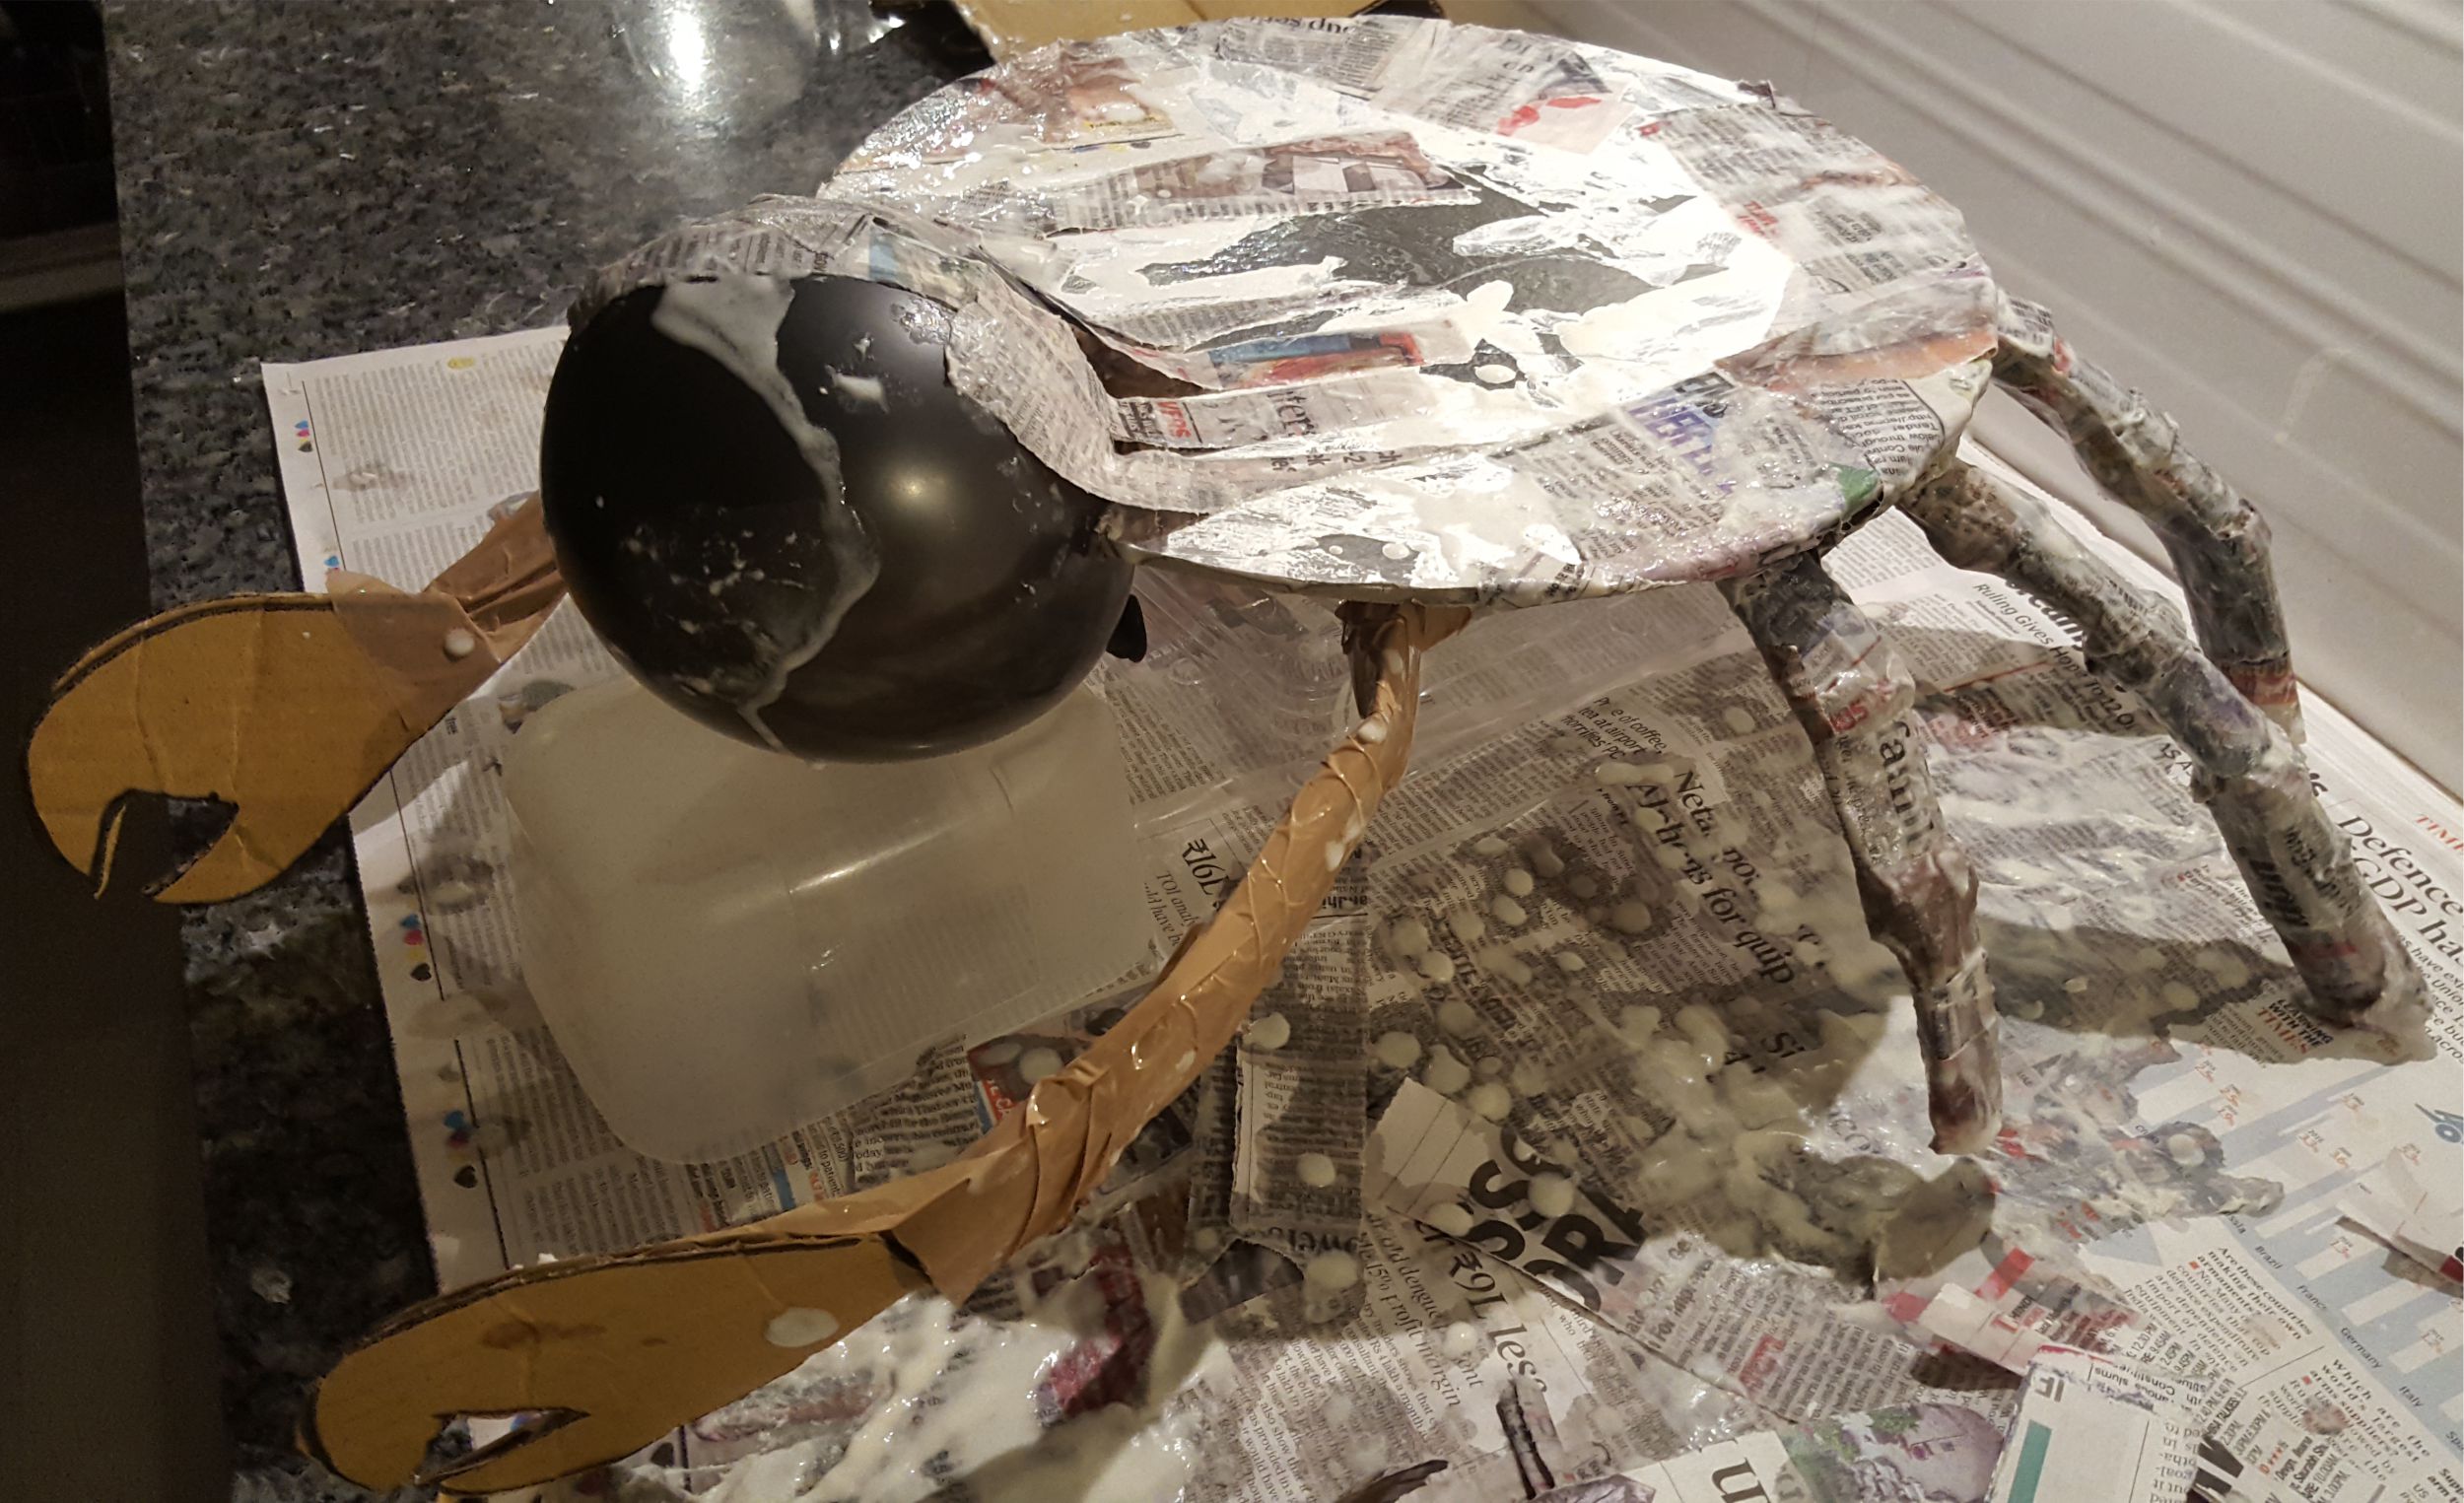

Blow up a balloon to half it’s normal size and attach it to the front of the cake board with newspapers and glue while supporting it with any box you have handy.
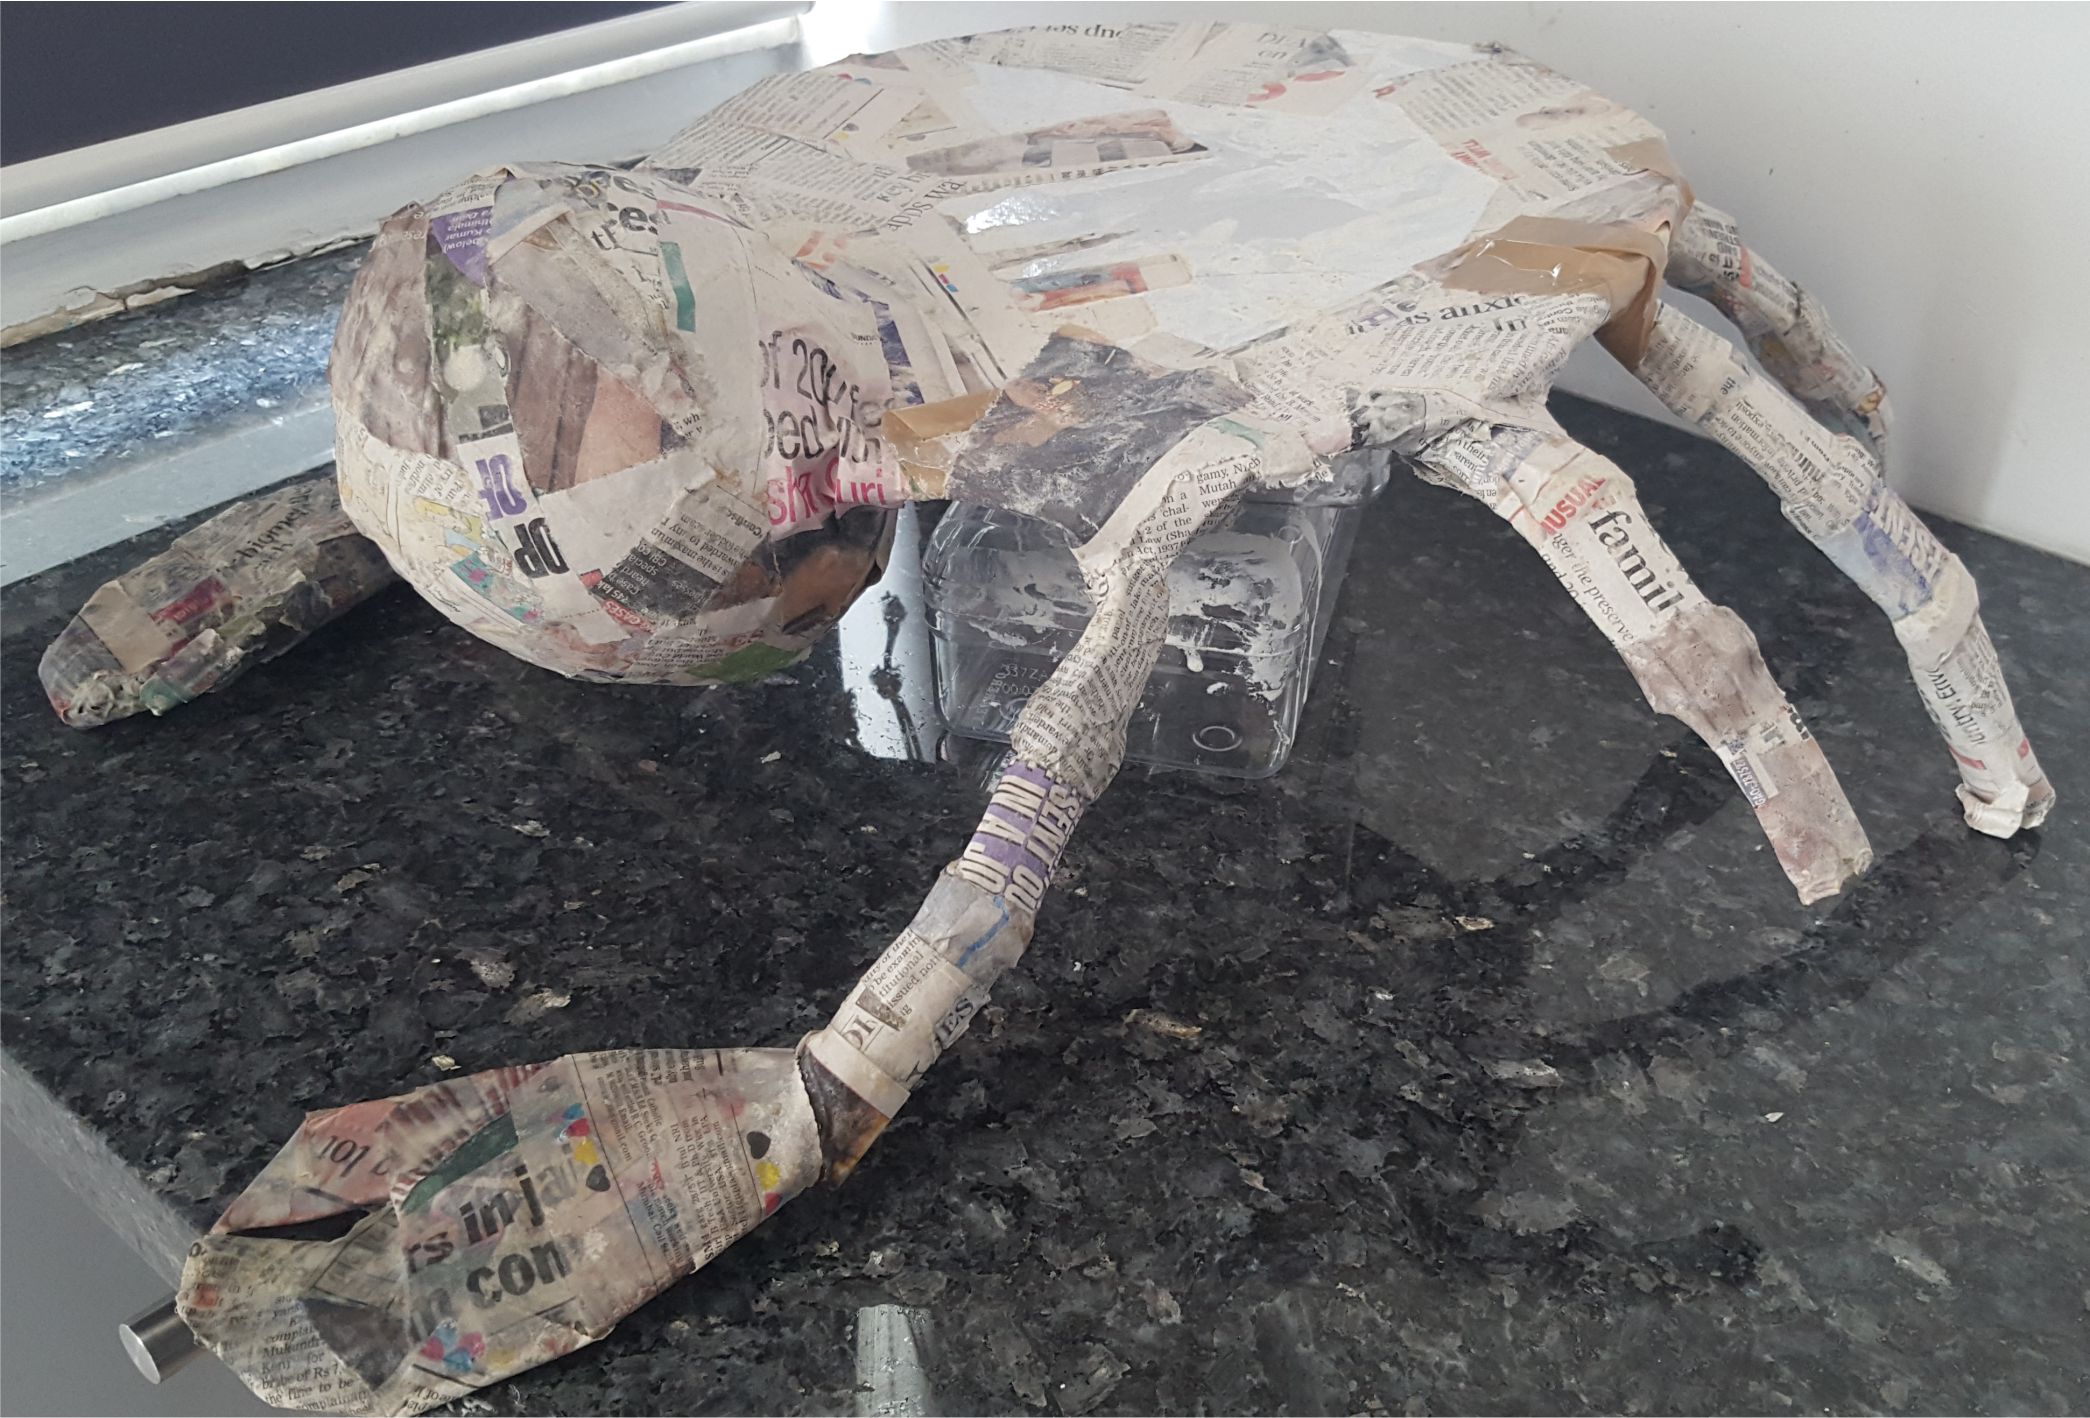

Cover the head and claws (and legs if needed) with 2-3 layers of newspapers. Make sure you reinforce the taped legs too to the cake board and don’t worry if one or two fall off in the process. That also happened to us, but we just reattached and once dry, they become quite sturdy. This can get quite messy (especially if children are helping) but the homemade glue is quite easy to wipe off afterwards so no harm done
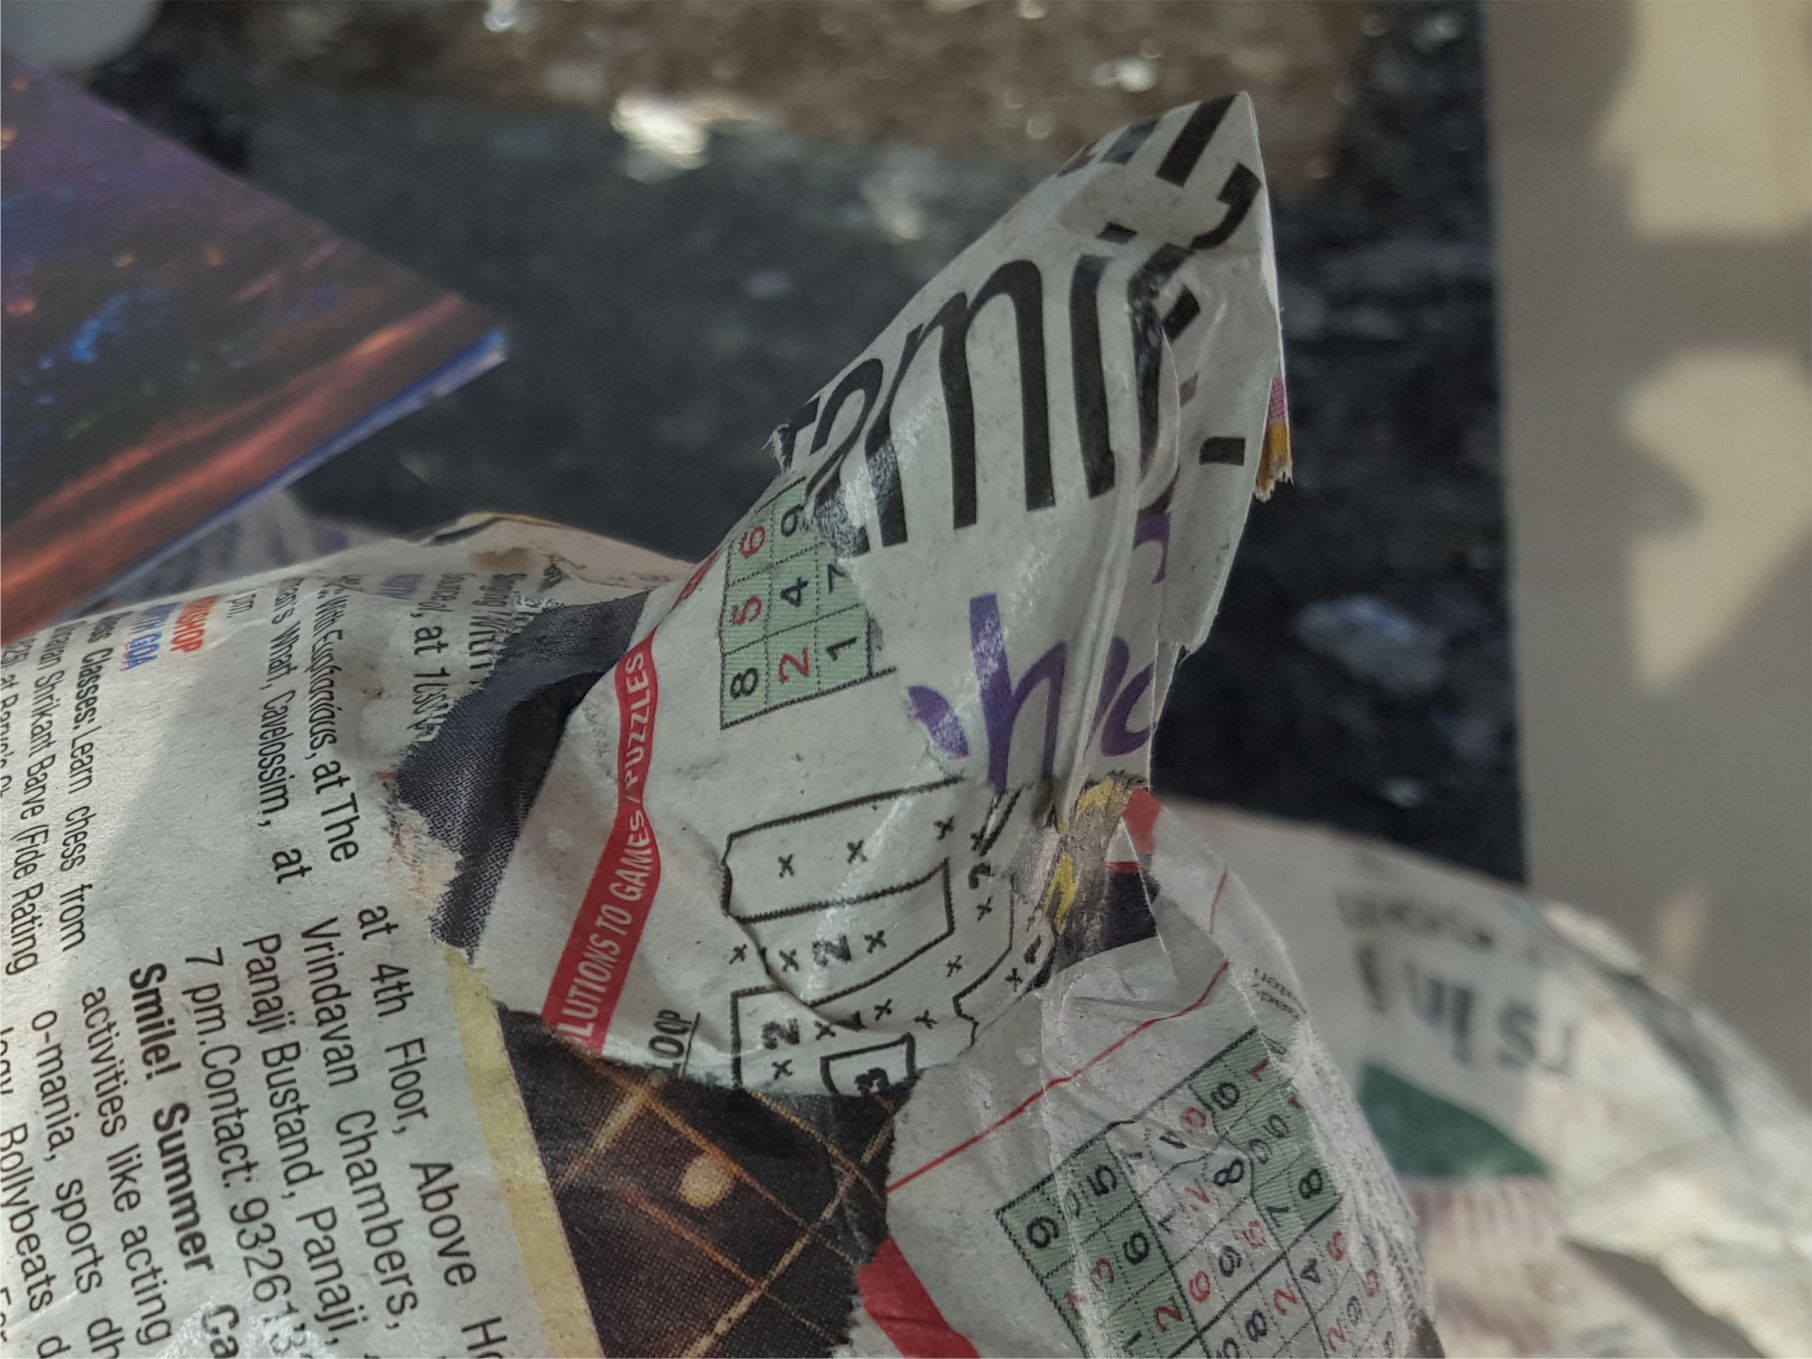

Cut out a “horn” from the disposable egg box and attach with newspapers to the “forehead” of the crab
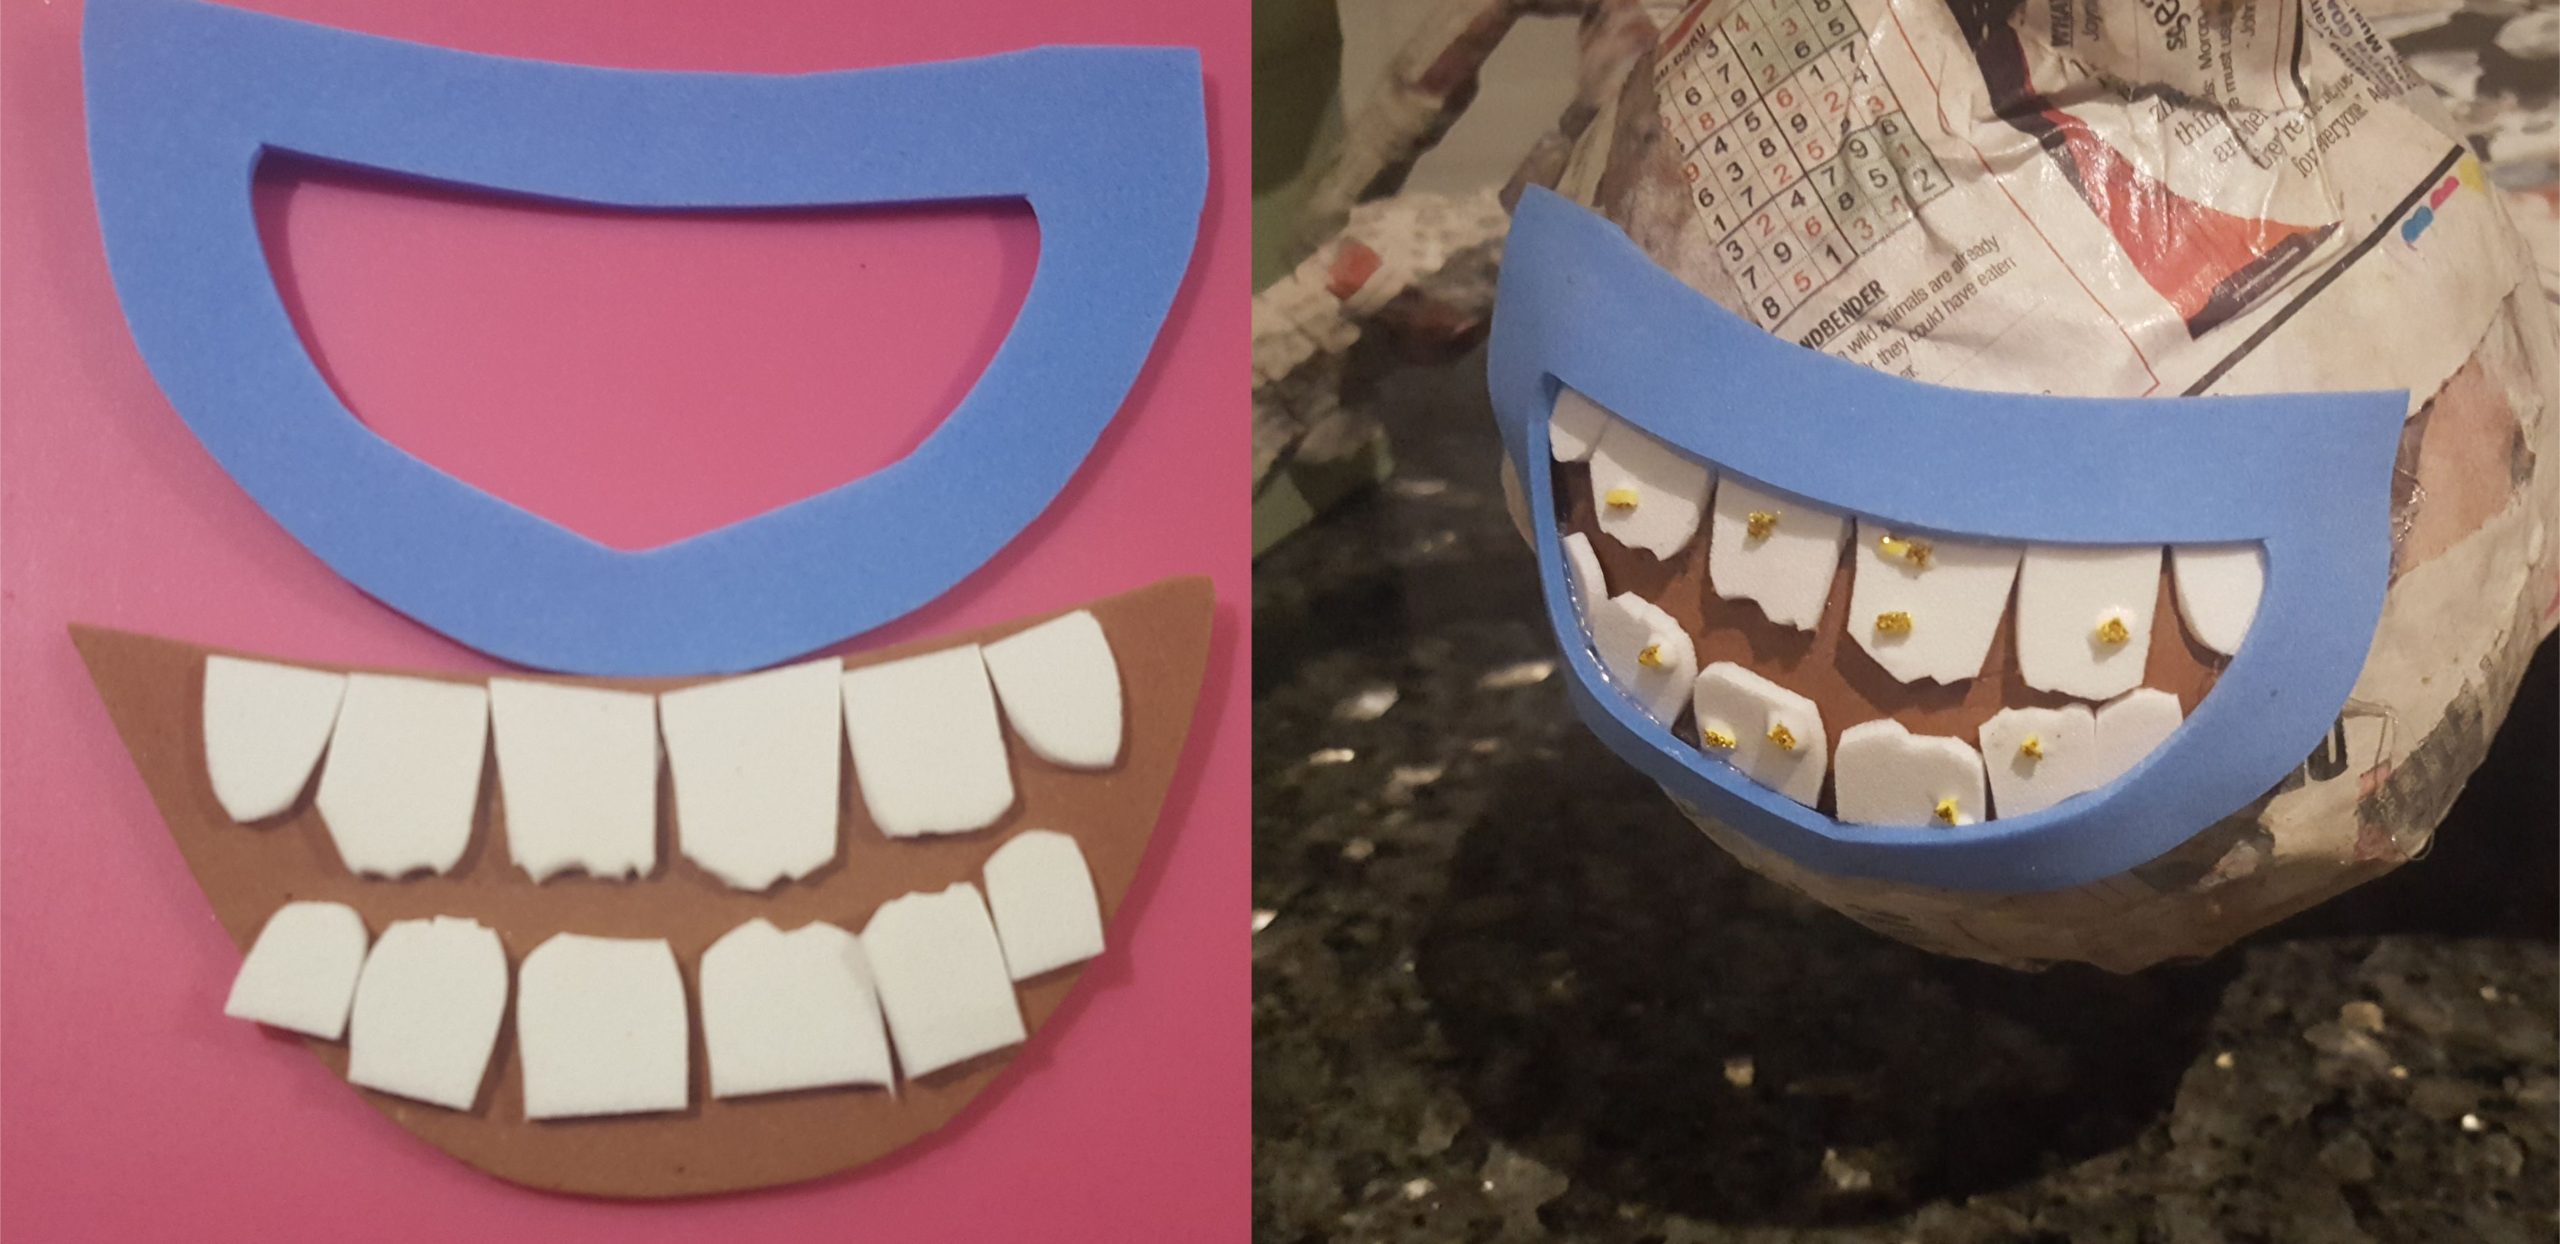

Use brown and white foam paper to make the mouth with 12 uneven white teeth (brown is the background). We cut small pieces of gold foam paper to make Tamatoa’s teeth look more authentic and shiny. The blue colour foam paper is not necessary as it will be painted anyways. Use whatever colour you have at home as “lips”


Use fevicryl to make the eyes and let them dry on a toothpick or wooden skewer.
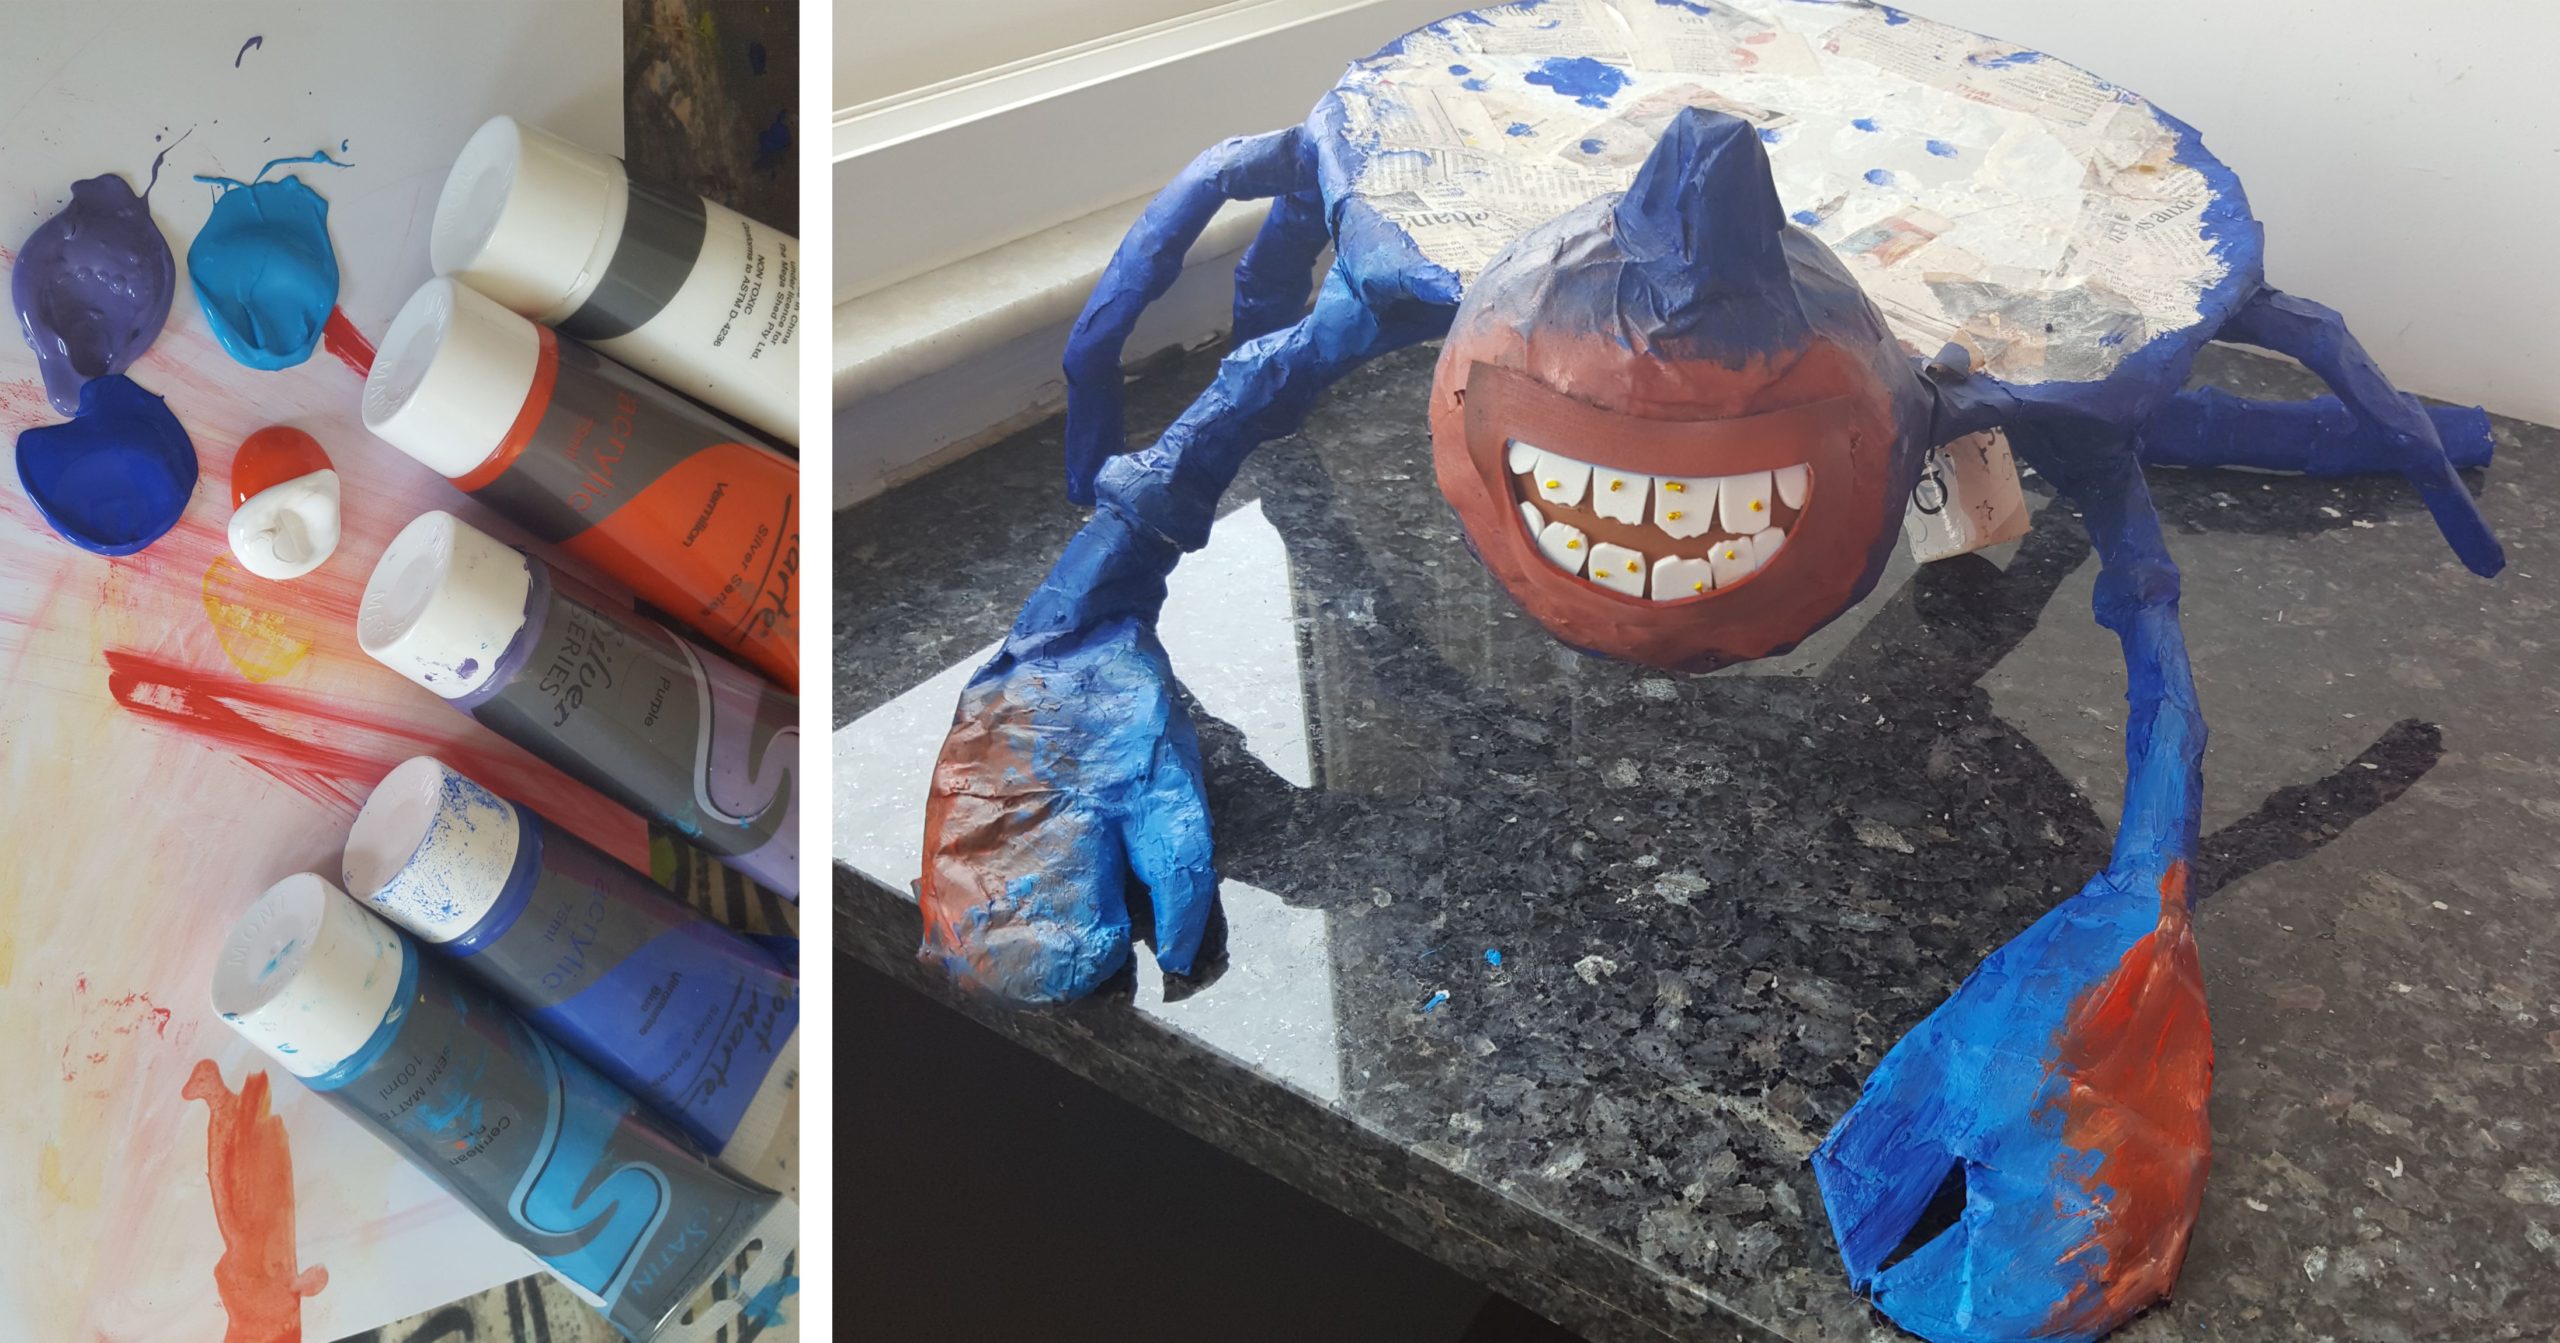

Using orange, dark and light blue and white, paint Tamatoa. Most of his shell is dark blue but the side of the claws and face is dark orange.
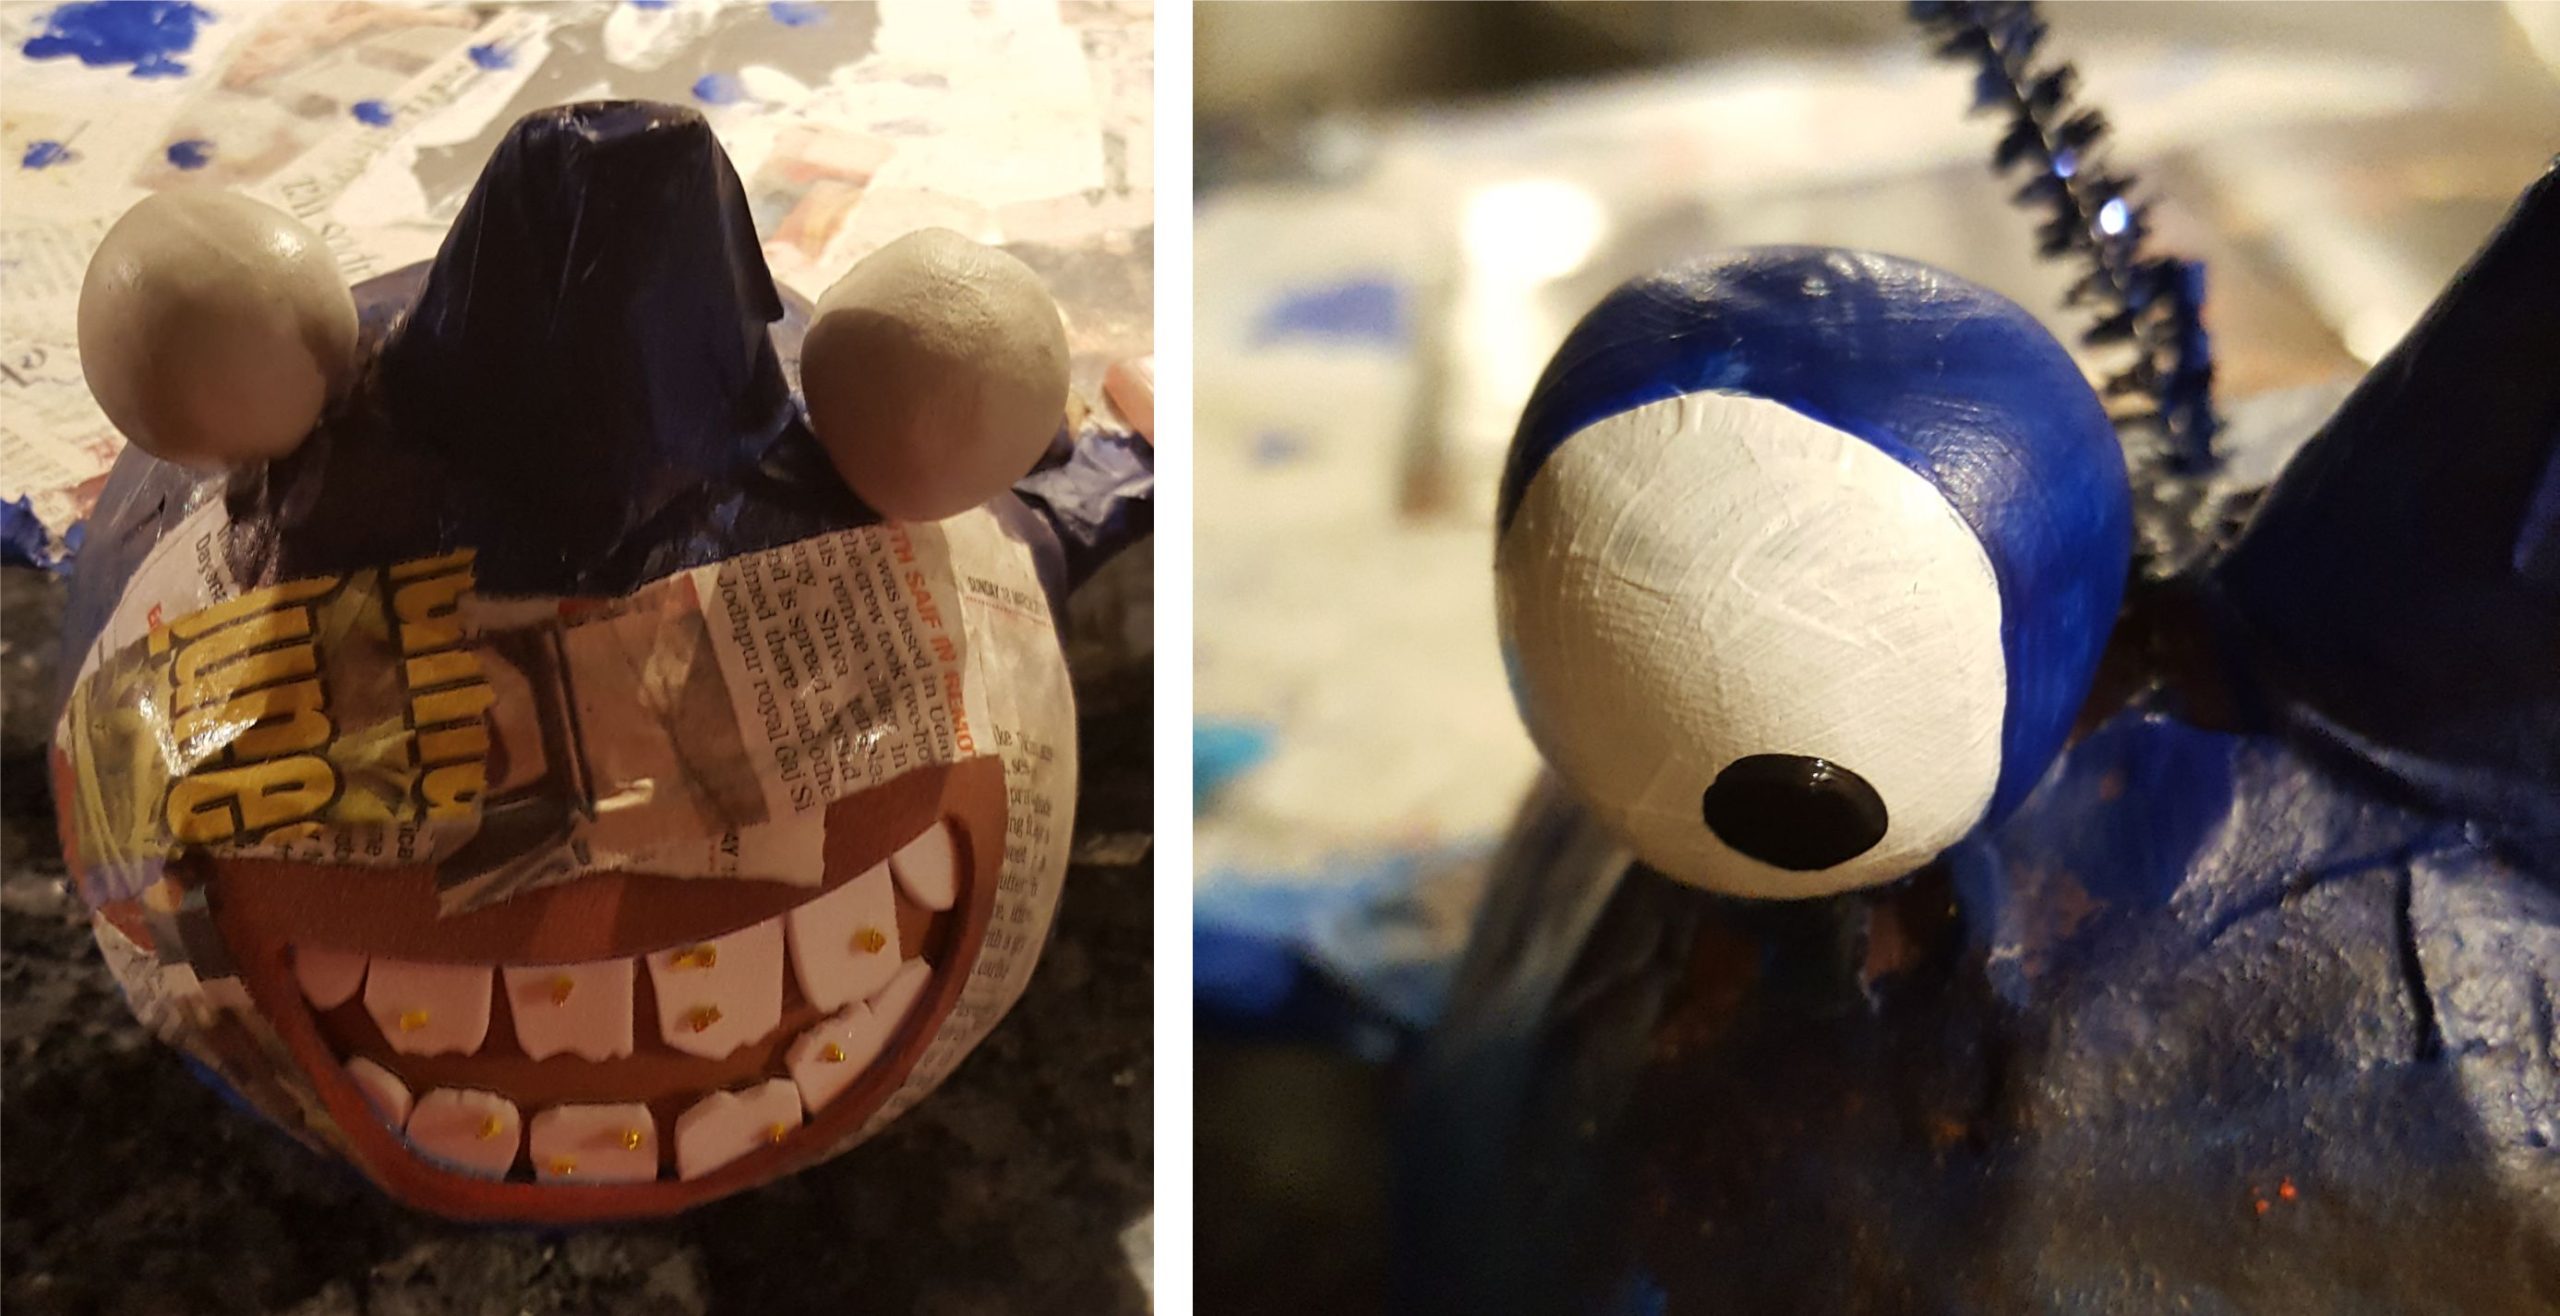

as you can see on the previous picture, there is a line around the mouth where the foam paper is. I didn’t like this sharp edge, so I added another layer of newspaper around the mouth and painting it again. Attach the eyes and paint them blue, white and black.


Use gold glitter and fevicol glue to decorate the claws and the top of the legs and make them shiny.
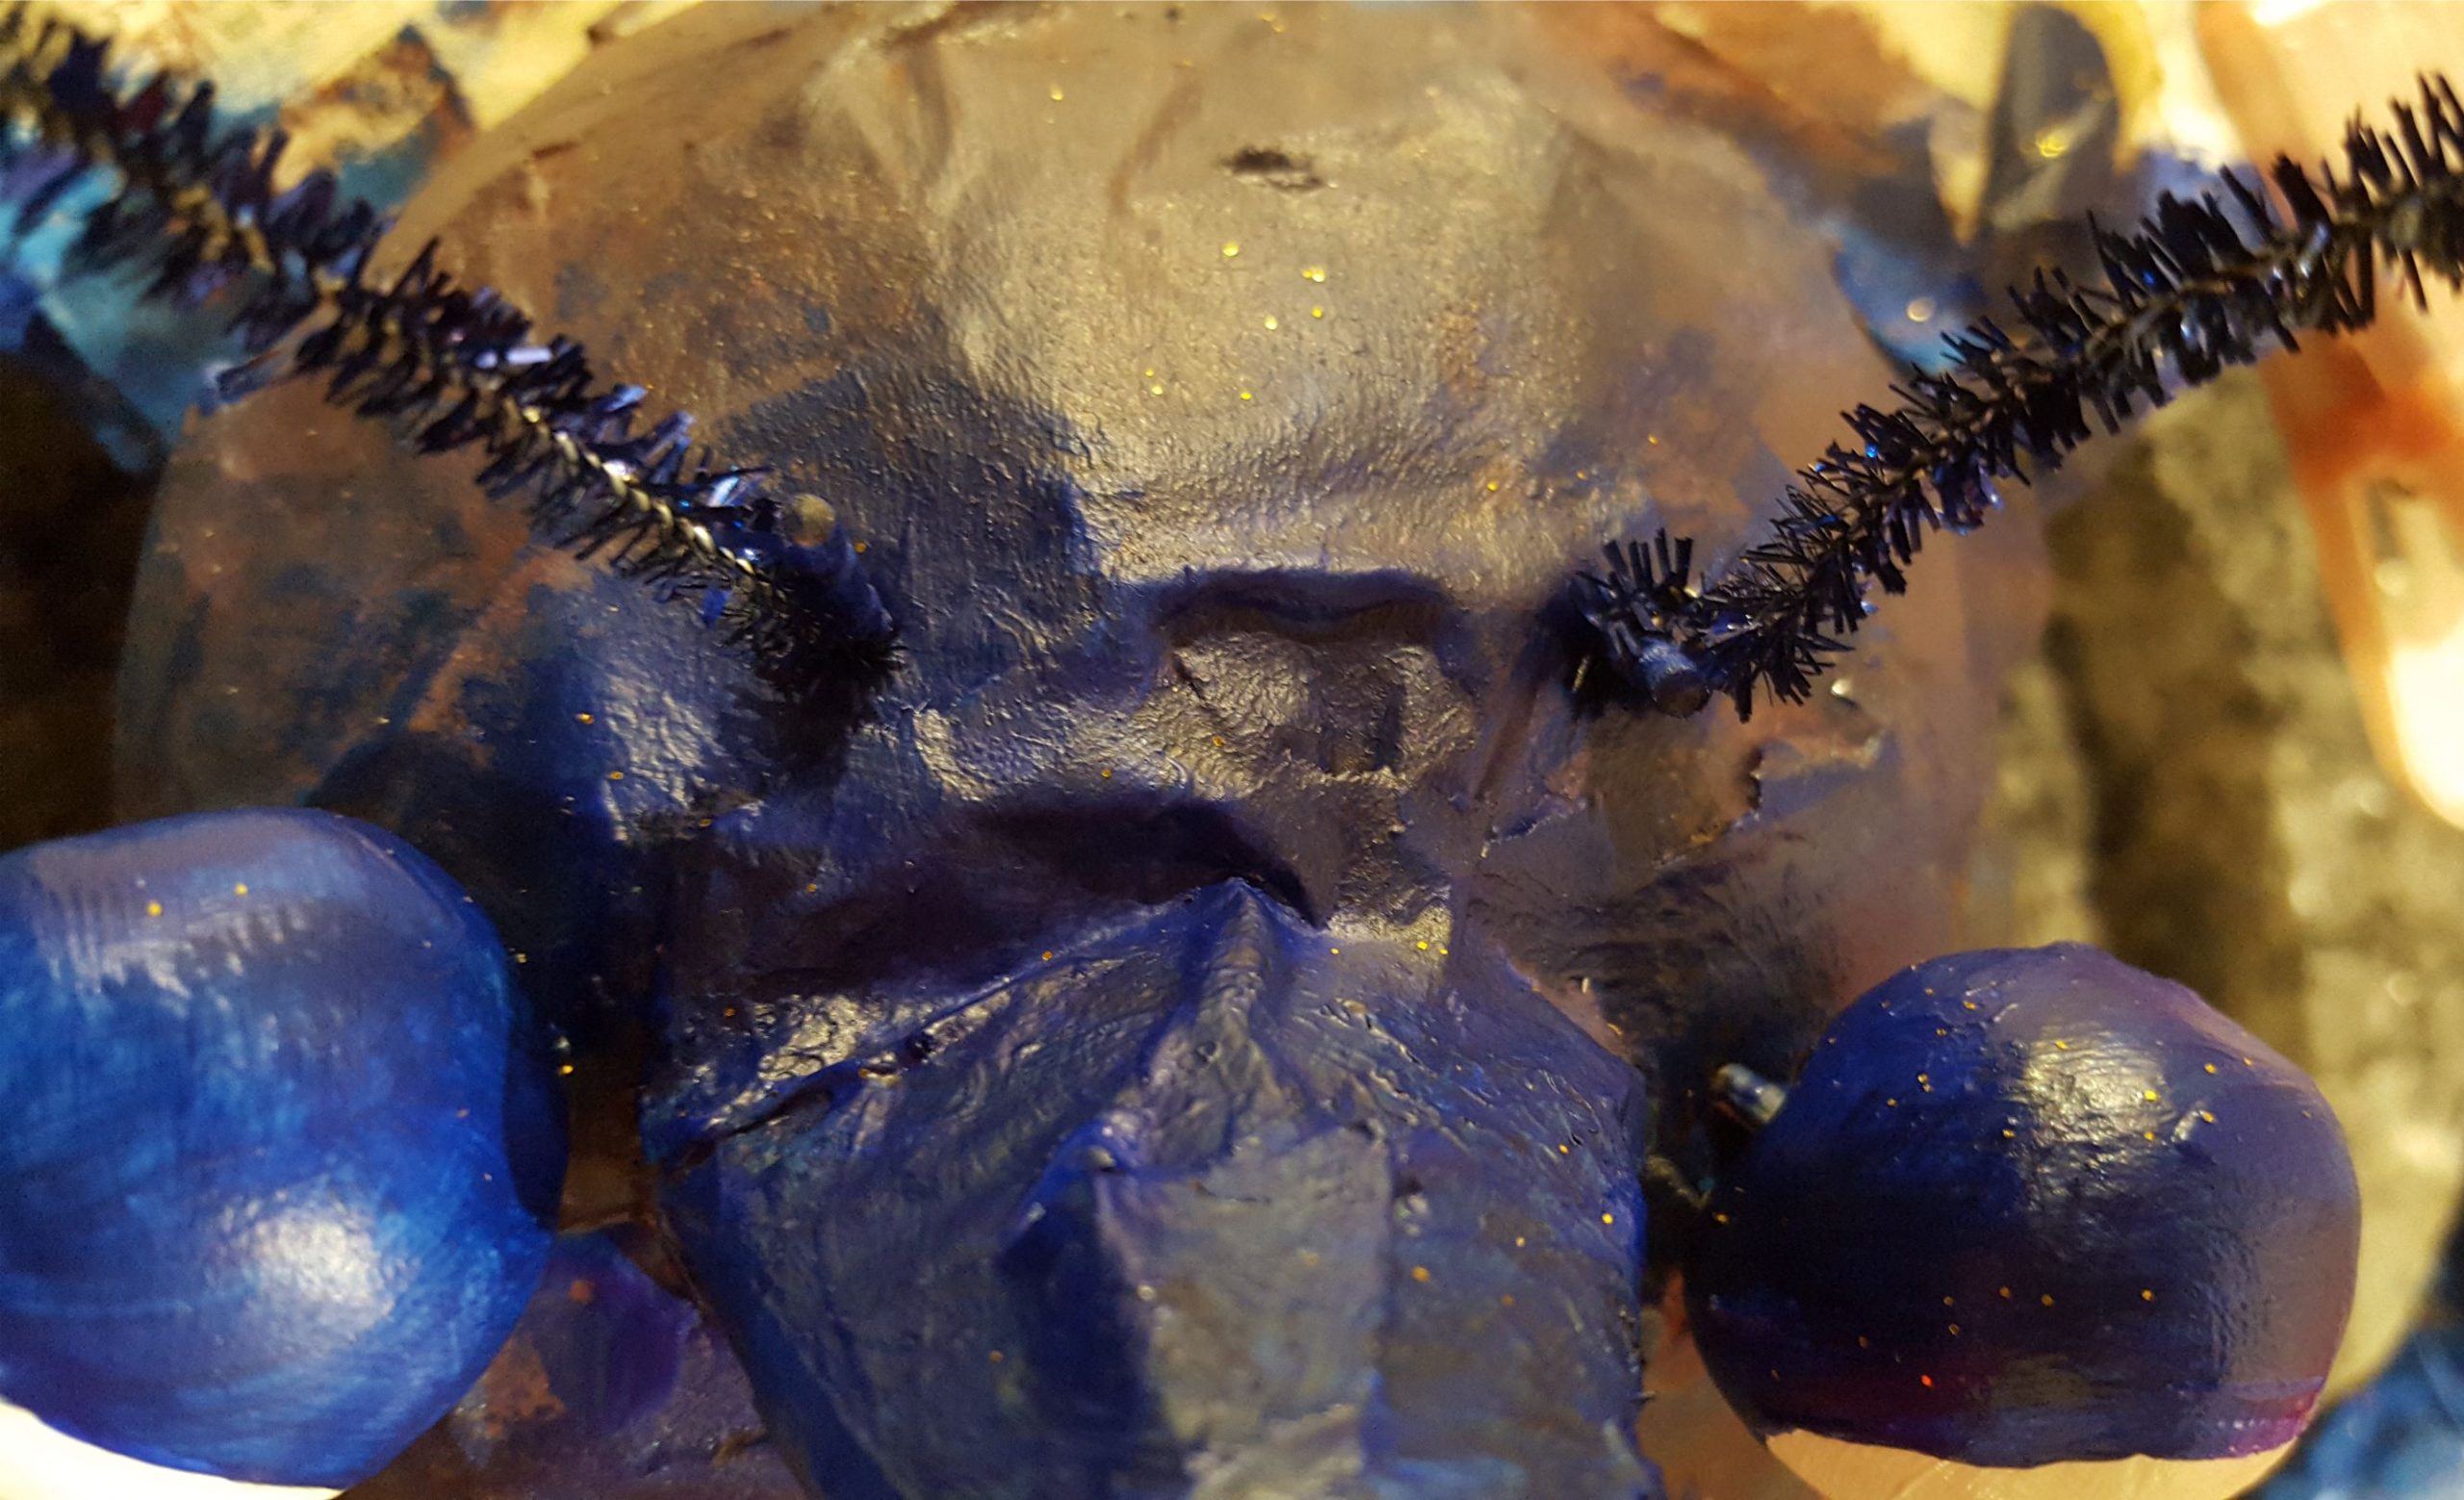

Make a hole for the pipe cleaners behind the eyes and insert them.
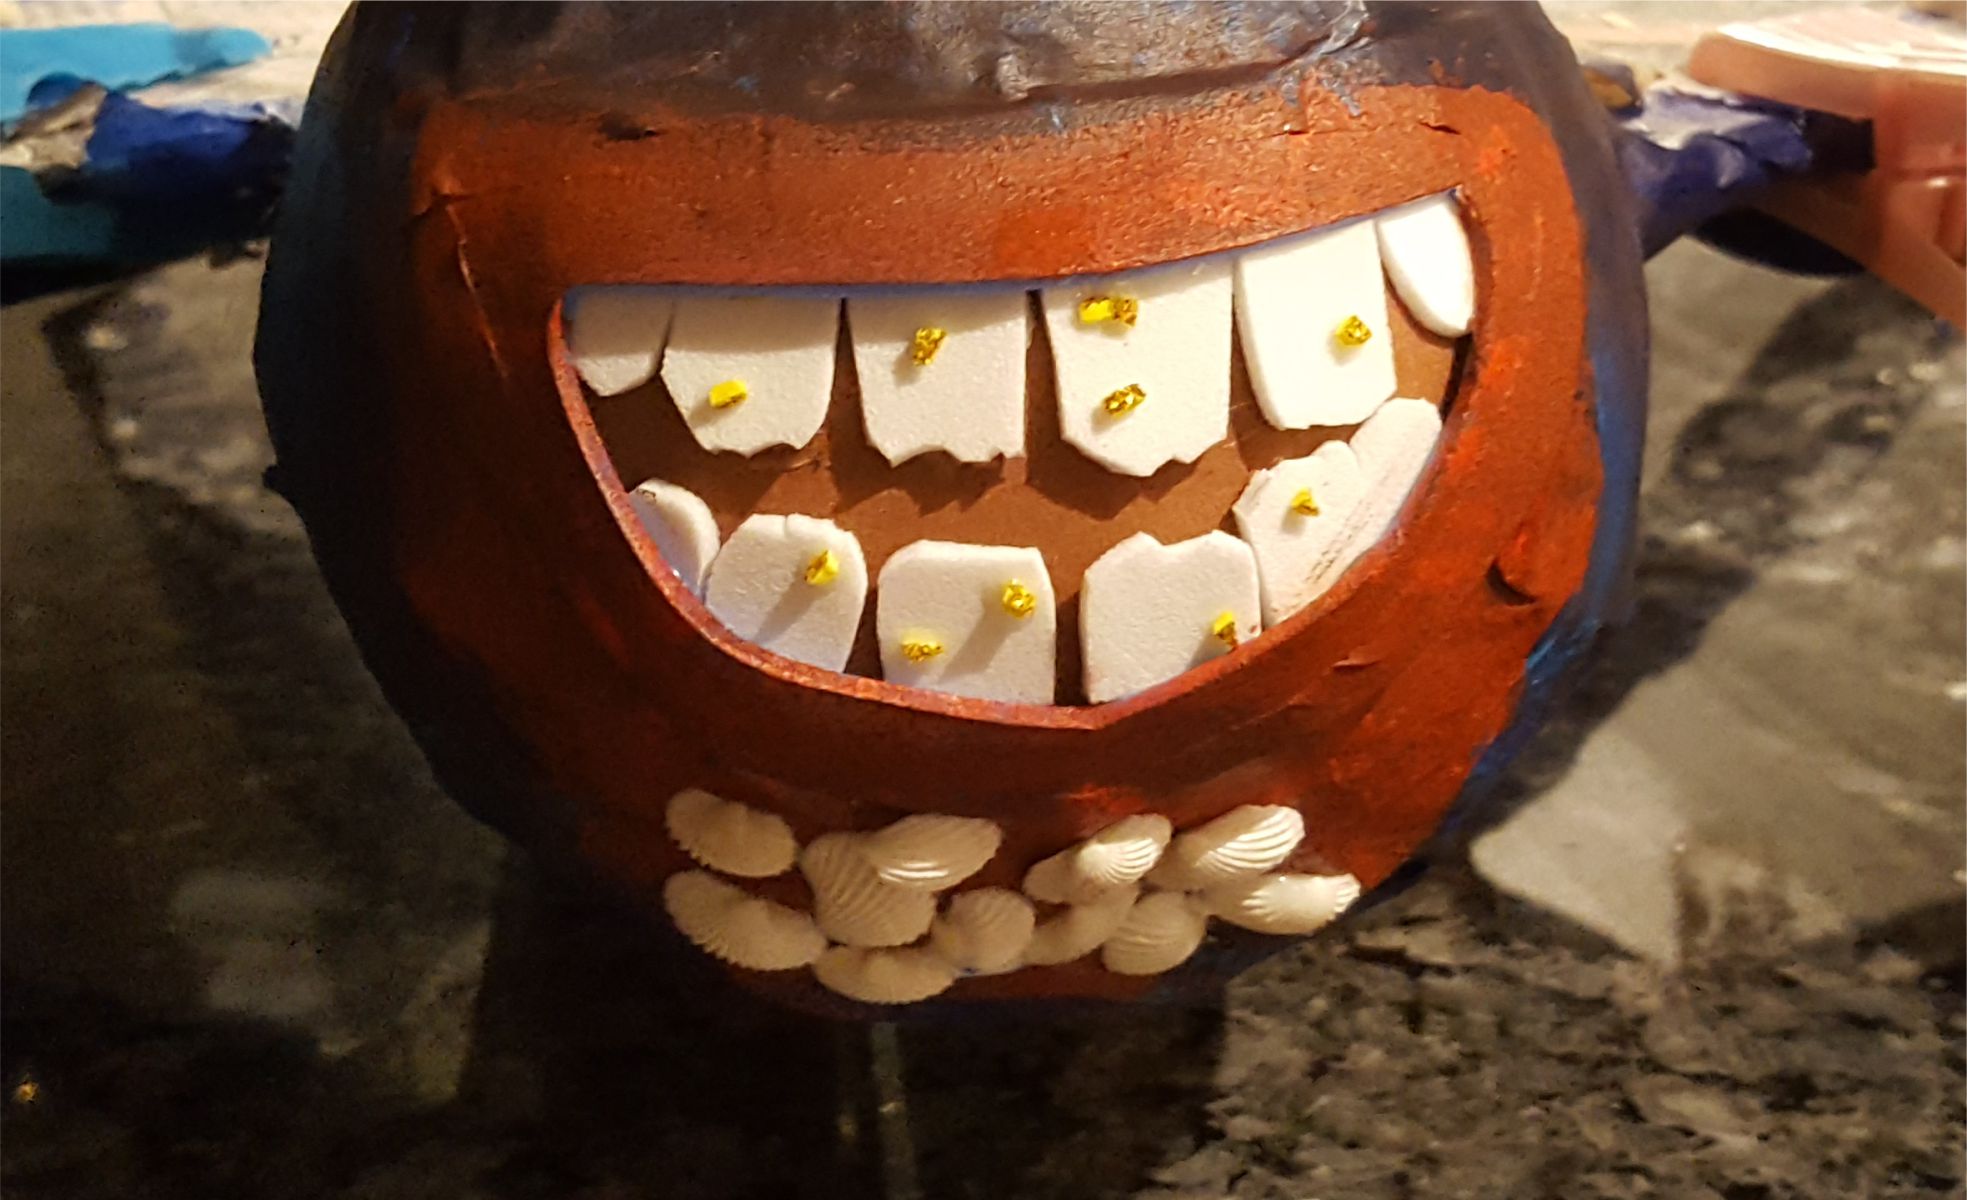

Glue some small white seashells on the chin of the crab
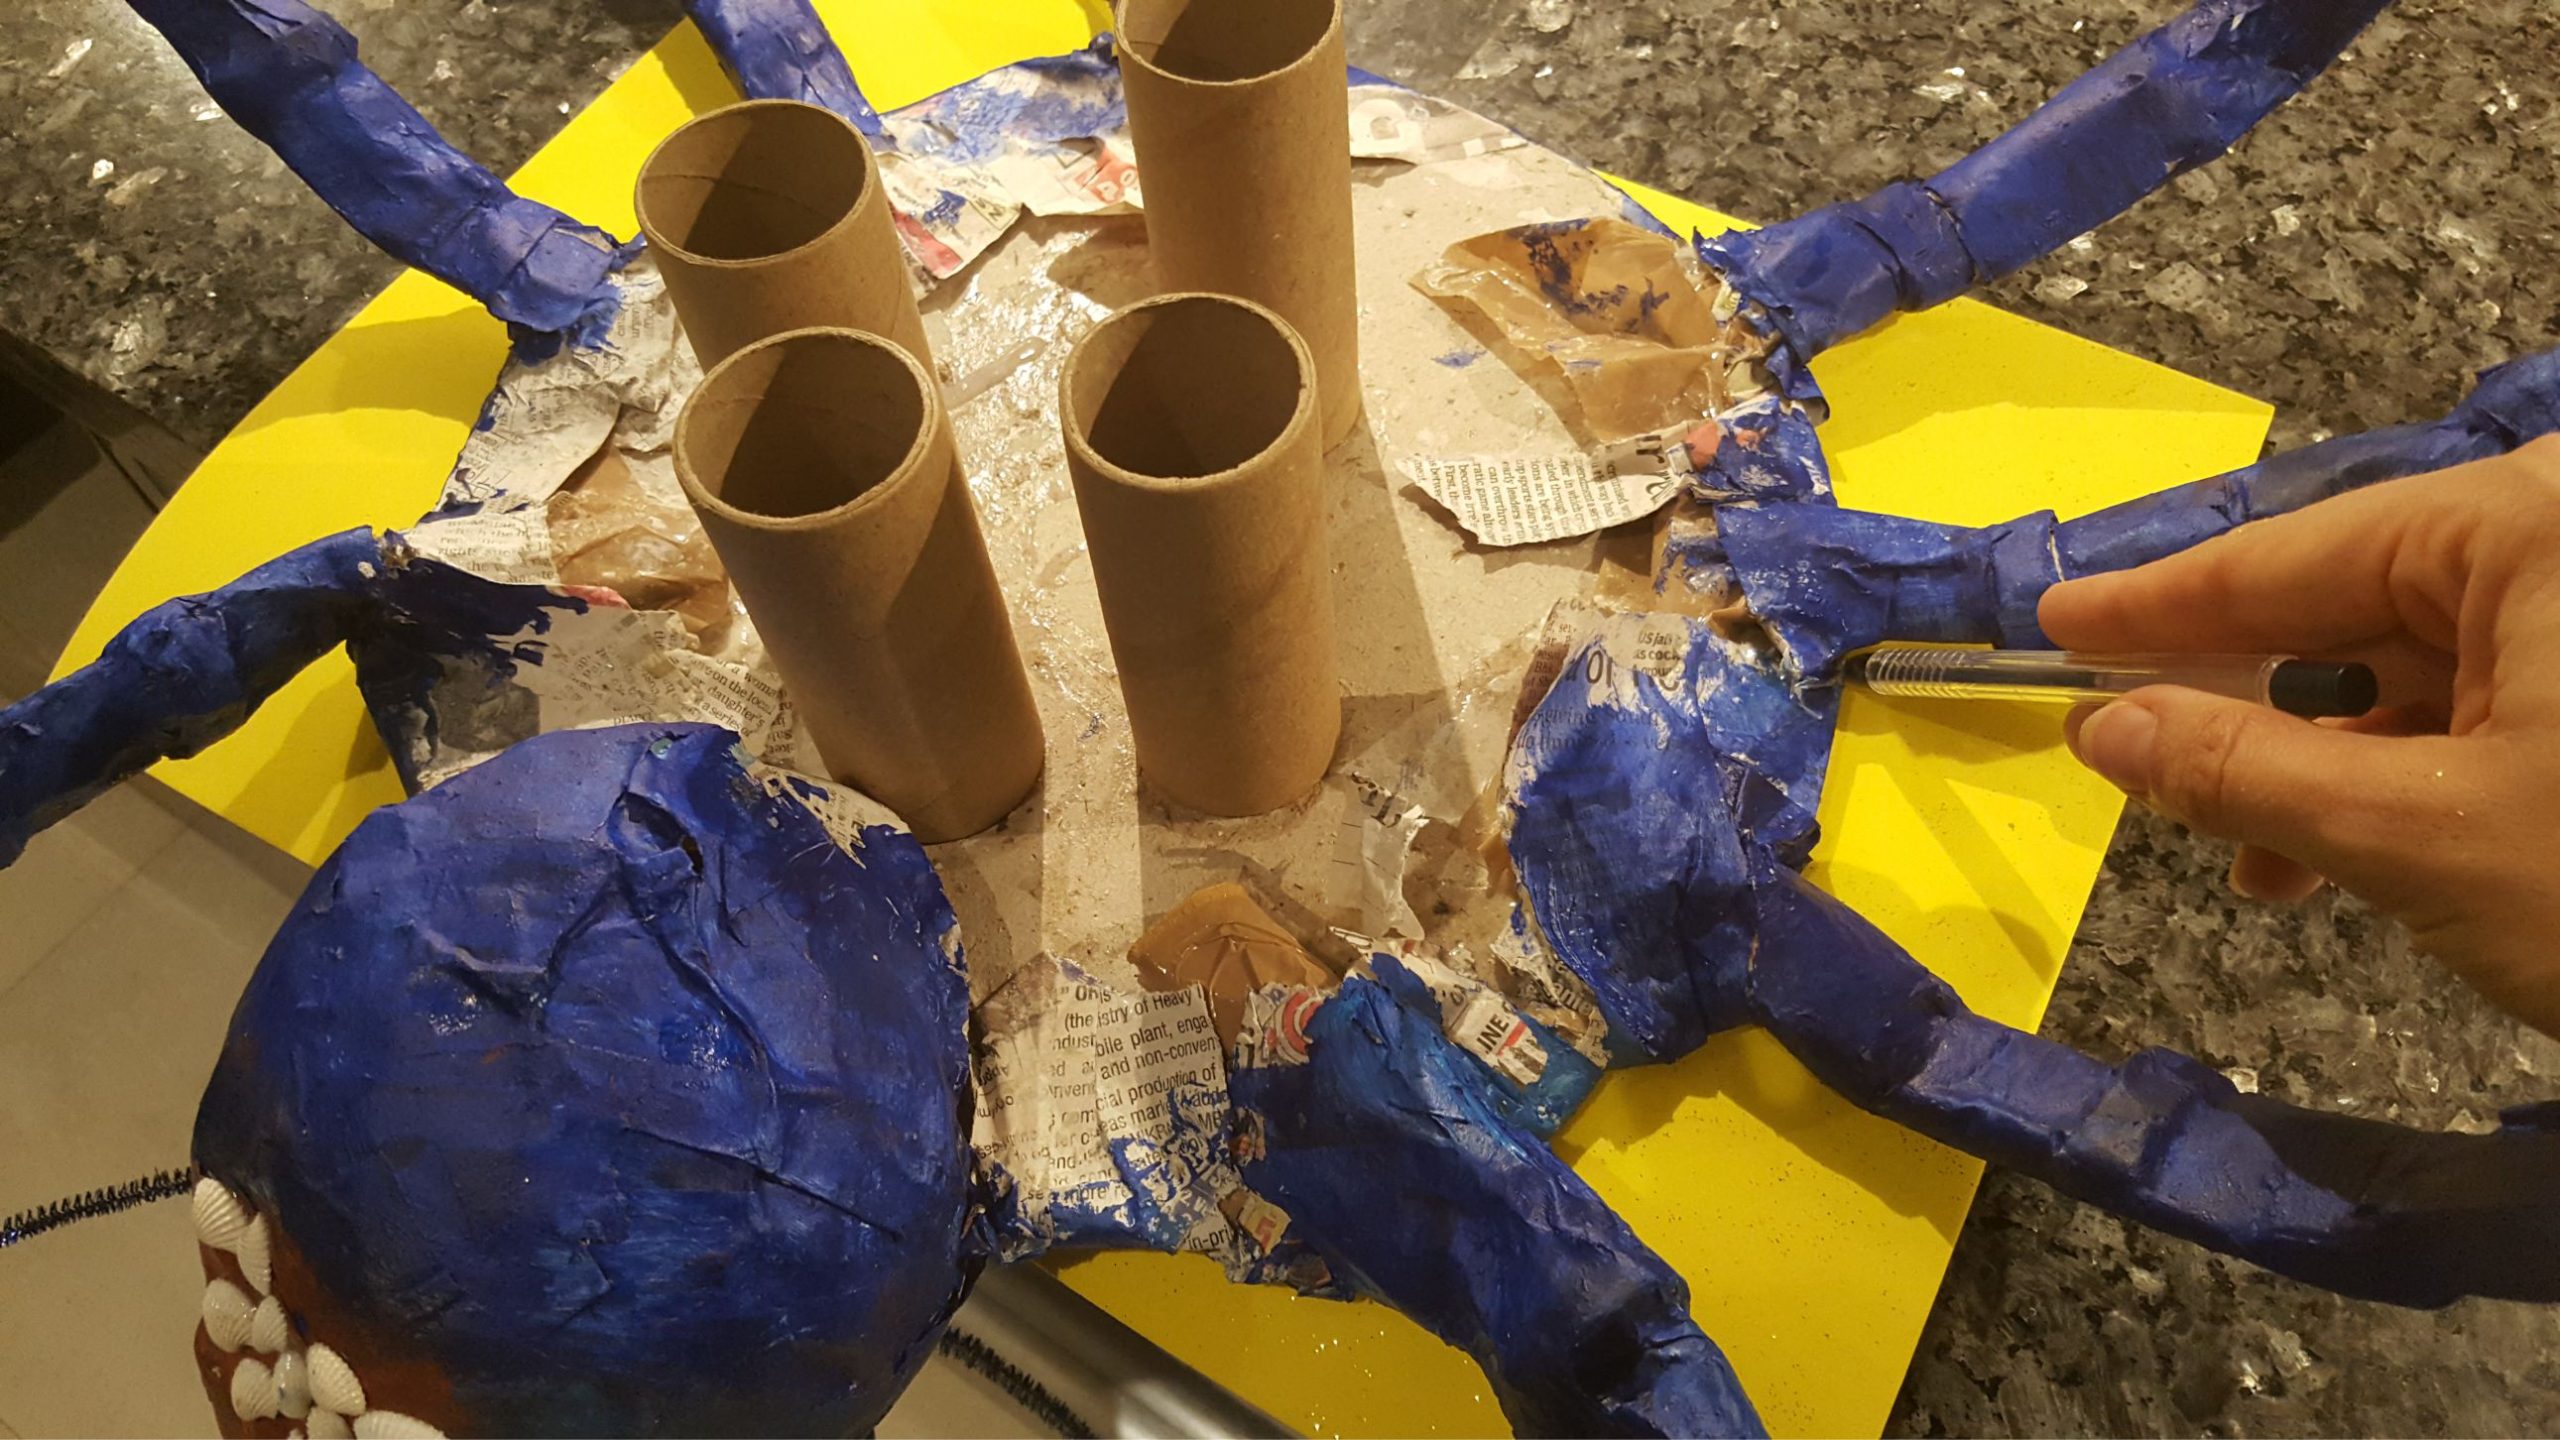

To make the base for the shiny shell, turn the crab over and draw a line around the cake board on gold glitter foam paper. I also exchanged the plastic containers for empty toilet paper rolls. They gave the same support but were smaller and easier to hide underneath. The underside of the crab looks extremely bad, I know. But remember this was just supposed to be a gimmick cookie tray. Make the underside smoother and blue too if you wish (and have the extra energy)
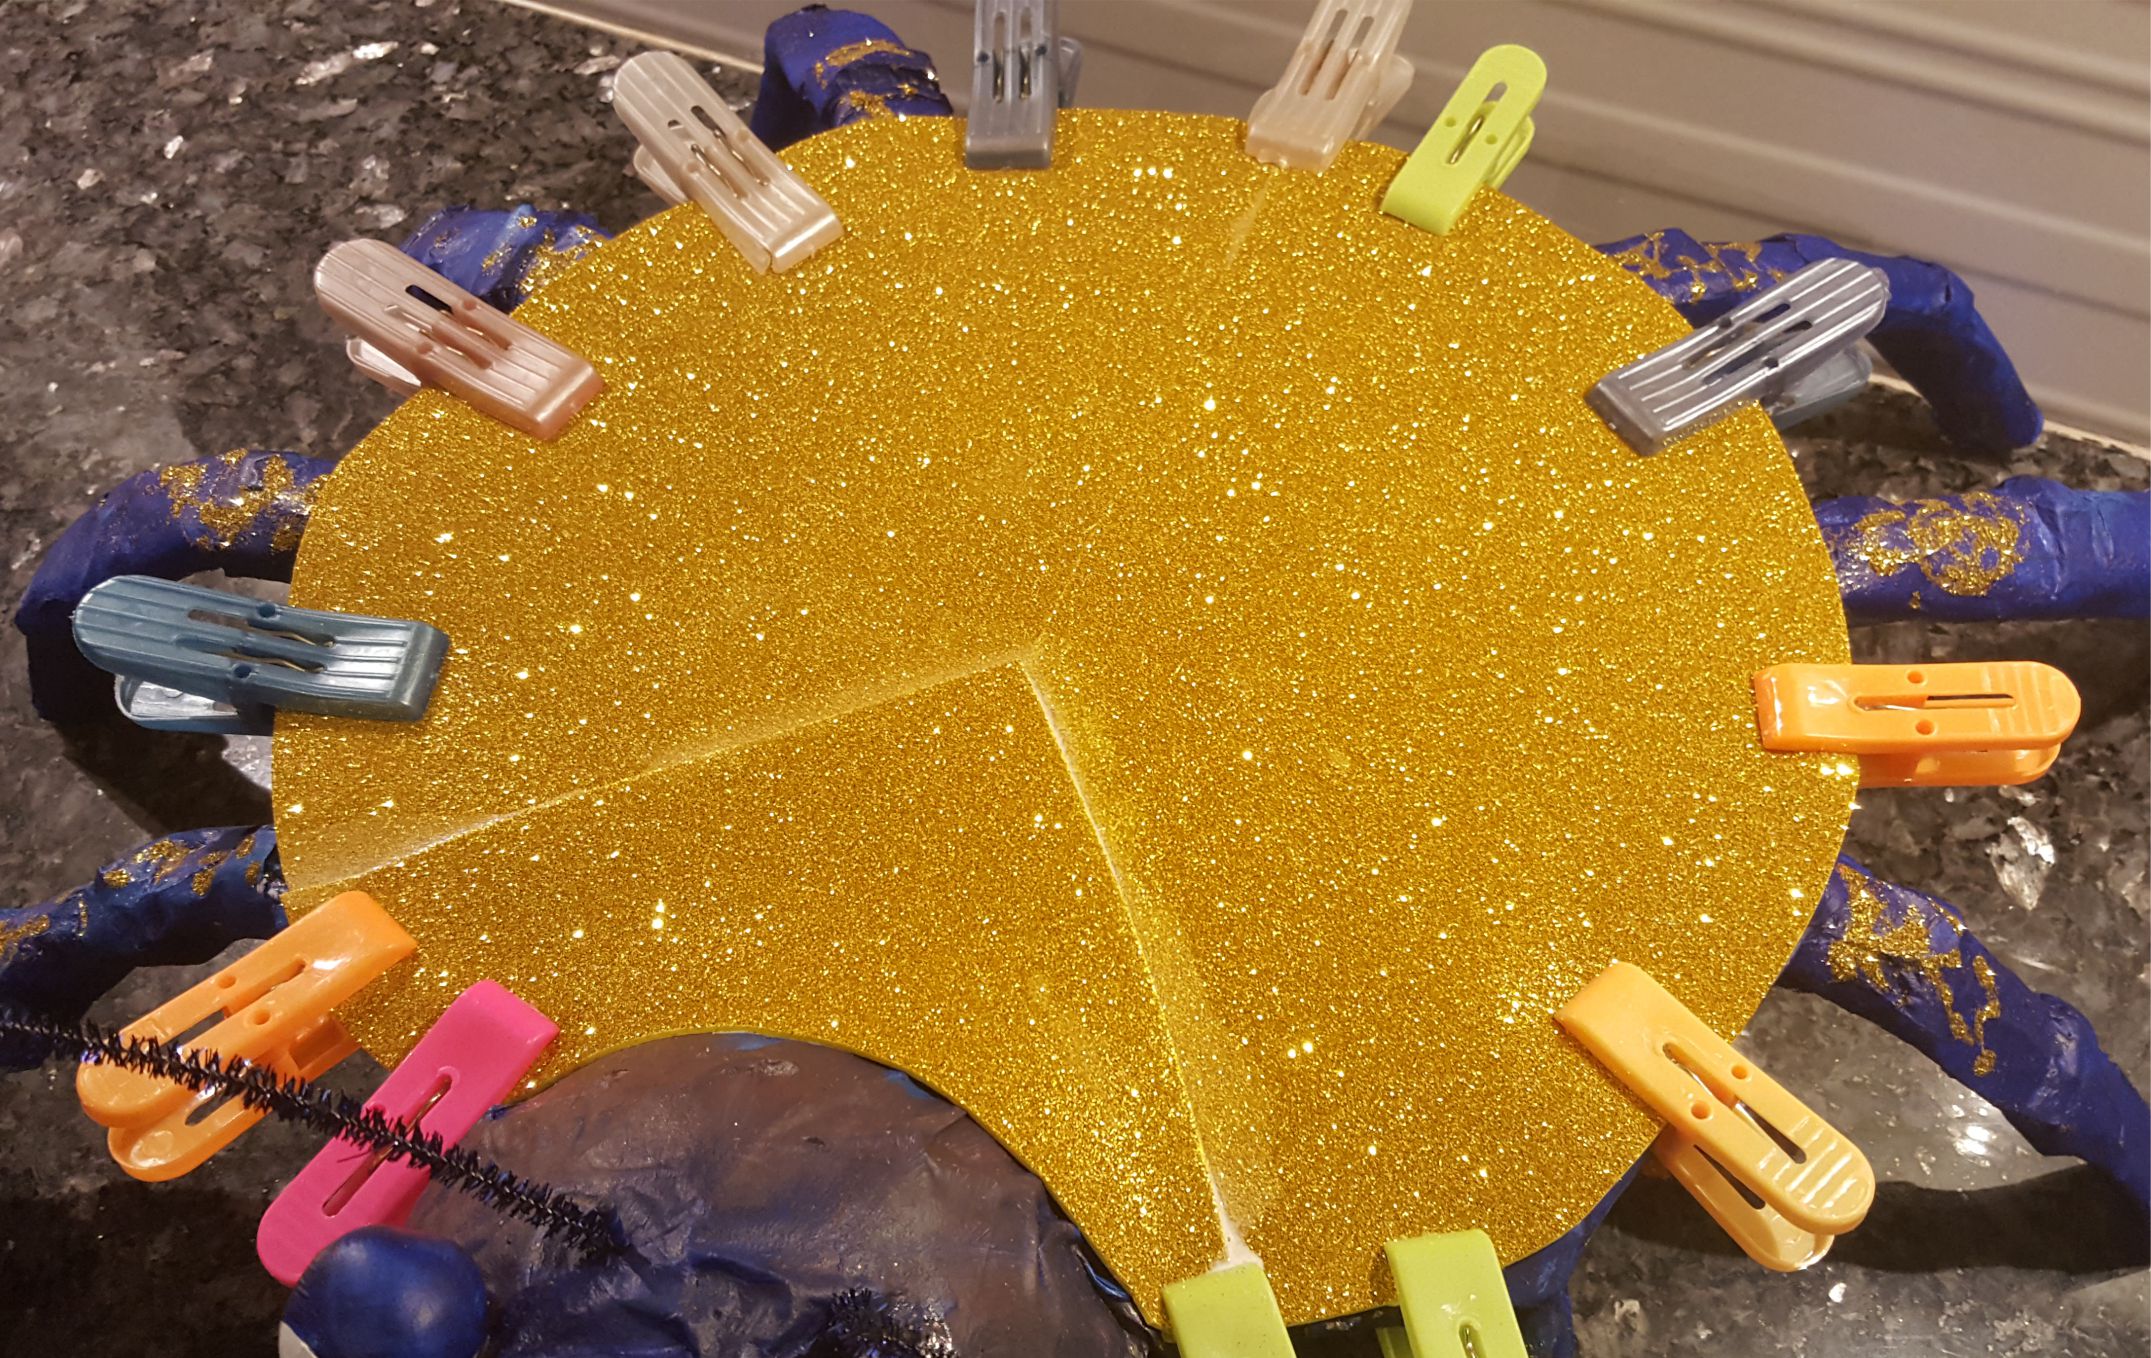

Cut out the gold glitter paper and glue it on to the cake board. Fit clothes pins around while it dries.


And Tamatoa the Crab is shiny and ready for the cookies.
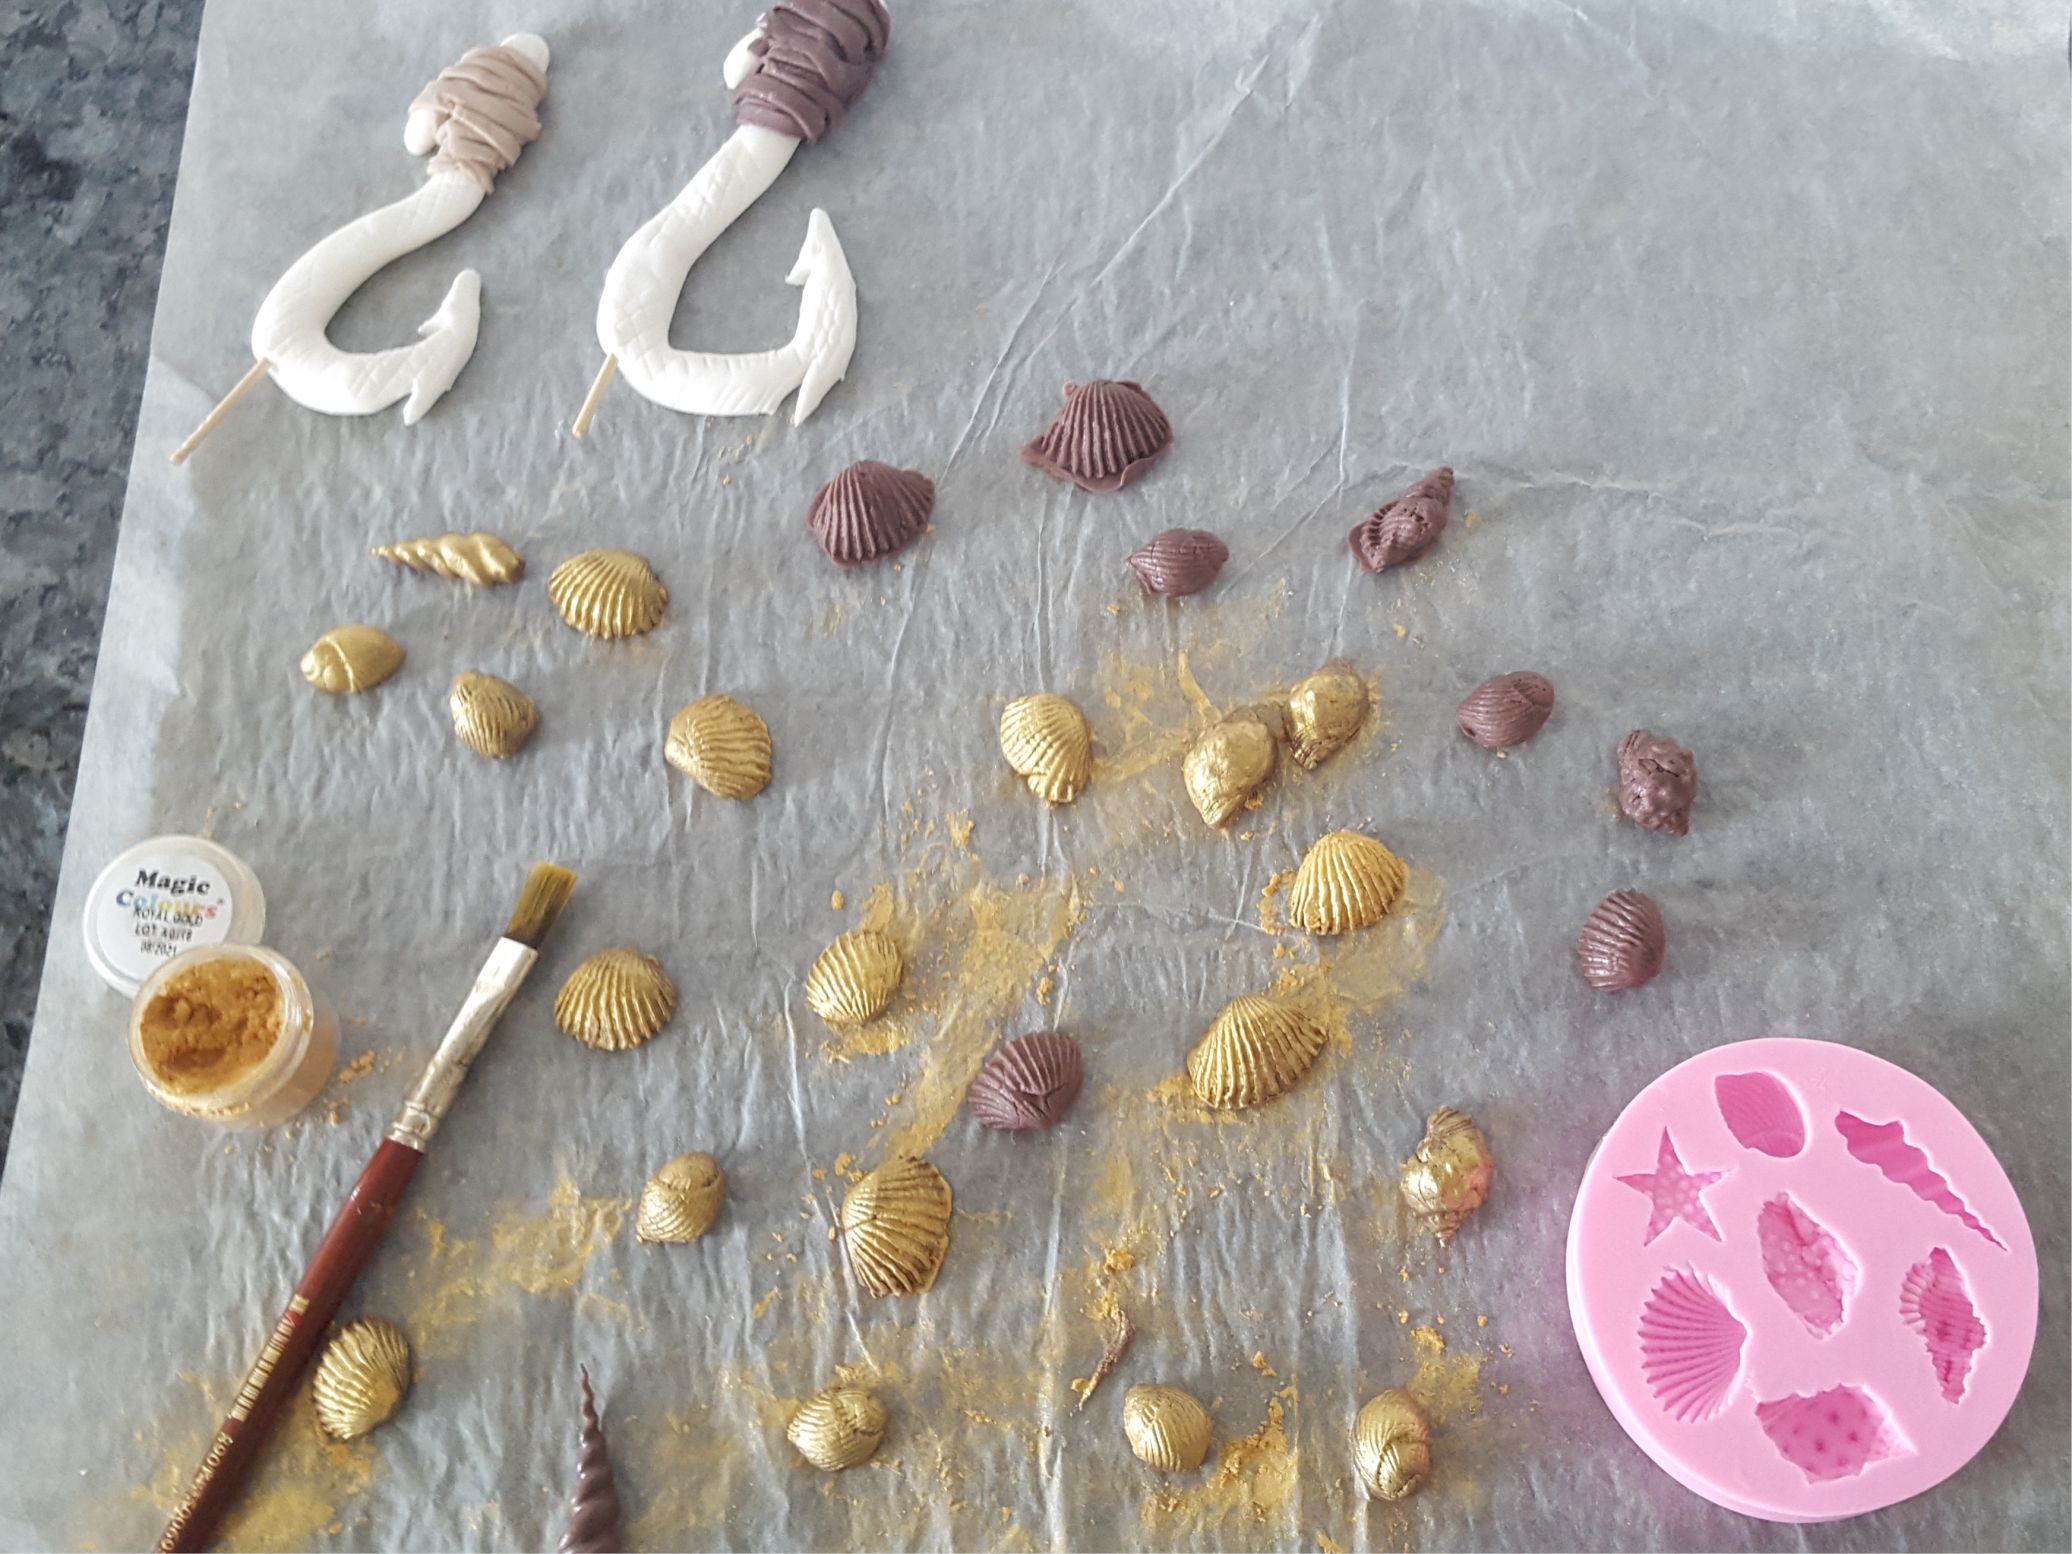

Use a seashell fondant cutter to make the seashell shapes. The color of the fondant doesn’t matter. I had extra brown fondant, so that’s what we used. Use Magic Colour gold dust. It works like a charm and colors the fondant nicely and evenly.
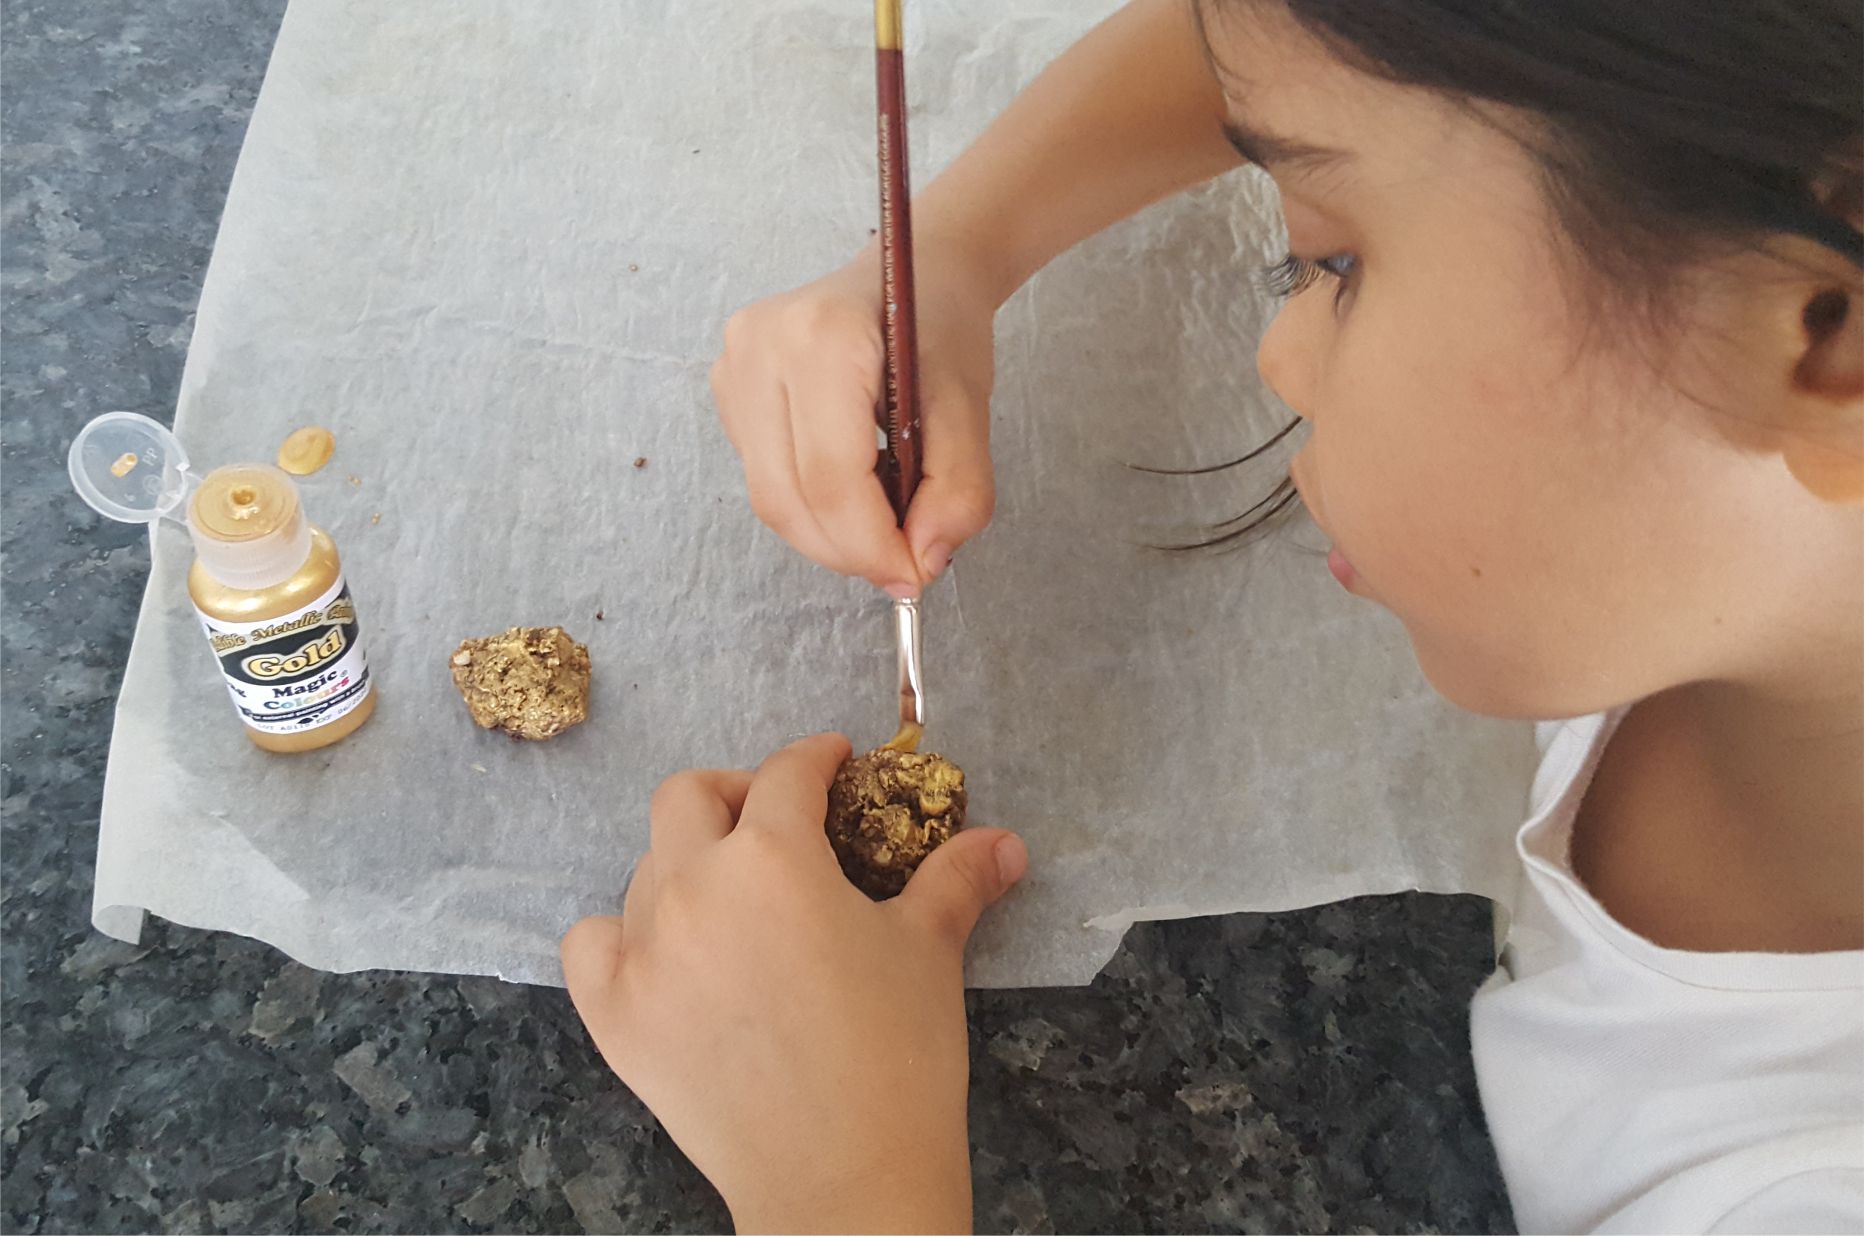

Use edible Magic Color gold paint for the cookies. As mentioned earlier, my daughter wanted to paint them as she thought they would look better that way -she was right of course.
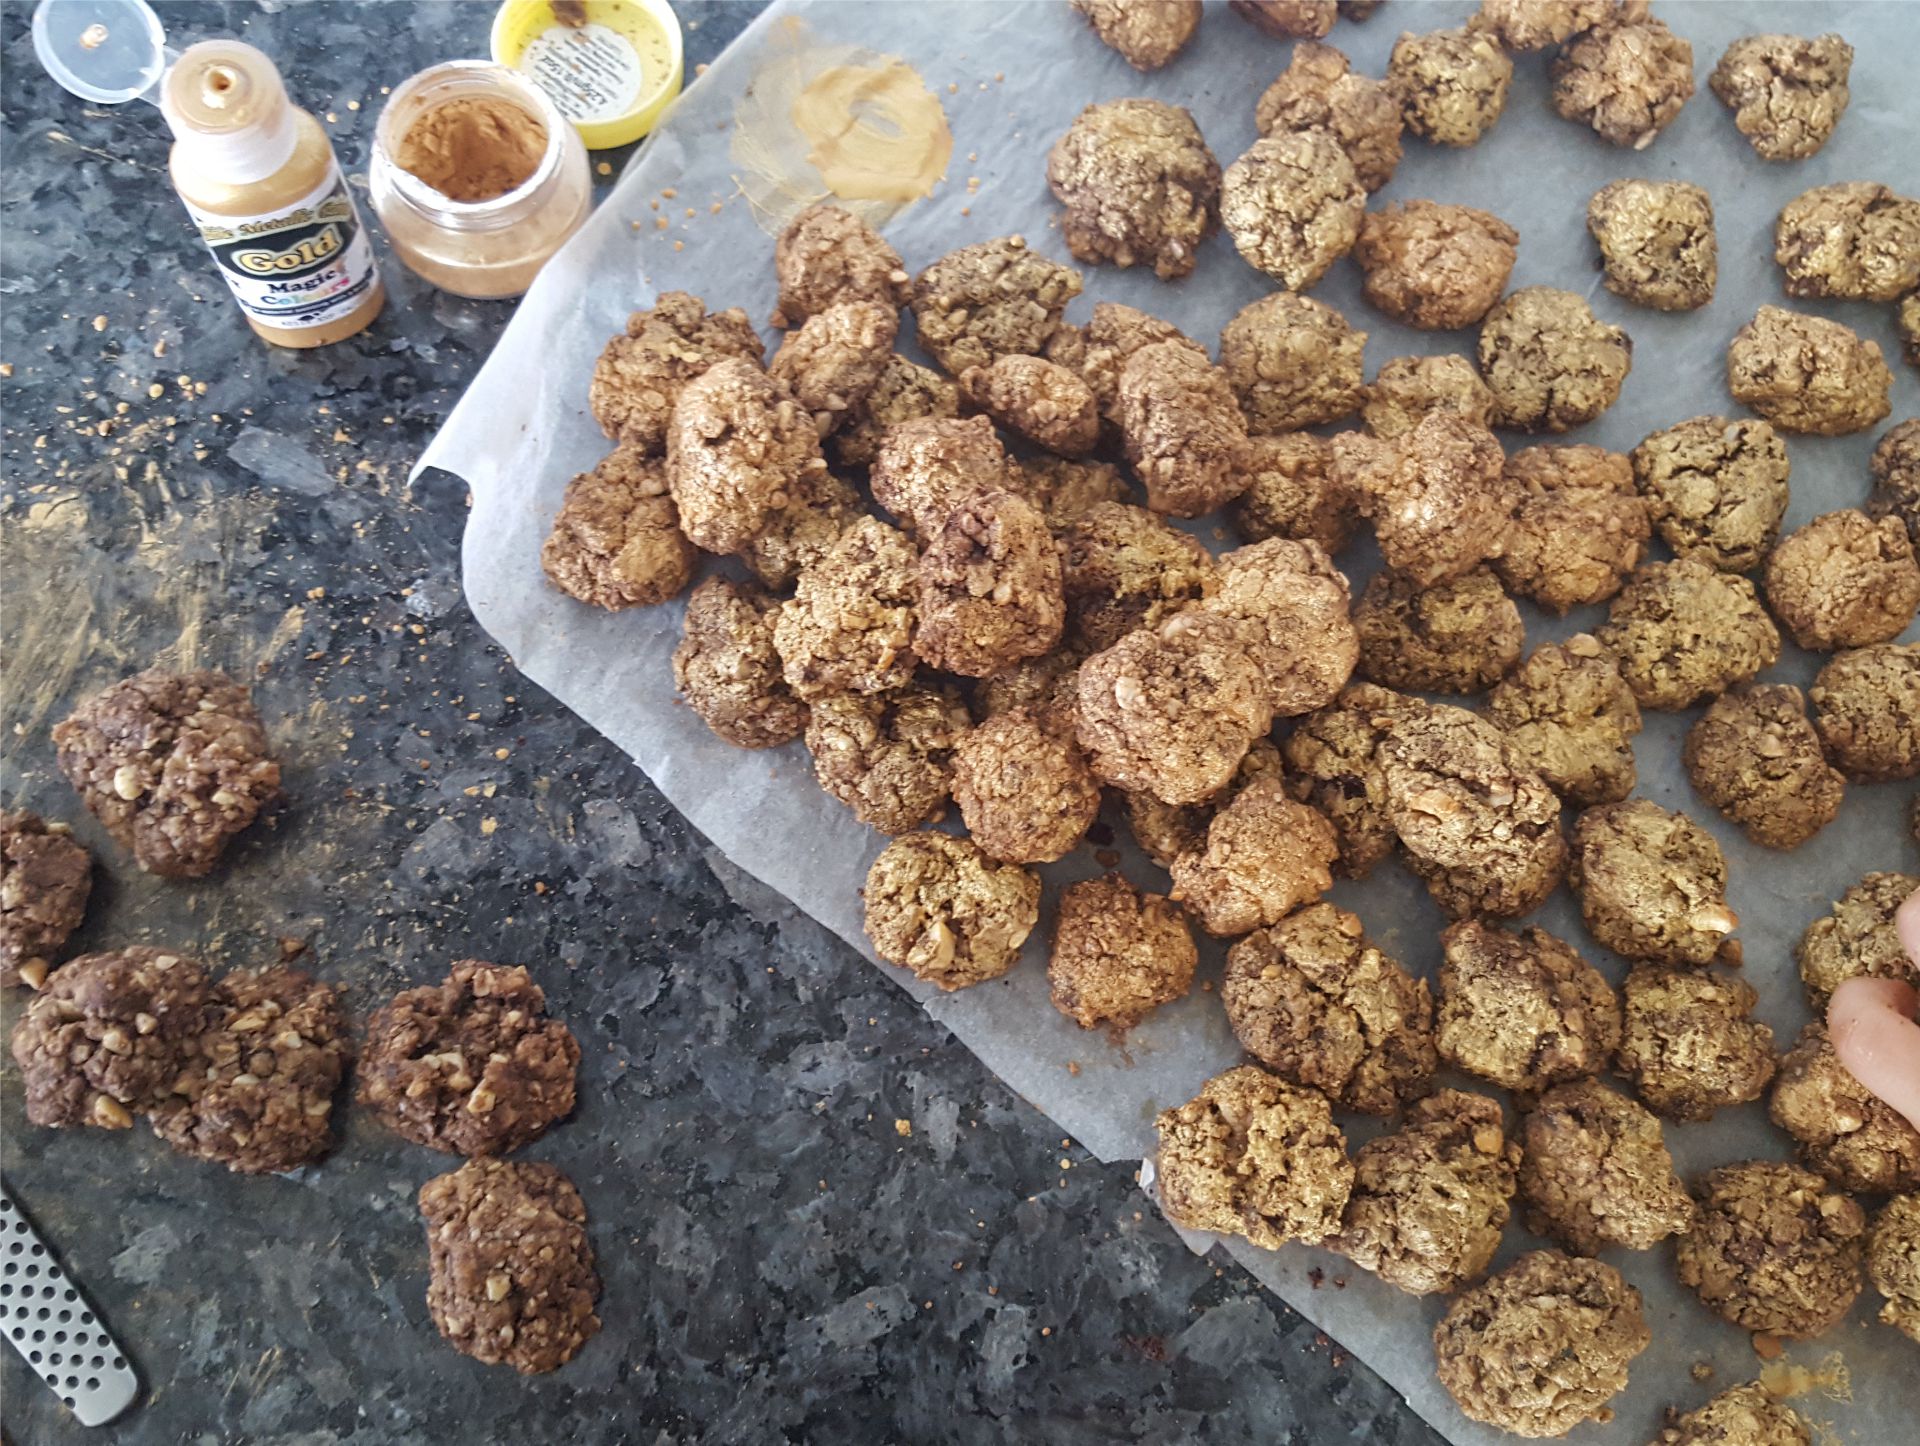

It was a quite a tiresome job to paint them all, but they did look beautiful after we were done.
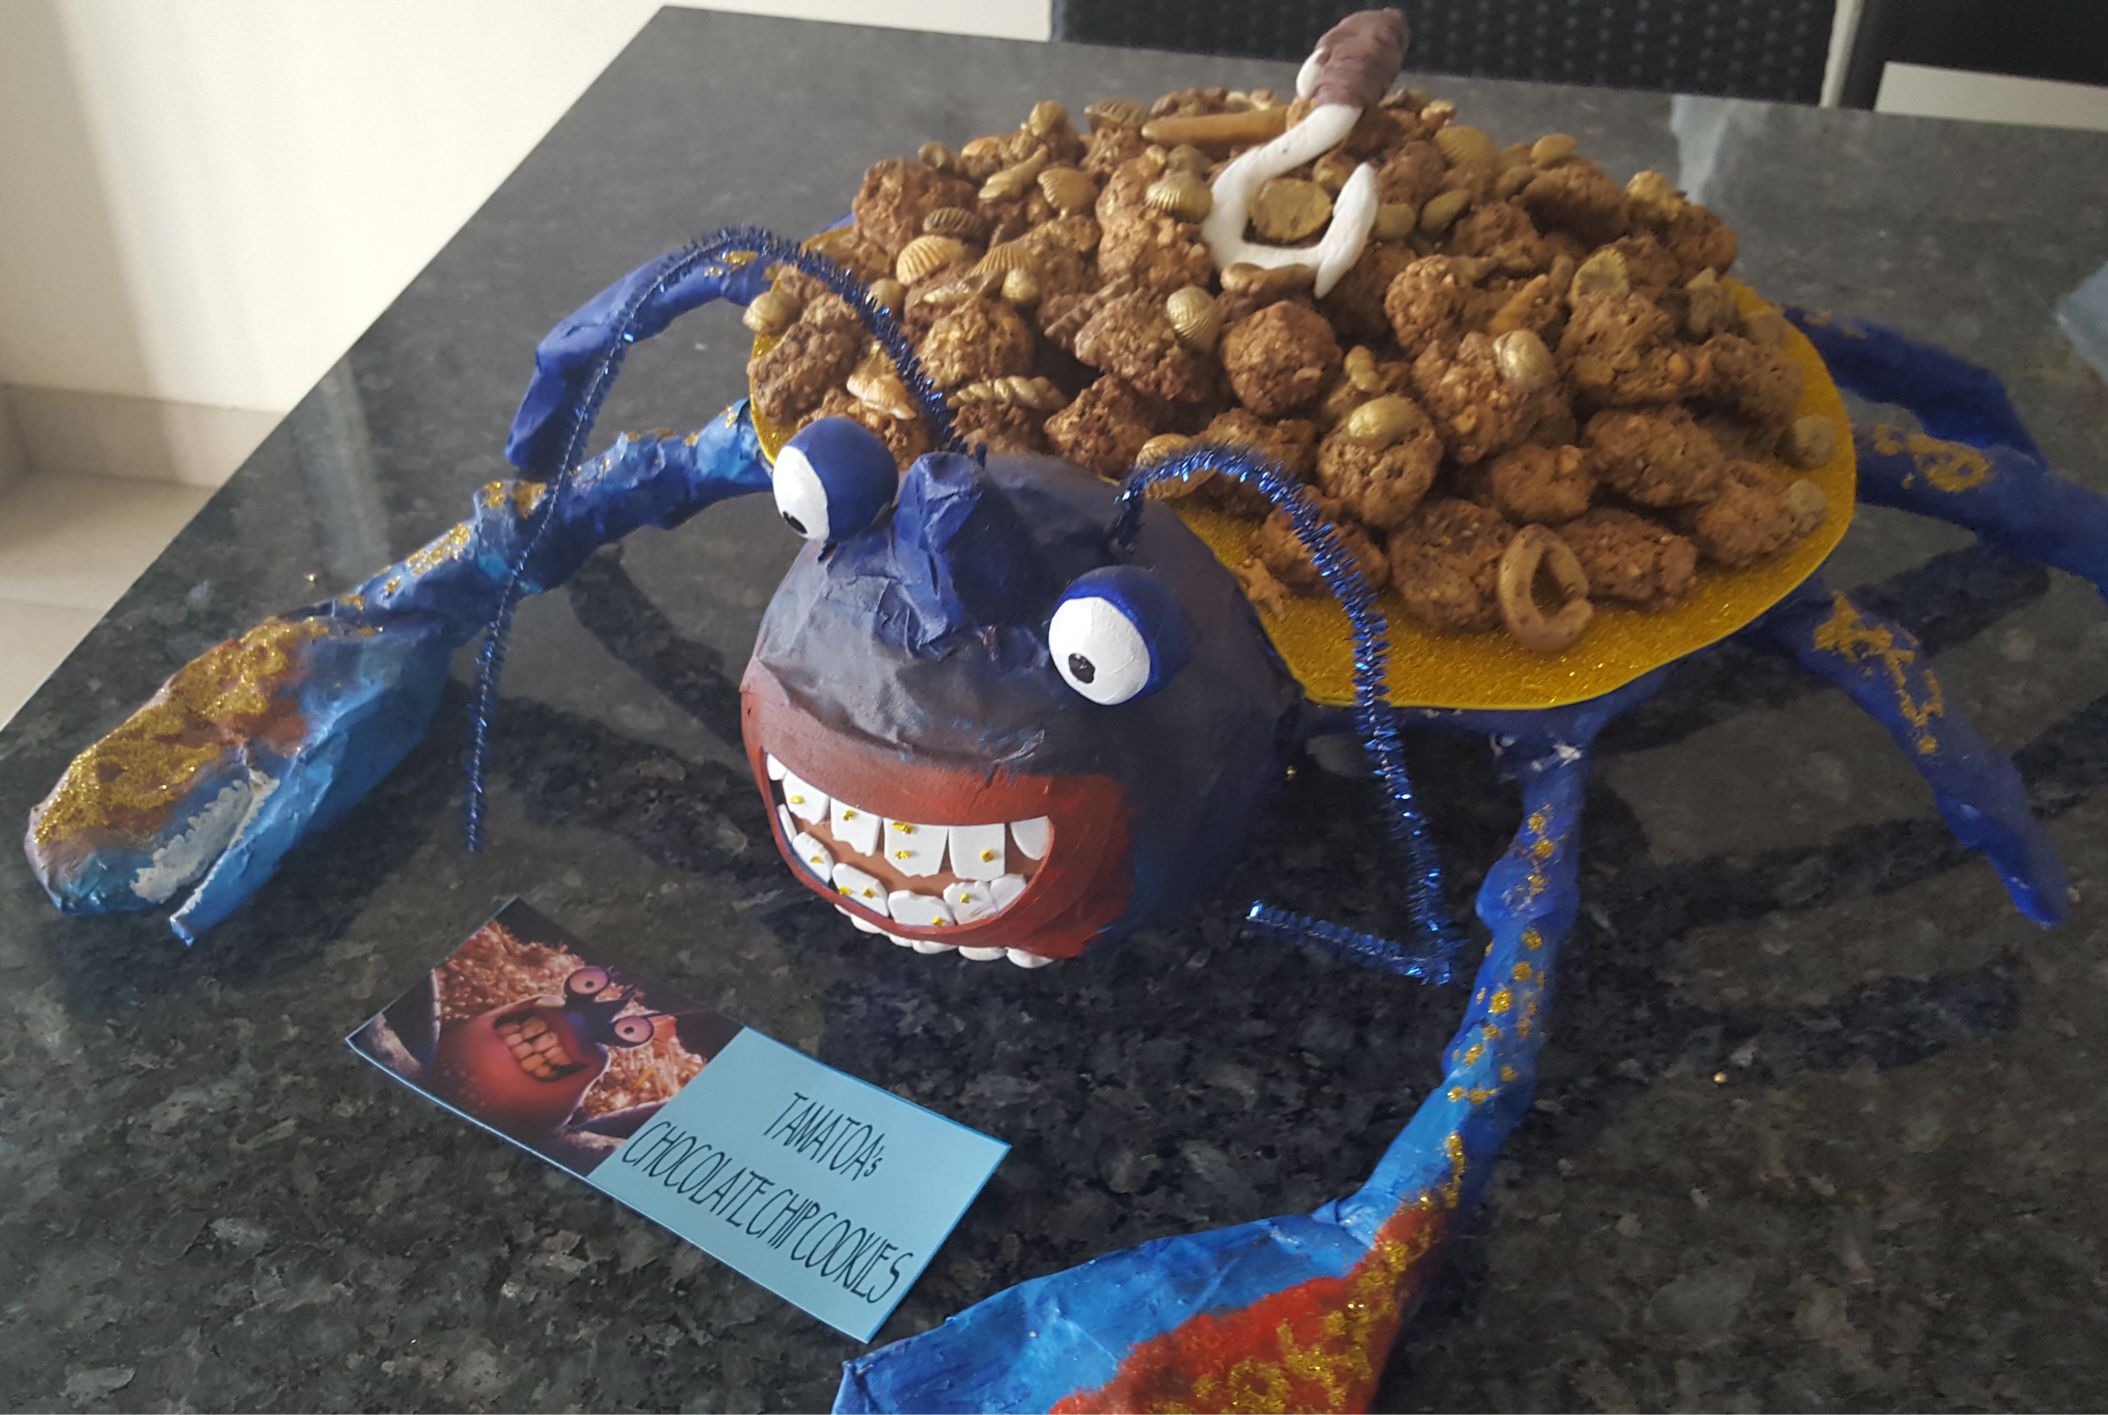

Pile all the cookies on top of the Tamatoa Cookie Stand along with the golden seashells and Maui’s hook at the very top and the perfect prop for a themed Moana party is ready. Please let me know what you think in the comment section below. Have fun crafting.


Leave a Review
You must be logged in to post a comment.