- January 3, 2021
- 1 Like
- 0 / 5
- 5,389 Total Views


- Prep Time15min
- Total Time90min
The recipe for homemade lollipops is quite simple but there are a few things that’s good to know before you start. Read on to learn everything you need to know before making your own lollipops.
After I made peppermint flavoured candy canes several times during December, I decided to try my luck with lollipops too. We have a unicorn-themed birthday party coming up, so these lollipops fit right in with that theme. It also helps to know, that we won’t have to eat all those lollipops ourselves 😉
My top tips for making homemade lollipops:
It takes time to get it right.
The recipe for homemade lollipops is quick and easy to make with only 5 ingredients. It takes about 15 minutes from the time you start weighing the ingredients to the finished candy. The shaping, however, takes time, as you can only do a small piece at a time. The remaining candy will get hard and unusable if left at room temperature so I use my preheated oven (set to 100 degrees Celcius) to keep the candy soft and flexible while I work on another piece.
It’s fun and challenging at the same time to get the shape, the colour combination and the thickness right before the candy hardens and breaks. My lollipops are not professional looking or the same in size and shape, but it really doesn’t matter -not to me or the kids, anyways.
Keep it simple
If you are trying to make candy for the first time and you are doing it alone, I recommend making candy canes. You don’t have to make them Christmassy or peppermint flavoured. You can also make simple sticks at first. It’s a little trickier to get the candy to stay on the lollipop stick and quickly twirl it without burning your hands(!!) or breaking the candy. I expected it to be a lot easier than it was, but guess I just have try it again and again. Am sure the kids are going to love that 😉
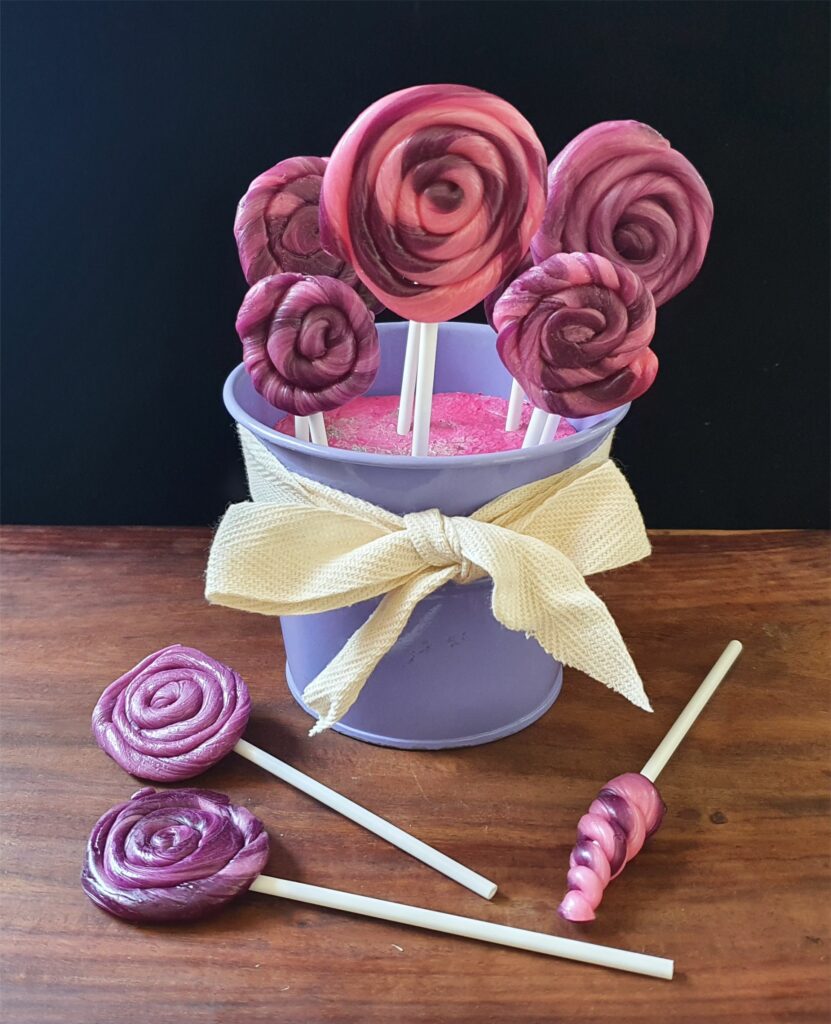

Use the right ingredients for perfect homemade lollipops
As mentioned before in the candy cane recipe, I have had a bad experience with the Magic food gel when it comes to candy making. The candy became hard and it crystallized immediately after adding the gel colour so I couldn’t stretch it or even reheat it. I have since then used the Sugarin Gel Colours without any problems. I have not mentioned the amount of food colour in the recipe below. It all depends on how dark you want the candy to be. I used 3 large drops for the pink candy and 6-7 large drops for the violet. That is why the violet candy became so much darker.
I didn’t use any gloves while making these, but they might come in useful, if you find the right ones. I had tried to purchase a pair from Amazon.in. But they were too bulky and I couldn’t make the shapes properly.
I used the Ossoro Spanish Strawberry flavour which gave a great taste of sweet strawberries. I bought the lollipop sticks on amazon.in. and the corn sirup on www.bakewala.com
How to store the lollipops
Store the lollipops in an airtight container for up to 2 weeks. Be careful not to let the lollipops touch each other as they might stick and break when pulled apart. I put a piece of parchment paper between the layers.
The lollipops will slowly get softer with time because of the moisture in the air (at least in humid Goa) but the shape and flavour will remain the same.
Hope you have lots of fun with these. Let me know in the comments below if you have any questions.
Yield: Approximately 25 medium sized lollipops
Continue to the step-by-step guide below for detailed instructions on how to make your own lollipops.
Ingredients
Directions
Preheat the oven to 100 degrees Celsius
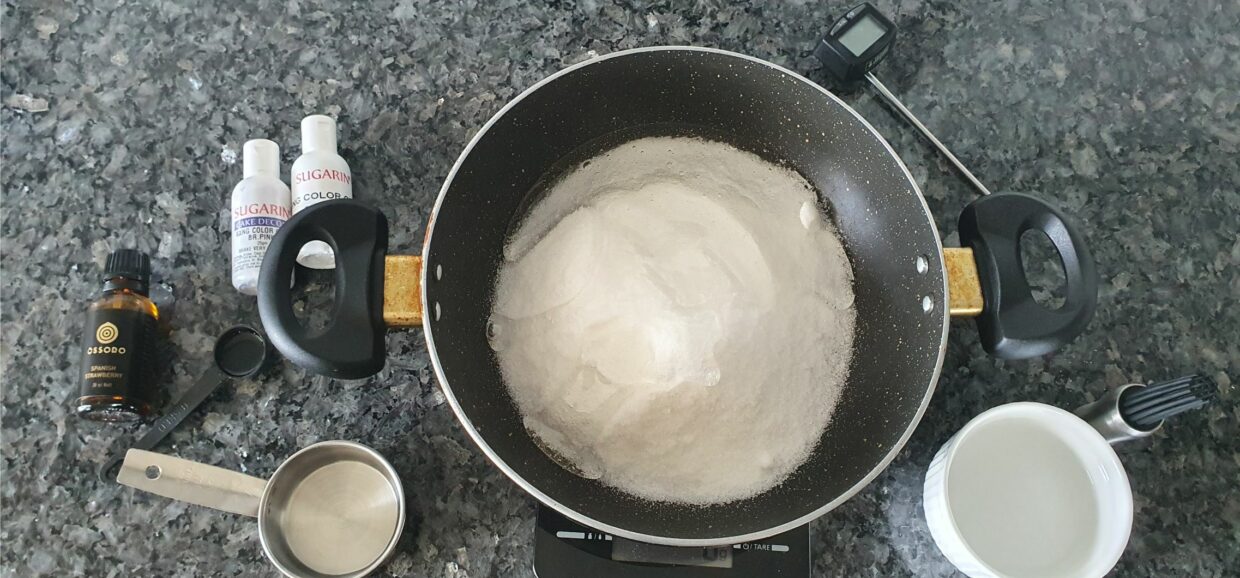

Keep all your ingredients ready. There is very little time for this later so it's better to keep it all ready. I have weighed the sugar and corn sirup in the pan directly to make it easier to handle the very sticky corn sirup.
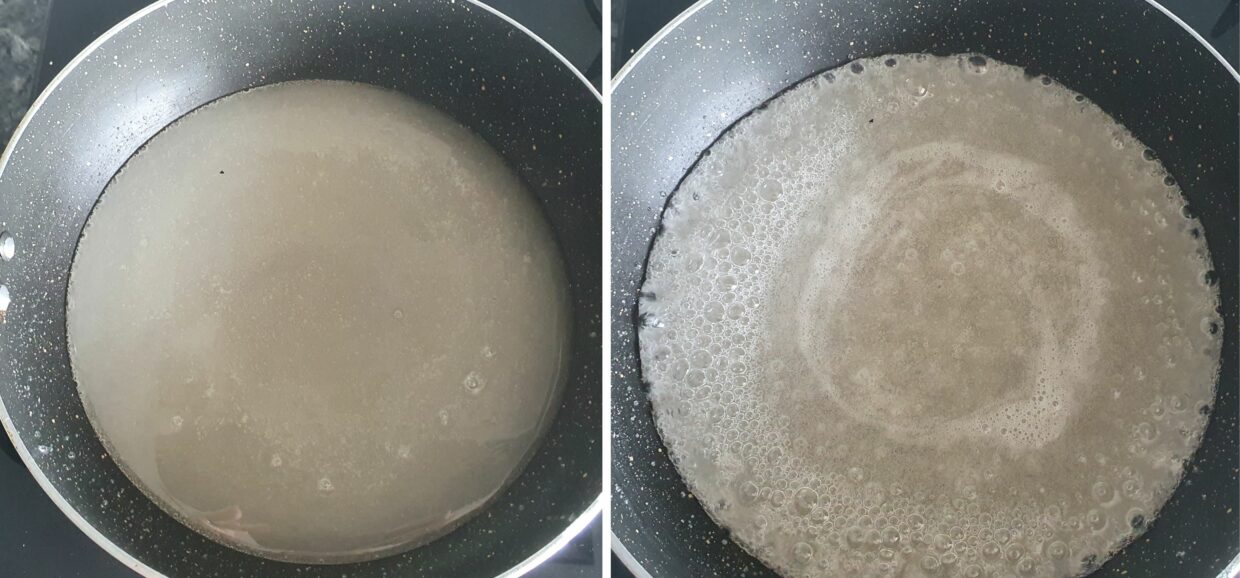

Add the water and heat on medium heat. Stir only until all the sugar has dissolved.
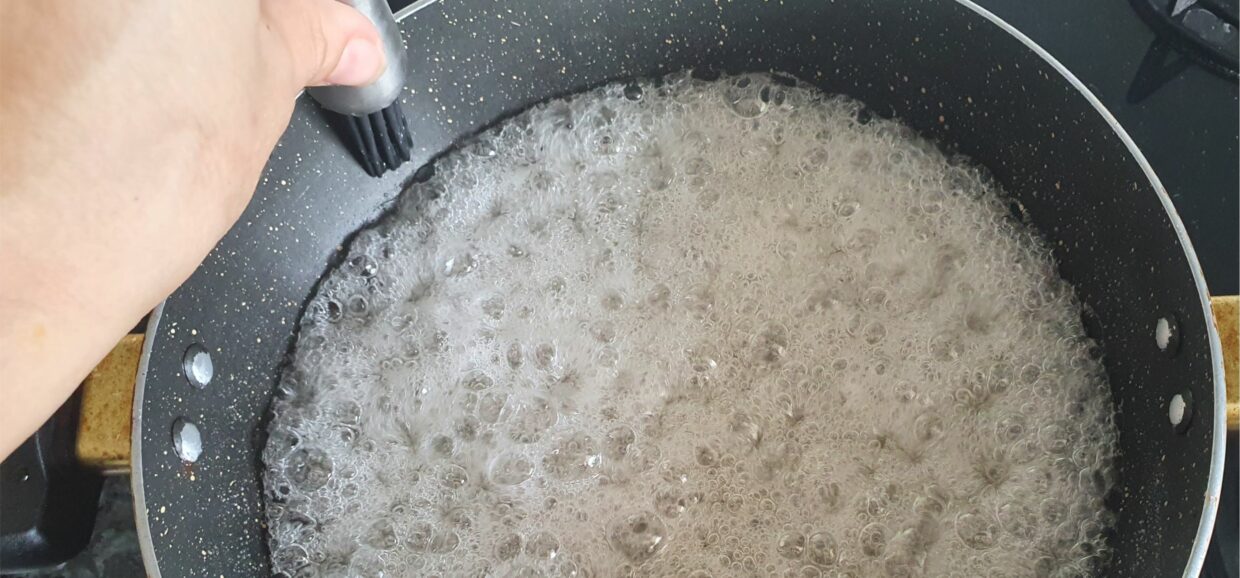

When the mixture starts to boil and the sugar has dissolved, stop stirring! Use a wet pastry brush to wet the insides of the pan. This is to make sure the sugar doesn't brown or burn on the sides.
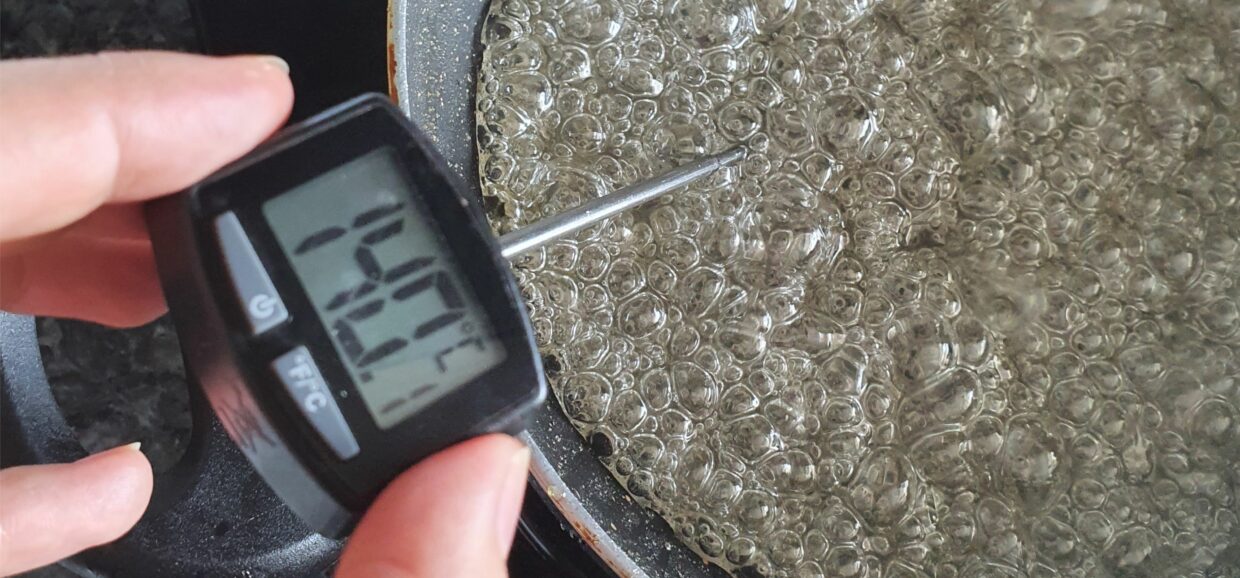

Heat the mixture to 285F/140C. It takes about 10 minutes. Remove the pan from the heat
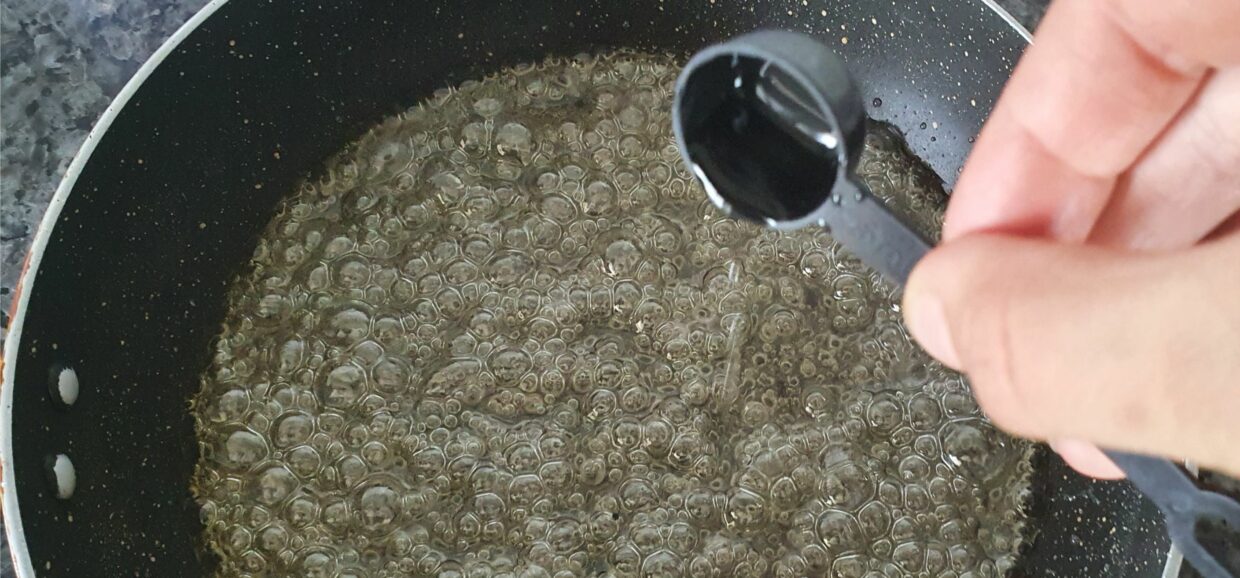

Add the 3/4 tsp of strawberry flavour and stir the mixture. Make sure to keep your head slightly away as the mixture will bubble and fumes will rise.


Oil a tray and pour half of the candy mixture onto the tray. Place the tray in the oven.
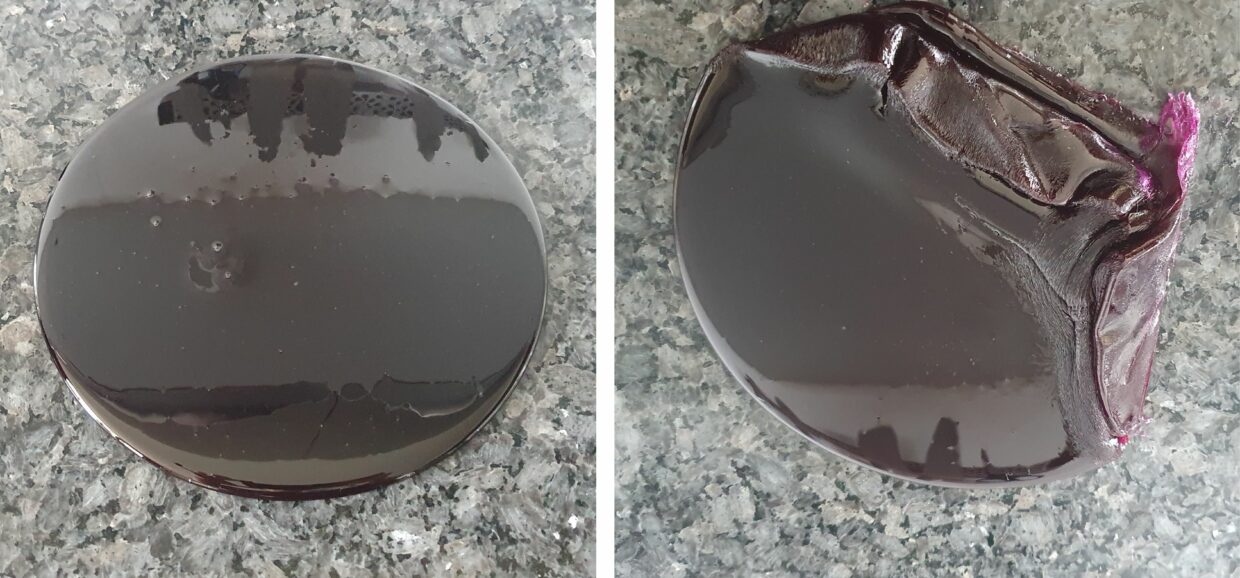

Add gel colour to the other half of the candy. I have used 6-7 drops of gel colour here. Pour the candy out on the counter and wait a few minutes for a skin to form.
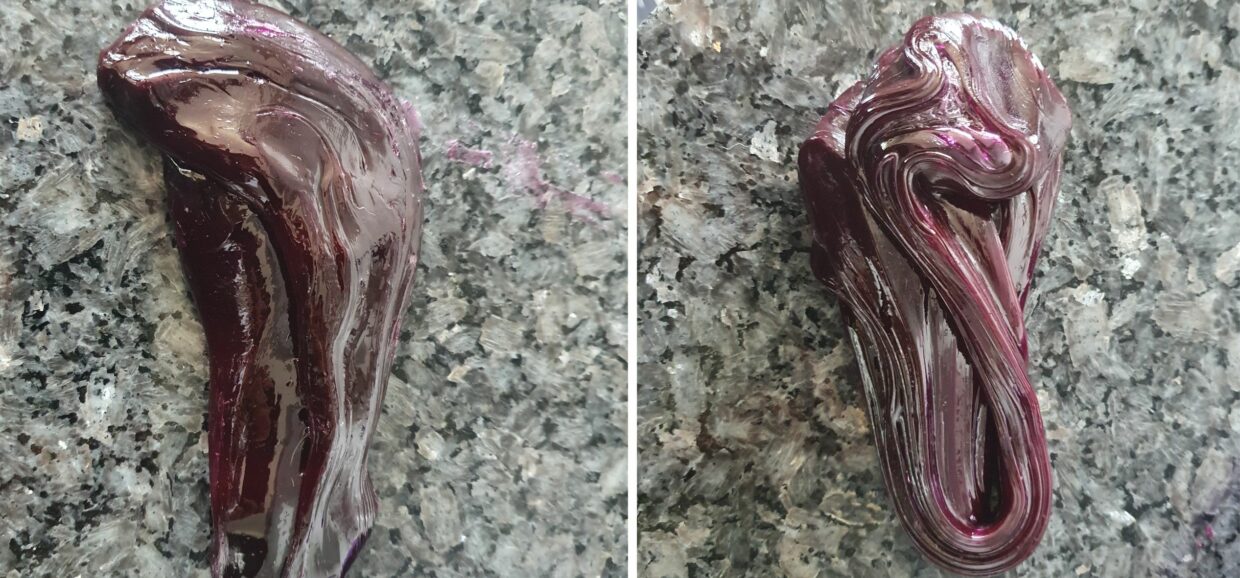

Start to stretch the candy. It will still be very warm so use protective gloves if needed. I think they are too bulky and hard to work with so I just stretch with my bare hands.
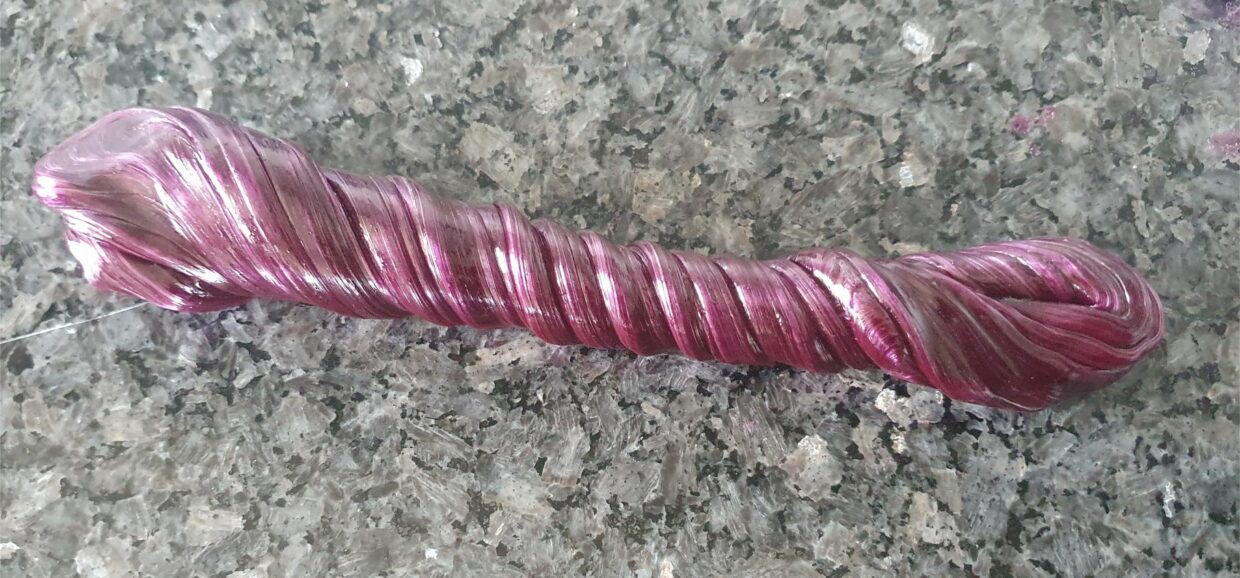

Stretch the candy until it turns glossy and lighter in colour. Place it back in the oven while you get to work on the other piece.


Add gel colour to the other half (I have used 3 drops to make a lighter pink colour) and stretch it until it becomes glossy too.
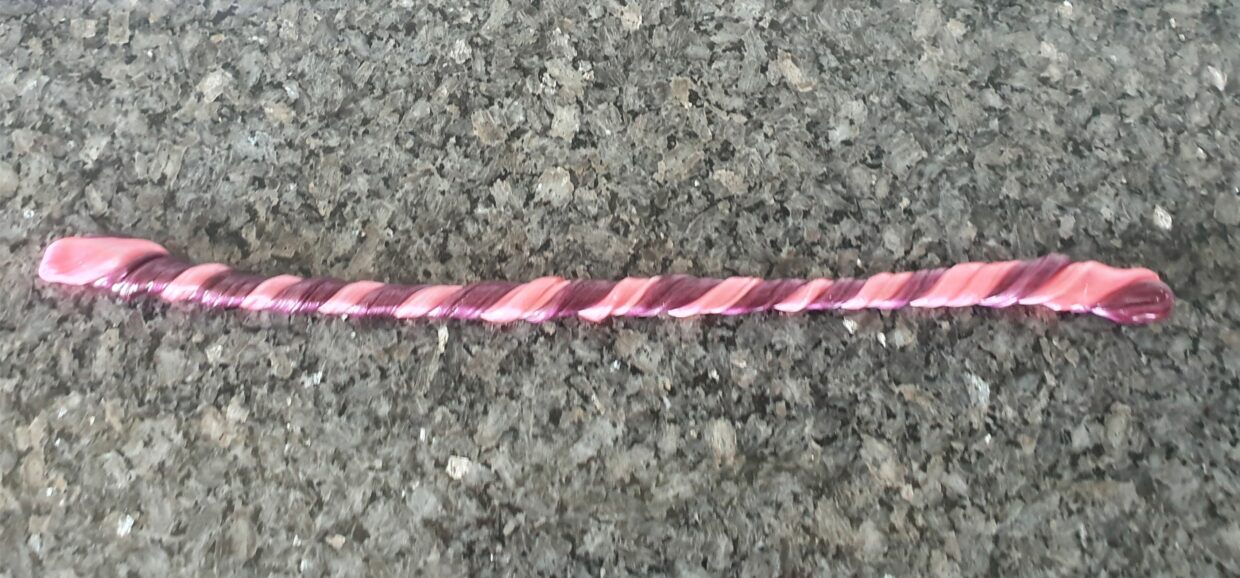

Place two pieces of violet and pink candy on top of each other and twist
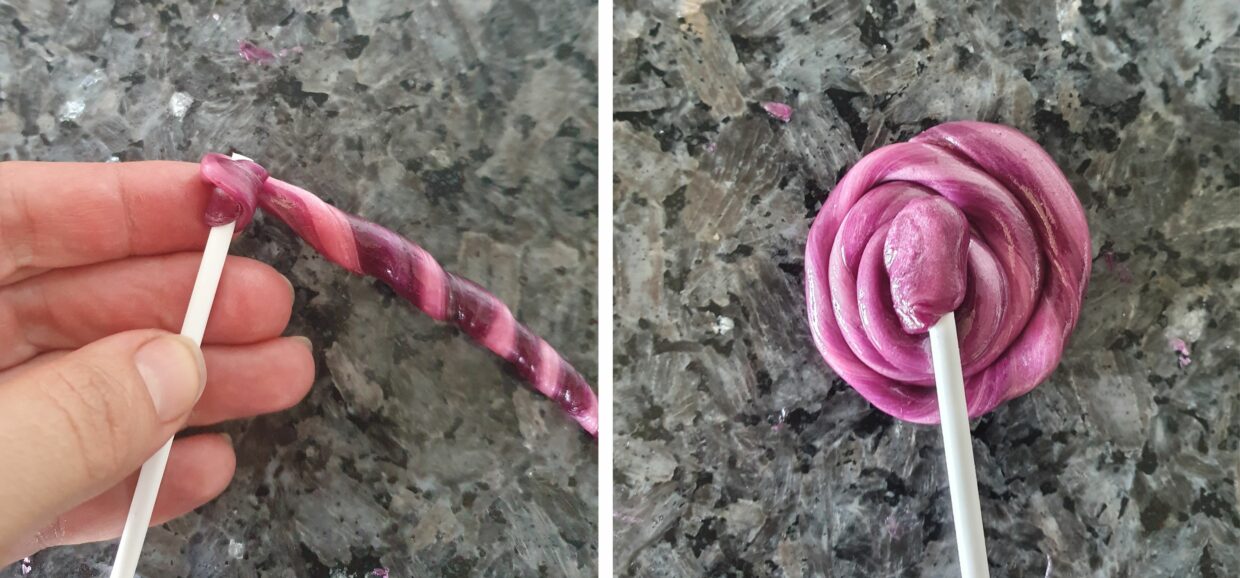

Attach the end of the candy around the lollipop stick and quickly twirl the rest. Place it "face" down on the counter and press the lollipop stick into the candy to make it flatter.
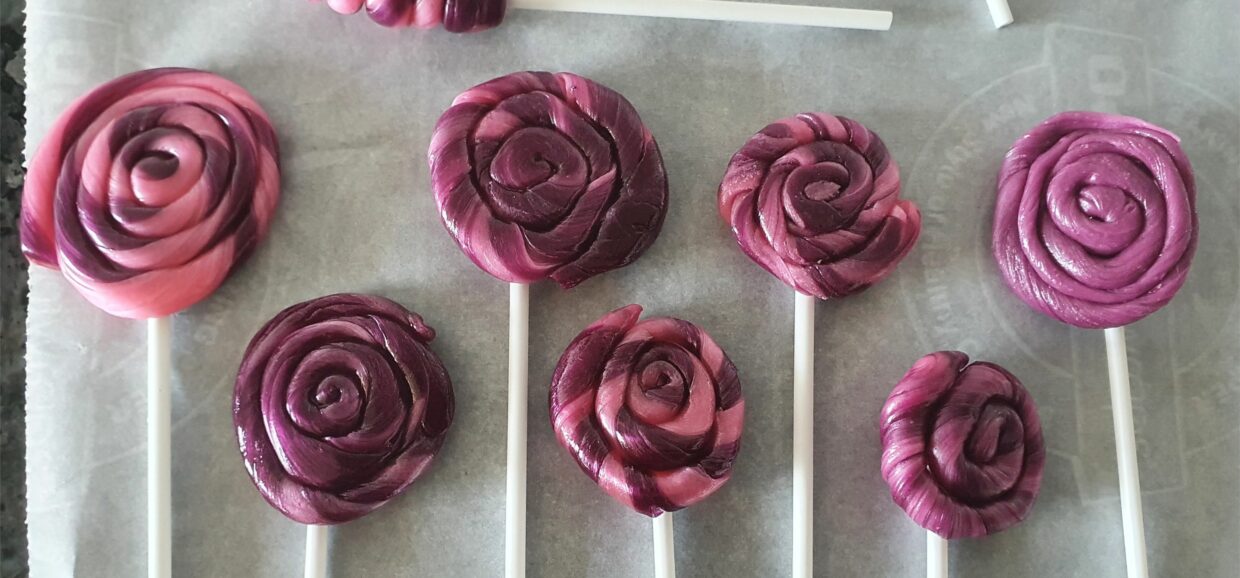

Leave the lollipops to rest on a baking sheet until they have hardened.
You may also like
Homemade Lollipops
Ingredients
Follow The Directions
Preheat the oven to 100 degrees Celsius
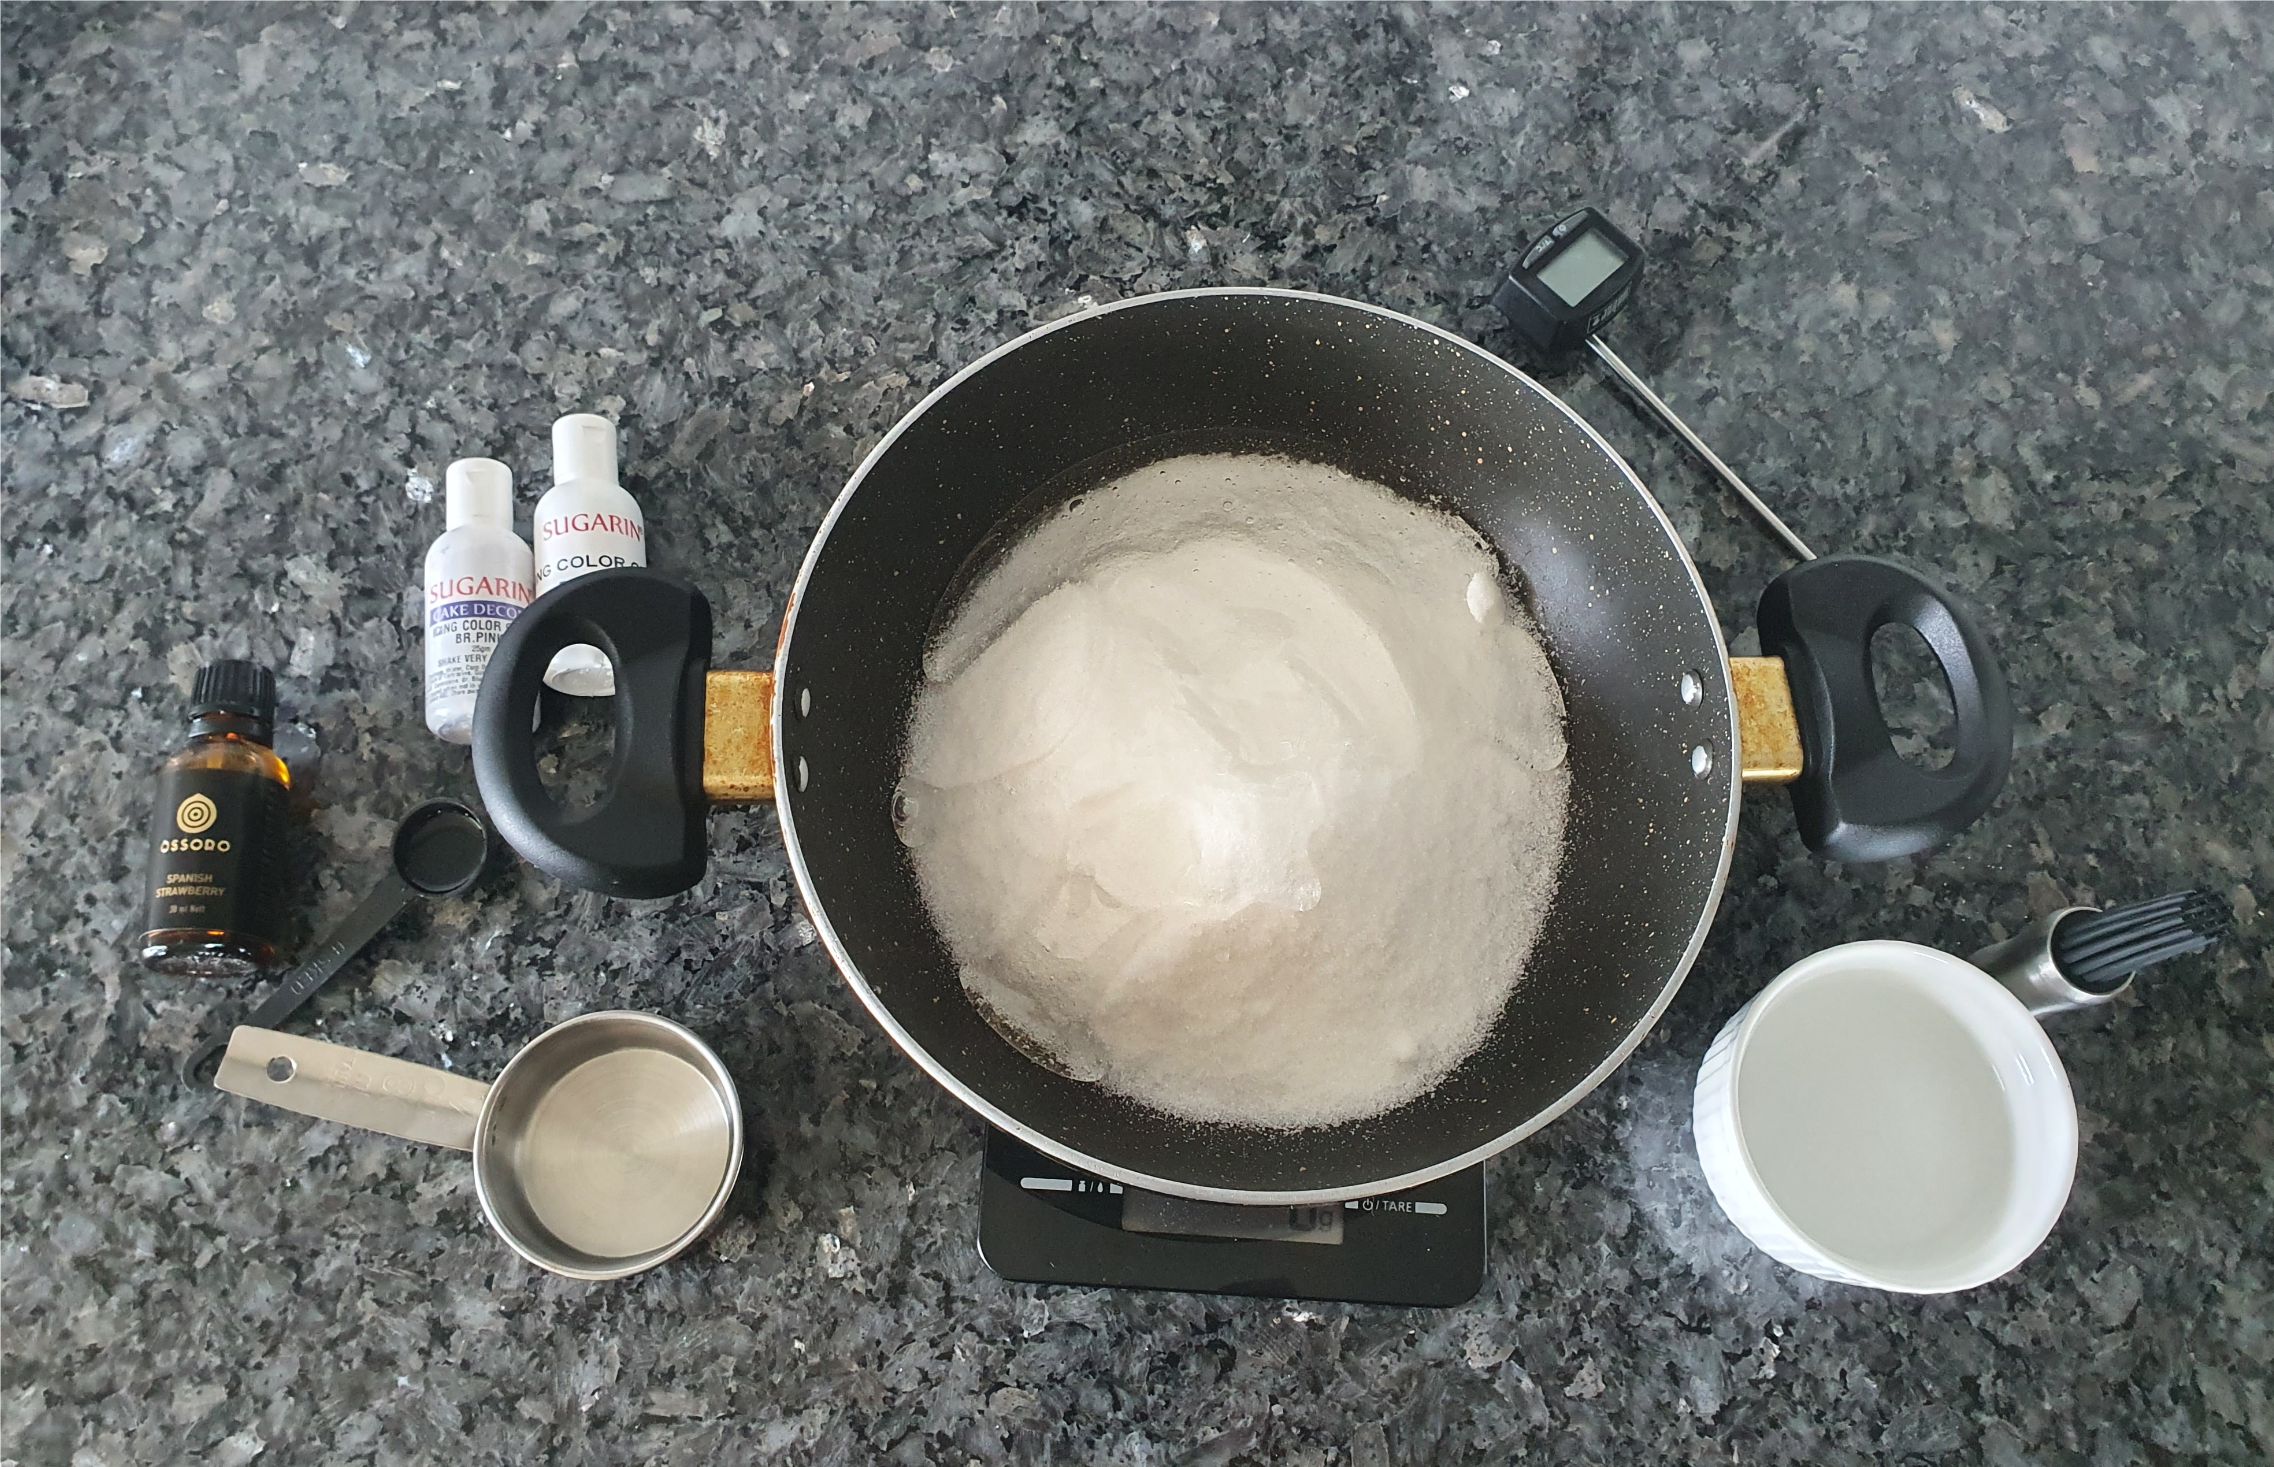

Keep all your ingredients ready. There is very little time for this later so it's better to keep it all ready. I have weighed the sugar and corn sirup in the pan directly to make it easier to handle the very sticky corn sirup.
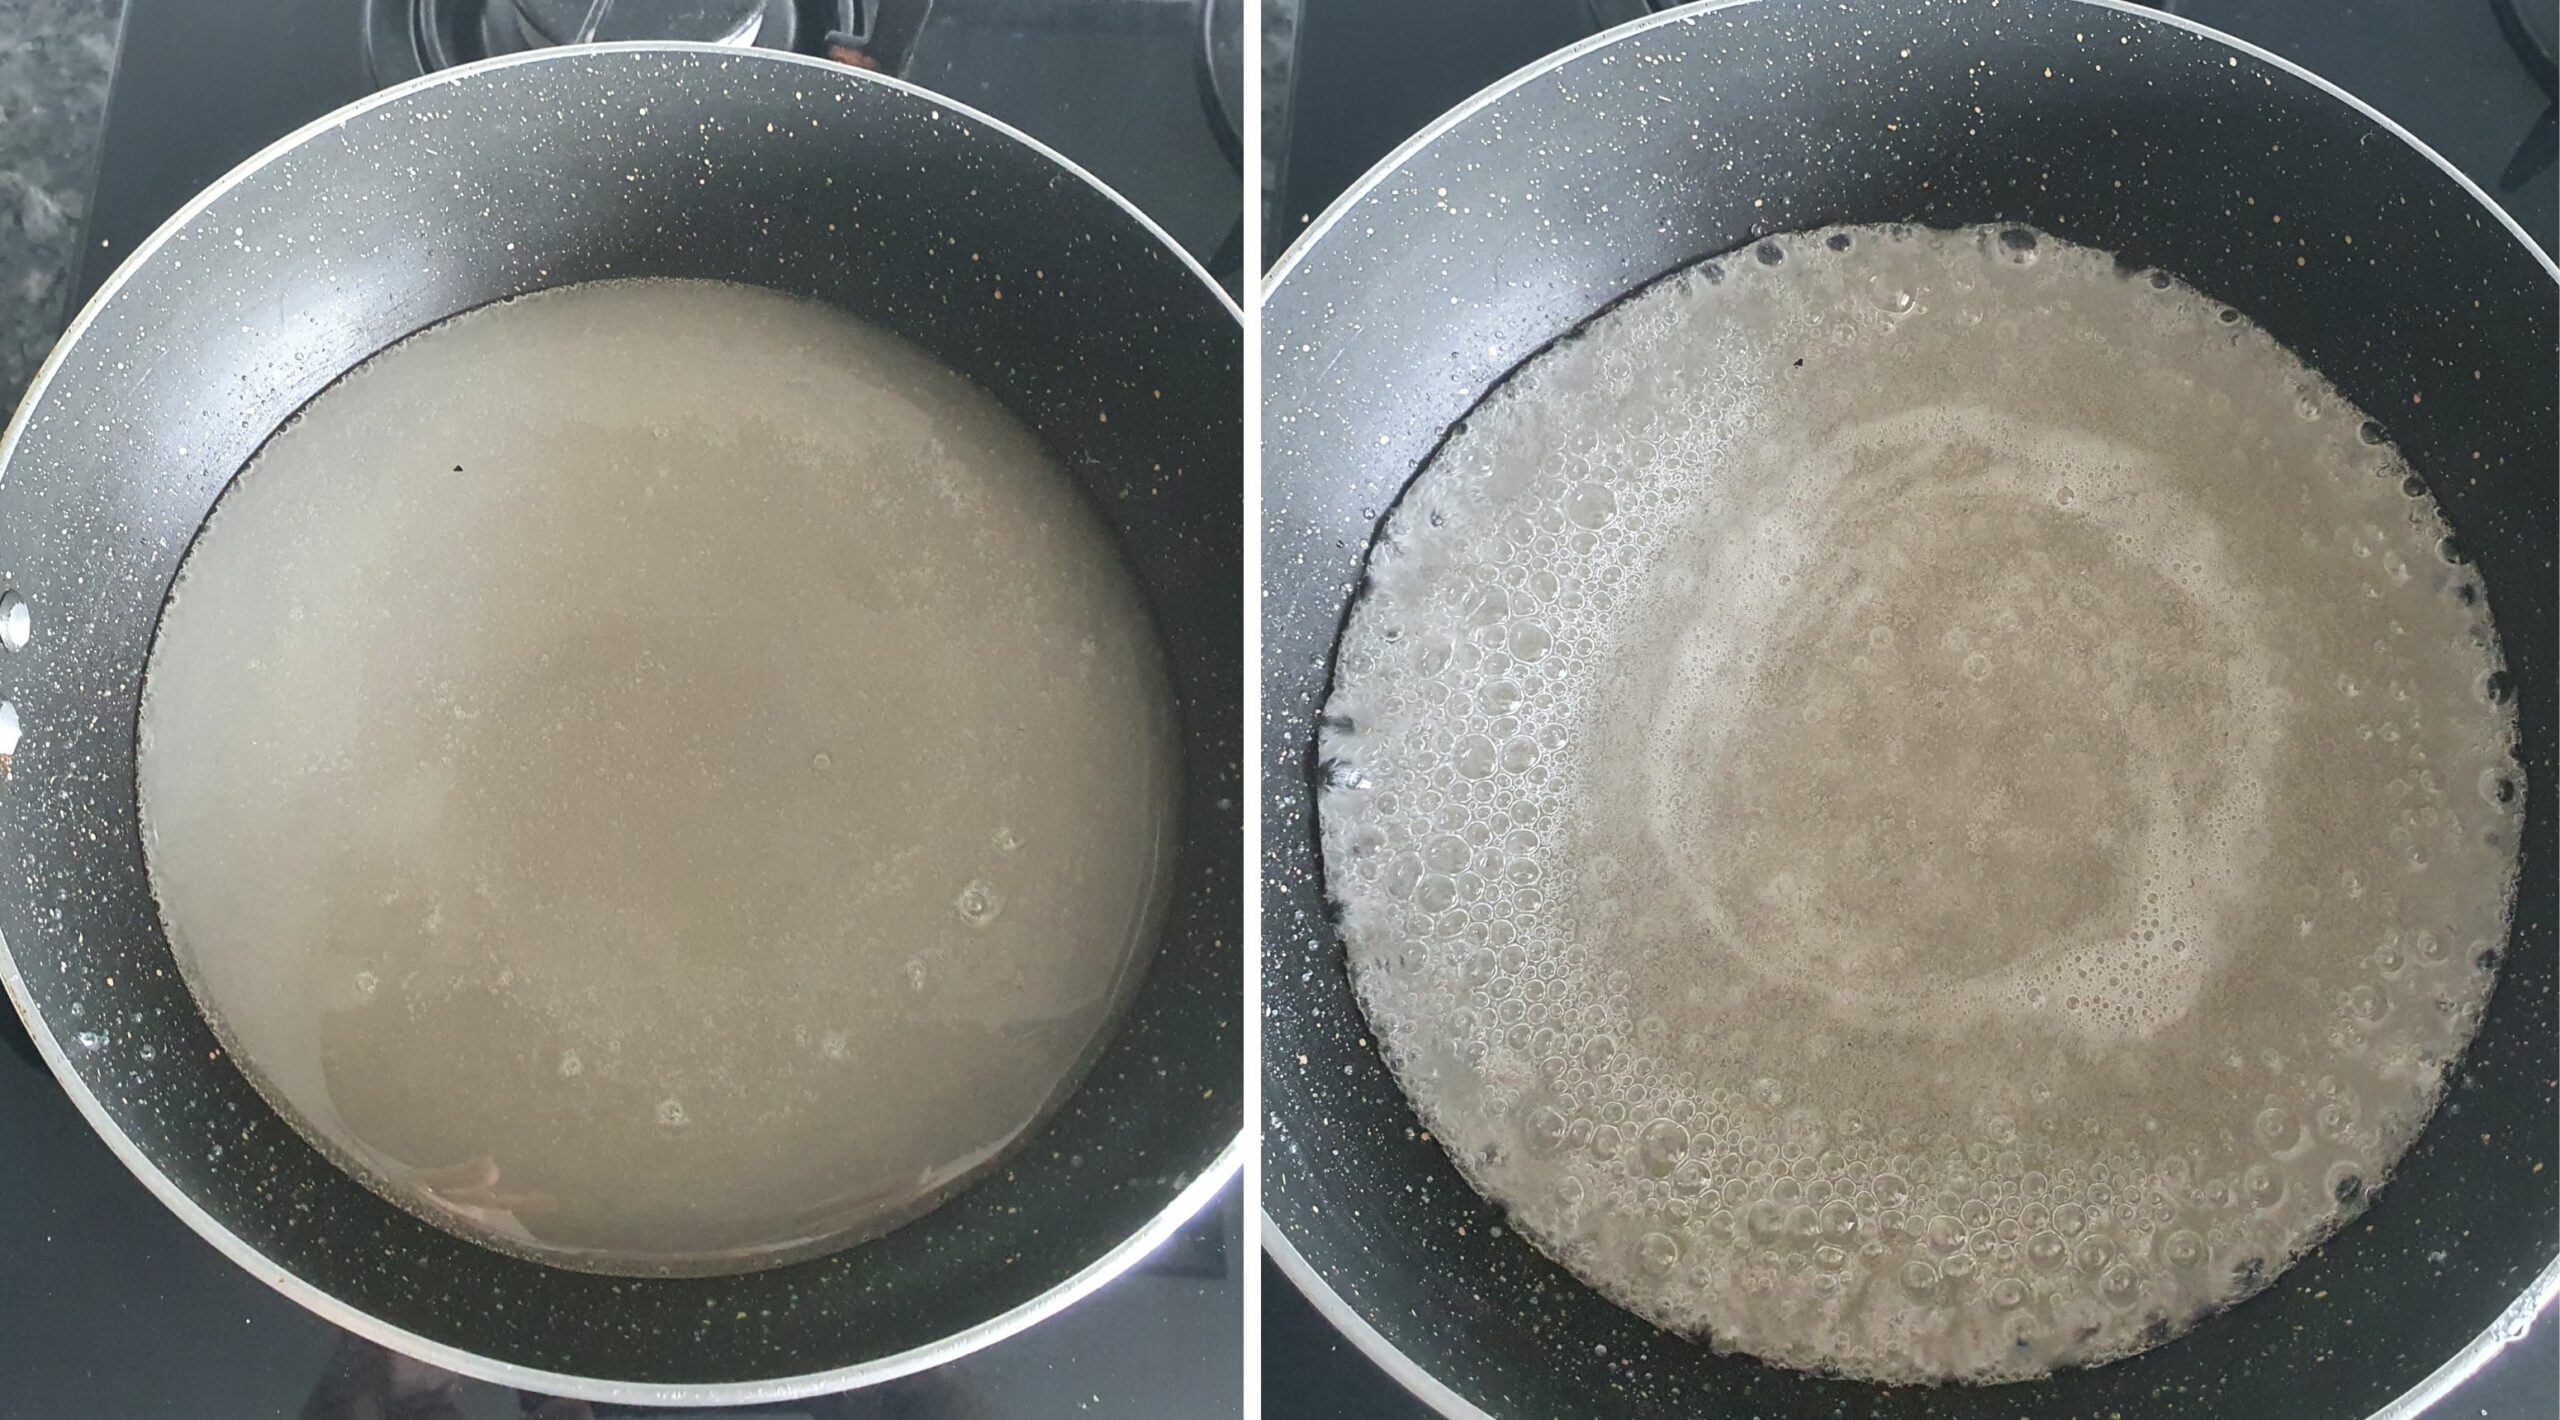

Add the water and heat on medium heat. Stir only until all the sugar has dissolved.
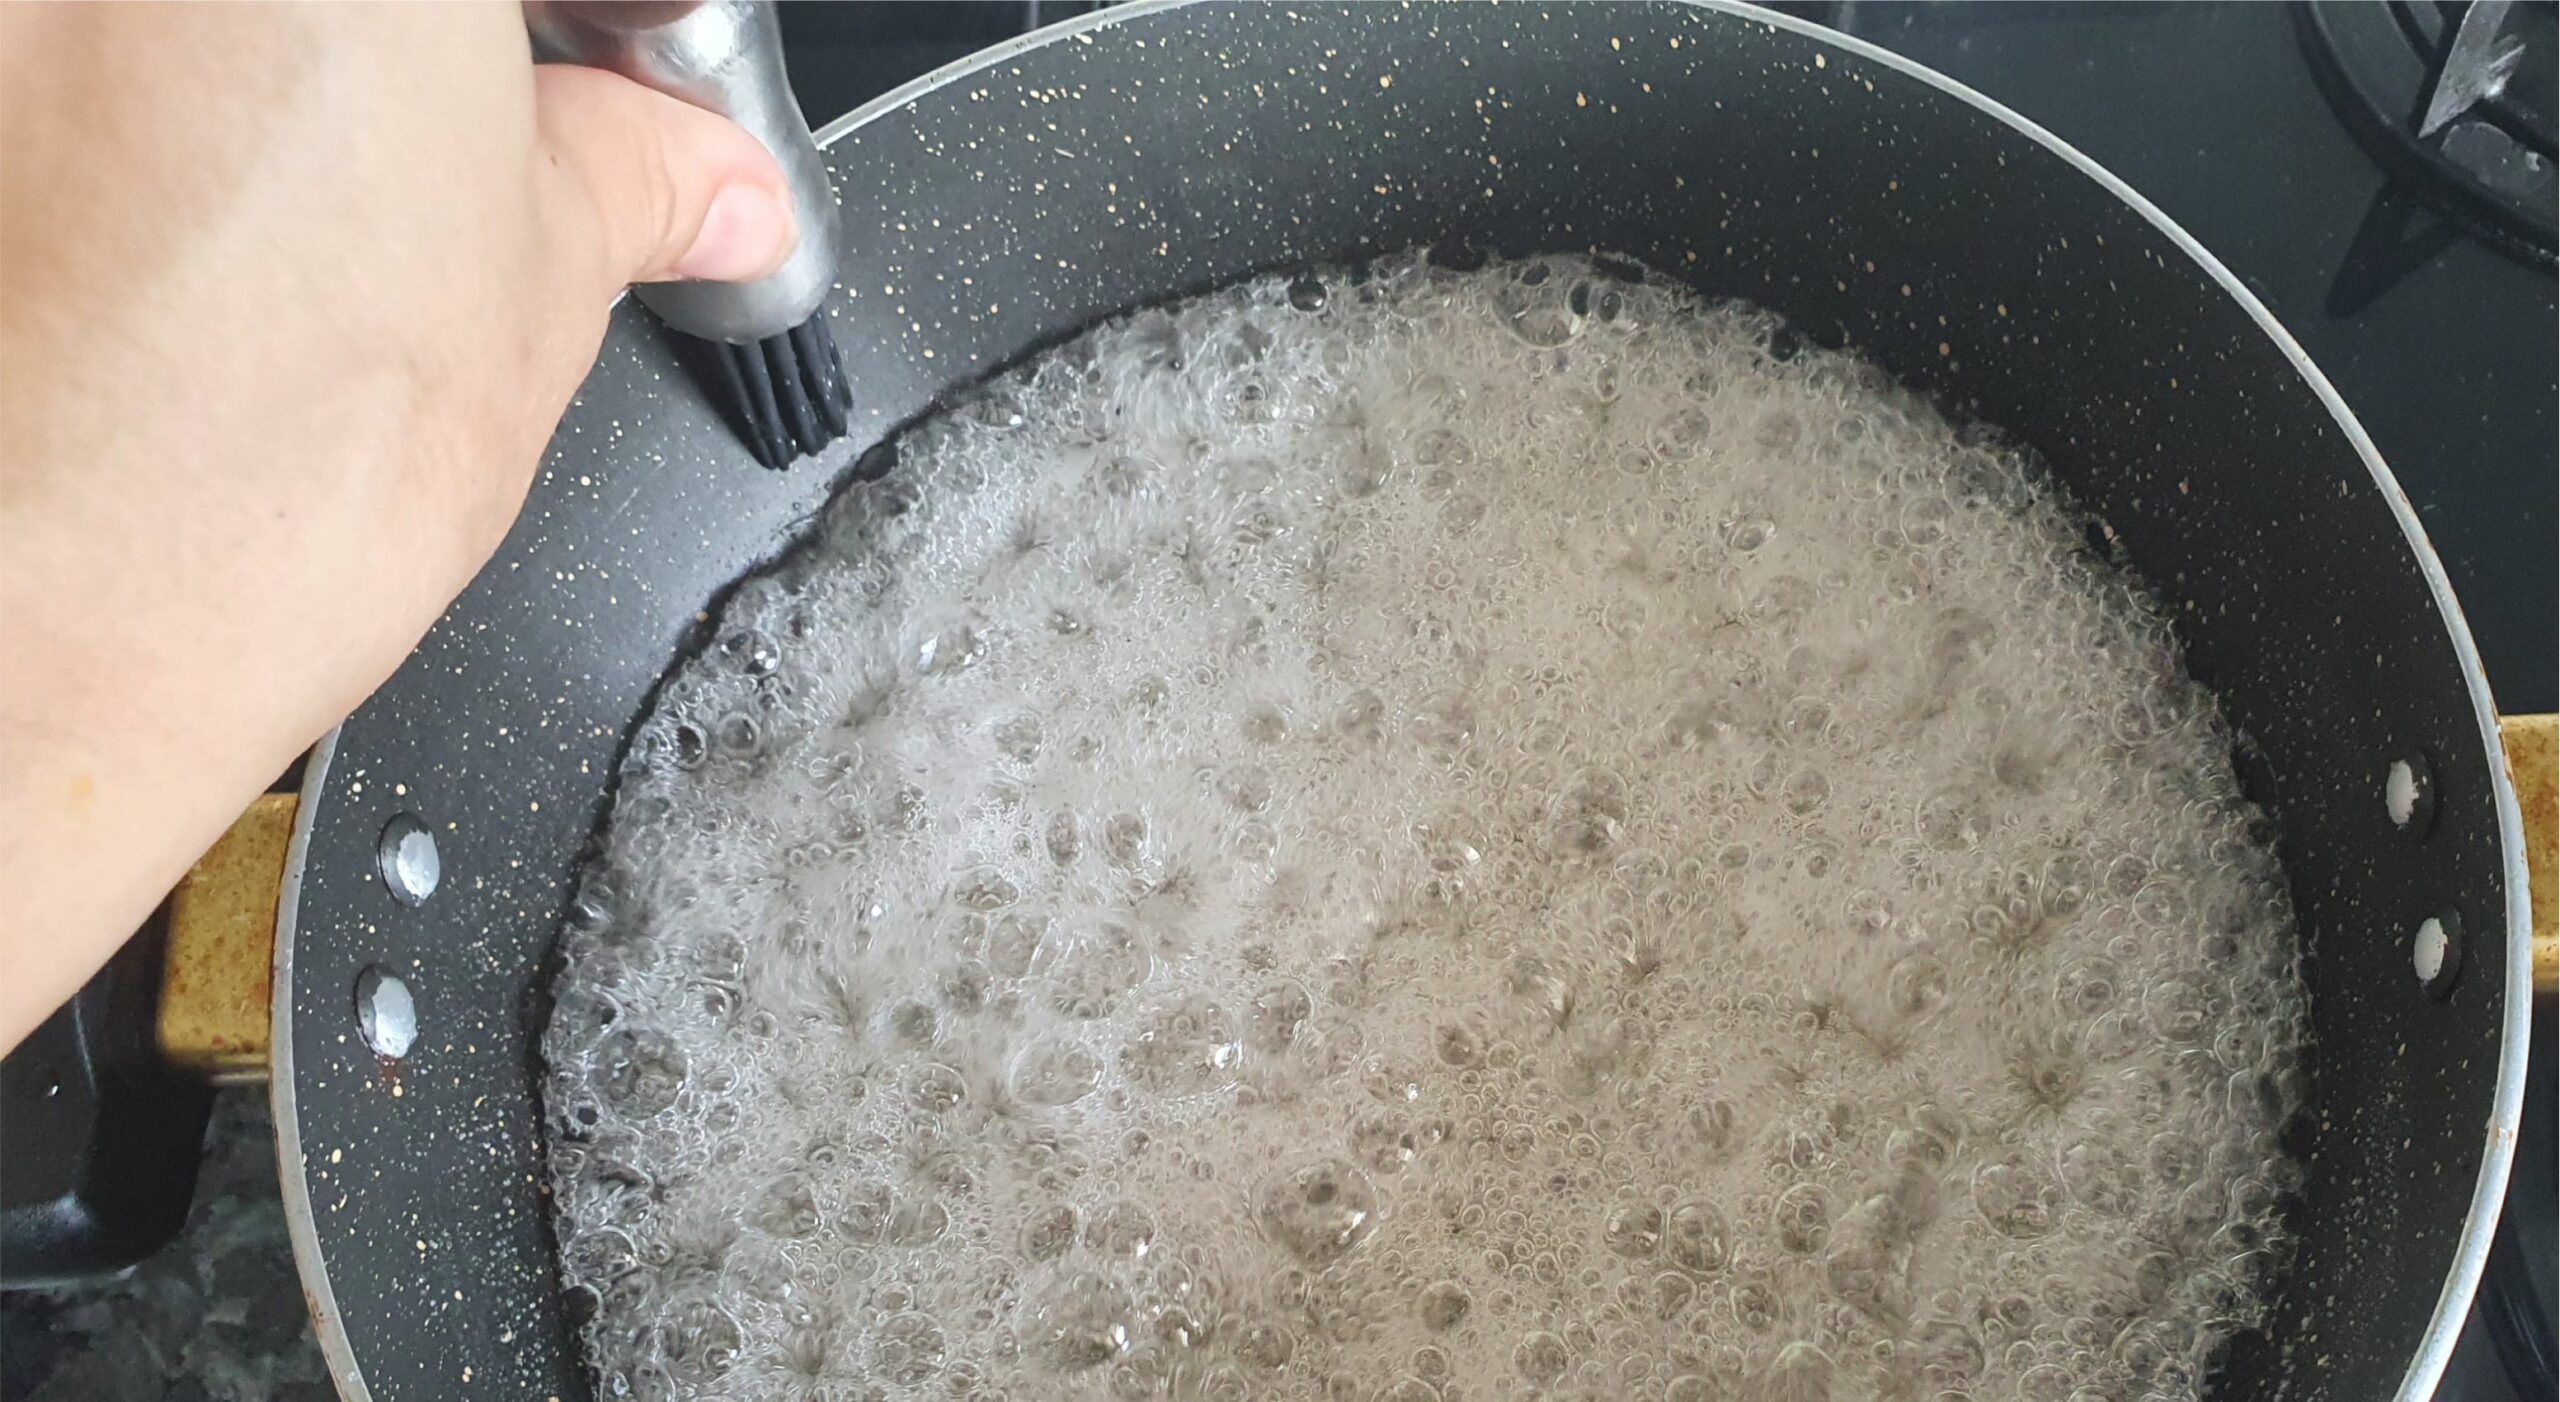

When the mixture starts to boil and the sugar has dissolved, stop stirring! Use a wet pastry brush to wet the insides of the pan. This is to make sure the sugar doesn't brown or burn on the sides.
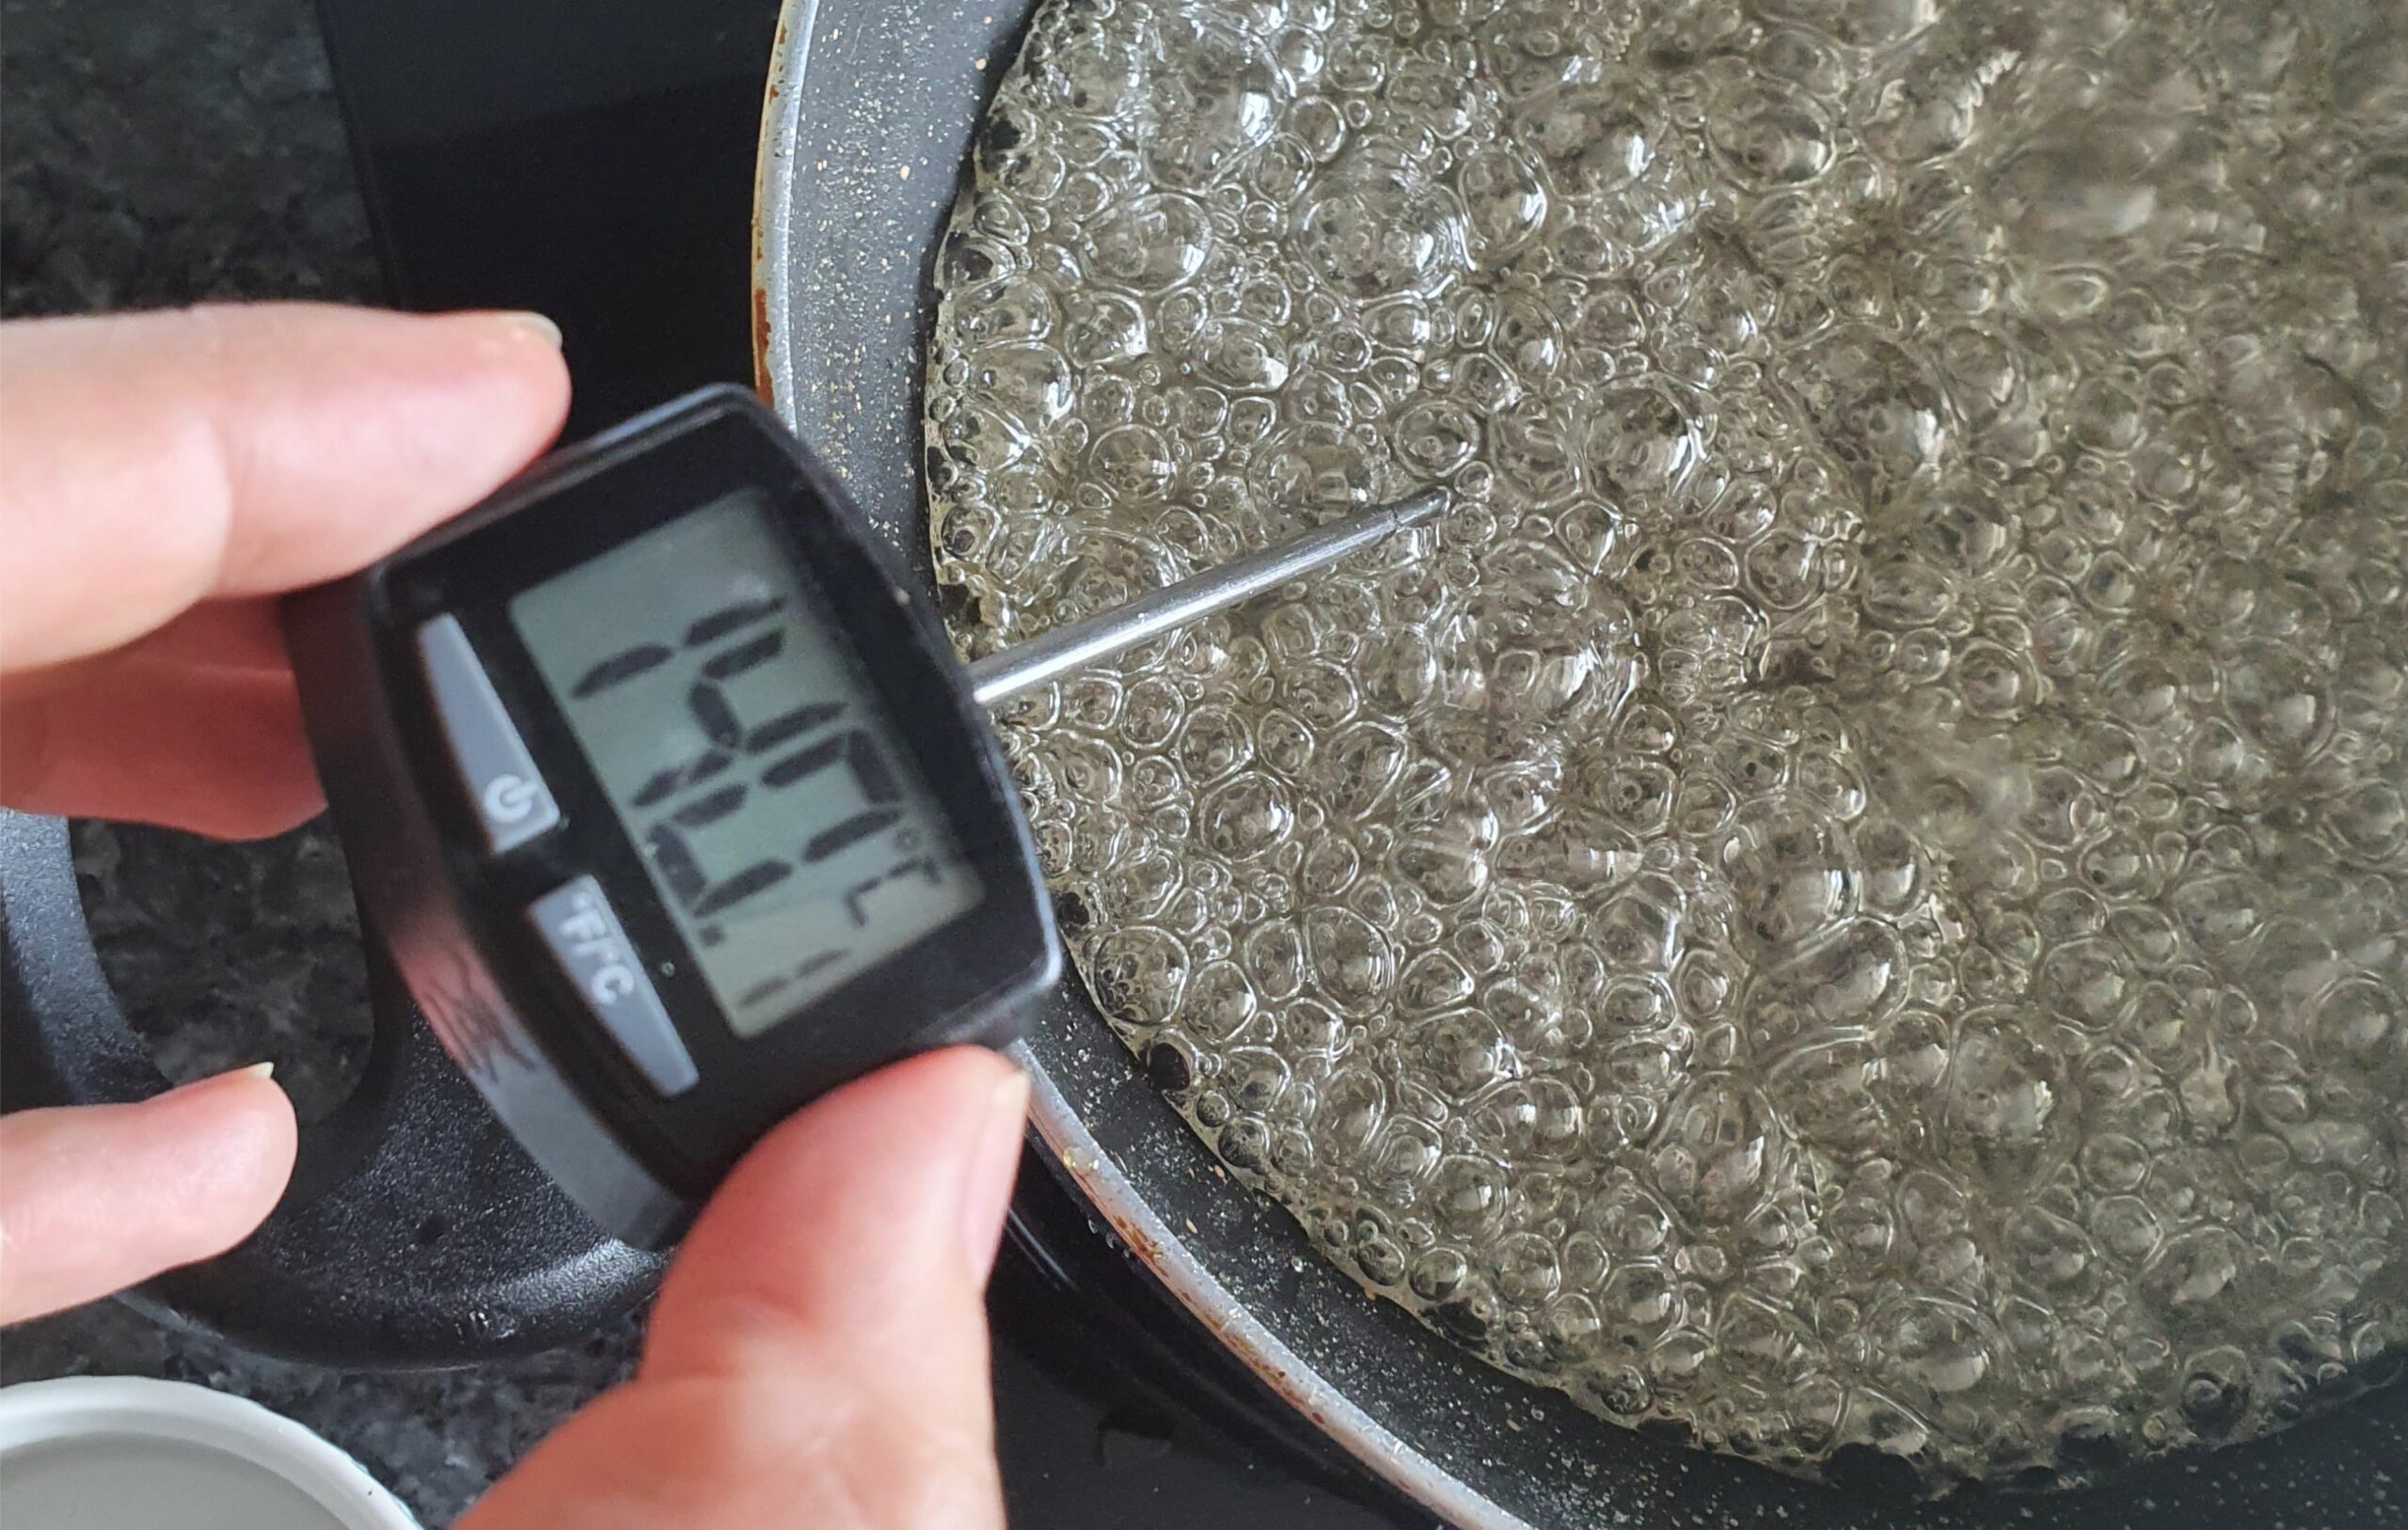

Heat the mixture to 285F/140C. It takes about 10 minutes. Remove the pan from the heat
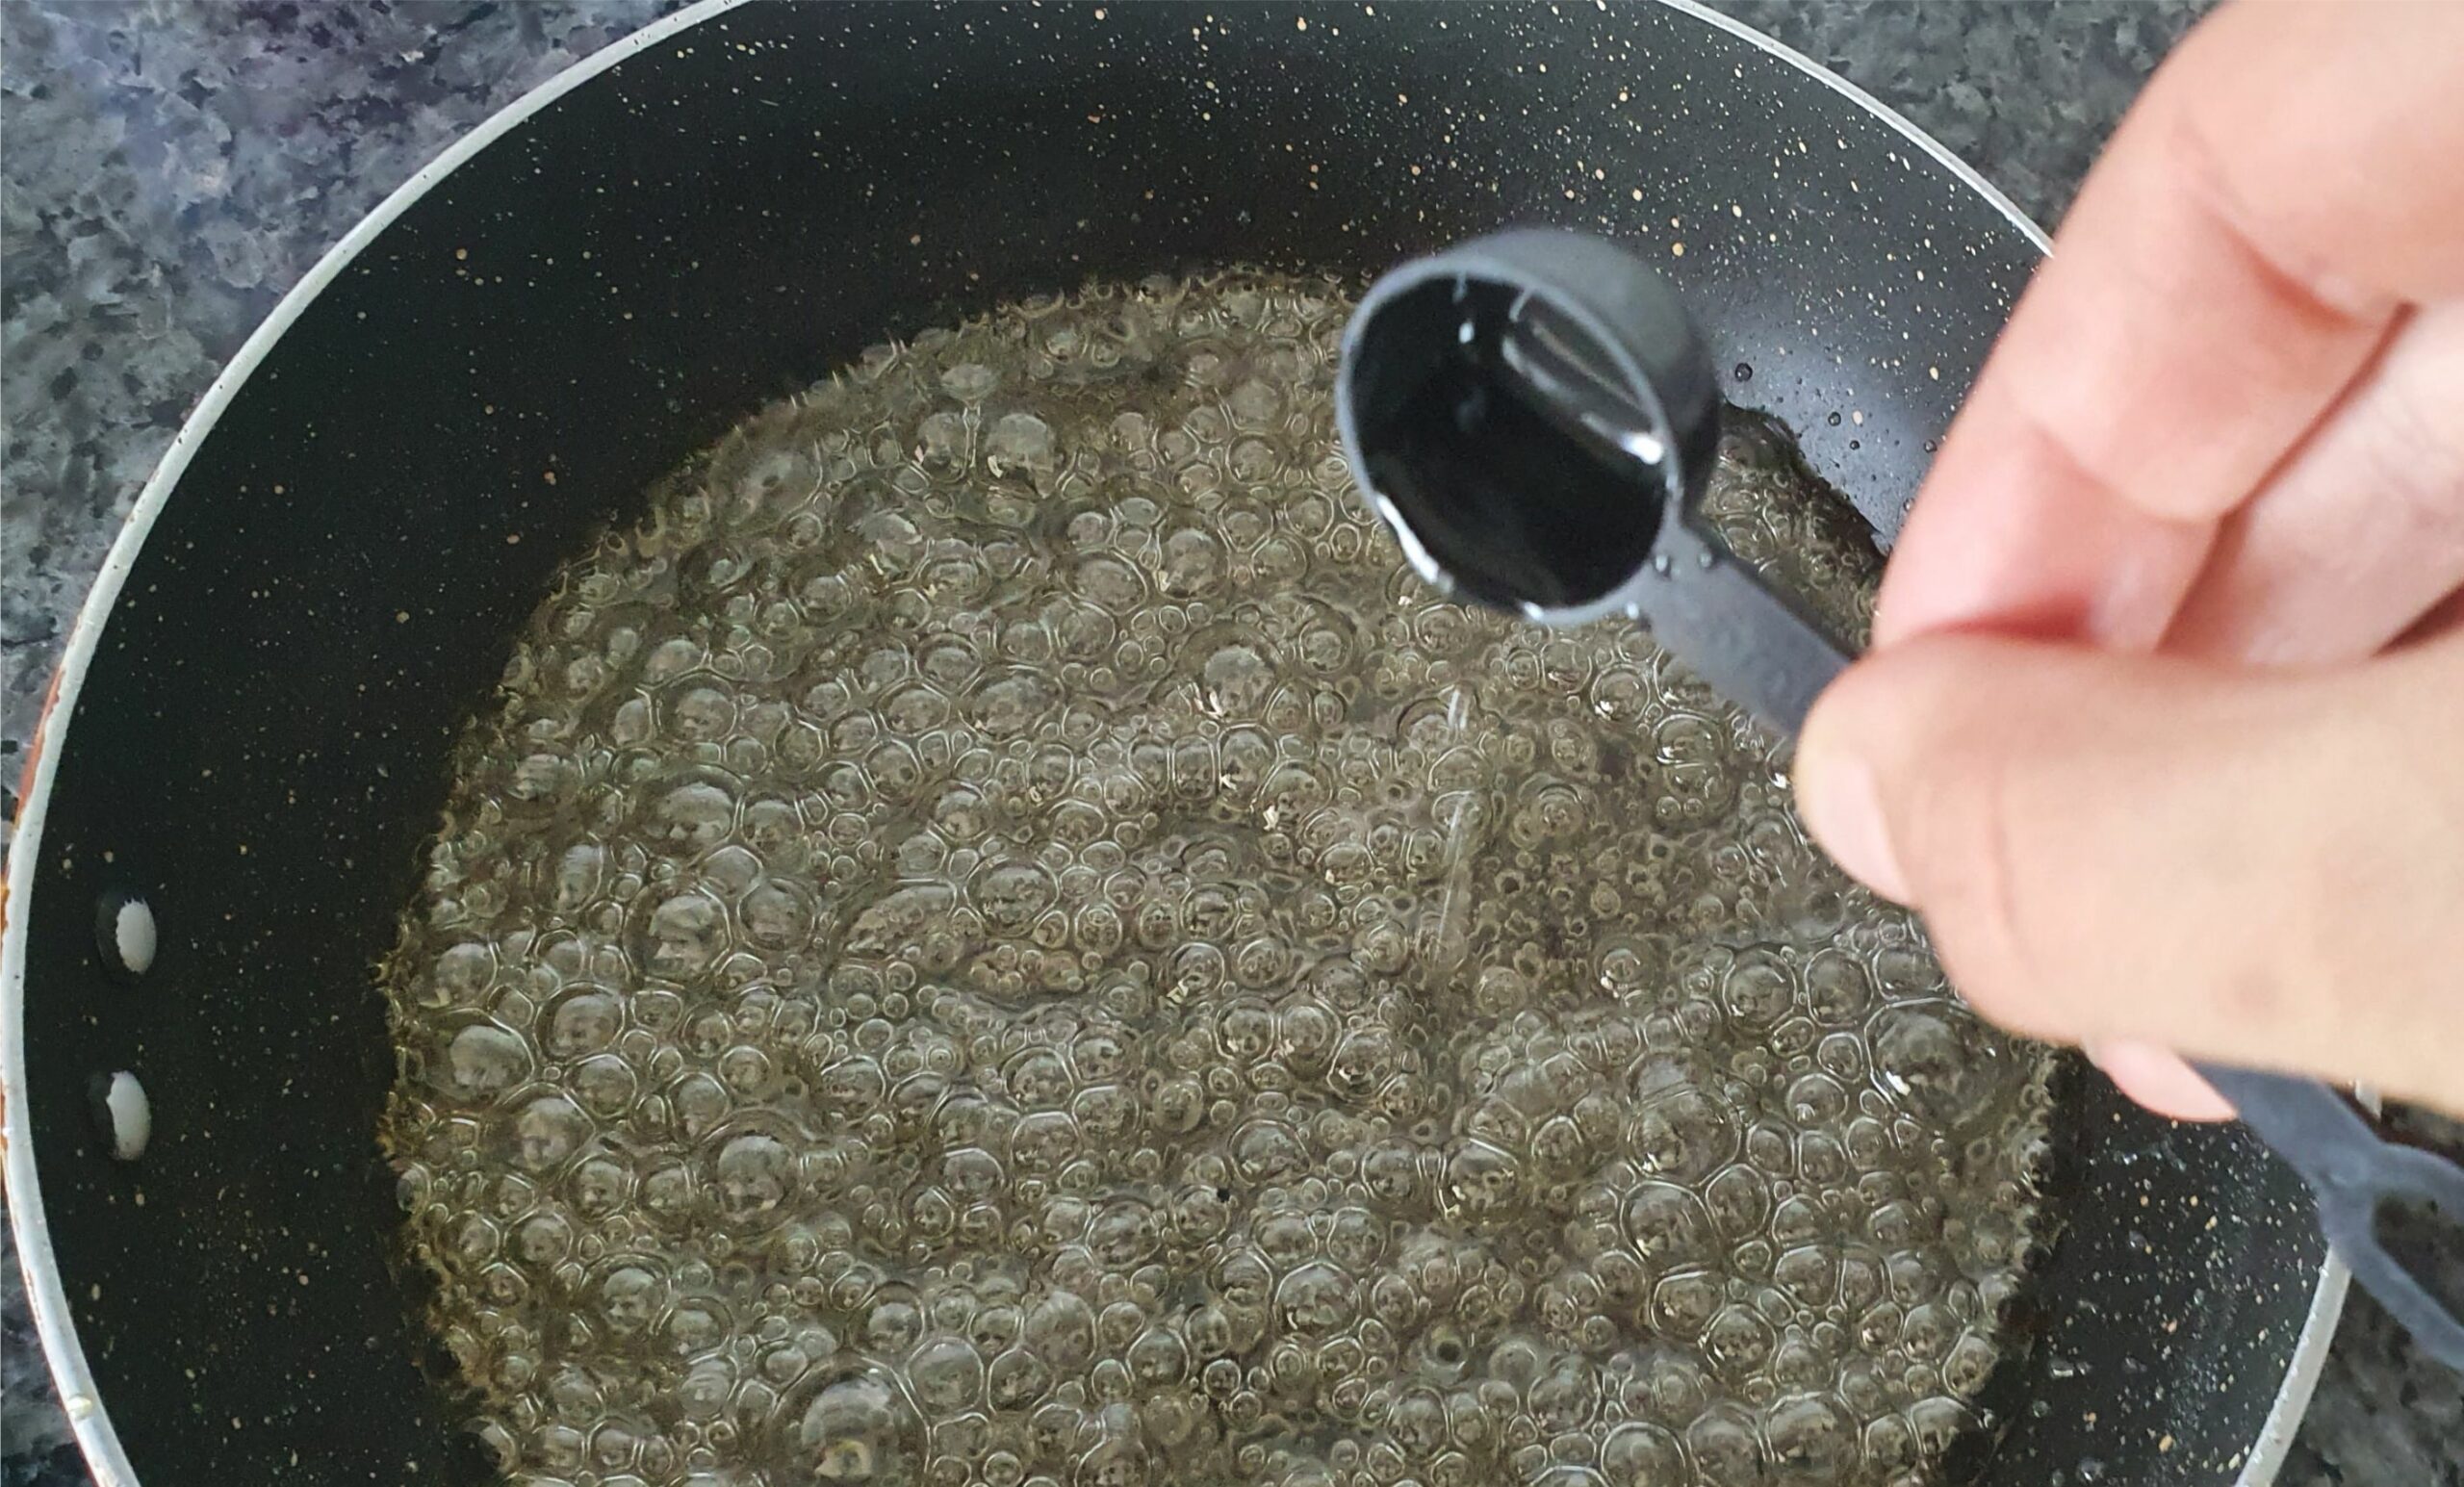

Add the 3/4 tsp of strawberry flavour and stir the mixture. Make sure to keep your head slightly away as the mixture will bubble and fumes will rise.
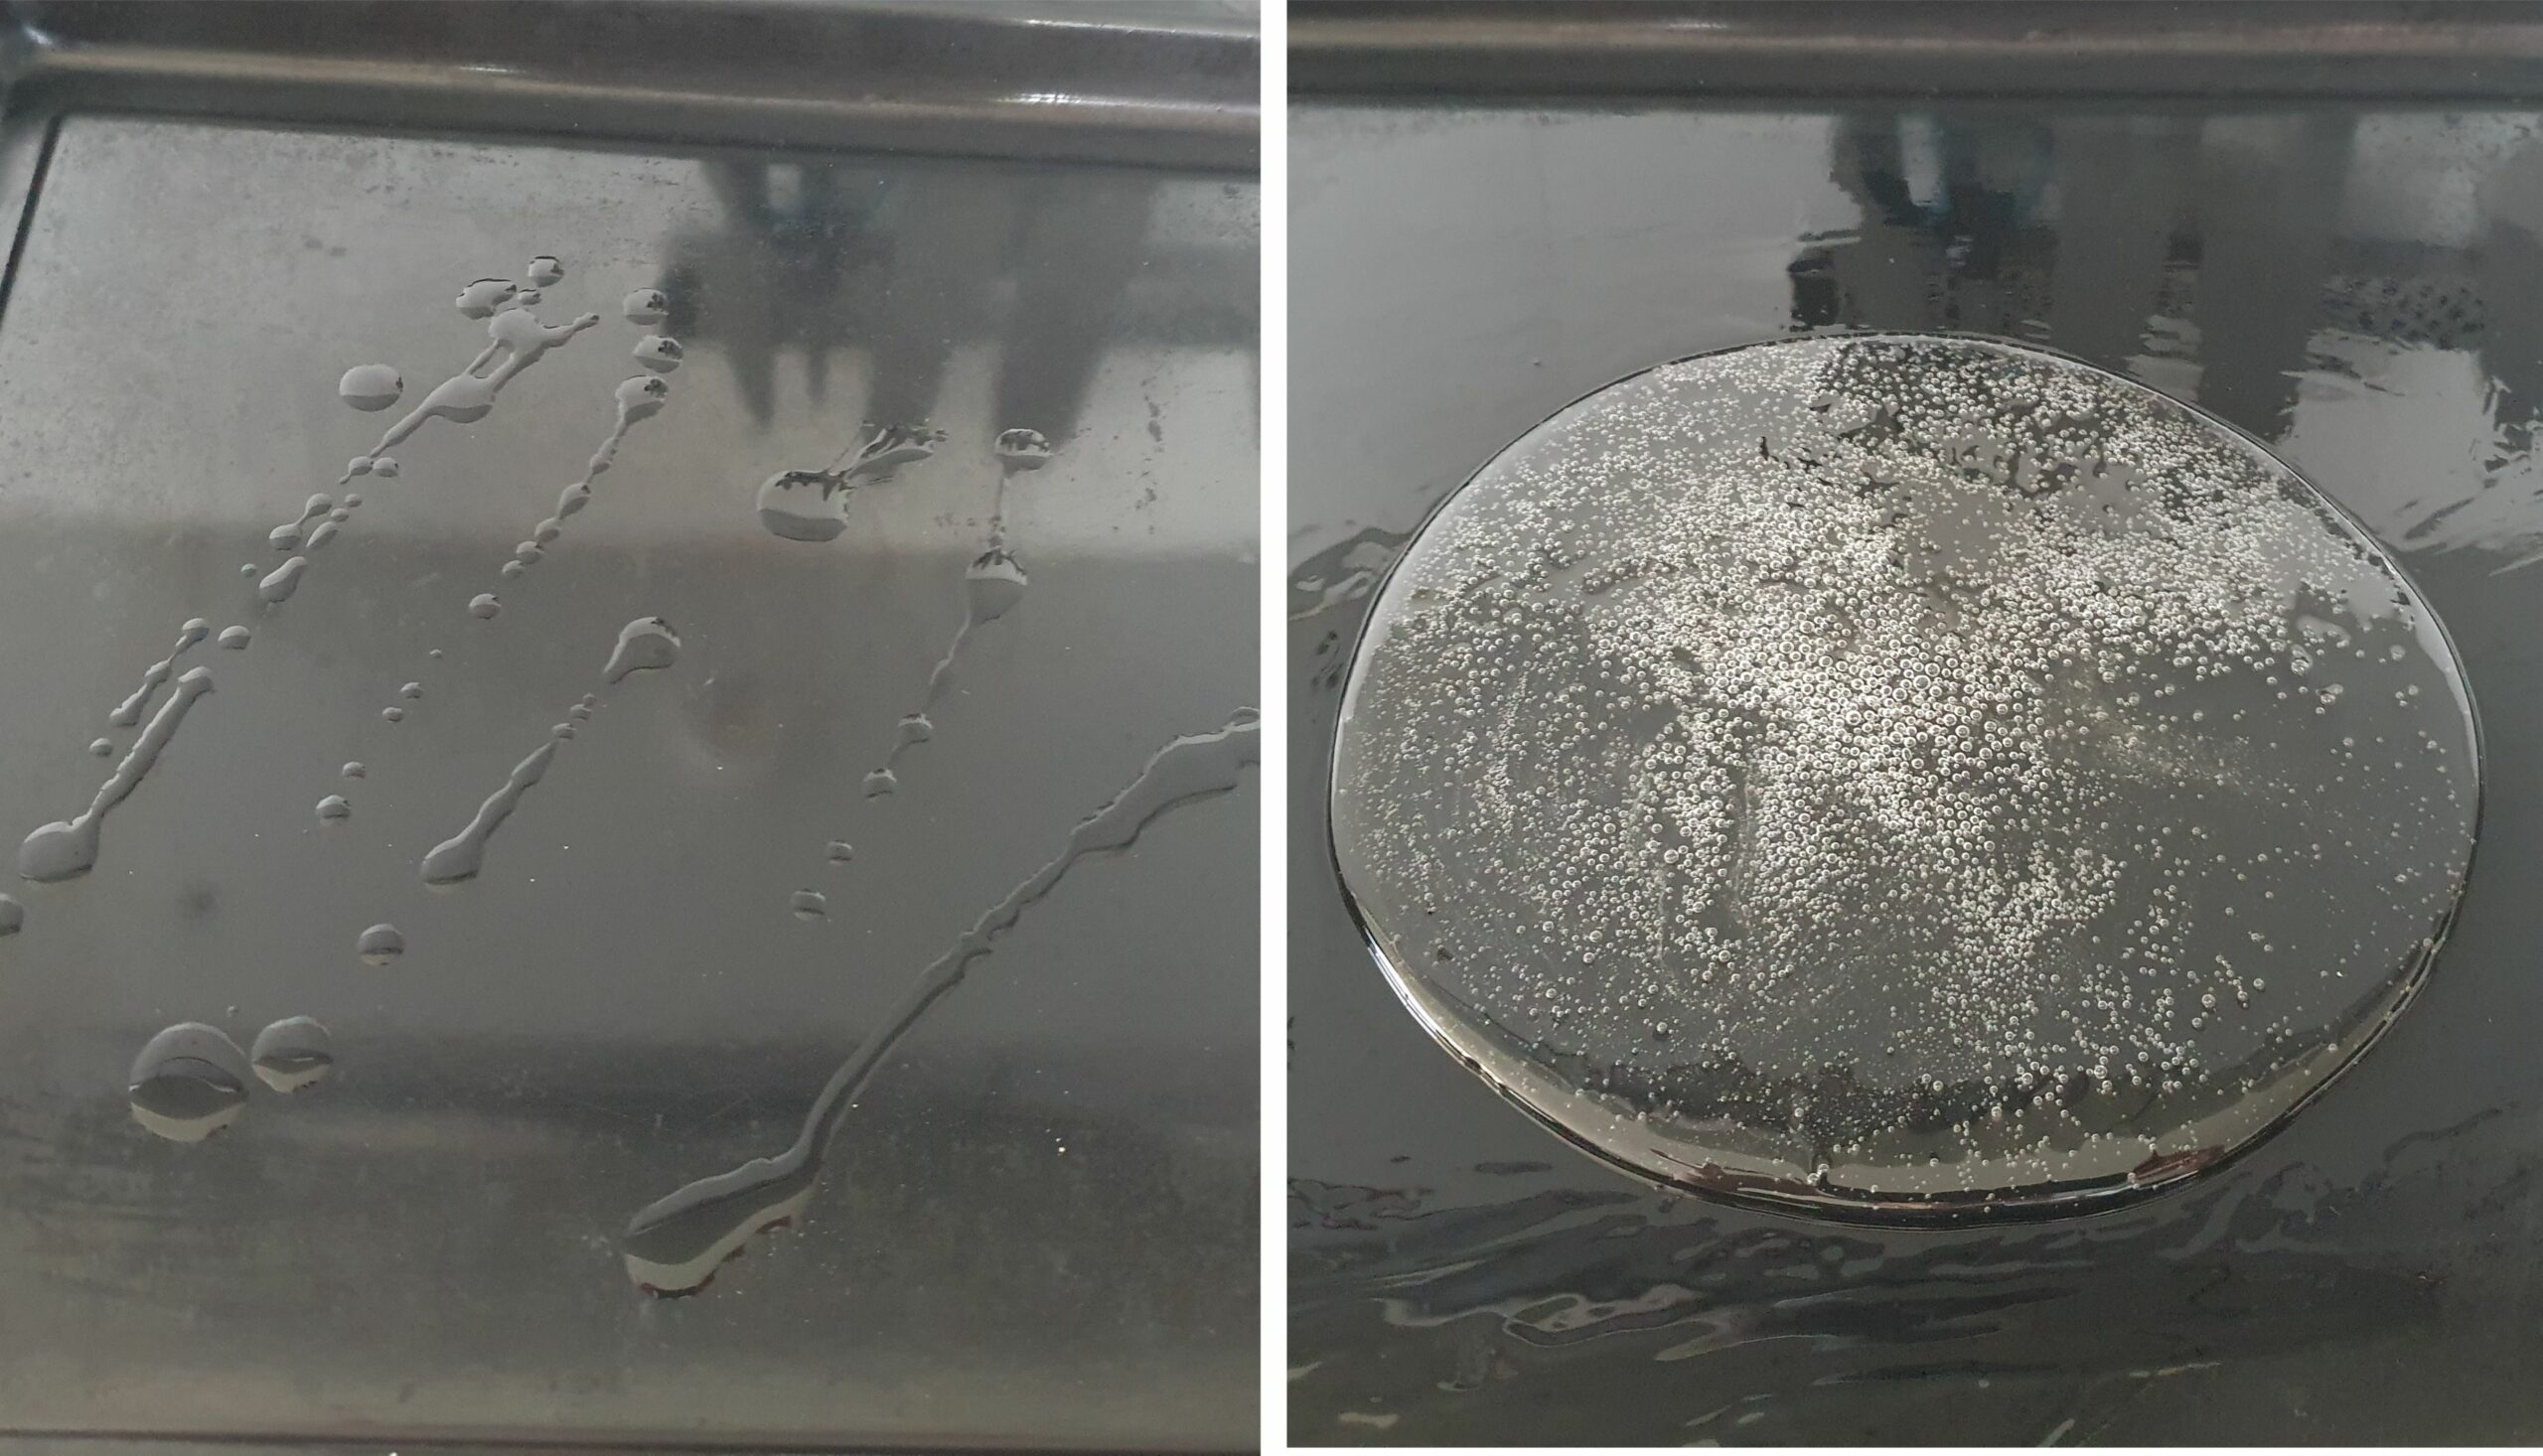

Oil a tray and pour half of the candy mixture onto the tray. Place the tray in the oven.
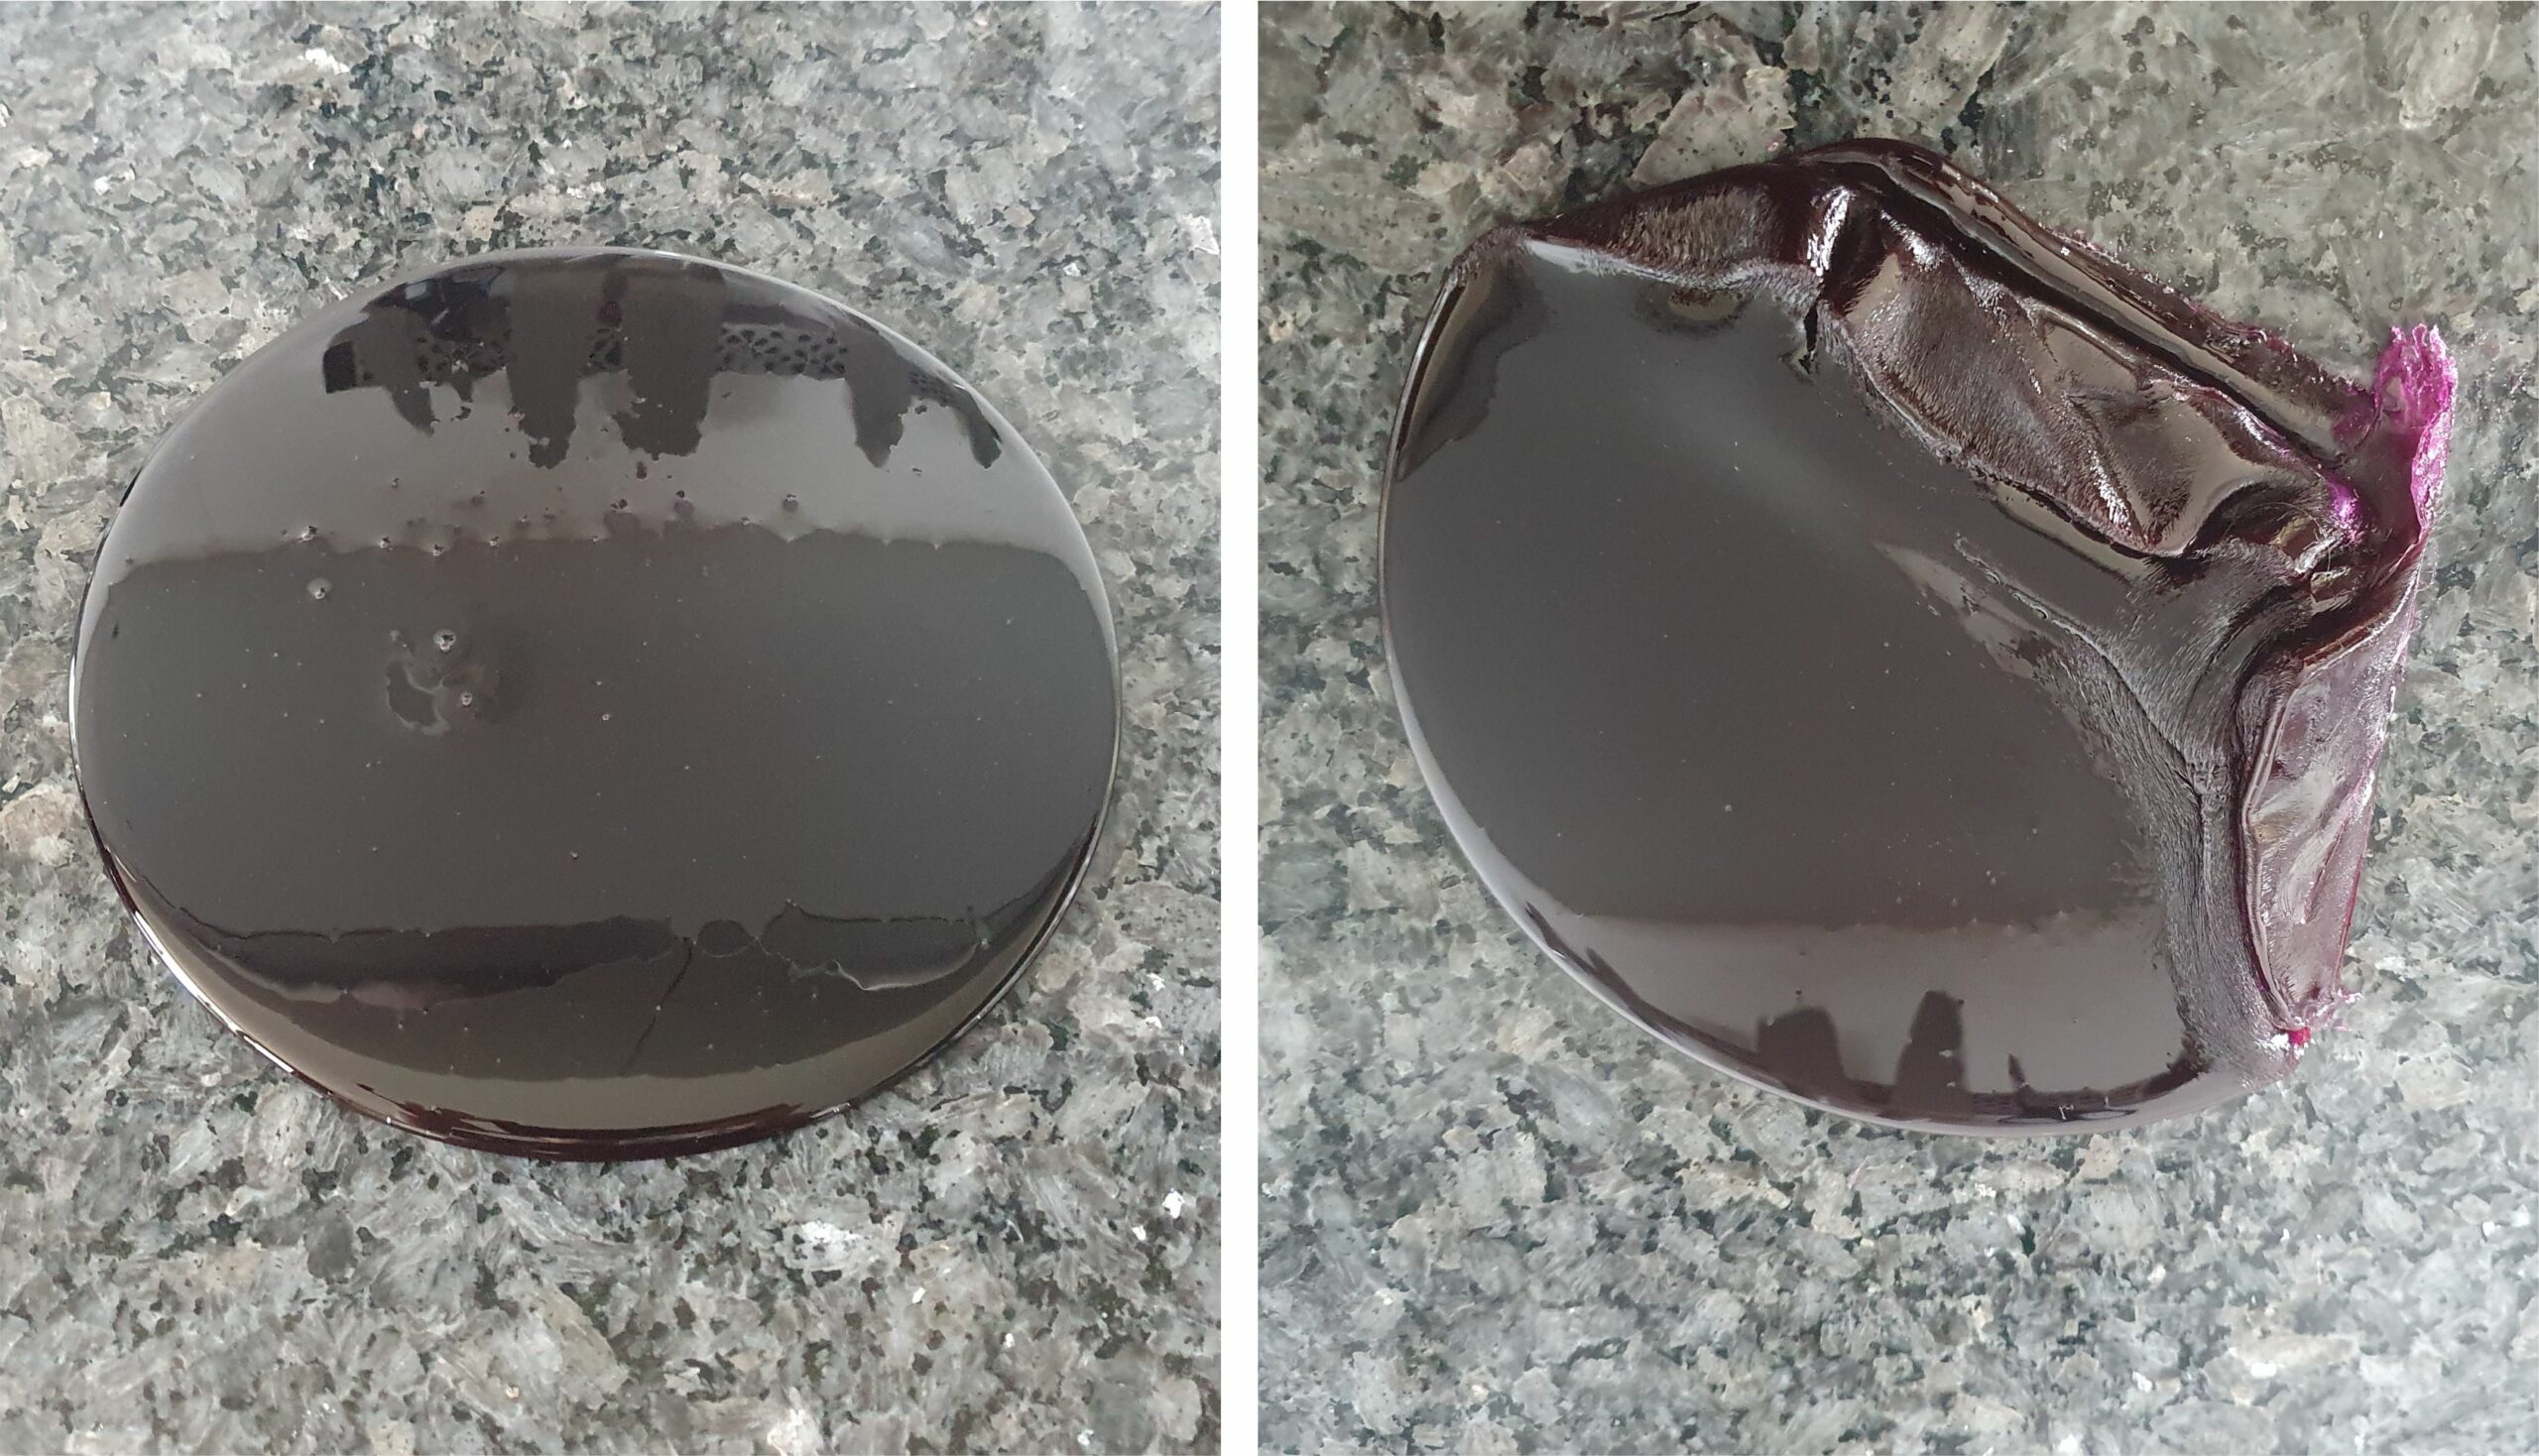

Add gel colour to the other half of the candy. I have used 6-7 drops of gel colour here. Pour the candy out on the counter and wait a few minutes for a skin to form.
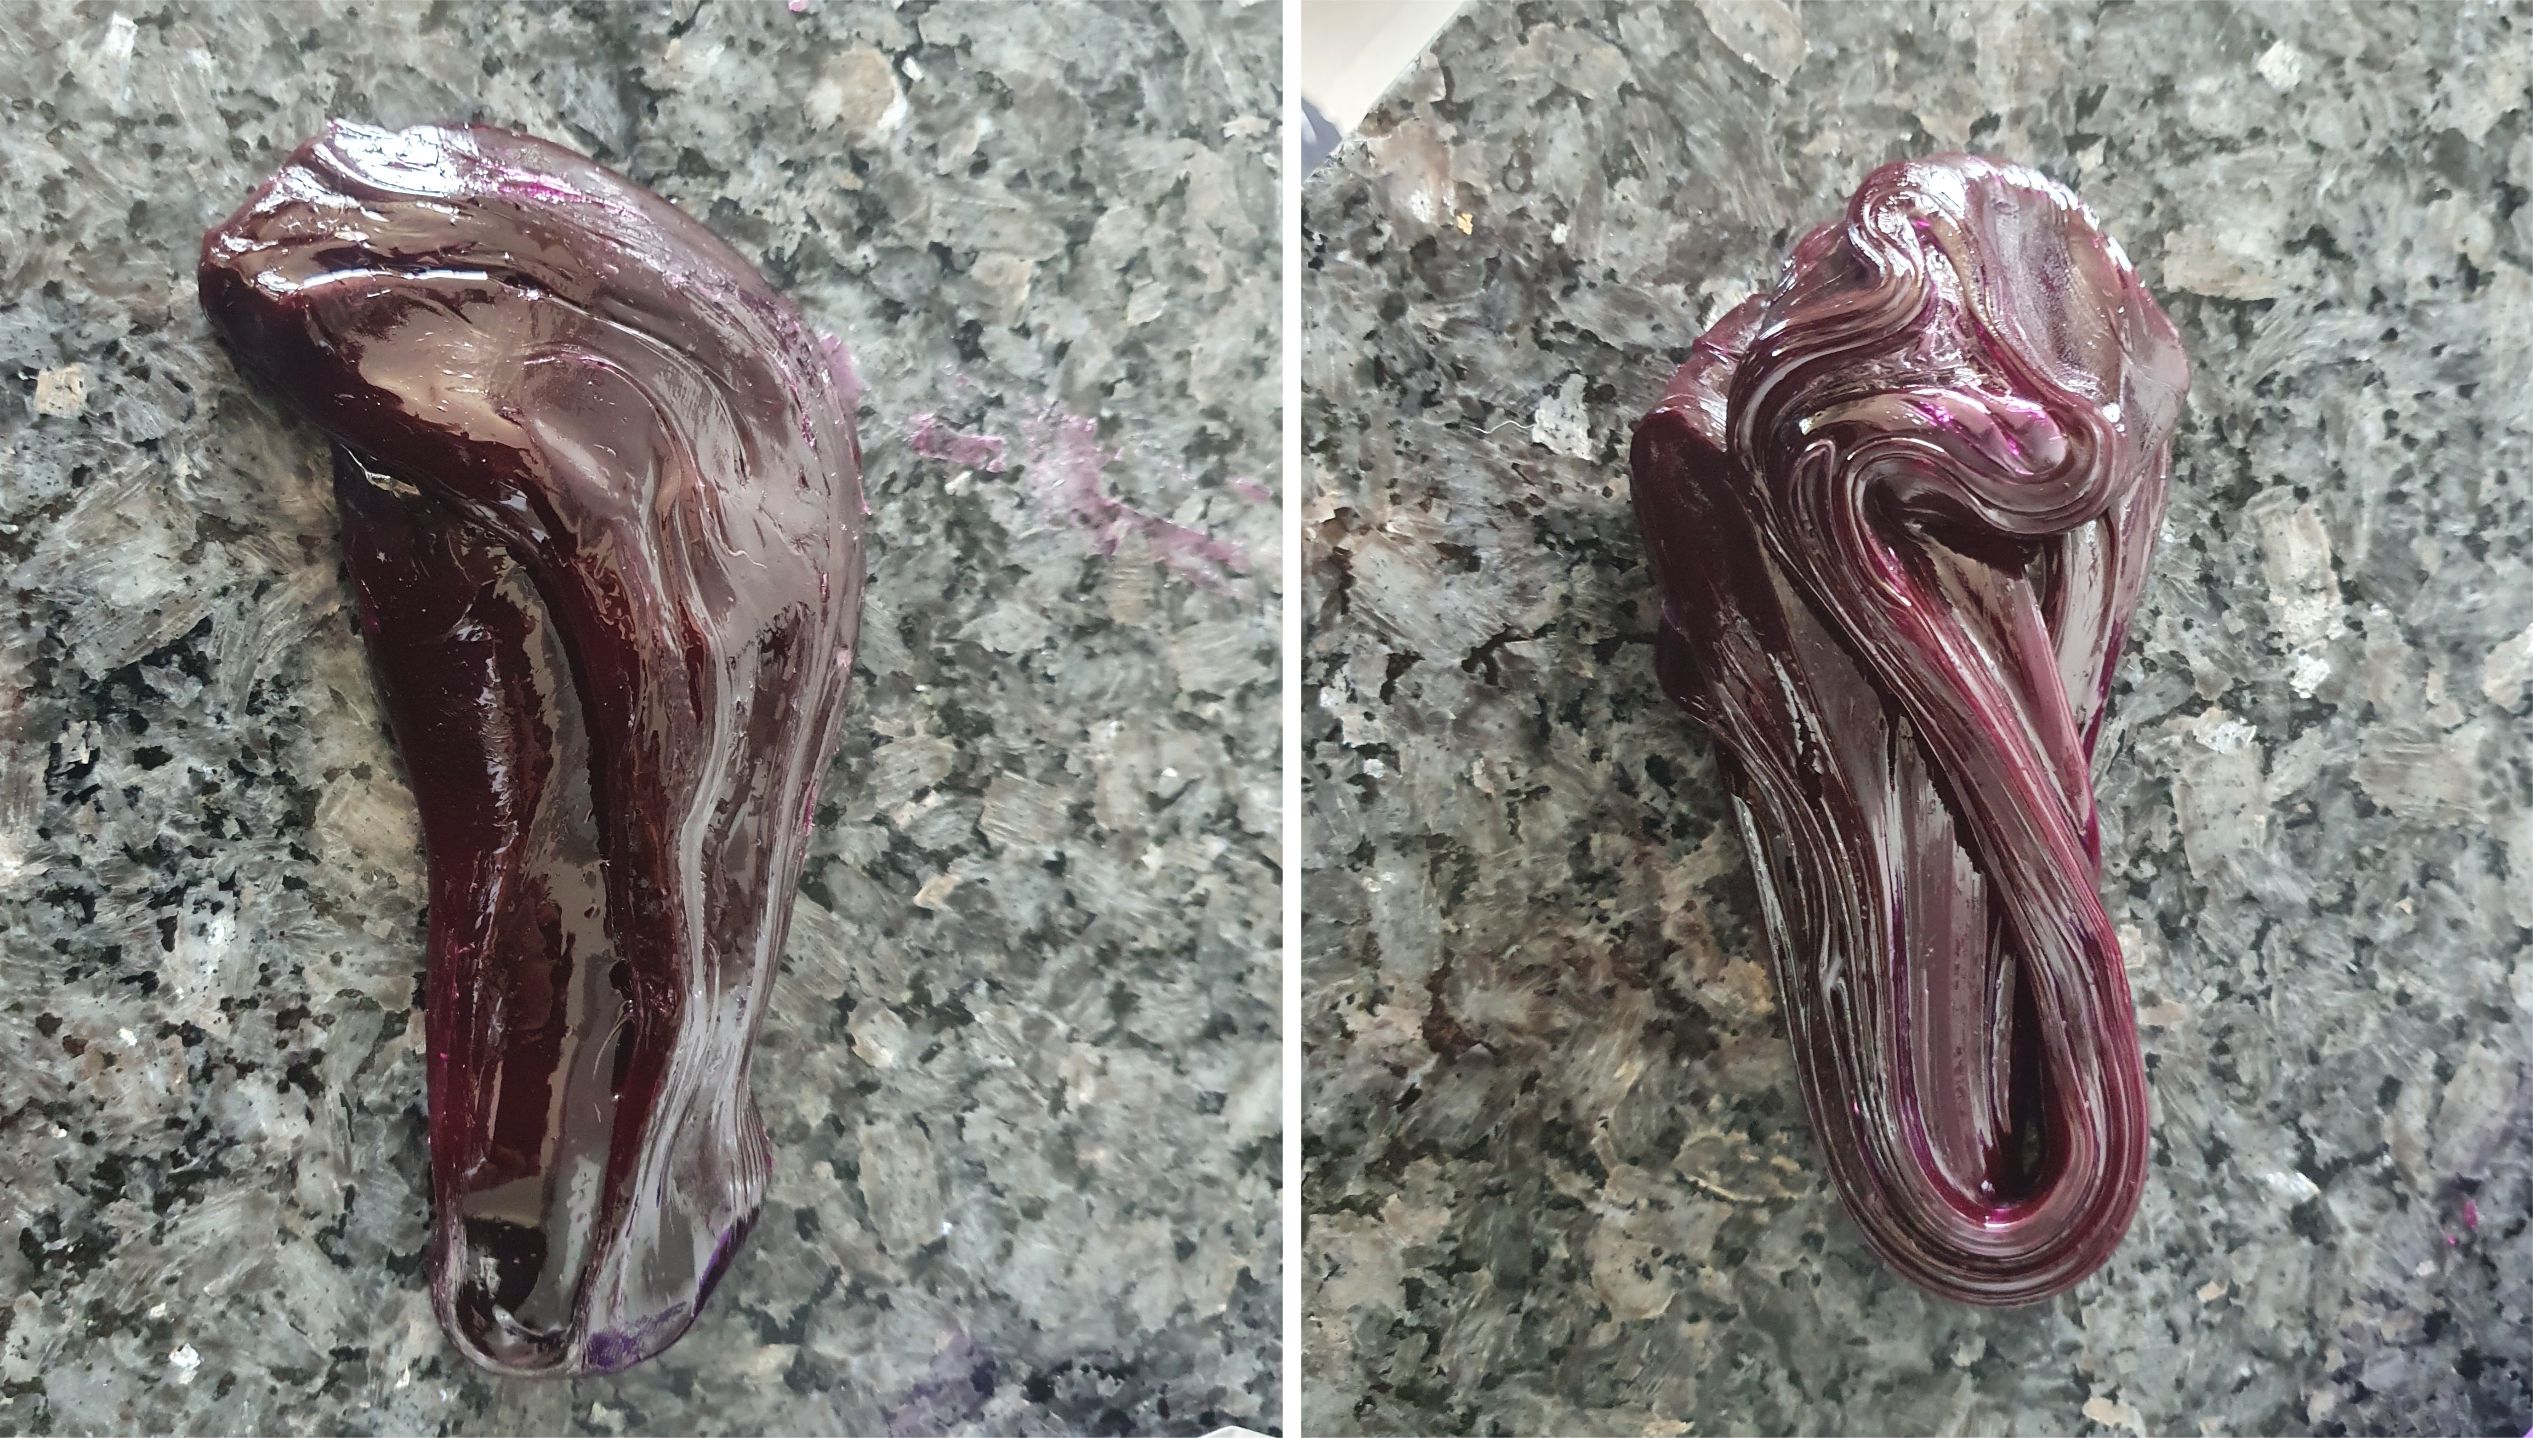

Start to stretch the candy. It will still be very warm so use protective gloves if needed. I think they are too bulky and hard to work with so I just stretch with my bare hands.
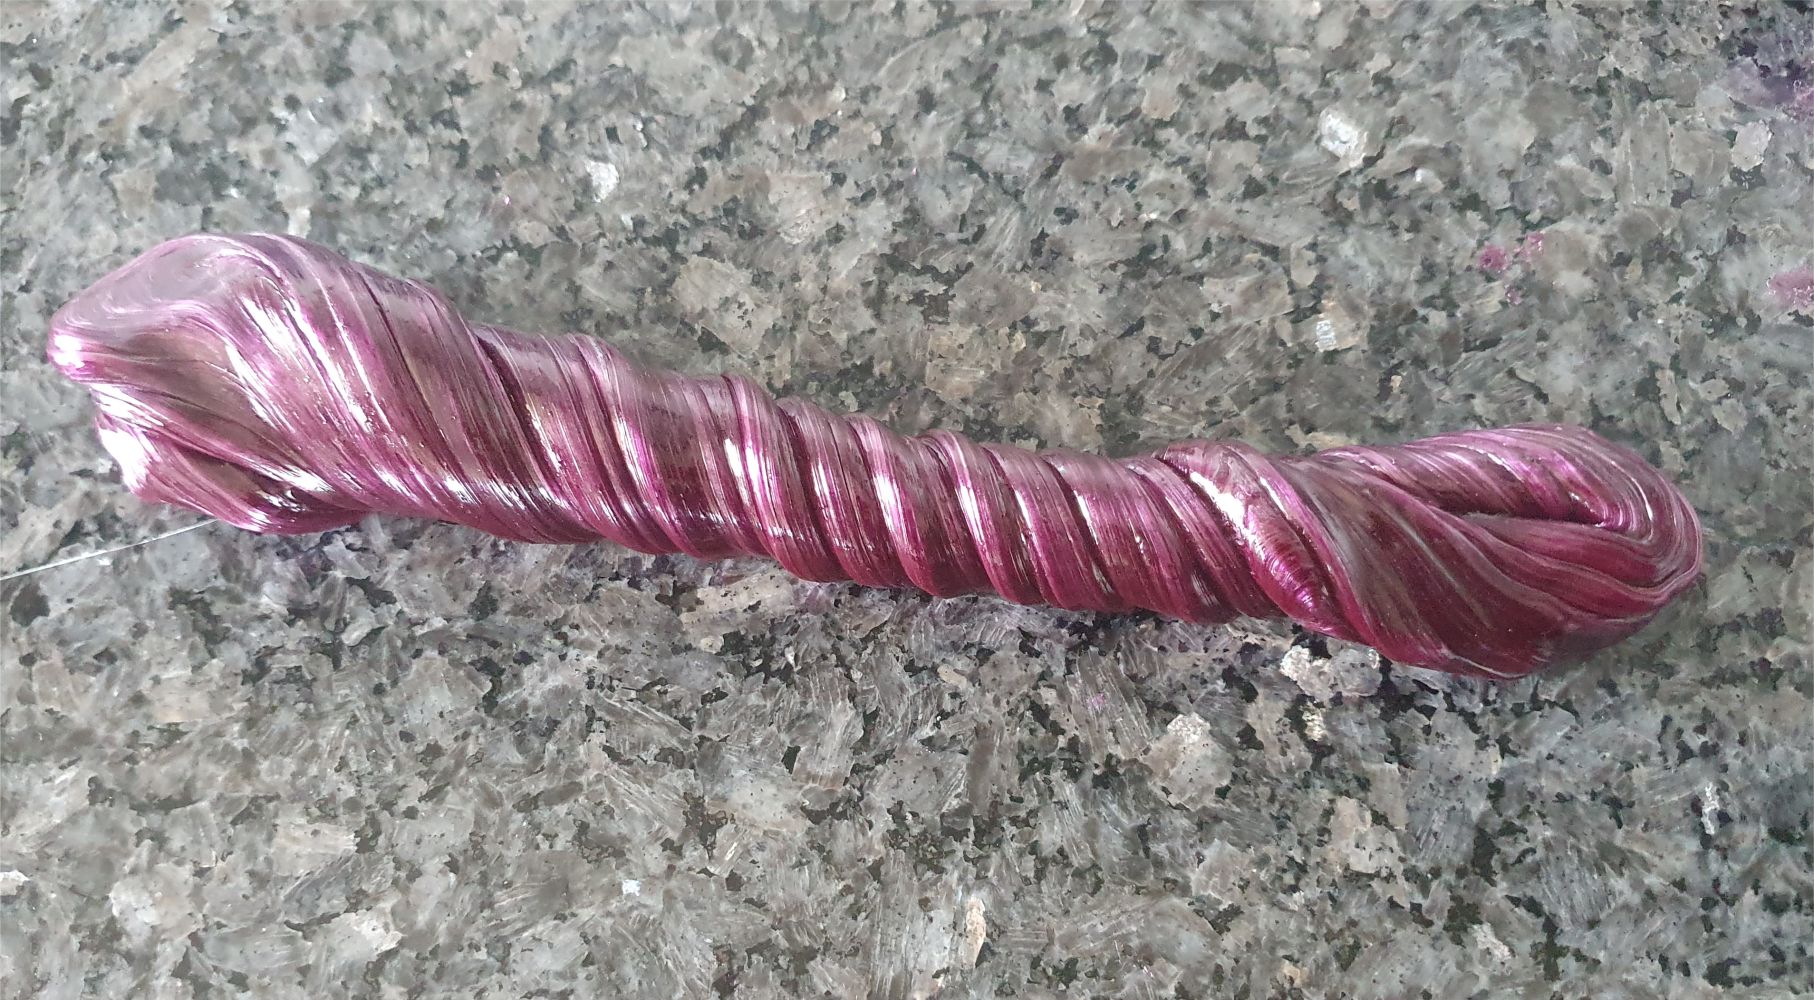

Stretch the candy until it turns glossy and lighter in colour. Place it back in the oven while you get to work on the other piece.
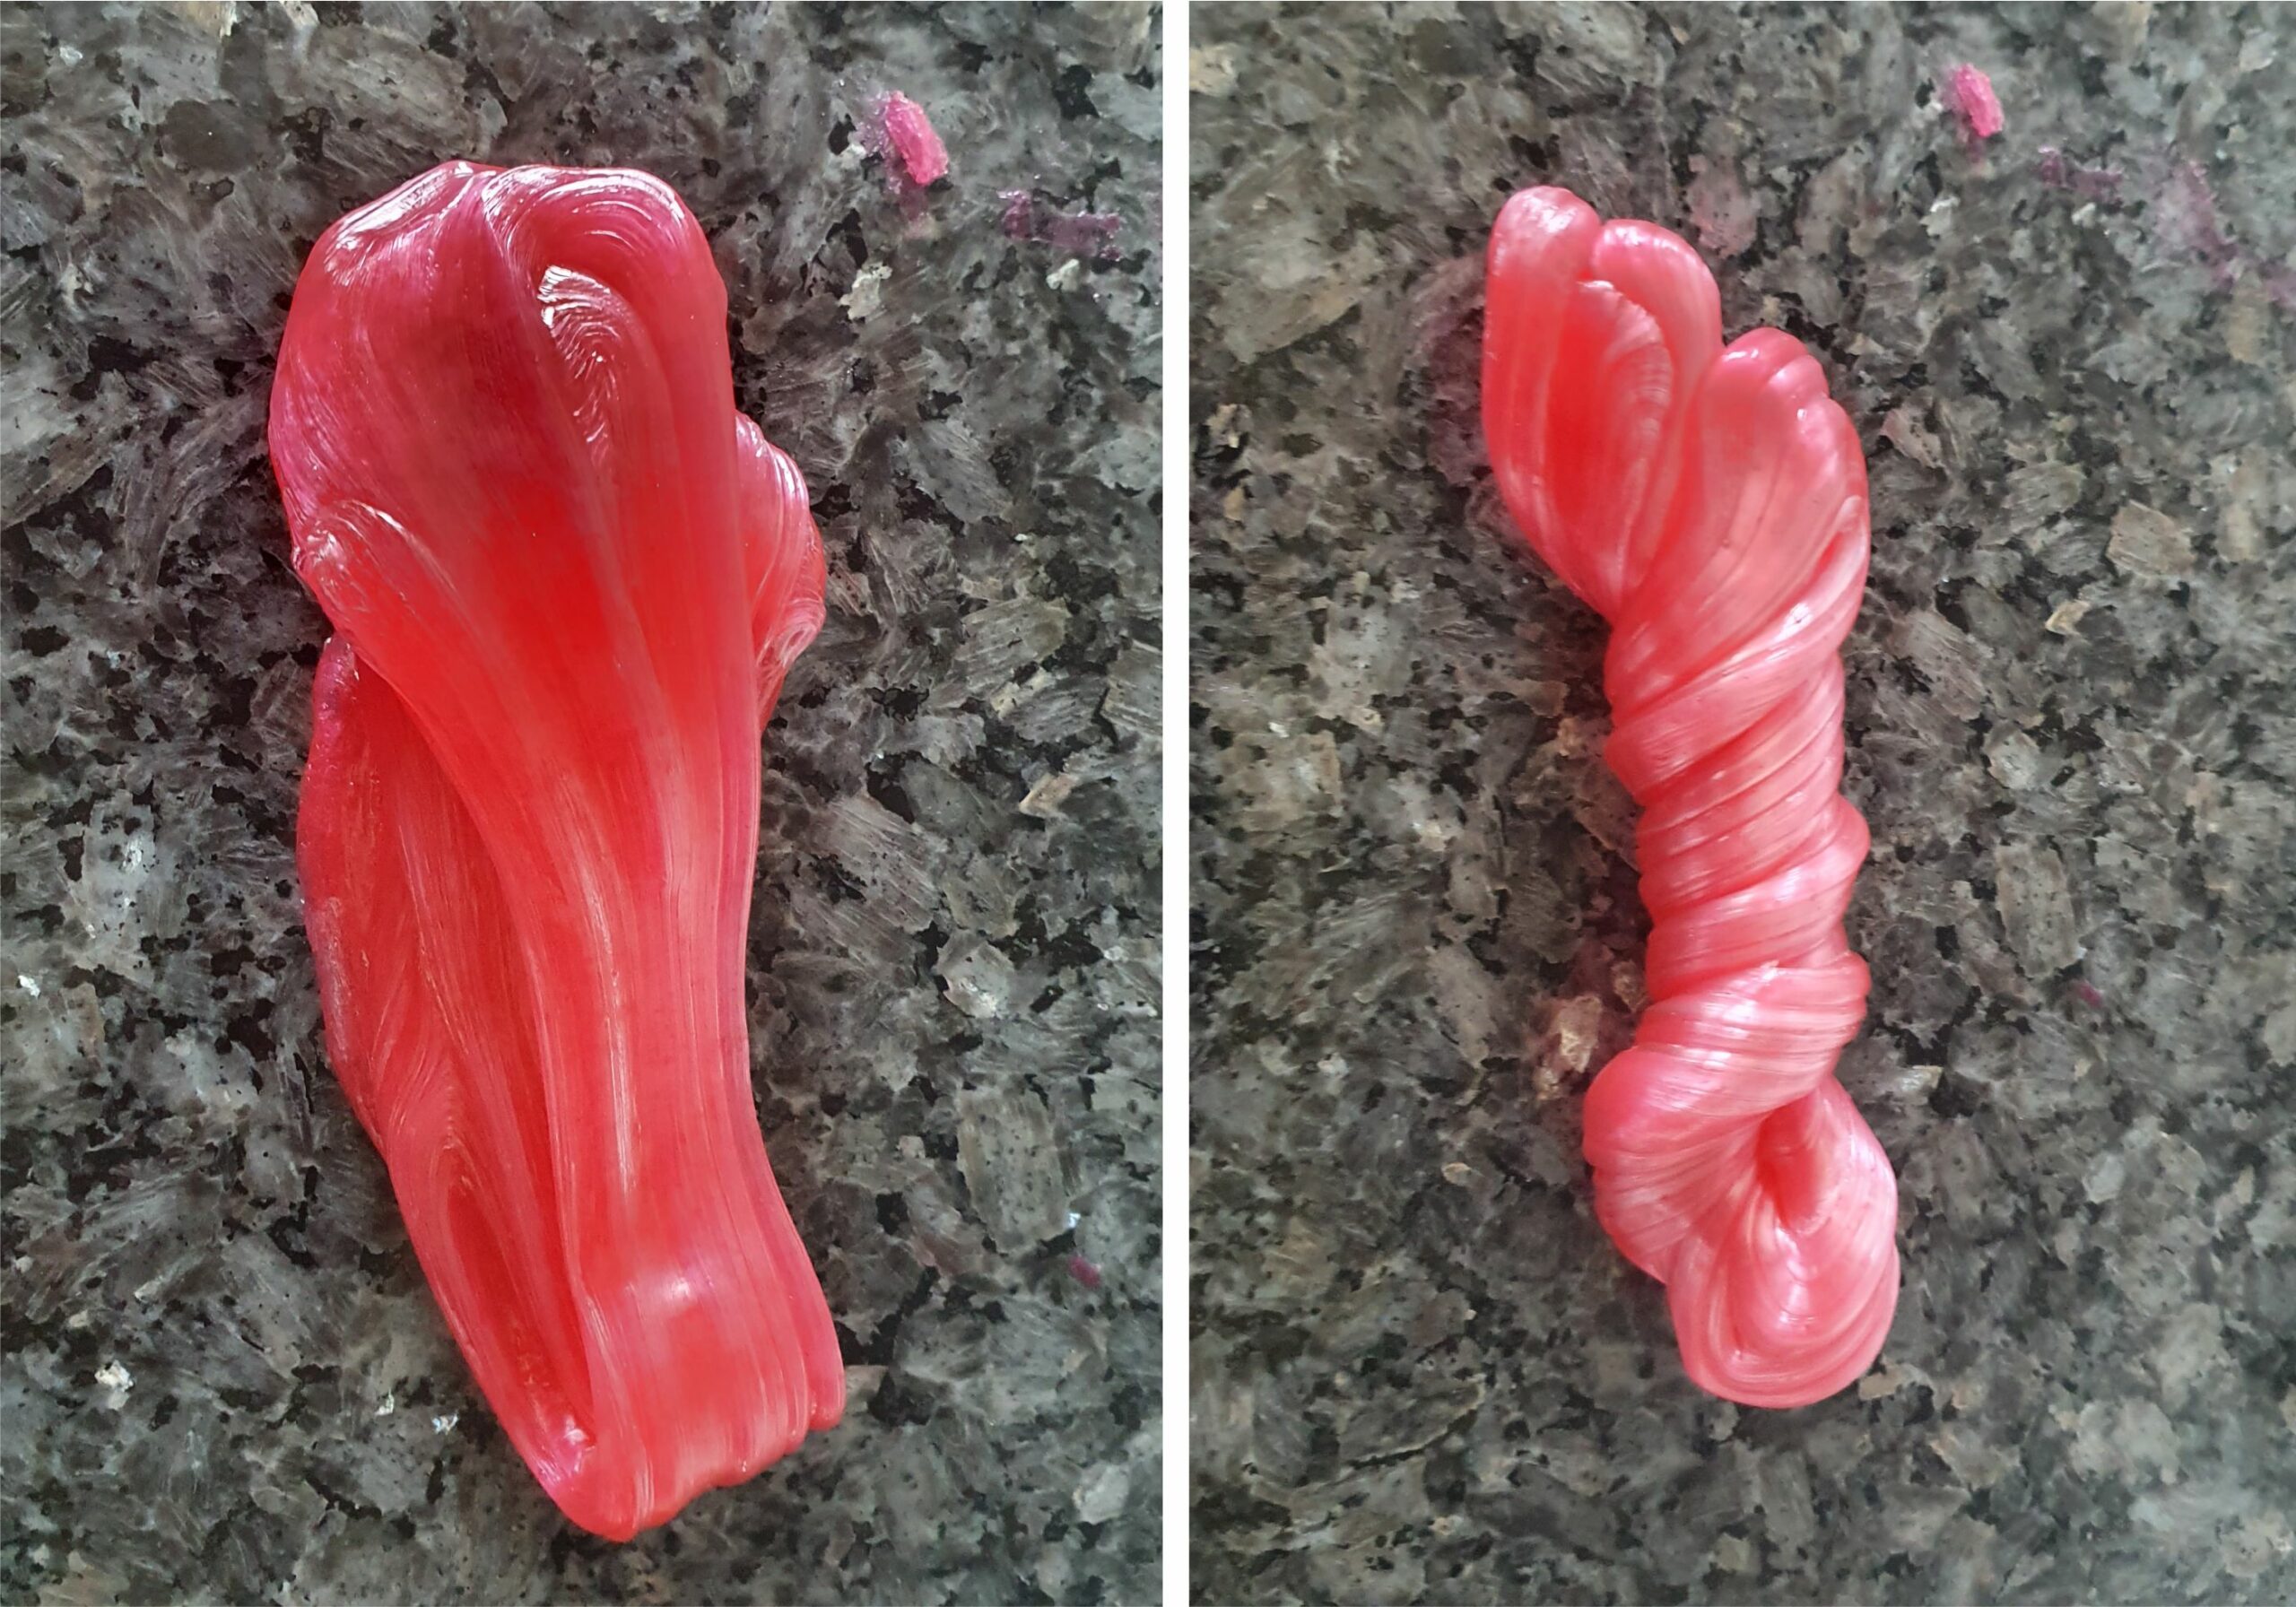

Add gel colour to the other half (I have used 3 drops to make a lighter pink colour) and stretch it until it becomes glossy too.
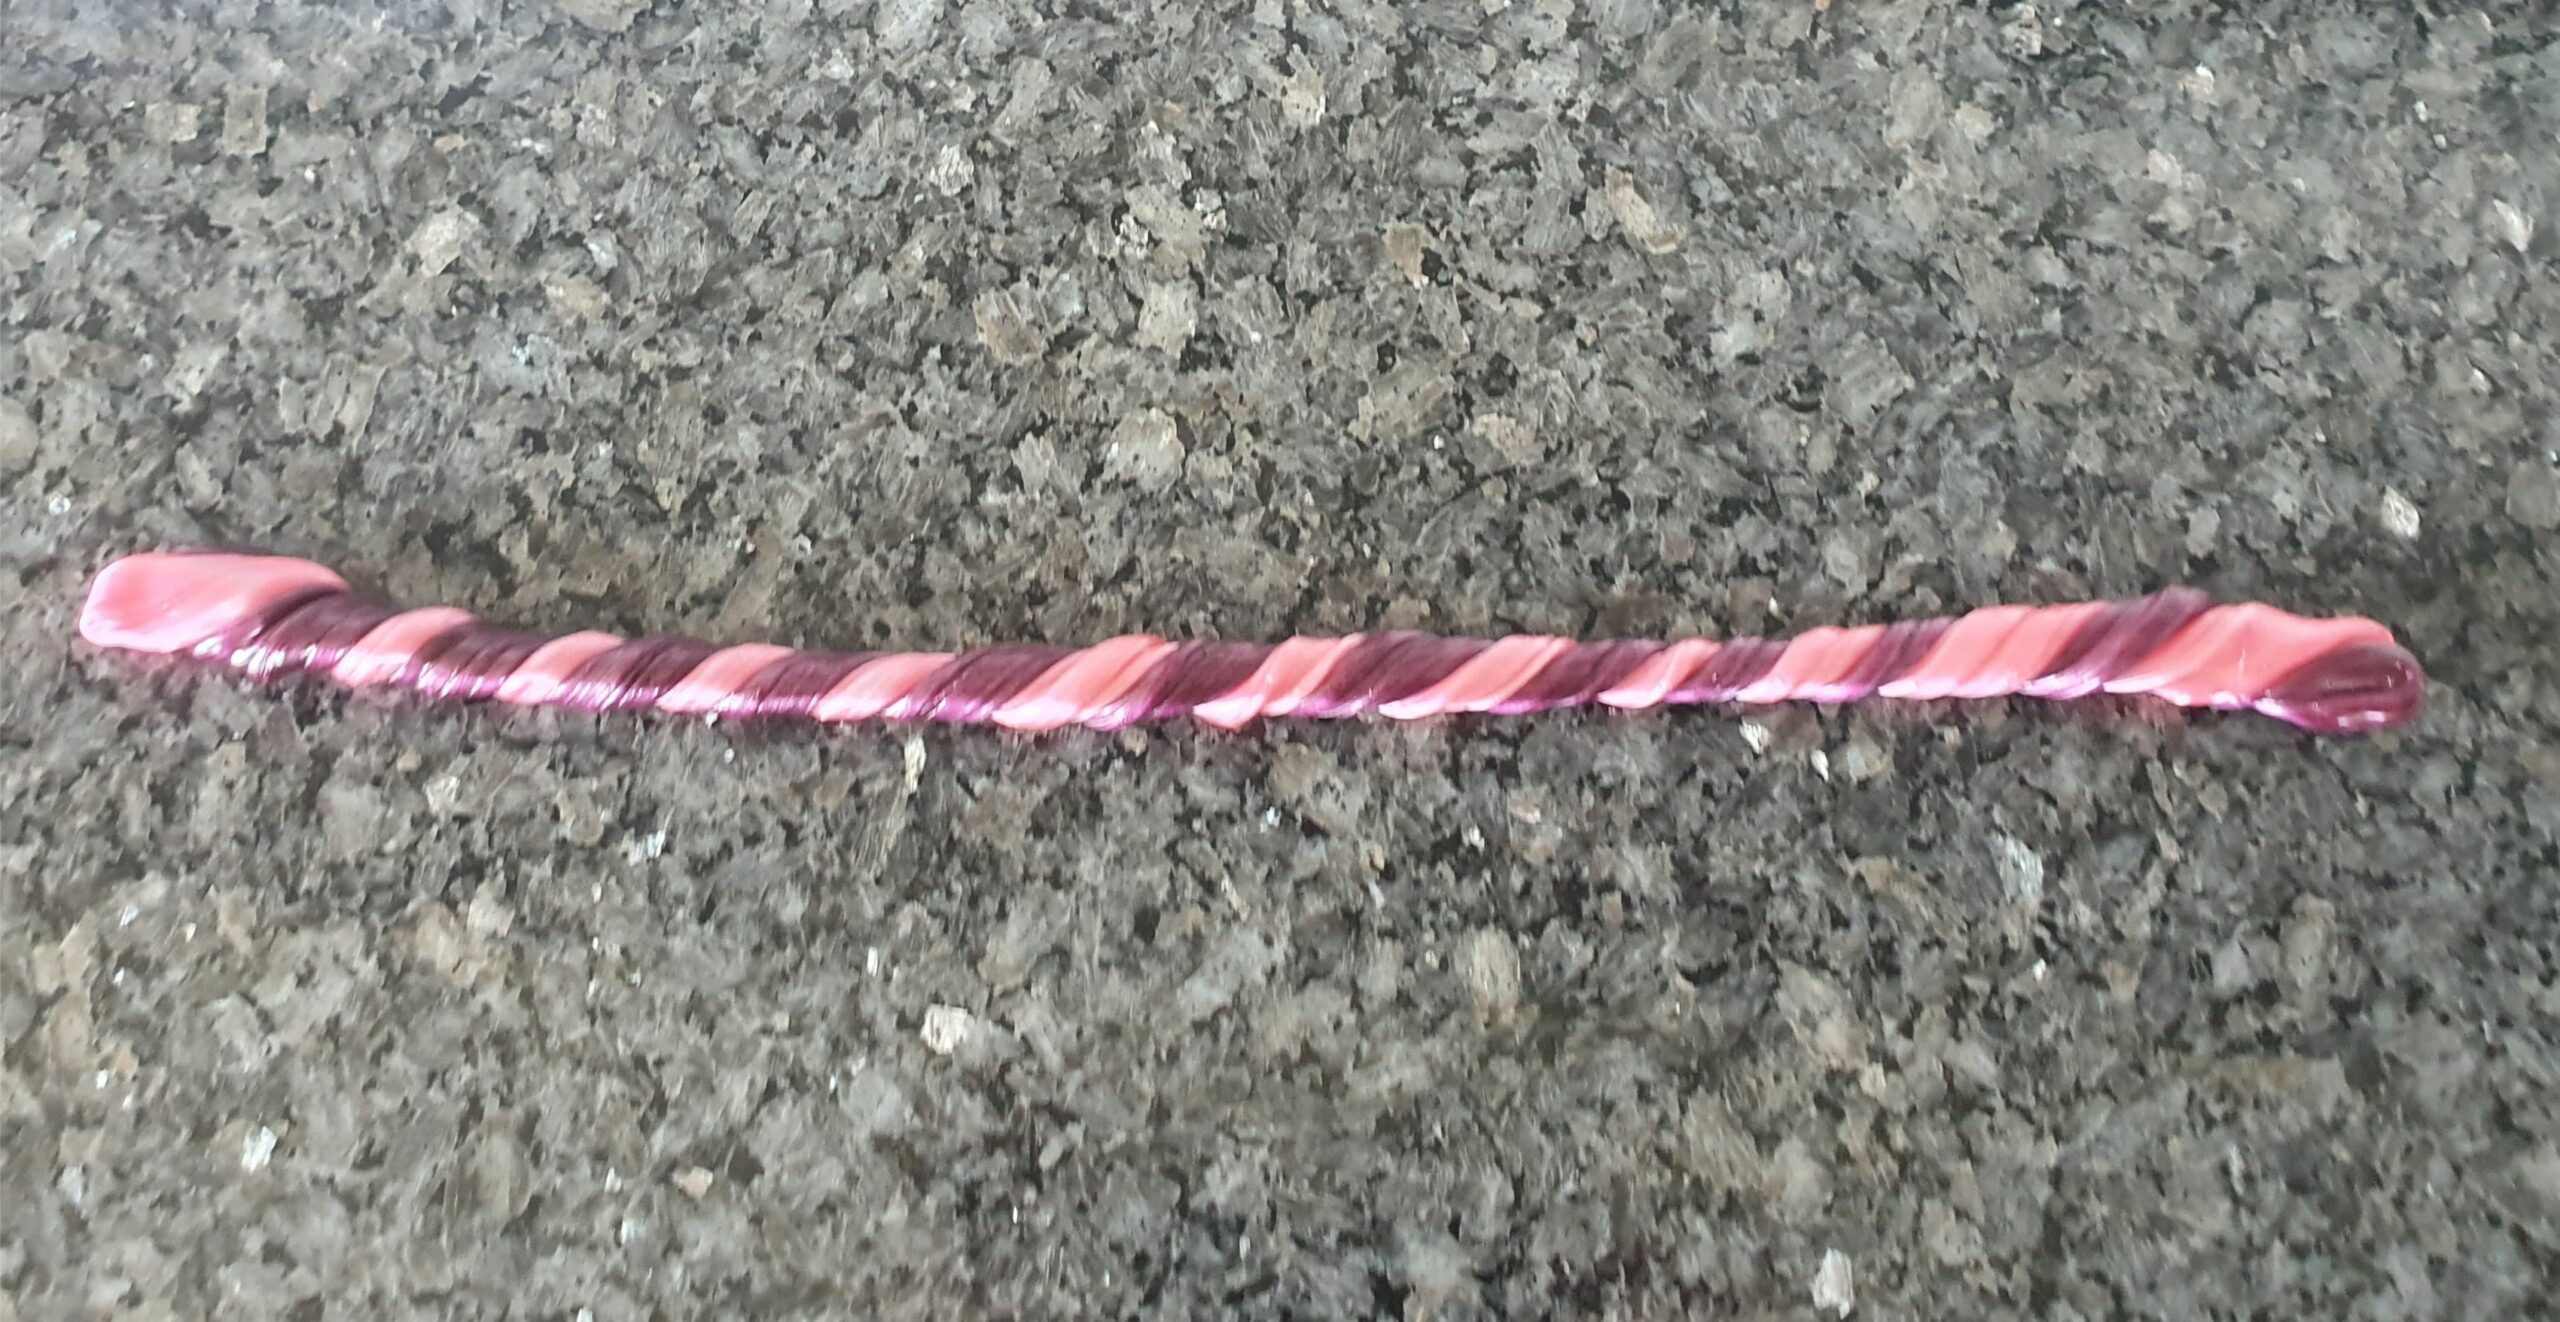

Place two pieces of violet and pink candy on top of each other and twist
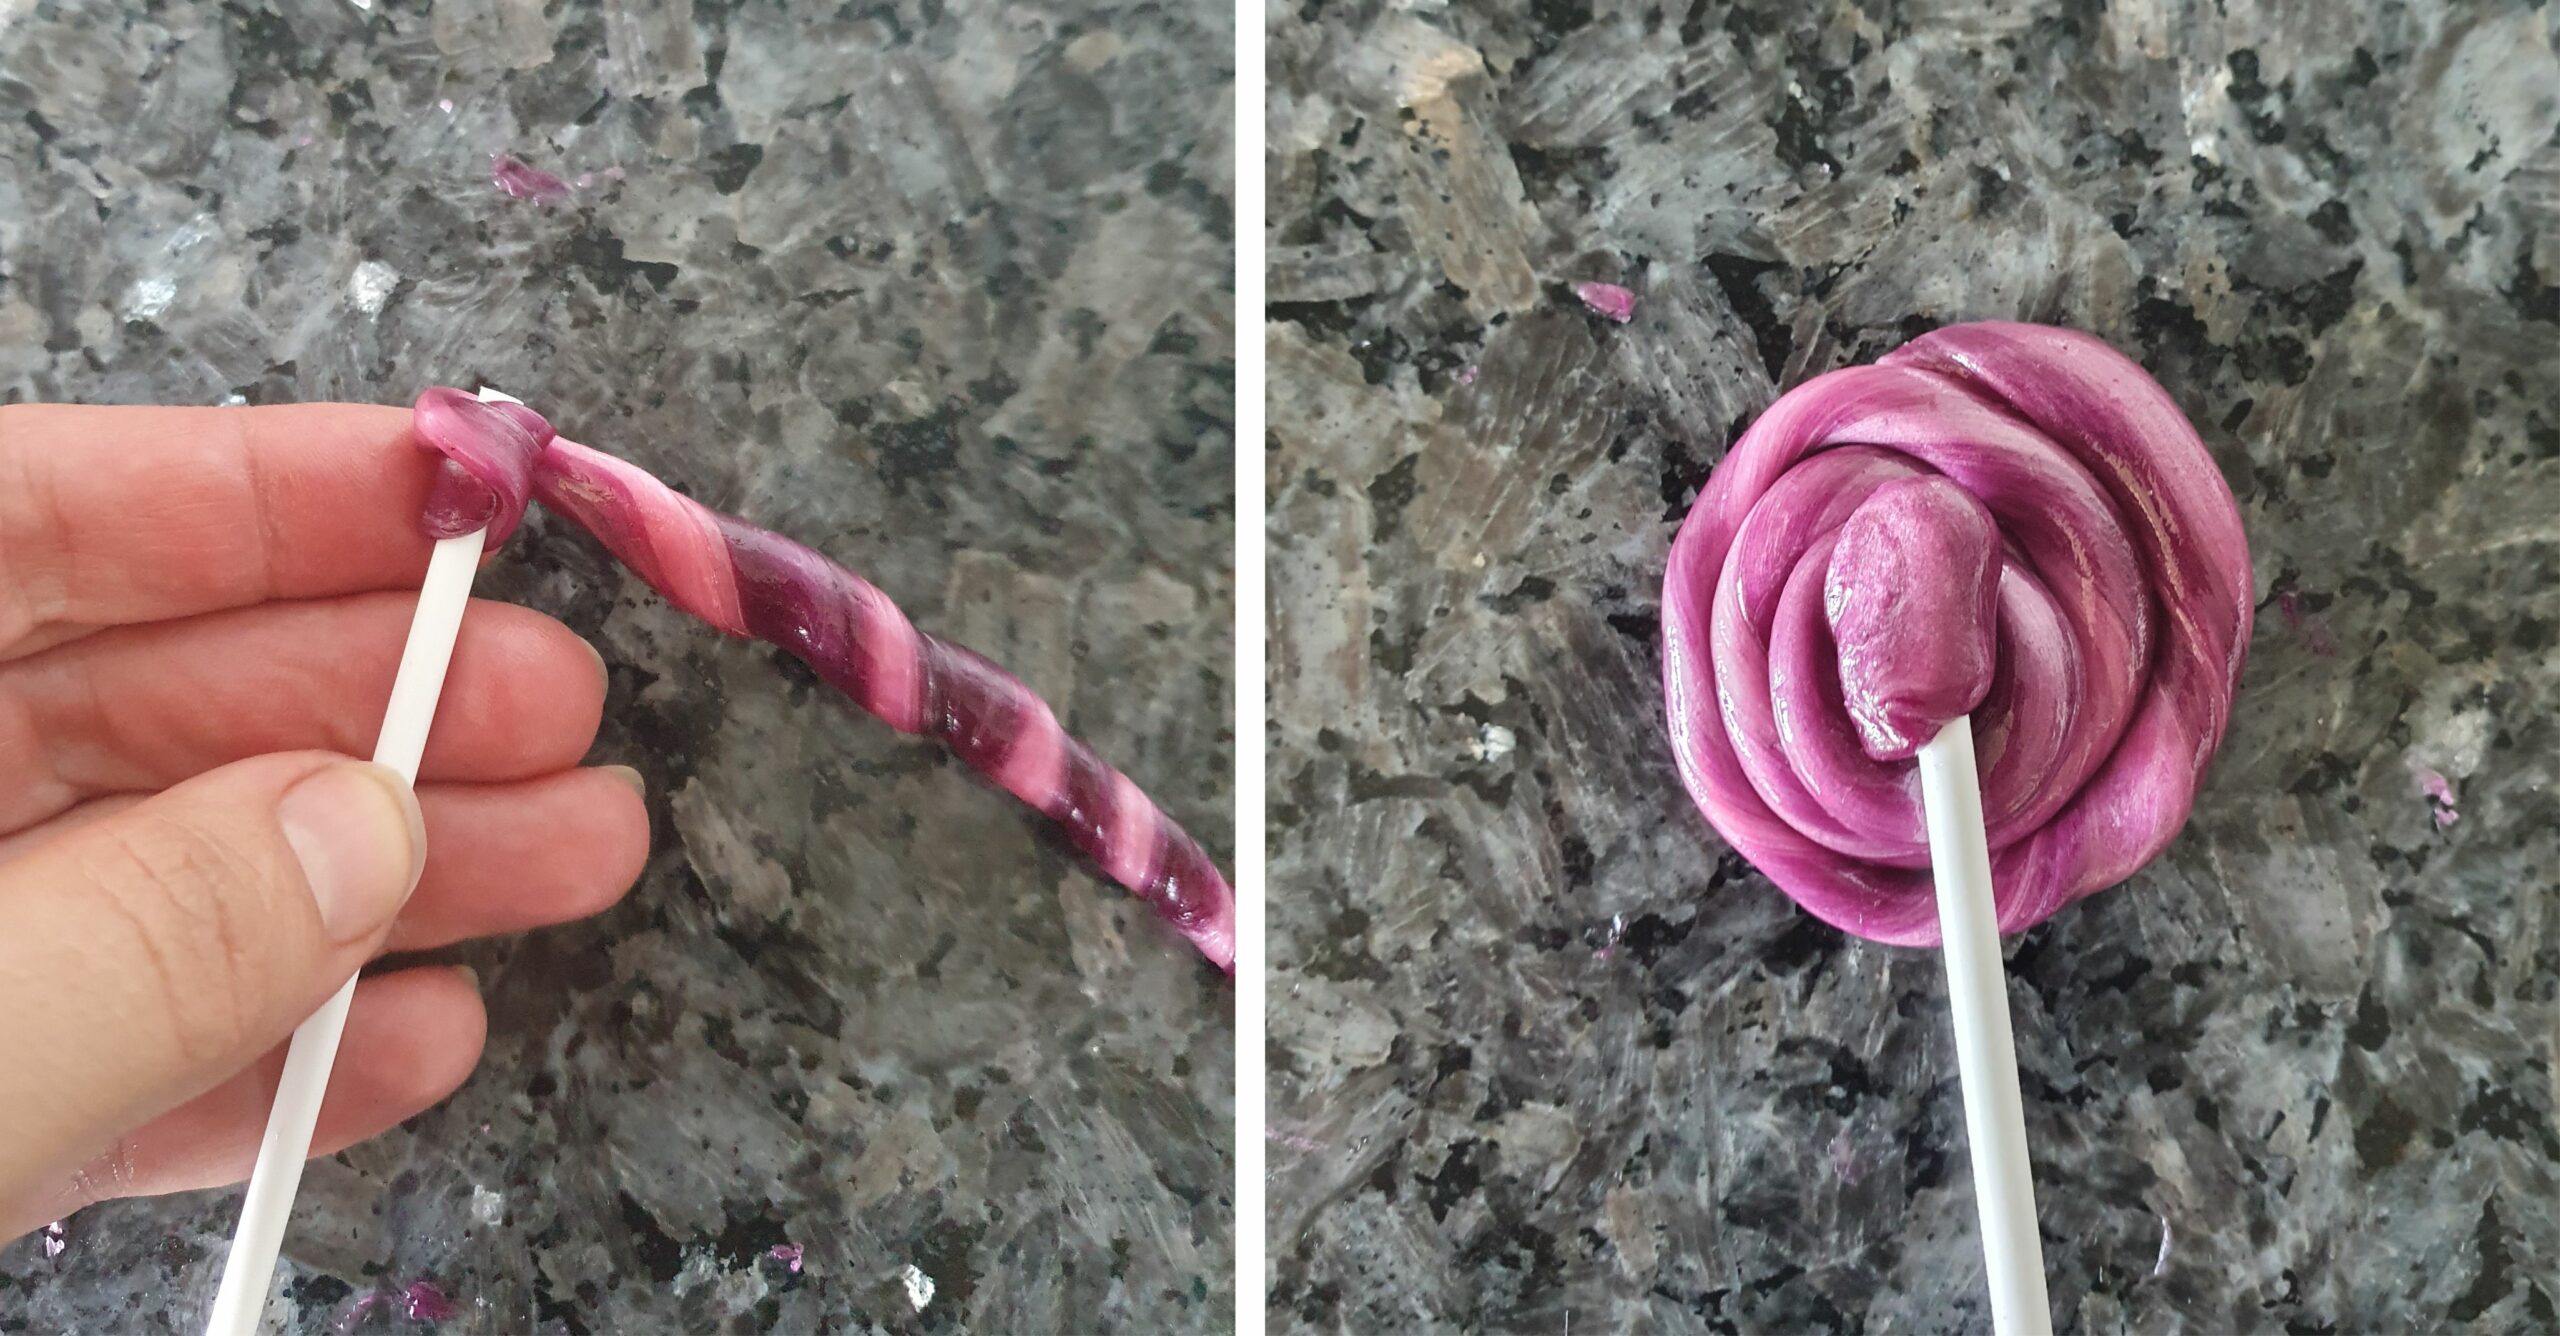

Attach the end of the candy around the lollipop stick and quickly twirl the rest. Place it "face" down on the counter and press the lollipop stick into the candy to make it flatter.
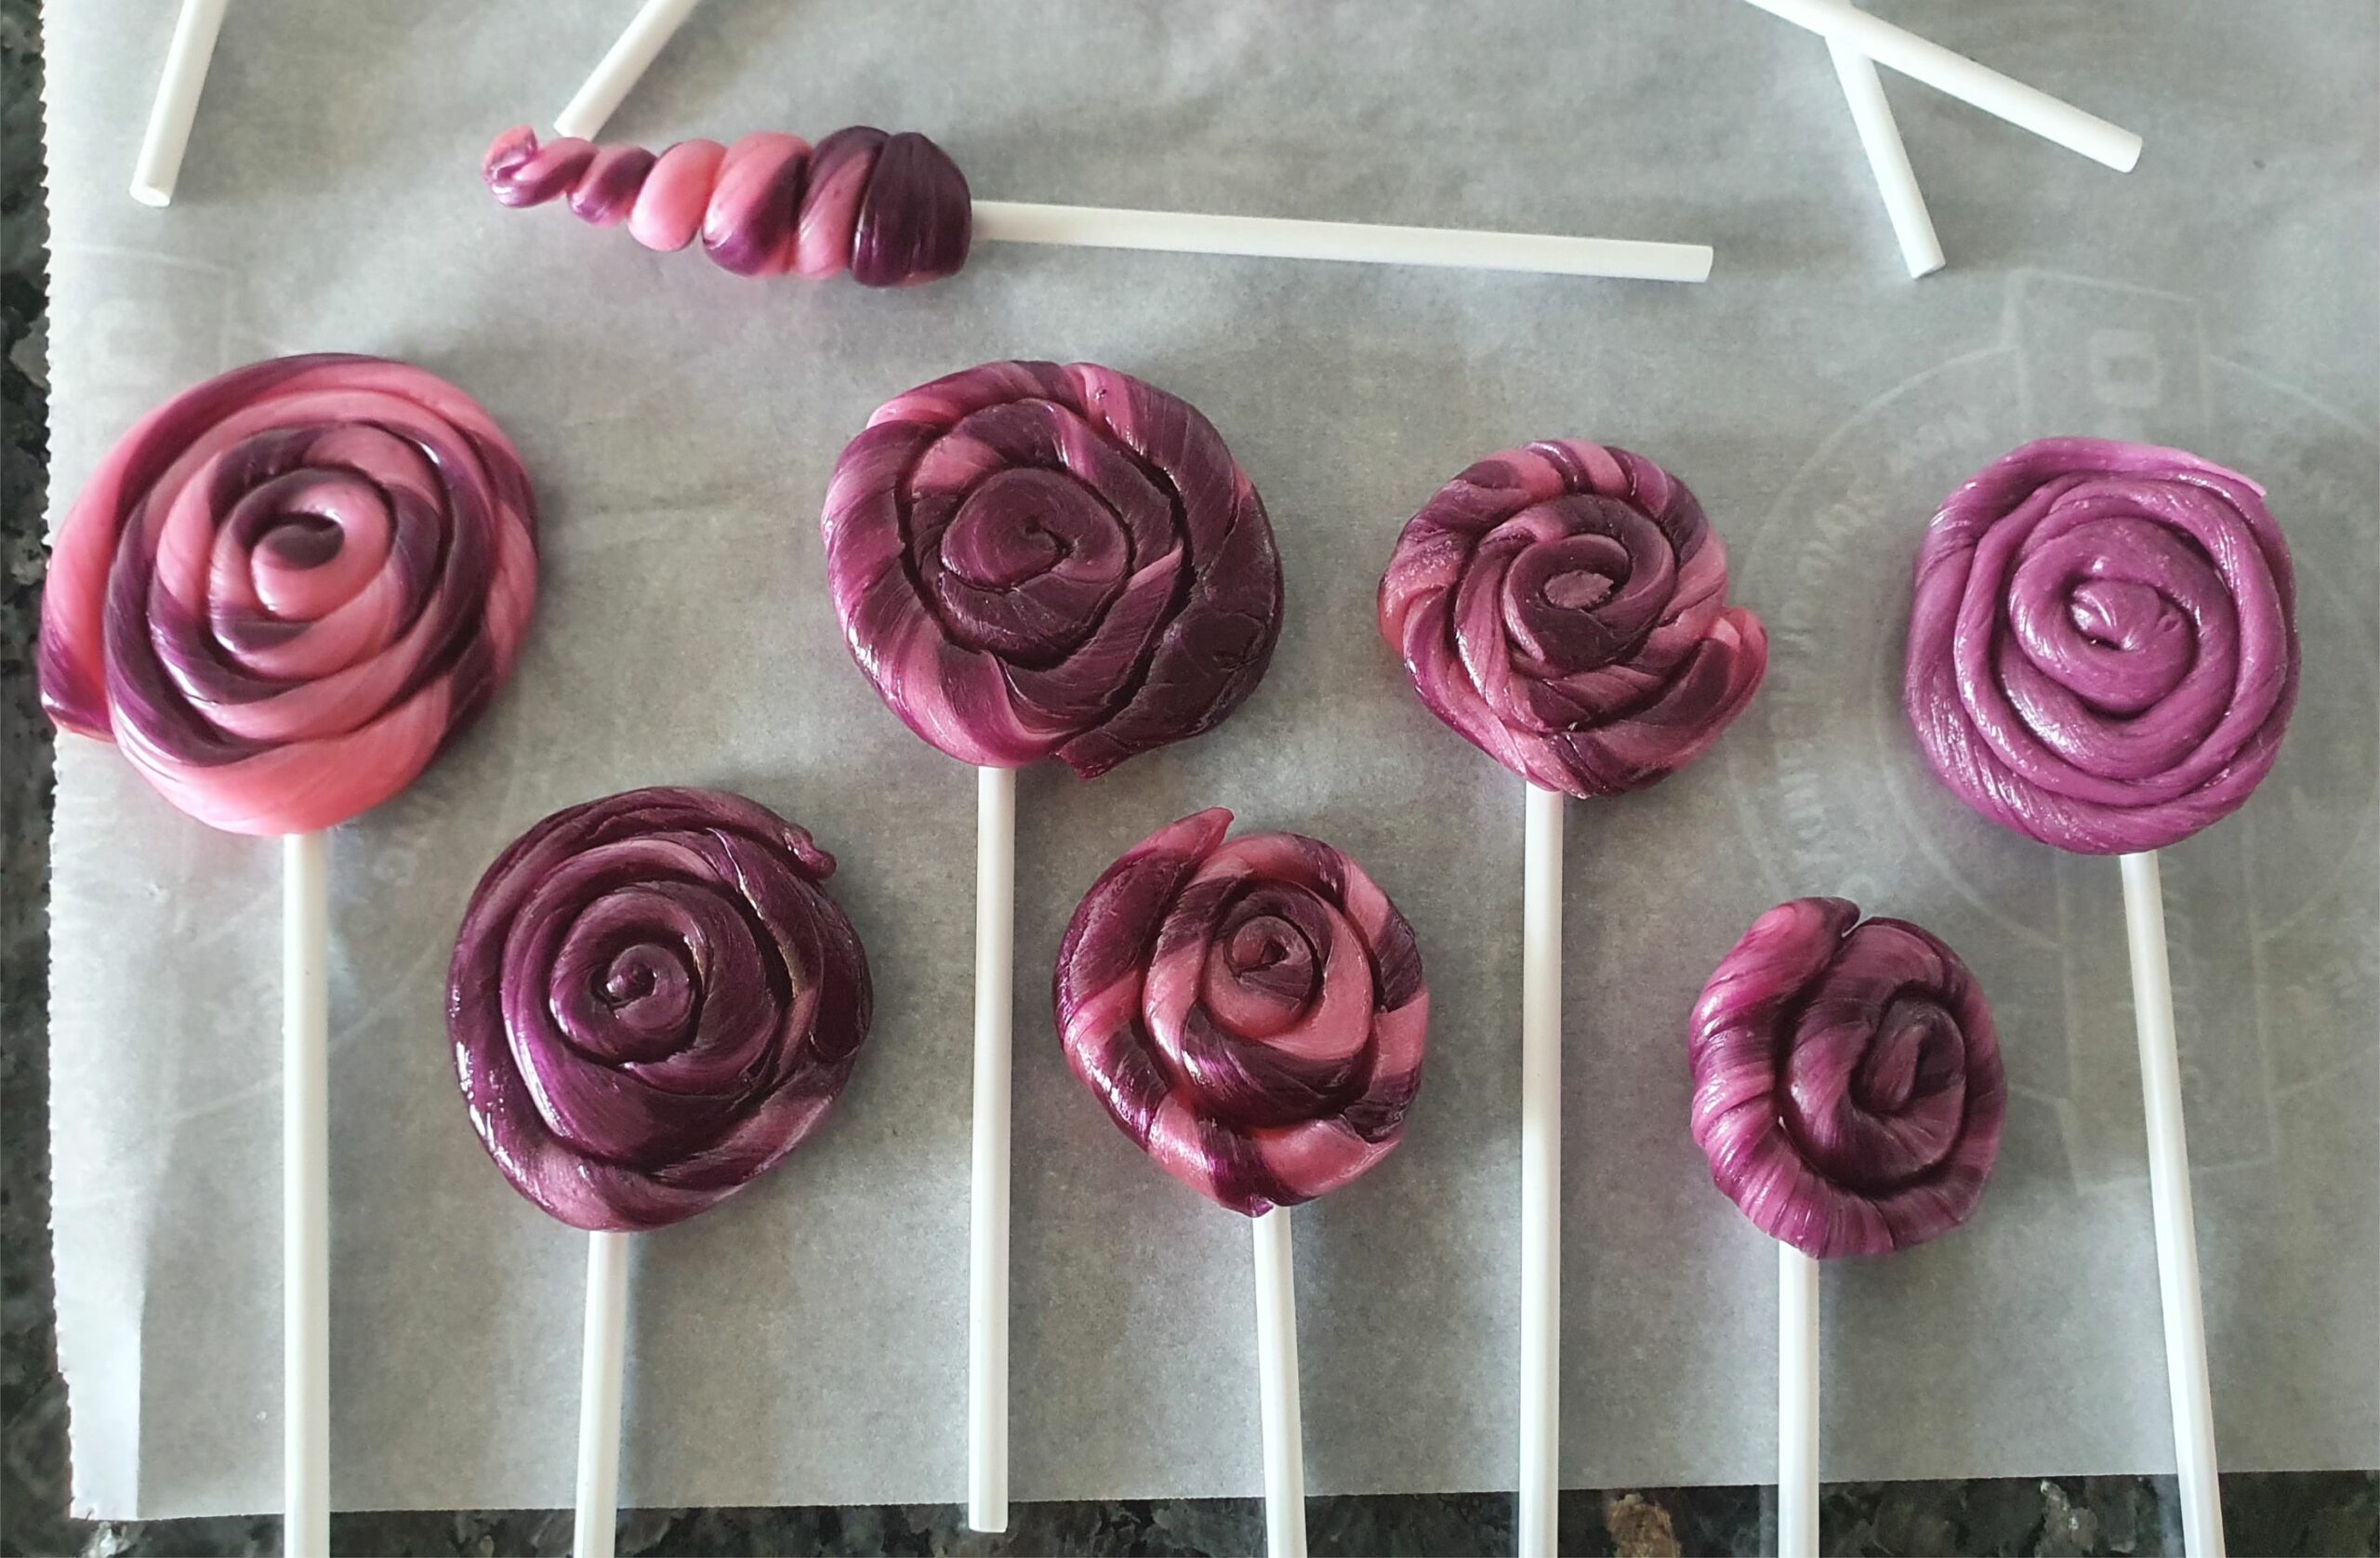

Leave the lollipops to rest on a baking sheet until they have hardened.



Leave a Review
You must be logged in to post a comment.