- December 5, 2020
- 1 Like
- 0 / 5
- 6,131 Total Views


- Prep Time50min
- Total Time2 hours
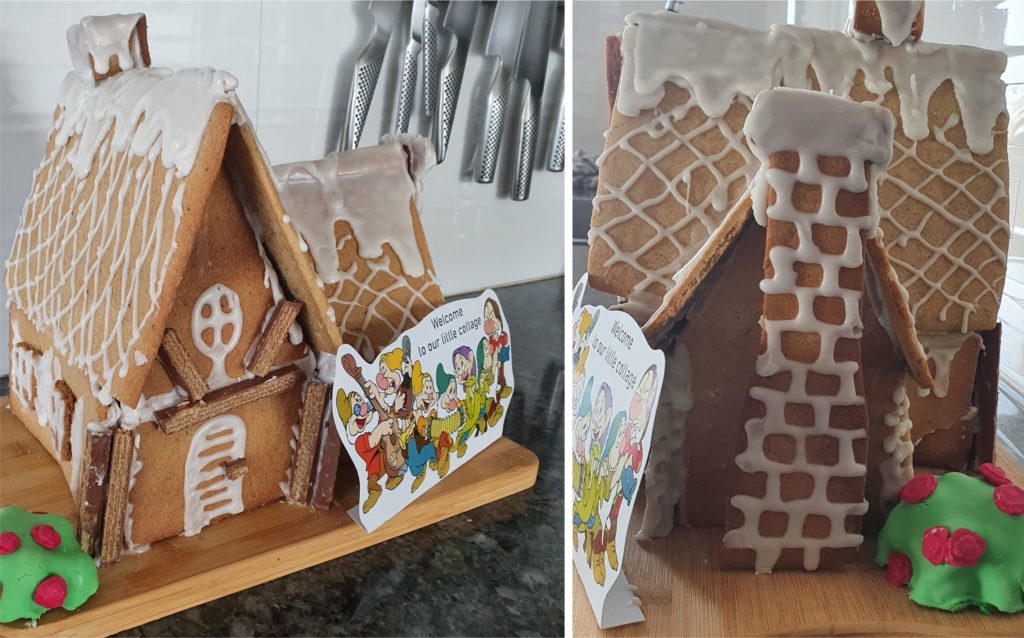
We are new to making gingerbread house s in our family. It’s actually a little less than a year ago, that I made it for the first time for my daughter’s Snow-White party. I wanted to make the dwarves house and decided to try it out. It wasn’t the smartest decision at the time (last minute decision that it was) but it turned out to be a real hit with everyone at the party and a beautiful centerpiece for the table.
We have made them alone or when friends have come over several times since, so I now have all the do’s and don’ts to share with you all. And I can vouch for the fact that practice makes perfect (or at least a lot better) 😉

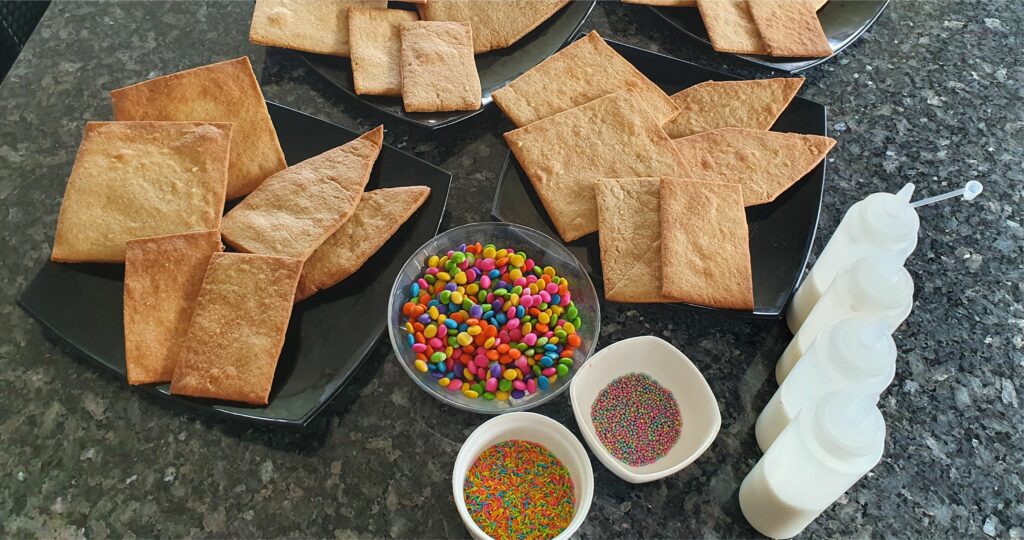
The ingredients for making a Gingerbread House at home
The dough:
I use this Danish gingerbread recipe to make the dough. It works just as well eggless as it does with the egg, so whether you are vegetarian or not, it’s a great recipe for gingerbread houses. Please see my suggestions in the recipe for making it eggless without changing the texture or flavour. If you are using your own tried and tested recipe make sure it doesn’t contain a lot of rising agents or liquids as you want each piece to remain the same size as before cooking. This gingerbread recipe only has a quarter of a teaspoon of baking powder so the dough doesn’t rise very much and therefore all the pieces of the house fit together afterwards too.
The icing:
Apart from a good, strong and tasty dough, you will also need icing. In my experience it’s easier to use the simplest and easiest kind; just water and icing sugar. In the picture on top, we have used that. It’s easy to handle and requires less ingredients. We have used this easy icing recipe for the borders too. It dries quickly and you can assemble the house fairly quickly without destroying all your hard work. I have given the details below in the steps.

Tips for making a Gingerbread House with kids
If you are making gingerbread houses with smaller kids (8-9 years and below), I recommend putting the icing into squeezy bottles so it’s easier for them to handle. The squeezy bottles allow them to focus on decorating without the struggle of managing piping bags, which can be tricky for little hands. While it’s not possible to make thin lines with bottles, younger kids tend to prefer lots of icing anyway, and the bottles help avoid frustration when the icing doesn’t flow easily. Older kids and adults, on the other hand, might enjoy the precision and creativity that icing bags offer. Whether you’re hosting a fun family activity or planning a festive event, incorporating some playful challenges like Lucky Wins casino themes into the decorating process can add an extra layer of excitement for everyone involved, especially if prizes or treats are up for grabs! My 11-year-old loved the icing bag challenge, creating intricate designs, while the younger kids enjoyed going wild with the squeezy bottles.
You can also make homemade candy canes for the decoration. See how here.
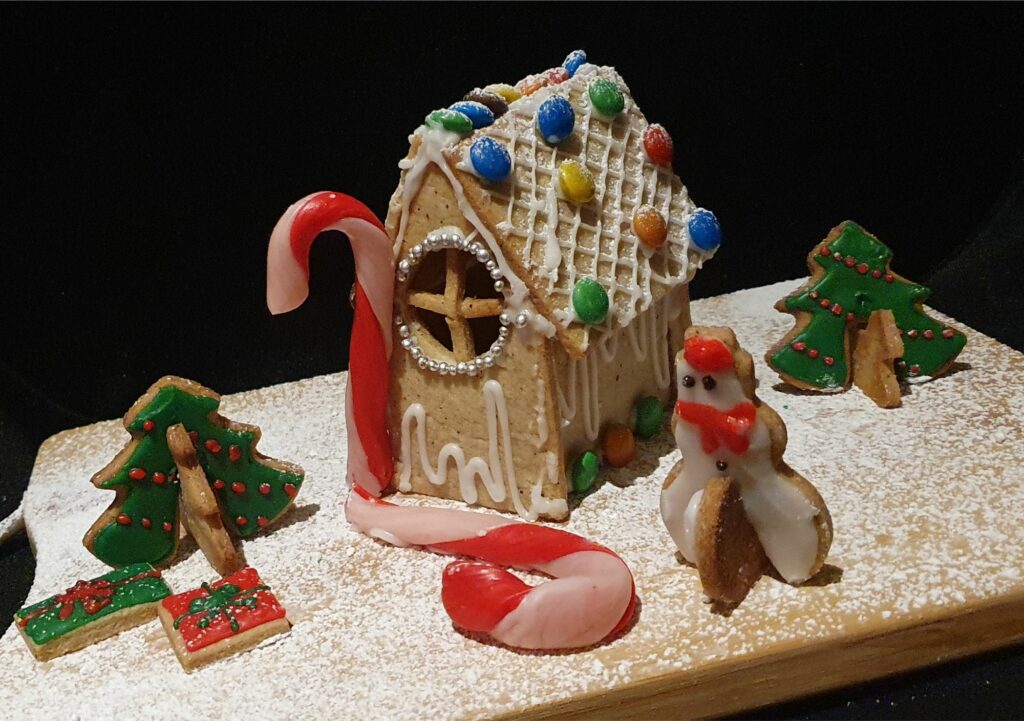

Free templates to make it easier for you
You can use my easy-print-and-cut templates for the Large Gingerbread House and Small Gingerbread House. Just click on the link to download and print. Remember to cut doors and windows before baking if you want those. I used a clubs cookie cutter and a circle cookie cutter to make the windows that you can see on the picture above. We made the trees out of marshmallows and green petal dust from our flower party (It’s amazing what I have kept from parties that can later find use again)
The houses below and above are made by my daughters. A LOT of icing and smarties on that big one, but it’s not always about presentation and more about having fun with it. 🙂
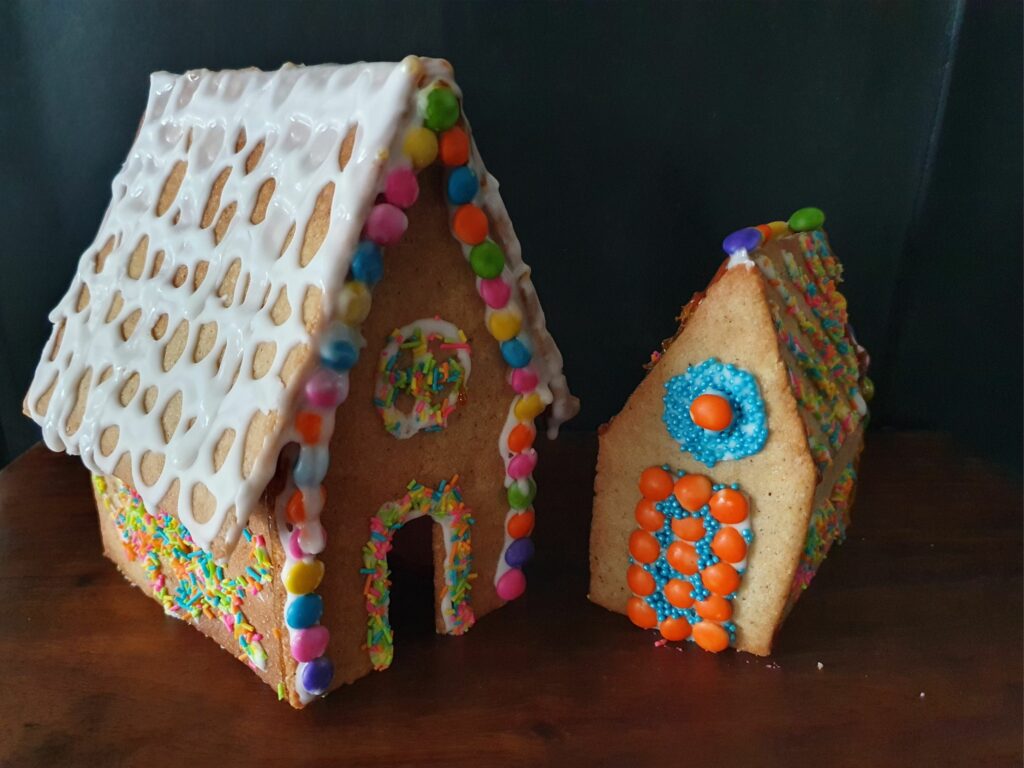

Here you can see the difference between the large and the small gingerbread house. You can also see that they have been made by using squeezy bottles instead of piping bags.
How to assemble the Gingerbread Houses
To assemble the house, you can either use icing or hot sugar. I have tried both and shown both in the steps below. They both have some positives and negatives.
To assemble a Gingerbread House using icing sugar:
- requires patience and an icing mixture that dries quickly (It usually works though)
- will leave white lines around every border.
- tastes good afterwards
- isn’t as strong as when assembled with hot sugar
To assemble the Gingerbread House using hot sugar:
- is quick as the sugar dries super fast
- will not easily break again
- doesn’t taste as good afterwards
- is riskier as the sugar is super hot and can burn your skin
Yield with one portion of Danish Gingerbread Dough: 2 large or 4 small gingerbread houses
Ingredients
Directions
Make the gingerbread dough.
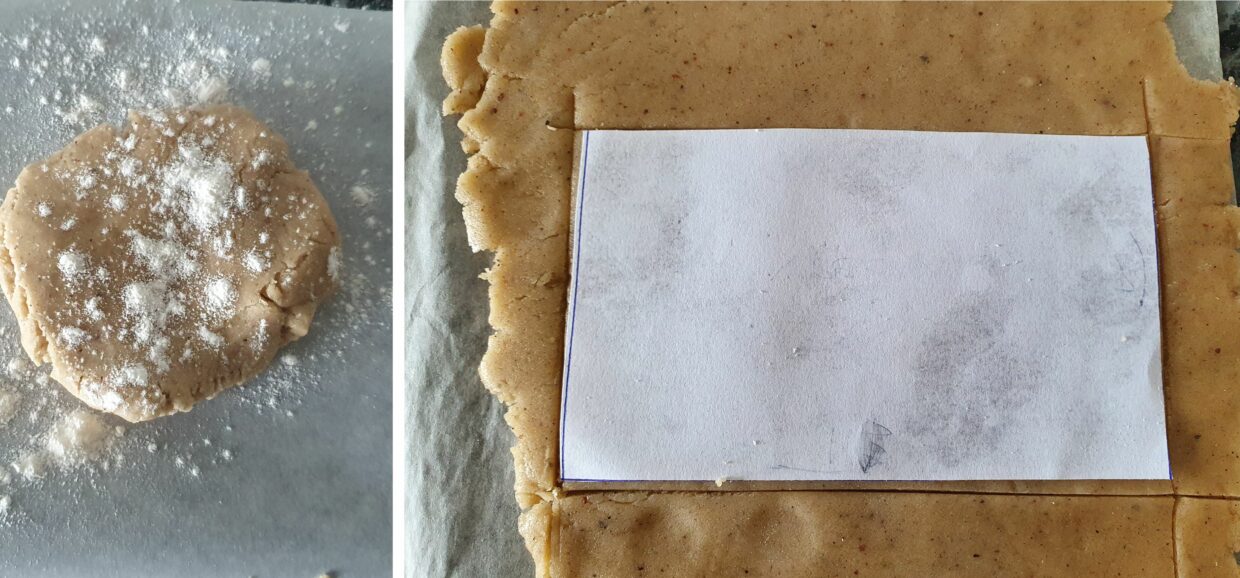

Roll it out on baking paper. That way you don't have to move the pieces later and risk changing the shape. Cut the pieces of dough according to the templates with a sharp knife.
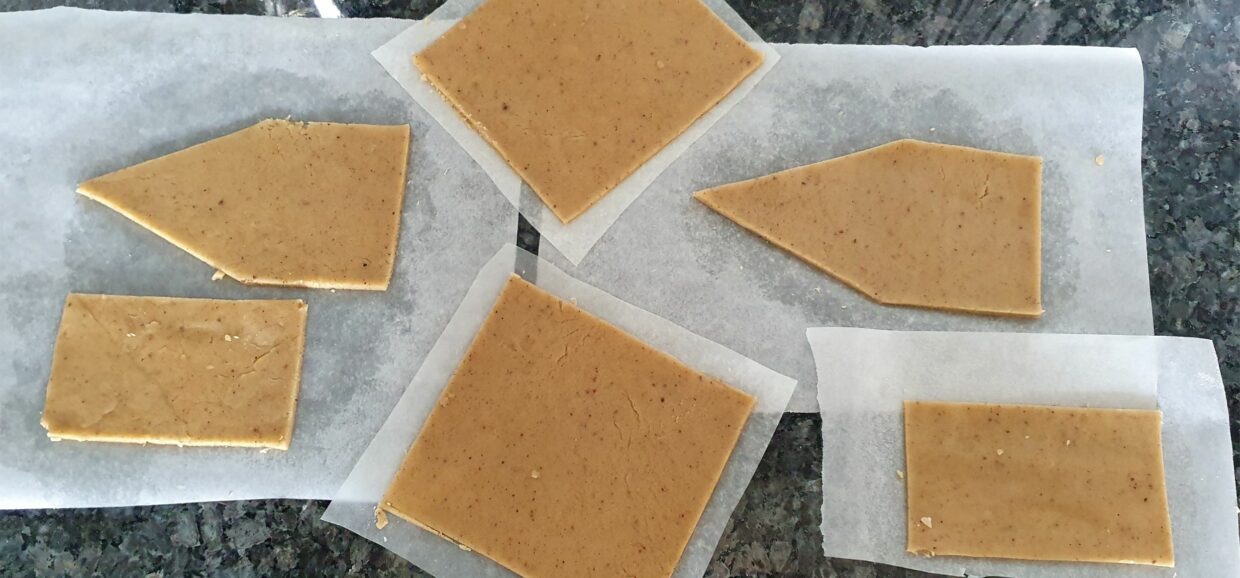

If you are unable to move the pieces, cut the baking paper instead to be able to fit as many as possible on a baking tray. Bake for 10-12min at 180 degrees Celsius.
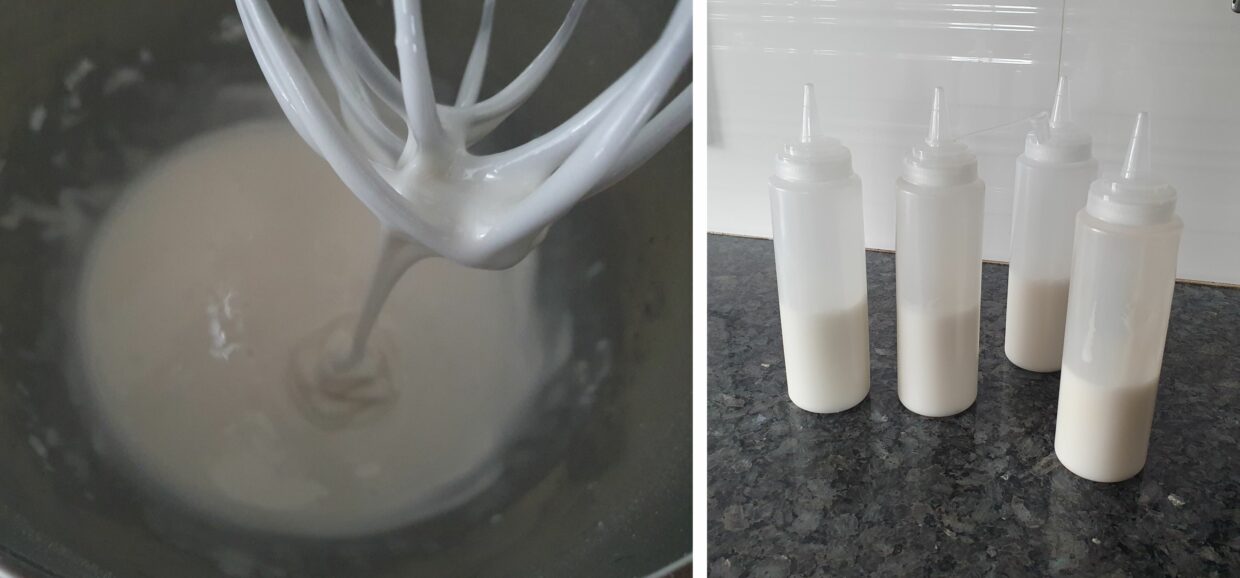

Make the icing by mixing 75gr of icing sugar with 2tsp of water. The icing should be very thick and take about 5 seconds to flatten out. Add another few drops of water if the icing doesn't mix fully. You will need one portion of icing for each house.
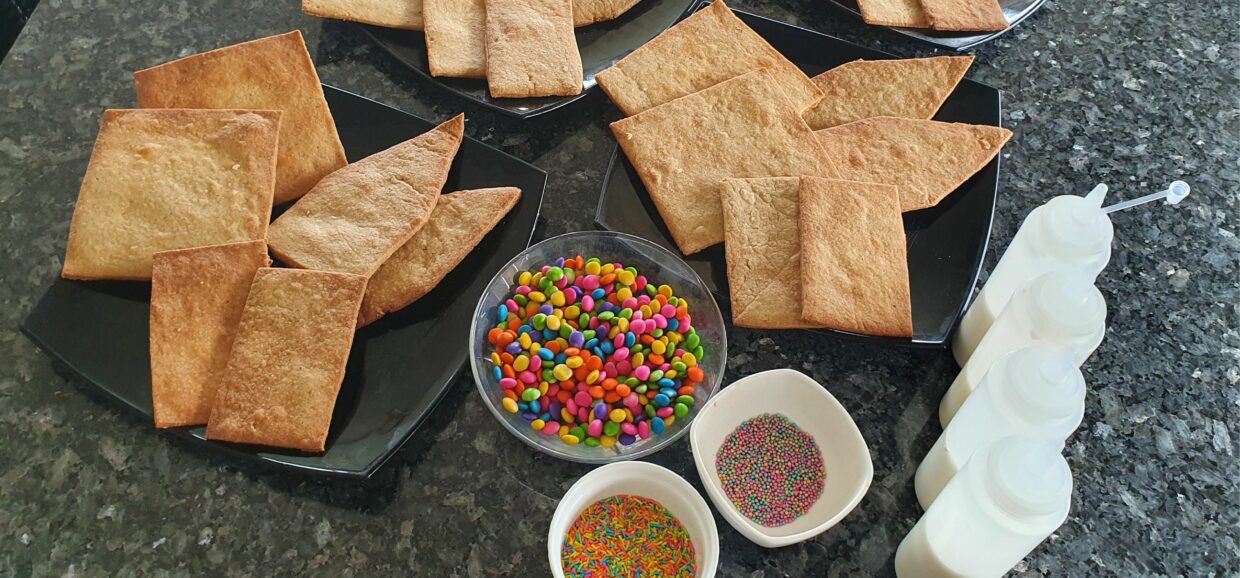

Get all the ingredients ready for the kids to start including sprinkles, chocolate buttons, icing and the house pieces.
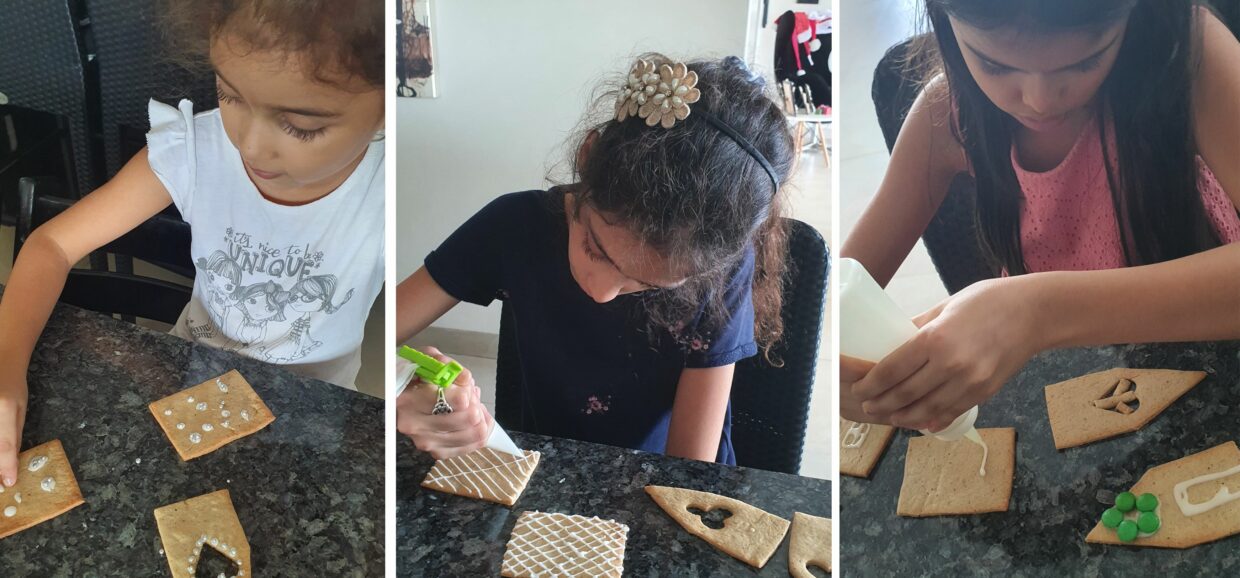

And now to the fun part: decorating all the sides and the roof. I just let the kids go with it and let them decorate anyhow they want. It's supposed to be a fun activity so why stop them if they want to put windows on the roof? :-)
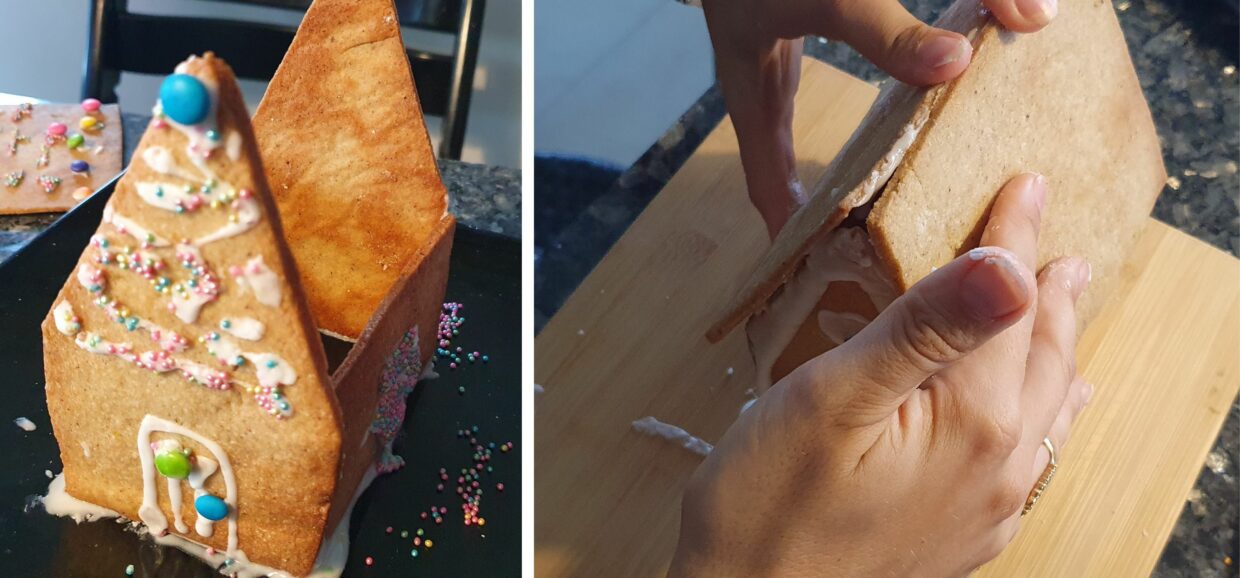

After all the pieces have been decorated and dried (if you are using a thick icing like suggested, you will not need to wait), fix the front of the house to the sides with icing. You can leave glasses or bowls around the house for support to make it easier. Let it dry for 10min before attaching the roof. Hold the roof in place for a few minutes before letting go.
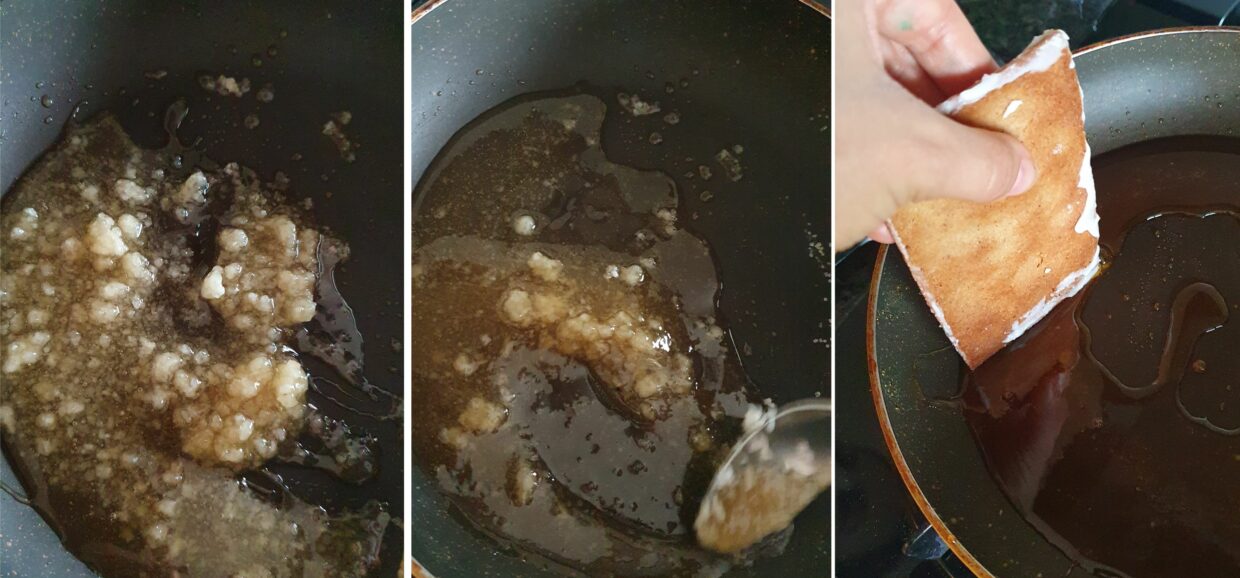

To assemble using hot sugar, heat the sugar in a flat pan. Melt until fully liquidized. Dip the sides into the hot sugar and attach to the other pieces. The sugar dries almost immediately and the pieces are stuck together.
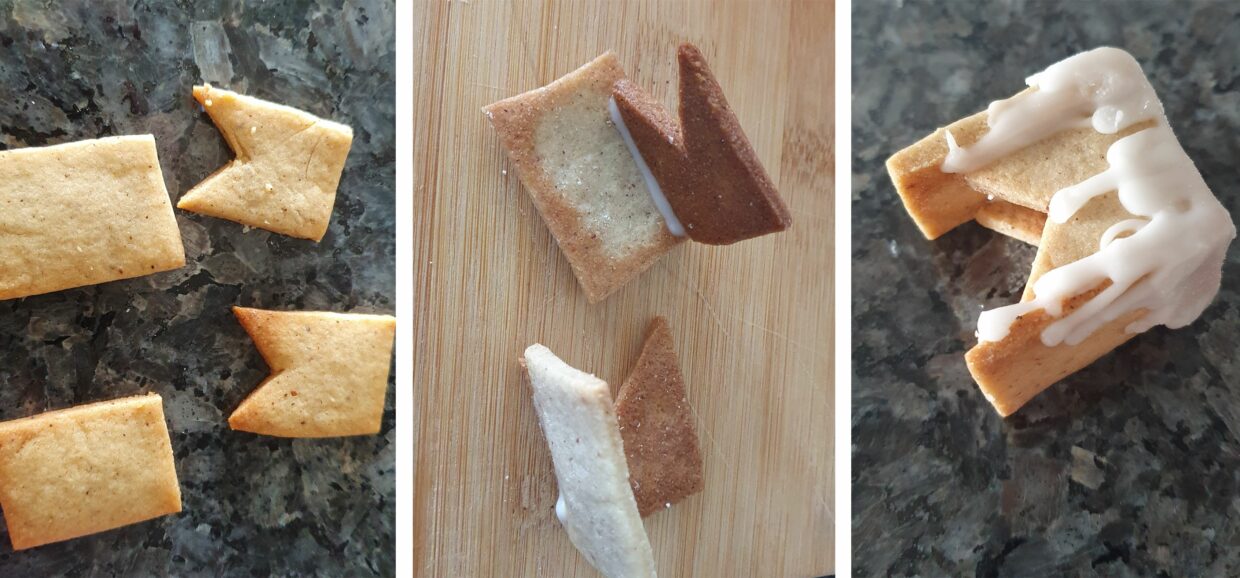

To make the chimney, add icing to the two halves first and let them dry fully. Then stick them together and the chimney is done.
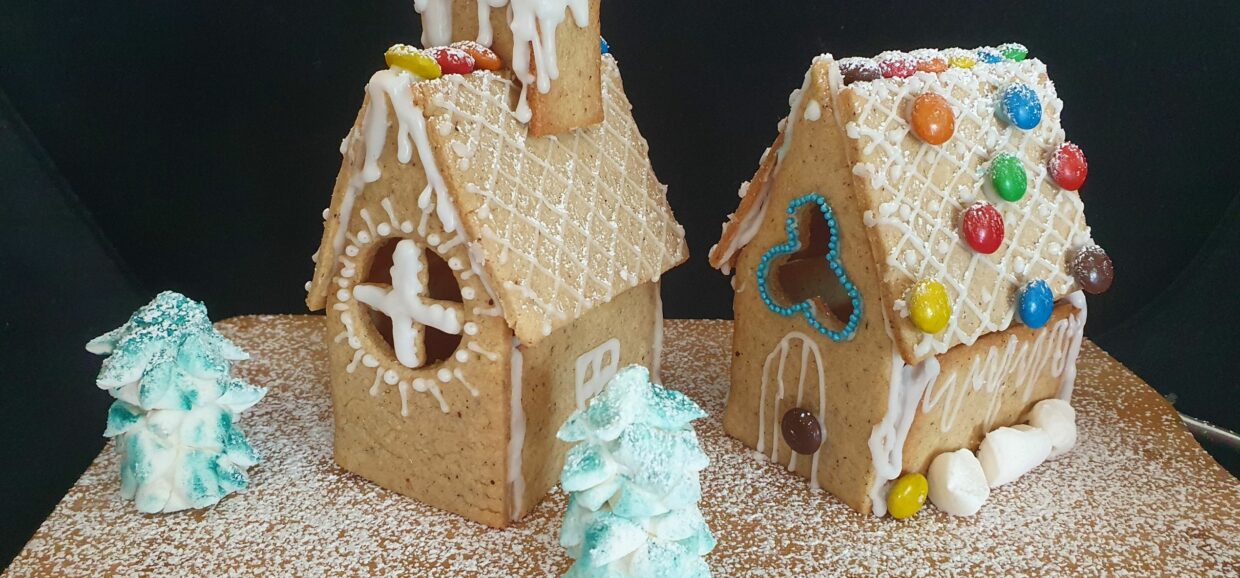

Finish by adding decorations like marshmallows or chocolate buttons. If you plan on eating the gingerbread house, leave it covered in an airtight container until the day you wish to serve it. Have fun and Merry Christmas
You may also like
Gingerbread House -Xmas Activity for Kids
Ingredients
Follow The Directions
Make the gingerbread dough.
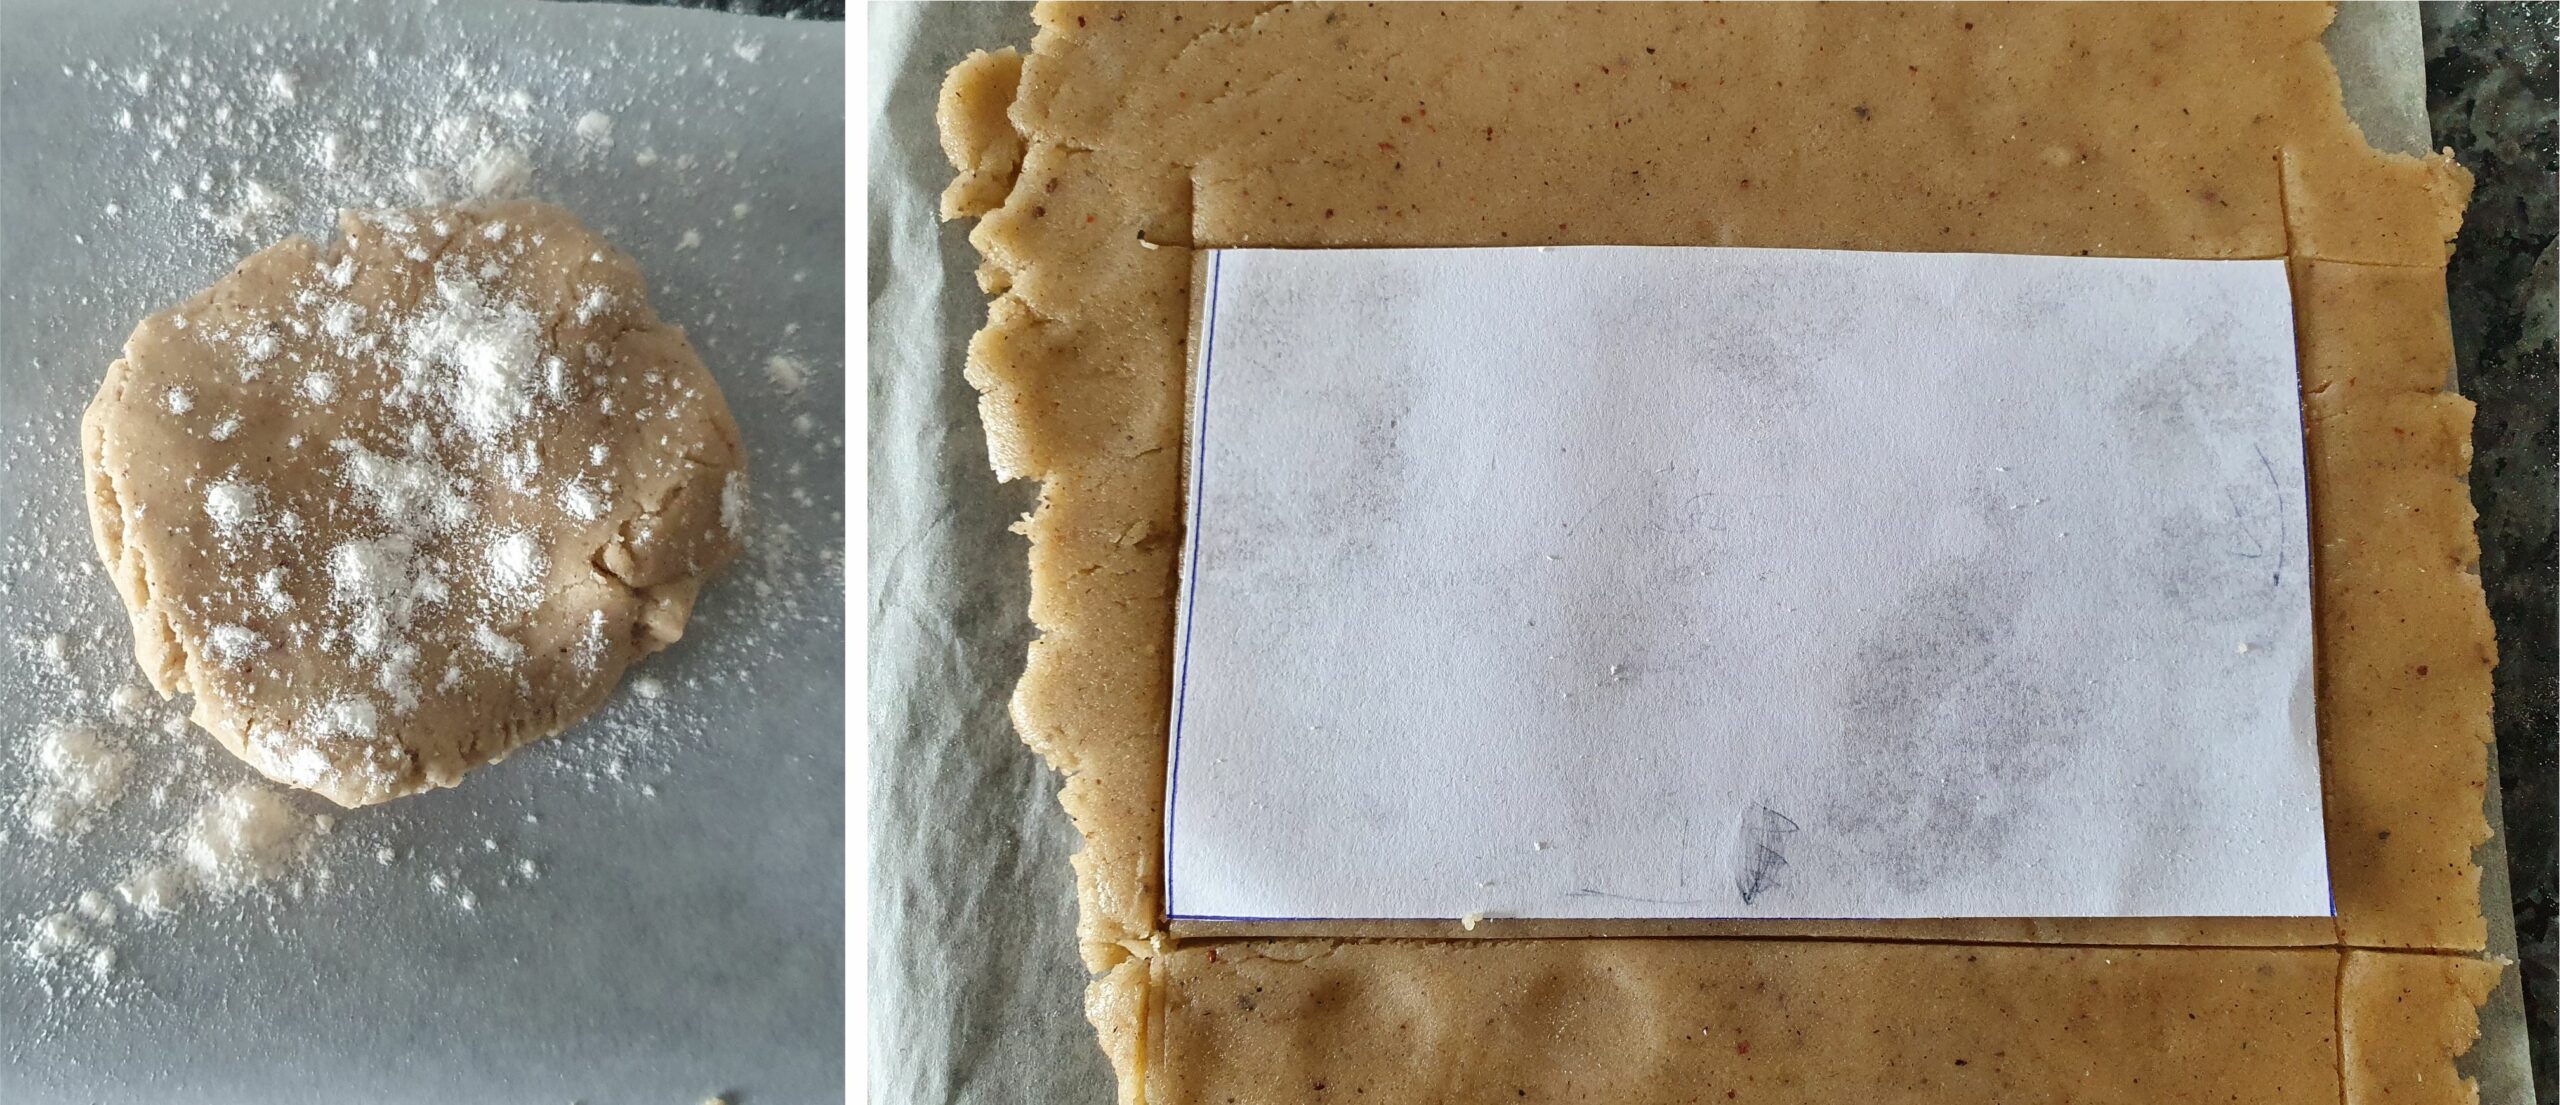

Roll it out on baking paper. That way you don't have to move the pieces later and risk changing the shape. Cut the pieces of dough according to the templates with a sharp knife.
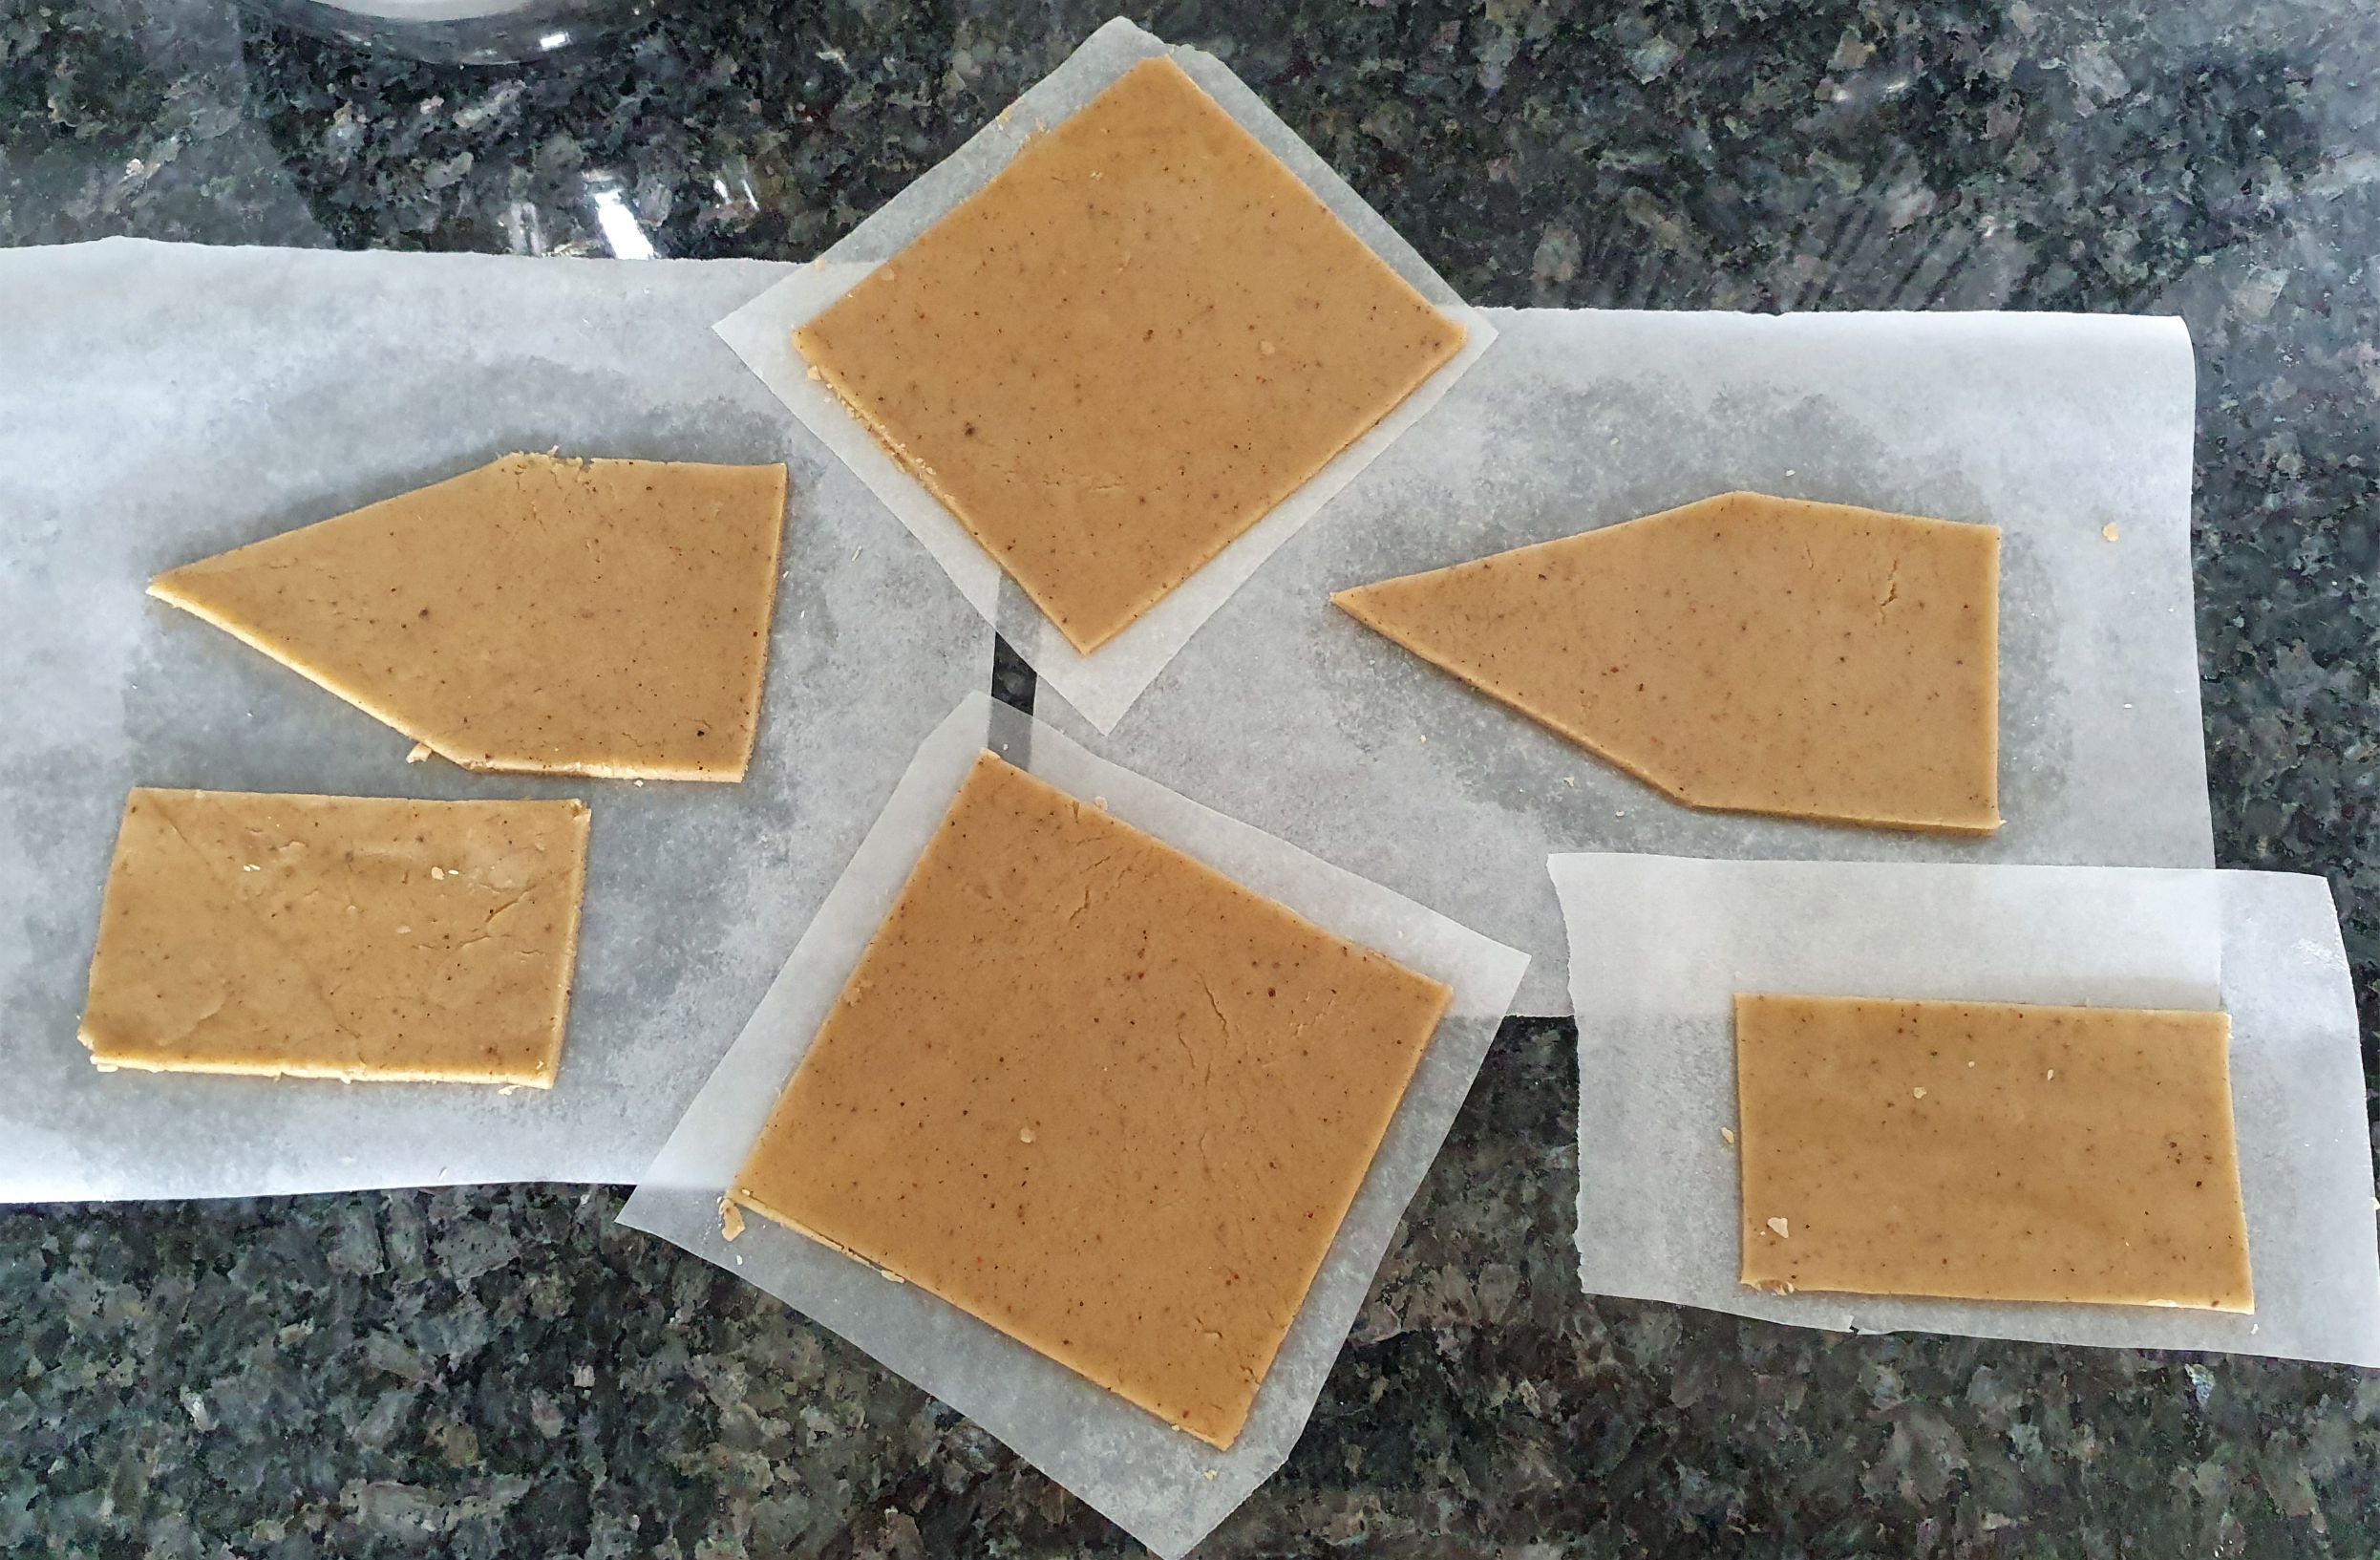

If you are unable to move the pieces, cut the baking paper instead to be able to fit as many as possible on a baking tray. Bake for 10-12min at 180 degrees Celsius.
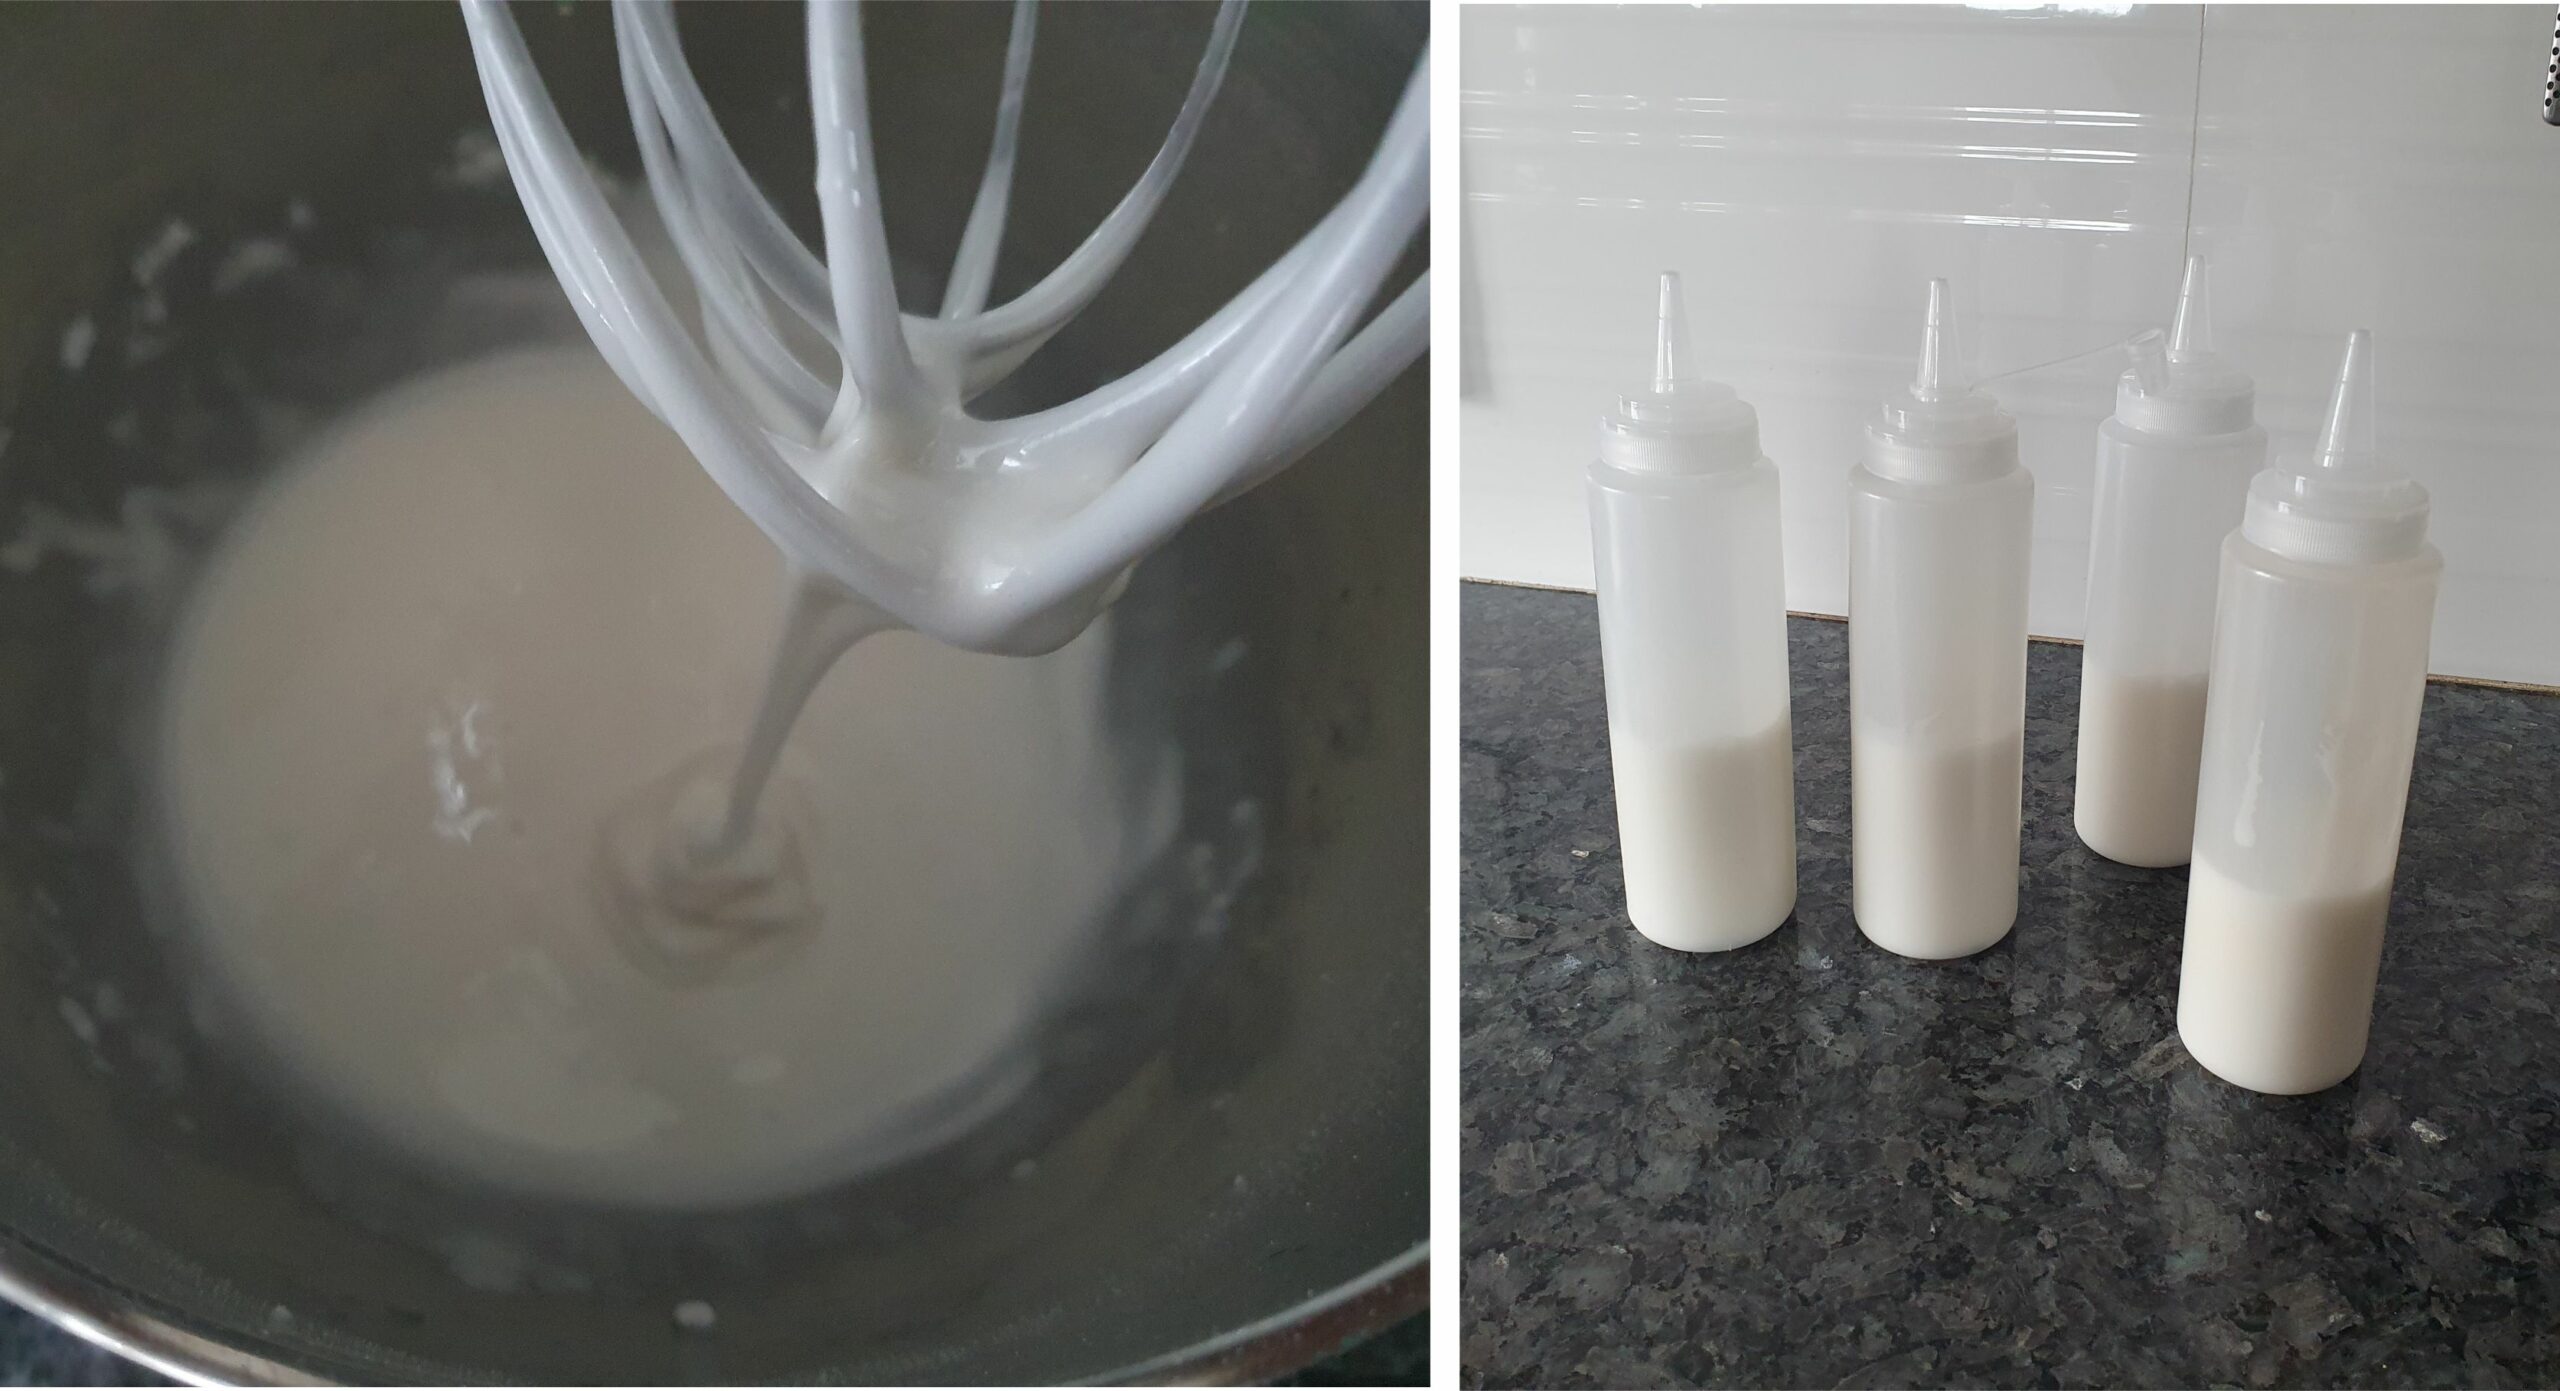

Make the icing by mixing 75gr of icing sugar with 2tsp of water. The icing should be very thick and take about 5 seconds to flatten out. Add another few drops of water if the icing doesn't mix fully. You will need one portion of icing for each house.
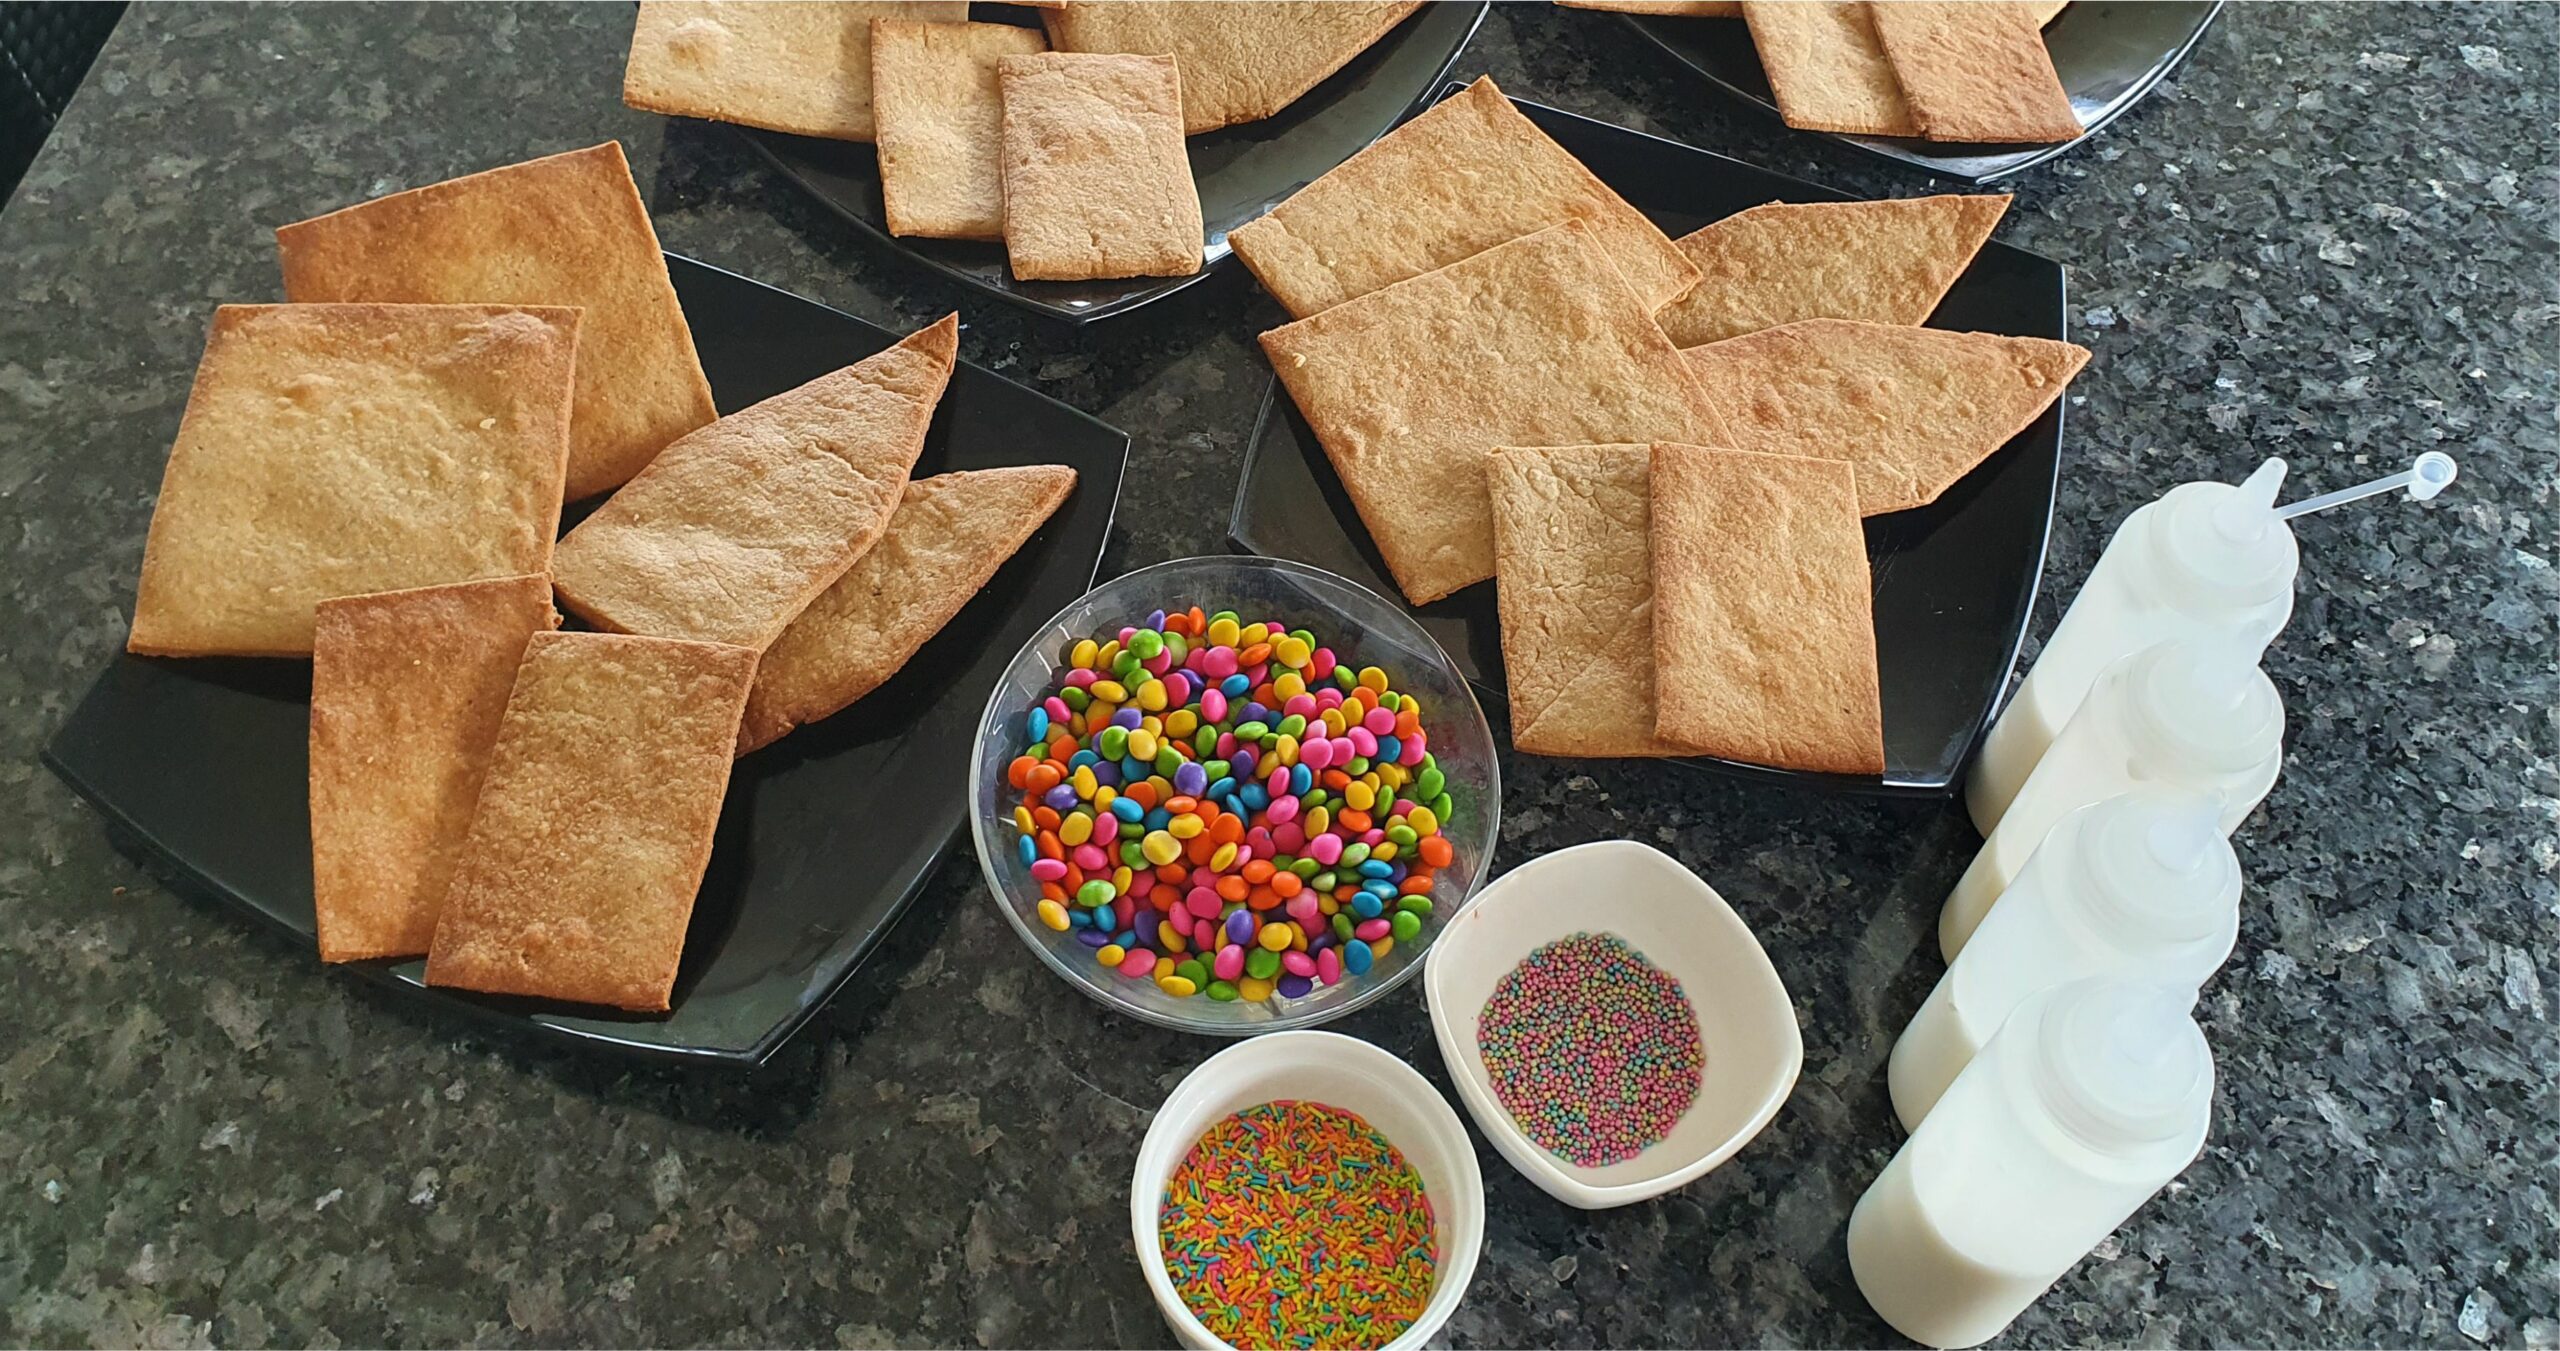

Get all the ingredients ready for the kids to start including sprinkles, chocolate buttons, icing and the house pieces.
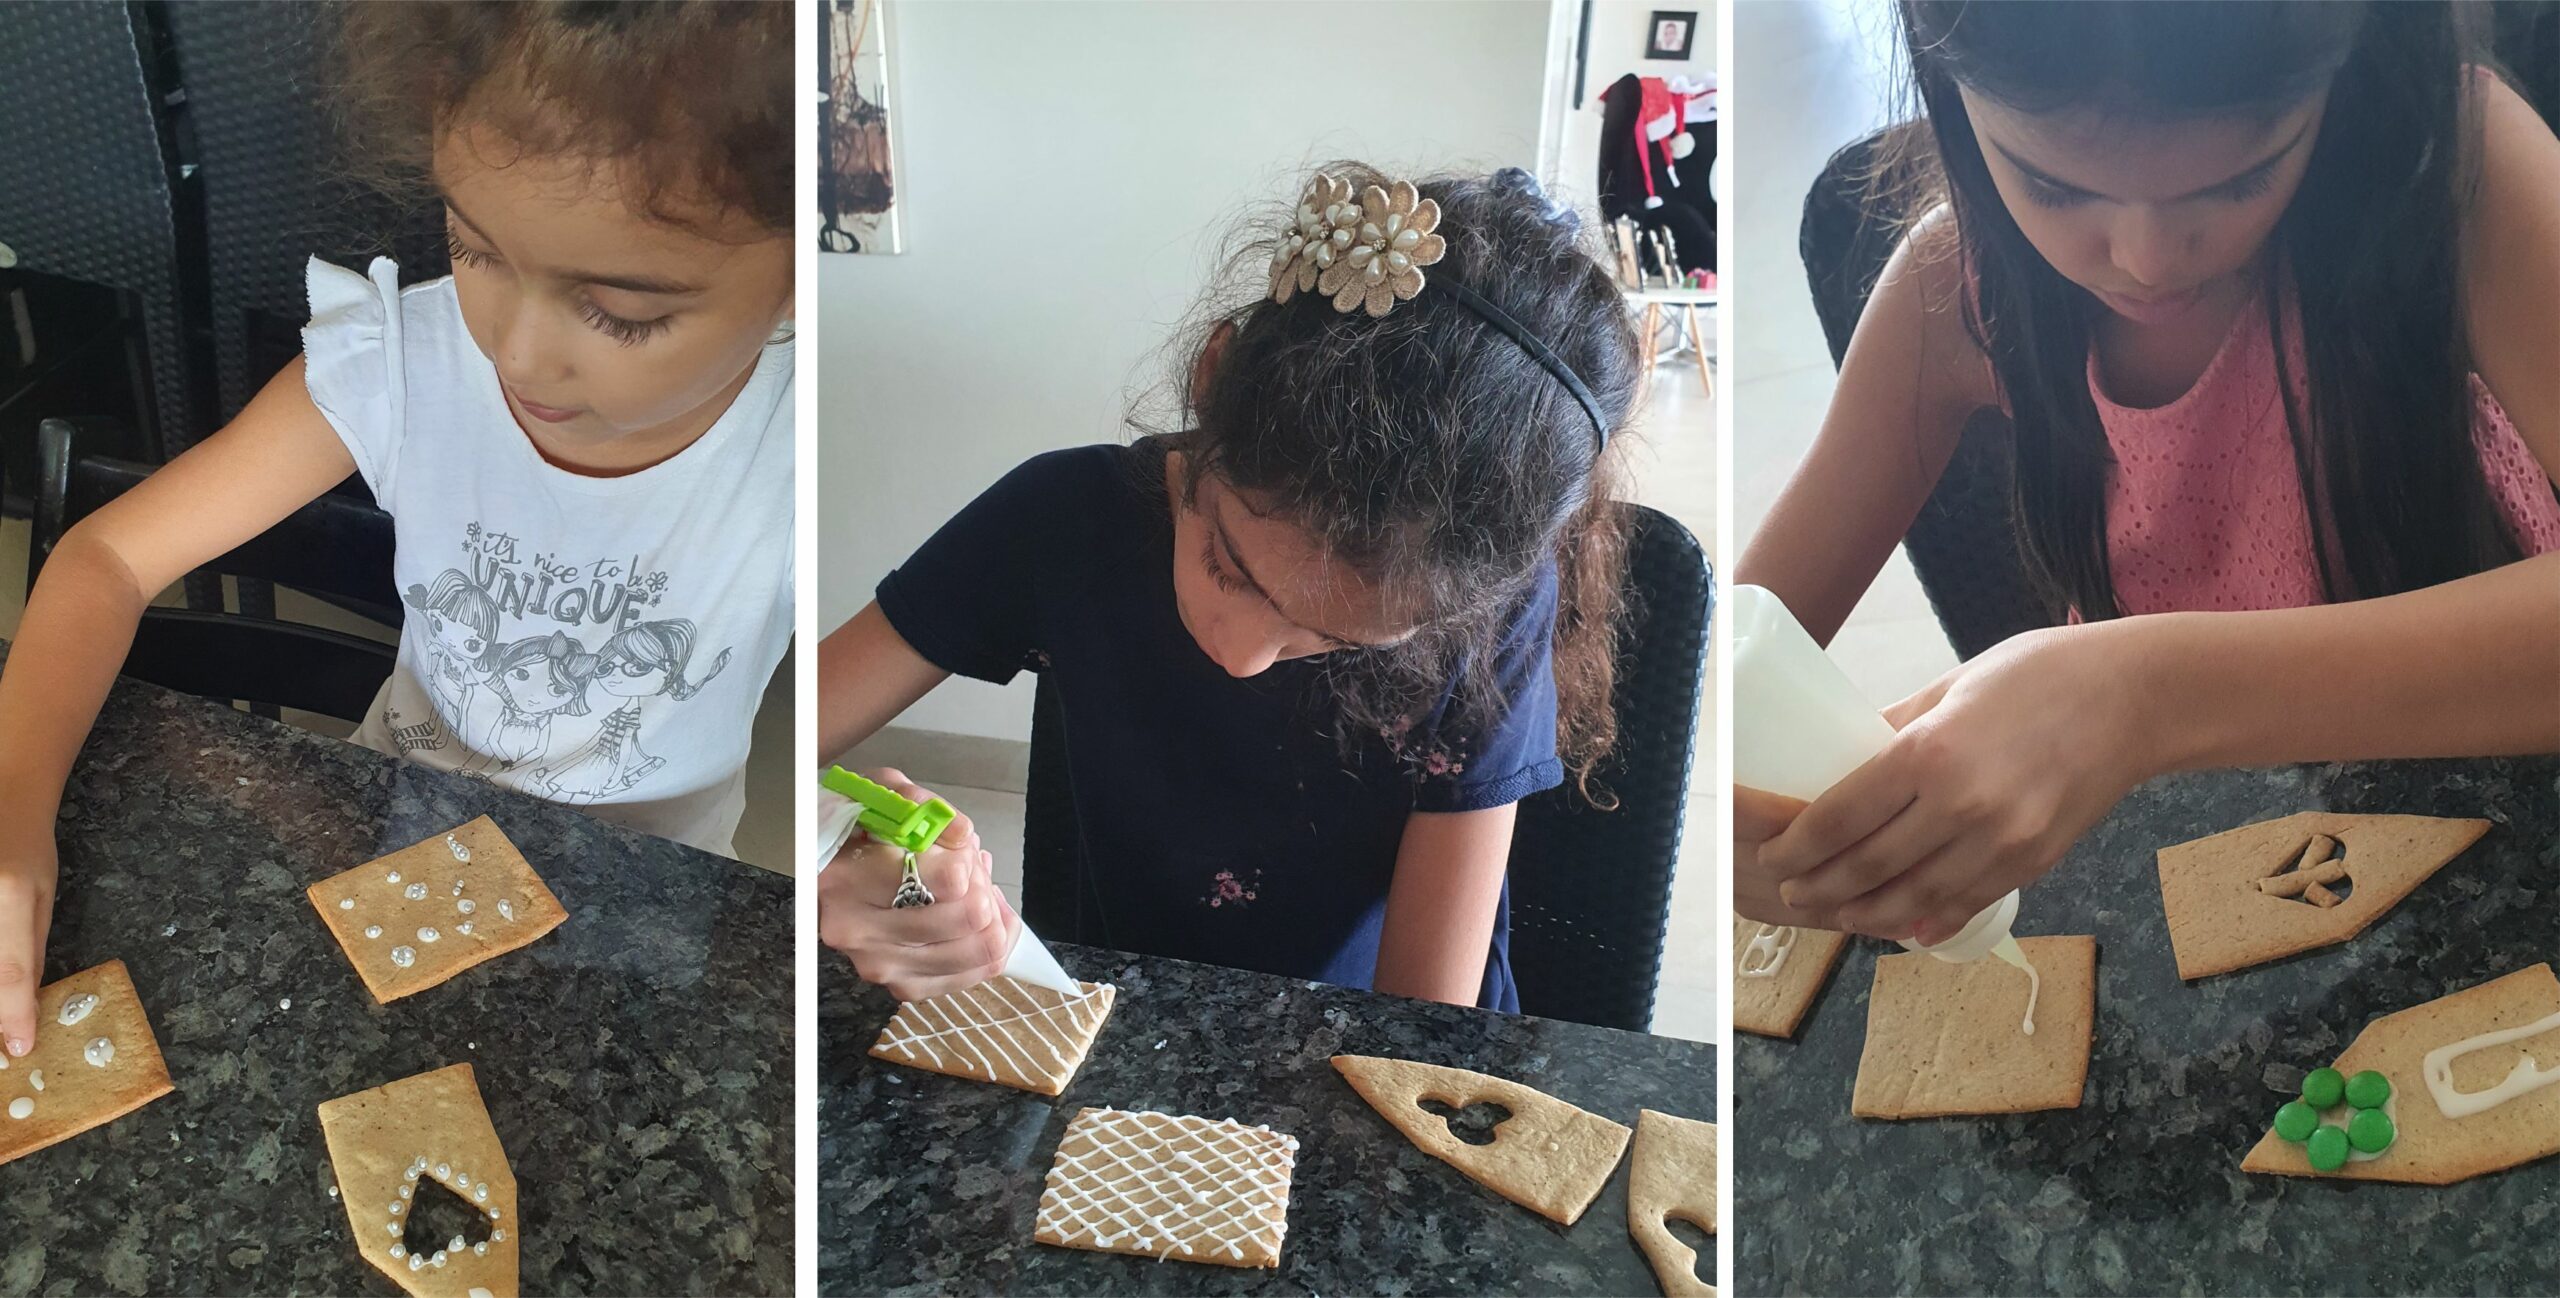

And now to the fun part: decorating all the sides and the roof. I just let the kids go with it and let them decorate anyhow they want. It's supposed to be a fun activity so why stop them if they want to put windows on the roof? :-)
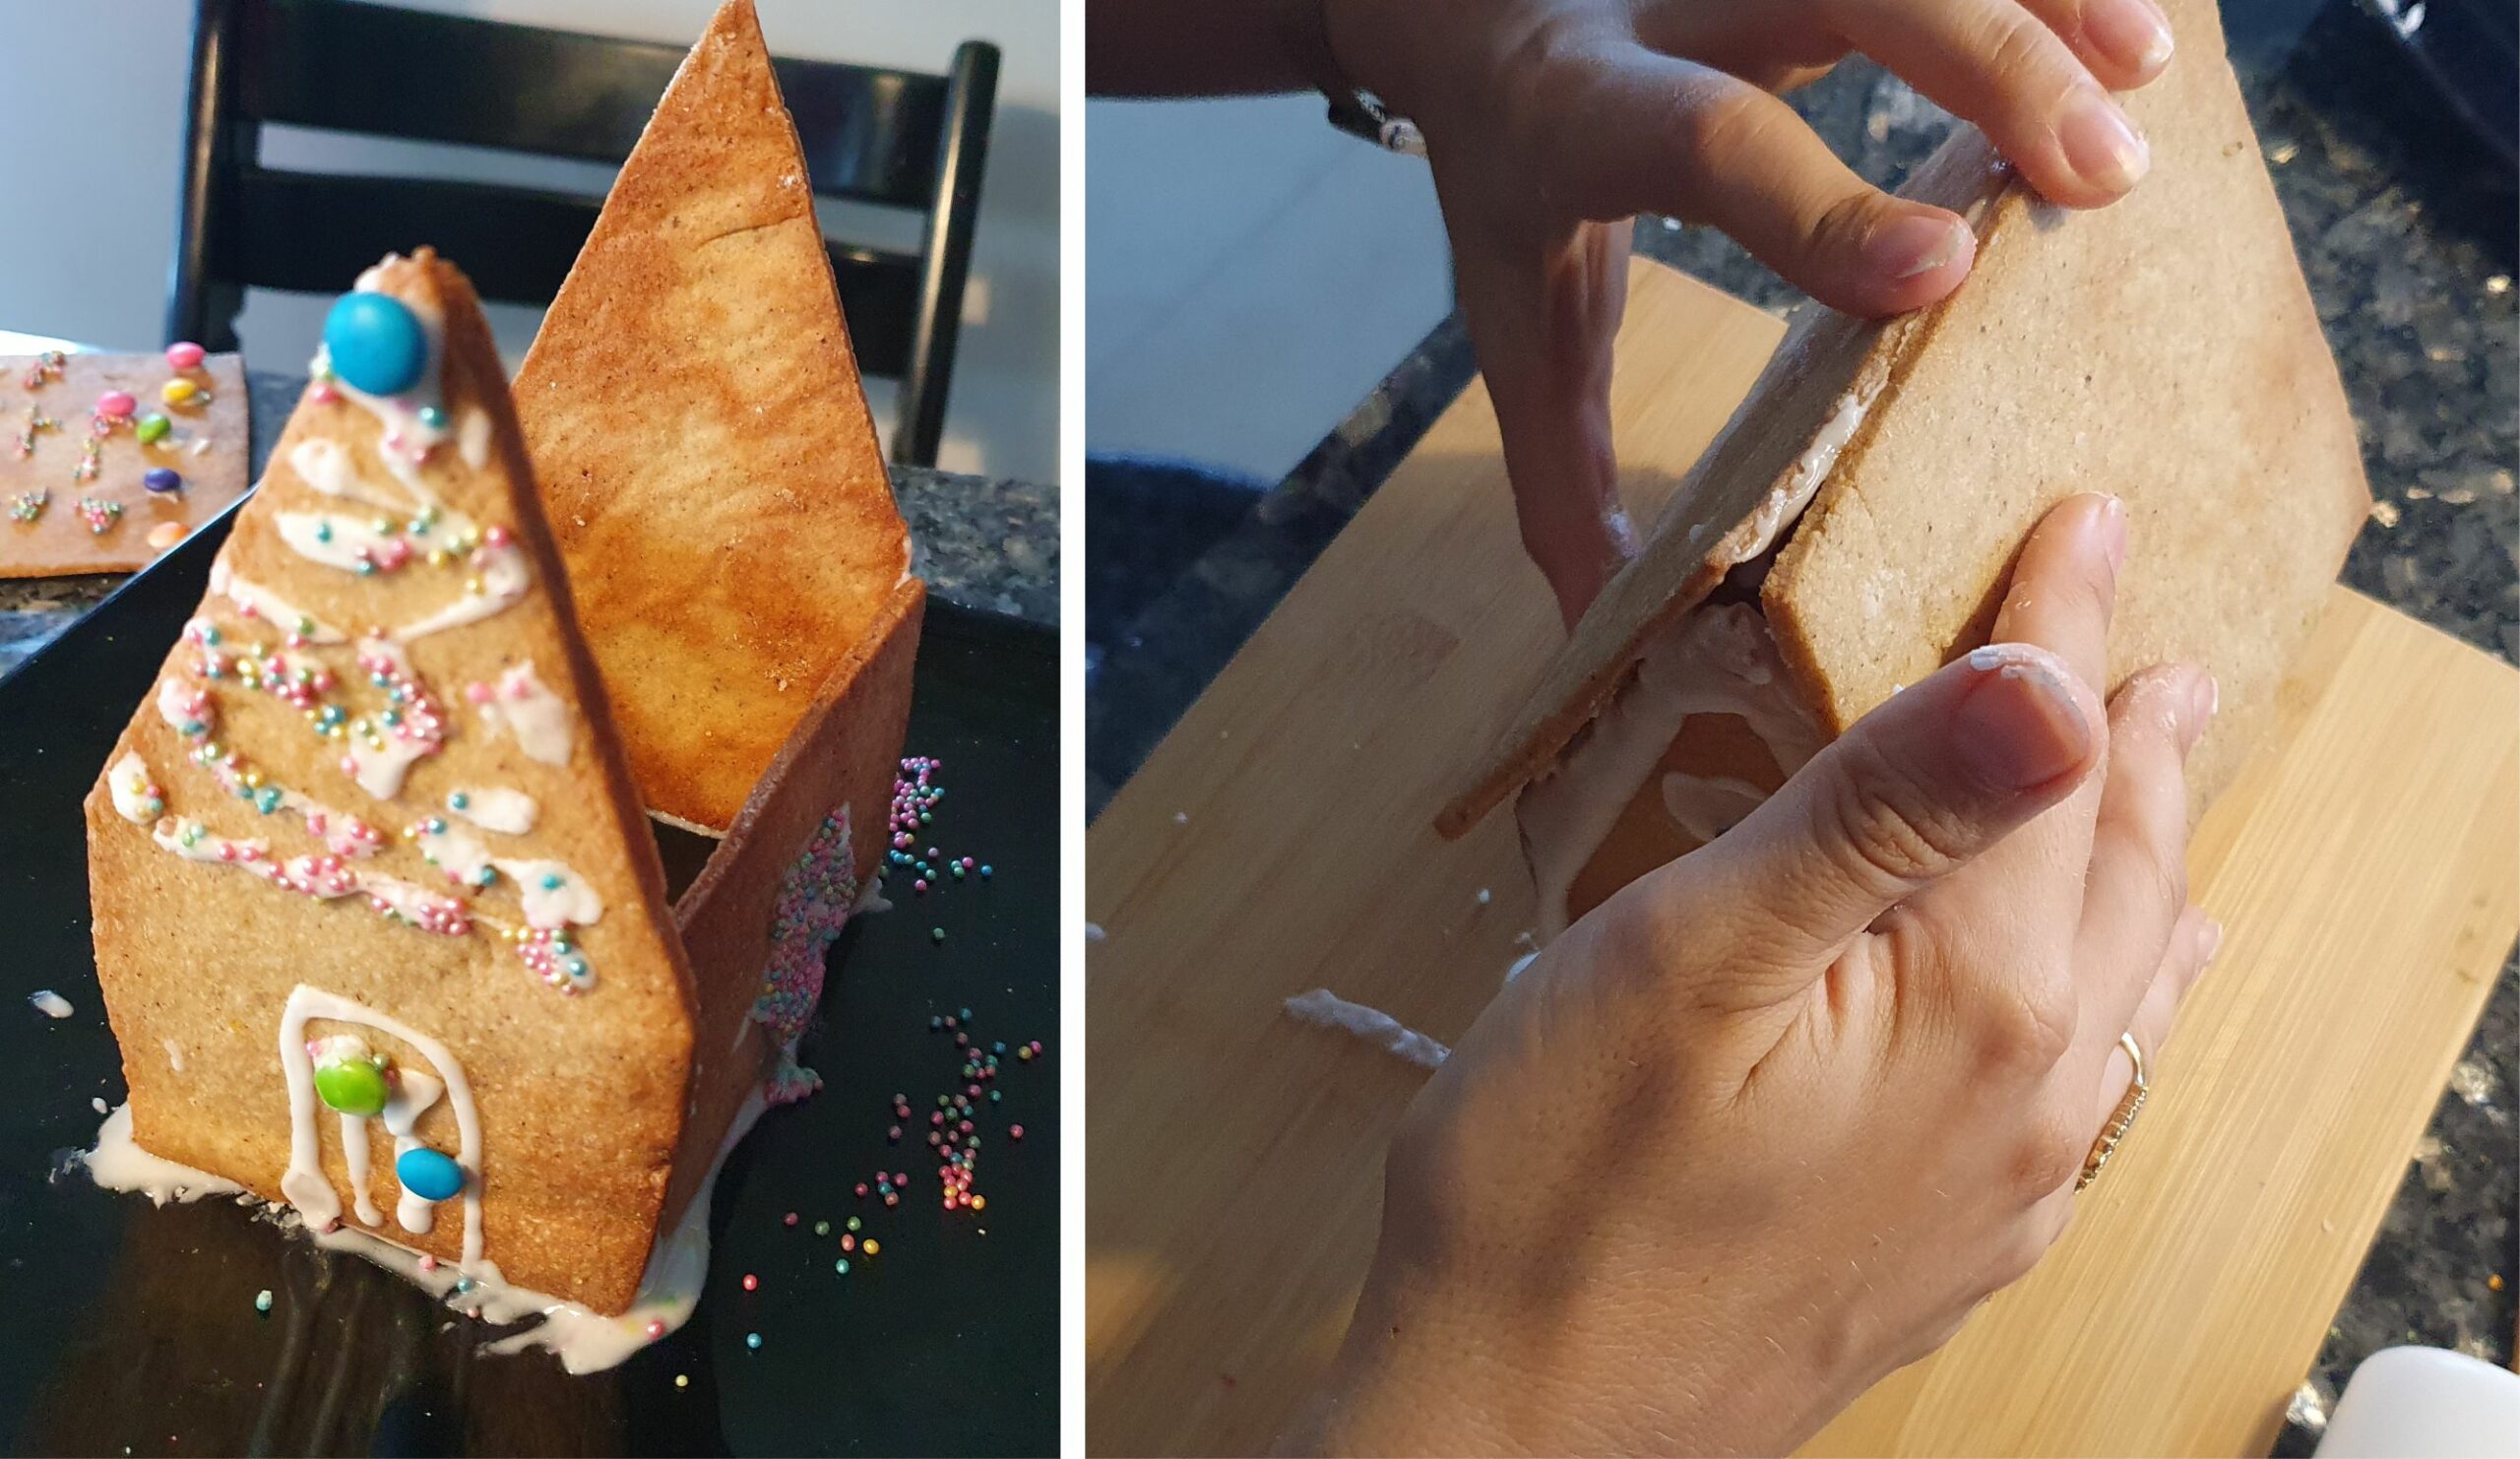

After all the pieces have been decorated and dried (if you are using a thick icing like suggested, you will not need to wait), fix the front of the house to the sides with icing. You can leave glasses or bowls around the house for support to make it easier. Let it dry for 10min before attaching the roof. Hold the roof in place for a few minutes before letting go.
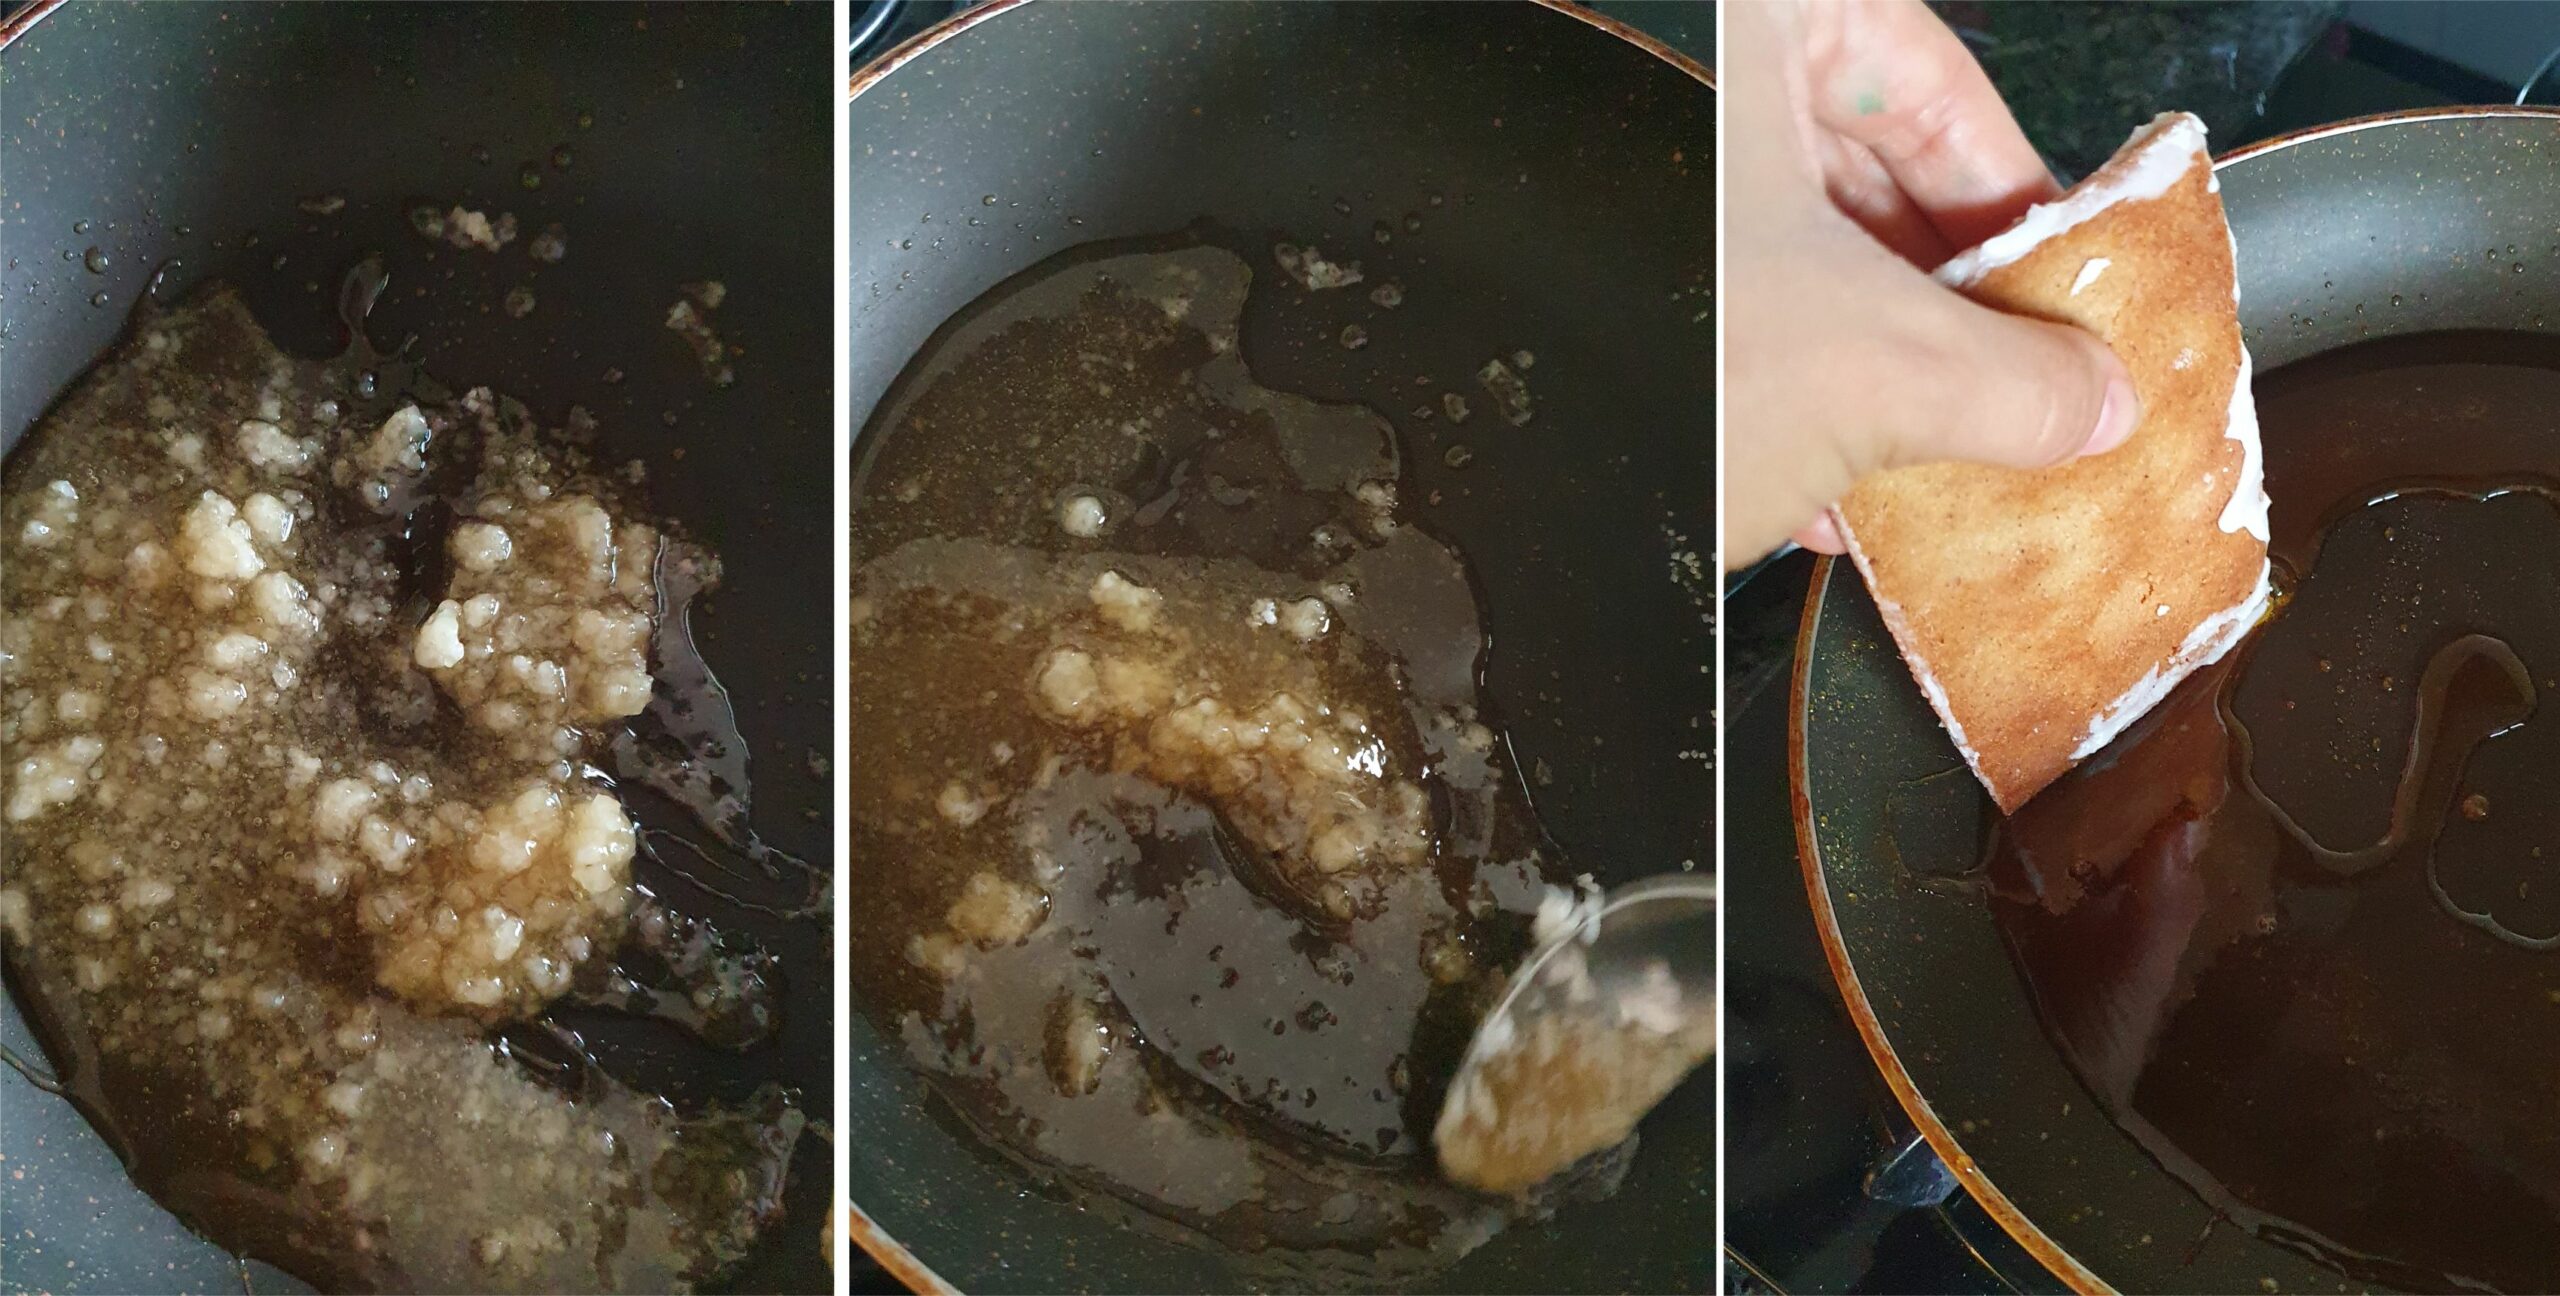

To assemble using hot sugar, heat the sugar in a flat pan. Melt until fully liquidized. Dip the sides into the hot sugar and attach to the other pieces. The sugar dries almost immediately and the pieces are stuck together.
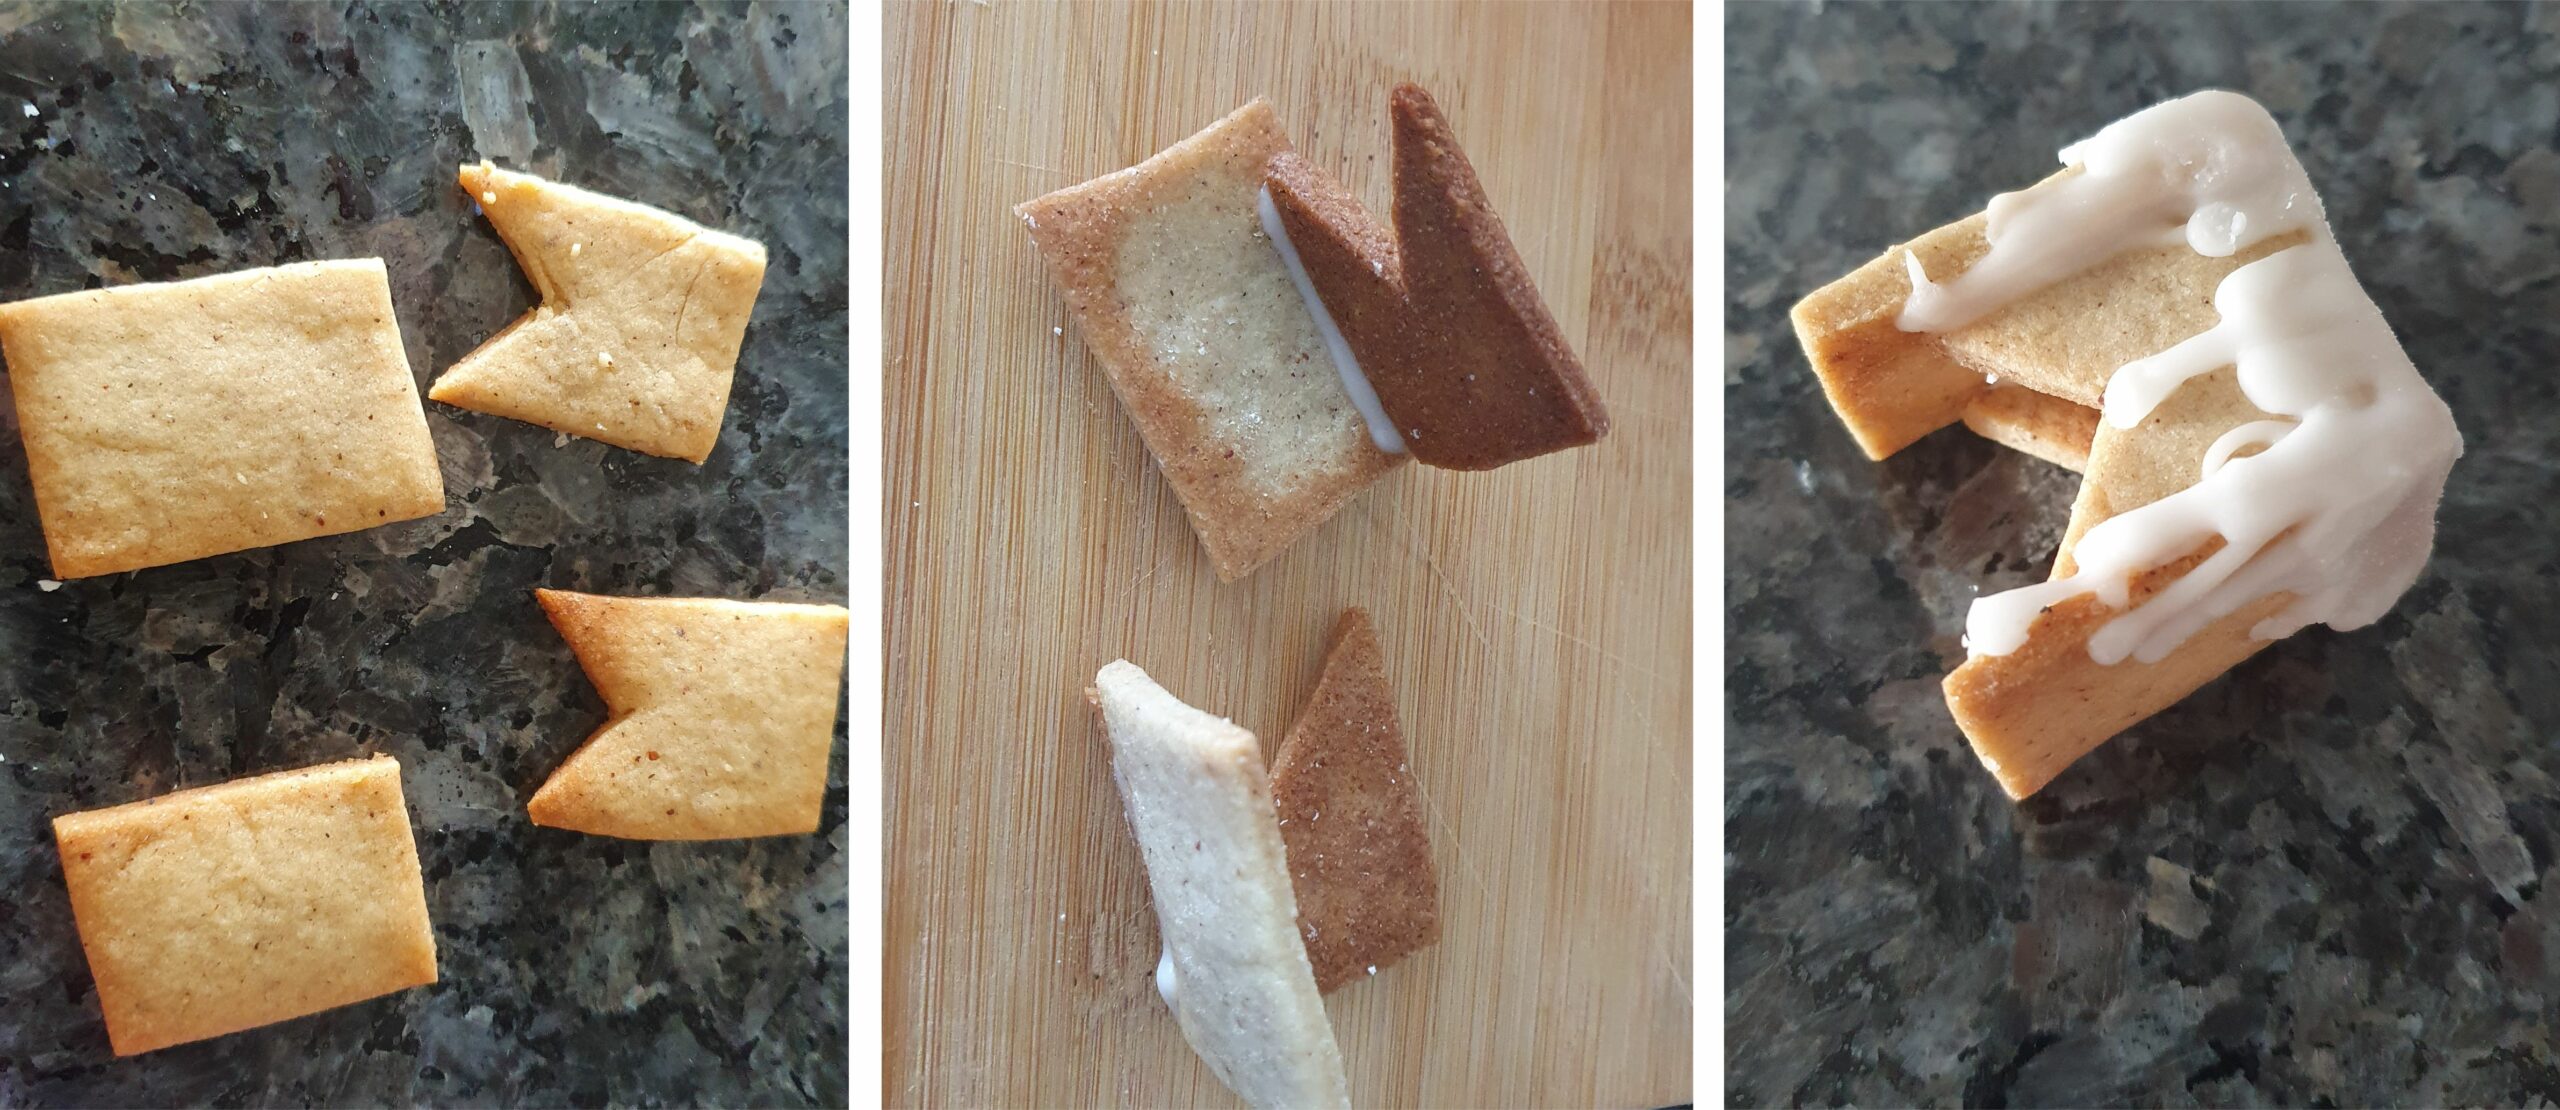

To make the chimney, add icing to the two halves first and let them dry fully. Then stick them together and the chimney is done.
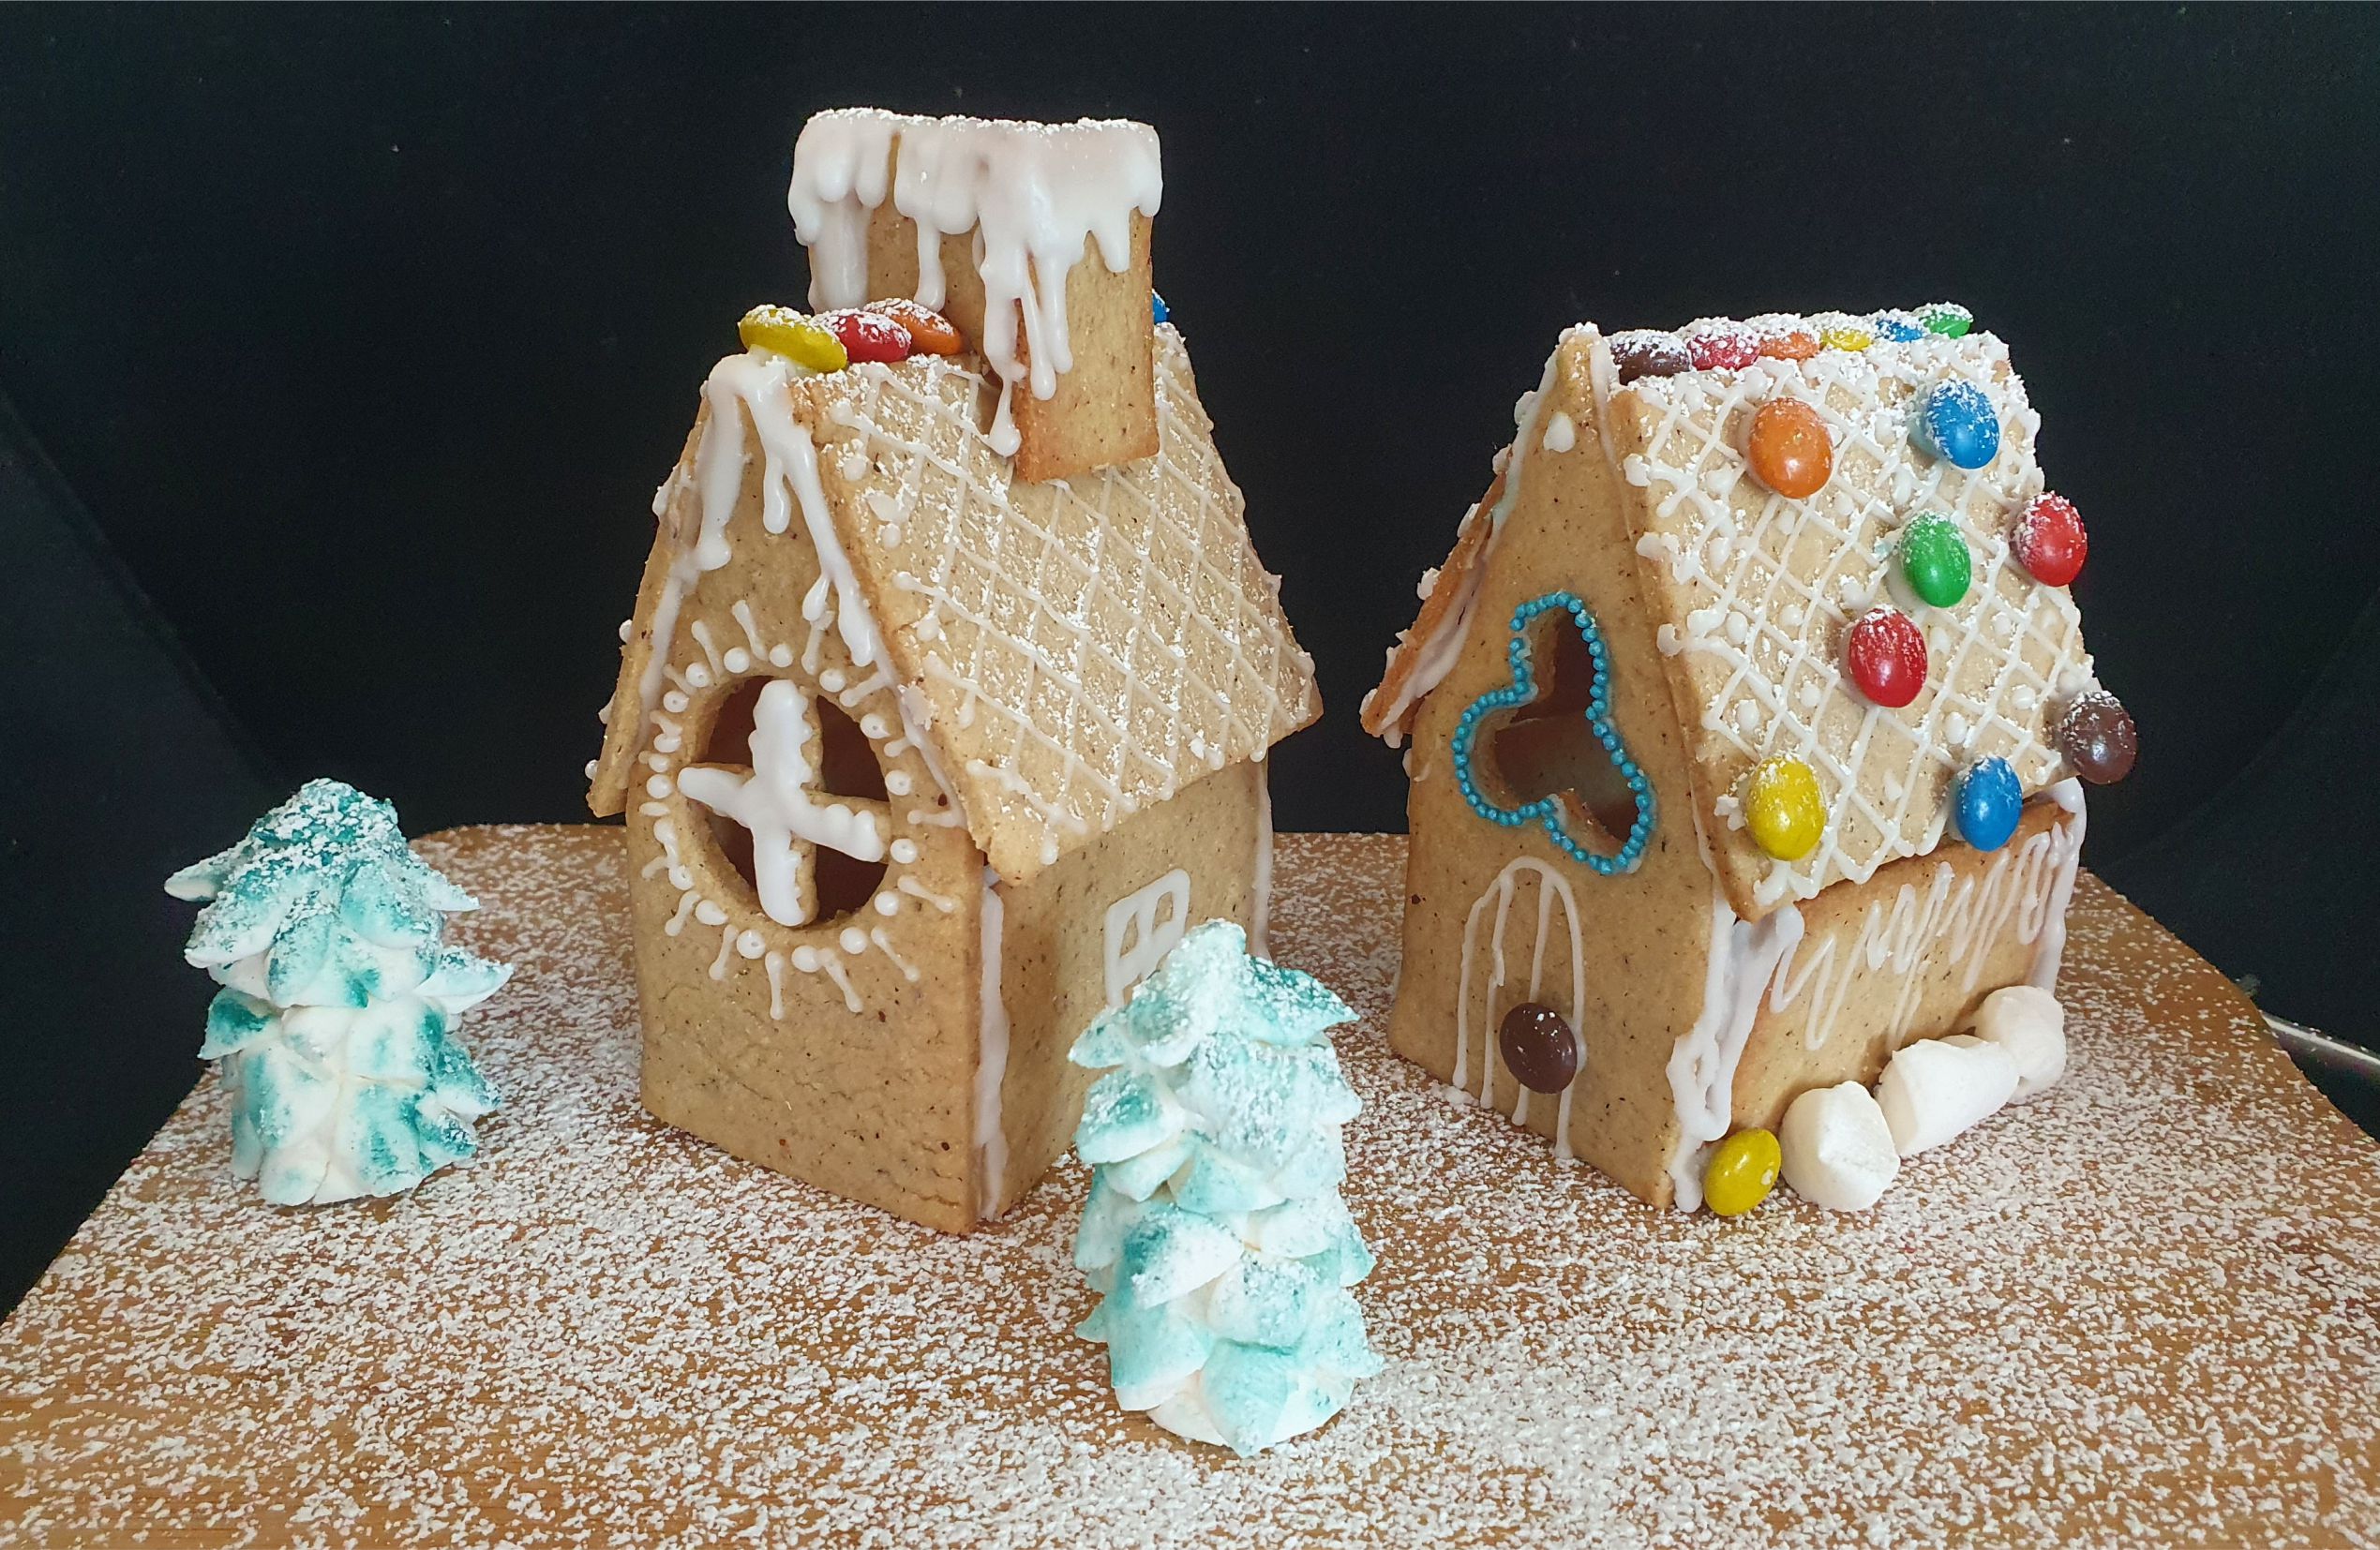

Finish by adding decorations like marshmallows or chocolate buttons. If you plan on eating the gingerbread house, leave it covered in an airtight container until the day you wish to serve it. Have fun and Merry Christmas






Leave a Review
You must be logged in to post a comment.