- November 9, 2020
- 1 Like
- 0 / 5
- 3,839 Total Views


- Prep Time20-30min
- Total Time2 hours to dry
Diwali is here yet again, and in our house that means yummy sweets, pretty rangoli designs, plenty of diyas and of course Diwali lamps. We have been making our own Diwali lamps every year for 10 years now. It has slowly become a tradition in our house and it’s a great way to start off the festivities.
There is no right or wrong when it comes to decorating the Diwali lamps -any decorative item works whether it’s crayons, glue, decorative tape, ribbon, sequins or craft jewels. The kids -no matter the age- usually have a really good idea of what they want. Just decide what decorative items you want to use (that also limits the clean-up time) to make it fun for everyone -including you! Glitter, for instance, is harder to use for younger kids without making a huge mess, so instead consider using glitter glue which is easier to control and looks equally beautiful when dry. I buy these small Fevicryl glitter glues in the local stationary shop. Otherwise use glitter paper like I have done below. Less mess but still very pretty.
Here are a few handy tips to make a Diwali lamp at home:
- Use thick craft paper instead of regular chart paper -it will be a bit harder to cut but will not bend or loose it’s shape with the moisture in the air or with the morning dew once it’s up and hanging.
- Be sure to follow step no 8 as it is very important. Without attaching the ribbon at the bottom too, the slits will close and the light will not be able to shine through the middle part of the lamp.
- Use thin paper that is coloured on both sides for the hanging strips. We like how the foil paper strips shines in the light but unfortunately foil paper is one-sided only. We fixed this problem by gluing two pieces of foil paper together but to make the task easier, use double sided paper.
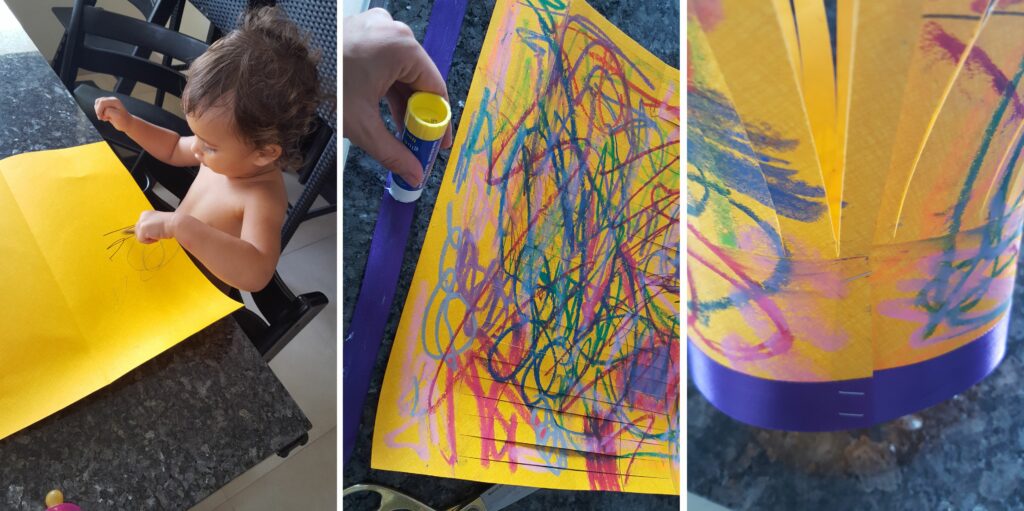

Young toddlers who have just learned to use a crayon can also make their own Diwali lamp -with a bit of help of course 🙂 I know this may seem crazy (and perhaps unnecessary) to some people, but for me, it was a way to keep the little one entertained while I helped the other two with their Diwali lamps. And the finished result is really quite cute, so why not?
So, for smaller kids/toddlers, don’t cut the paper in the beginning. Just give them the crayons and the craft paper and let them doodle on it. Follow steps 1-3 and 6-8 afterwards to finish the lamp.
Ingredients
Directions
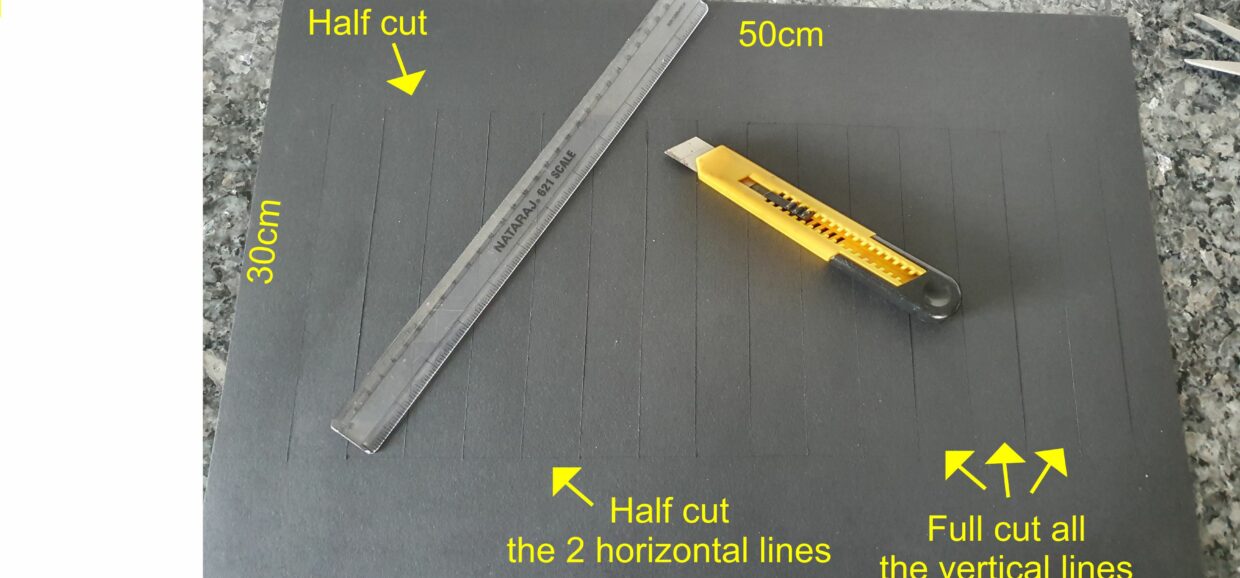

Start by cutting the craft paper like shown above. The two horizontal lines are only half cut so the craft paper can bend. The vertical lines in between are cut fully through. I didn't measure the lines but kept the width of the ruler as the measurement to make it easier. It's approximately 3cm width of each strip.
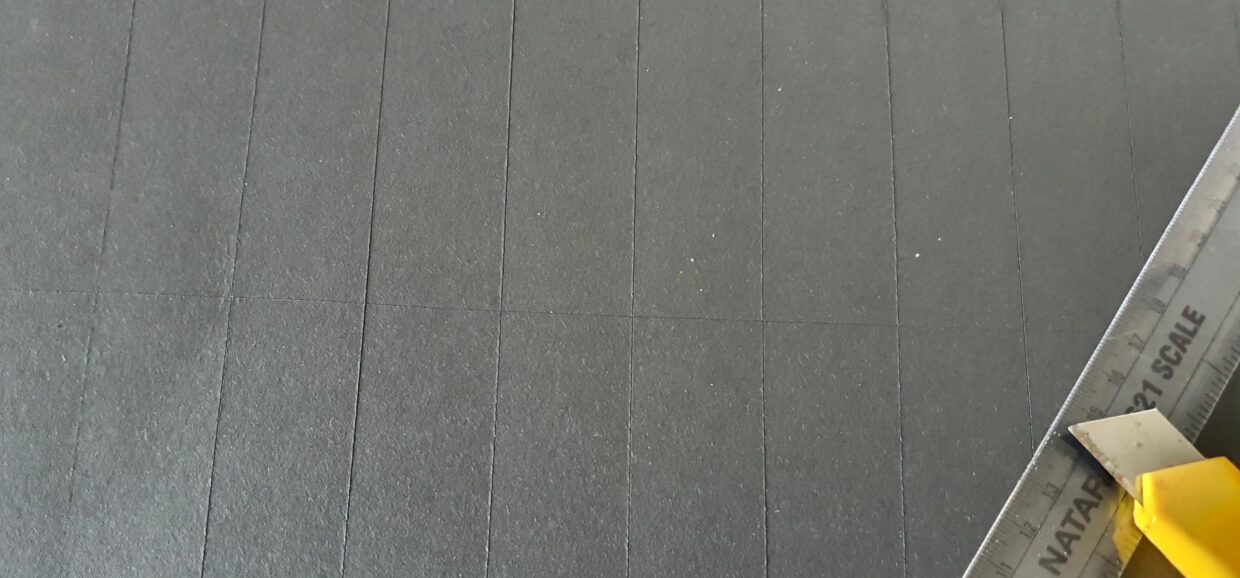

Make another horizontal half cut in the middle of the vertical strips
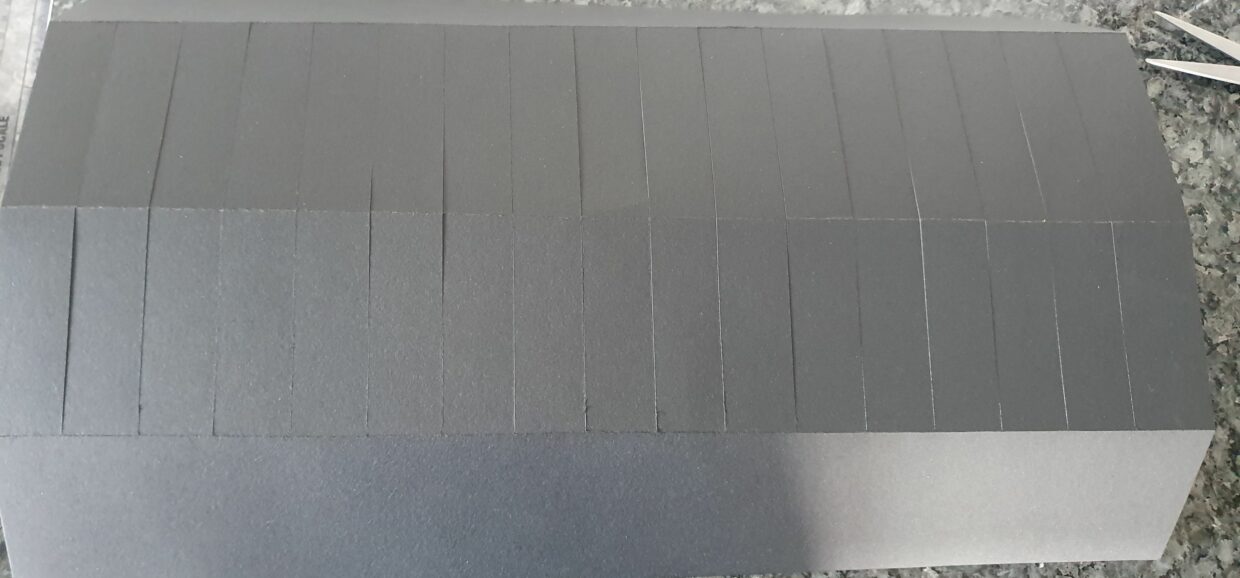

Fold/bend the half cut lines as shown here
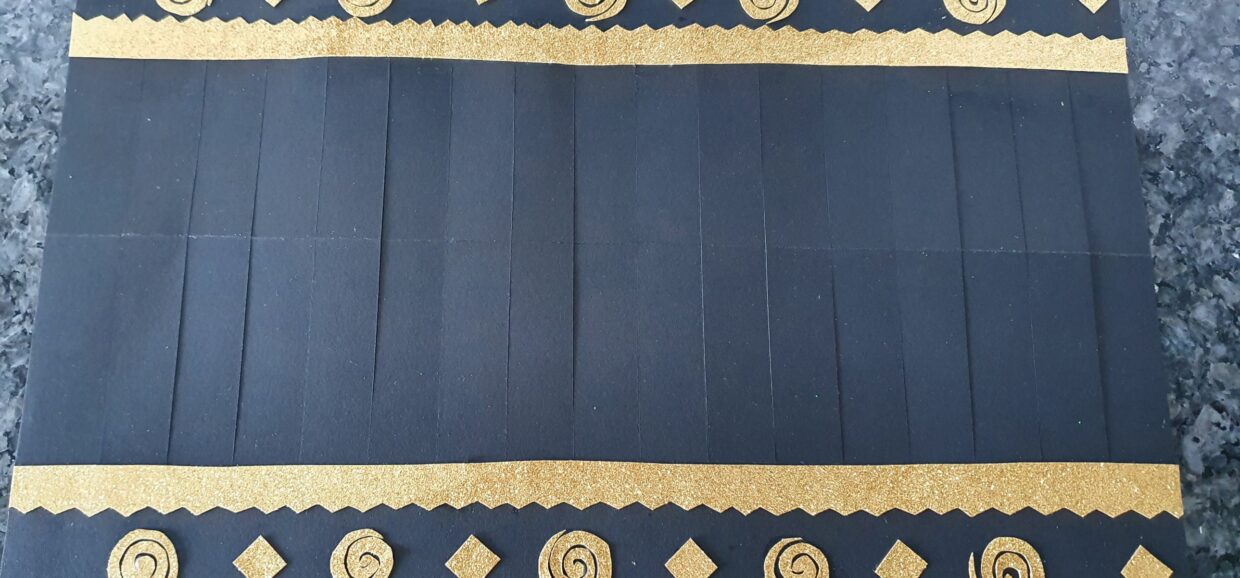

Decorate the lamp as you wish. You can use glitter paper, sequins, glitter glue, foam pieces or even crayons. It's up to you and your kids (and usually what you have lying around in the craft box too :-) ) Let the decorations dry for 1-2 hours.
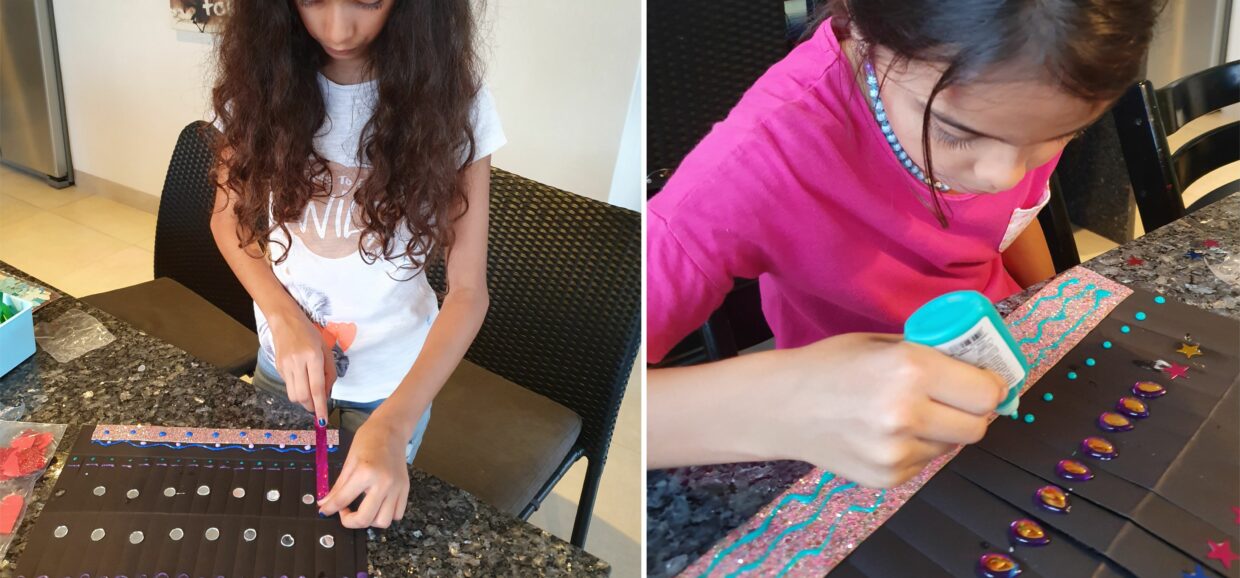

I can't say this enough, there is no right or wrong for decorating Diwali lamps! Sometimes they may look a bit messy when the kids are decorating them (especially if they like to use every single decorative material available. Ha ha) but once they are finished and the light hits them, they are always beautiful.
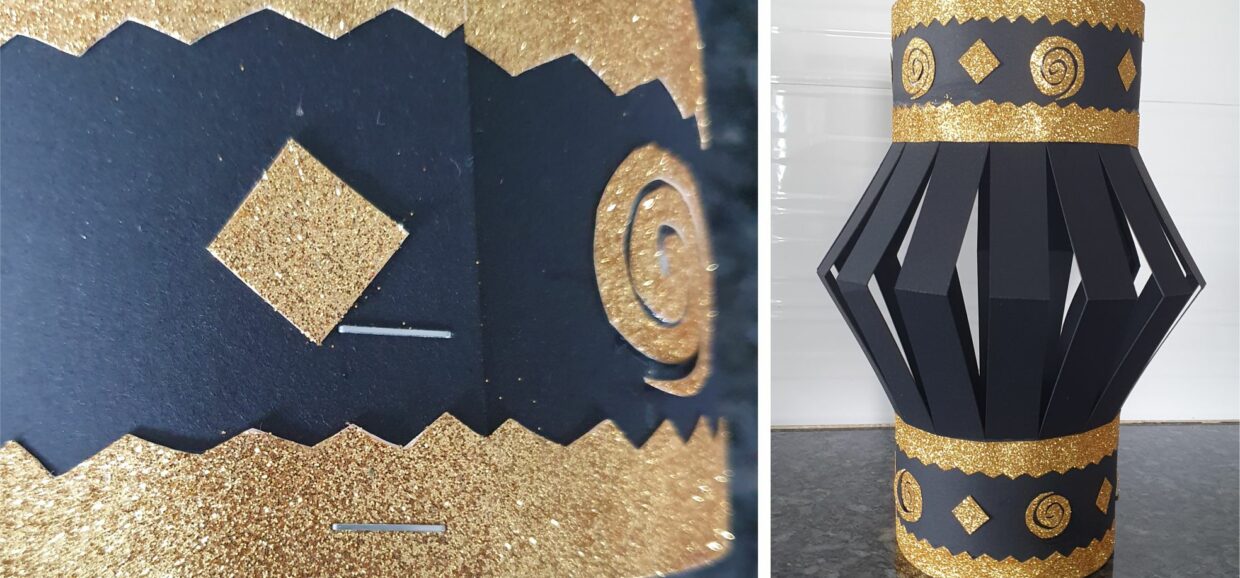

Staple the lamp together with a few staples on the top and bottom of the lamp
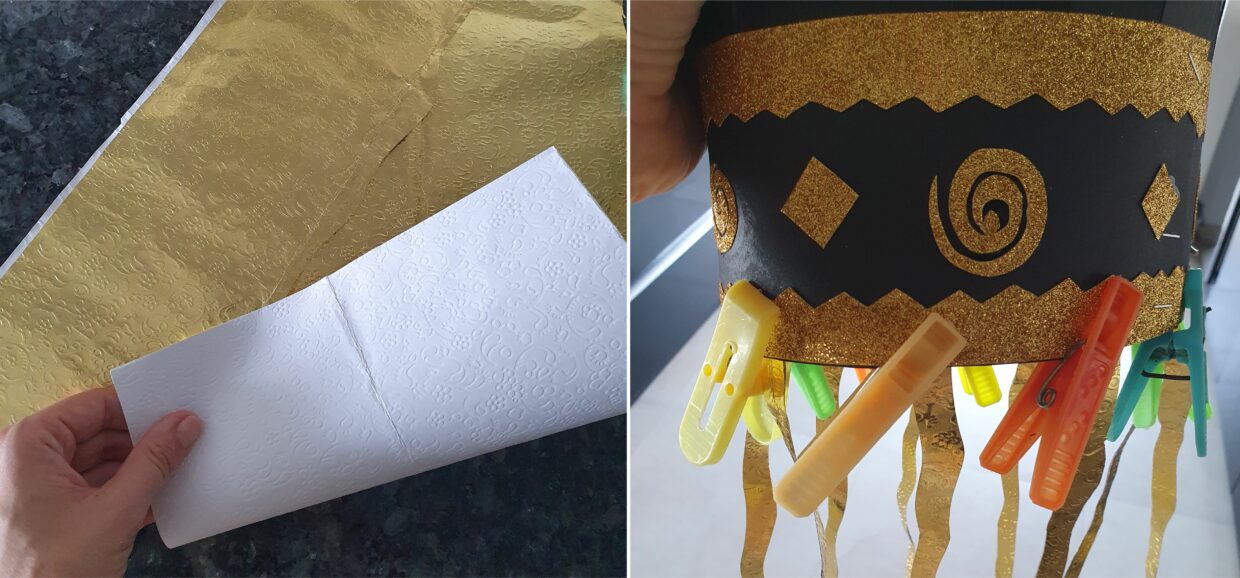

If you are using foil paper, I recommend gluing two sides together first so they are the same colour on both sides. Then cut the foil paper or tissue paper into long thing strips and glue them on. You can make them straight, wavy or zig zags.
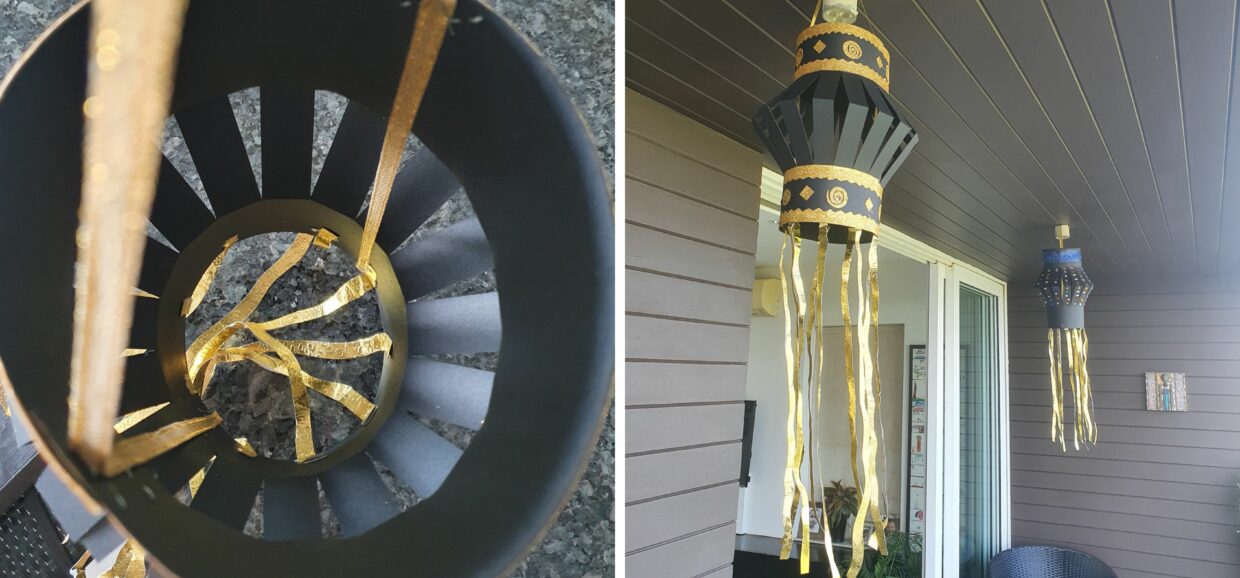

Take about 50-60cm of ribbon (depending on the size of your lamp) and attach the two ends on the inside at the bottom of the lamp. Then pull a little and attach the top part of the ribbon on the inside to the top of the lamp. Leave a loop on top for the lamp to hang from. This way you make sure the middle part of the lamp comes out and stays out even when gravity takes over once it hangs. Otherwise it will quickly close up again and the light will not shine through the slits.
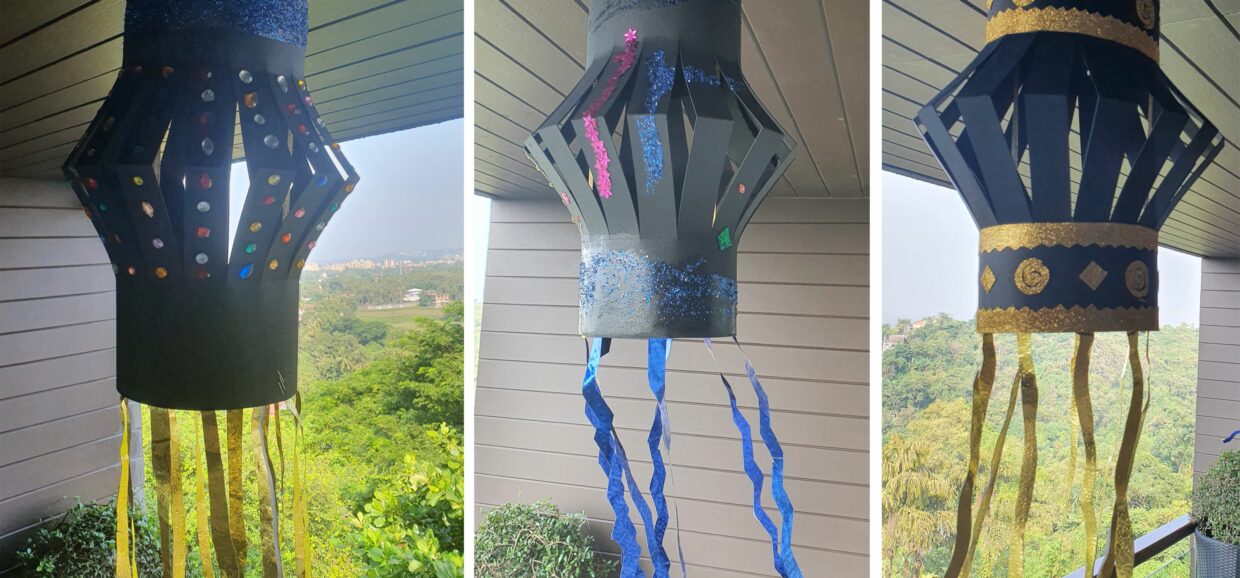

Hang your Diwali lamp string around a LED light (like I have done) or hang it from a LED bulb or put LED string lights inside it. The options are plenty -just make sure it doesn't come too close to an old-fashioned bulb as the paper might burn from the heat.
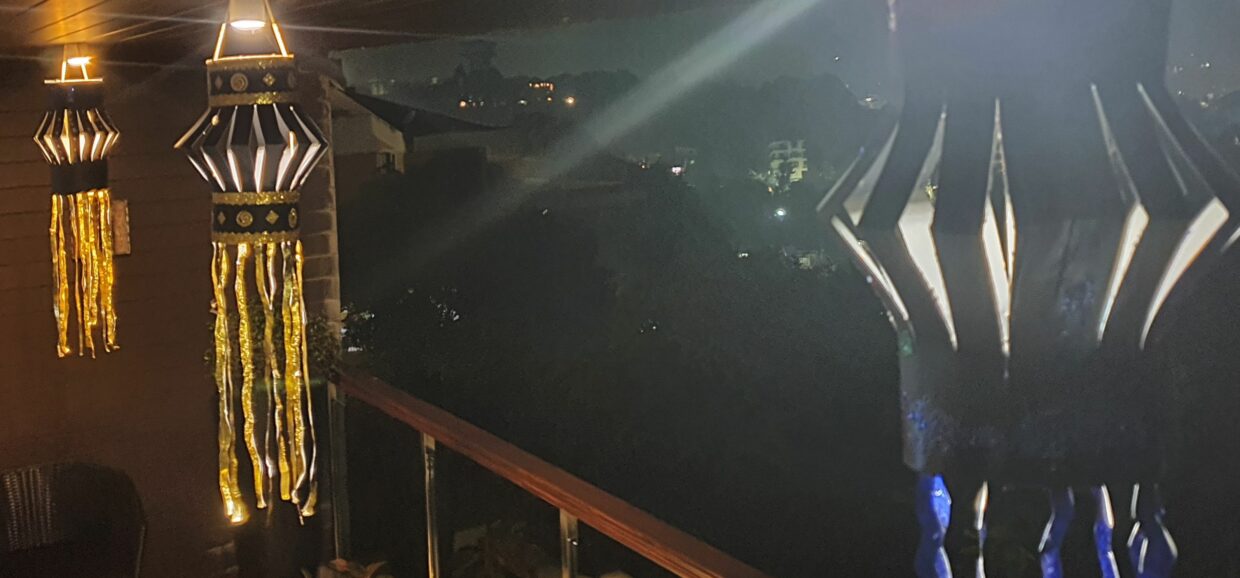

They look every so pretty once they are lit up in the dark night. Hope you liked this idea. Wish you all a very happy Diwali.
You may also like
DIY Diwali Lamp
Ingredients
Follow The Directions
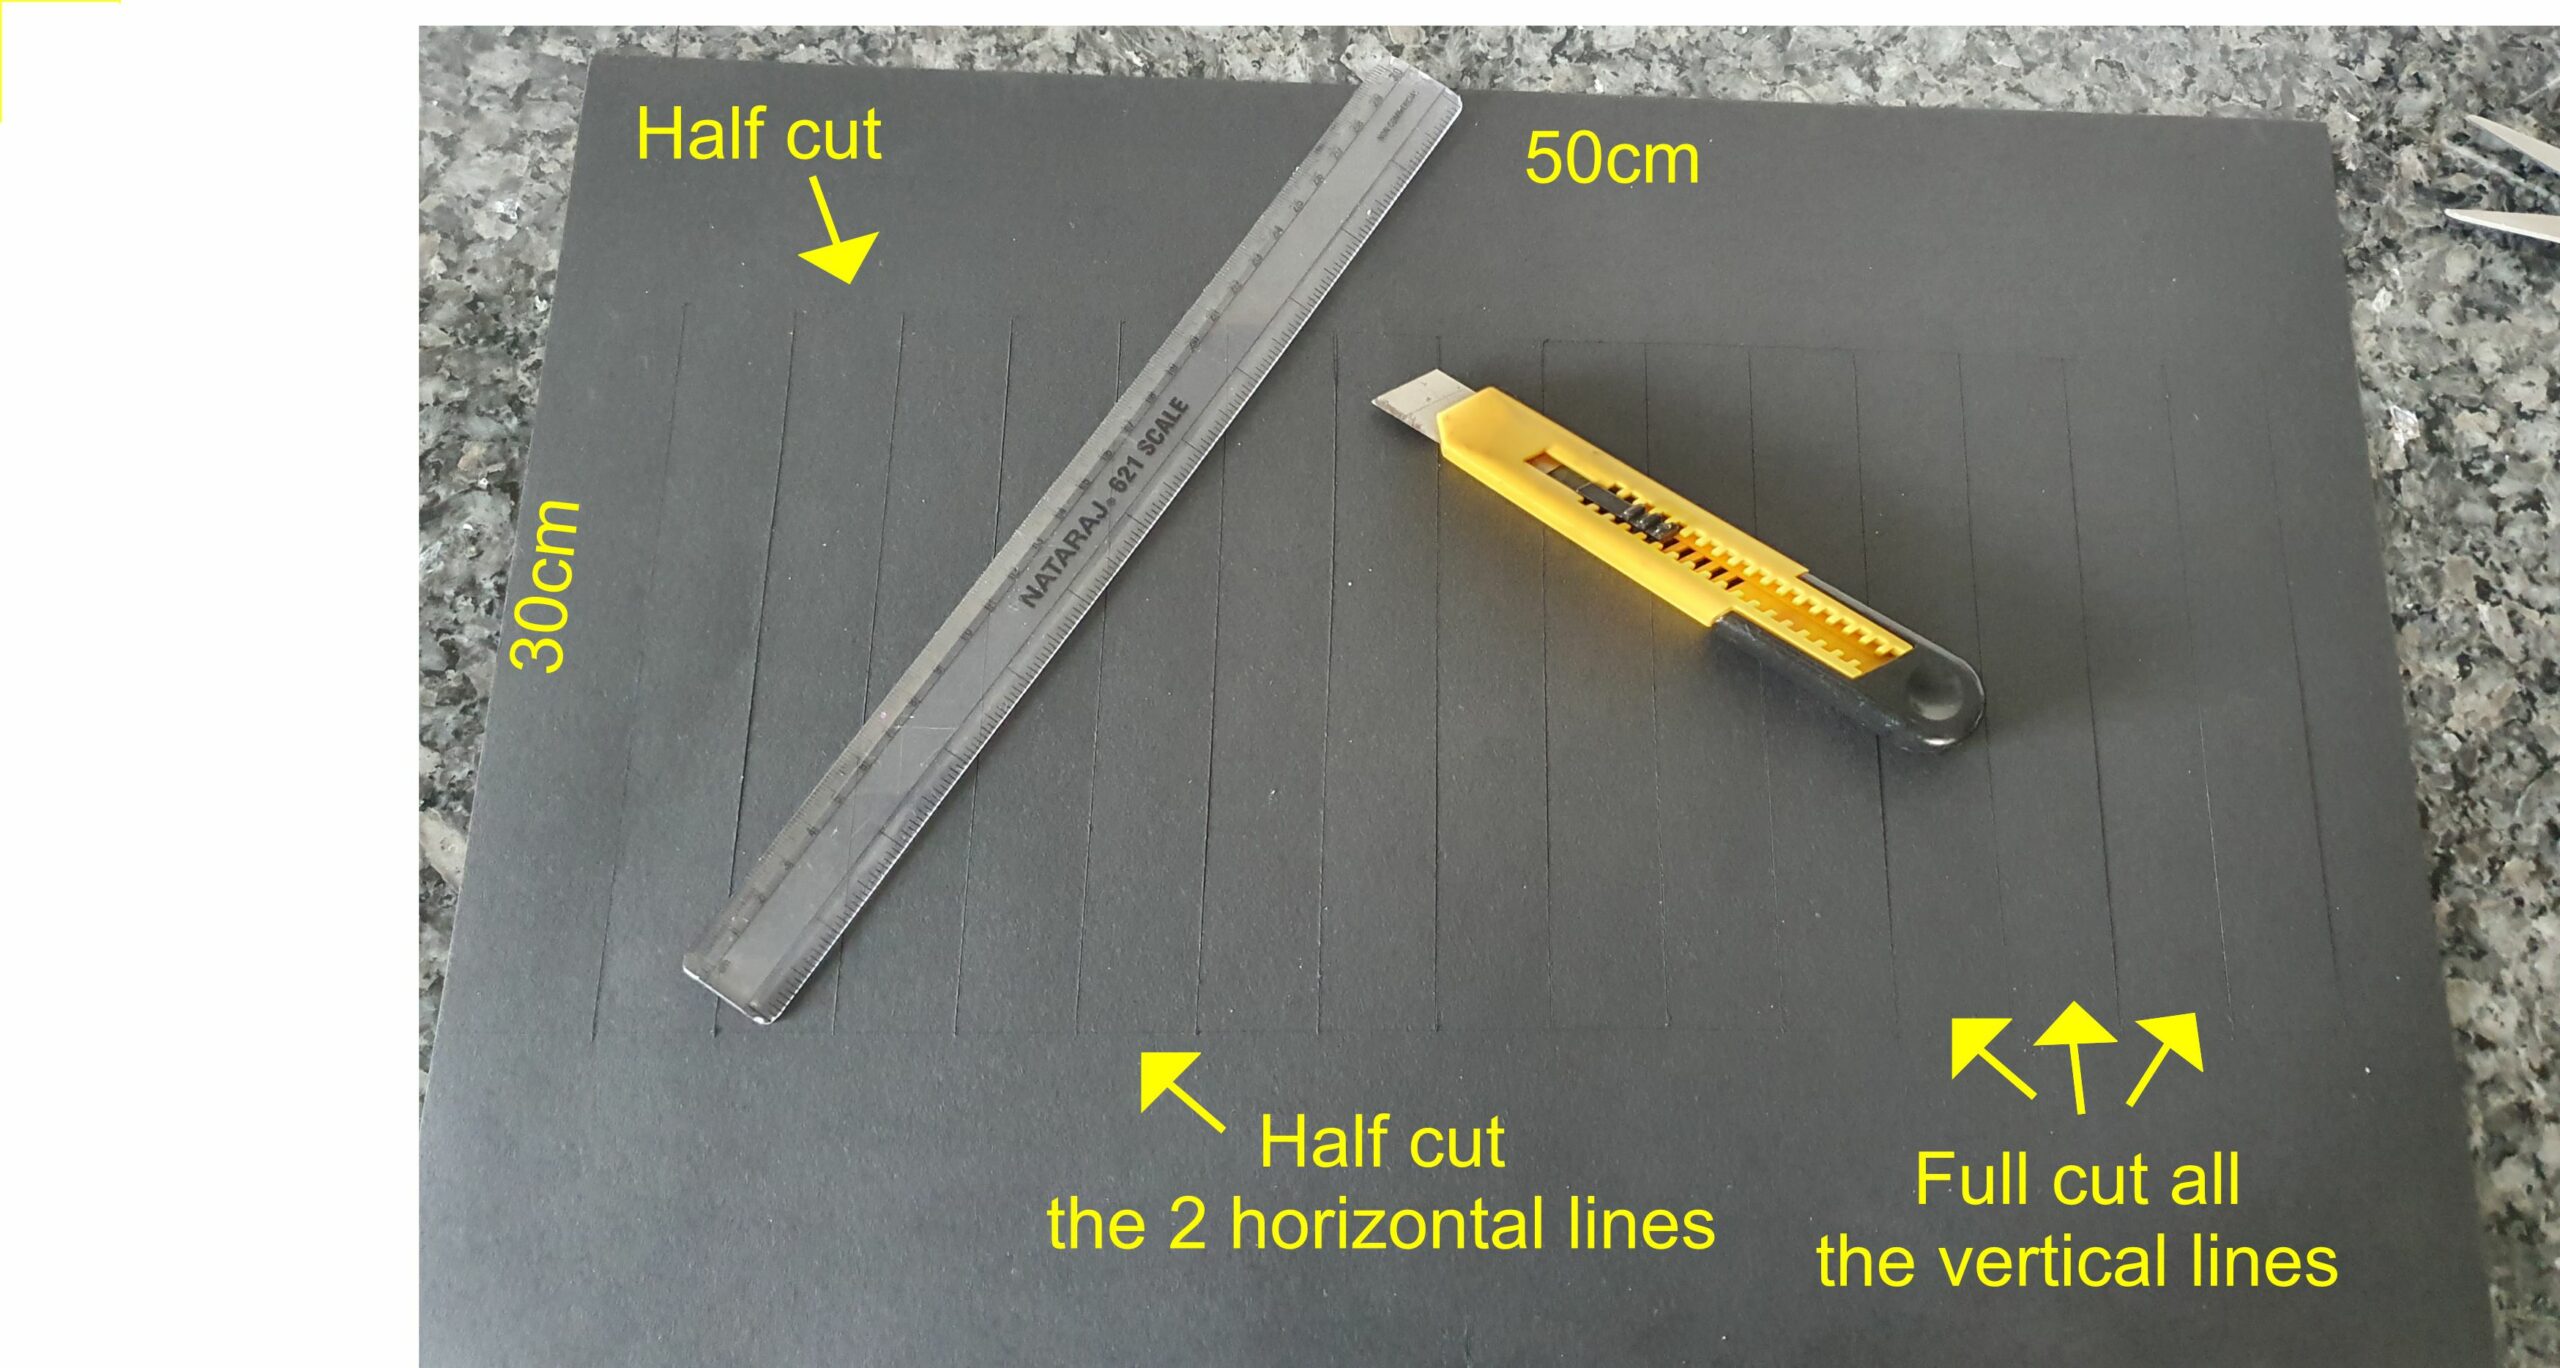

Start by cutting the craft paper like shown above. The two horizontal lines are only half cut so the craft paper can bend. The vertical lines in between are cut fully through. I didn't measure the lines but kept the width of the ruler as the measurement to make it easier. It's approximately 3cm width of each strip.
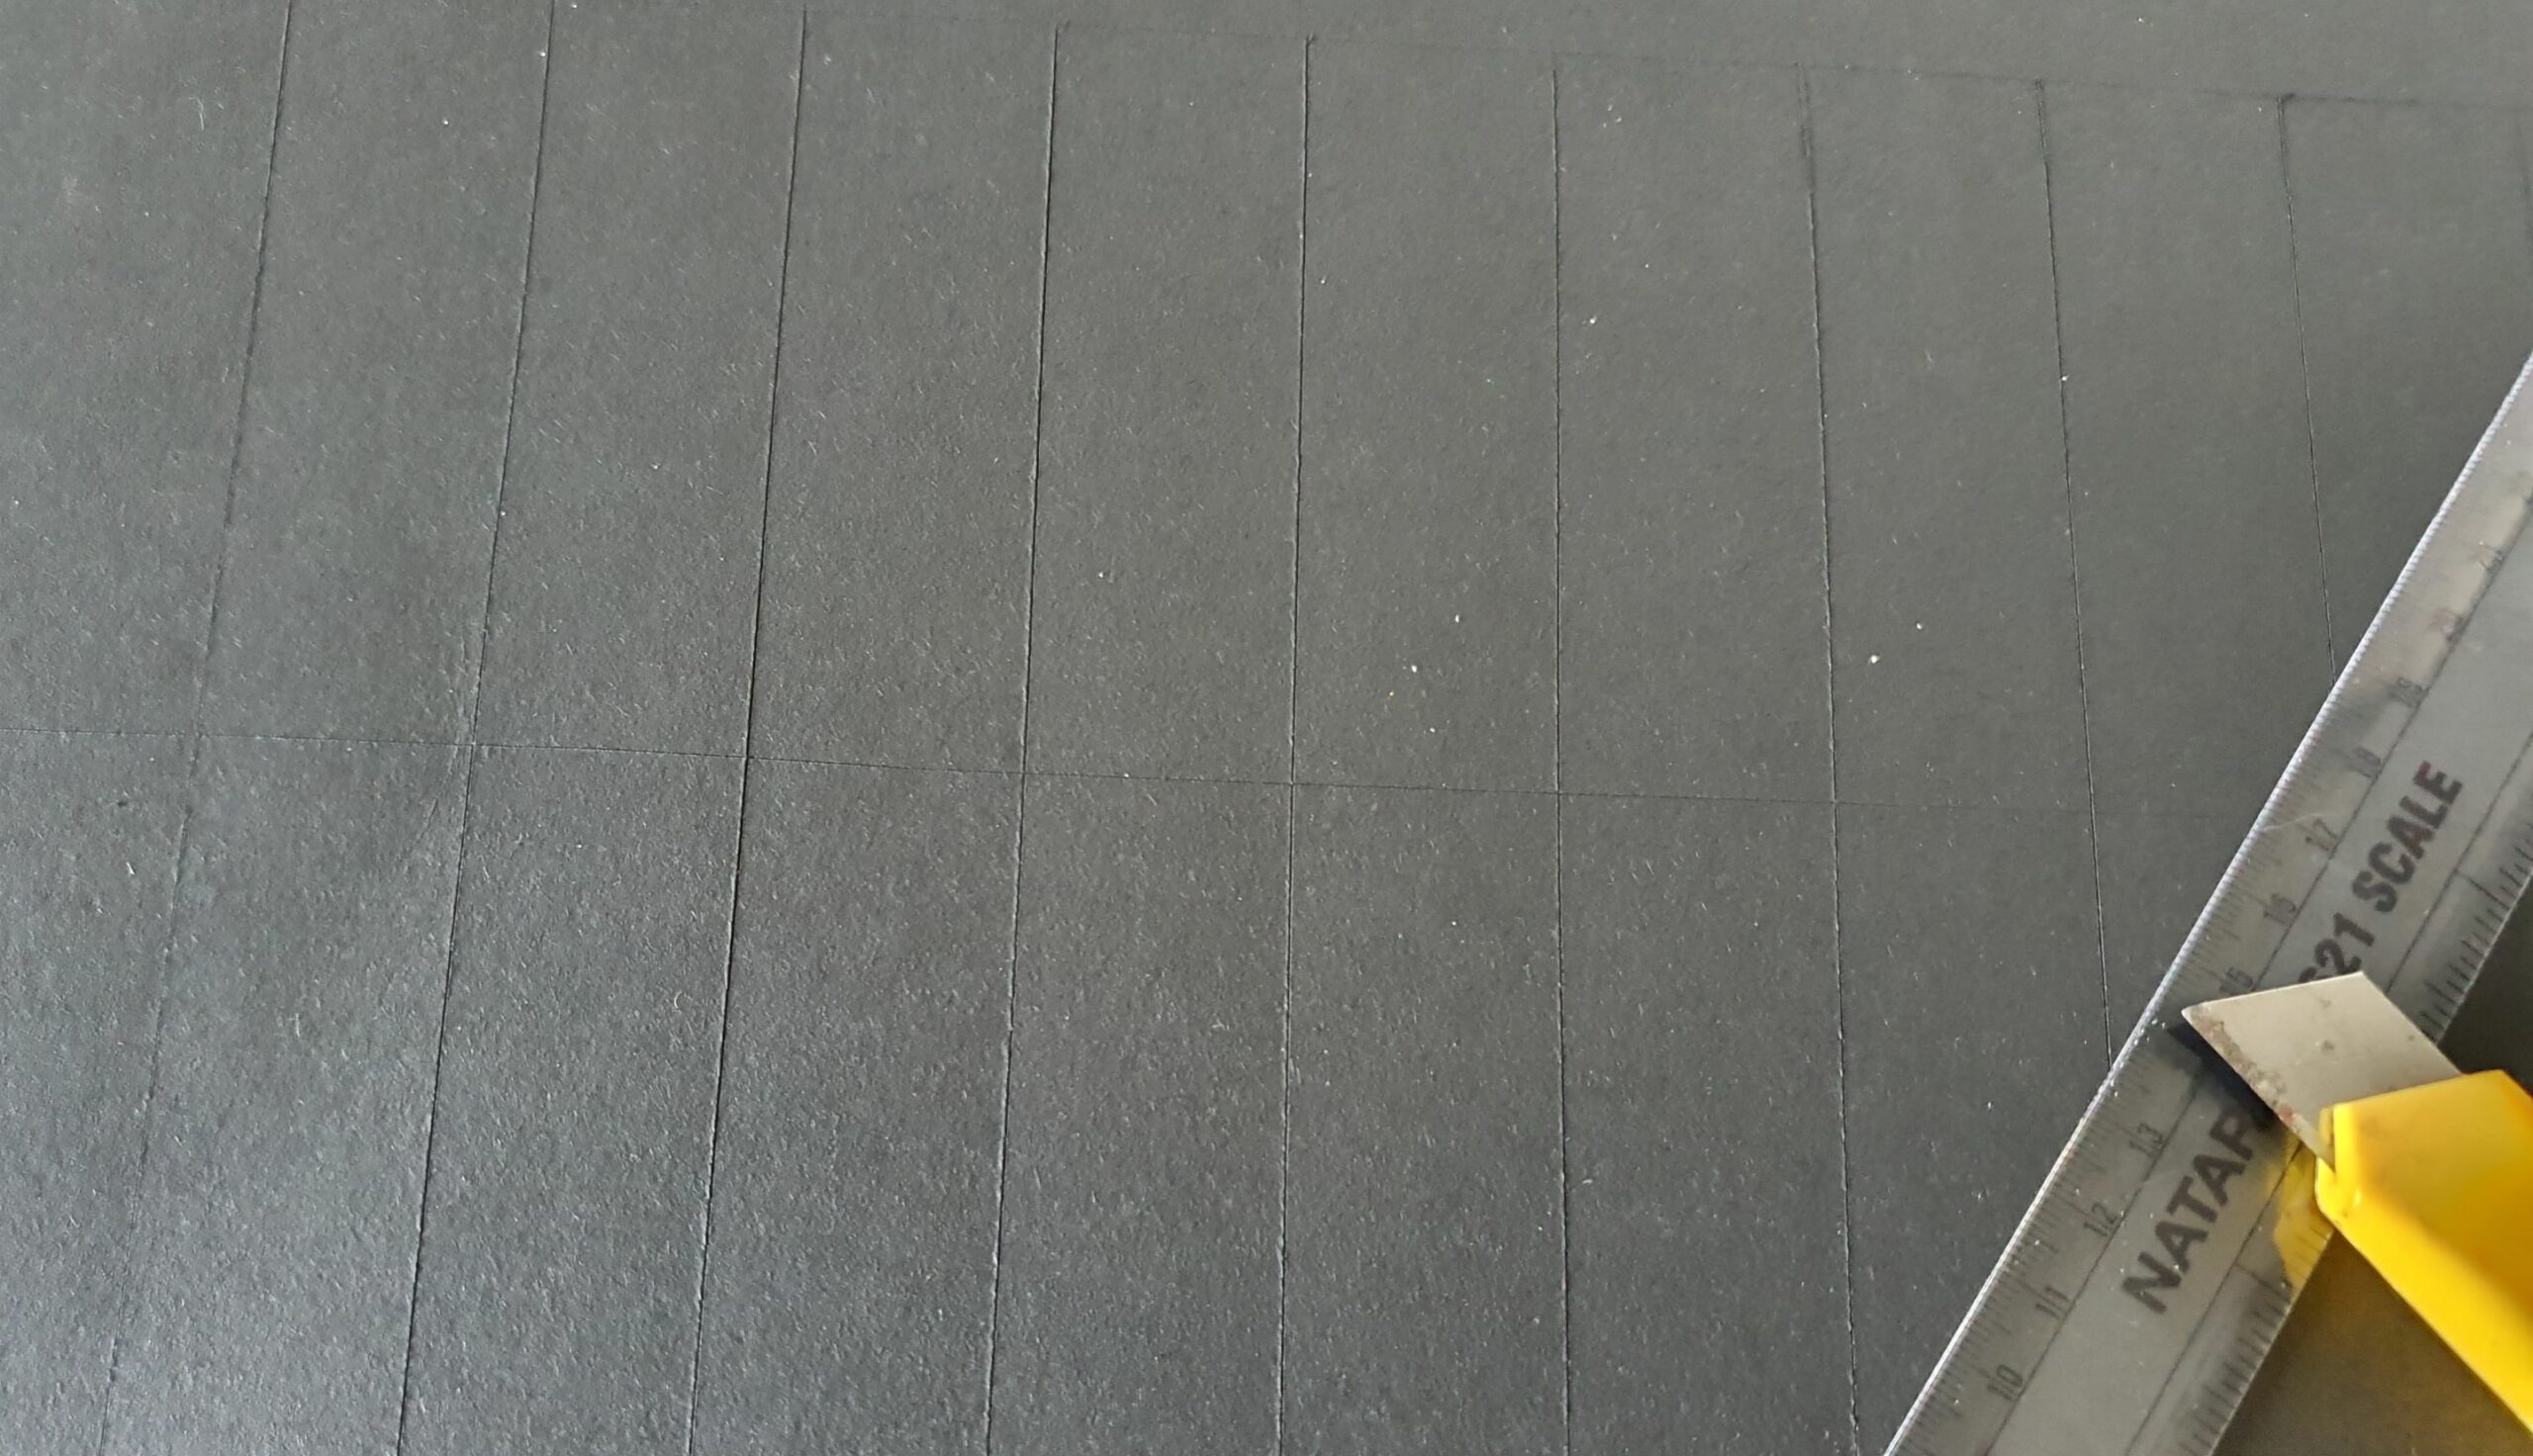

Make another horizontal half cut in the middle of the vertical strips
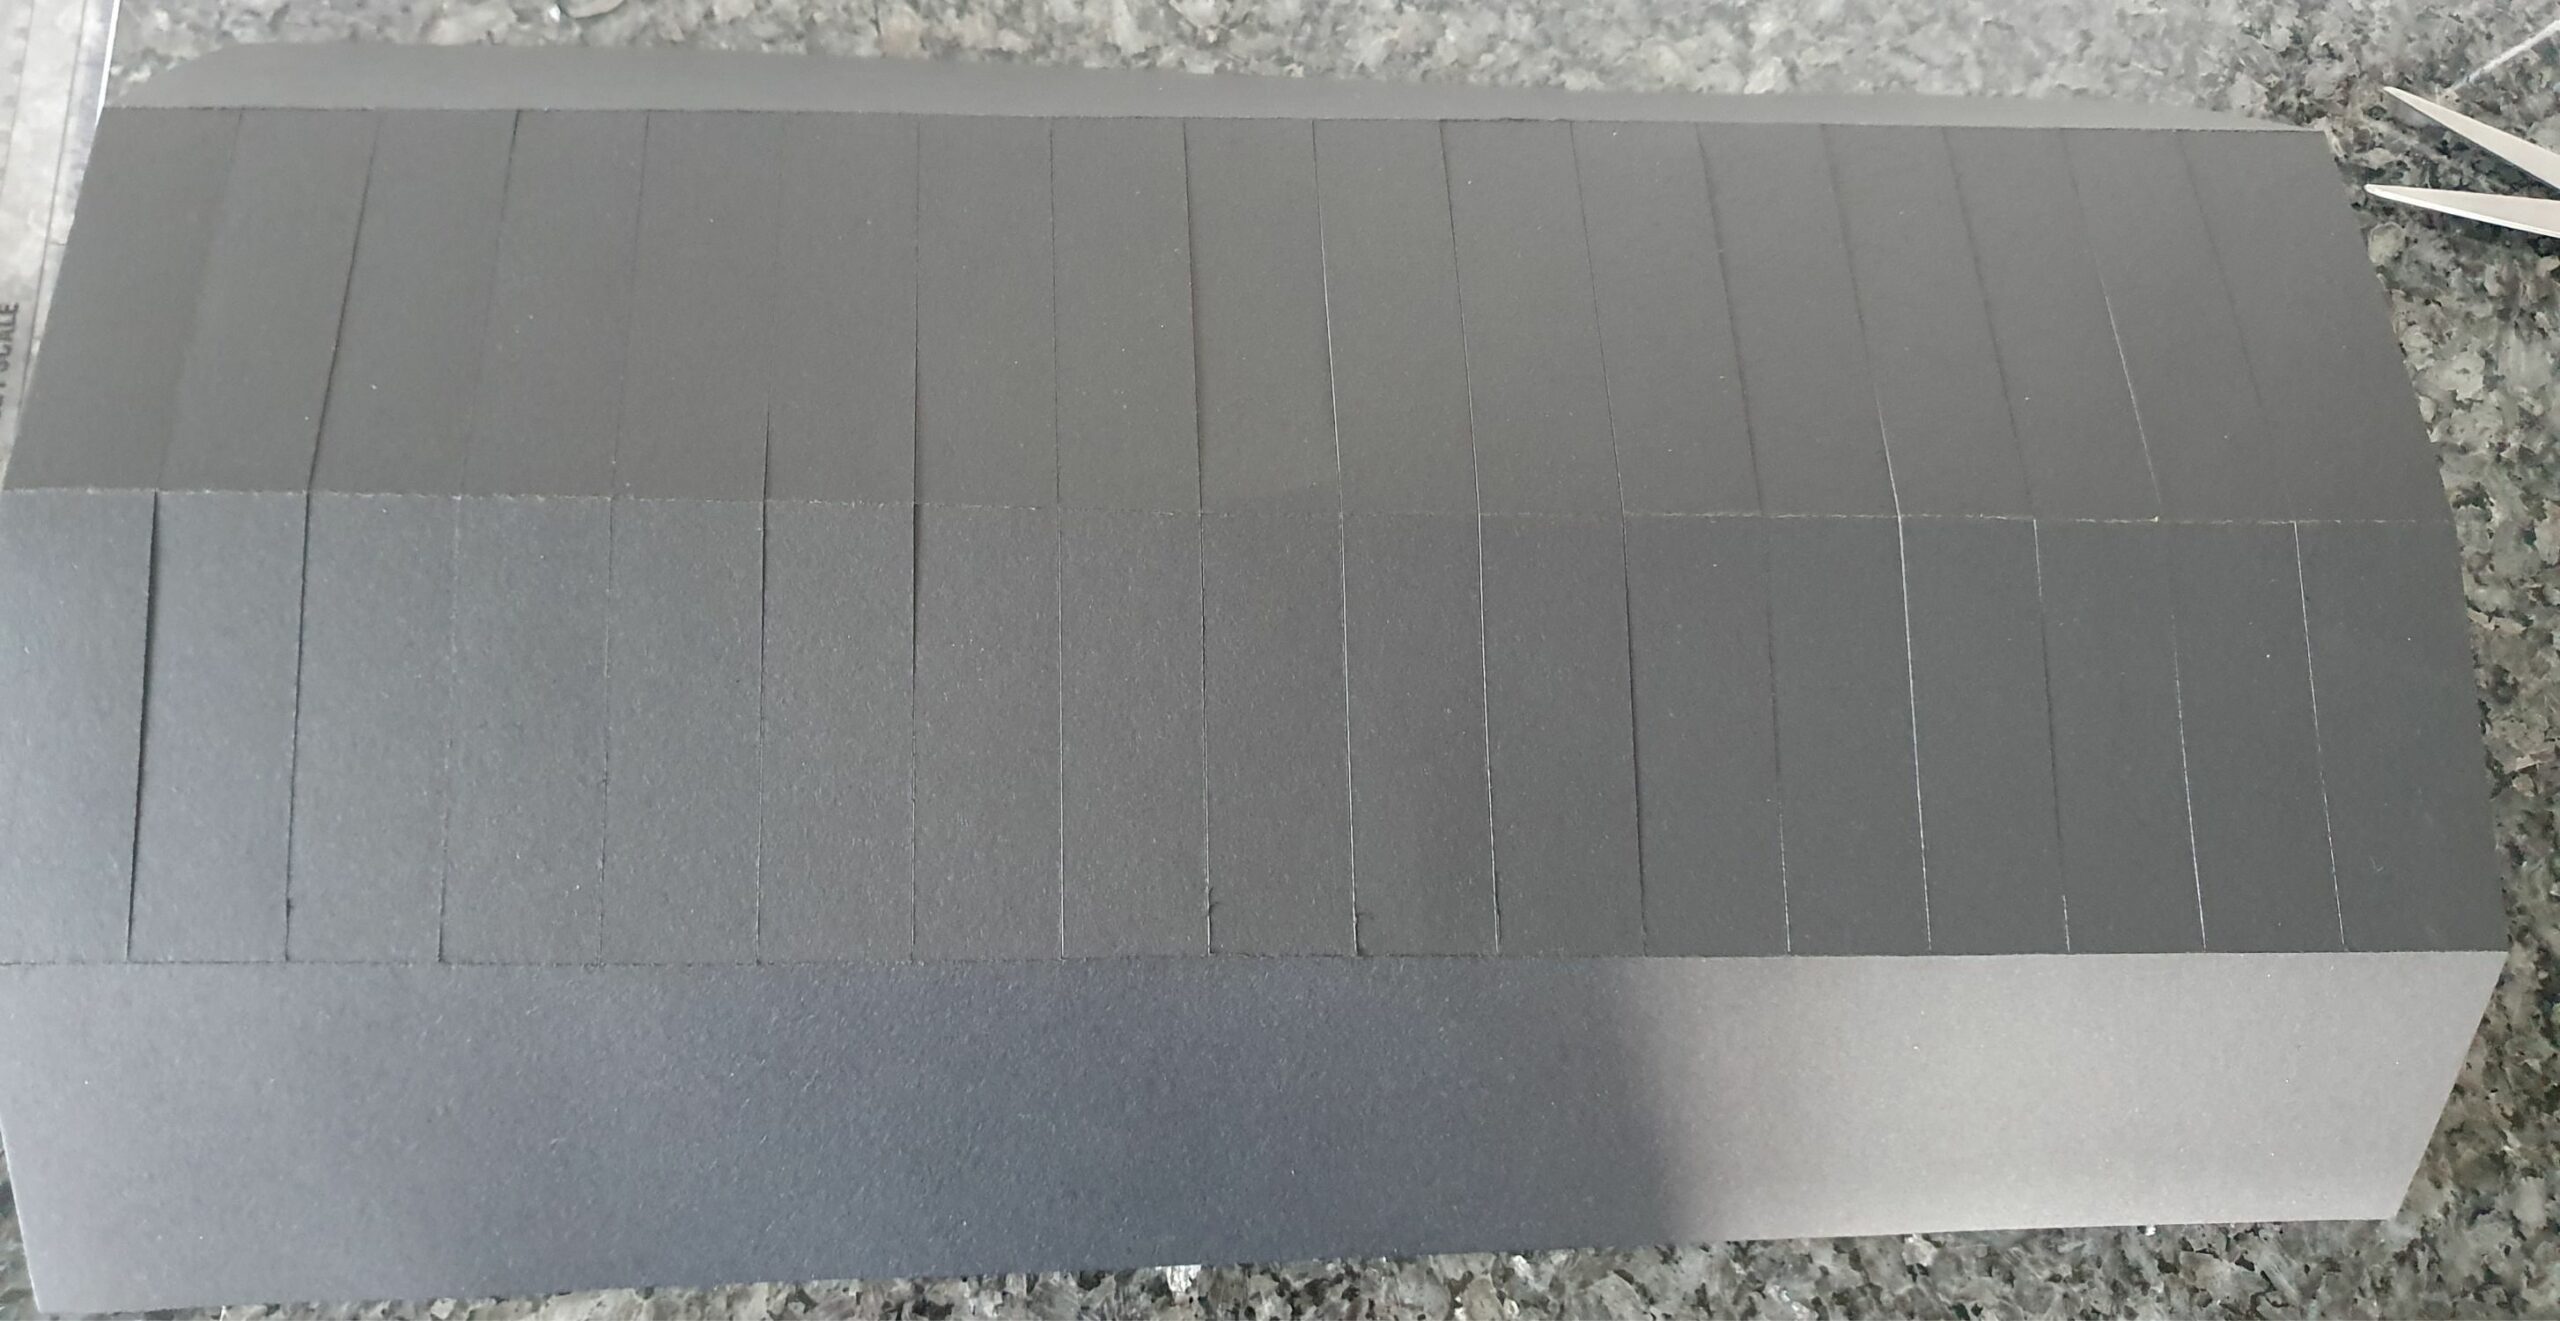

Fold/bend the half cut lines as shown here
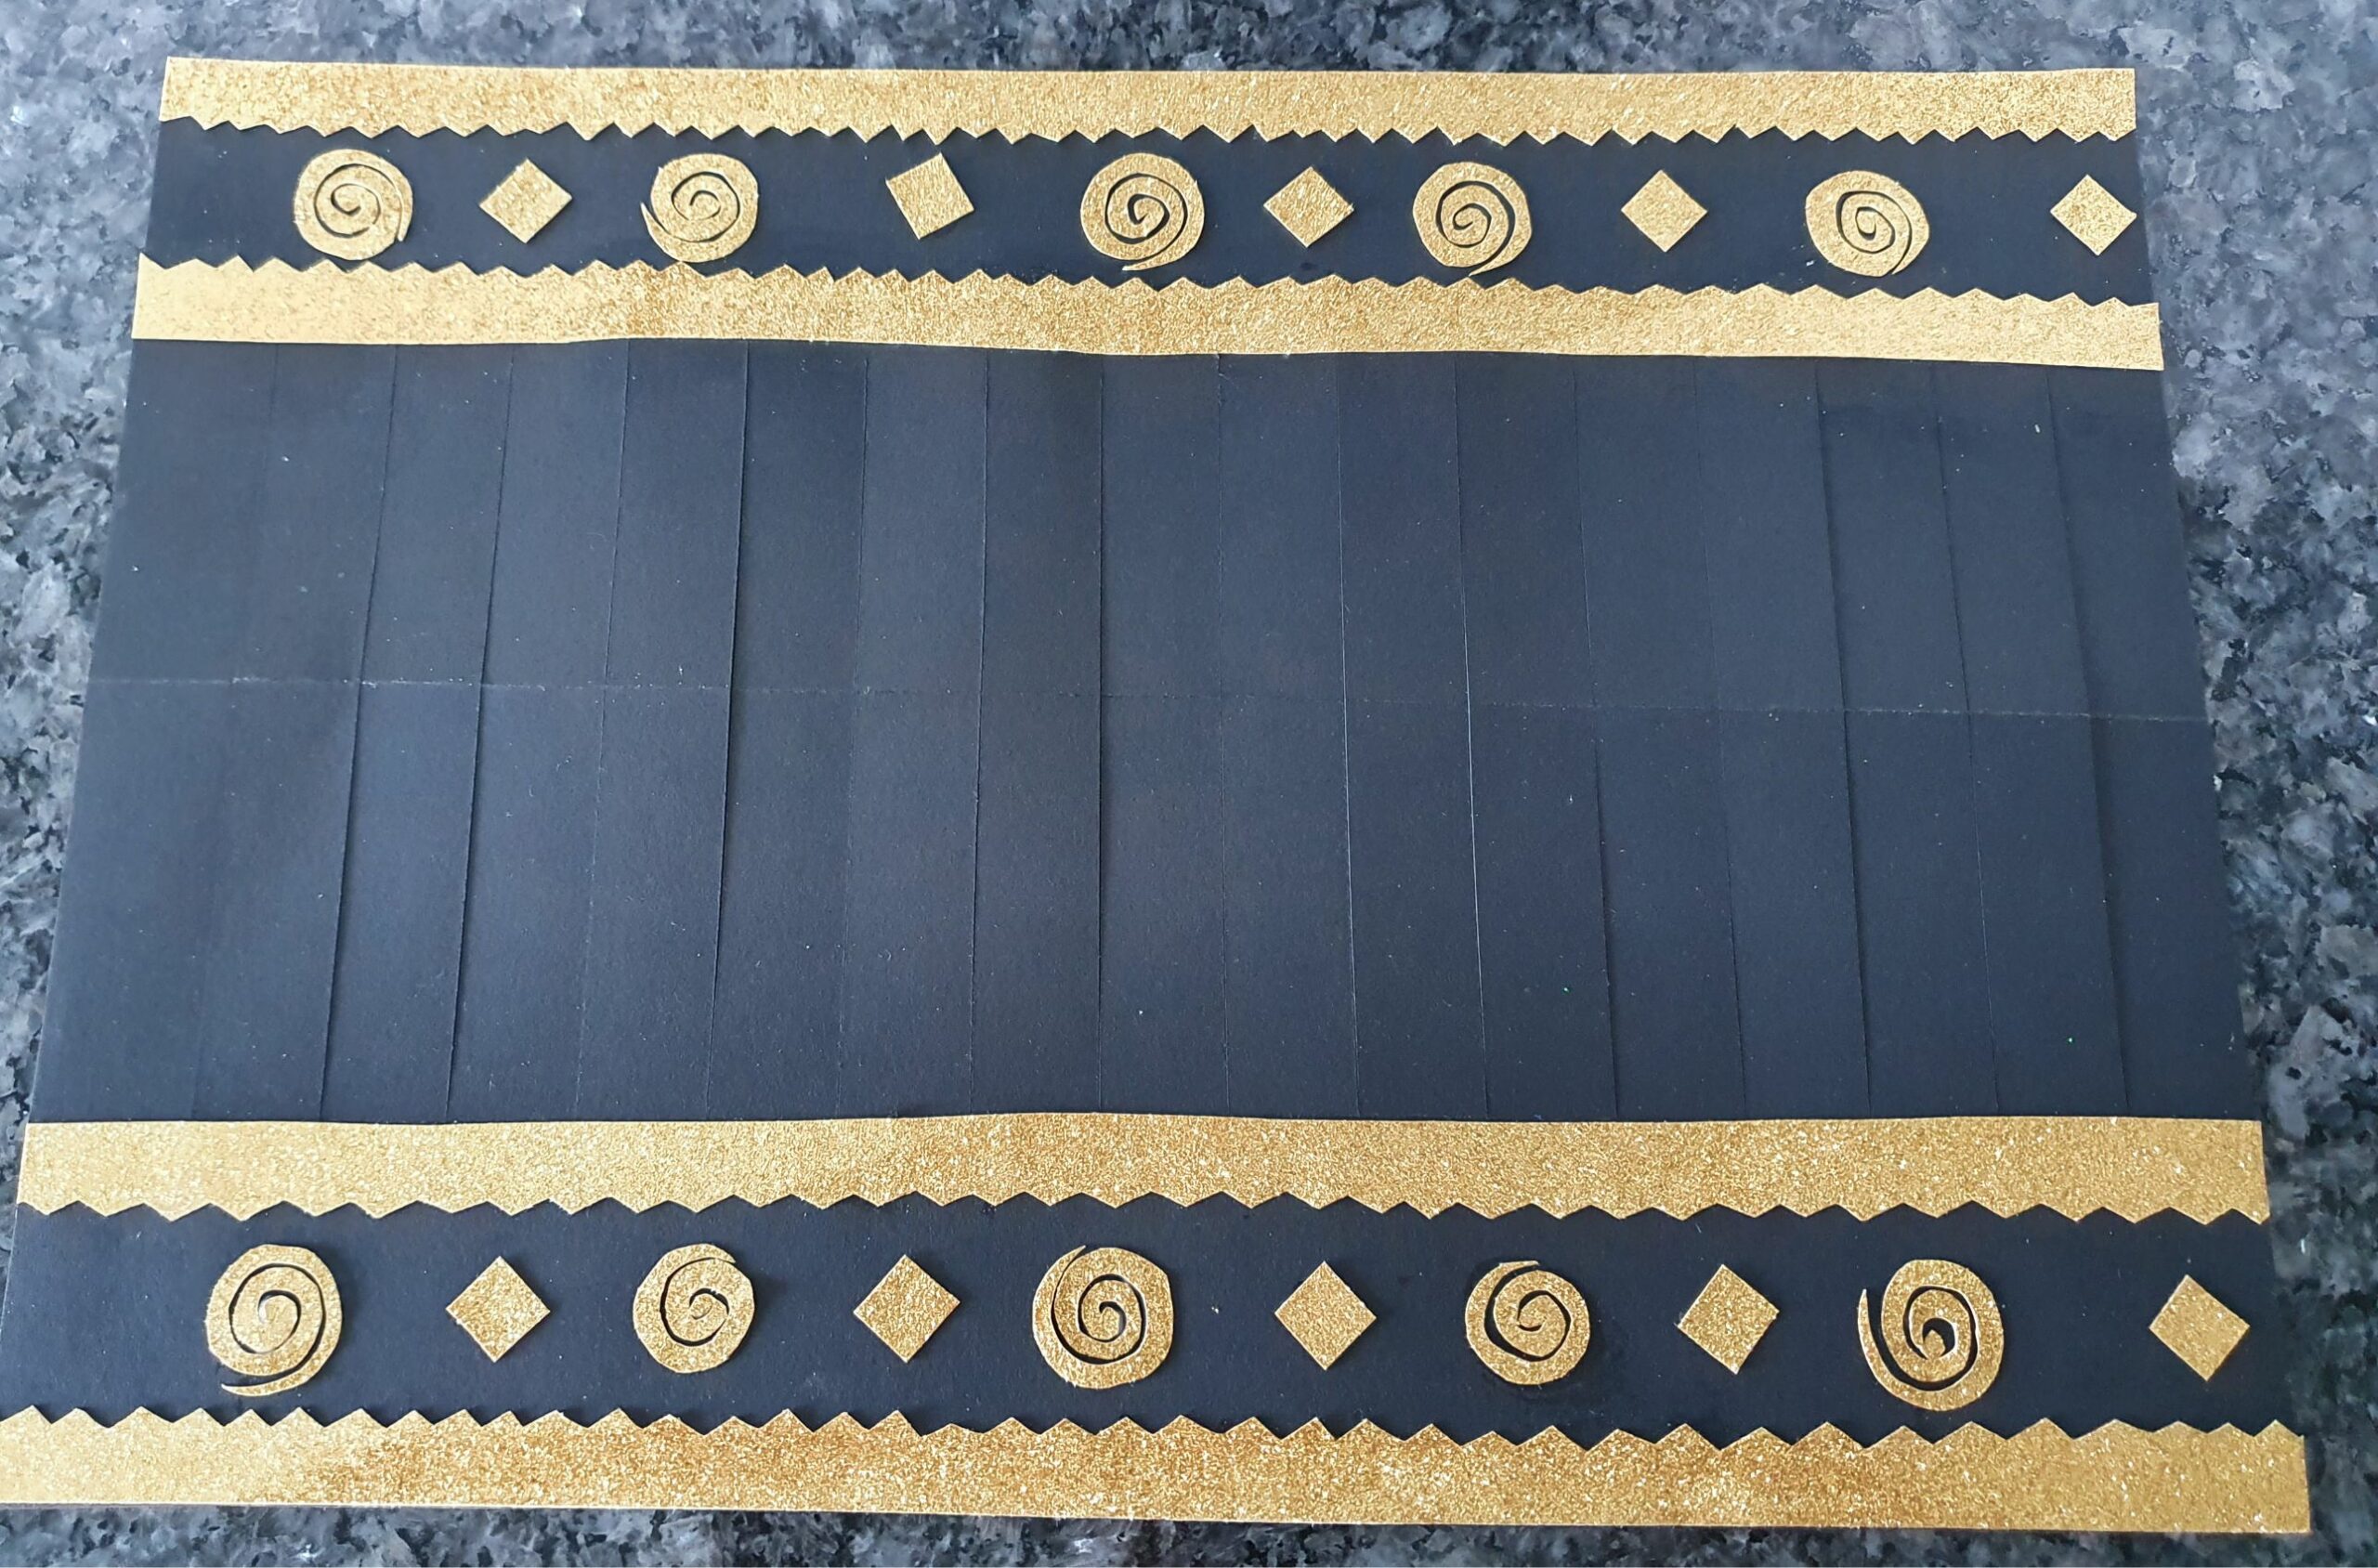

Decorate the lamp as you wish. You can use glitter paper, sequins, glitter glue, foam pieces or even crayons. It's up to you and your kids (and usually what you have lying around in the craft box too :-) ) Let the decorations dry for 1-2 hours.
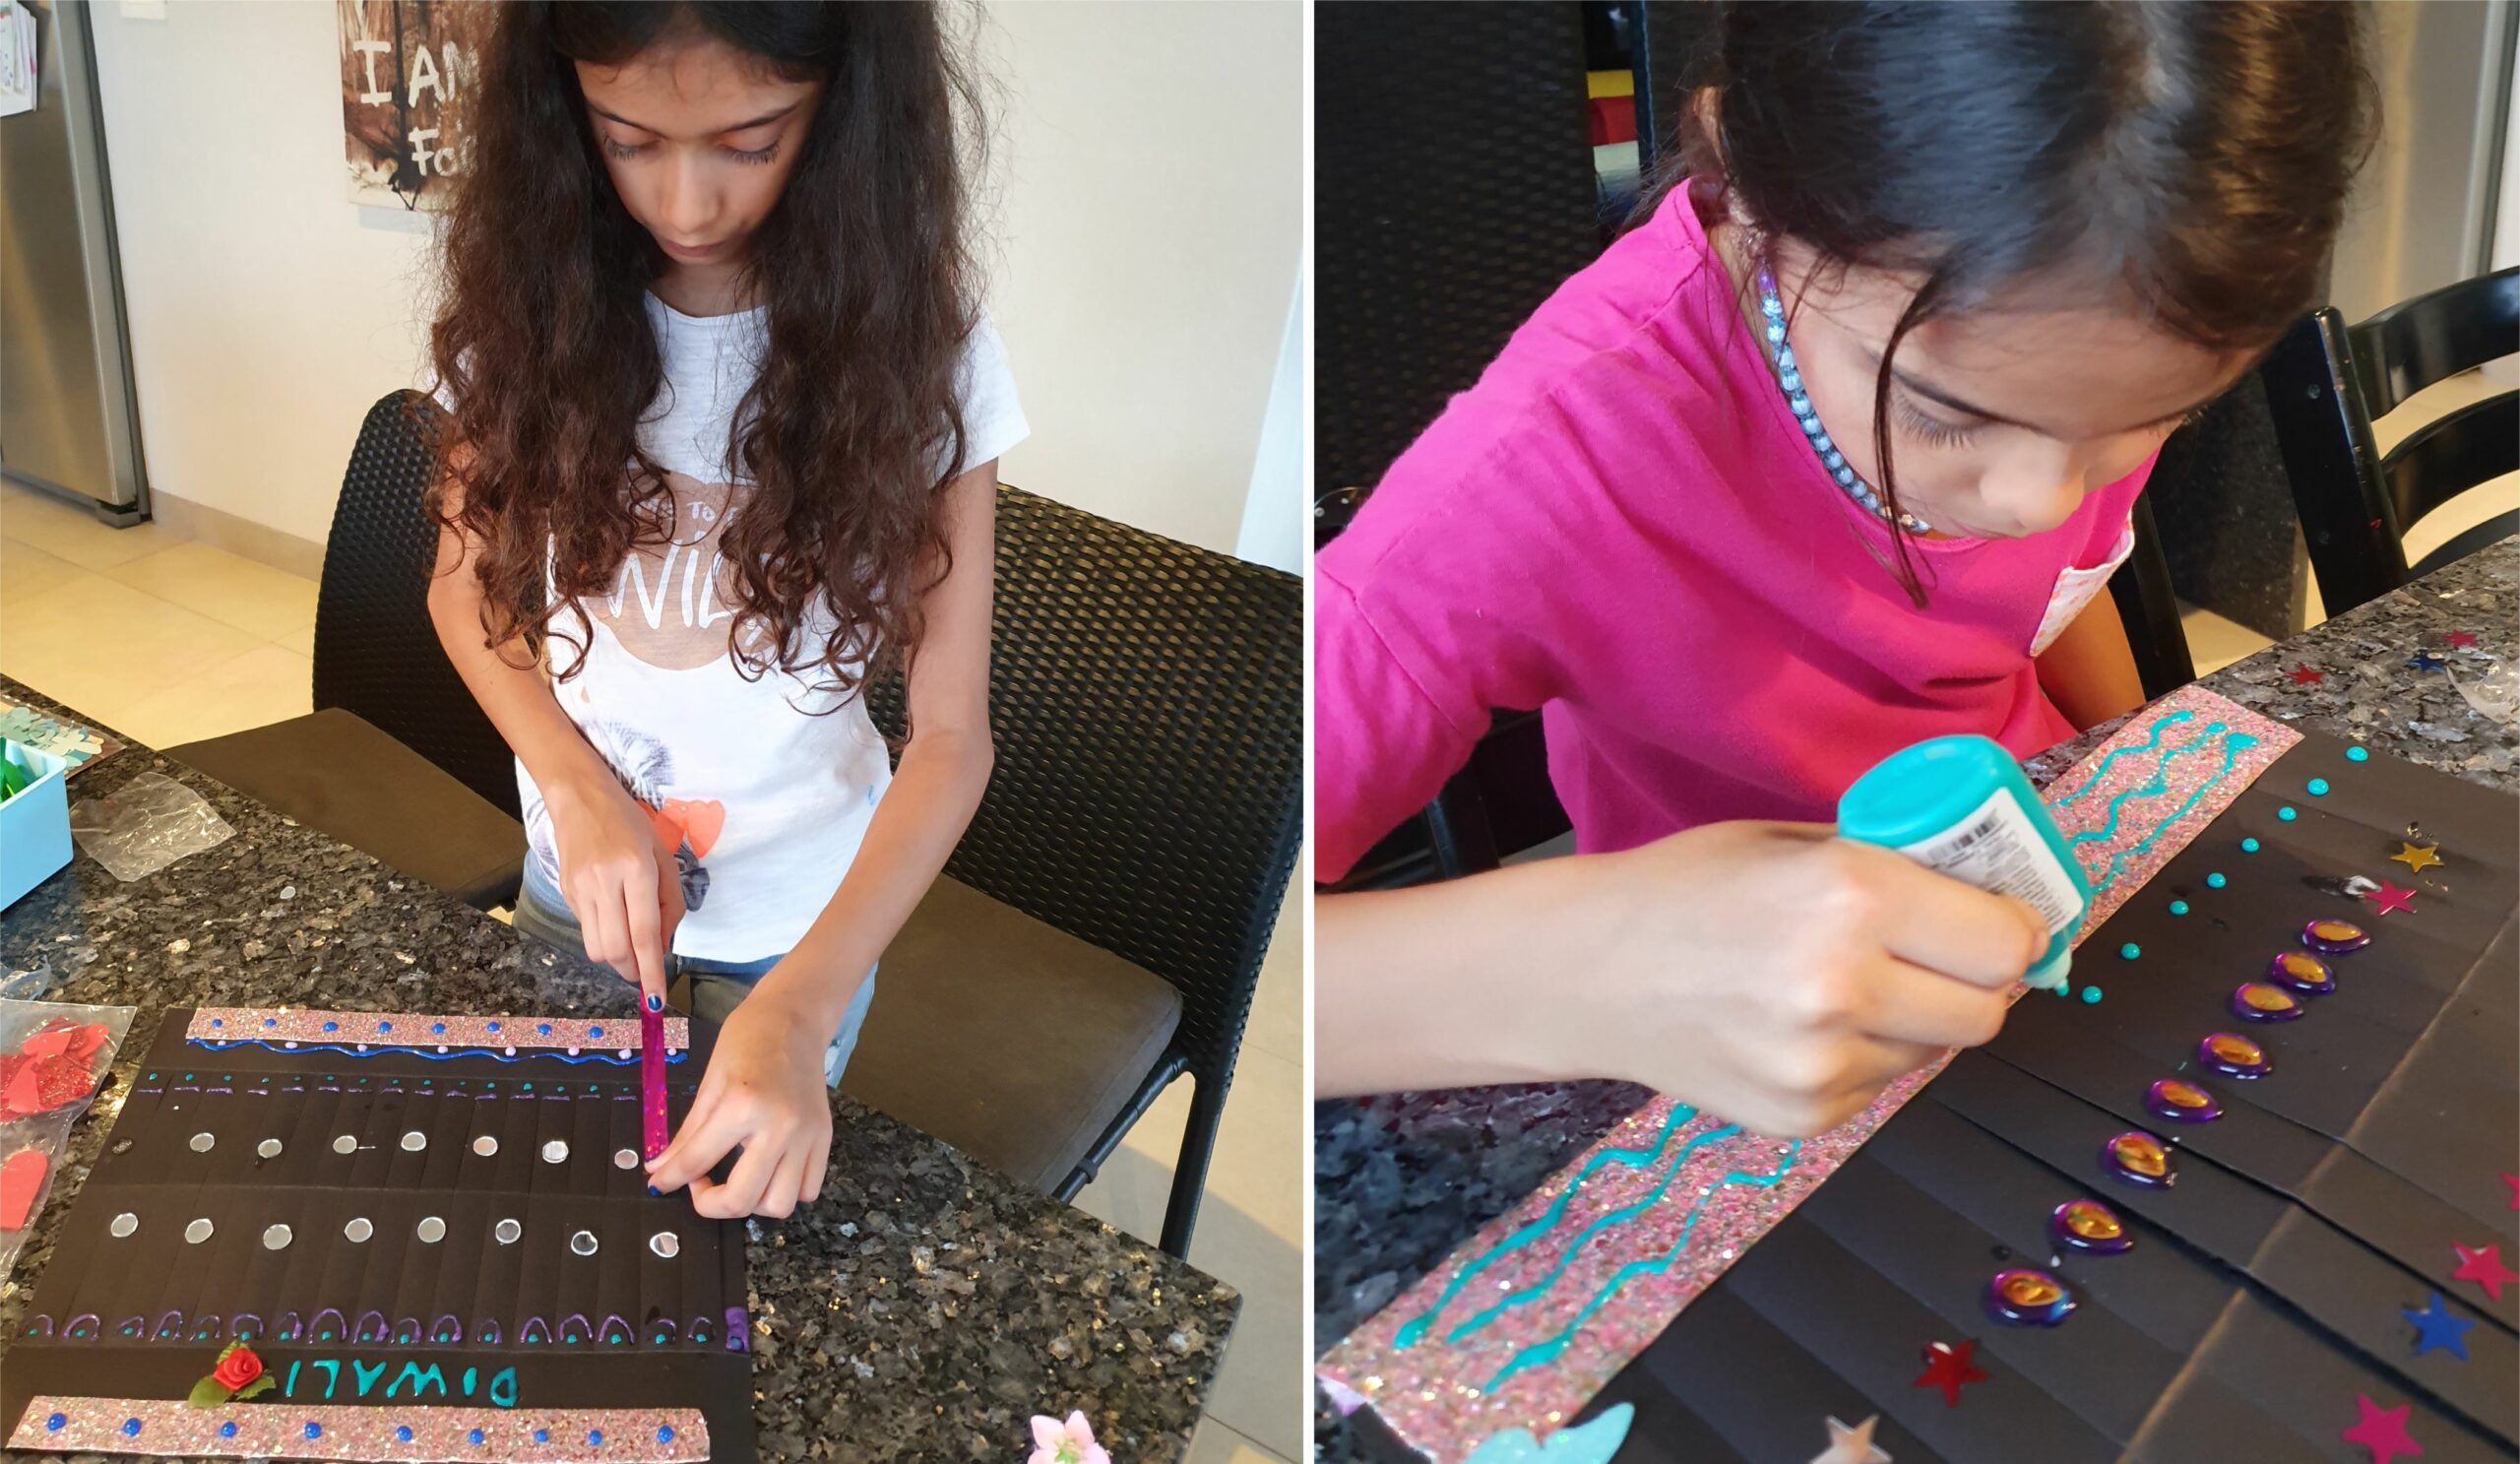

I can't say this enough, there is no right or wrong for decorating Diwali lamps! Sometimes they may look a bit messy when the kids are decorating them (especially if they like to use every single decorative material available. Ha ha) but once they are finished and the light hits them, they are always beautiful.
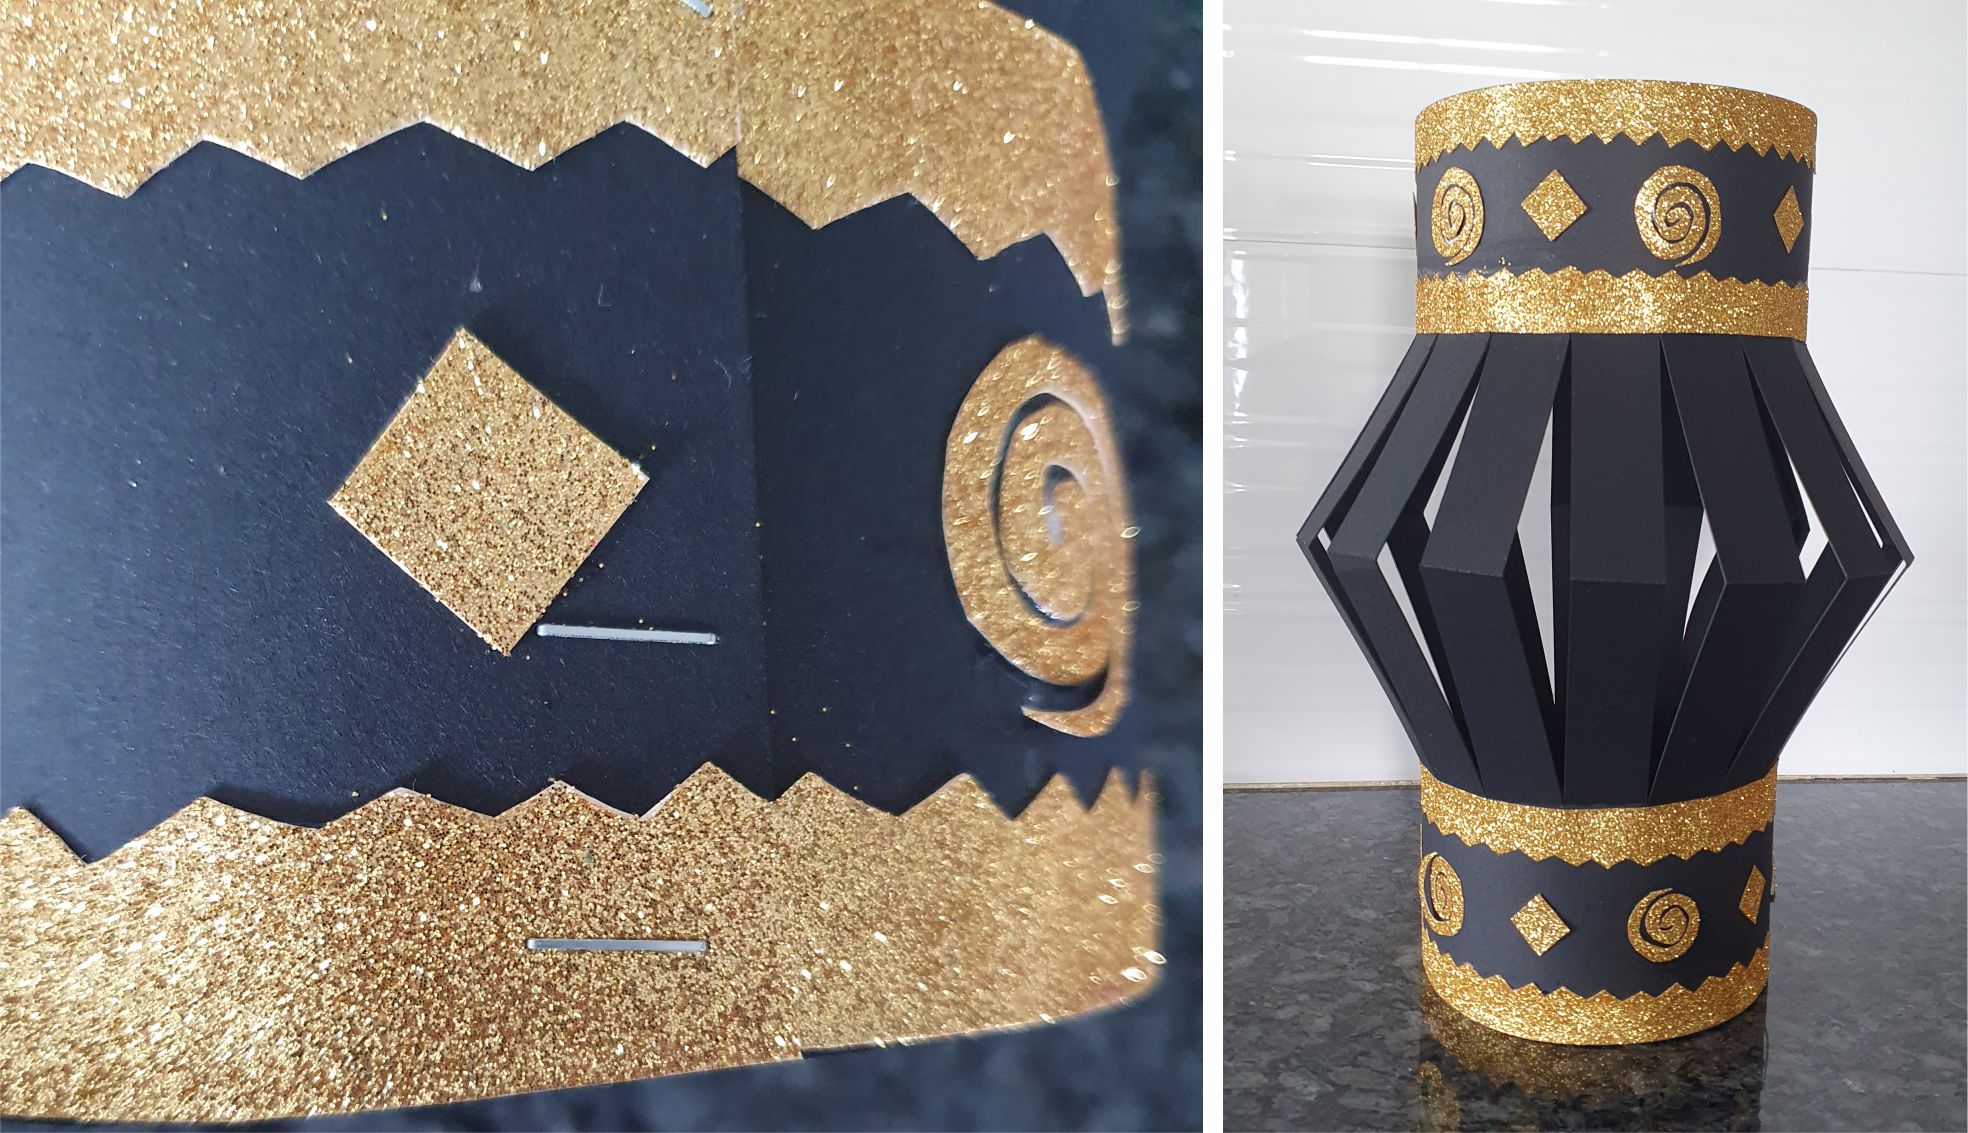

Staple the lamp together with a few staples on the top and bottom of the lamp
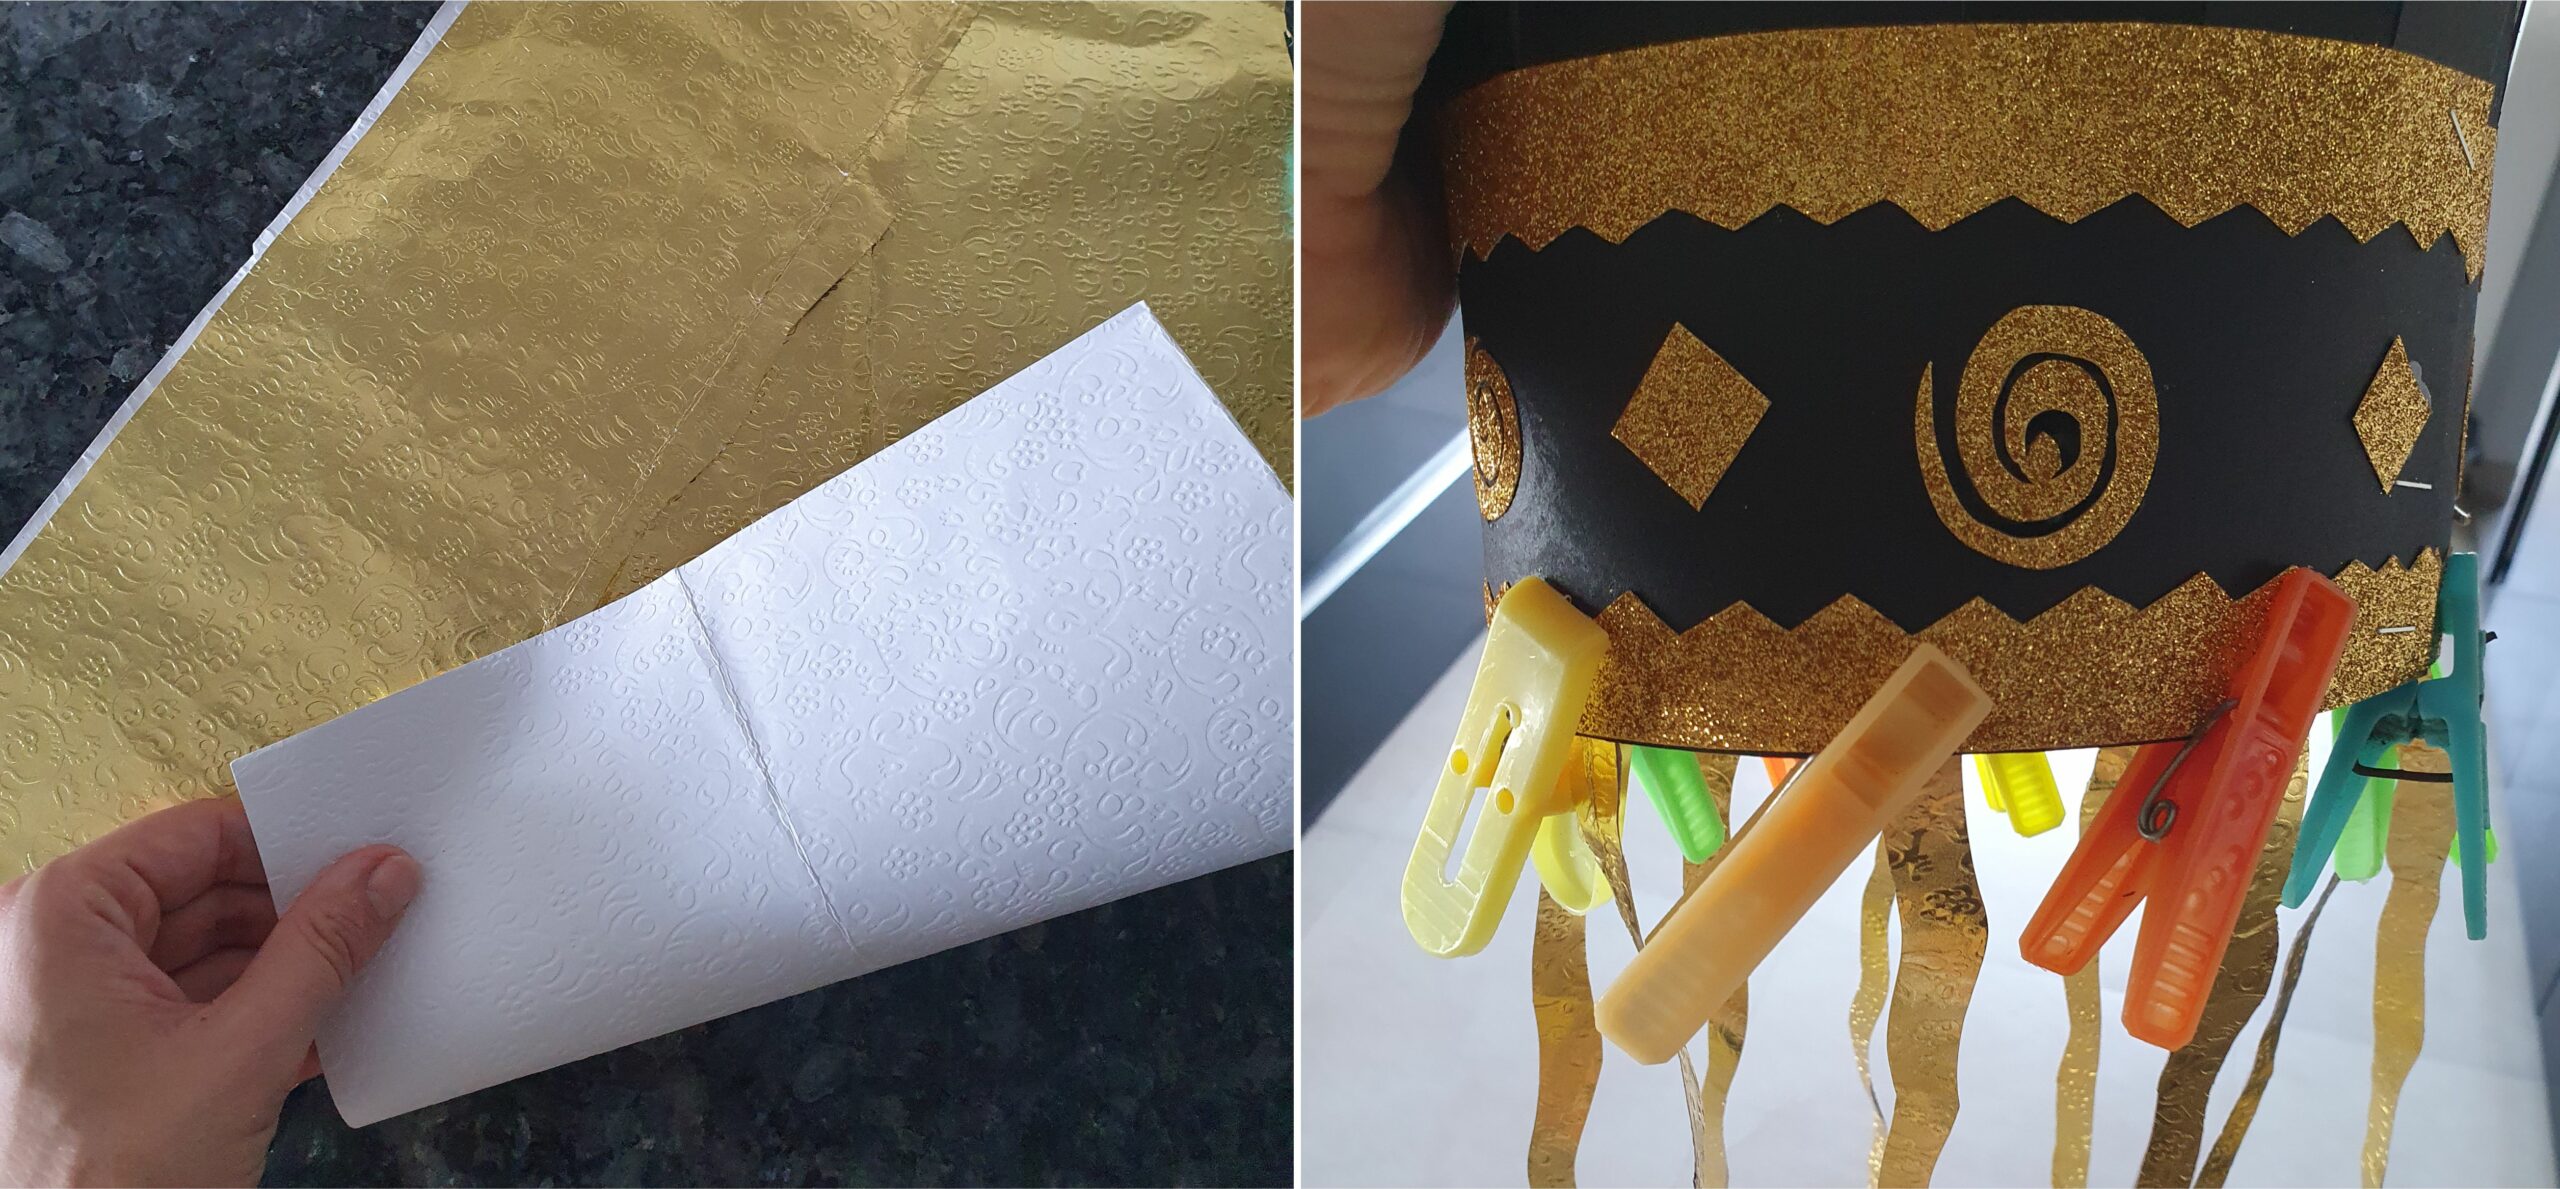

If you are using foil paper, I recommend gluing two sides together first so they are the same colour on both sides. Then cut the foil paper or tissue paper into long thing strips and glue them on. You can make them straight, wavy or zig zags.
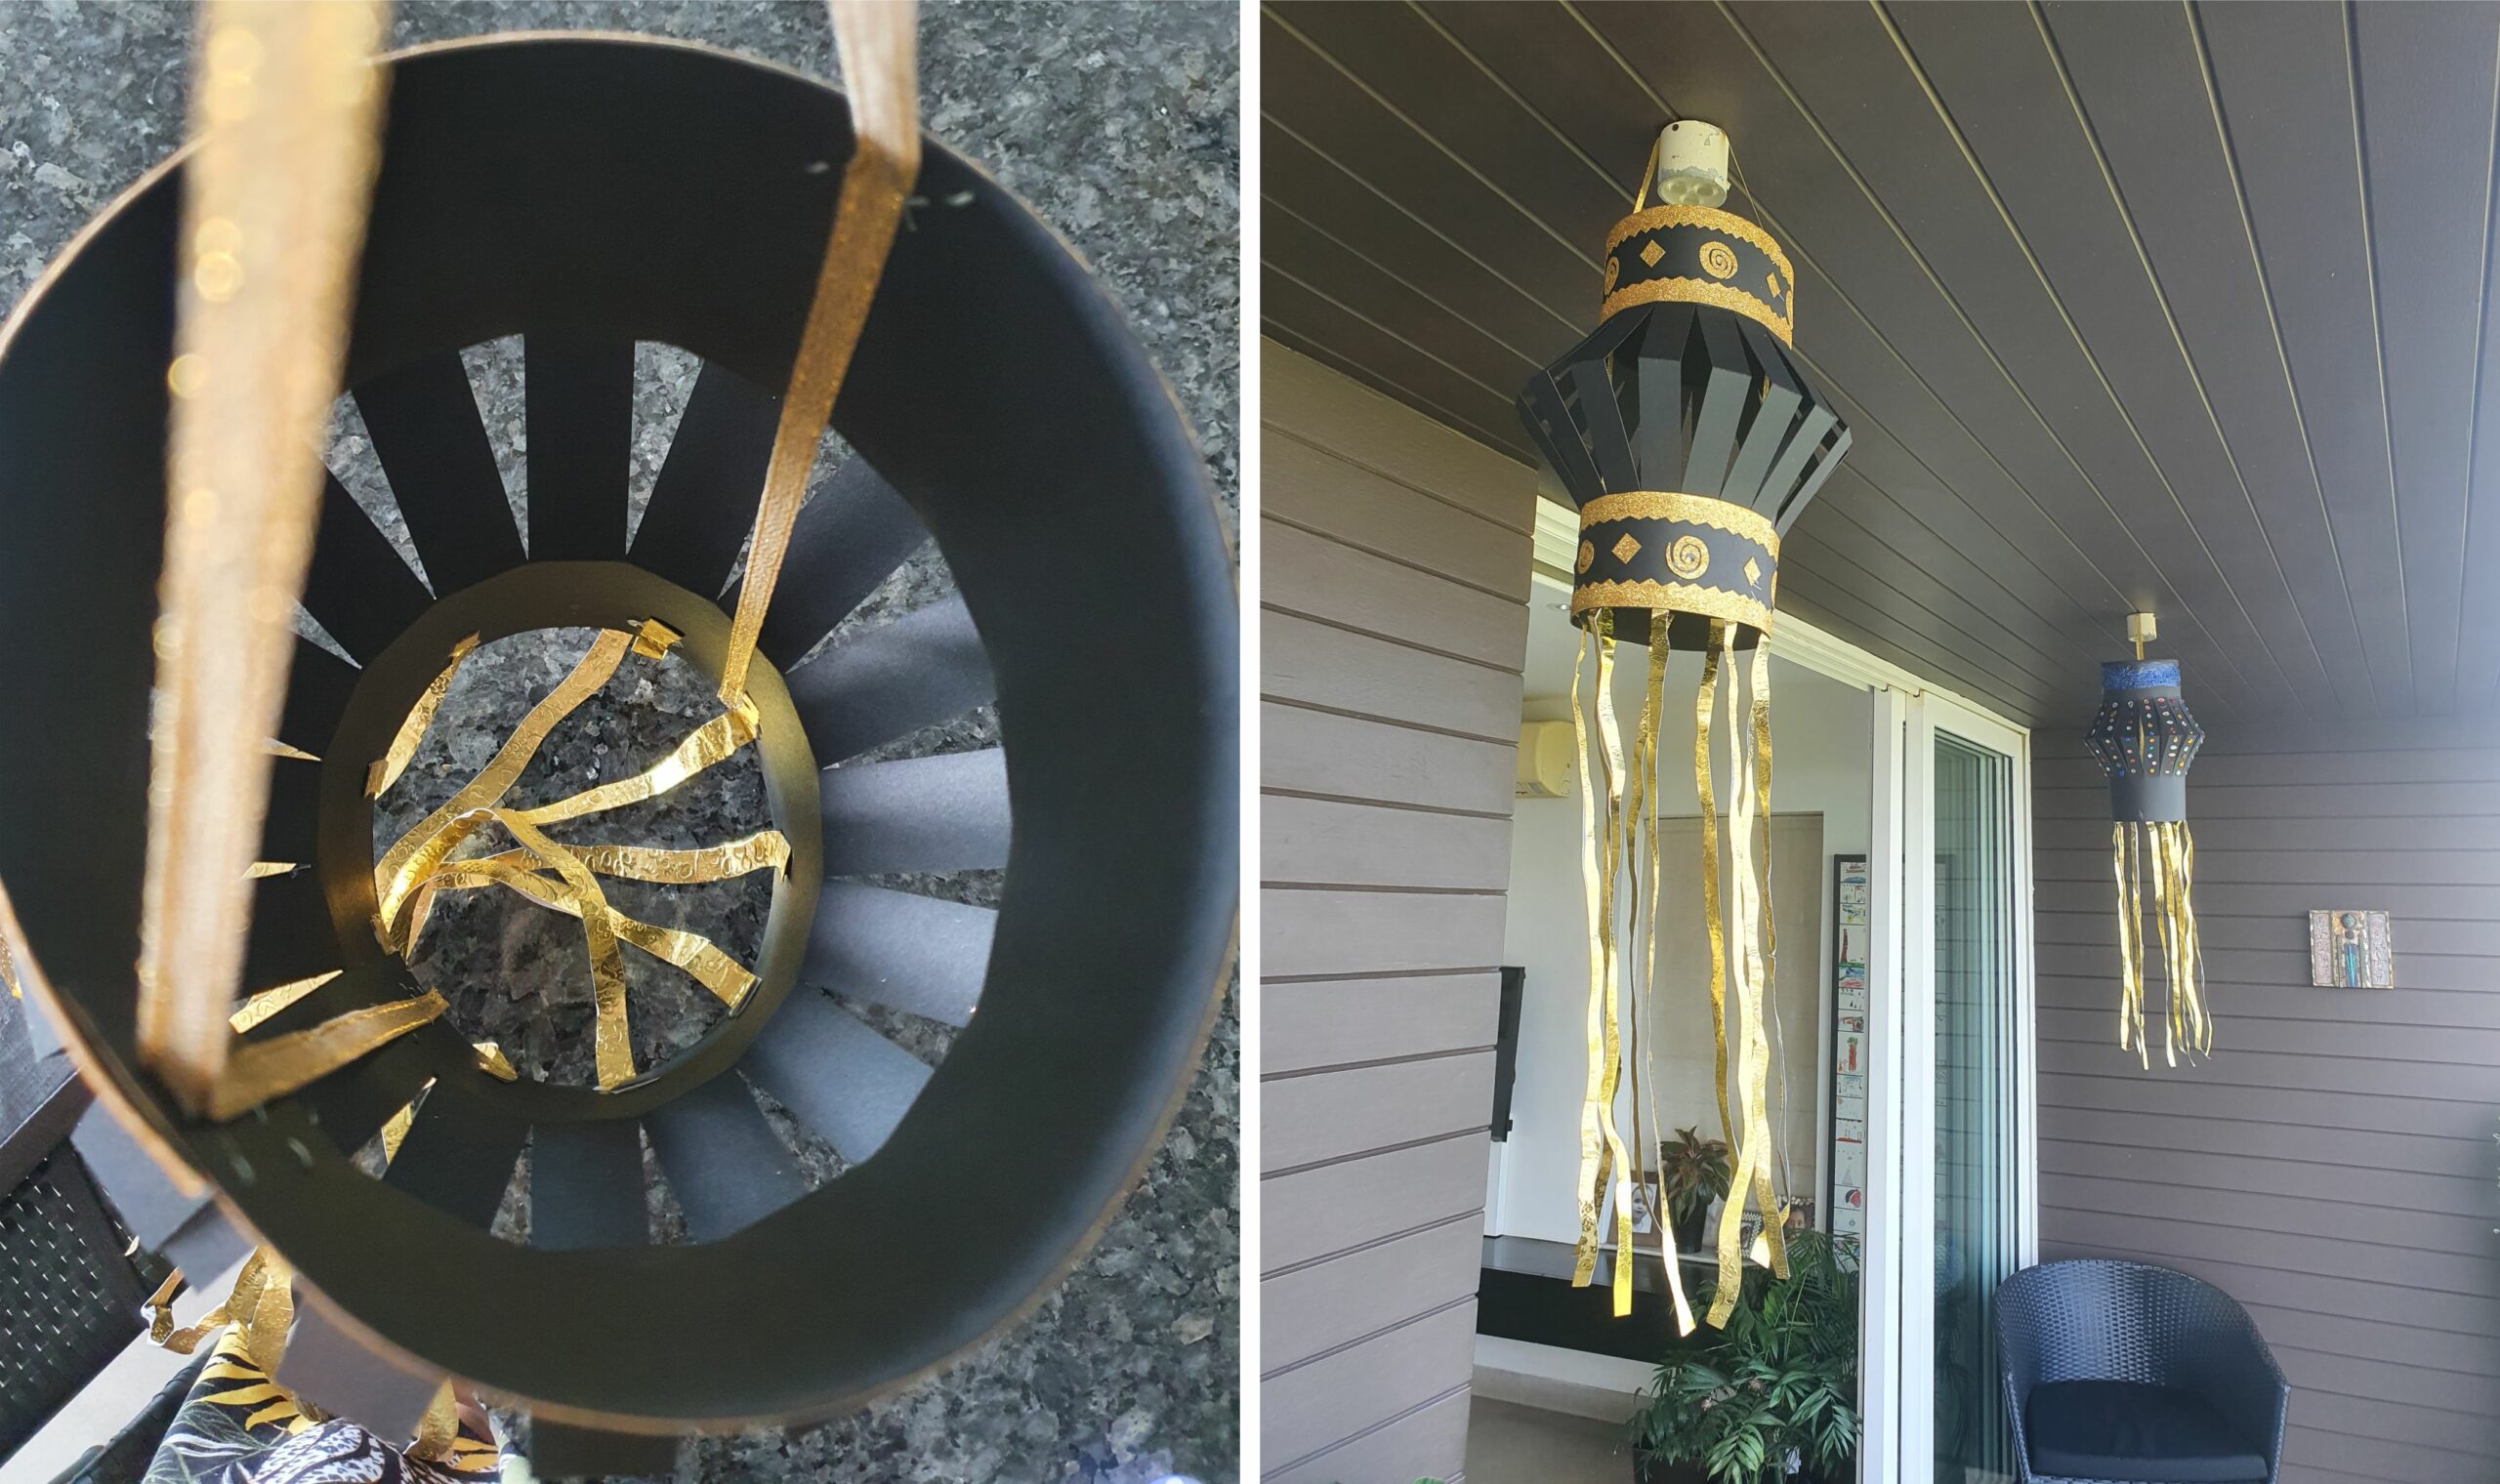

Take about 50-60cm of ribbon (depending on the size of your lamp) and attach the two ends on the inside at the bottom of the lamp. Then pull a little and attach the top part of the ribbon on the inside to the top of the lamp. Leave a loop on top for the lamp to hang from. This way you make sure the middle part of the lamp comes out and stays out even when gravity takes over once it hangs. Otherwise it will quickly close up again and the light will not shine through the slits.
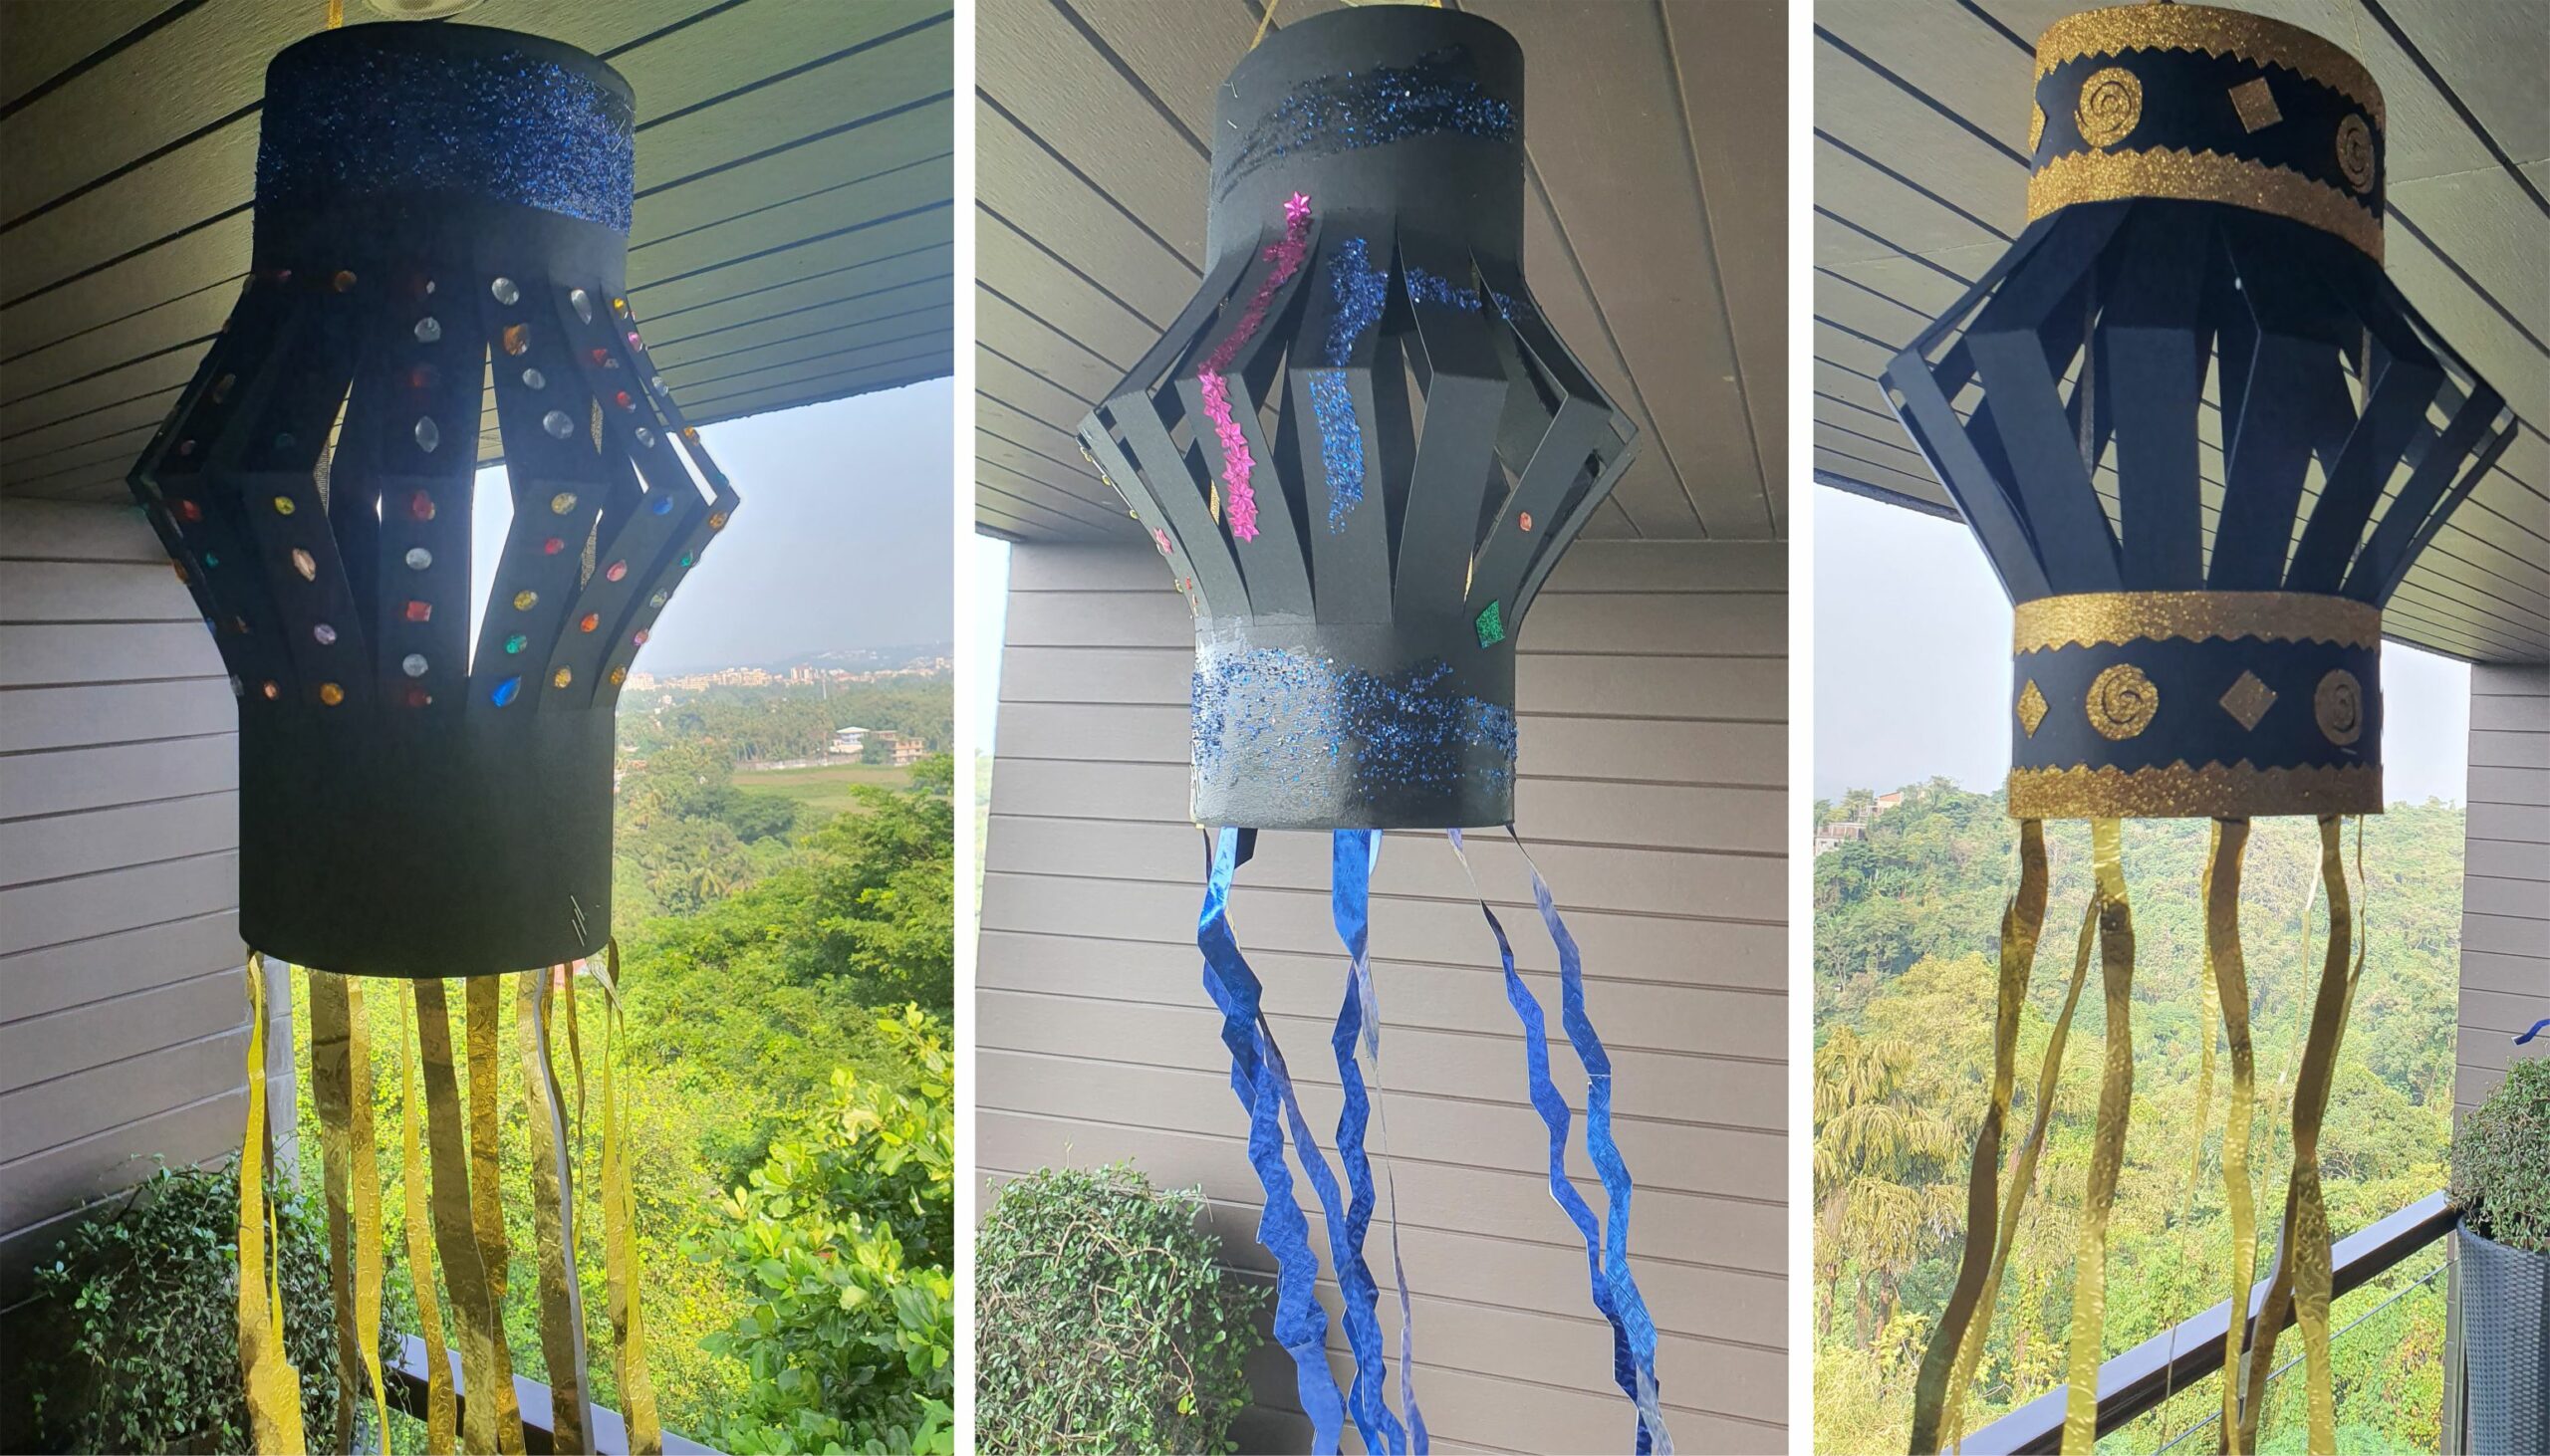

Hang your Diwali lamp string around a LED light (like I have done) or hang it from a LED bulb or put LED string lights inside it. The options are plenty -just make sure it doesn't come too close to an old-fashioned bulb as the paper might burn from the heat.
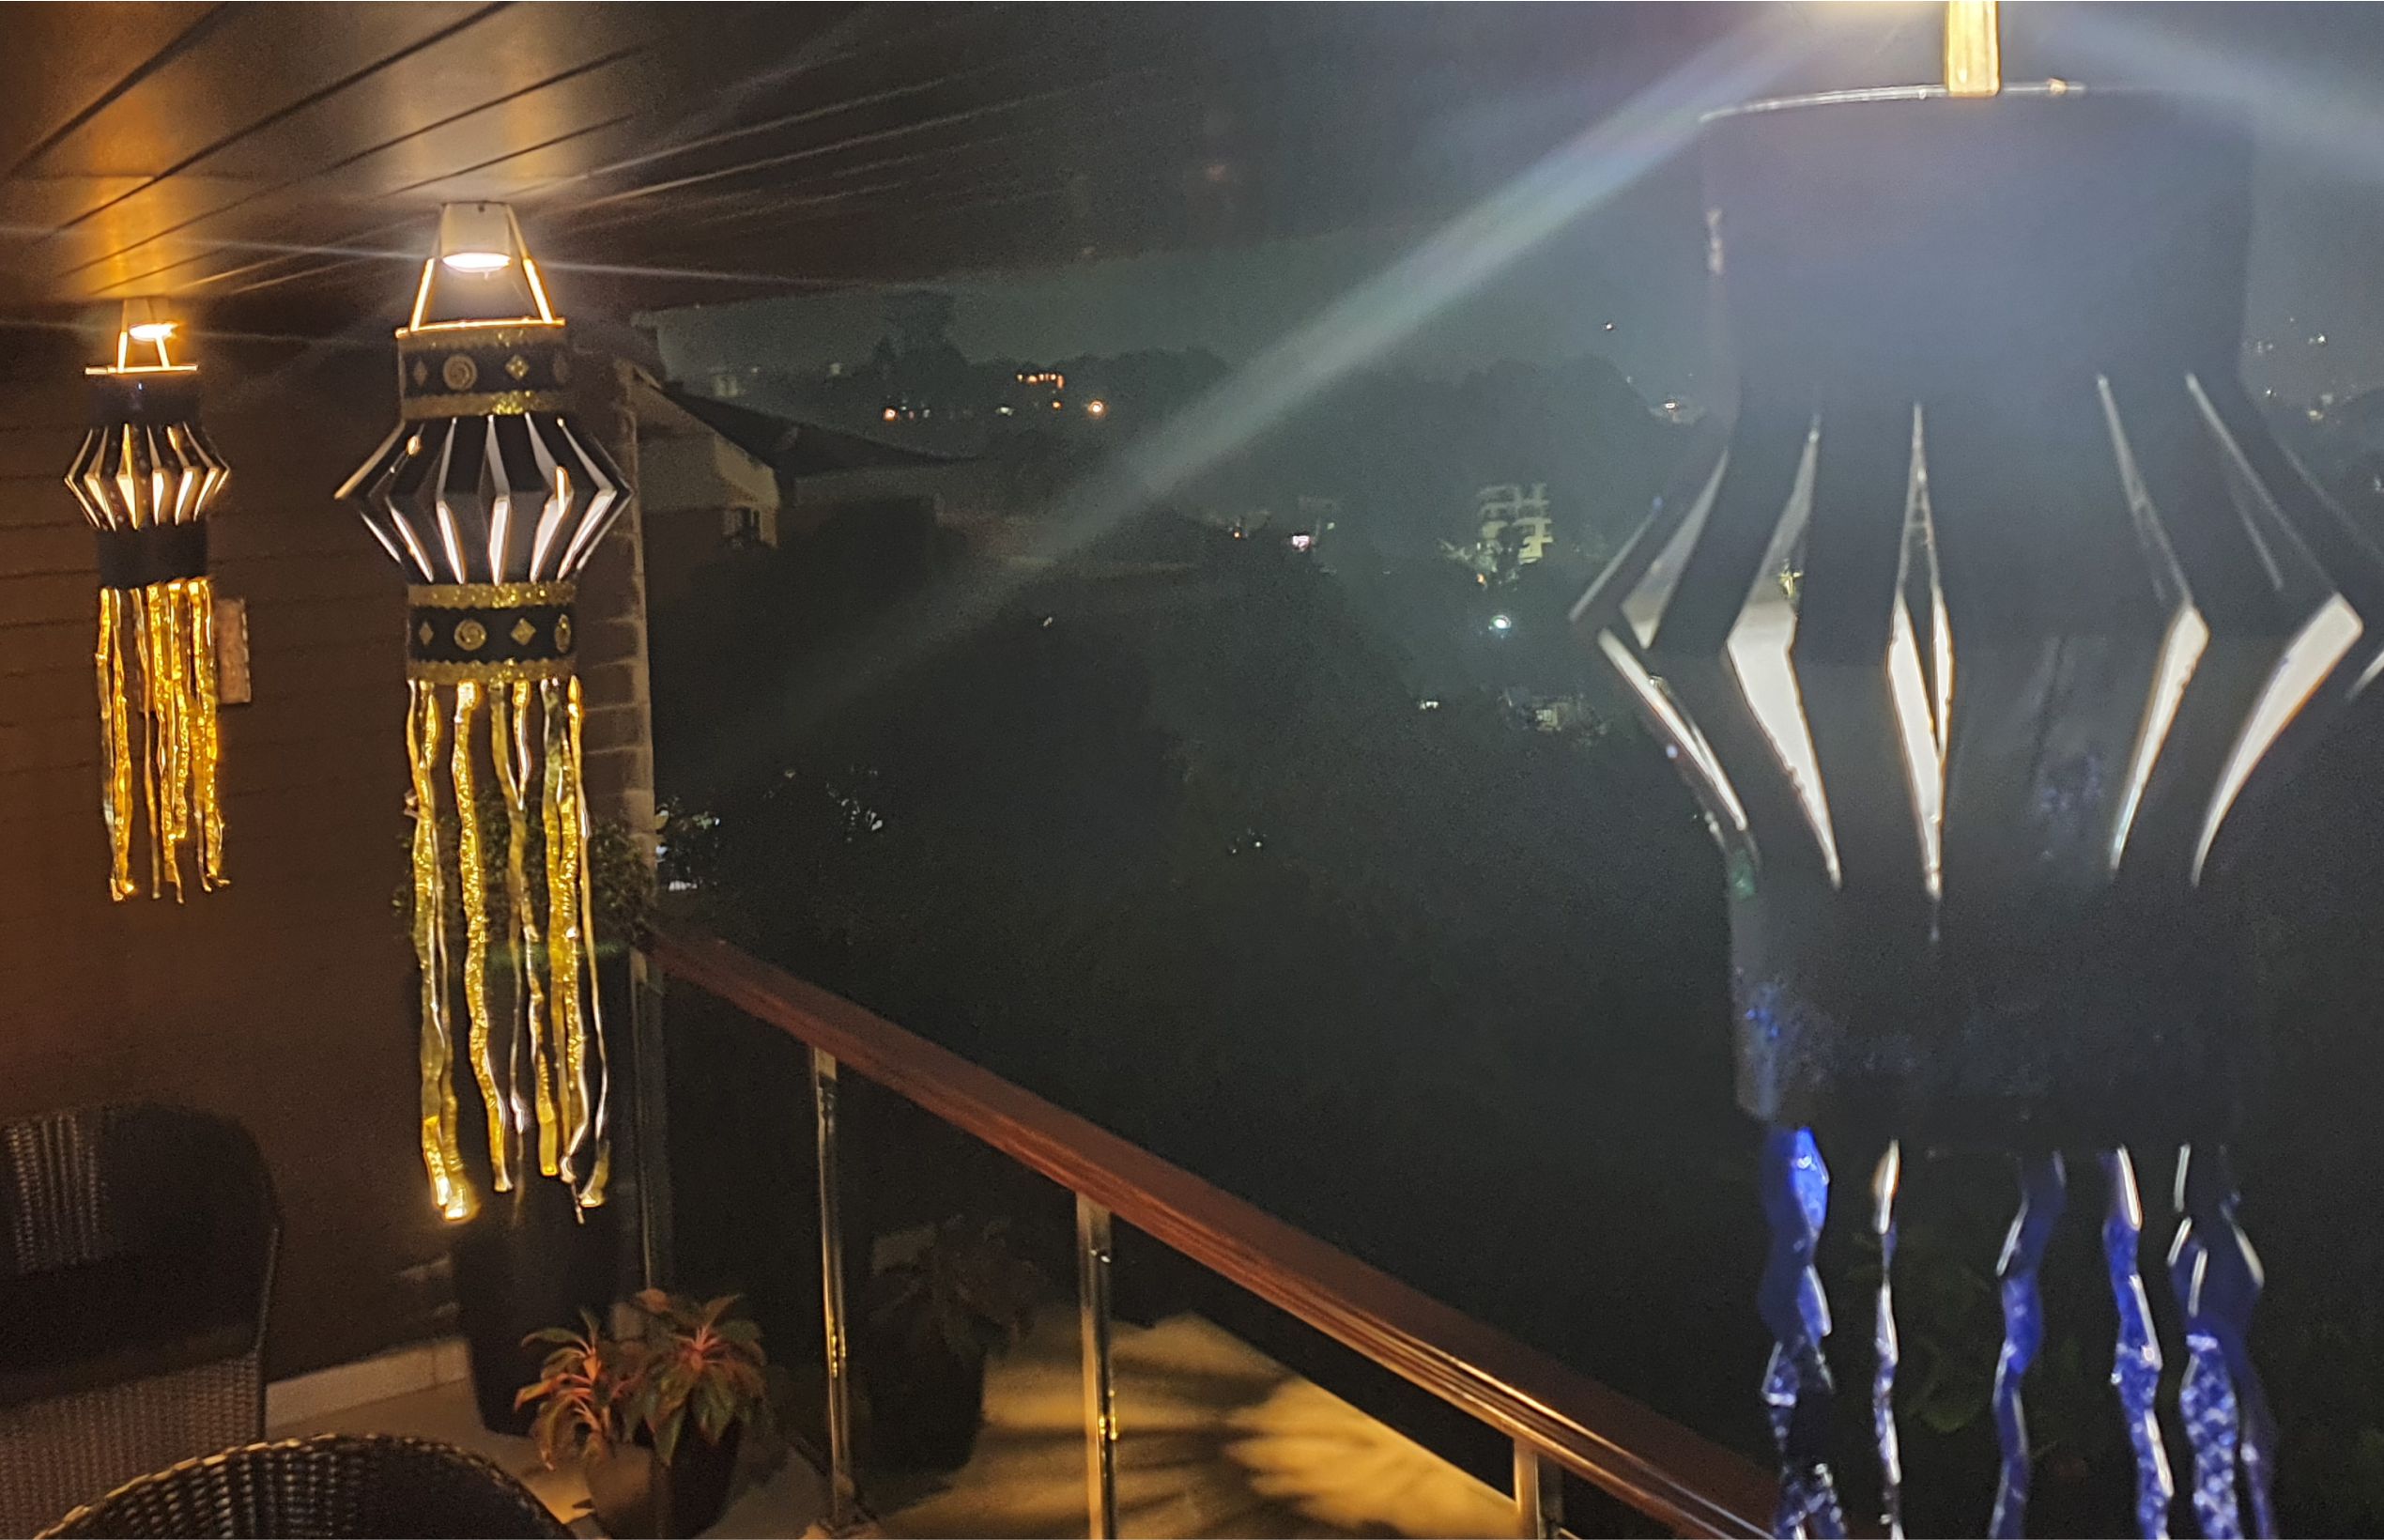

They look every so pretty once they are lit up in the dark night. Hope you liked this idea. Wish you all a very happy Diwali.



Leave a Review
You must be logged in to post a comment.