
- Prep Time10 min
- Total Time10 min
- Ready In10 min
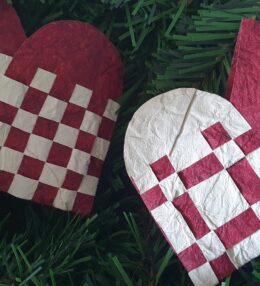
It’s a tradition in Denmark to make these stars… and we tend to make them out of as many different materials as possible; gift ribbon, strips of paper or even old vertical blinds! The method is the same whether the star you are making is tiny, small or really big.
We use them for Christmas tree decoration, on presents or even bigger ones hanging from the ceiling.
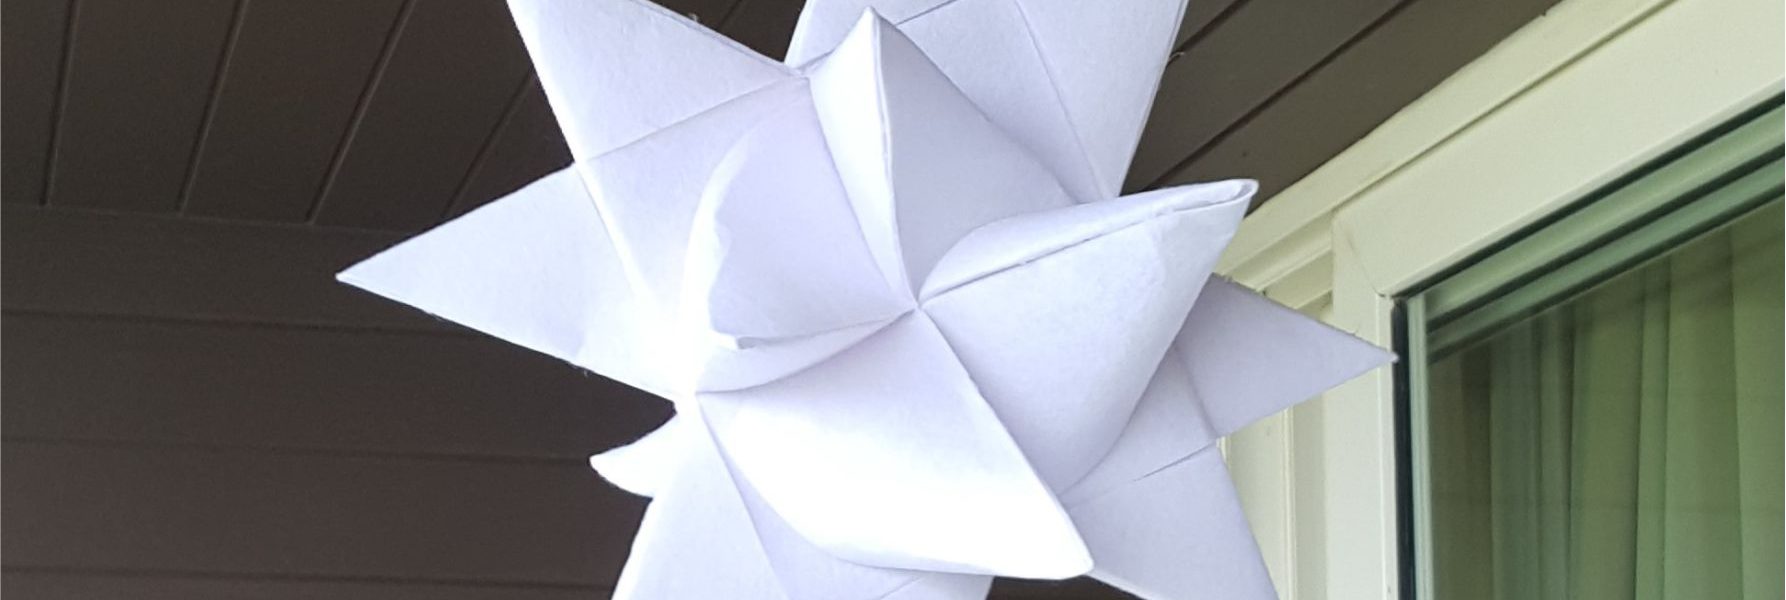
In this example I have made the star from white felt because I wanted to make big ones. The felt is NOT the easiest material to use because it is a bit soft and the edges don’t become as “pointed” as they should.
If you want to make even bigger ones you can staple two strips together –if your felt/paper isn’t big enough. The staples will be hidden once you start making the star. I did that for the giant star on my balcony (main picture)
Now let’s get to it… It may seem a bit difficult at first but once you start -and follow my instructions and many many pictures- it will suddenly seem quite simple.
My kids make these too every Christmas. I recommend using leather paper or other bendable handmade paper where you won’t see a crease, should you should make a wrong fold
The paper should be the same colour on both sides. Each strip should be 1:25. In this example each strip is measuring 4cm by 100cm. The final star becomes about 19cm wide.
Ingredients
Directions
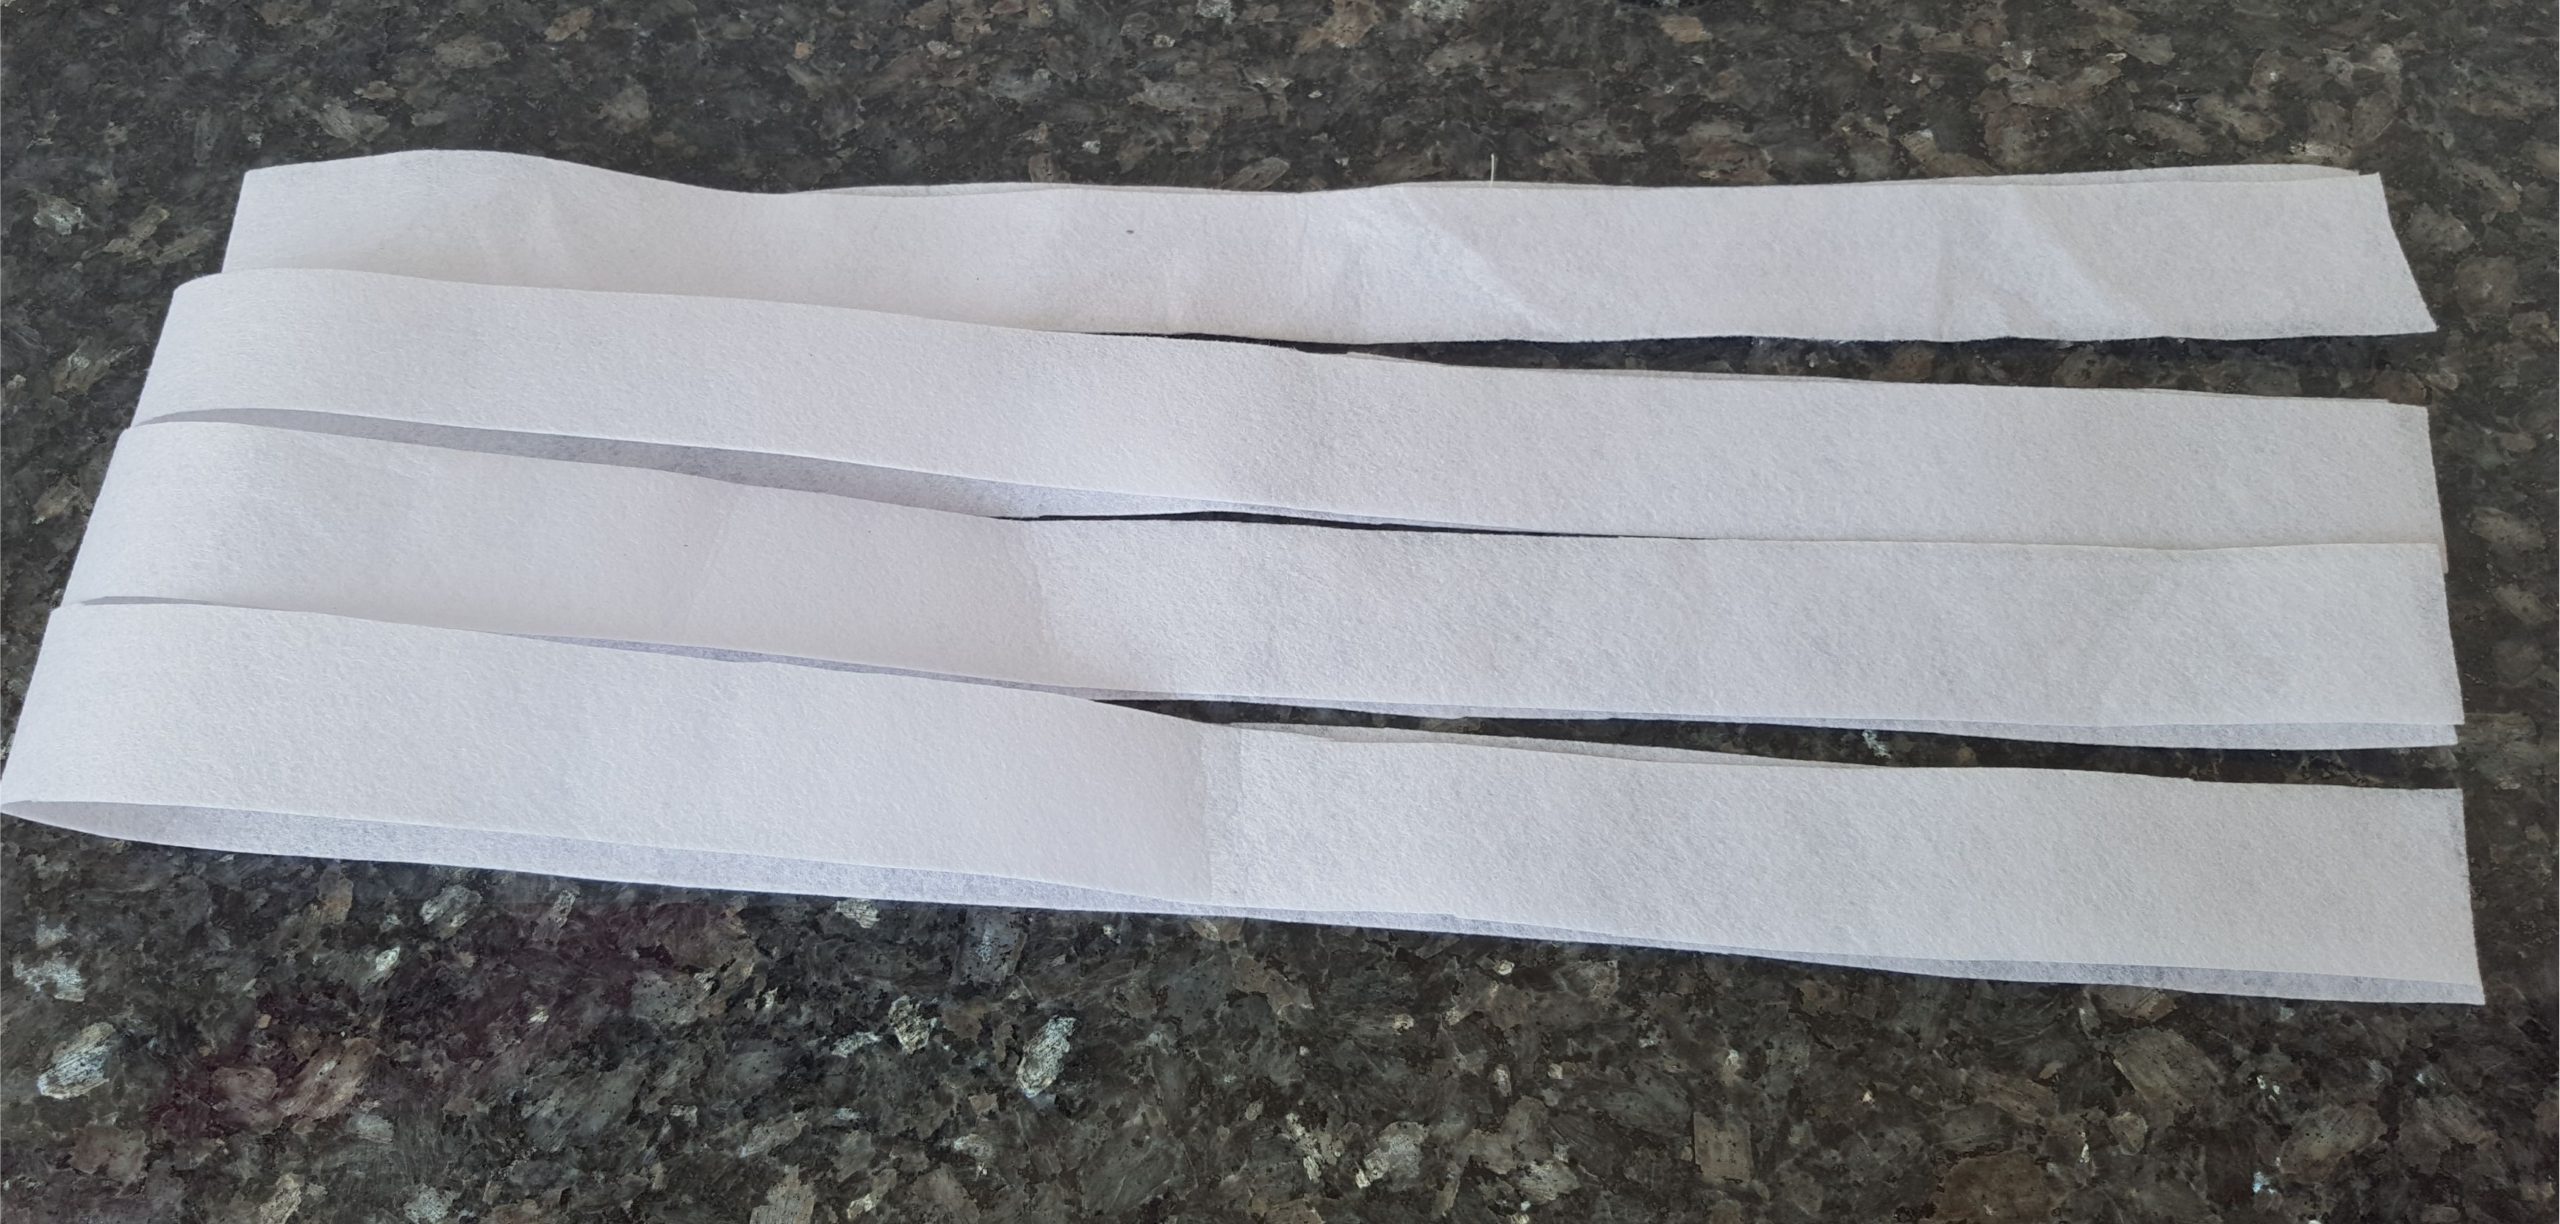
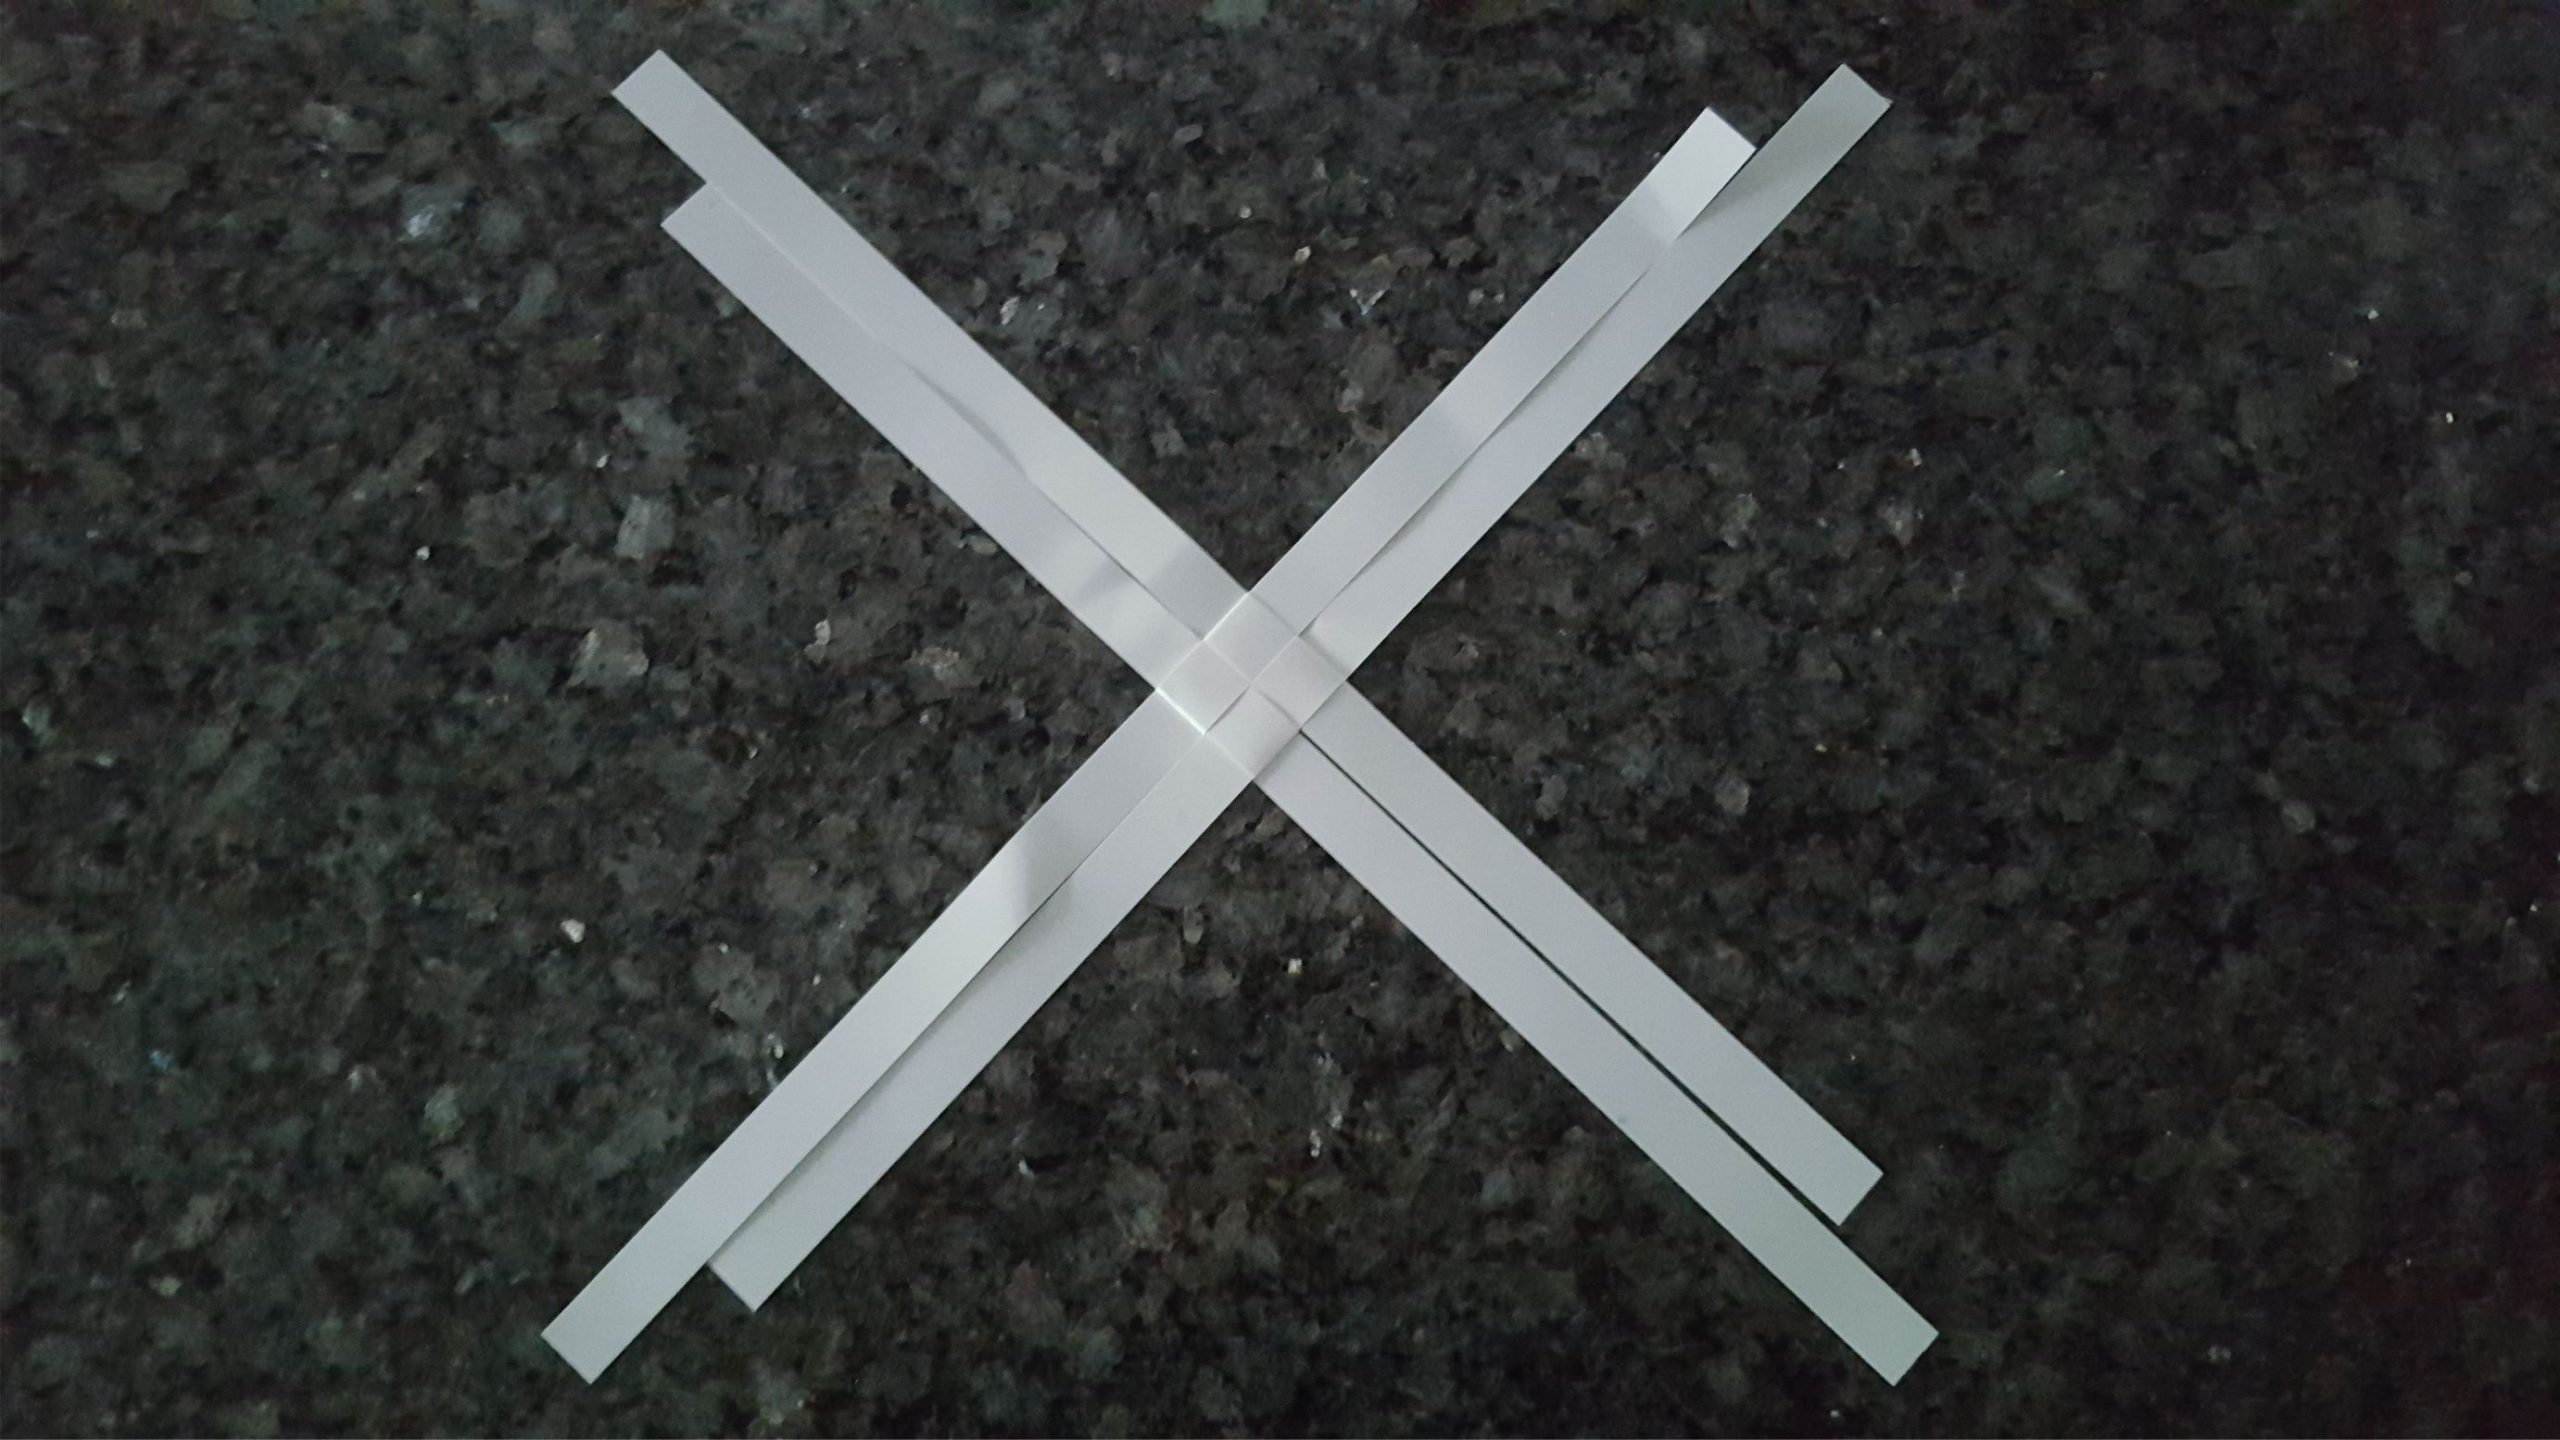
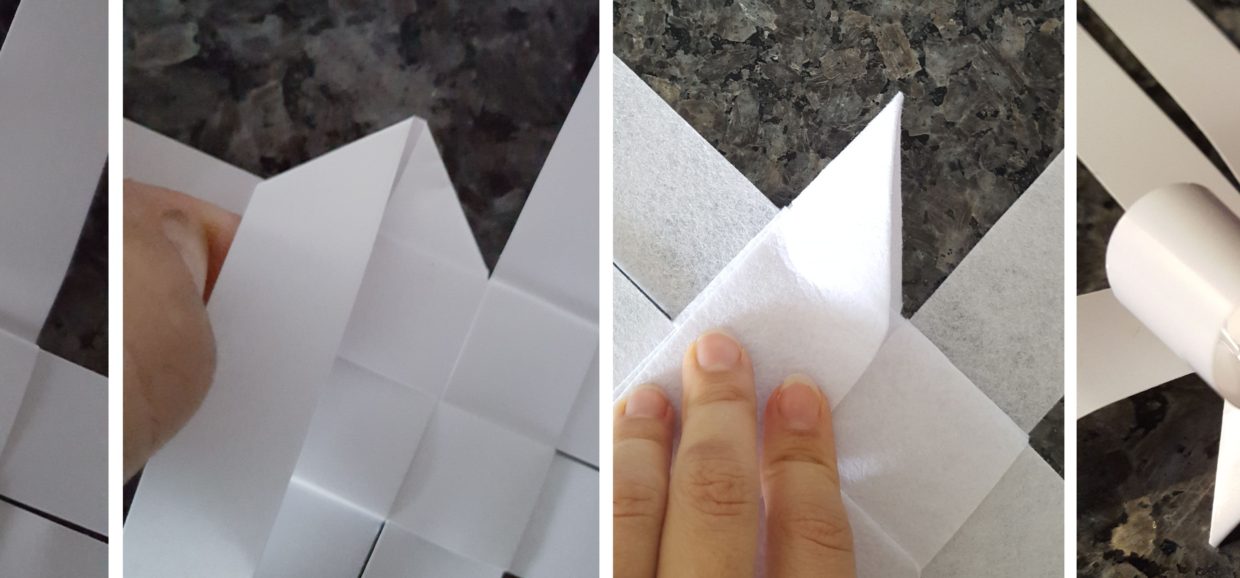
Start by bending the strips in half. Crease well.
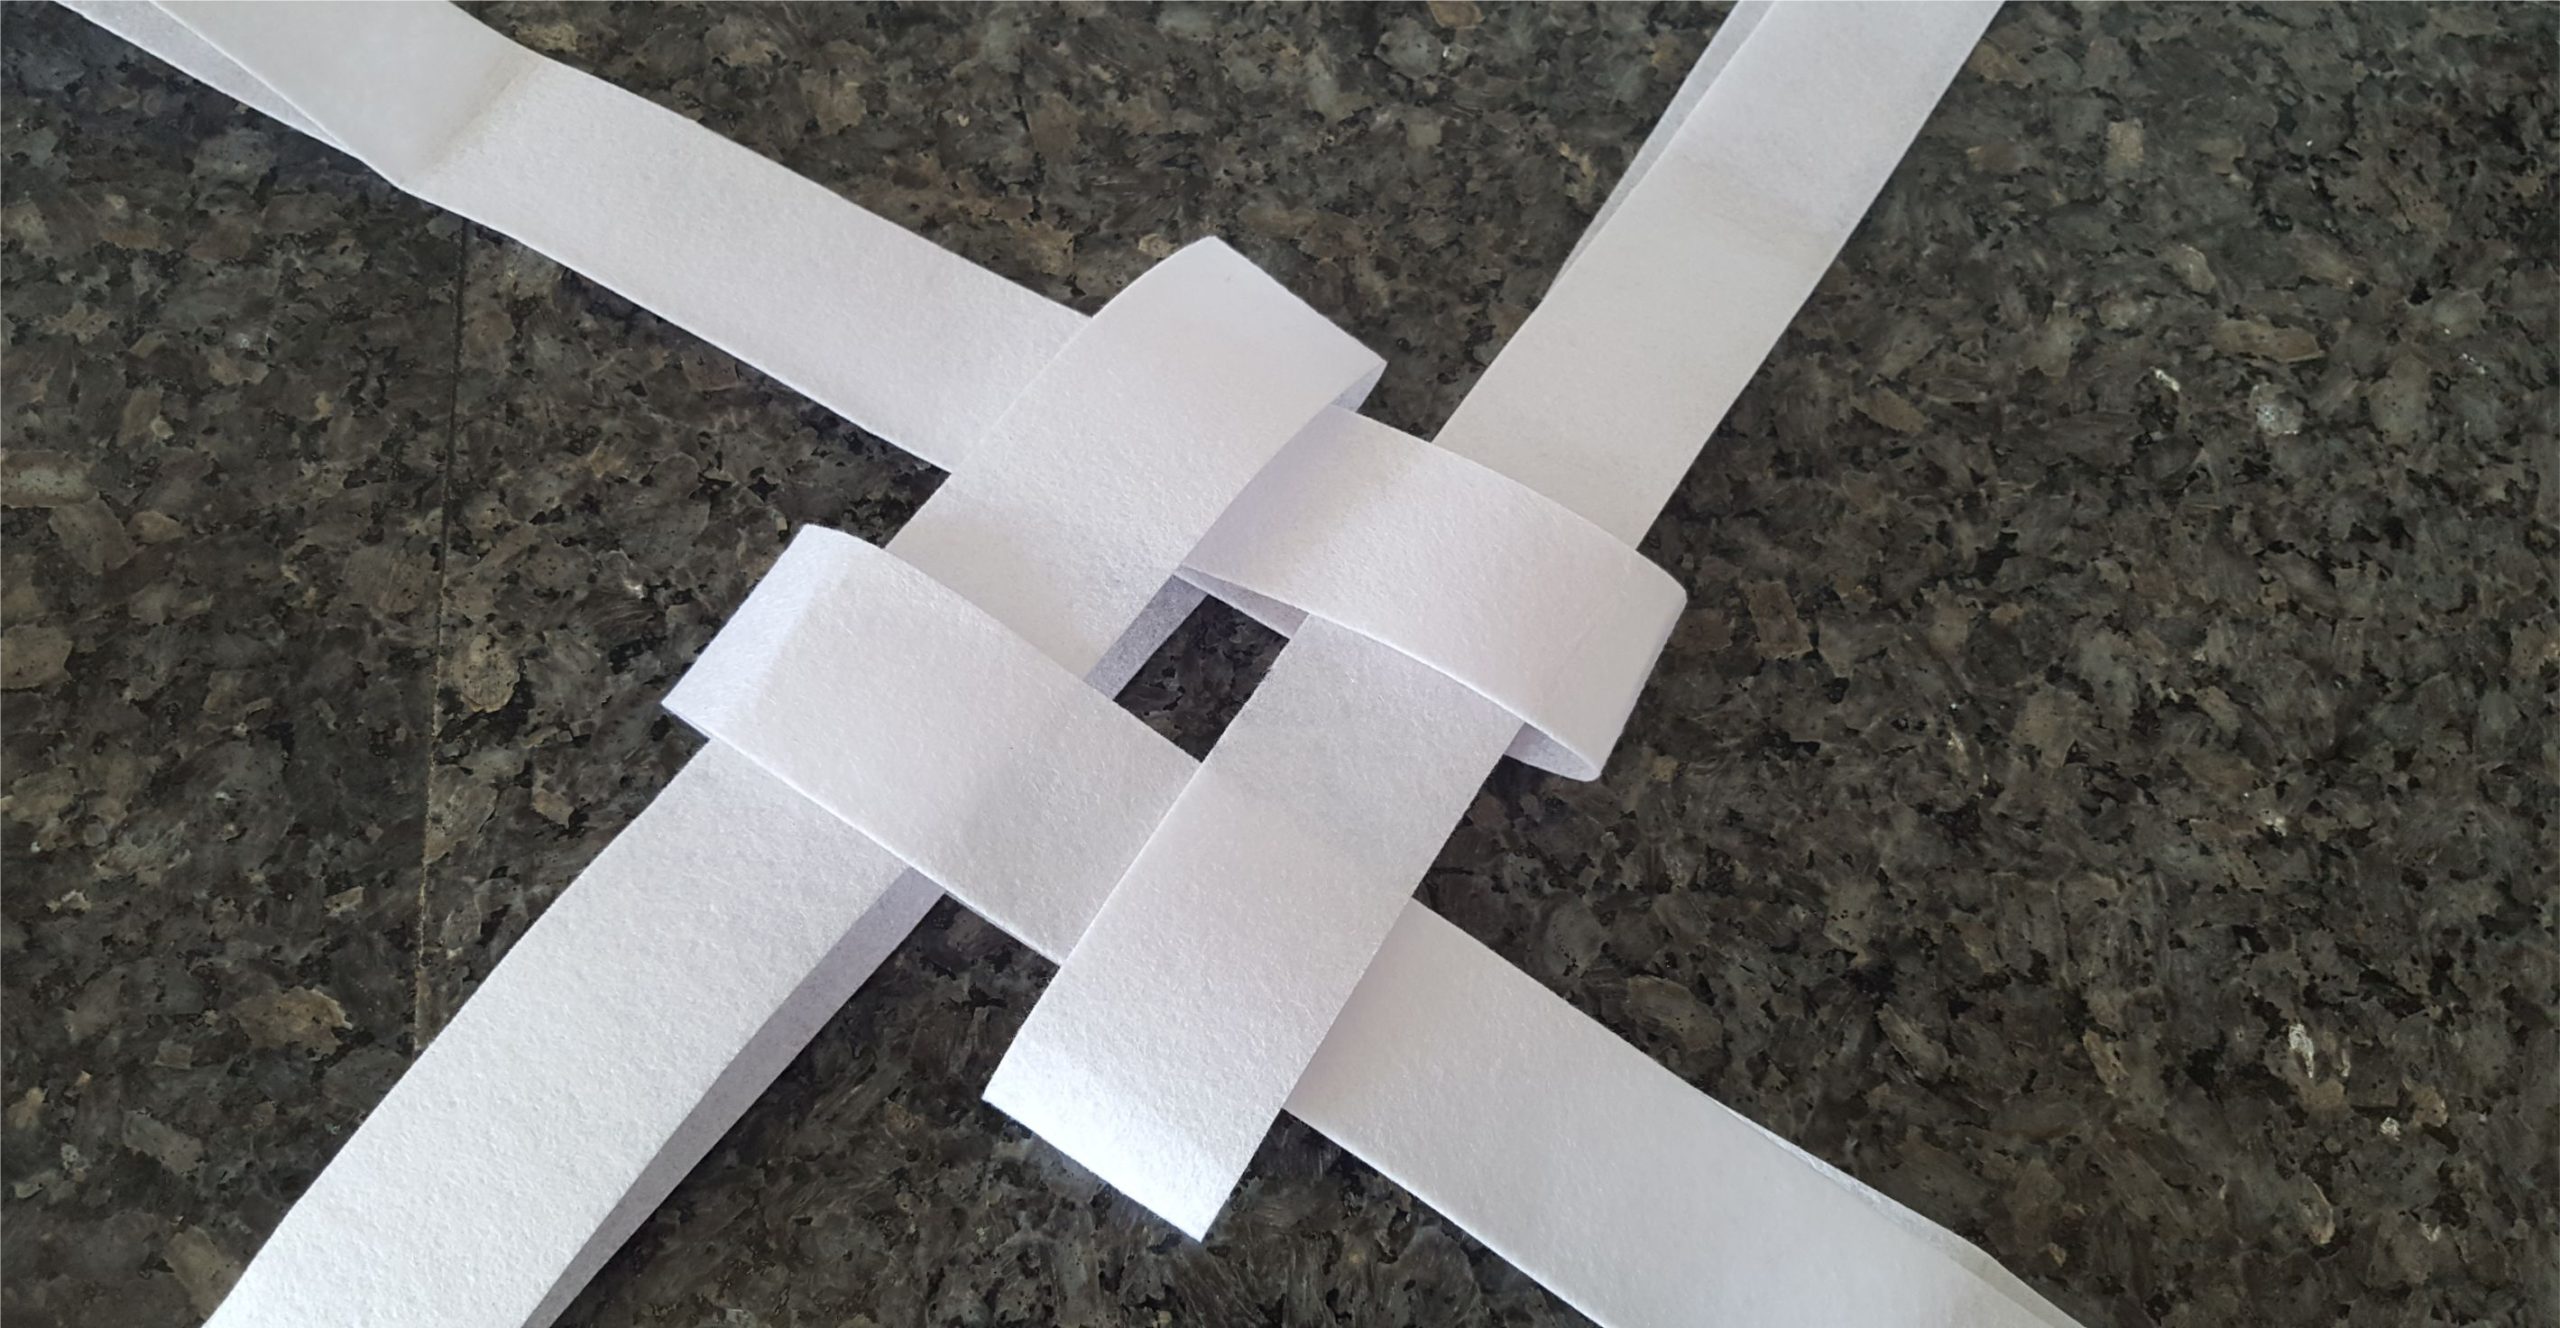
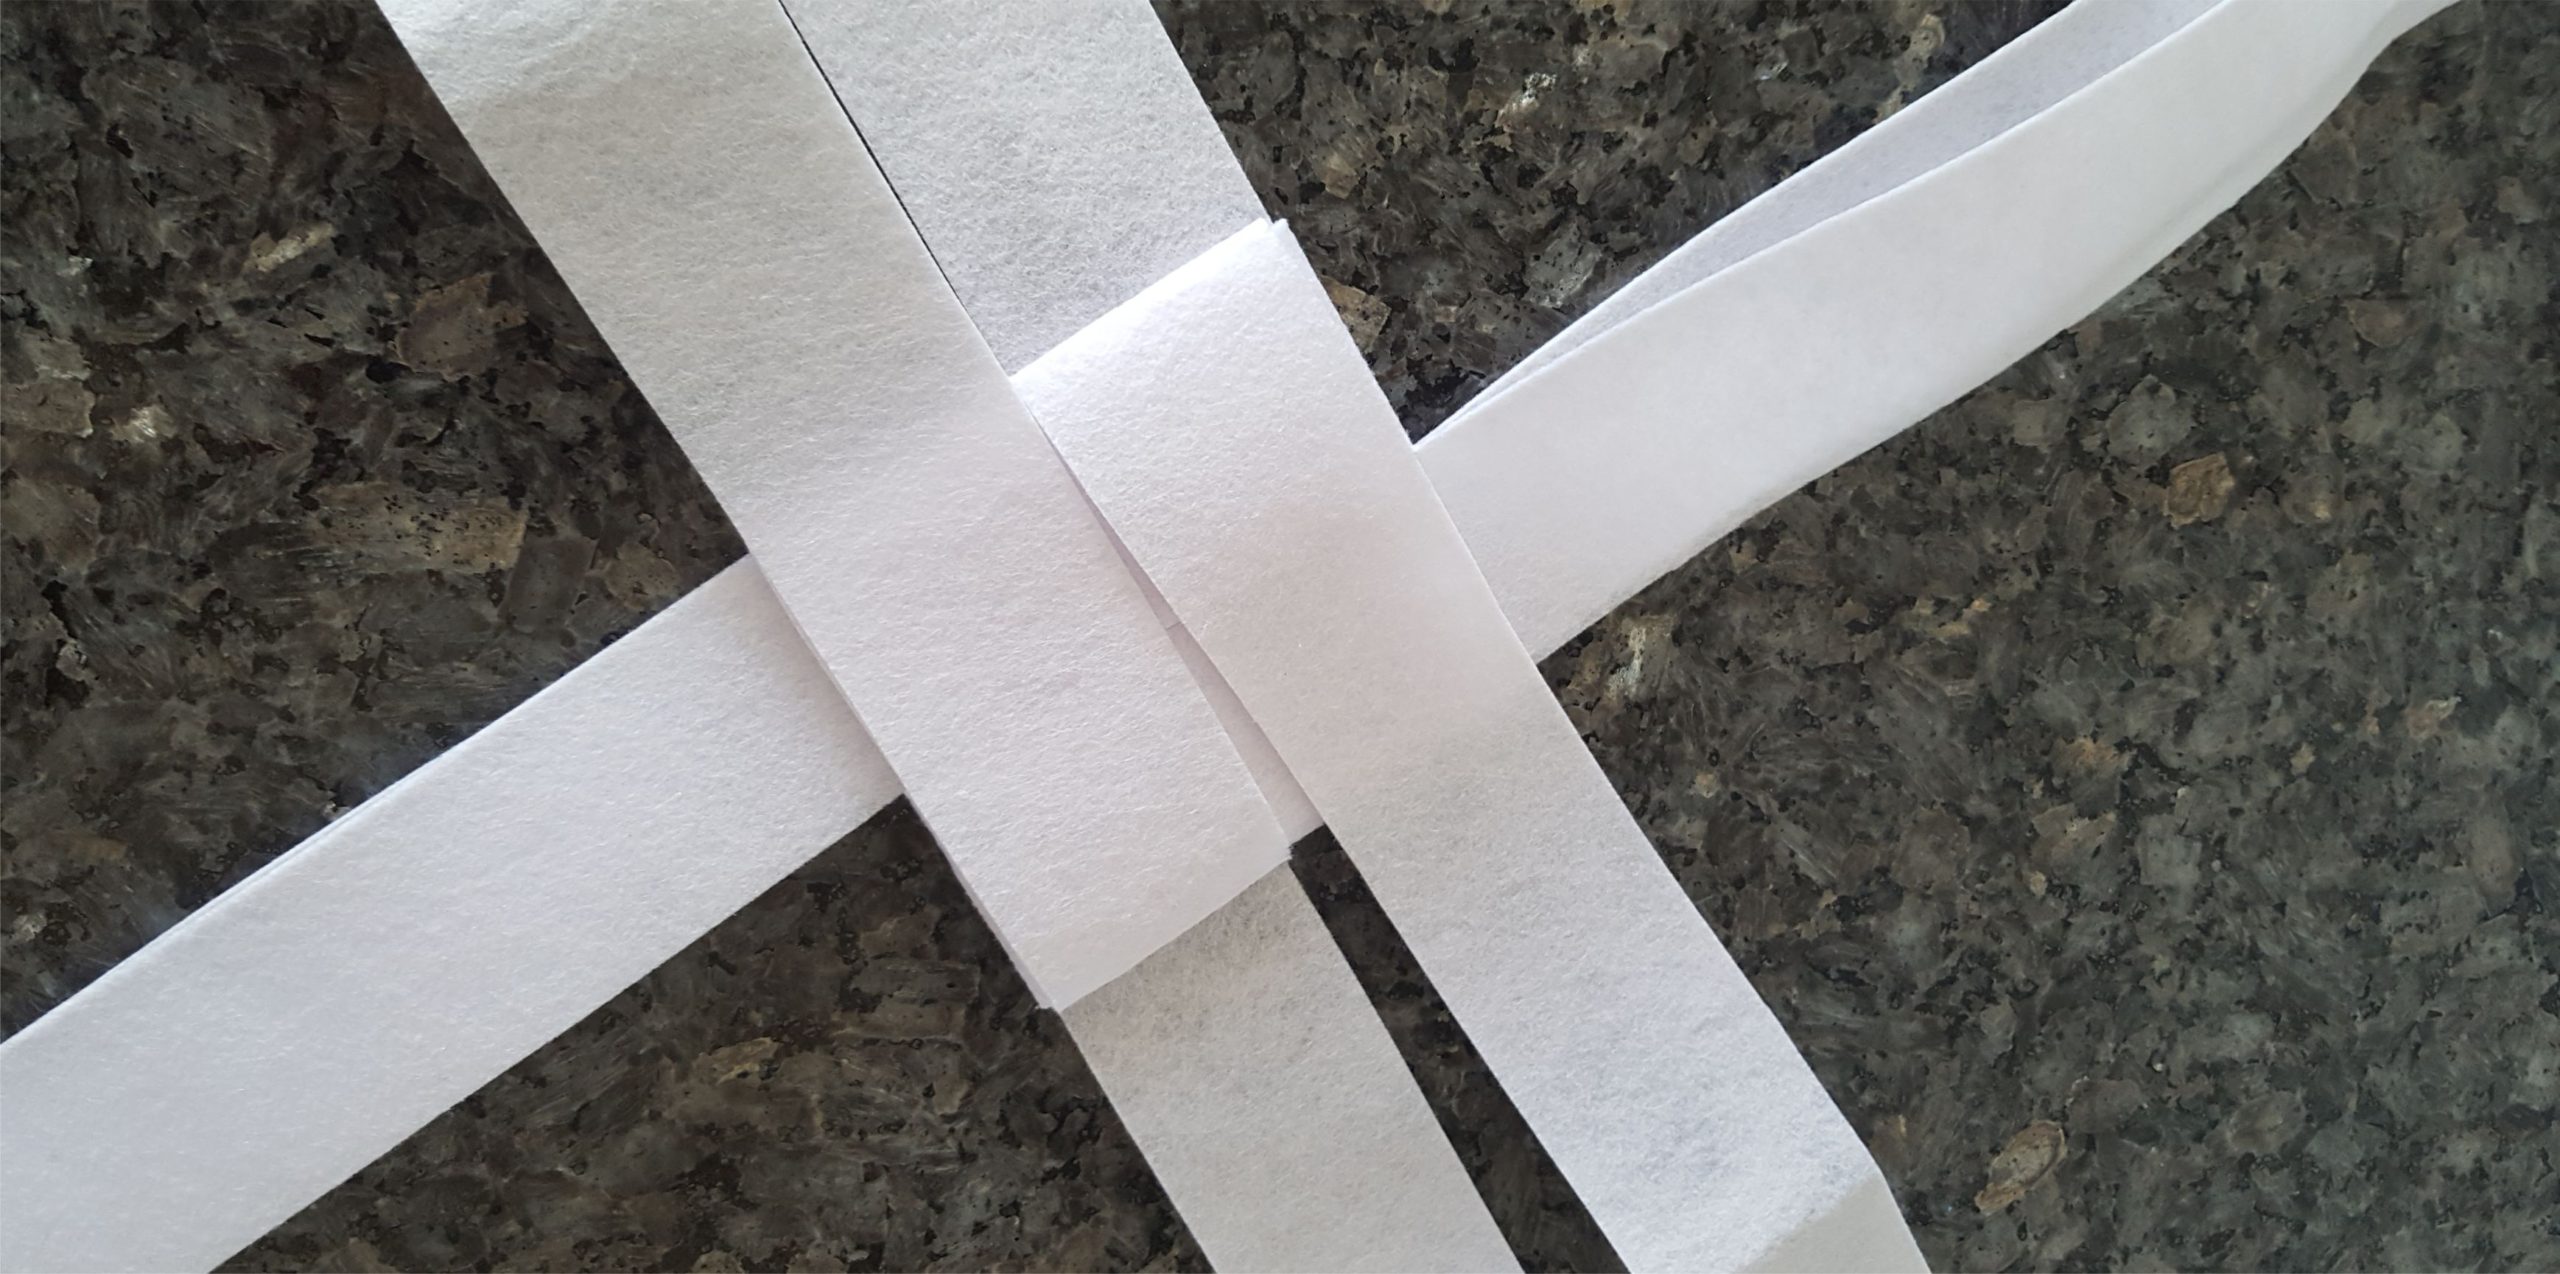
Arrange the strips inside each other like shown below
Pull gently to make the square tight
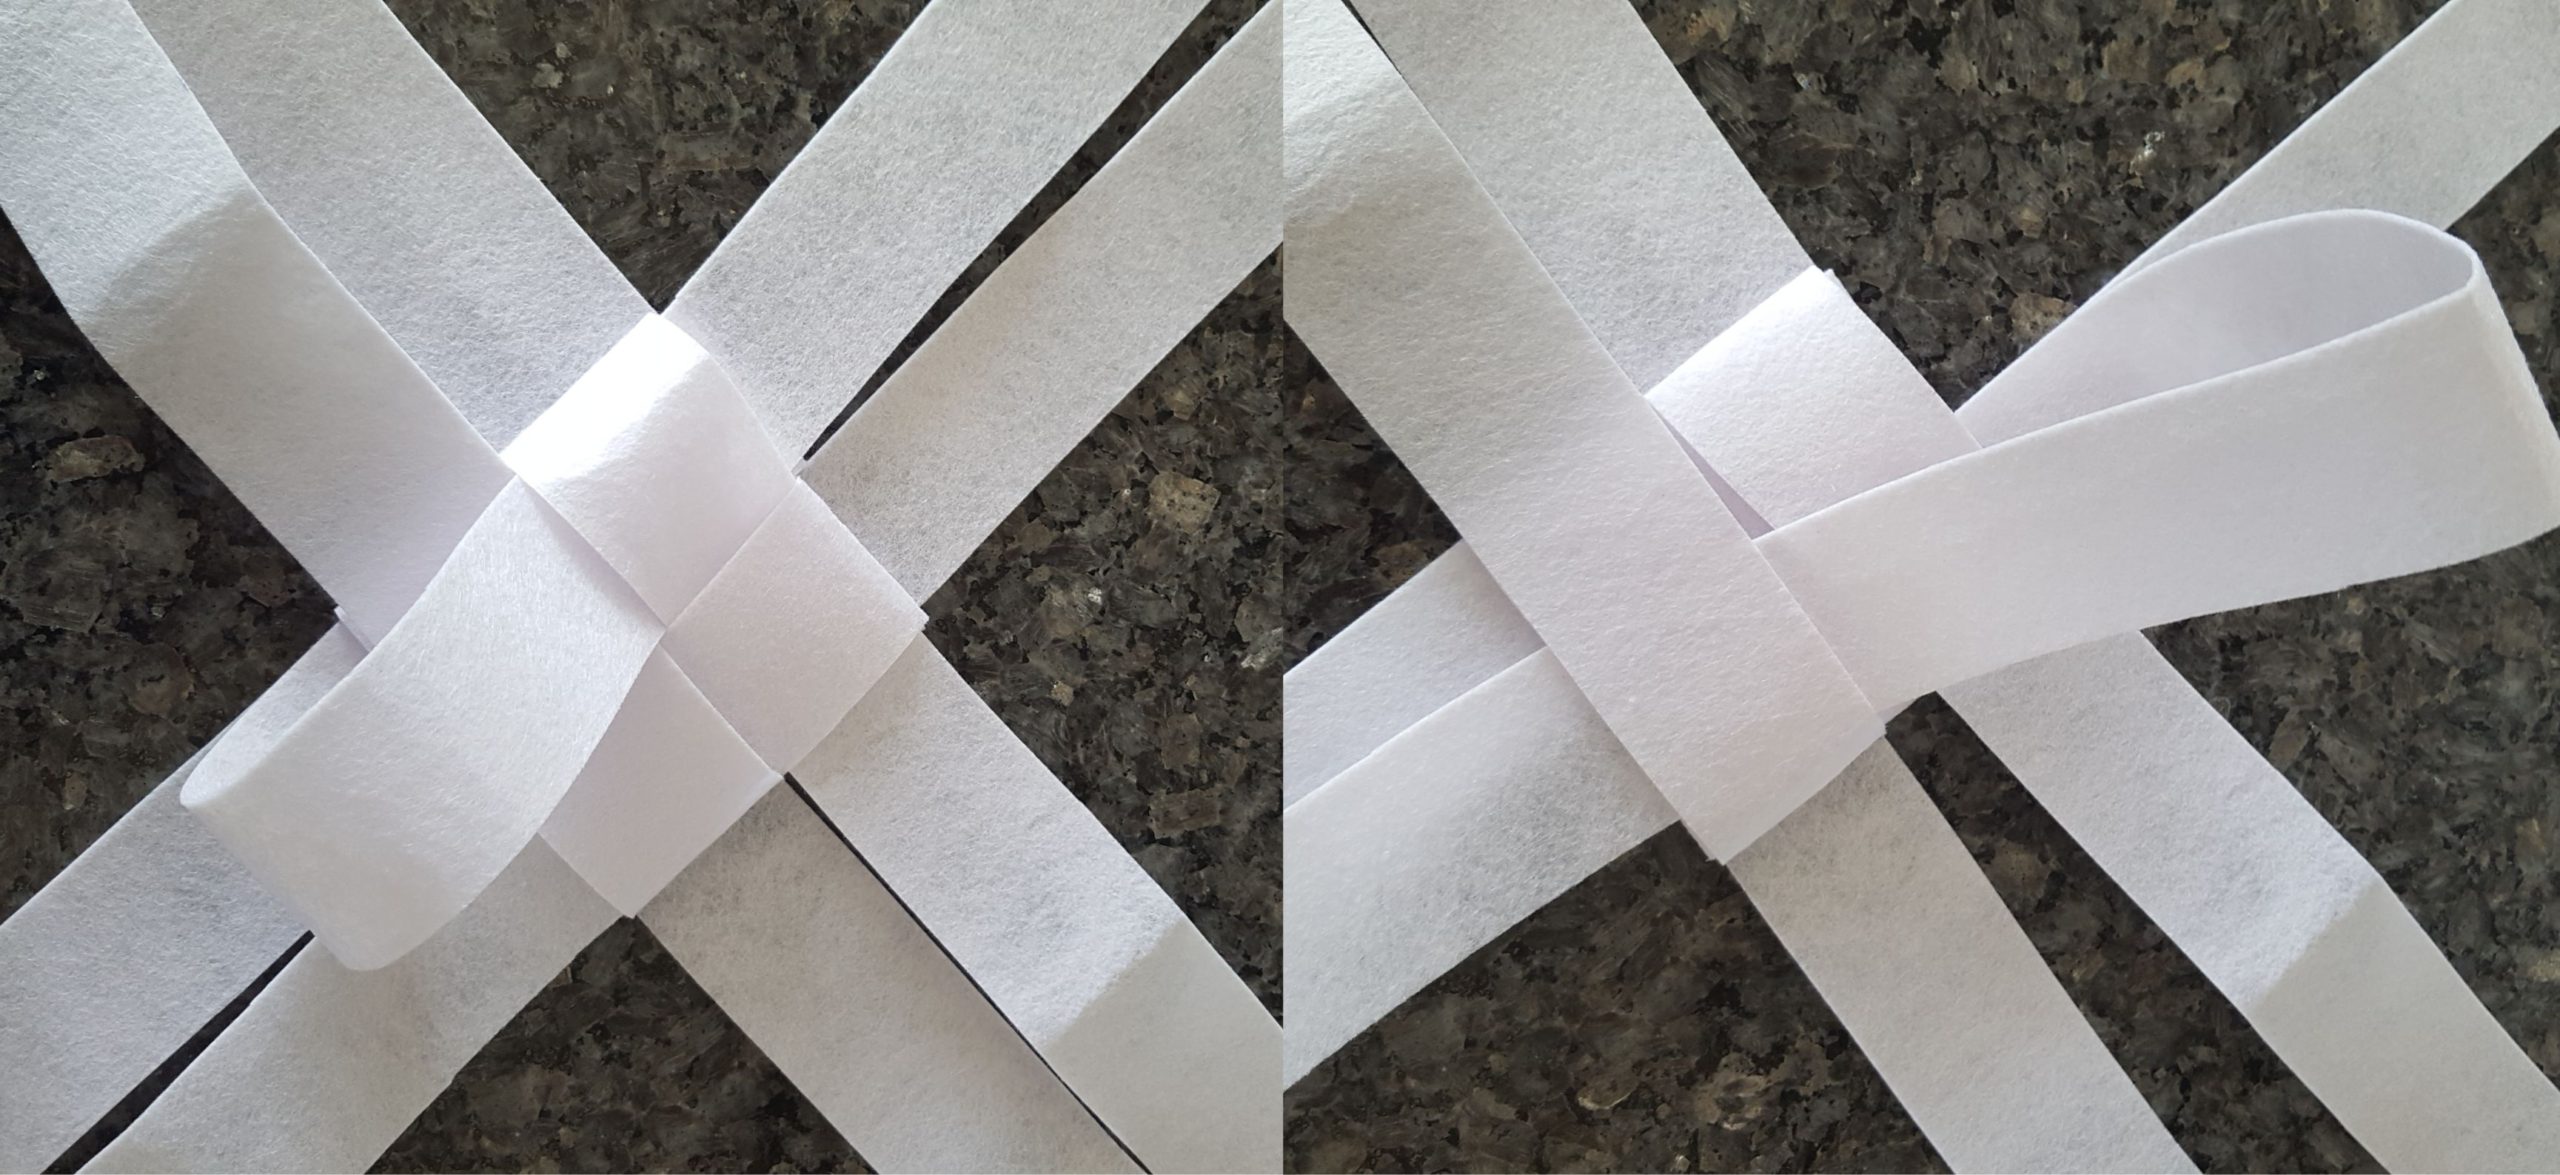
Bend the two top strips opposite each other across the square
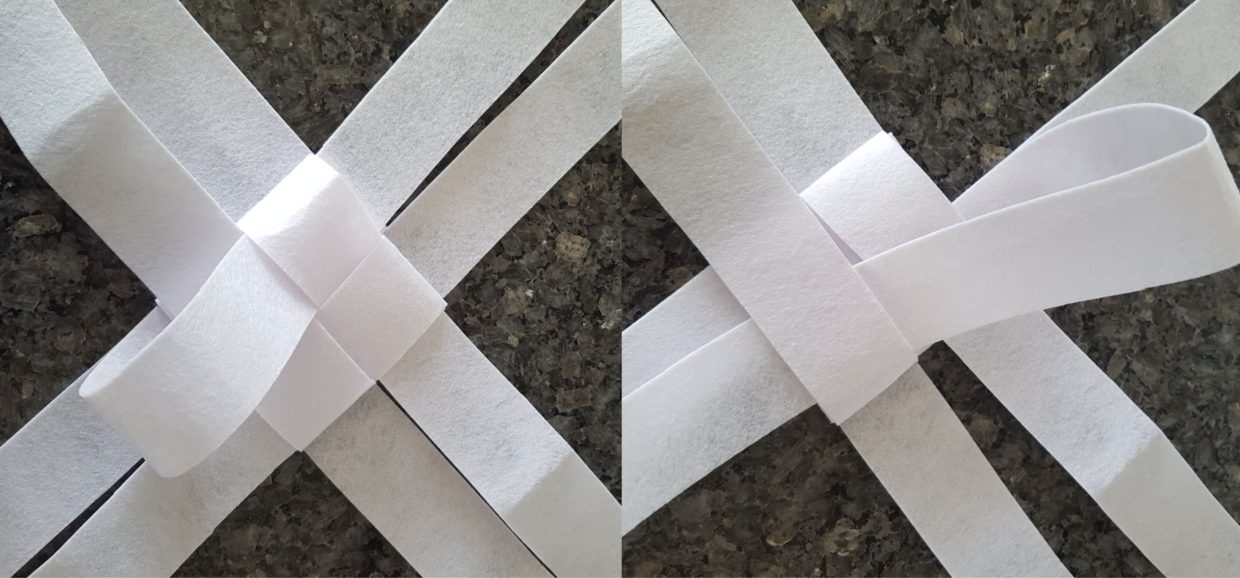
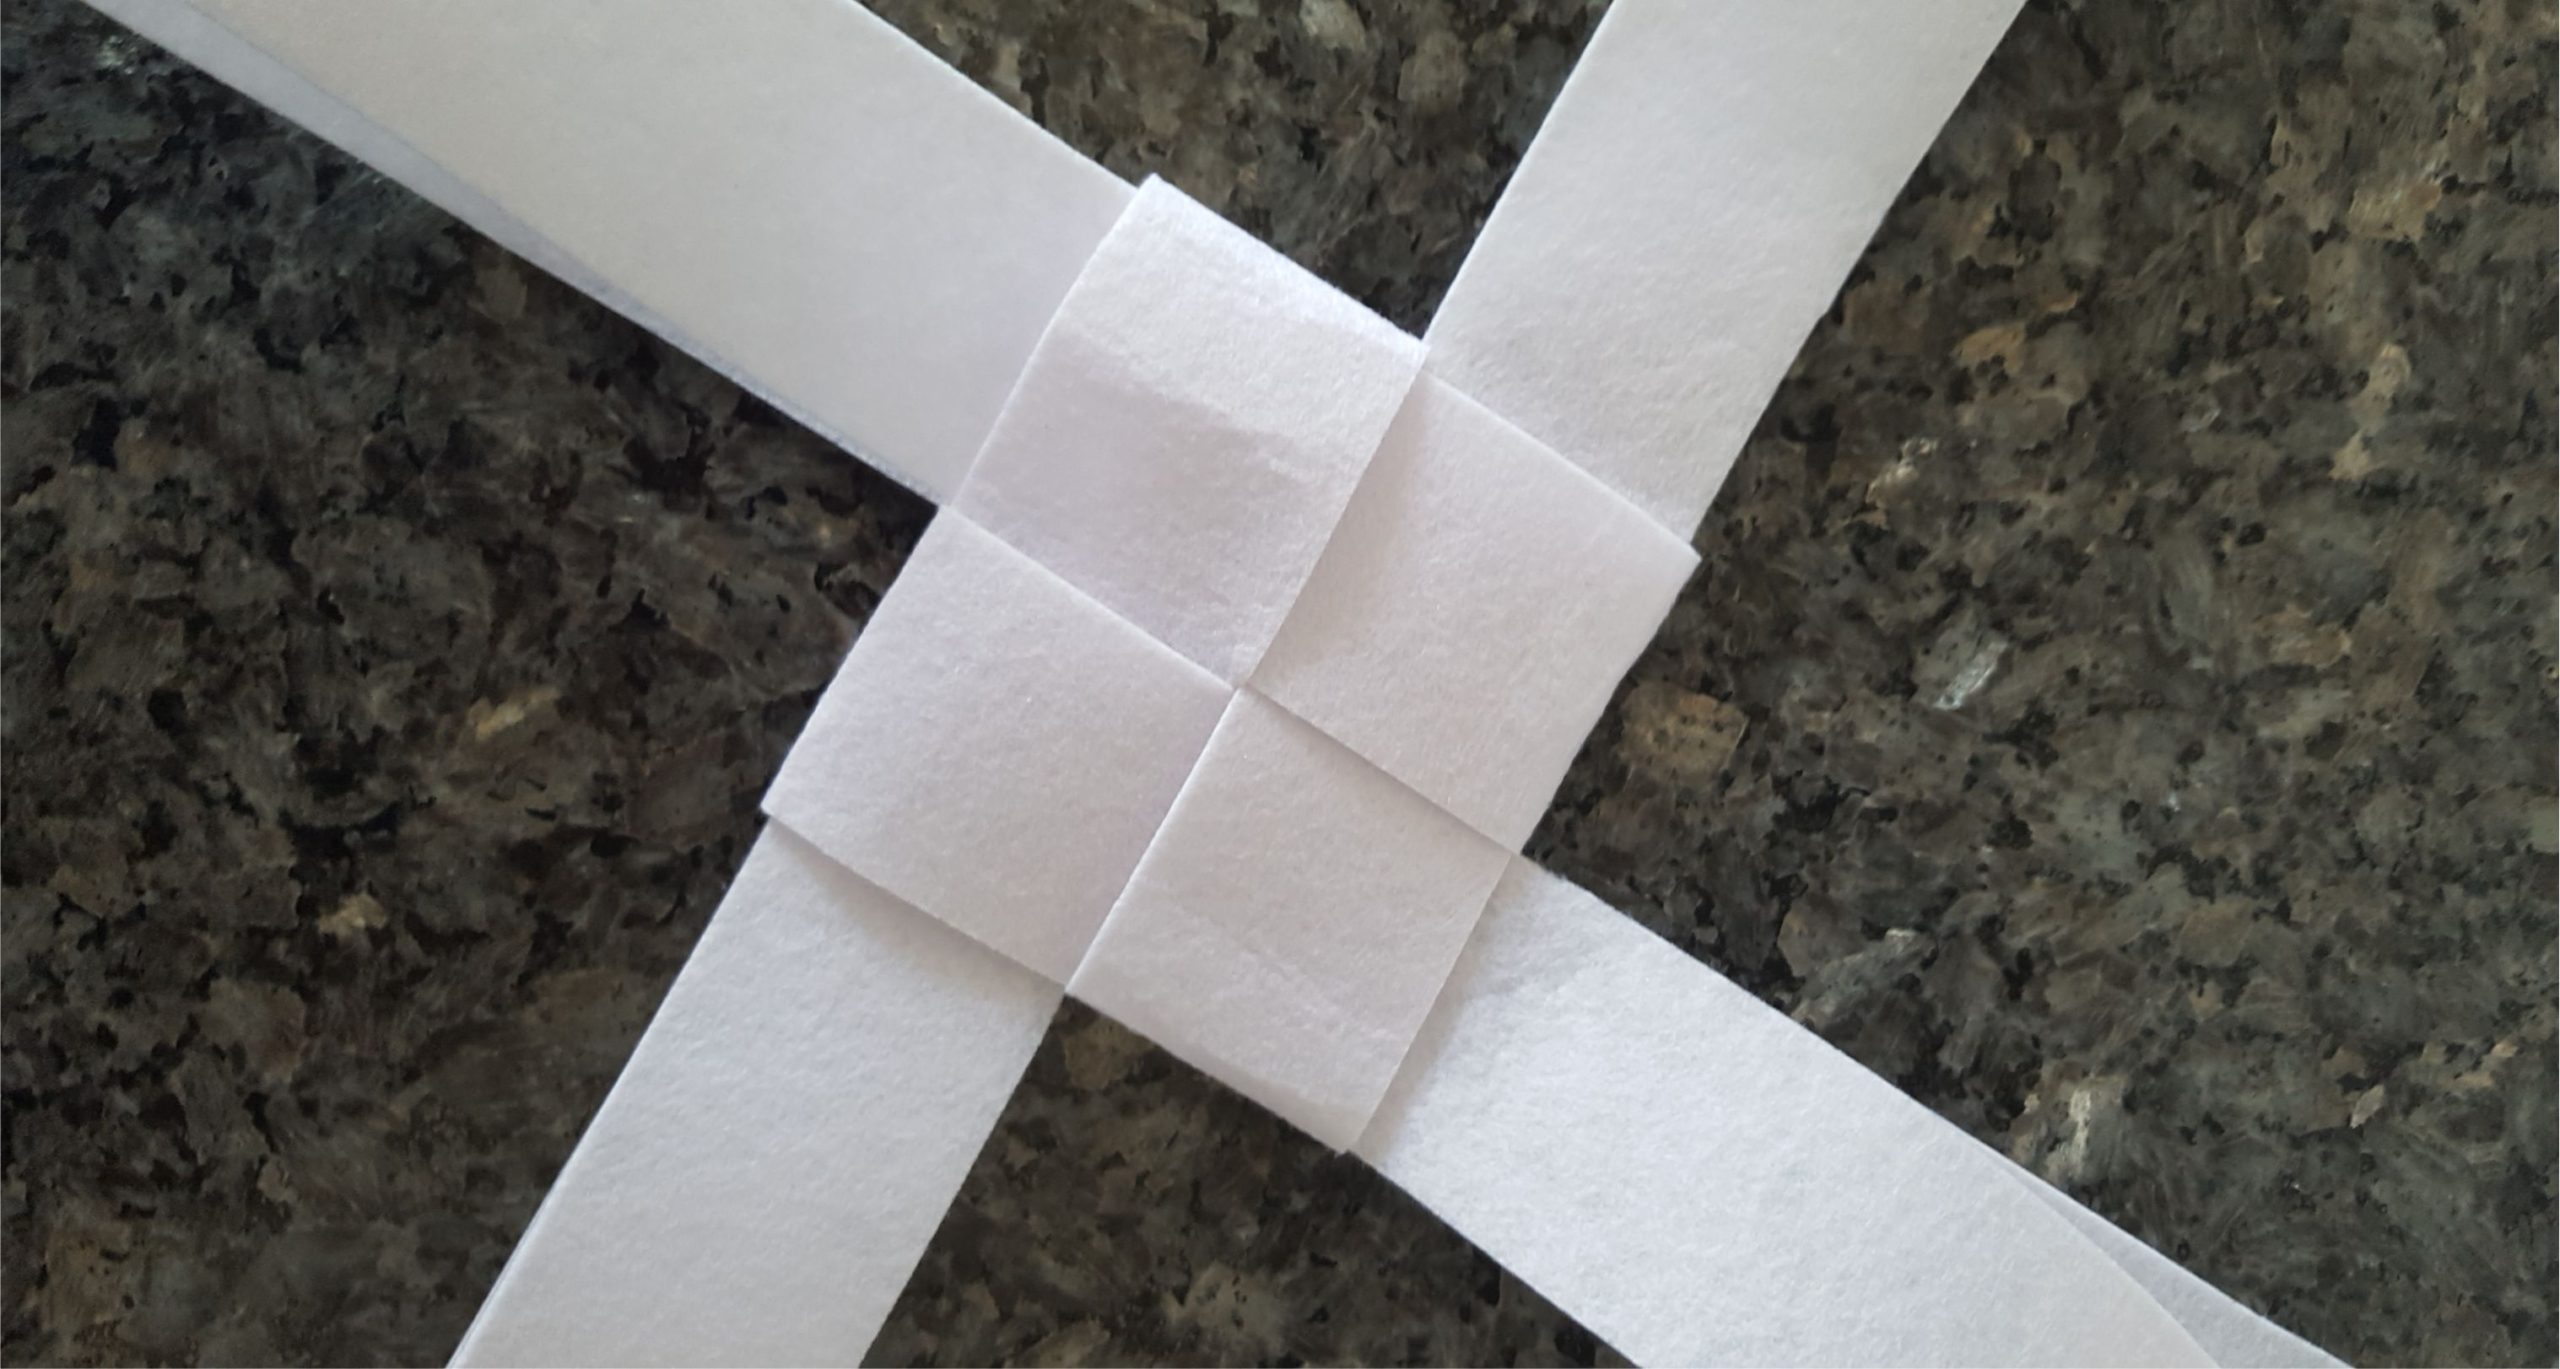
Lock the square by sliding the remaining two top strips underneath the ones you folded before
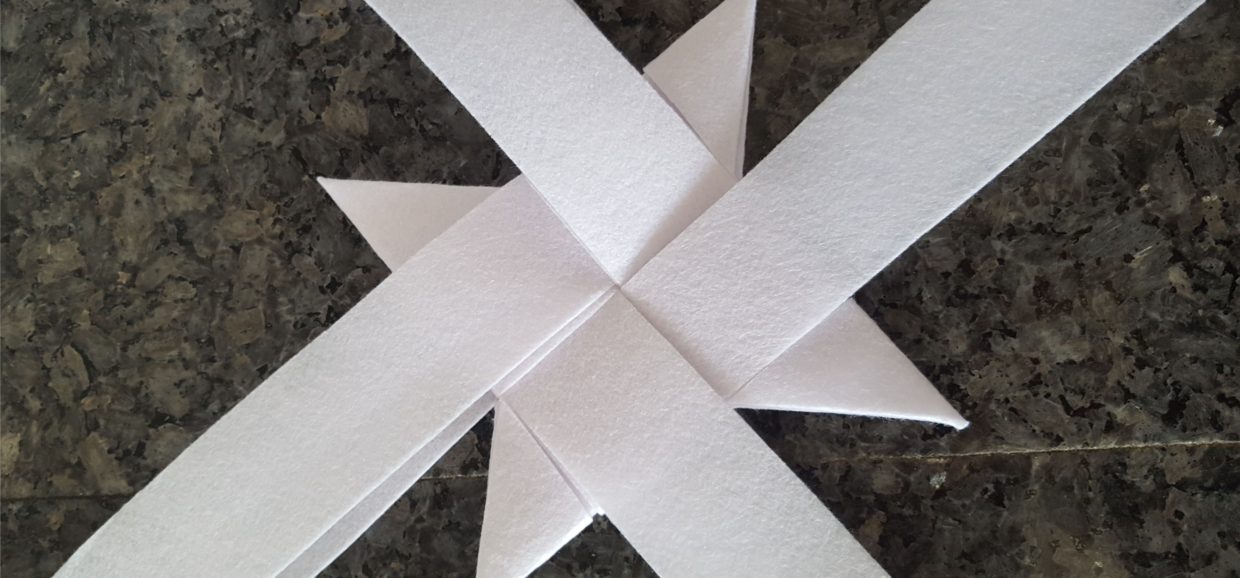
You will now have a square in the middle with 8 strips coming out. Two on each side -1 short and 1 long.
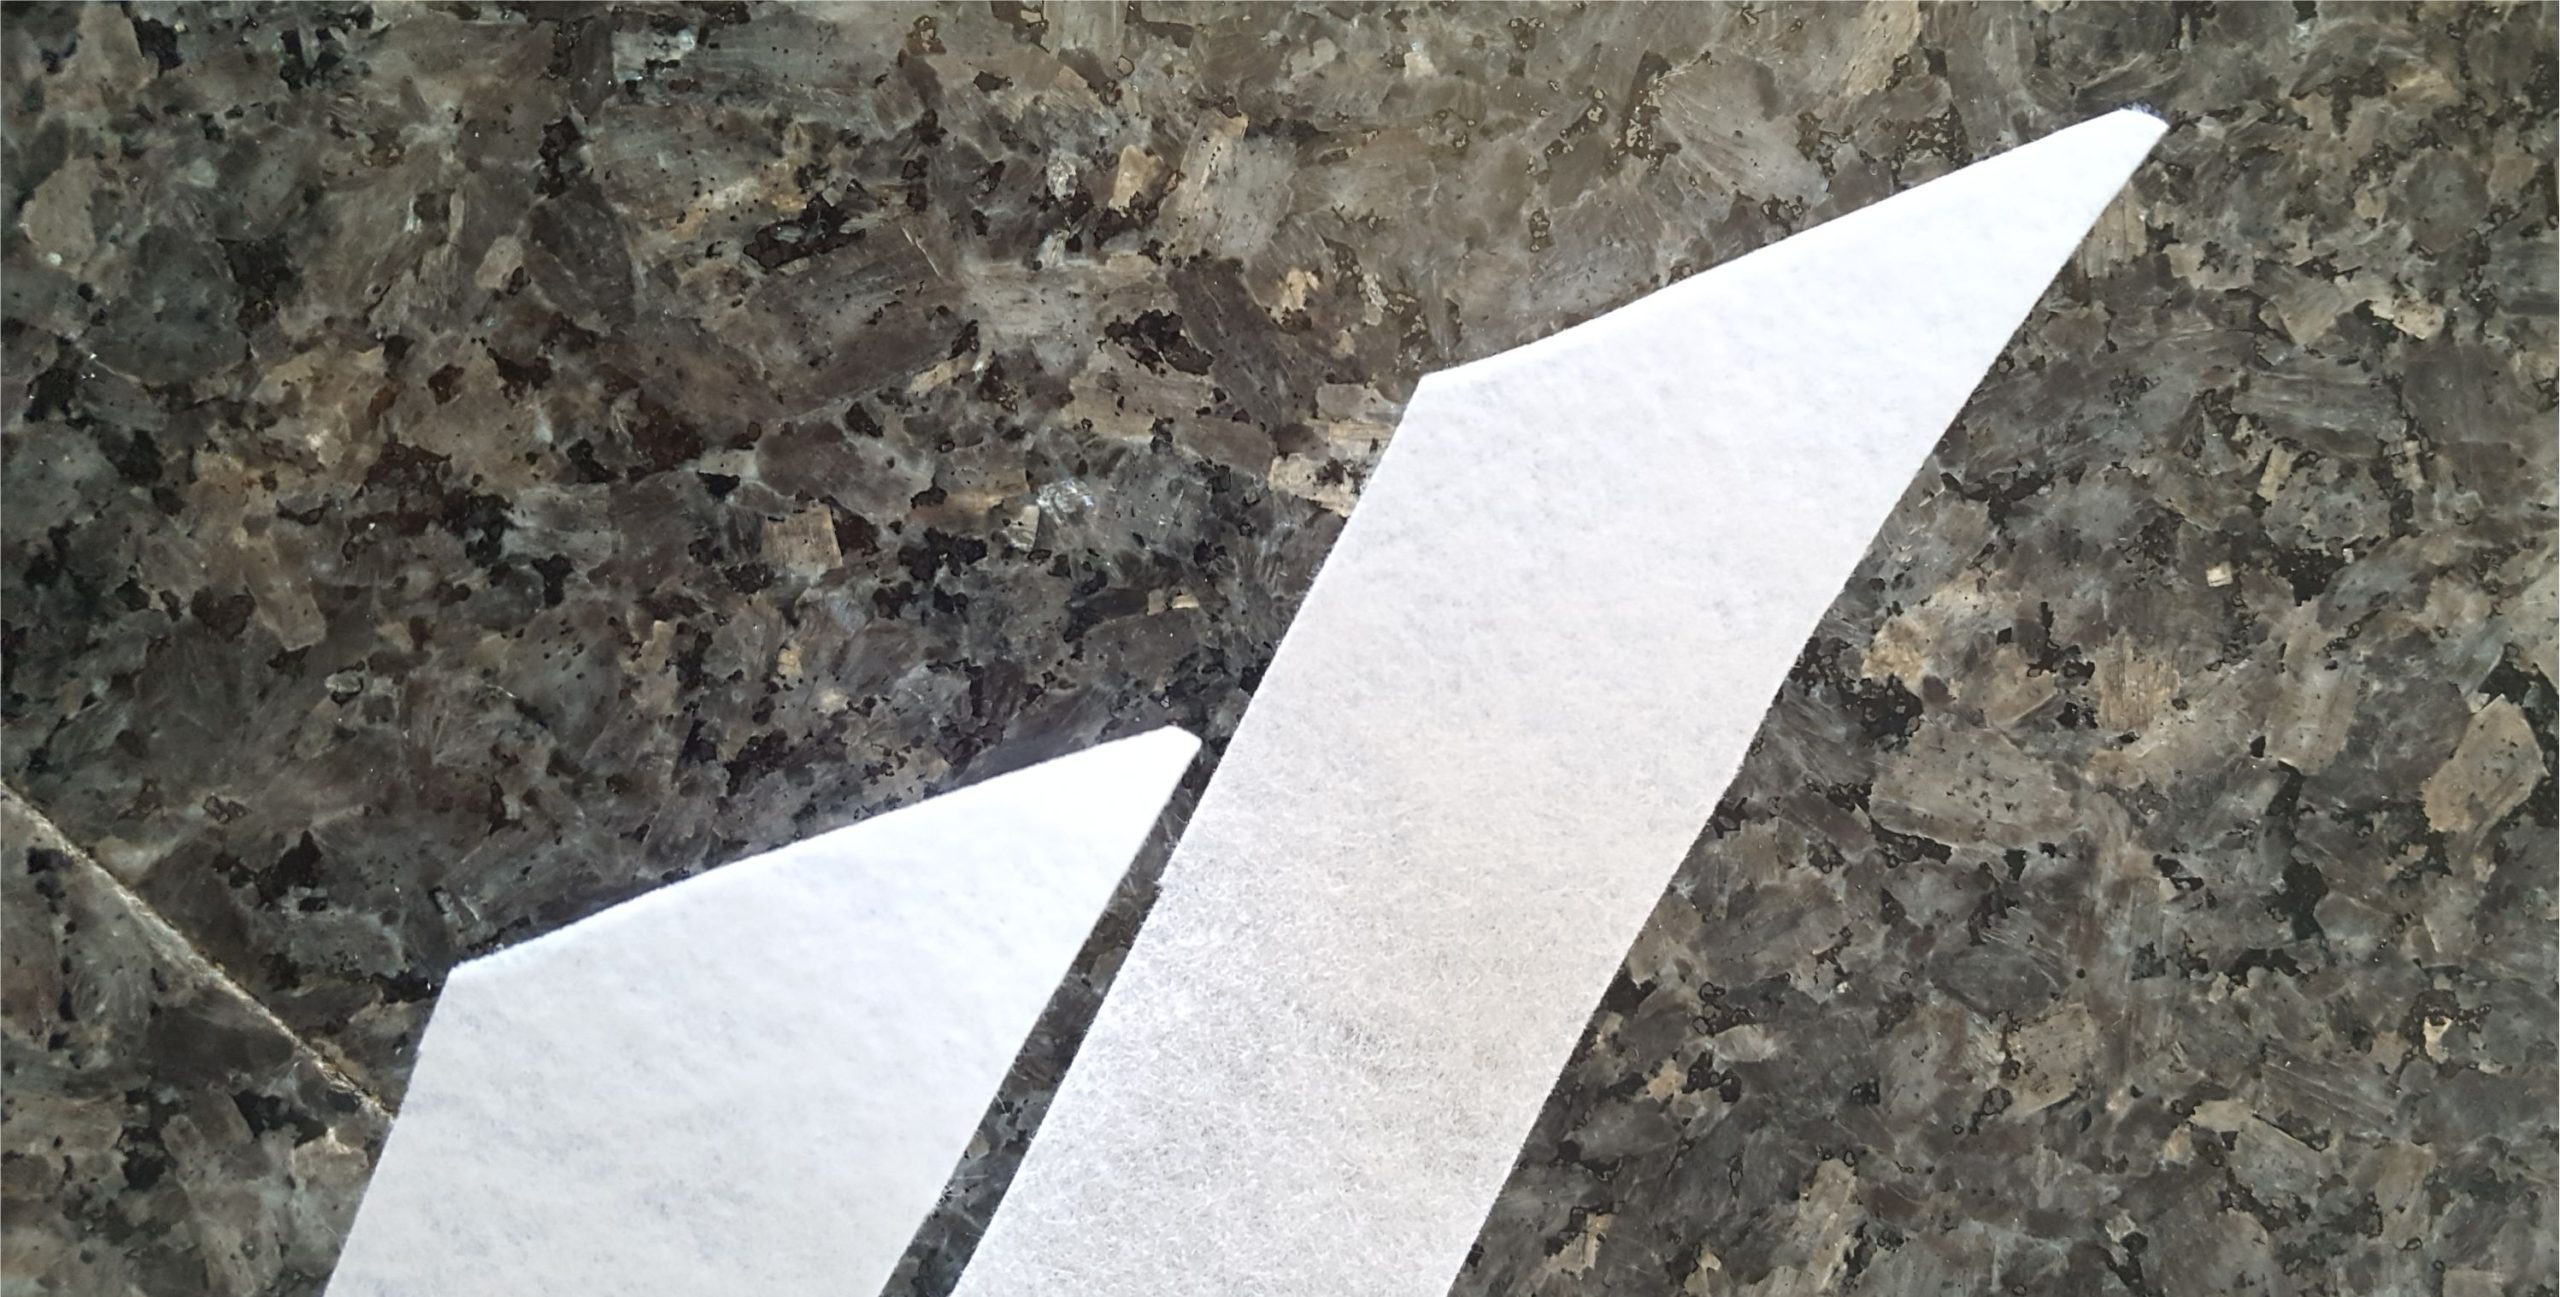
Cut the tips off each strip.
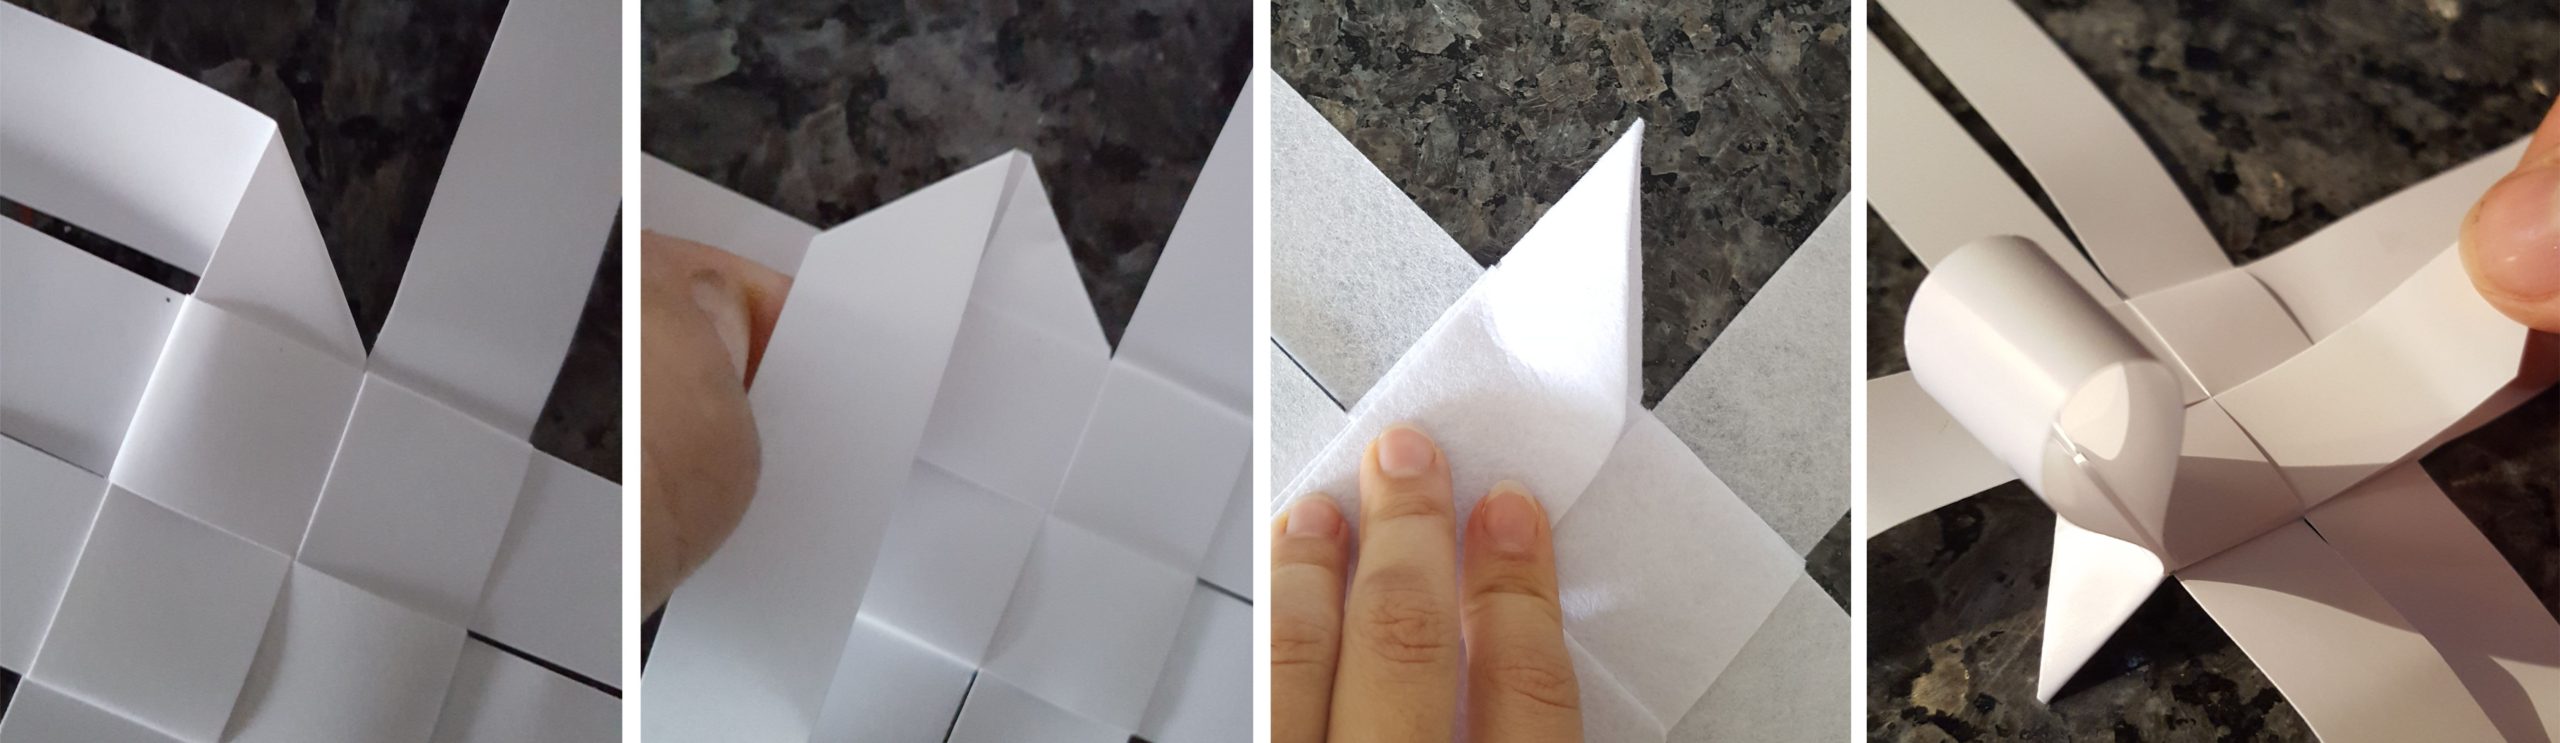
Start by making the side triangles. Bend the left strip backwards to make a triangle. Bend it forwards to make another small triangle. Fold to place these two triangles on top of each other. Insert the strip into the middle square and pull it through. Stop pulling once the triangle is formed
Do every second strip like this until four are done.
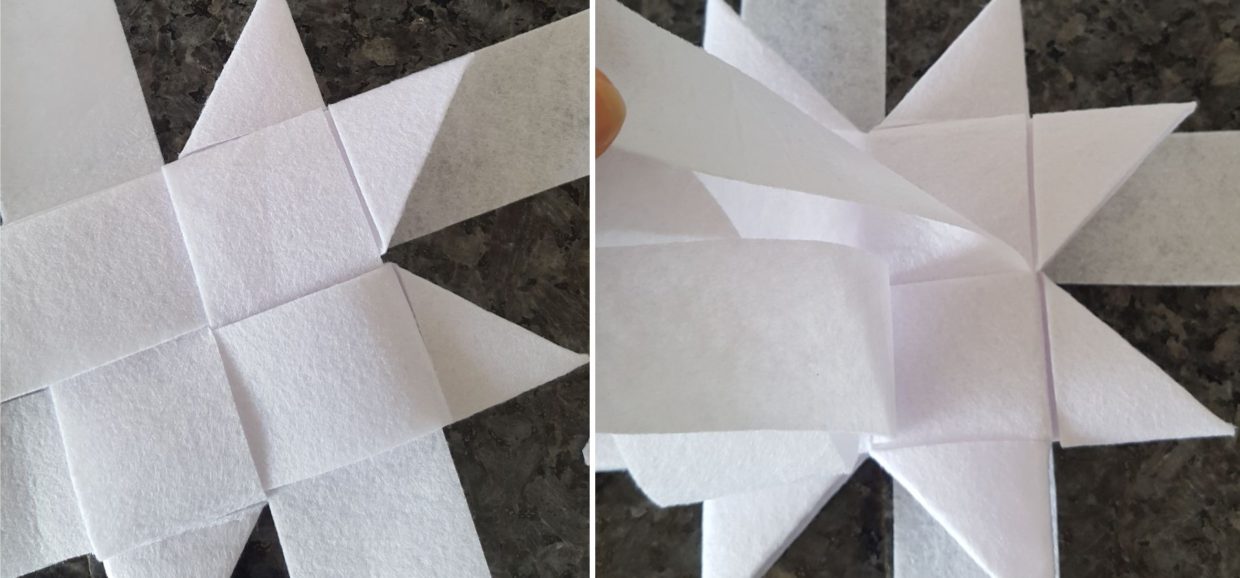
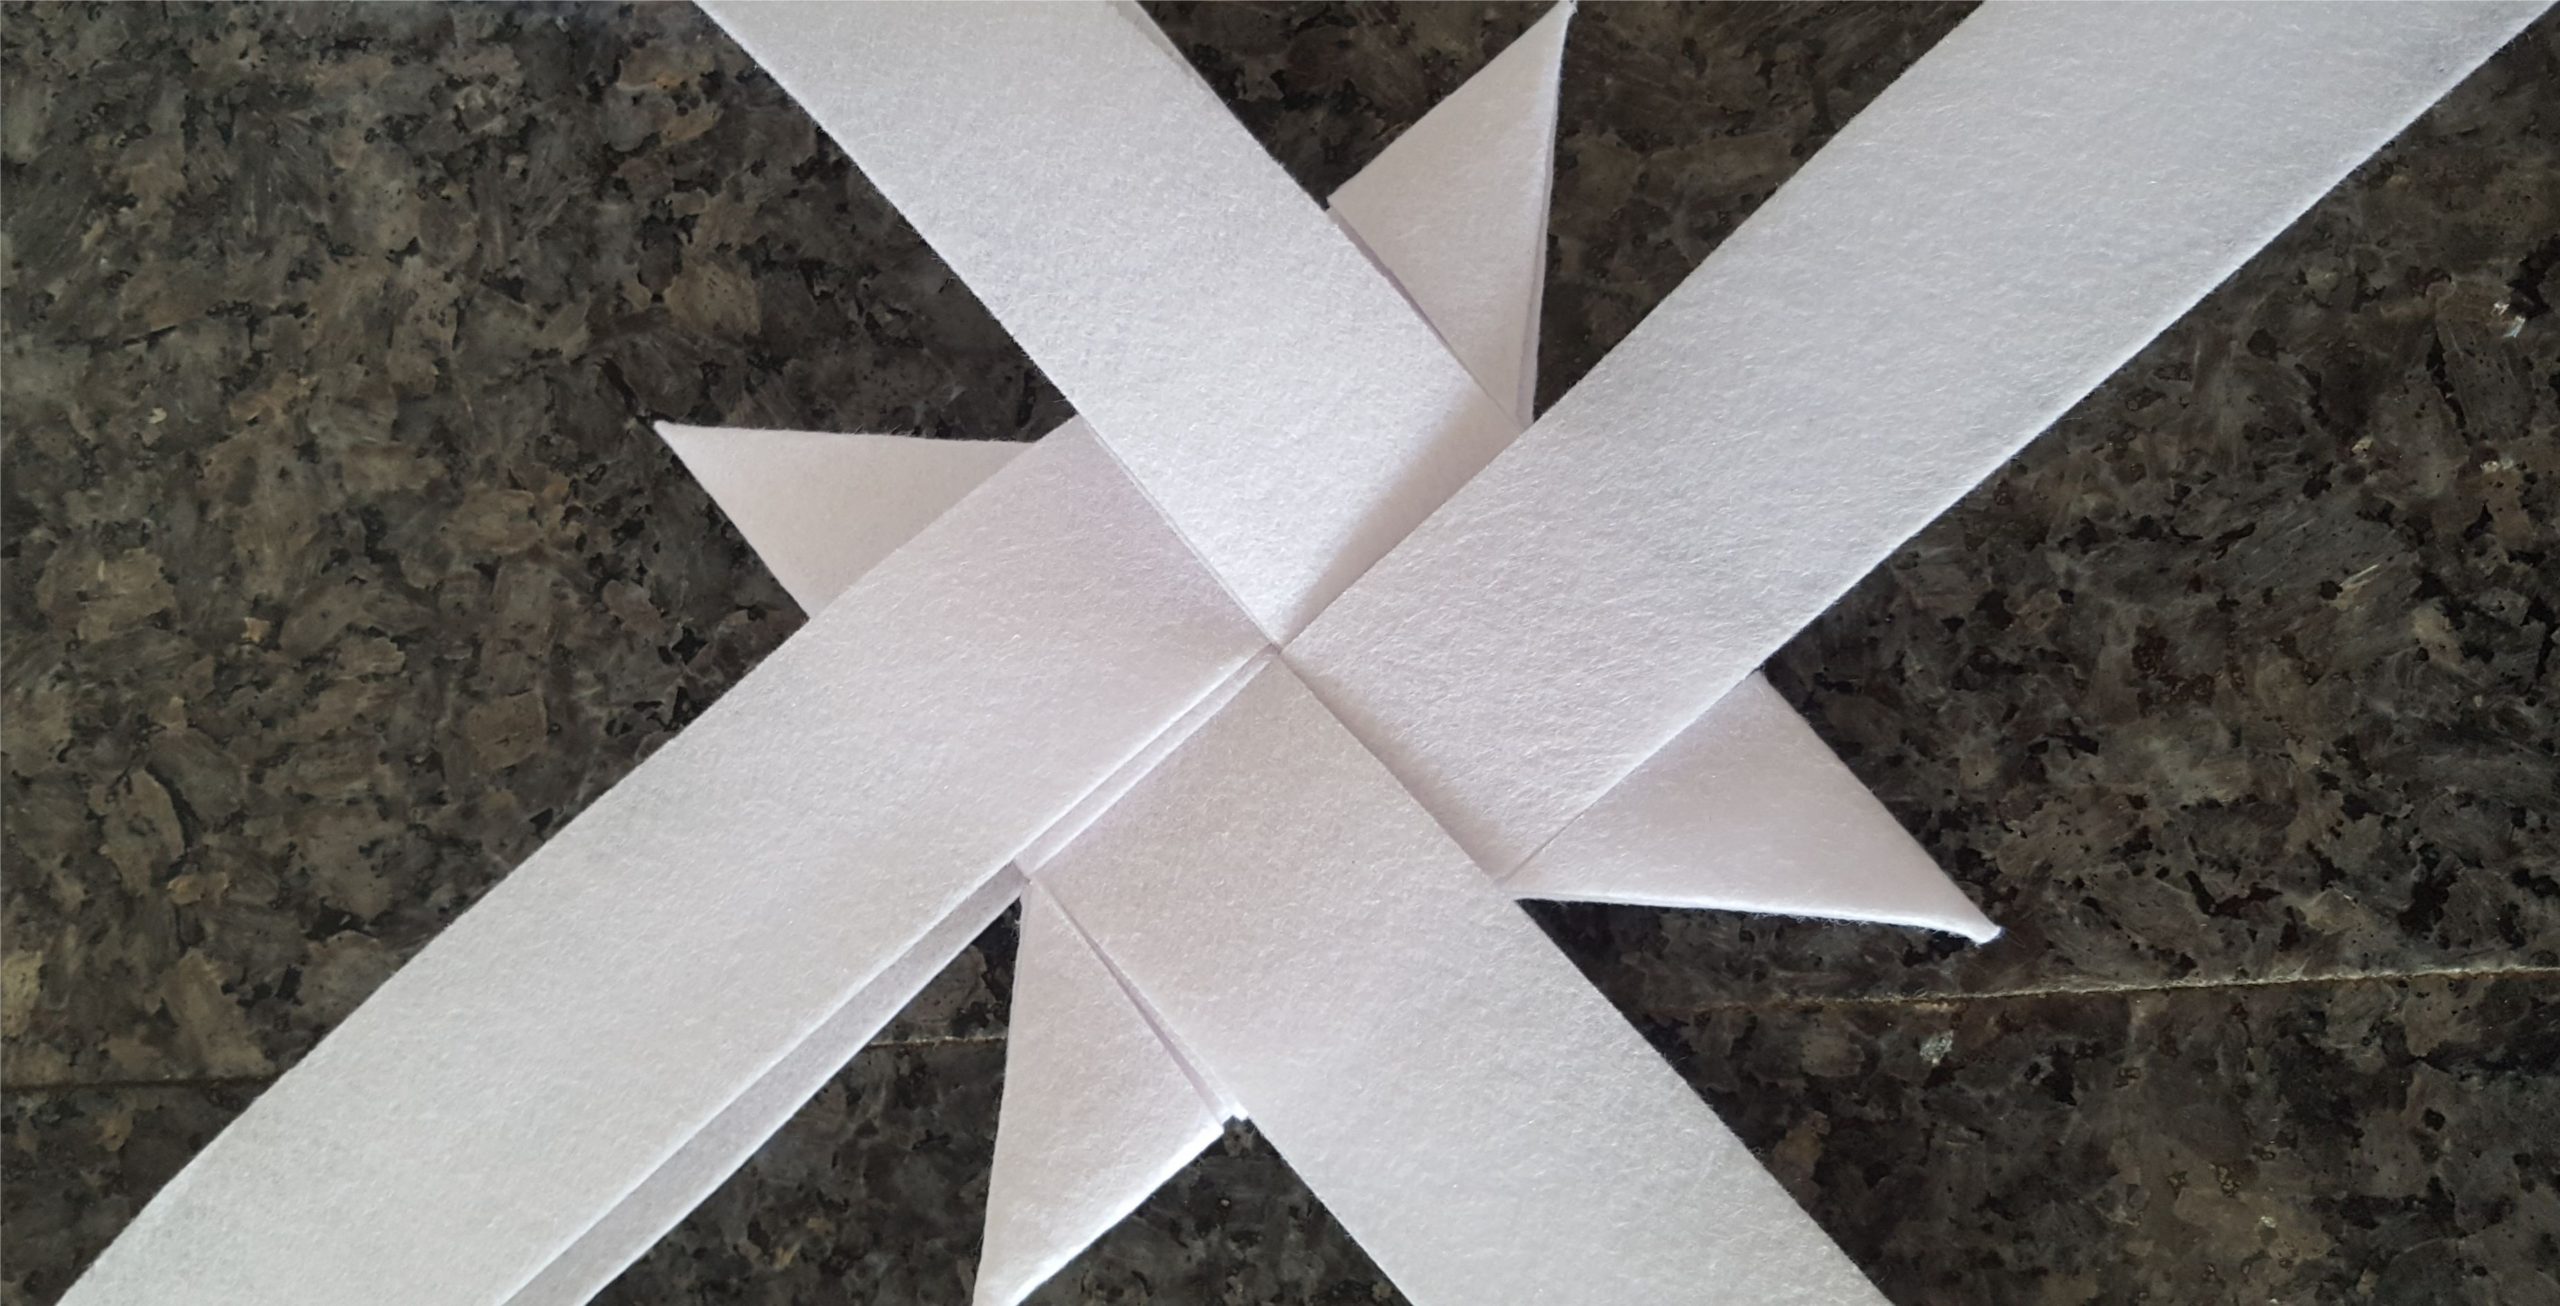
Turn the star over and do the other 4 strips. You will now have 8 triangles around the middle square and you will notice that the strips are coming out on top and bottom of the square (not on the sides anymore)
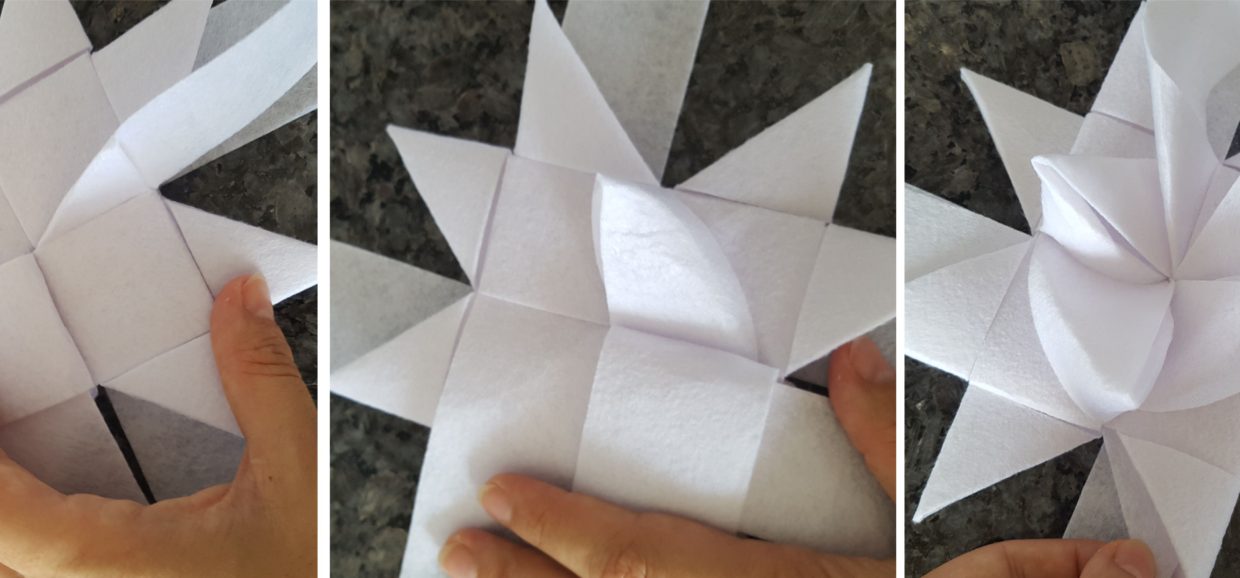
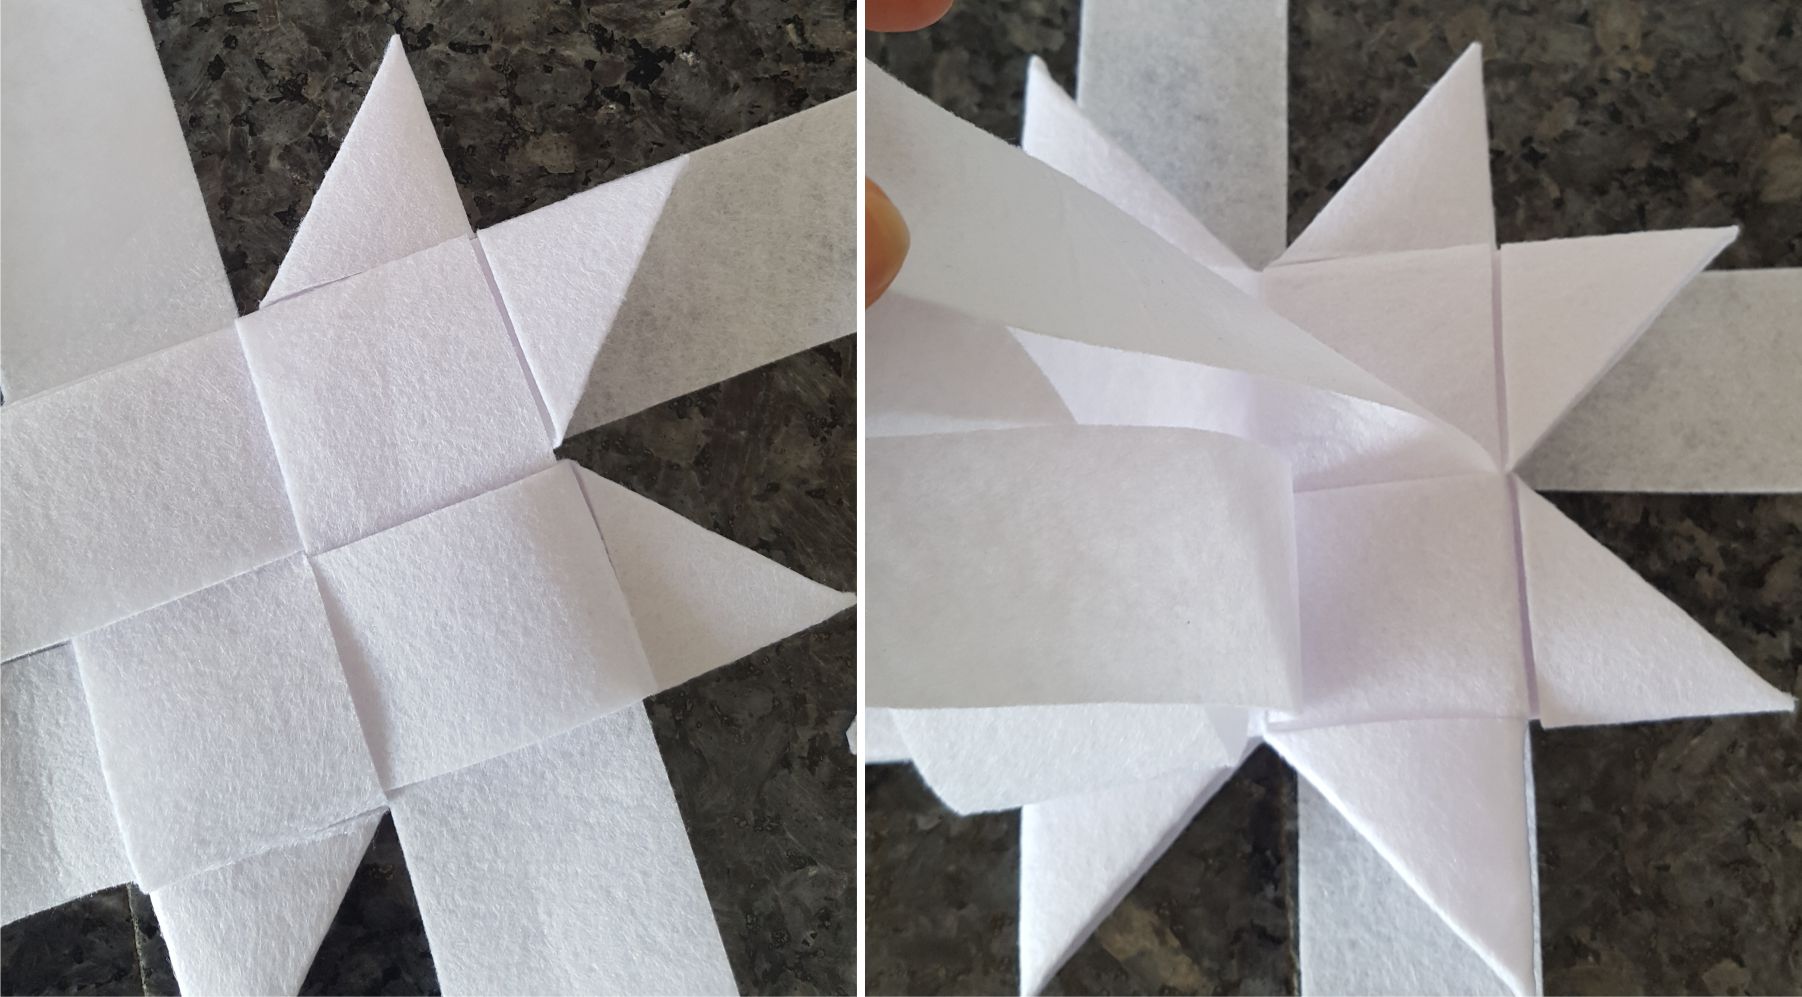
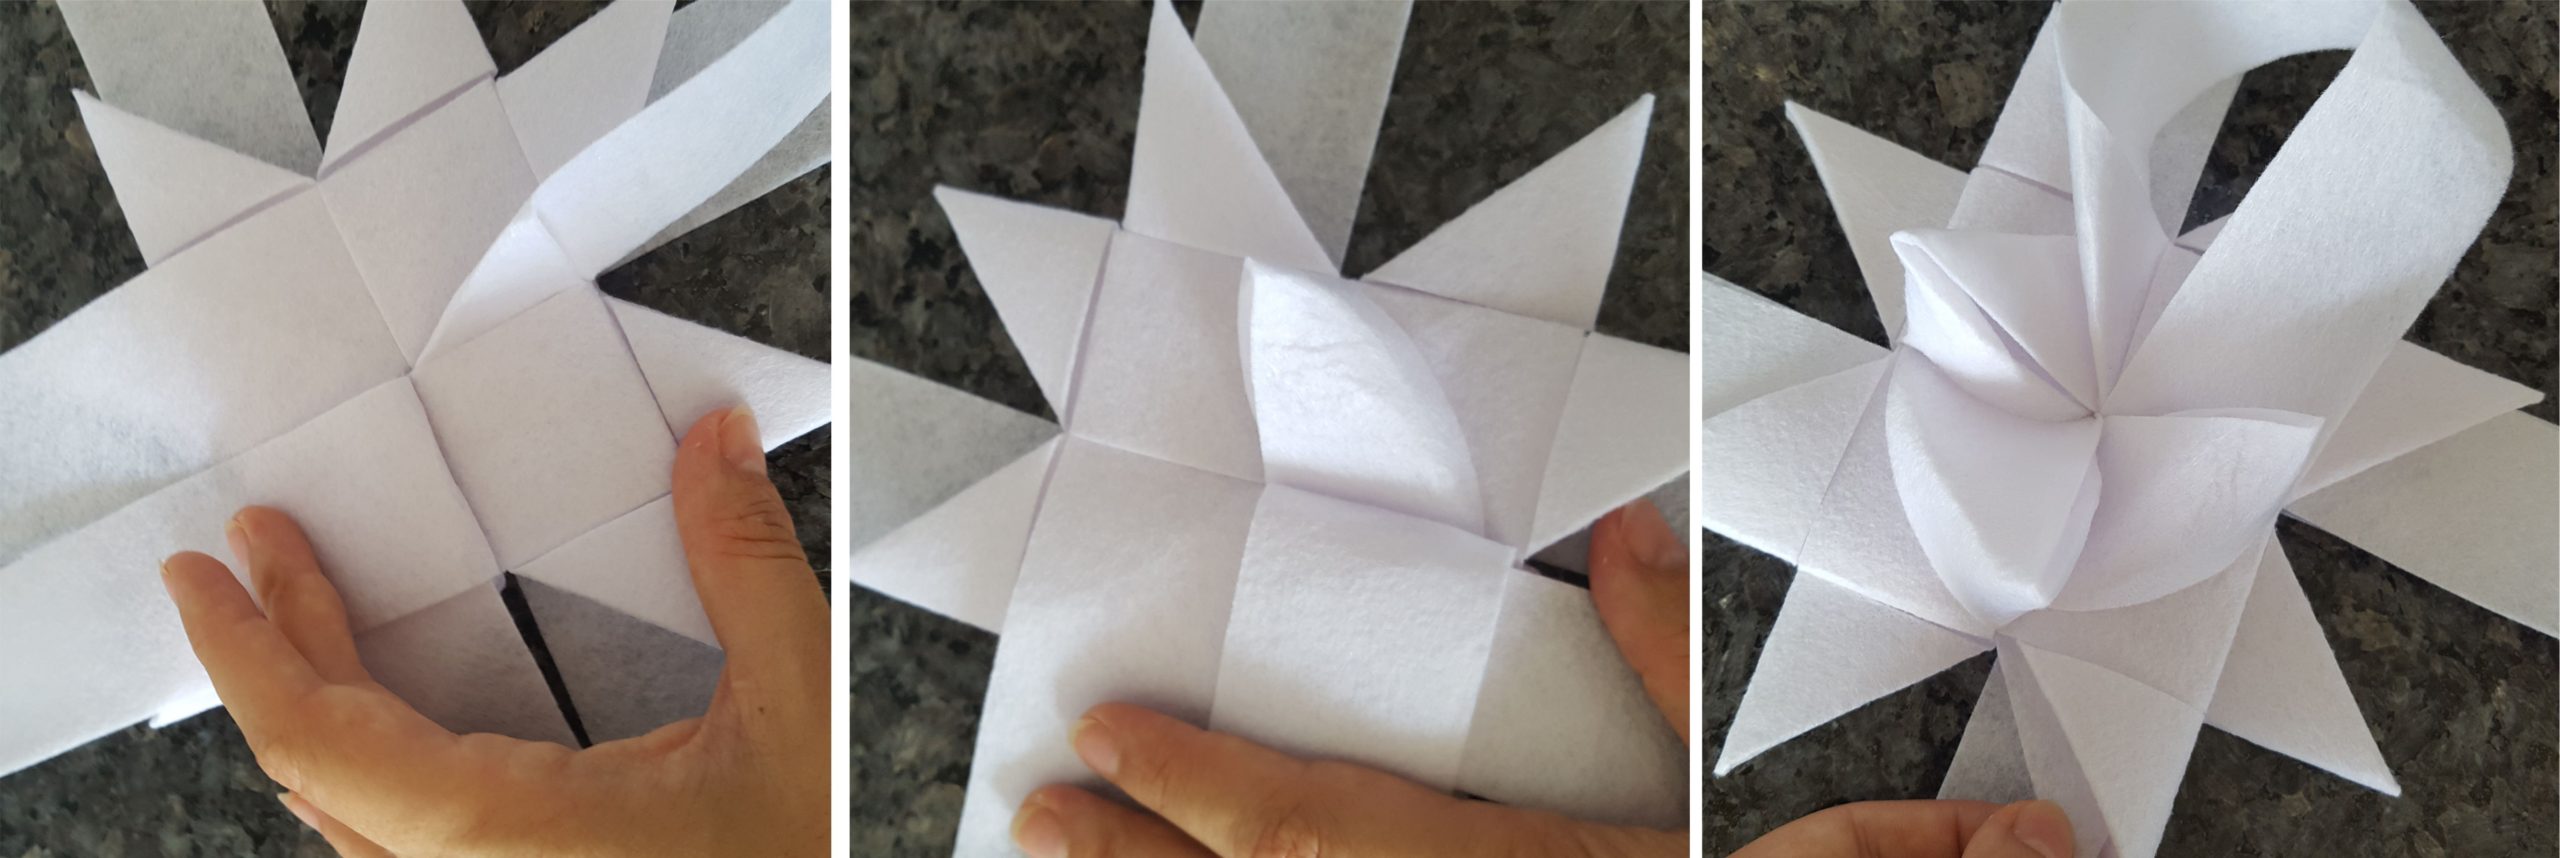
To make the top cones, make “a loop”, fold the strip around and insert into the square as shown below. You will have to lift the next strip to insert it correctly. Pull gently until a tip is formed. NOTE. If you pull too much the entire star will come apart so please be careful Do the other 3 tips.
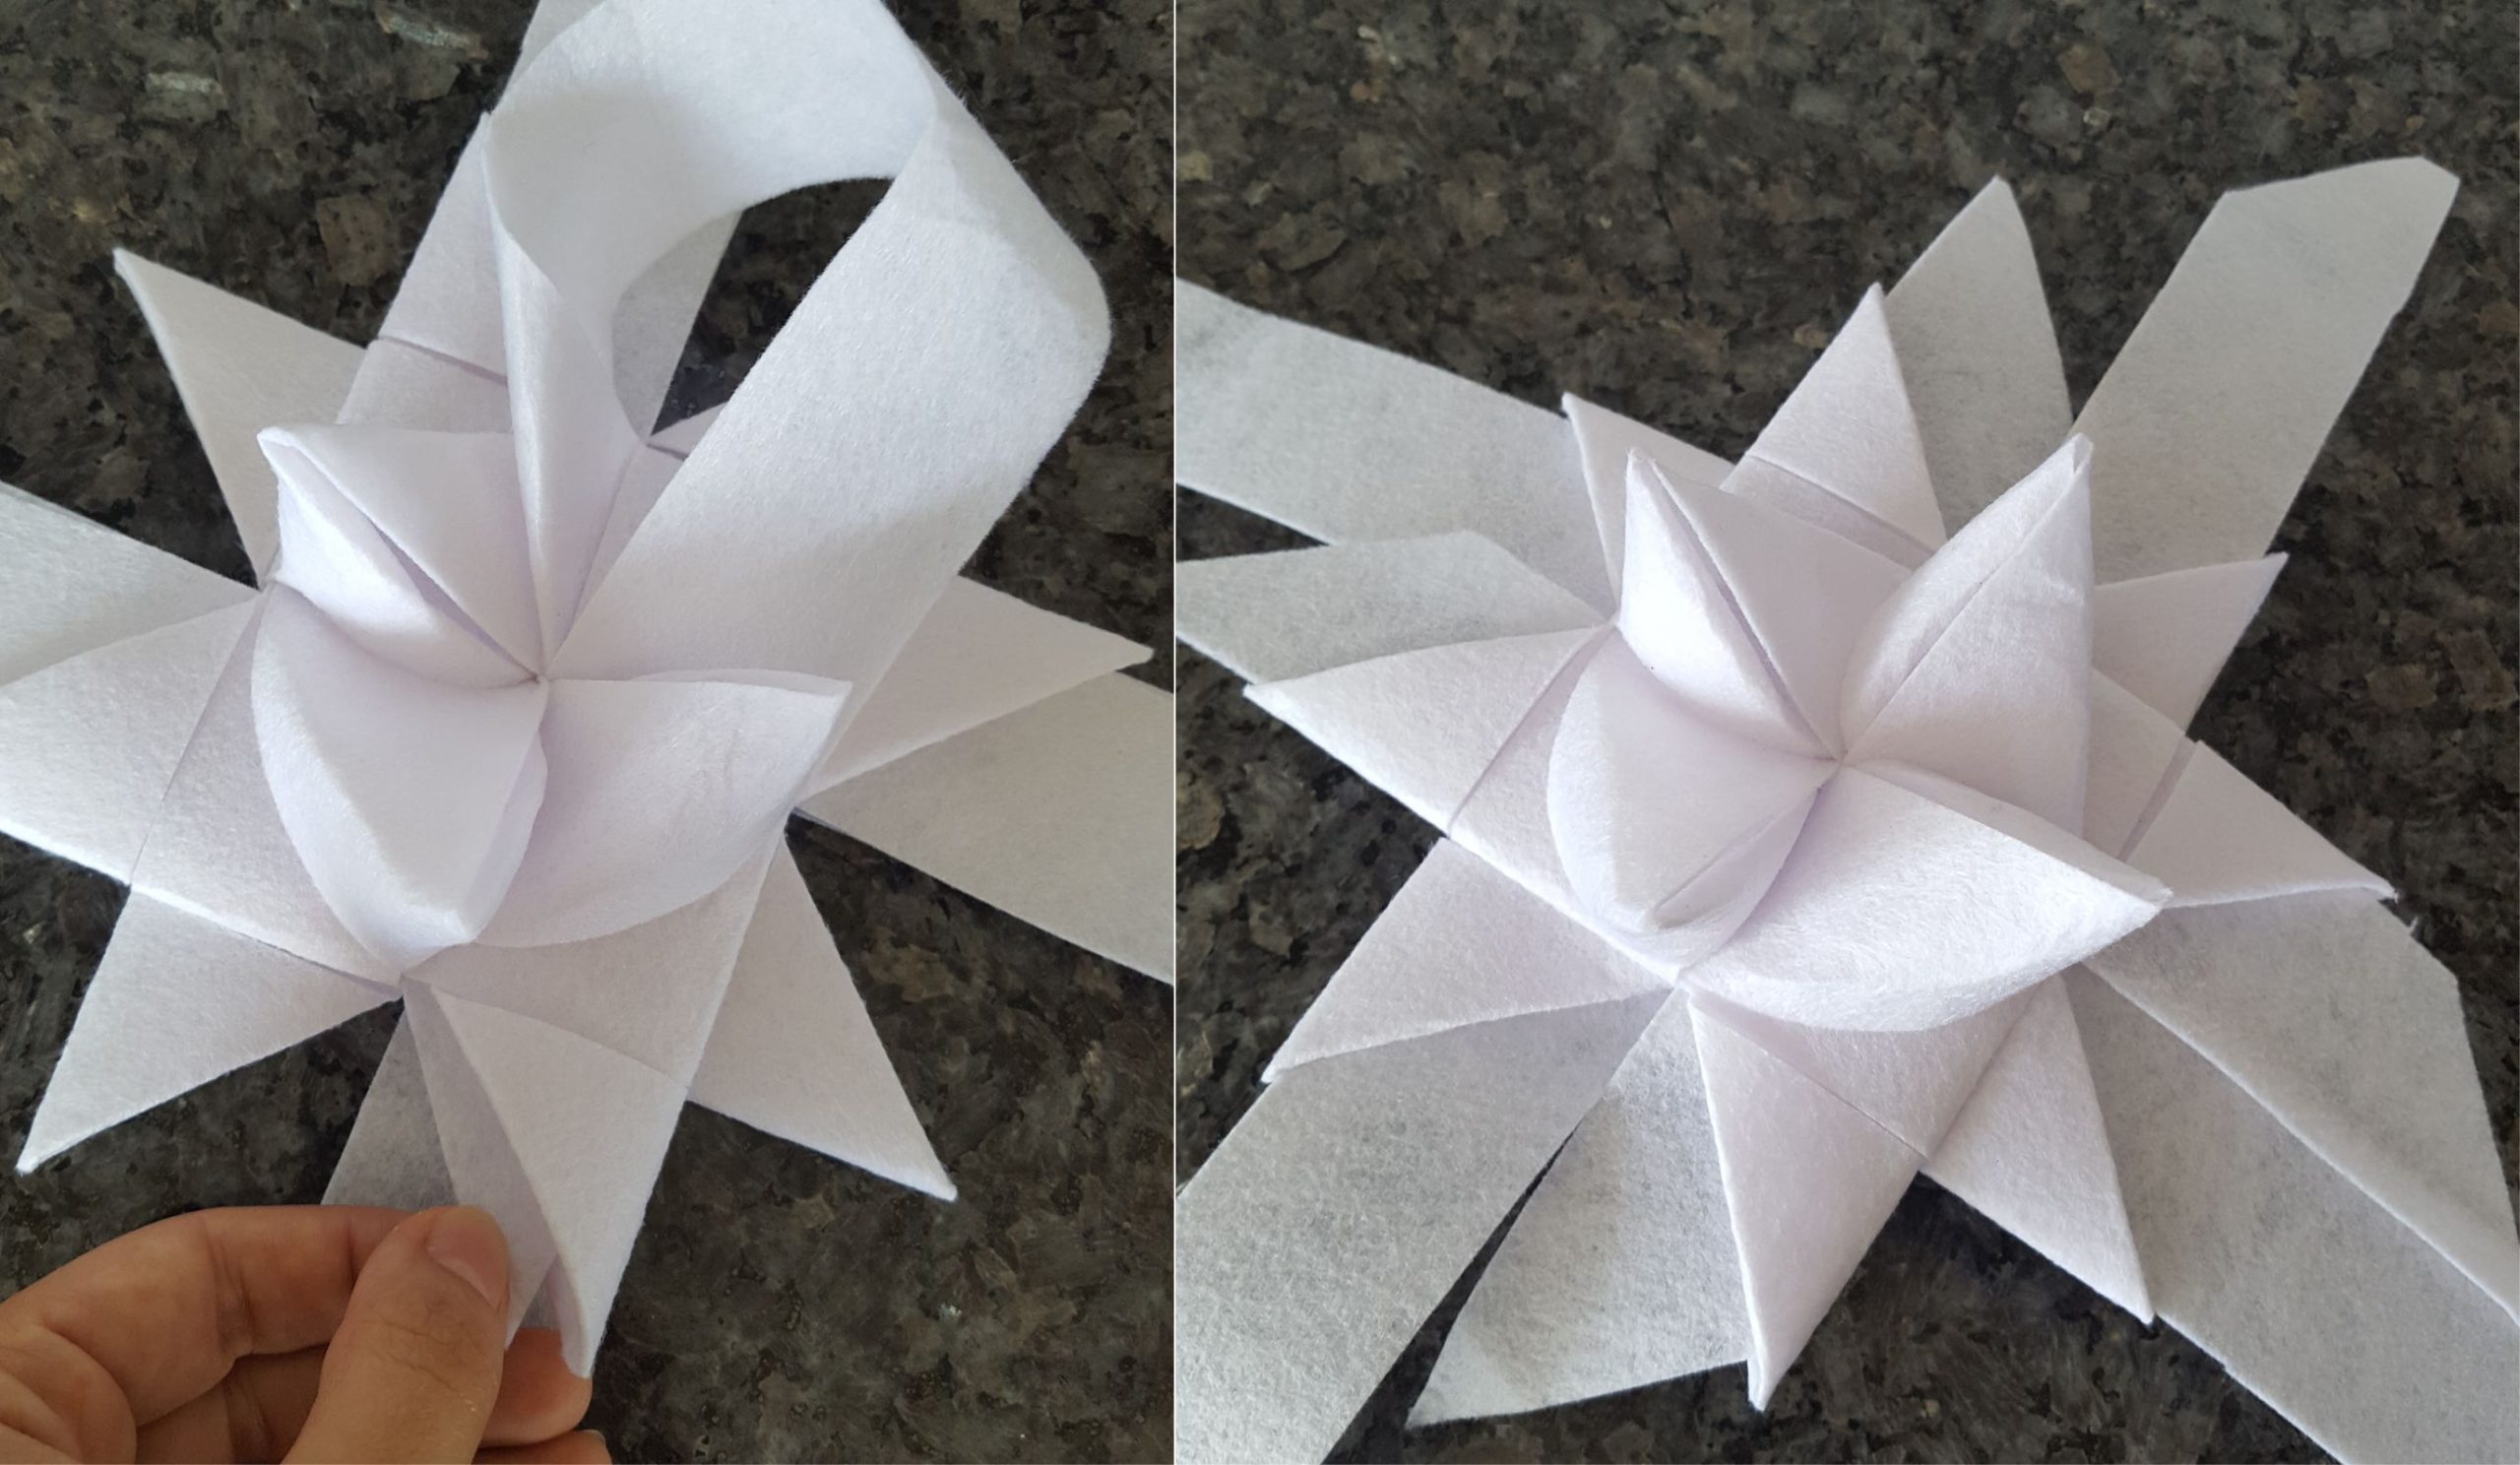
Turn over and do the 4 tips on the other side.
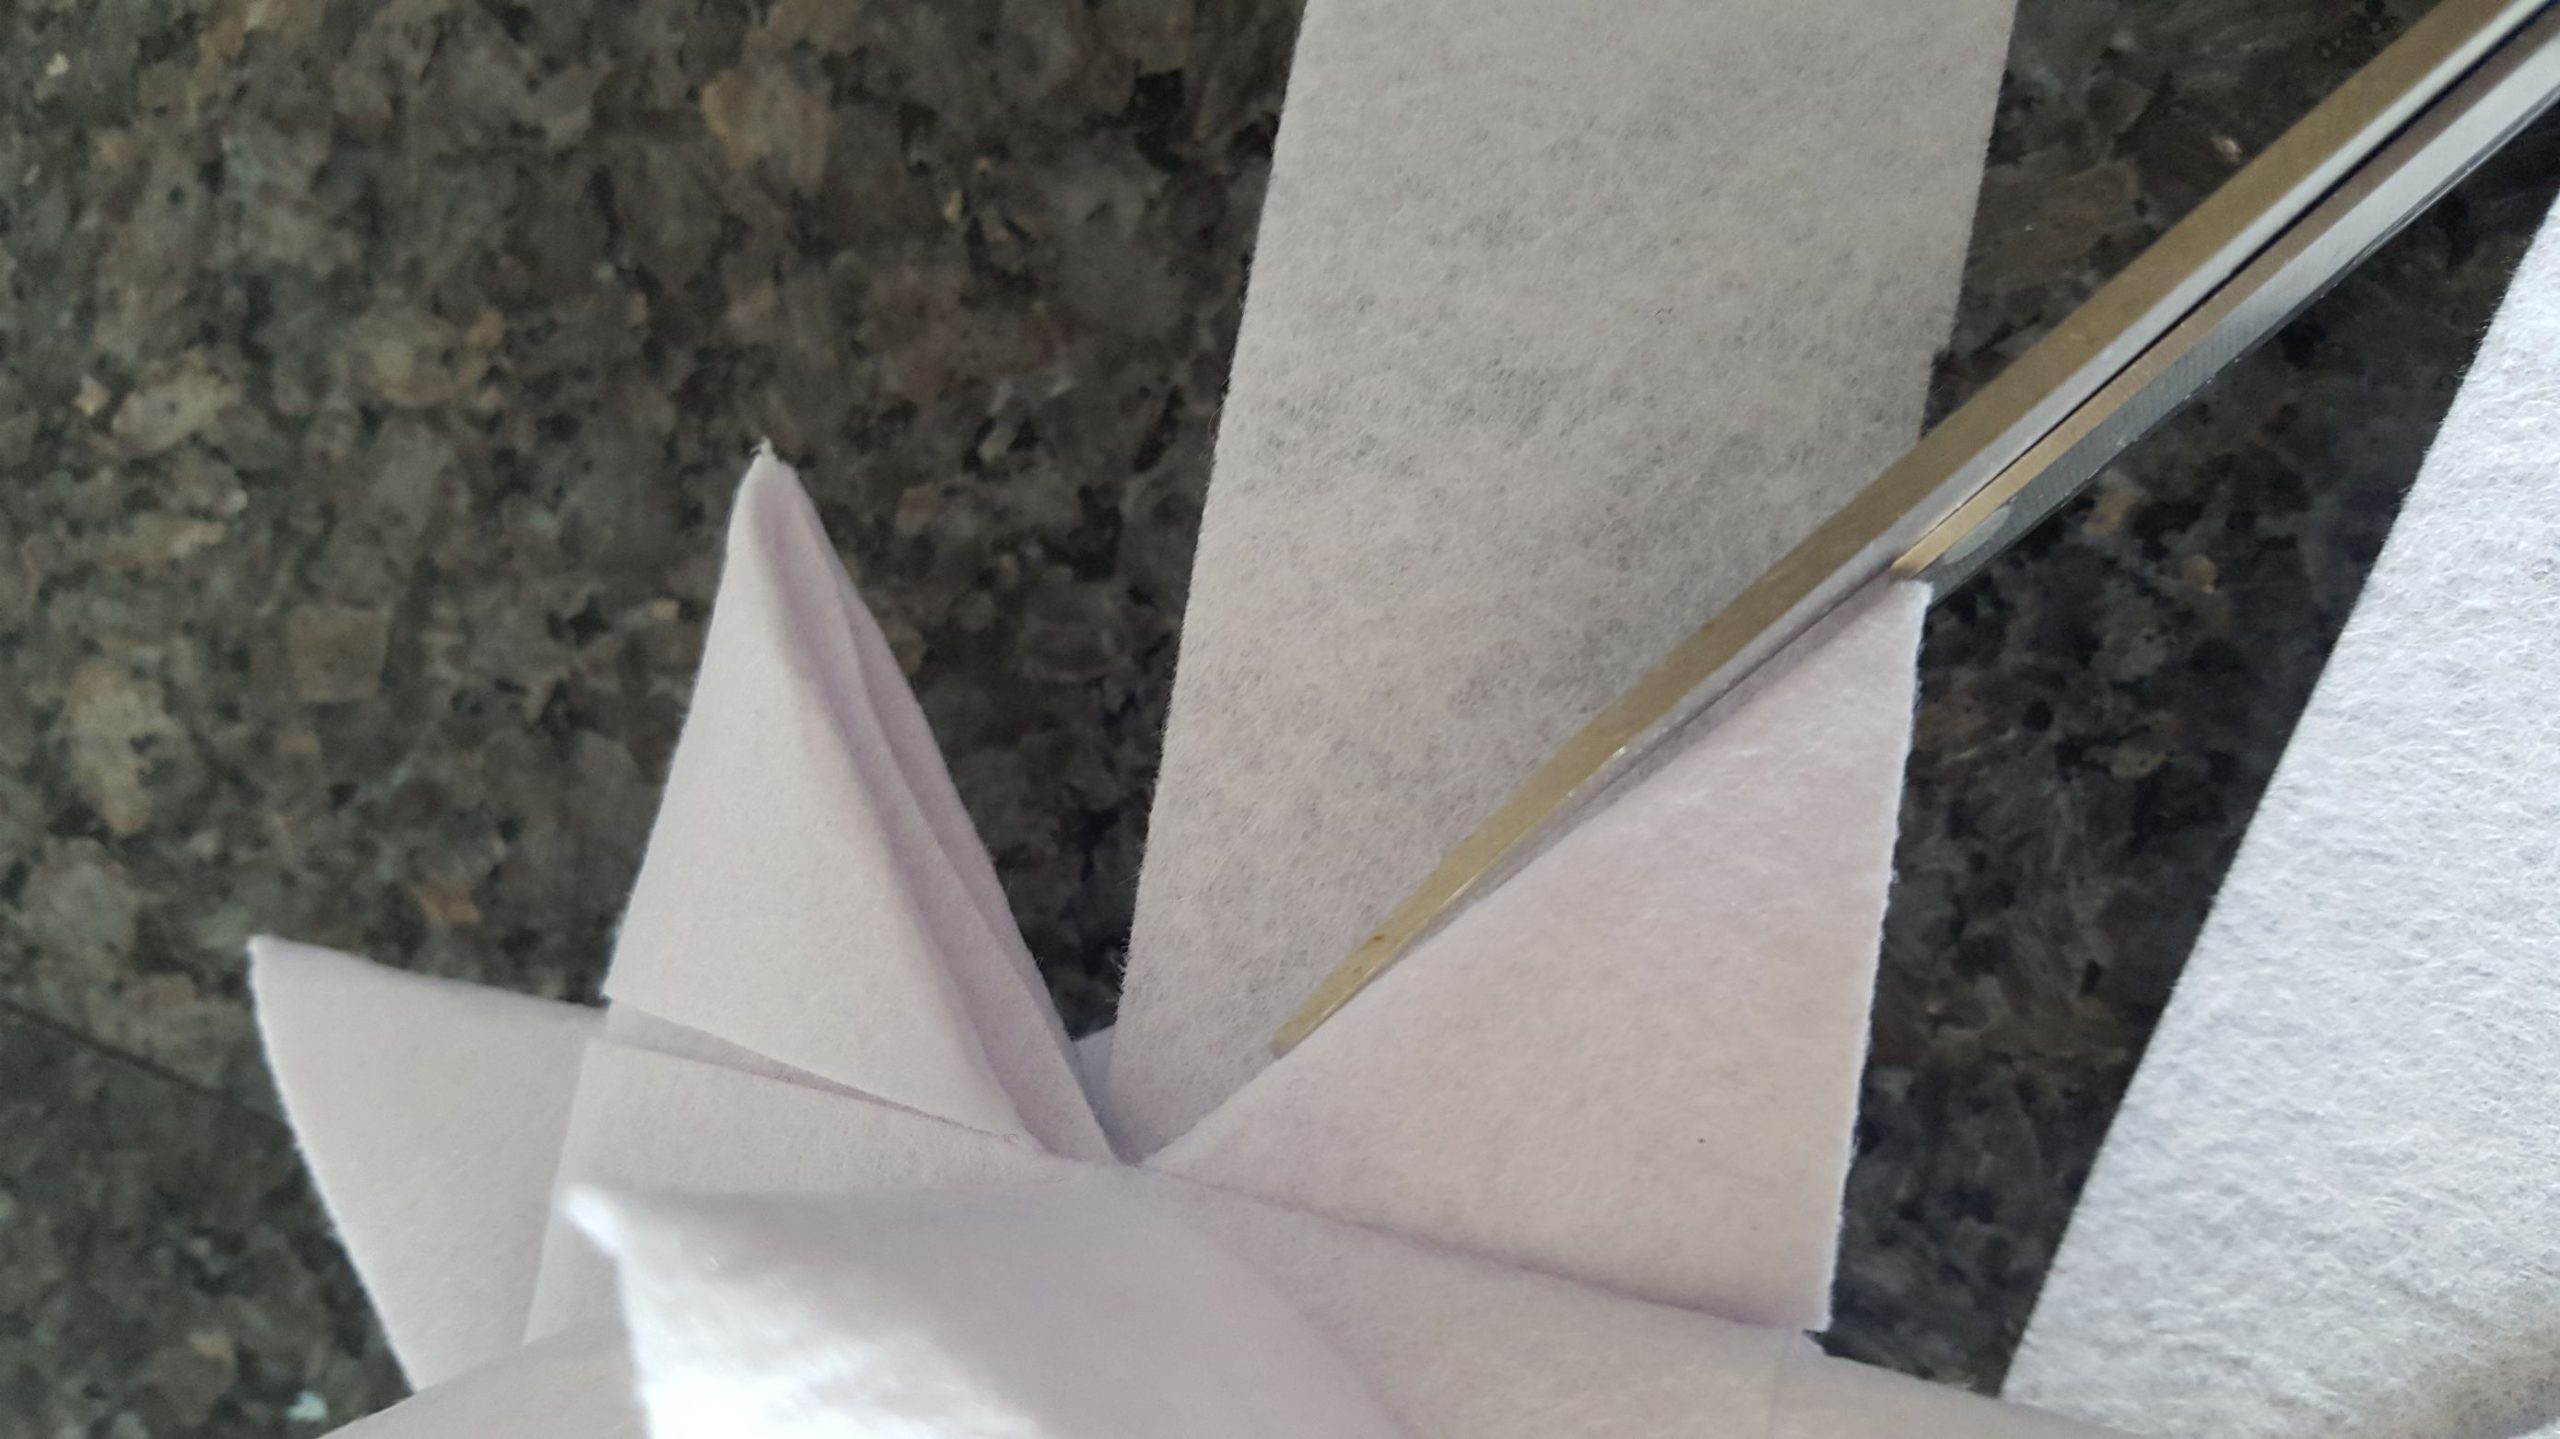
Cut off the remaining strips. Be careful not to cut into the star.

And your star is done!
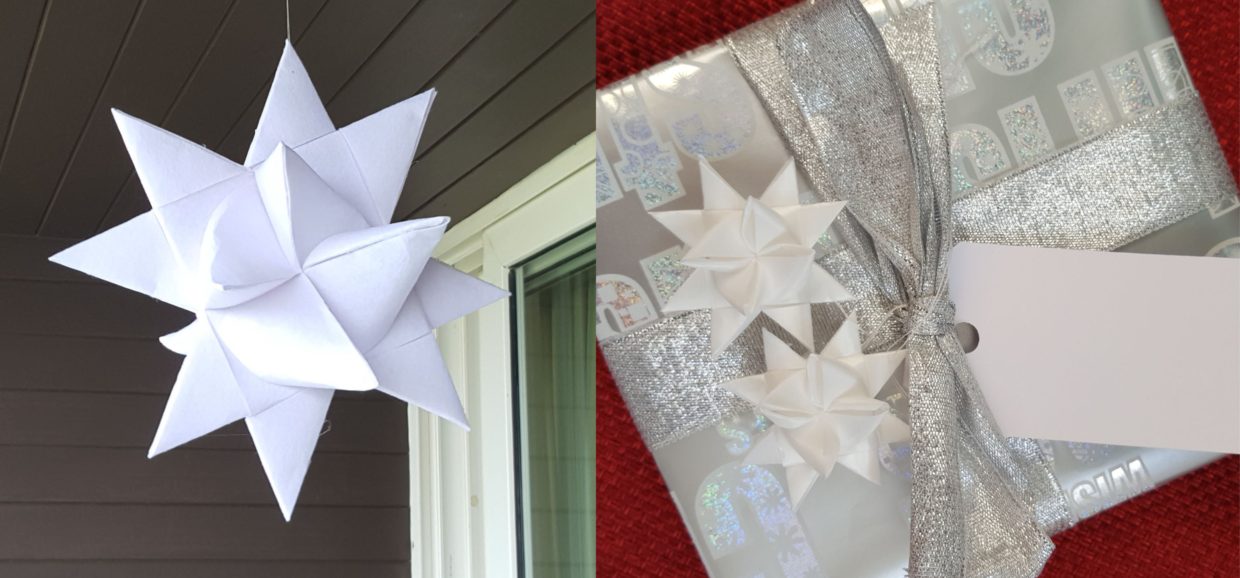
Tie a string through the tip of one of the triangles to hang it on your Xmas tree, in the window, outside or use it for decoration for presents. My kids also love colouring them after they are done. Happy Star Making!


Leave a Review
You must be logged in to post a comment.