
- Prep Time30-40min
- Total Time40-50min
We love perler beads in our house! They are so fun to make for us all -whether 4, 8,11 or… “much older” years old 😉 And this amazing perler beads present ticks all the boxes for a fun perler beads project.
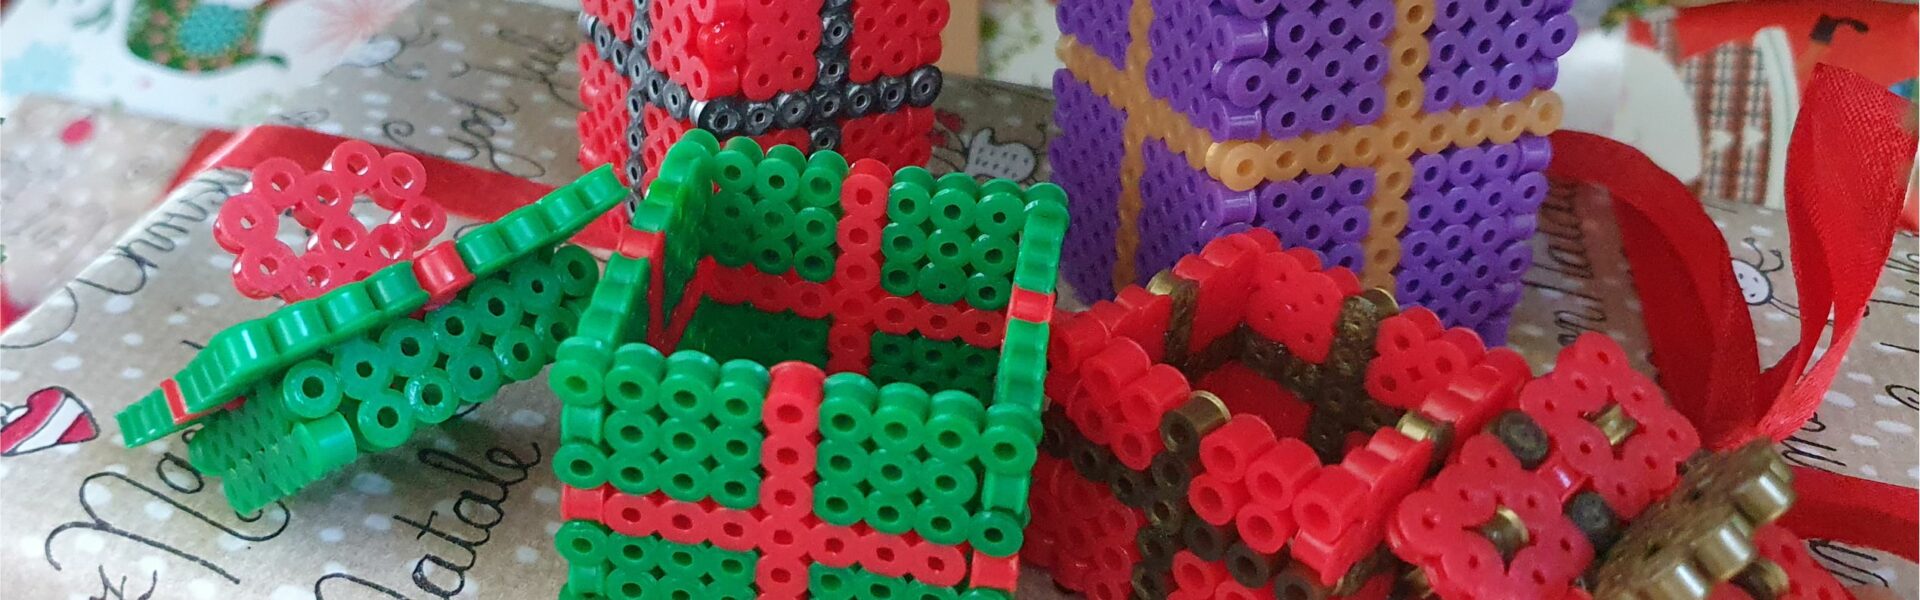
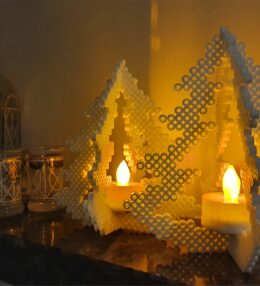
3D Perler Beads Present with a removable lid
This year, we have been making lots of Christmas designs and we are especially loving all the 3D version we have made -like these present. Christmas trees and Christmas baubles are to come as soon as I get a moment to share it with you. The presents are fairly easy to make, do not require lots of different colours and are not too time-consuming either. And to top it off they are really useful and decorative. Use them as presents under a tiny Christmas tree or perhaps as a jewelry box for a homemade pendant or ring.

My best tips for starting a perler beads project
Where to get the beads: If you are new to beads and don’t want to spend a fortune (Hama beads are Danish and they can be a bit costly in India), buy the mixed box of beads from Ikea. It requires a little more time to find the colour you want when they are all mixed but it’s definitely worth it. I think there are about 6-8000 beads in a box from Ikea for Rs700. Please also note that they require a little less ironing time as they melt slightly quicker than other brands. This is not a problem as long as you do the ironing on low heat (and not on medium heat as mentioned in the steps below)
The baking paper: I use this Oddy baking paper to iron the beads. It’s thick and doesn’t tear easily.
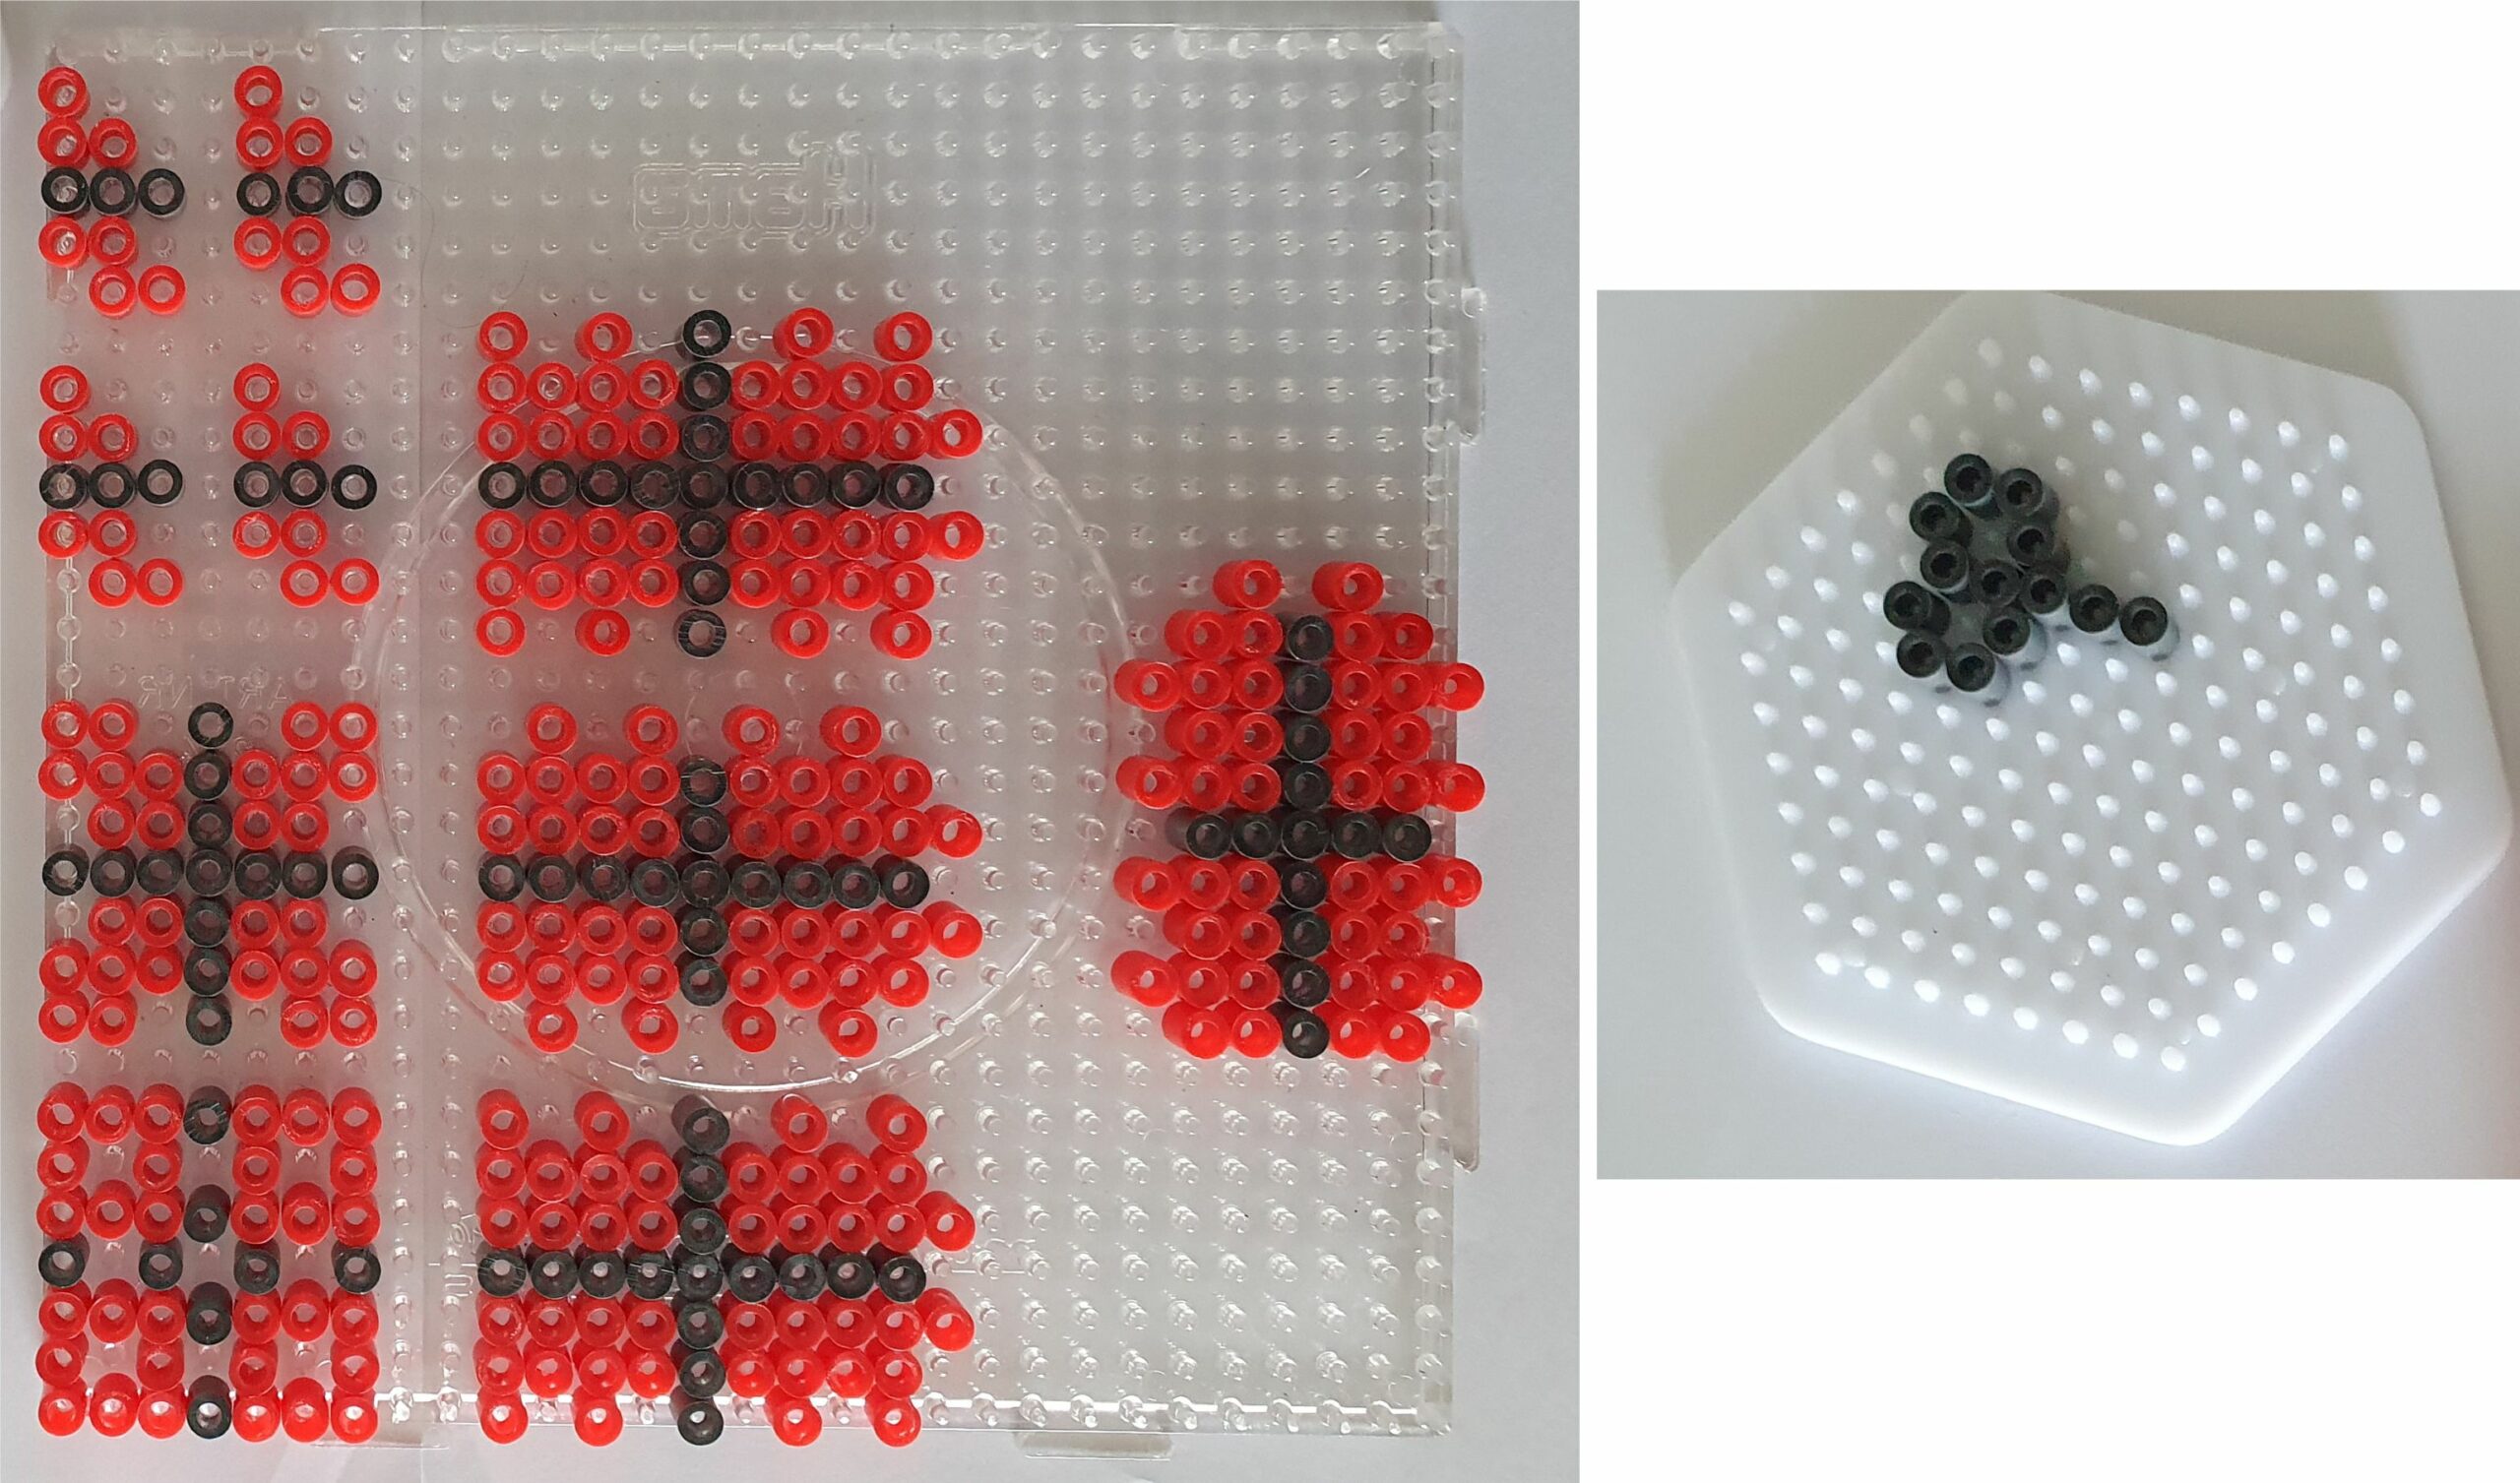
The perler beads peg boards: Use the square peg board for the present and the hexagon peg board for the bow.
See the detailed step-by-step guide with pictures below the ingredients.
Make a perler beads present with the kids -ironing tips:
Everyone can have fun with perler beads but the ironing is better to leave to a grown-up or older kids under supervision. Just so the bead fun doesn’t end with a burn on the hand, beads stuck to the iron or a ruined design because the iron was too hot. I don’t mean to make it sound tricky, it mostly isn’t, but it has happened in my house when I turned my back for a second or two. My kids have started ironing the beads themselves around the age of 10 years old.
Make sure to iron the beads gently on both sides for these presents so they can snap together afterwards like a cube foam puzzle. If the beads are too flat, they will not fit together. If the beads are ironed correctly, you should not need glue or blue tag, but use it if some of the pieces aren’t snapping together as they should.
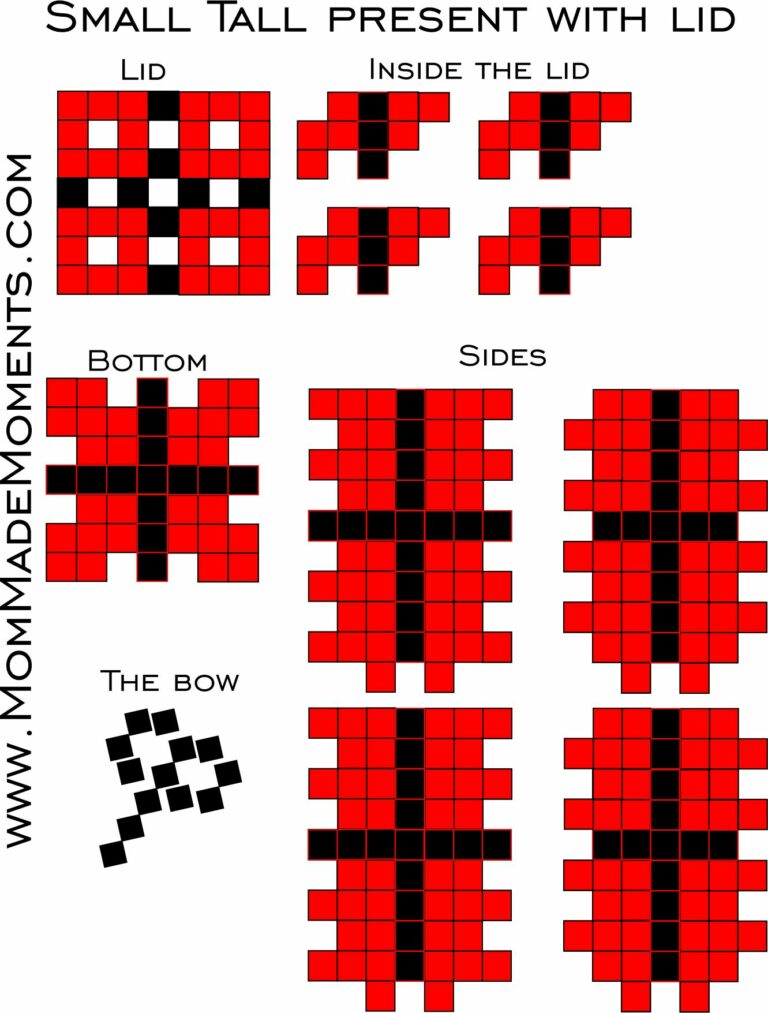
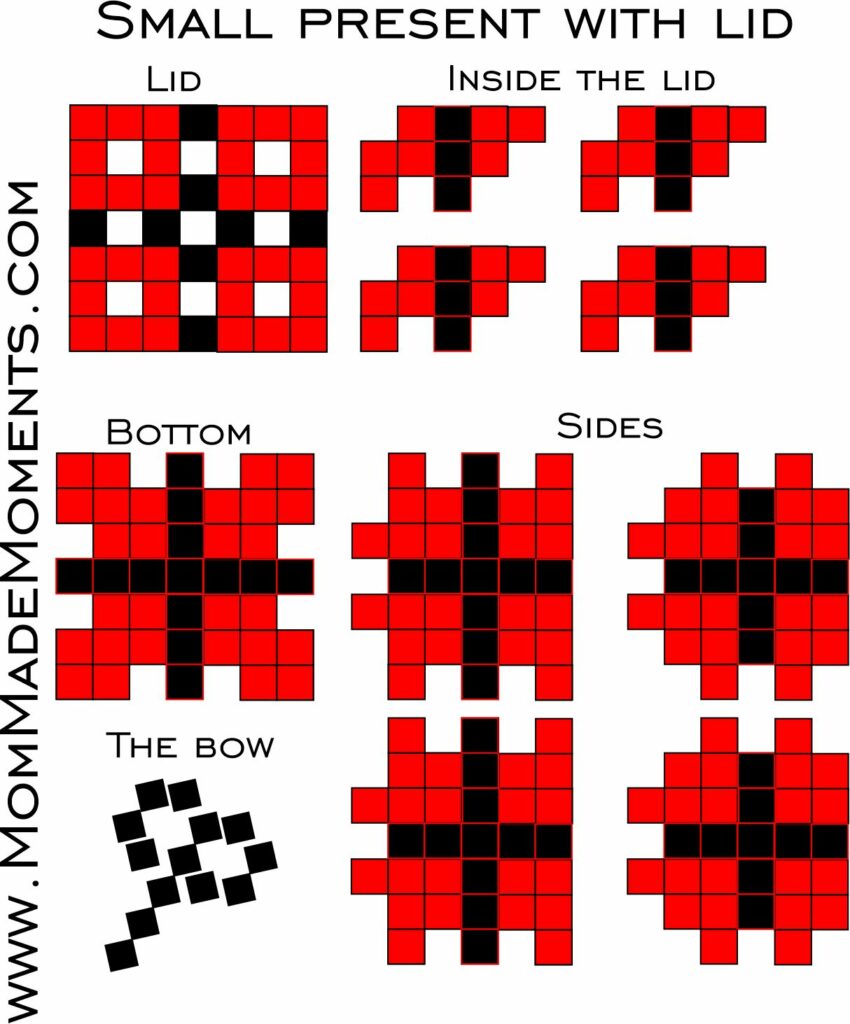
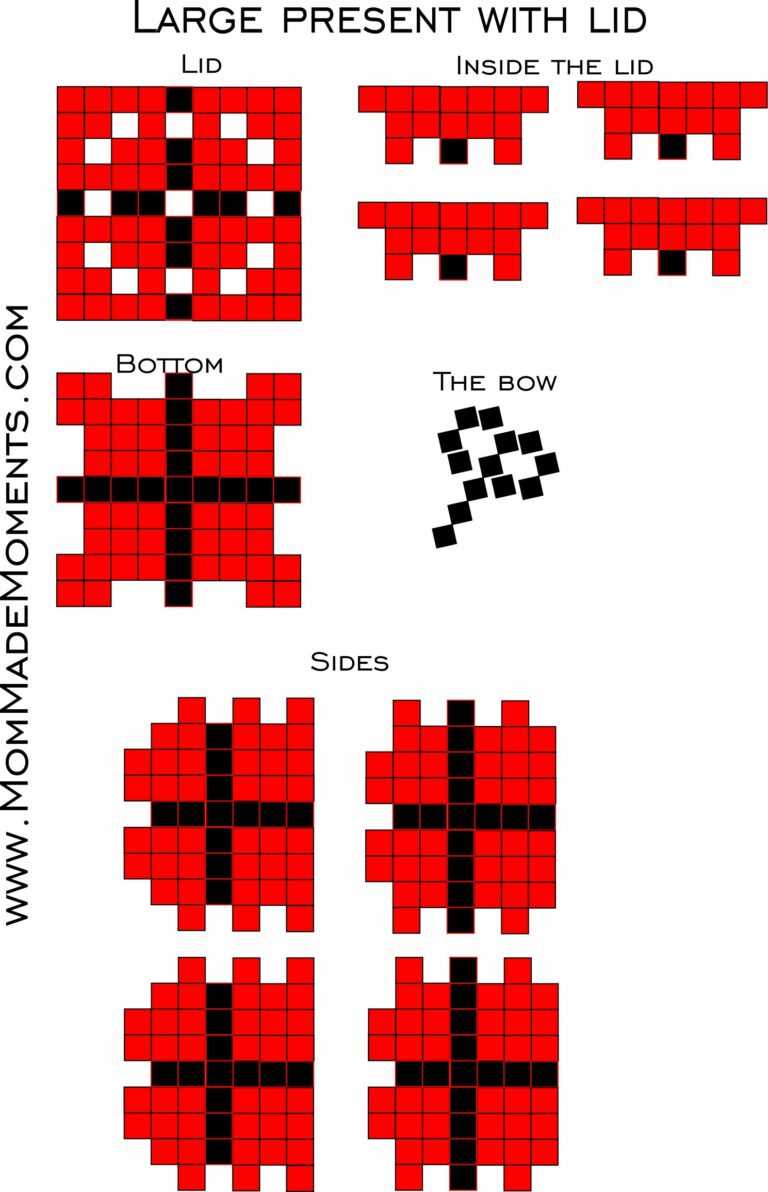
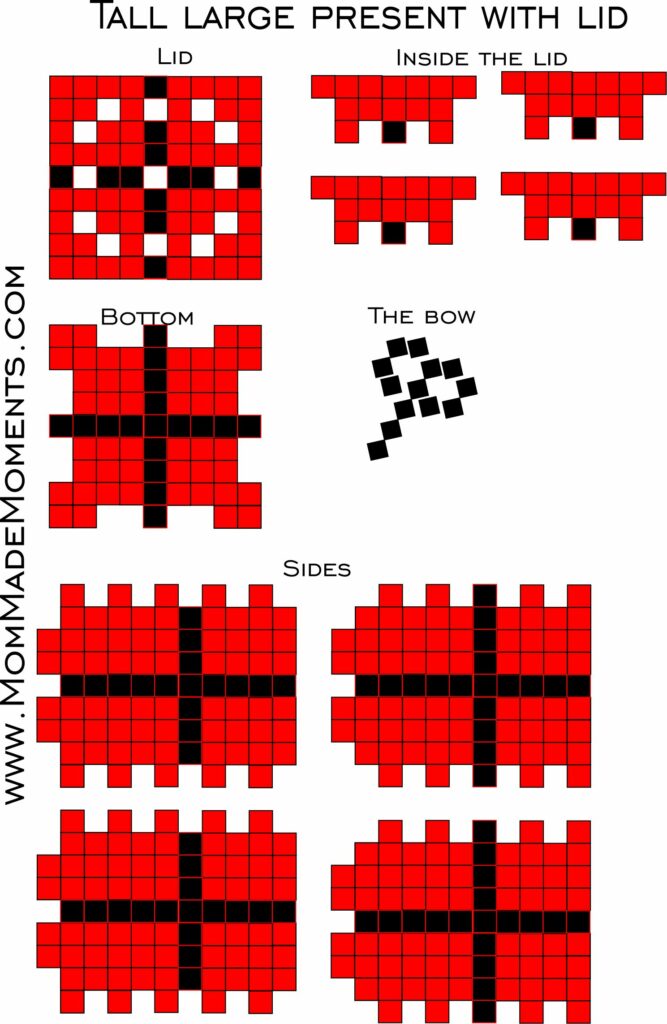
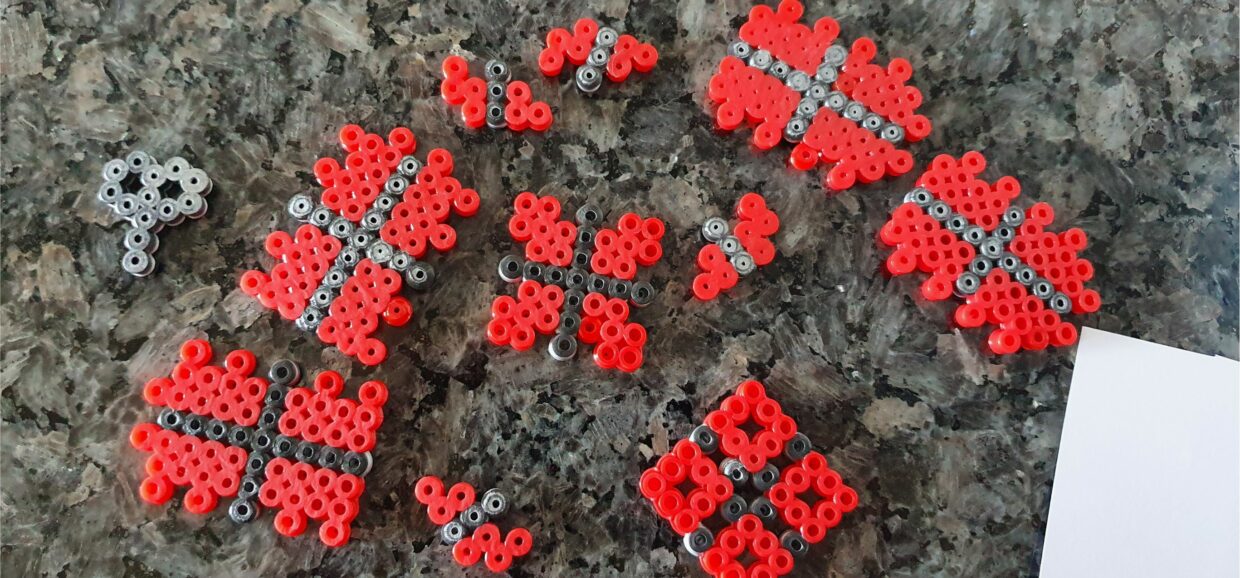
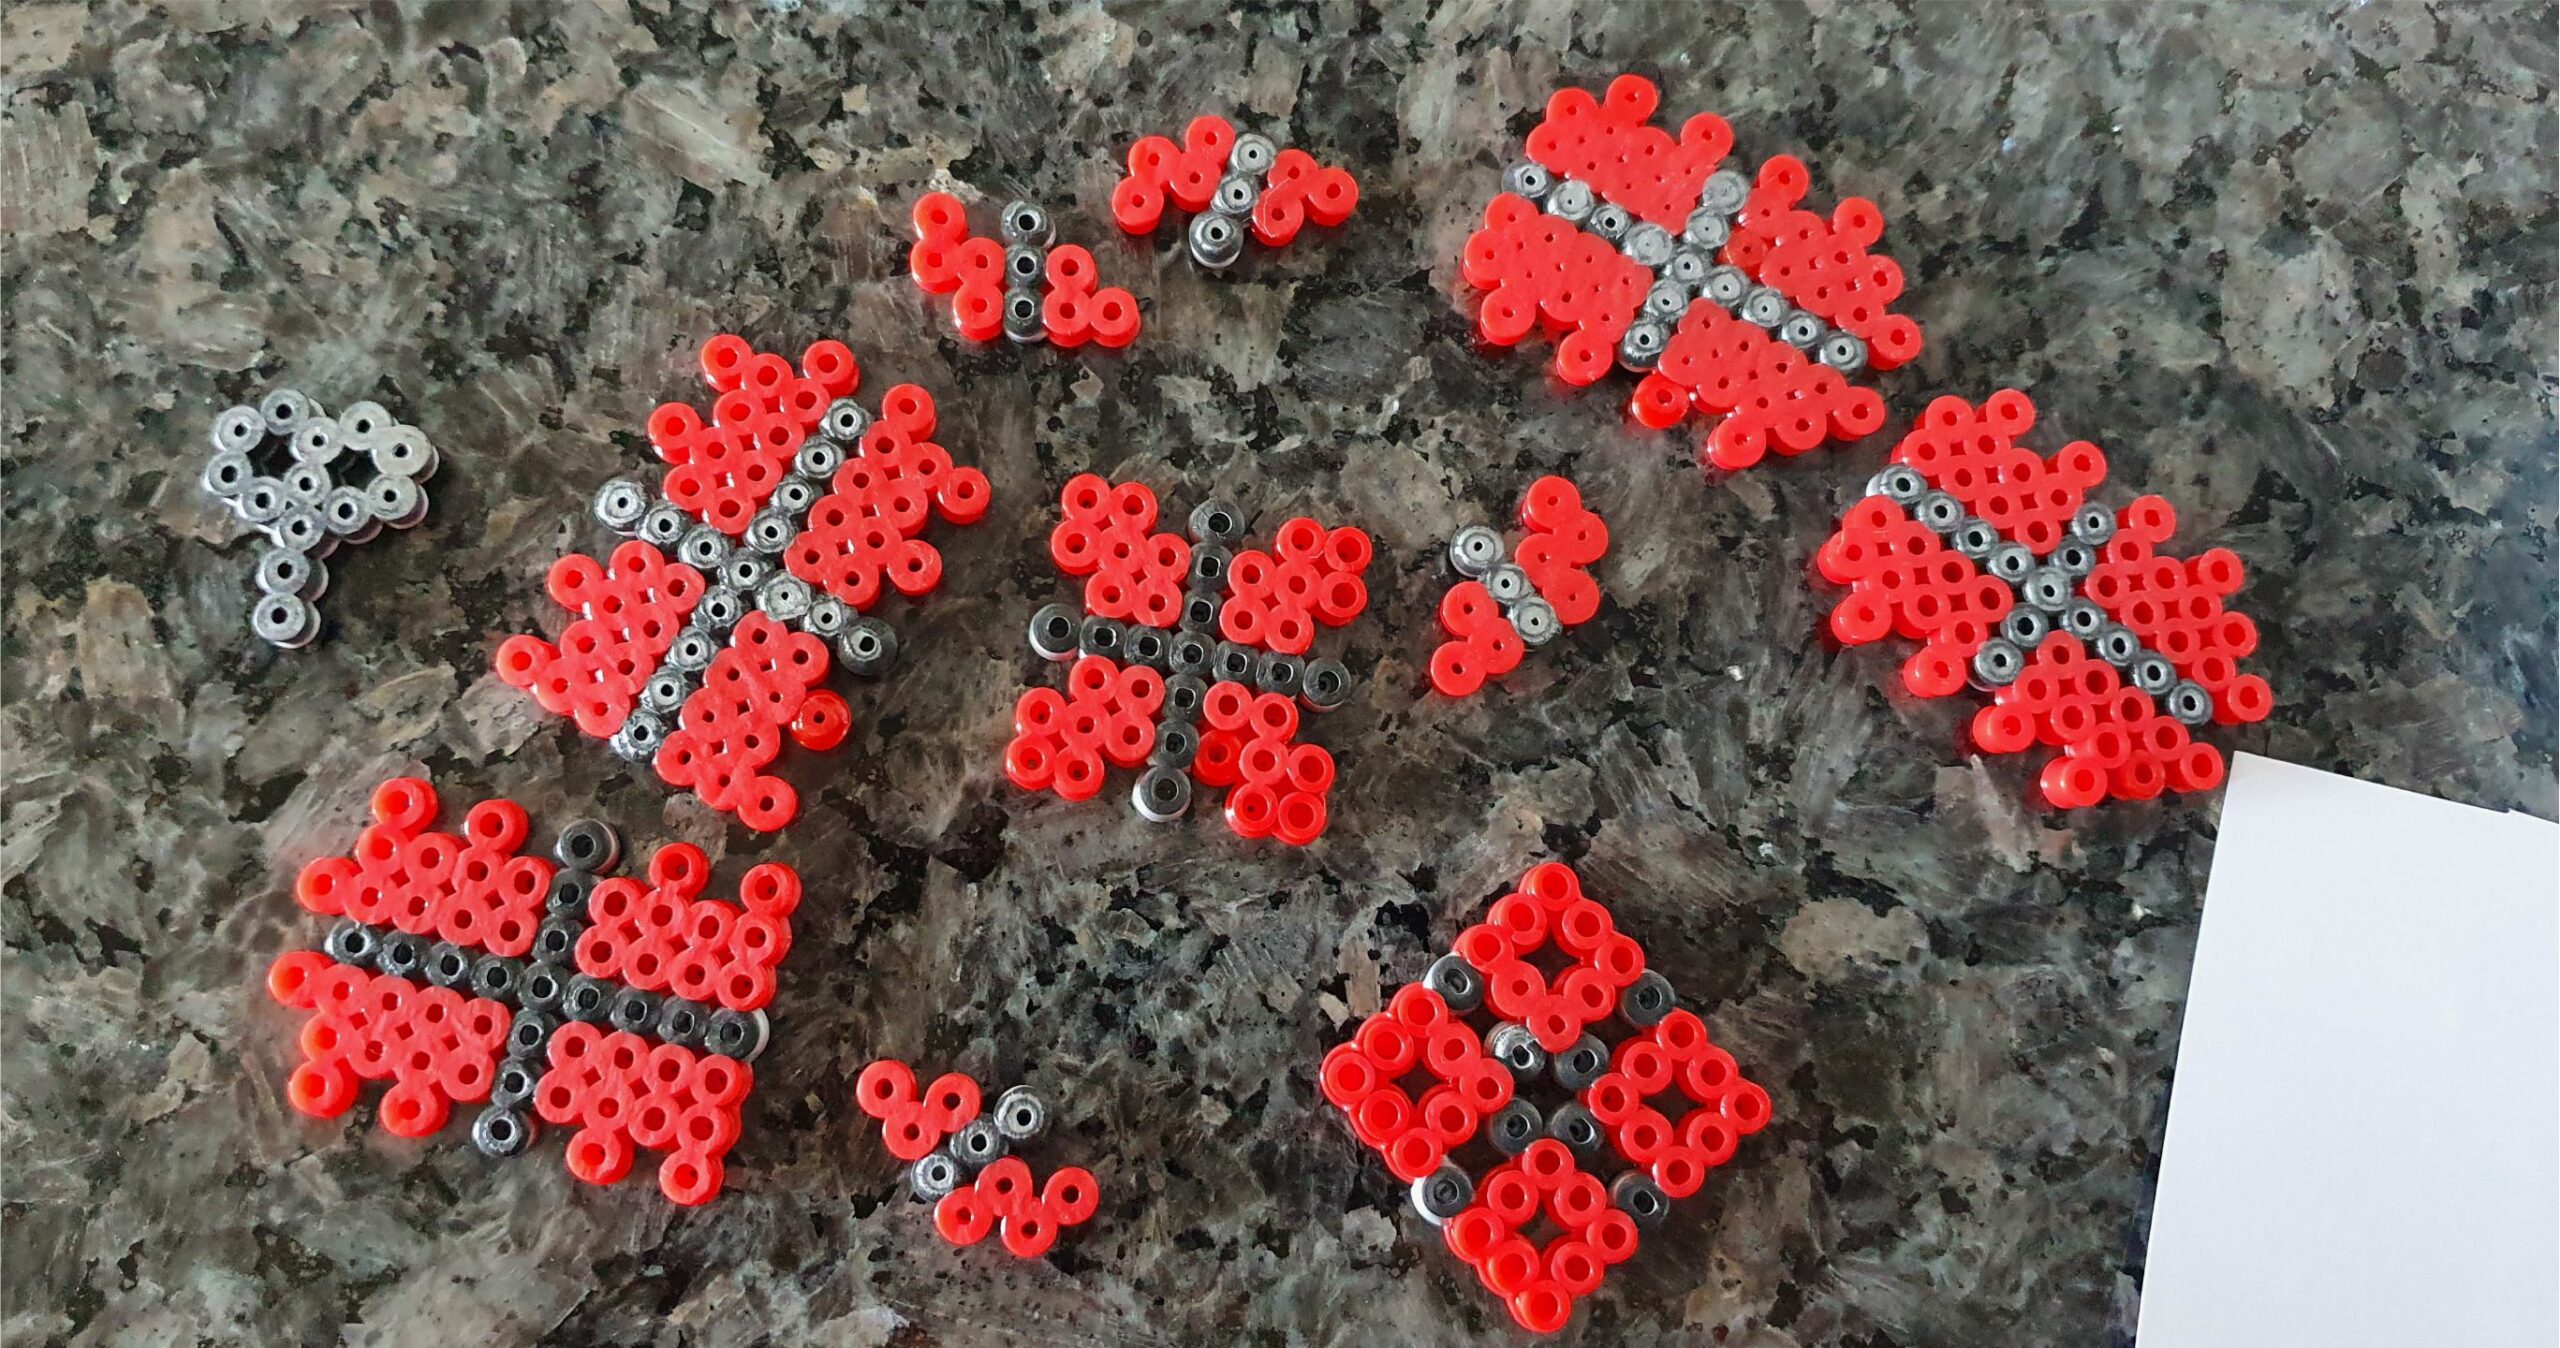
The designs for the four presents on the main picture are all shown here. In the steps below, I have made the small tall present.
The video also shows how to assemble the present.
Hope you have lots of fun with the project. Happy crafting and Merry Christmas
Ingredients
Directions
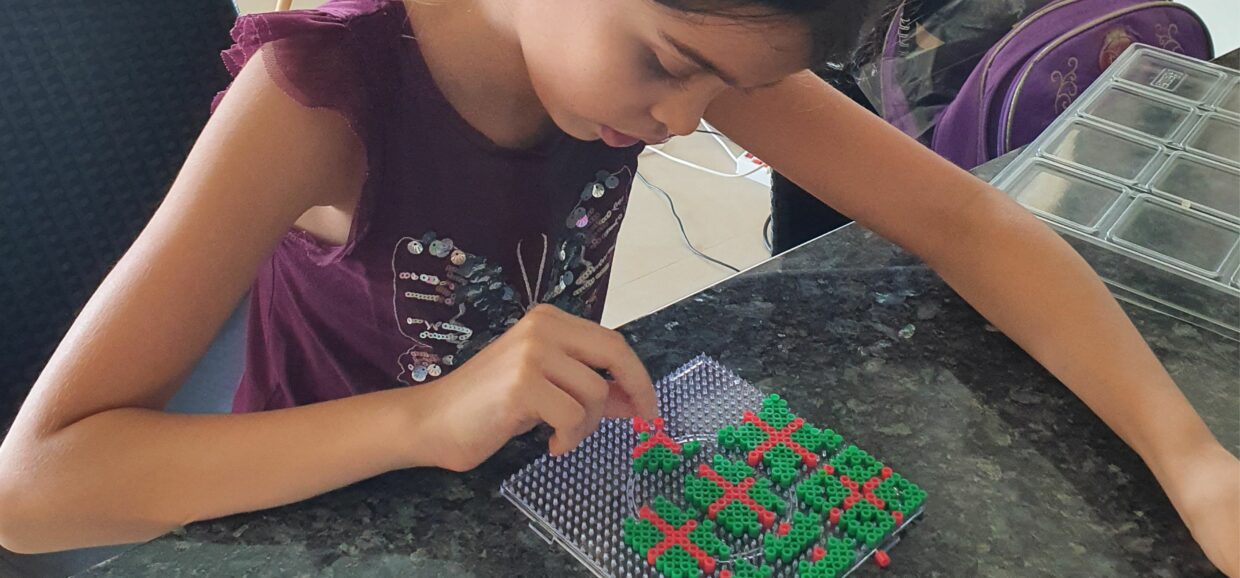
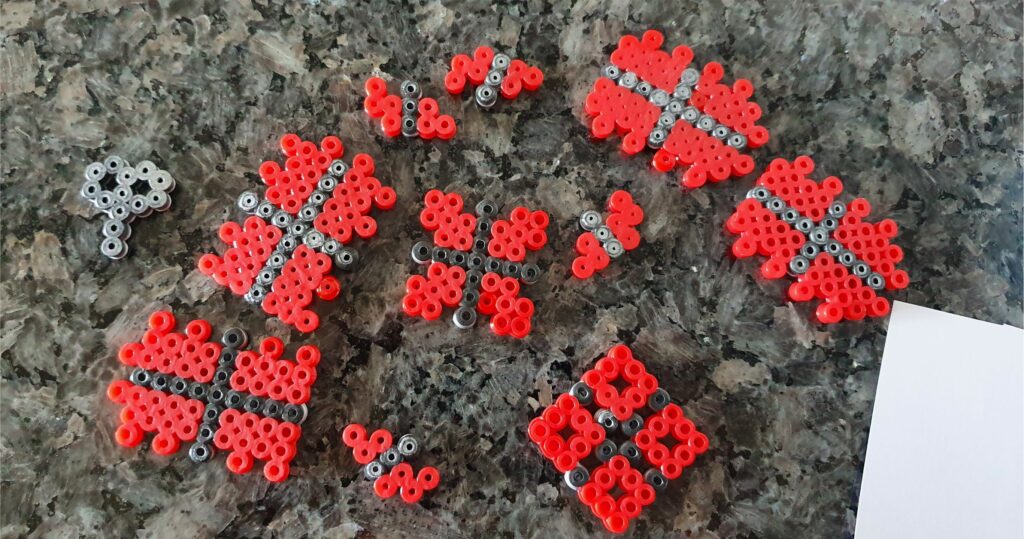
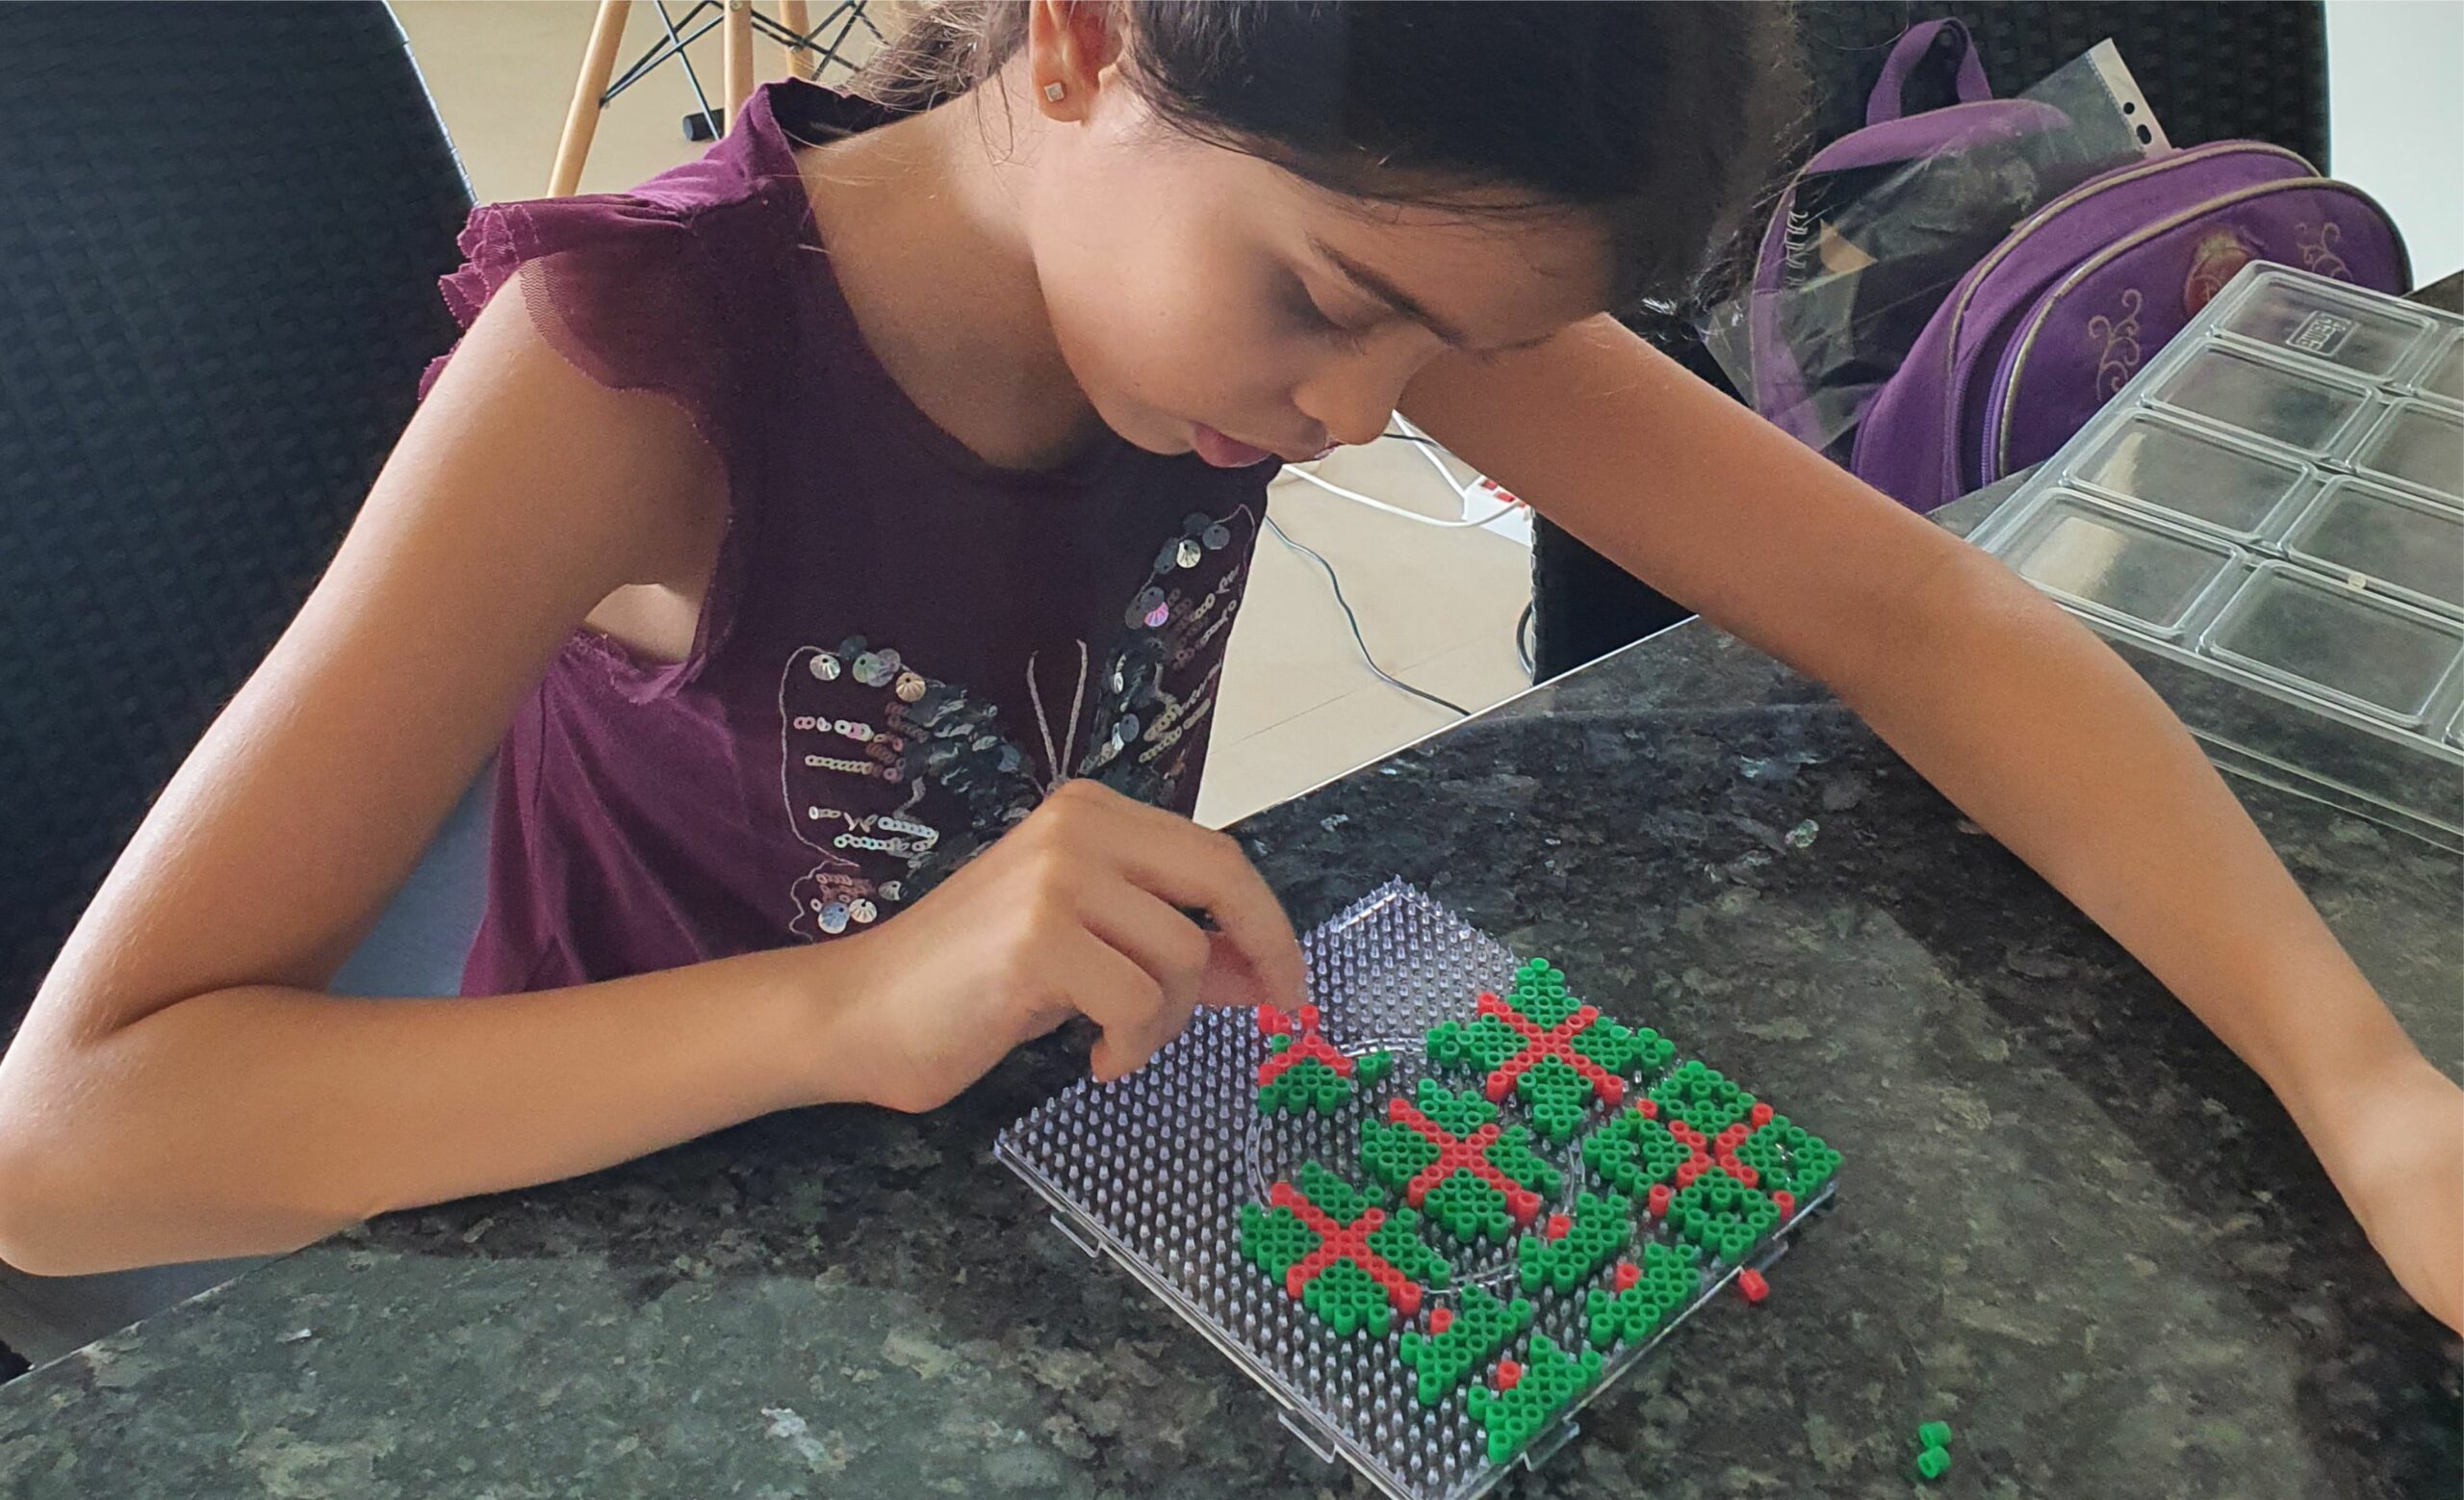
Start by making the bead designs according to the pictures above. My daughter is making the large present here.
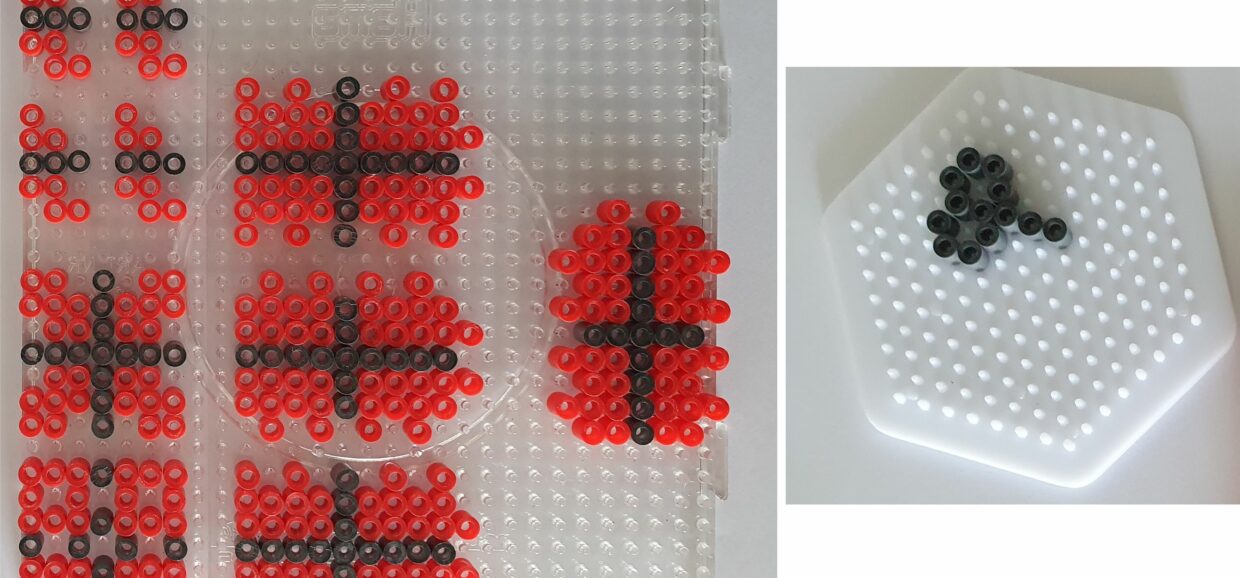
You will need 4 sides, 1 bottom, 1 top, 1 bow and 4 of the pieces that go inside the lid
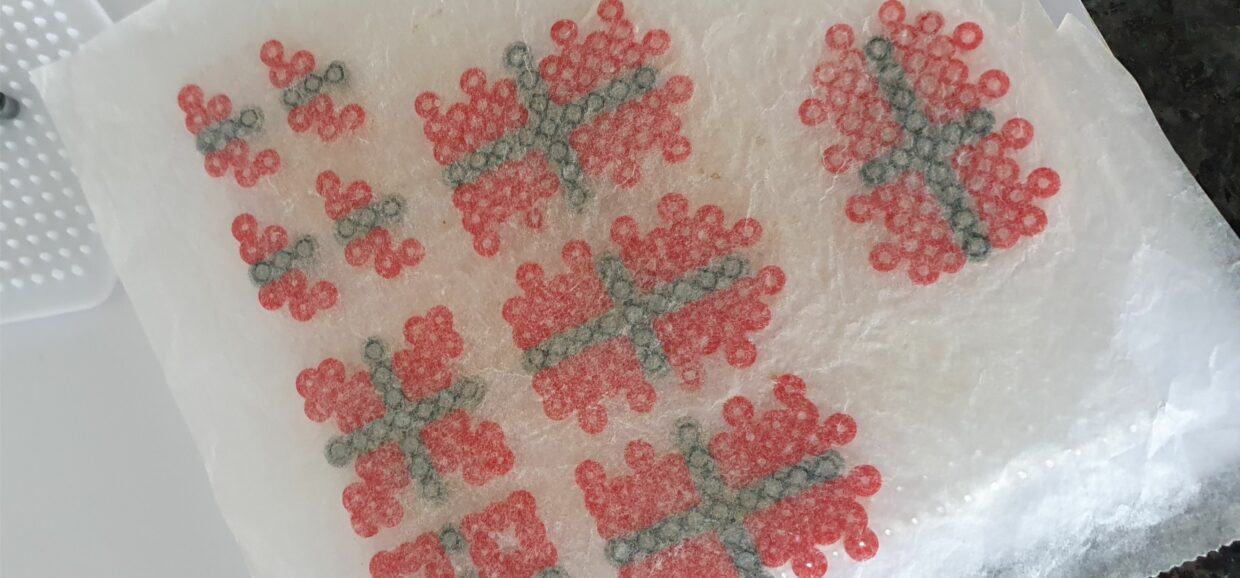
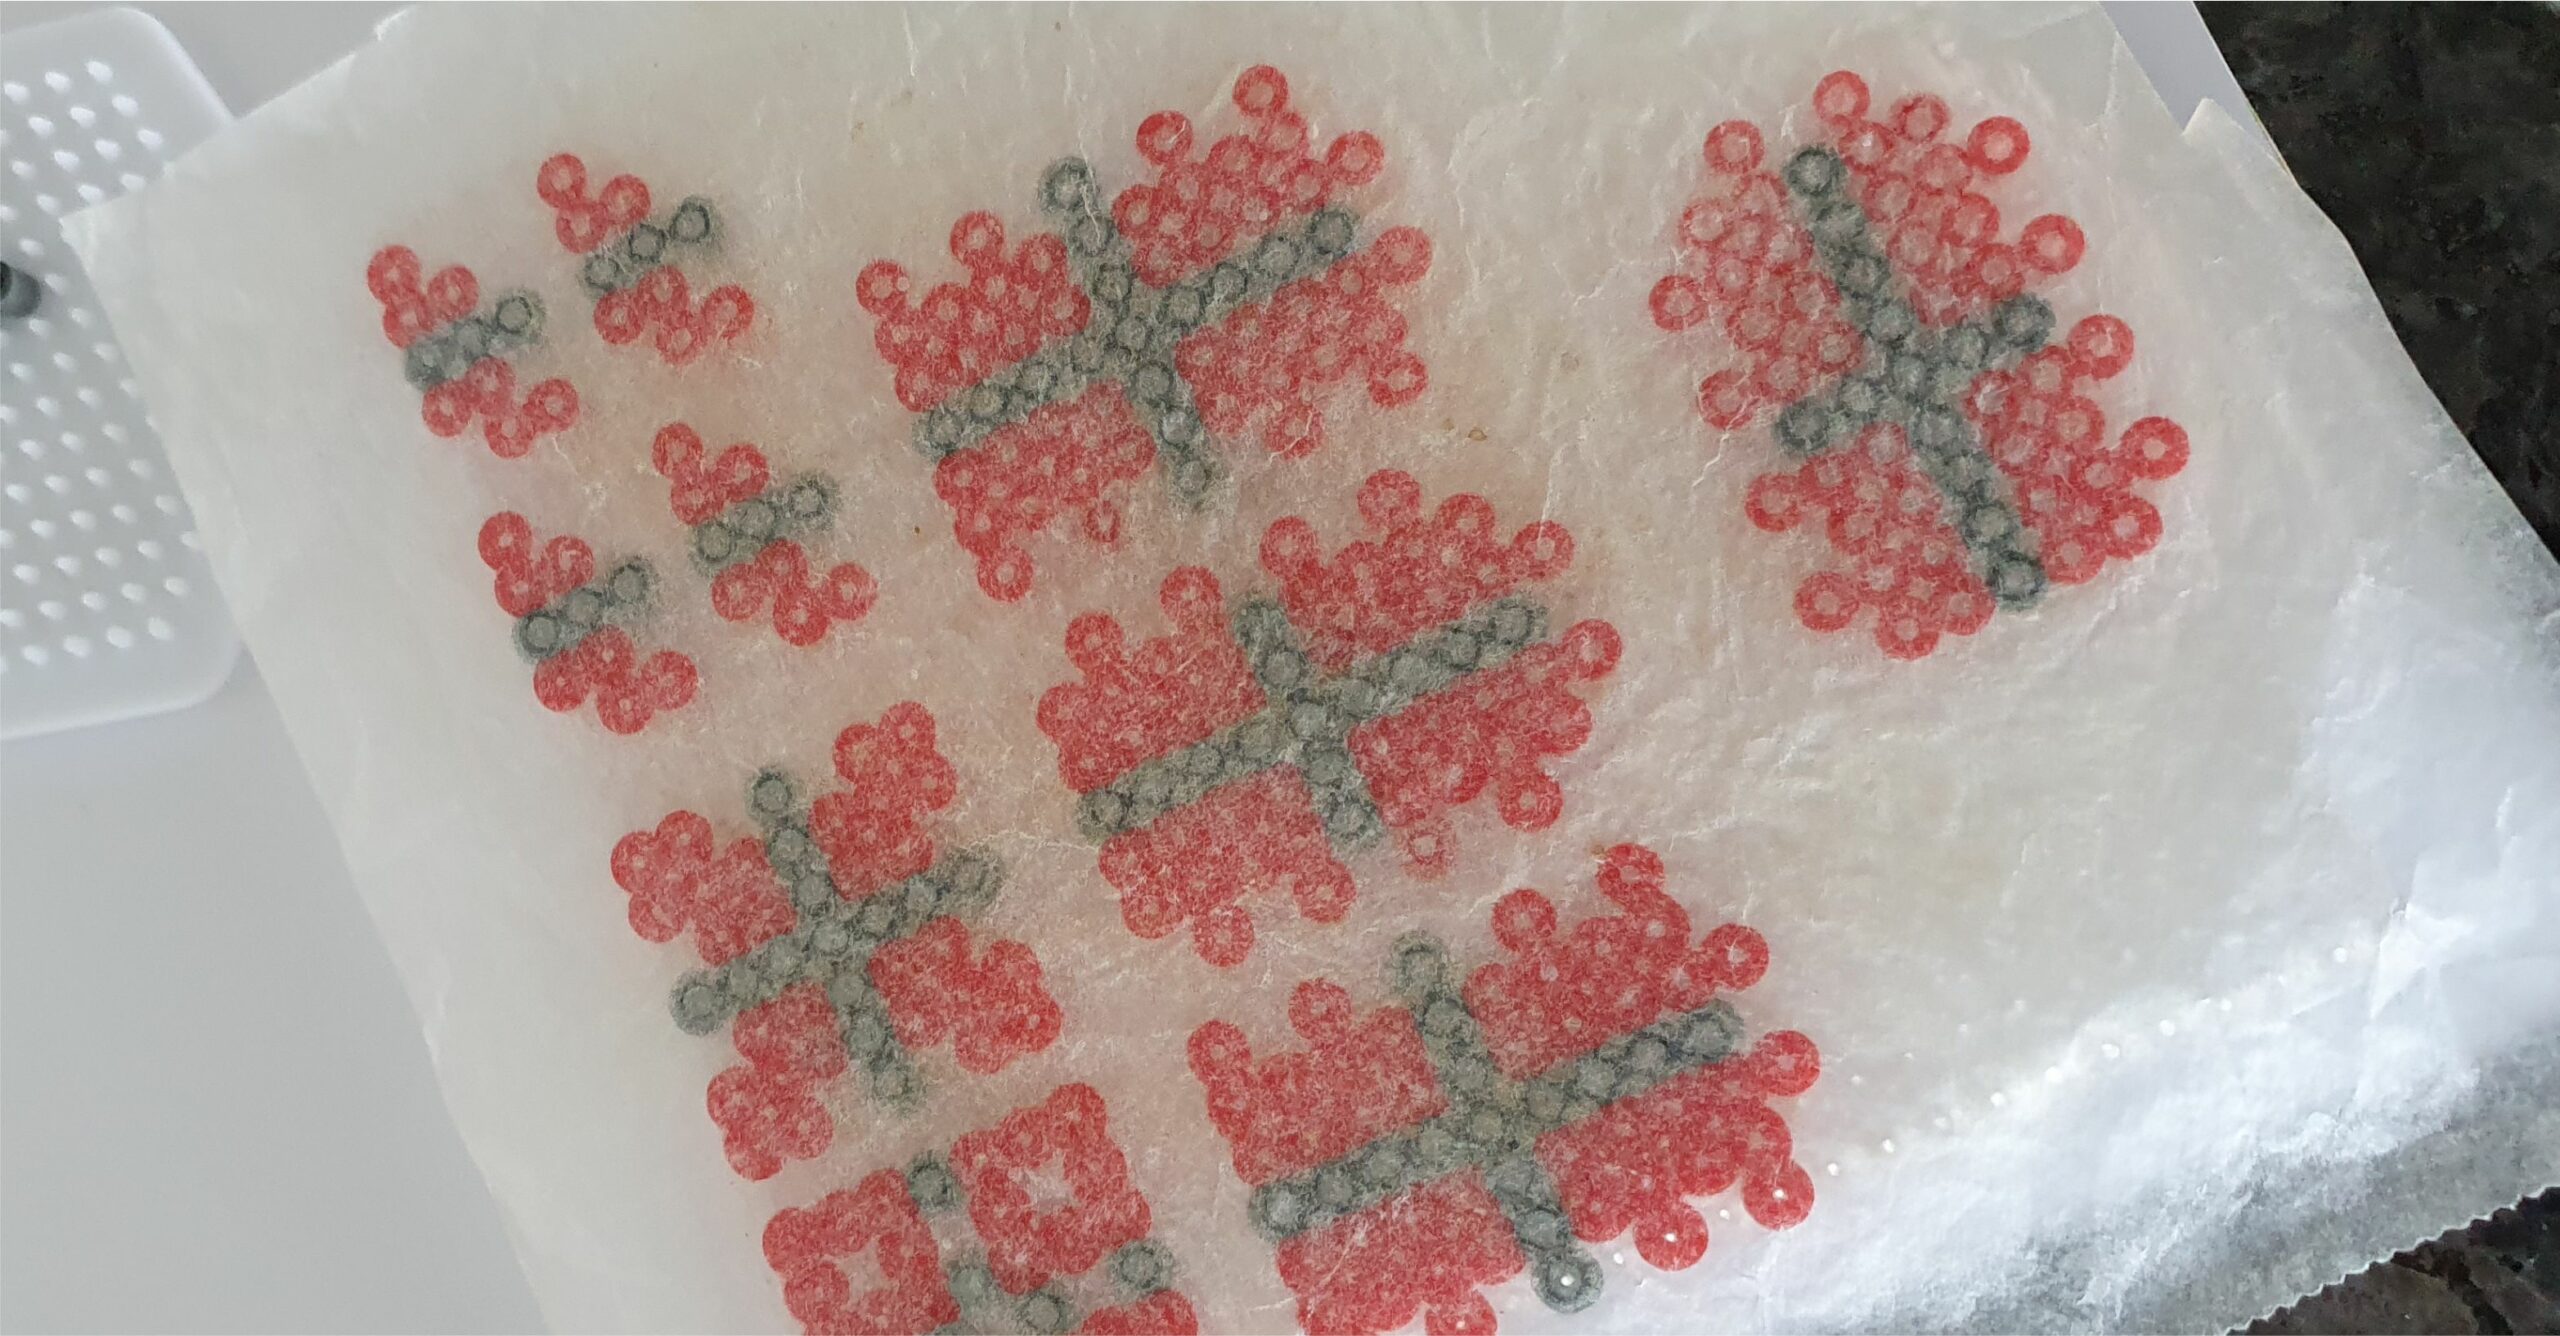
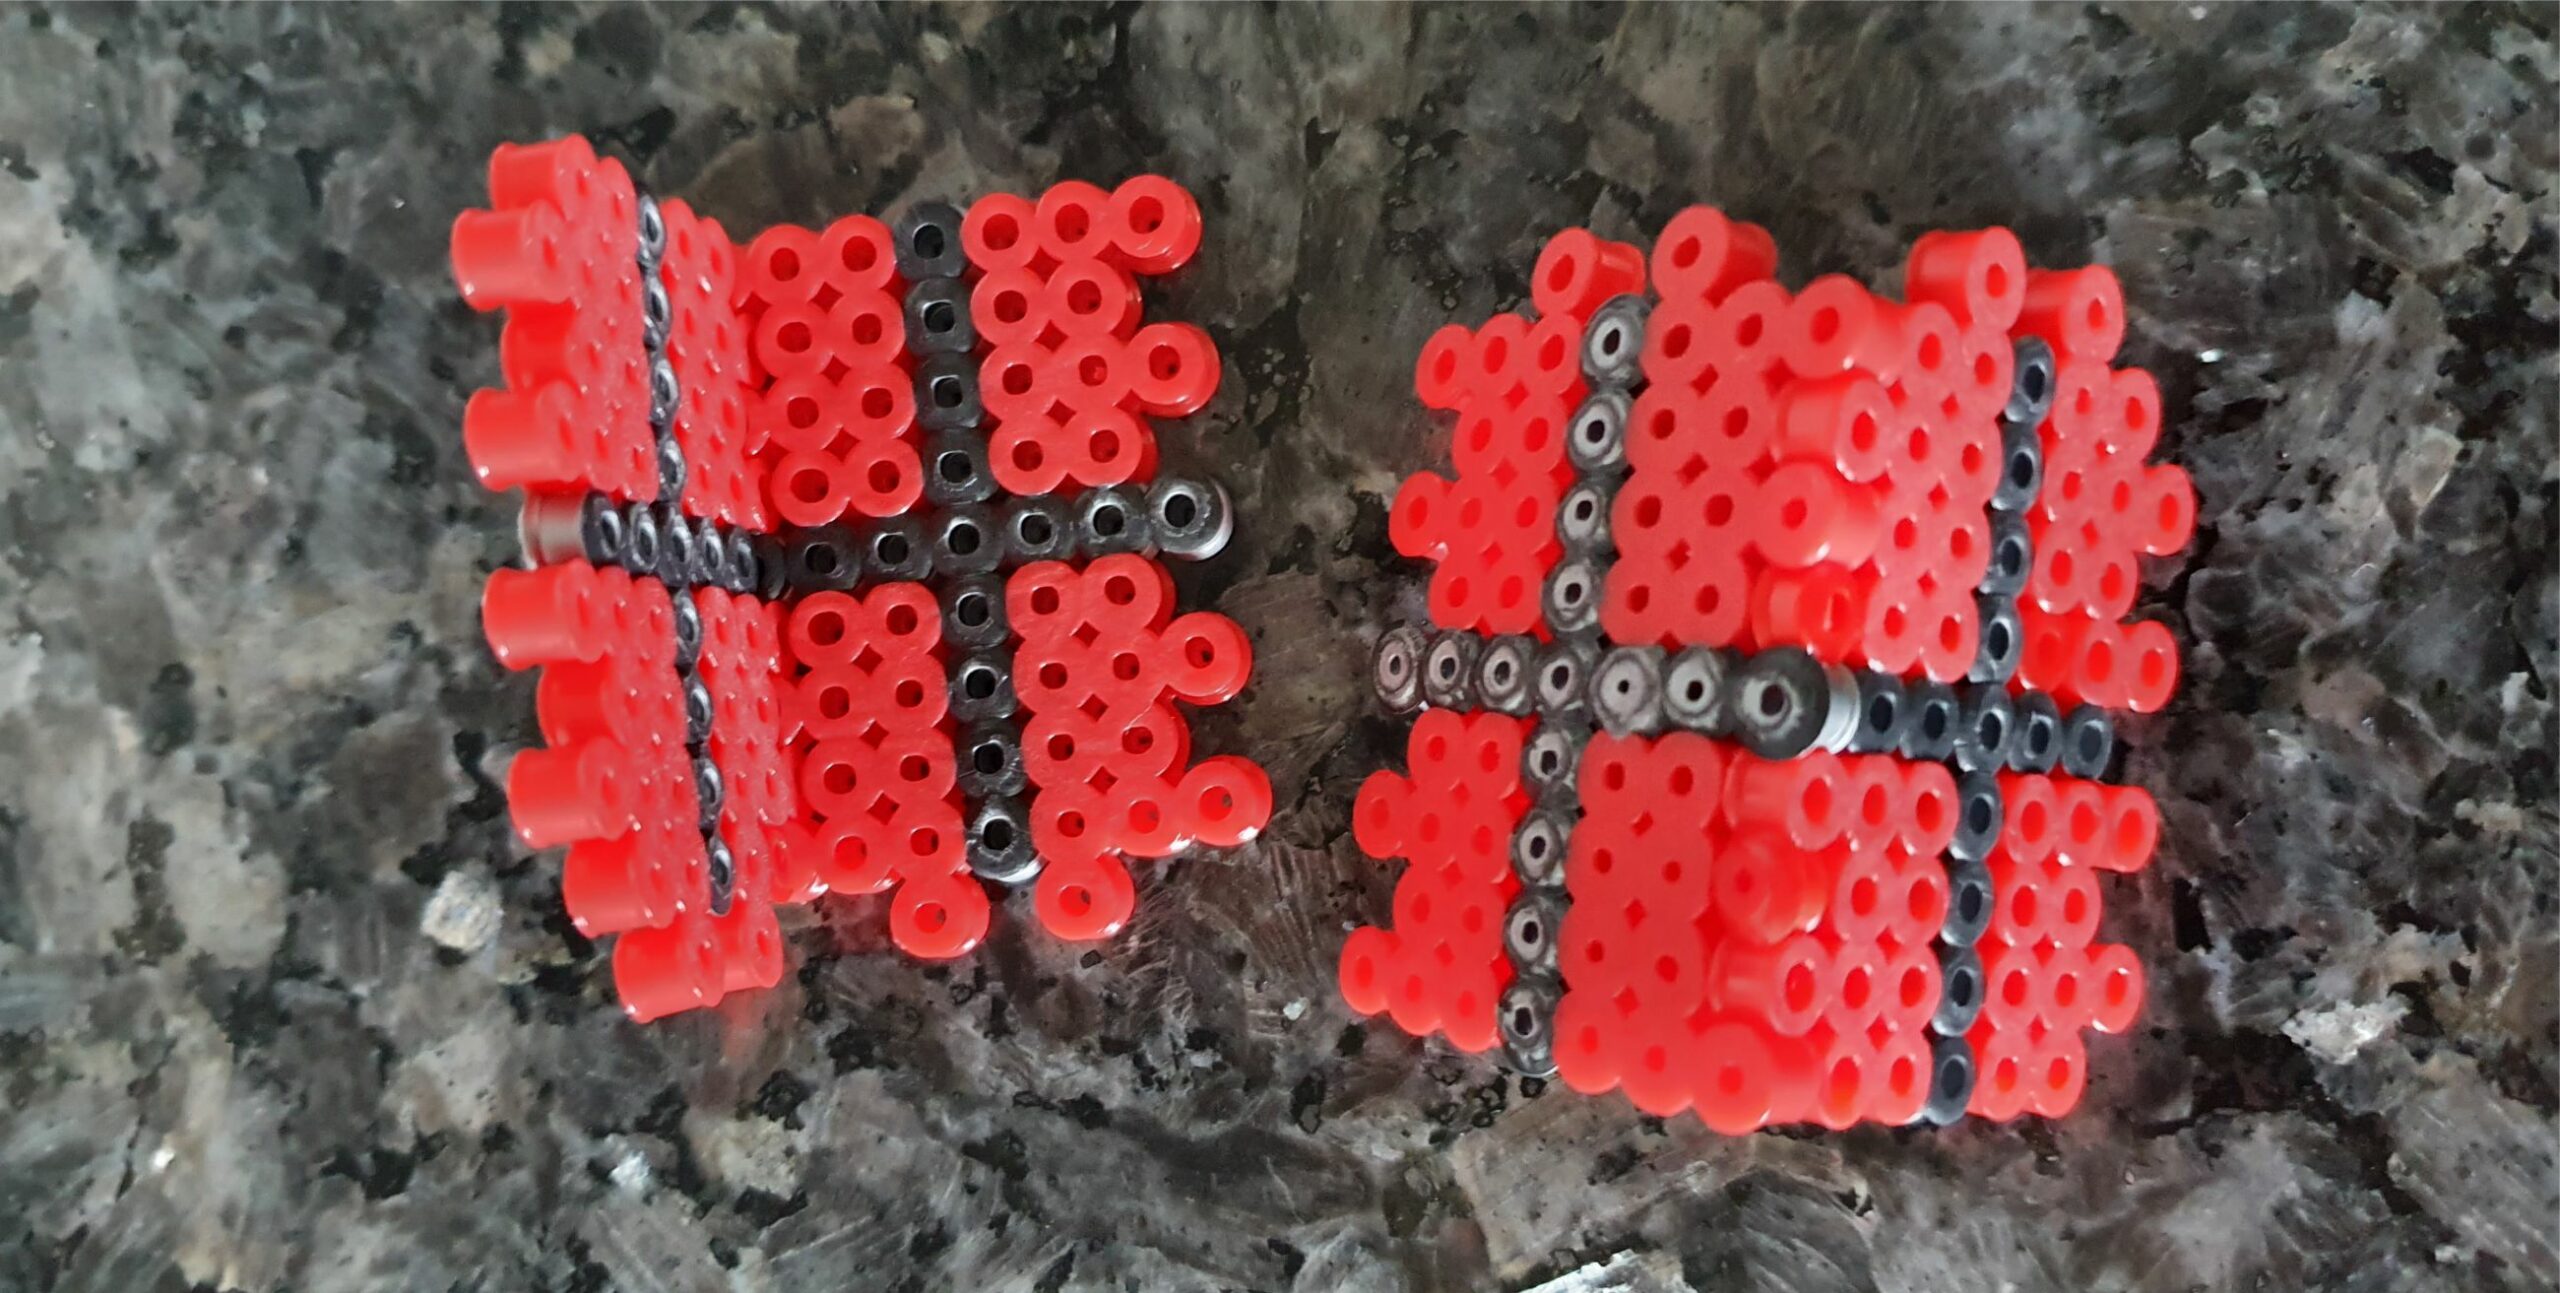
Using parchment paper or baking paper, iron the beads. Be careful not to iron them too much. They should be well stuck together but not too flat so they cannot connect afterwards
While the ironed beads are a bit bendy, place them under a heavy cutting board or book to make them flat while still warm. Let the beads cool down so they are hard and easy to work with.
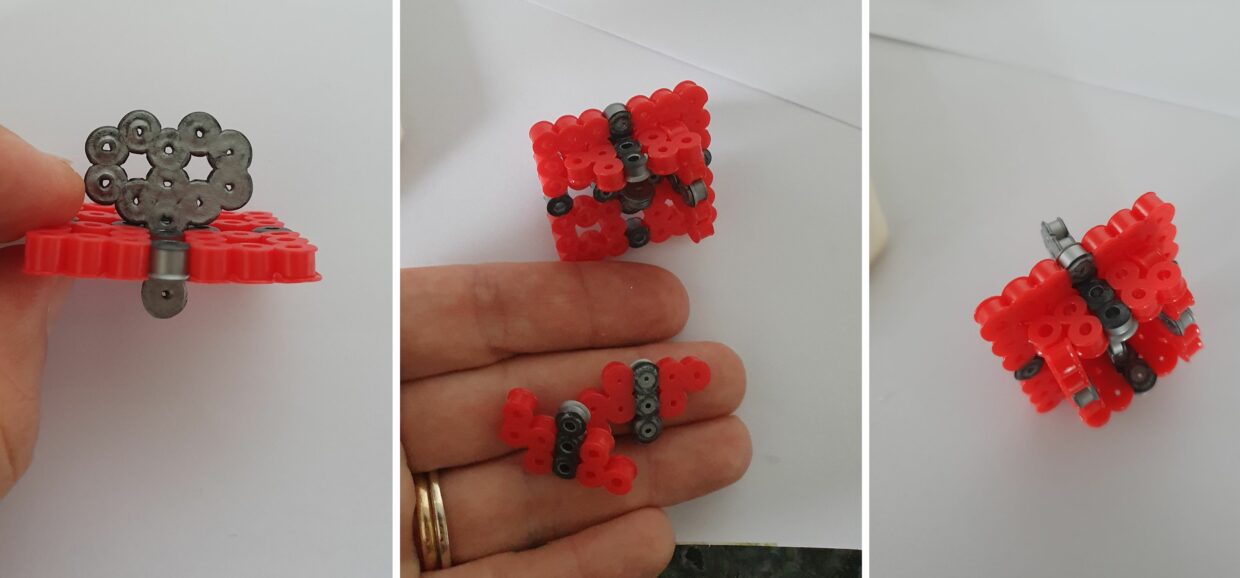
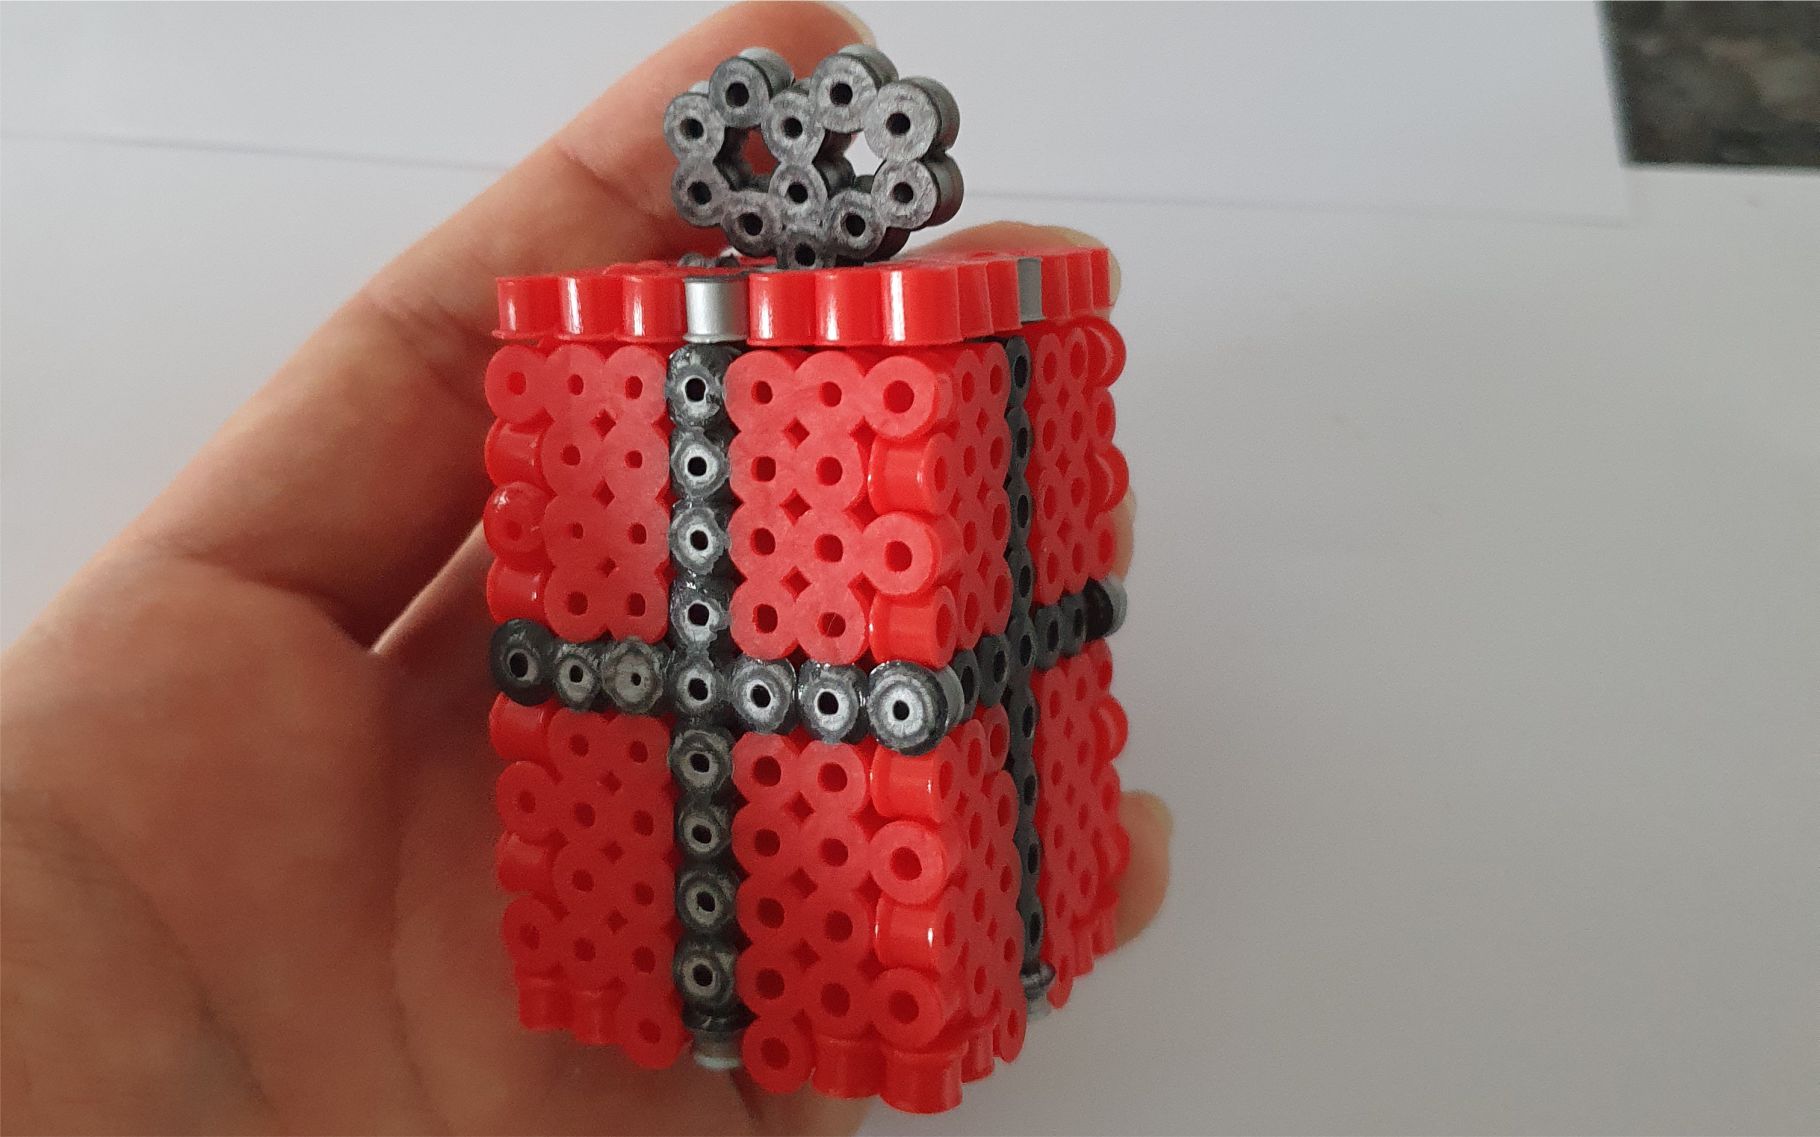
Assembly of the lid: Stick the bow into the middle hole. Then push the four pieces on like shown here

The pieces go together like a 3D jigsaw puzzle. Press the four sides together and onto the bottom piece.
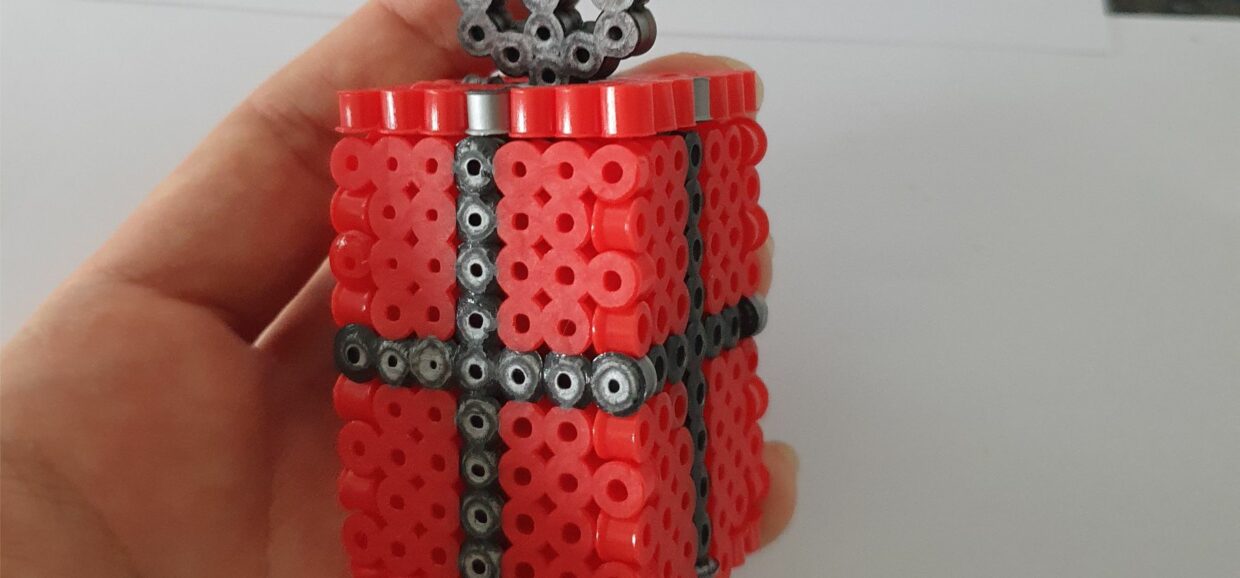
And you are done. Hope you liked this idea. Have fun and Merry Christmas.


Leave a Review
You must be logged in to post a comment.

Recipe Reviews