
- Prep Time30 - 45 min
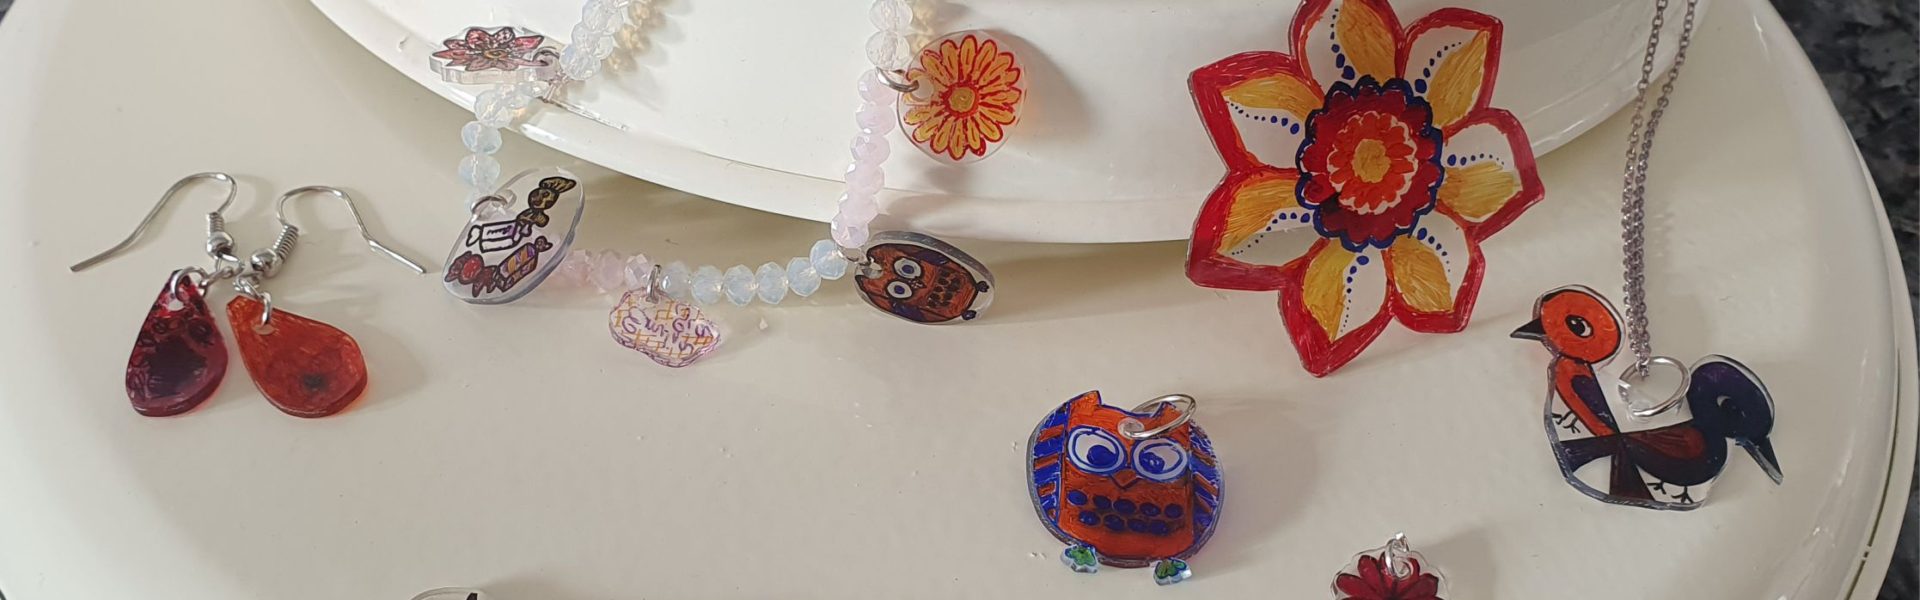
Make beautiful DIY Jewelry using shrinking plastic. I have shared how to use the shrinking plastic sheets here and in this post I will give a few tips on how to make it into jewelry, key chains and pendant WITHOUT ANY SPECIAL TOOLS! I will also share the trick to adjustable necklaces so you don’t have to buy any necklace accessories.
DIY Jewelry using Shrinking Plastic
We love using shrinky dink plastic in our house. It’s a fun activity for all ages -even I am fully engaged when we get the sheets out. Last time I made a cute Winnie the Pooh and Piglet pendant. Not sure if it will ever be used but I love how easy it is to get nice details on the drawing (because it’s nice and big) and then it shrinks and it is ever so cute. It will never stop to amaze me or my kids. I buy the Shrinky Dink Sheets on Amazon.in or wherever I can find them for less than Rs1000/- for a full packet. This still sounds expensive -I know- but you will never use more than one A4 sheet for each craft session (for 4 people!) so it’s the same as 100/- for each time, which sounds a bit better. We have had ours for years and still have a few sheets left.
The trick to adjustable necklaces
I love making necklaces that are adjustable in length – they fit over the head, but can be adjusted so they are short and pretty too. An adjustable necklace or bracelet is really quite easy to make but there is -like most crafts- a trick to it. For better results, I always use leather or faux leather string for these. They are smooth, tie well and don’t become loose again. Learn how to tie these in the step-by-step guide below the ingredients.

You can make adjustable necklaces with shells or shrinking plastic. You can read more about this craft and get all the tips here.
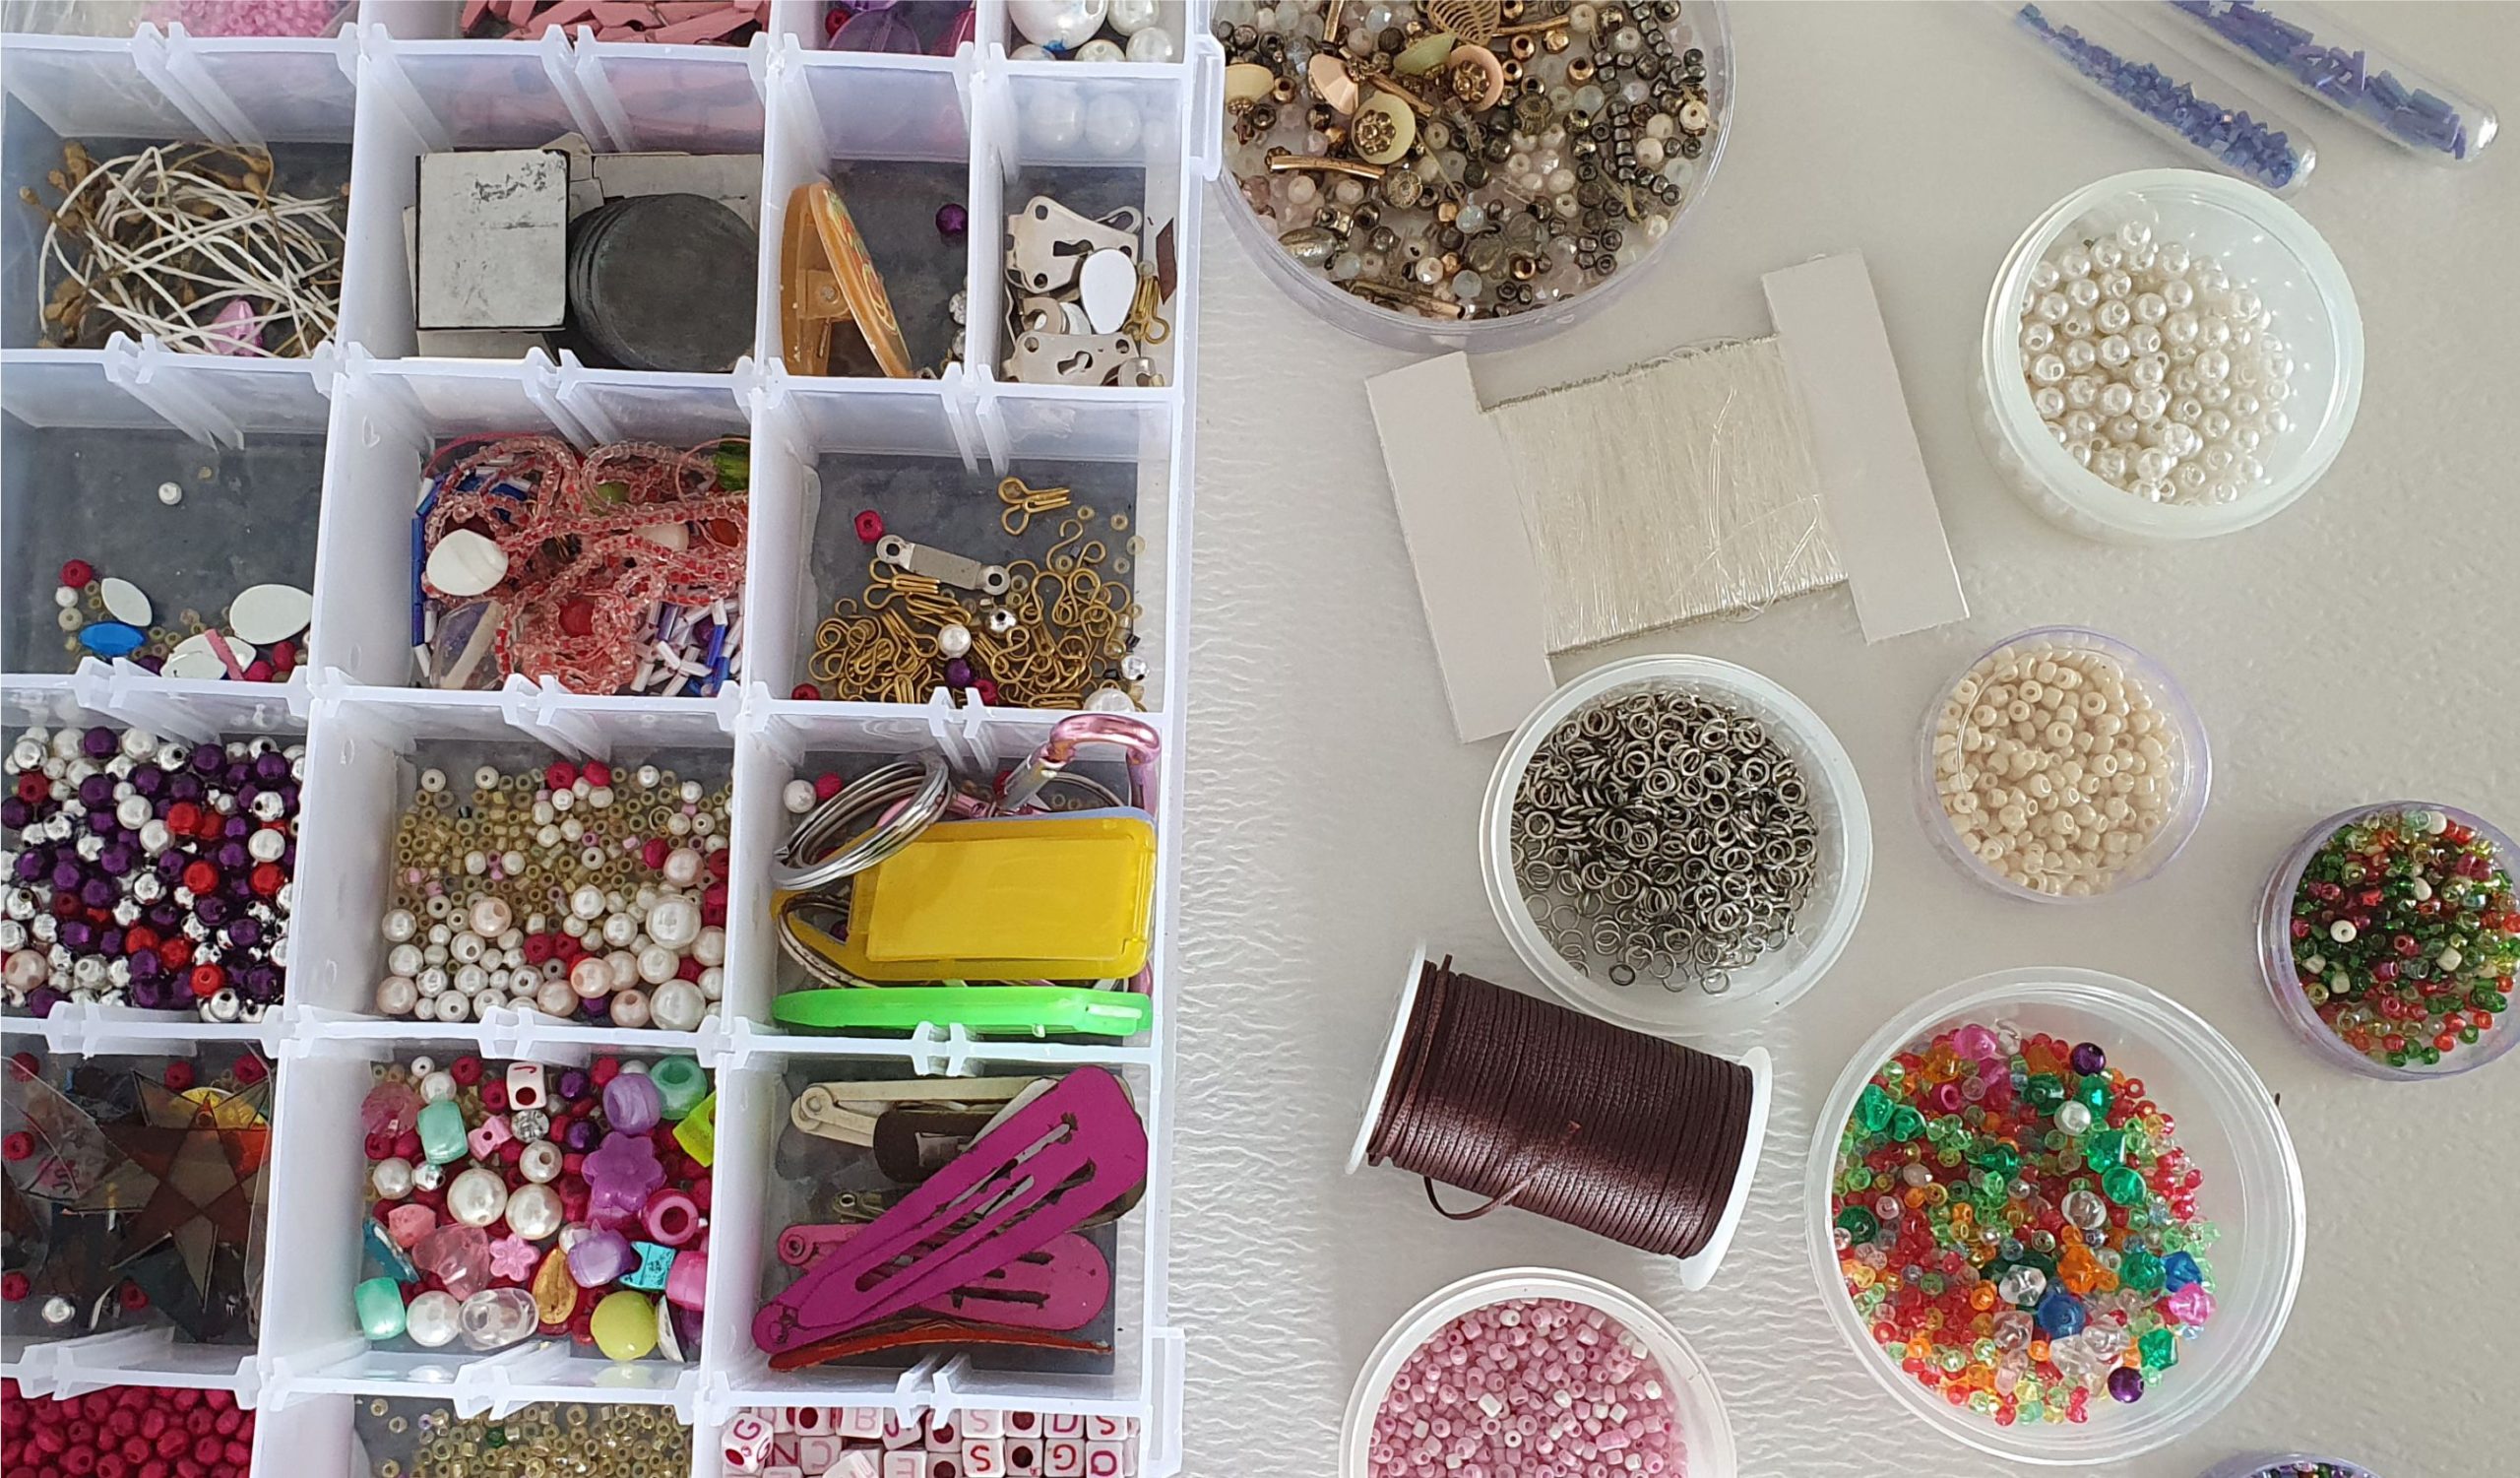
What else do you need to make DIY Jewelry using shrinking plastic?
String. I love to use strong faux leather string for these. They have their own beauty so you only need a pendant and not necessarily beads too. You can also use thin elastic string for DIY jewelry. It’s very thin and easy for children to use when stringing beads, yet strong and not easy to break.
Jump rings. Find the jump rings in many different sizes online or in your local craft store.
See more ingredients and how to make it all without any special tools below -you just need a fork and a pair of scissors 🙂
Ingredients
Directions
Start by getting all your jewelry accessories out. You will need beads, string -either elastic or faux leather- and most importantly jump rings.
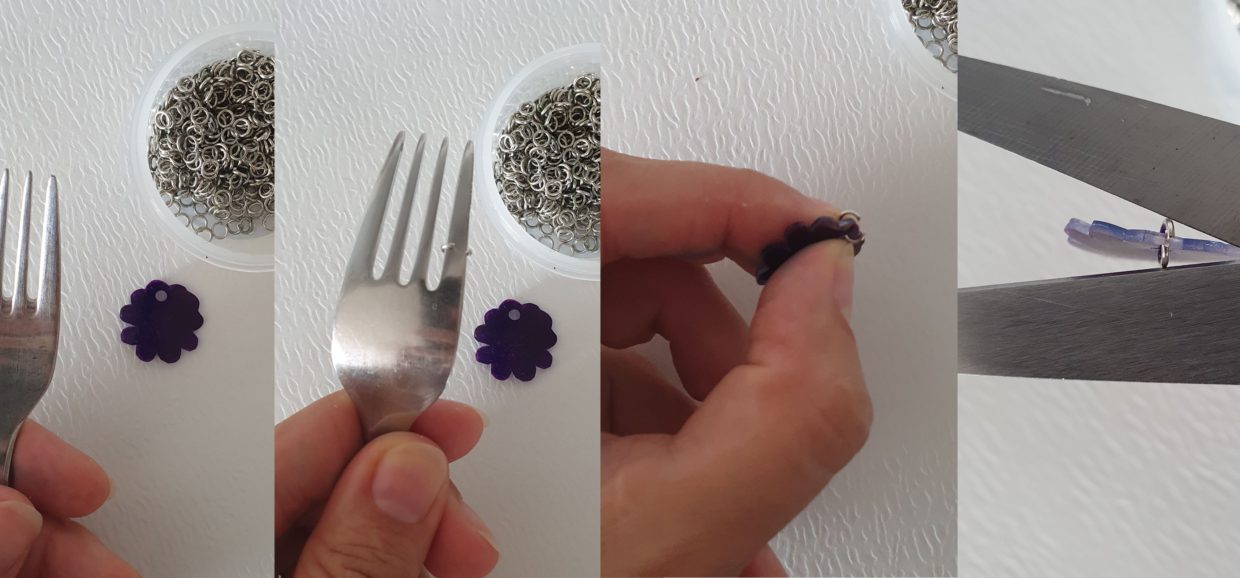
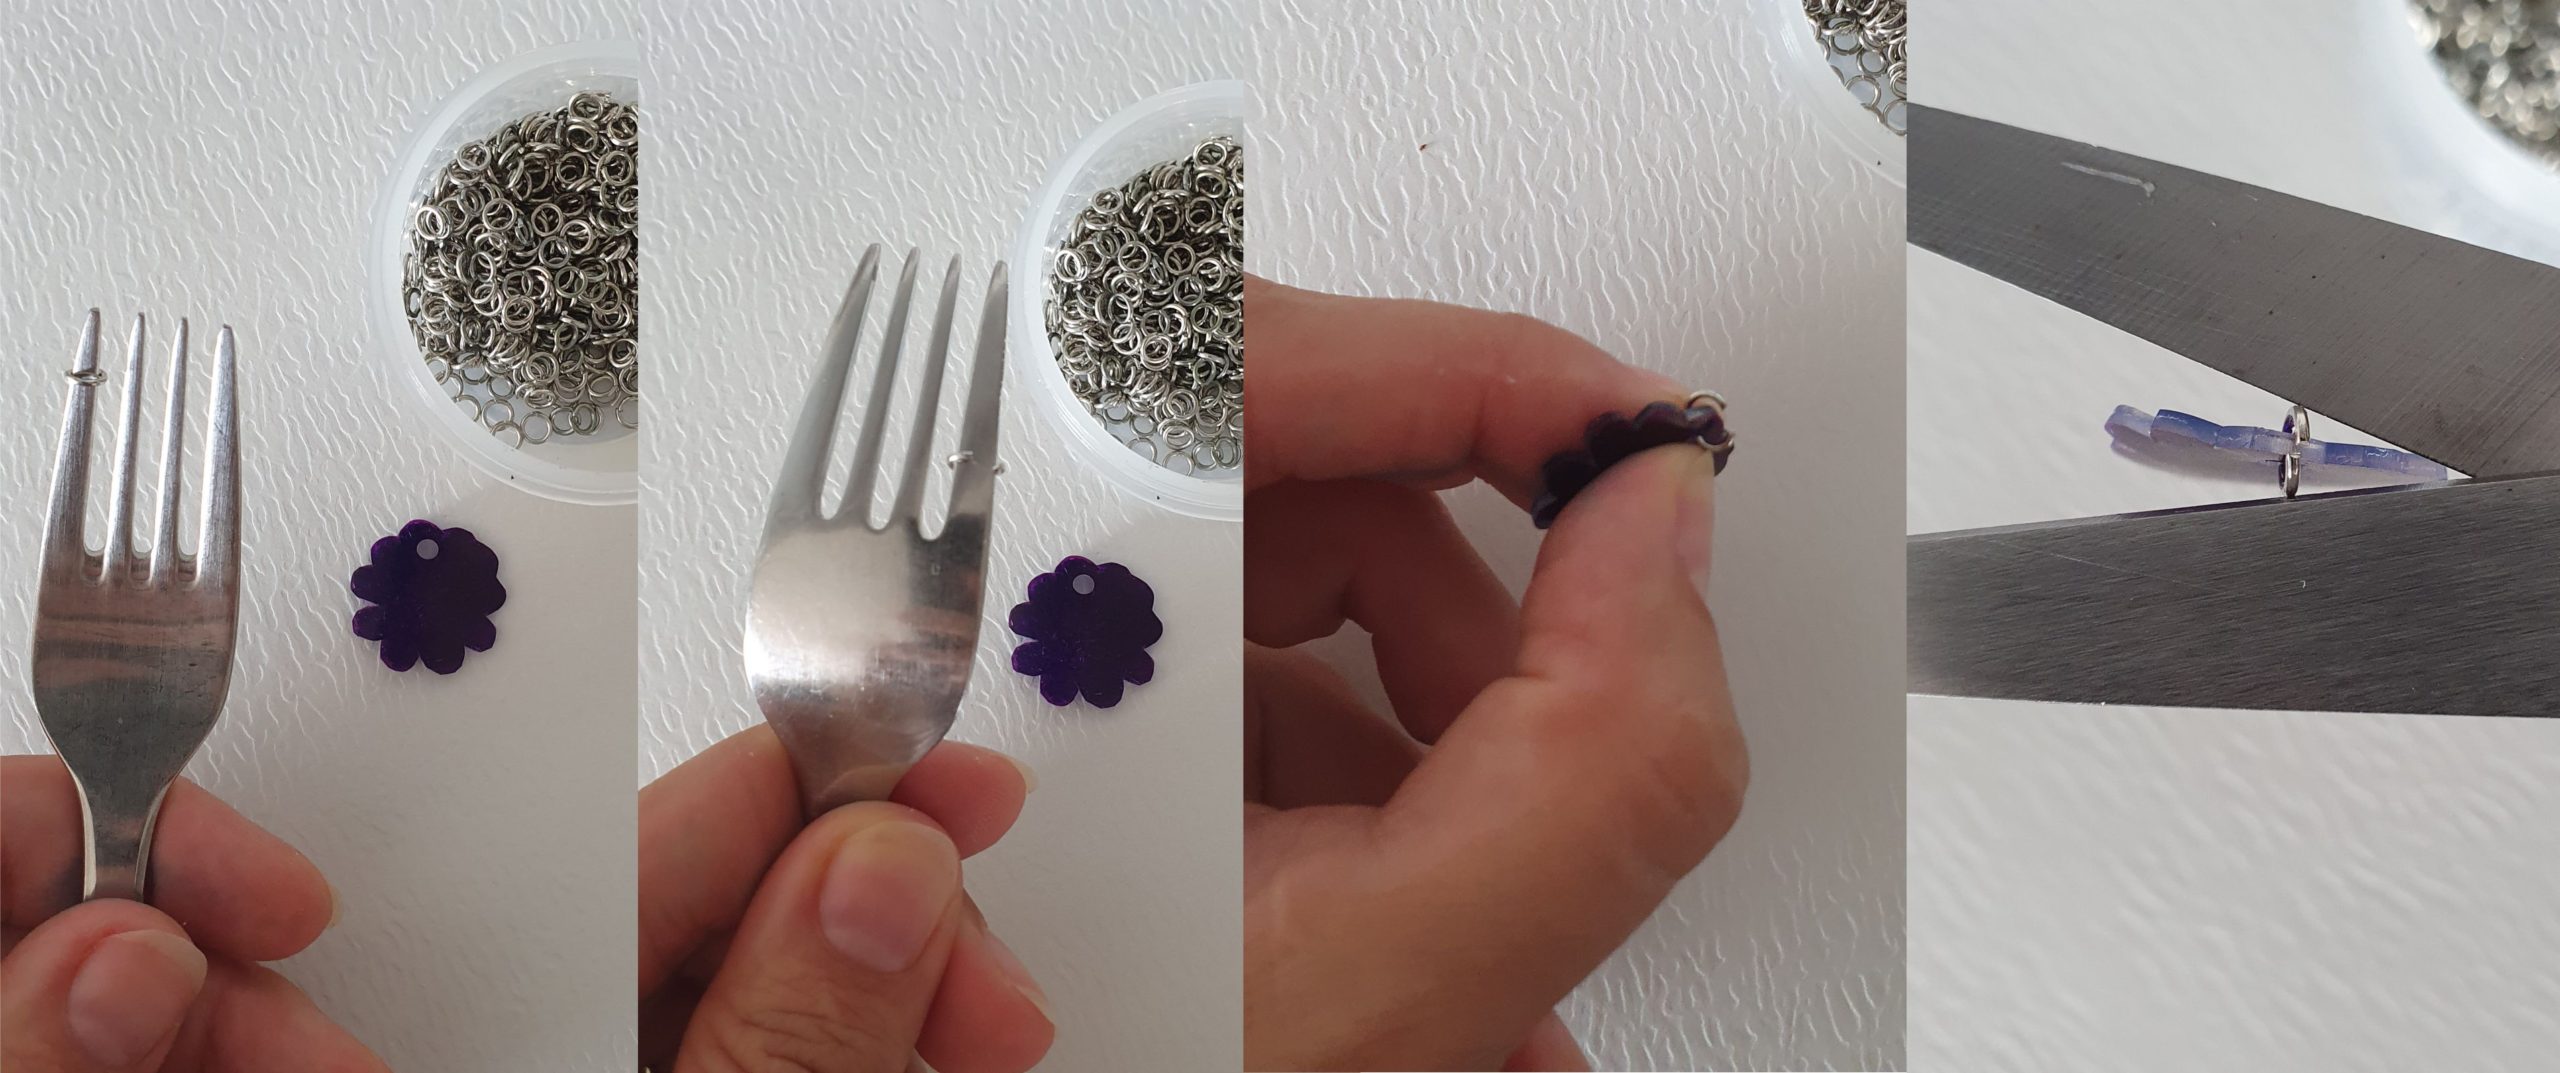
Start by attaching the jump rings to the Shrinking plastic pieces. I don’t use any tools when fixing the jump rings. I just use a fork to expand the ring -by simply pressing it down on one of the tines- and a scissor to squeeze the two ends together again.
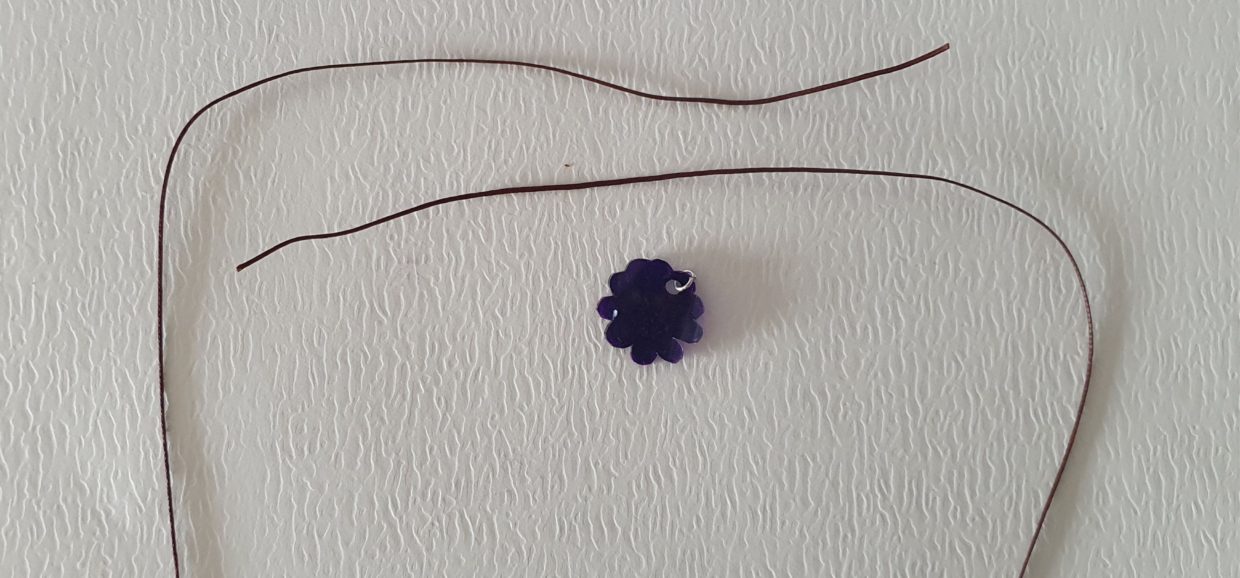
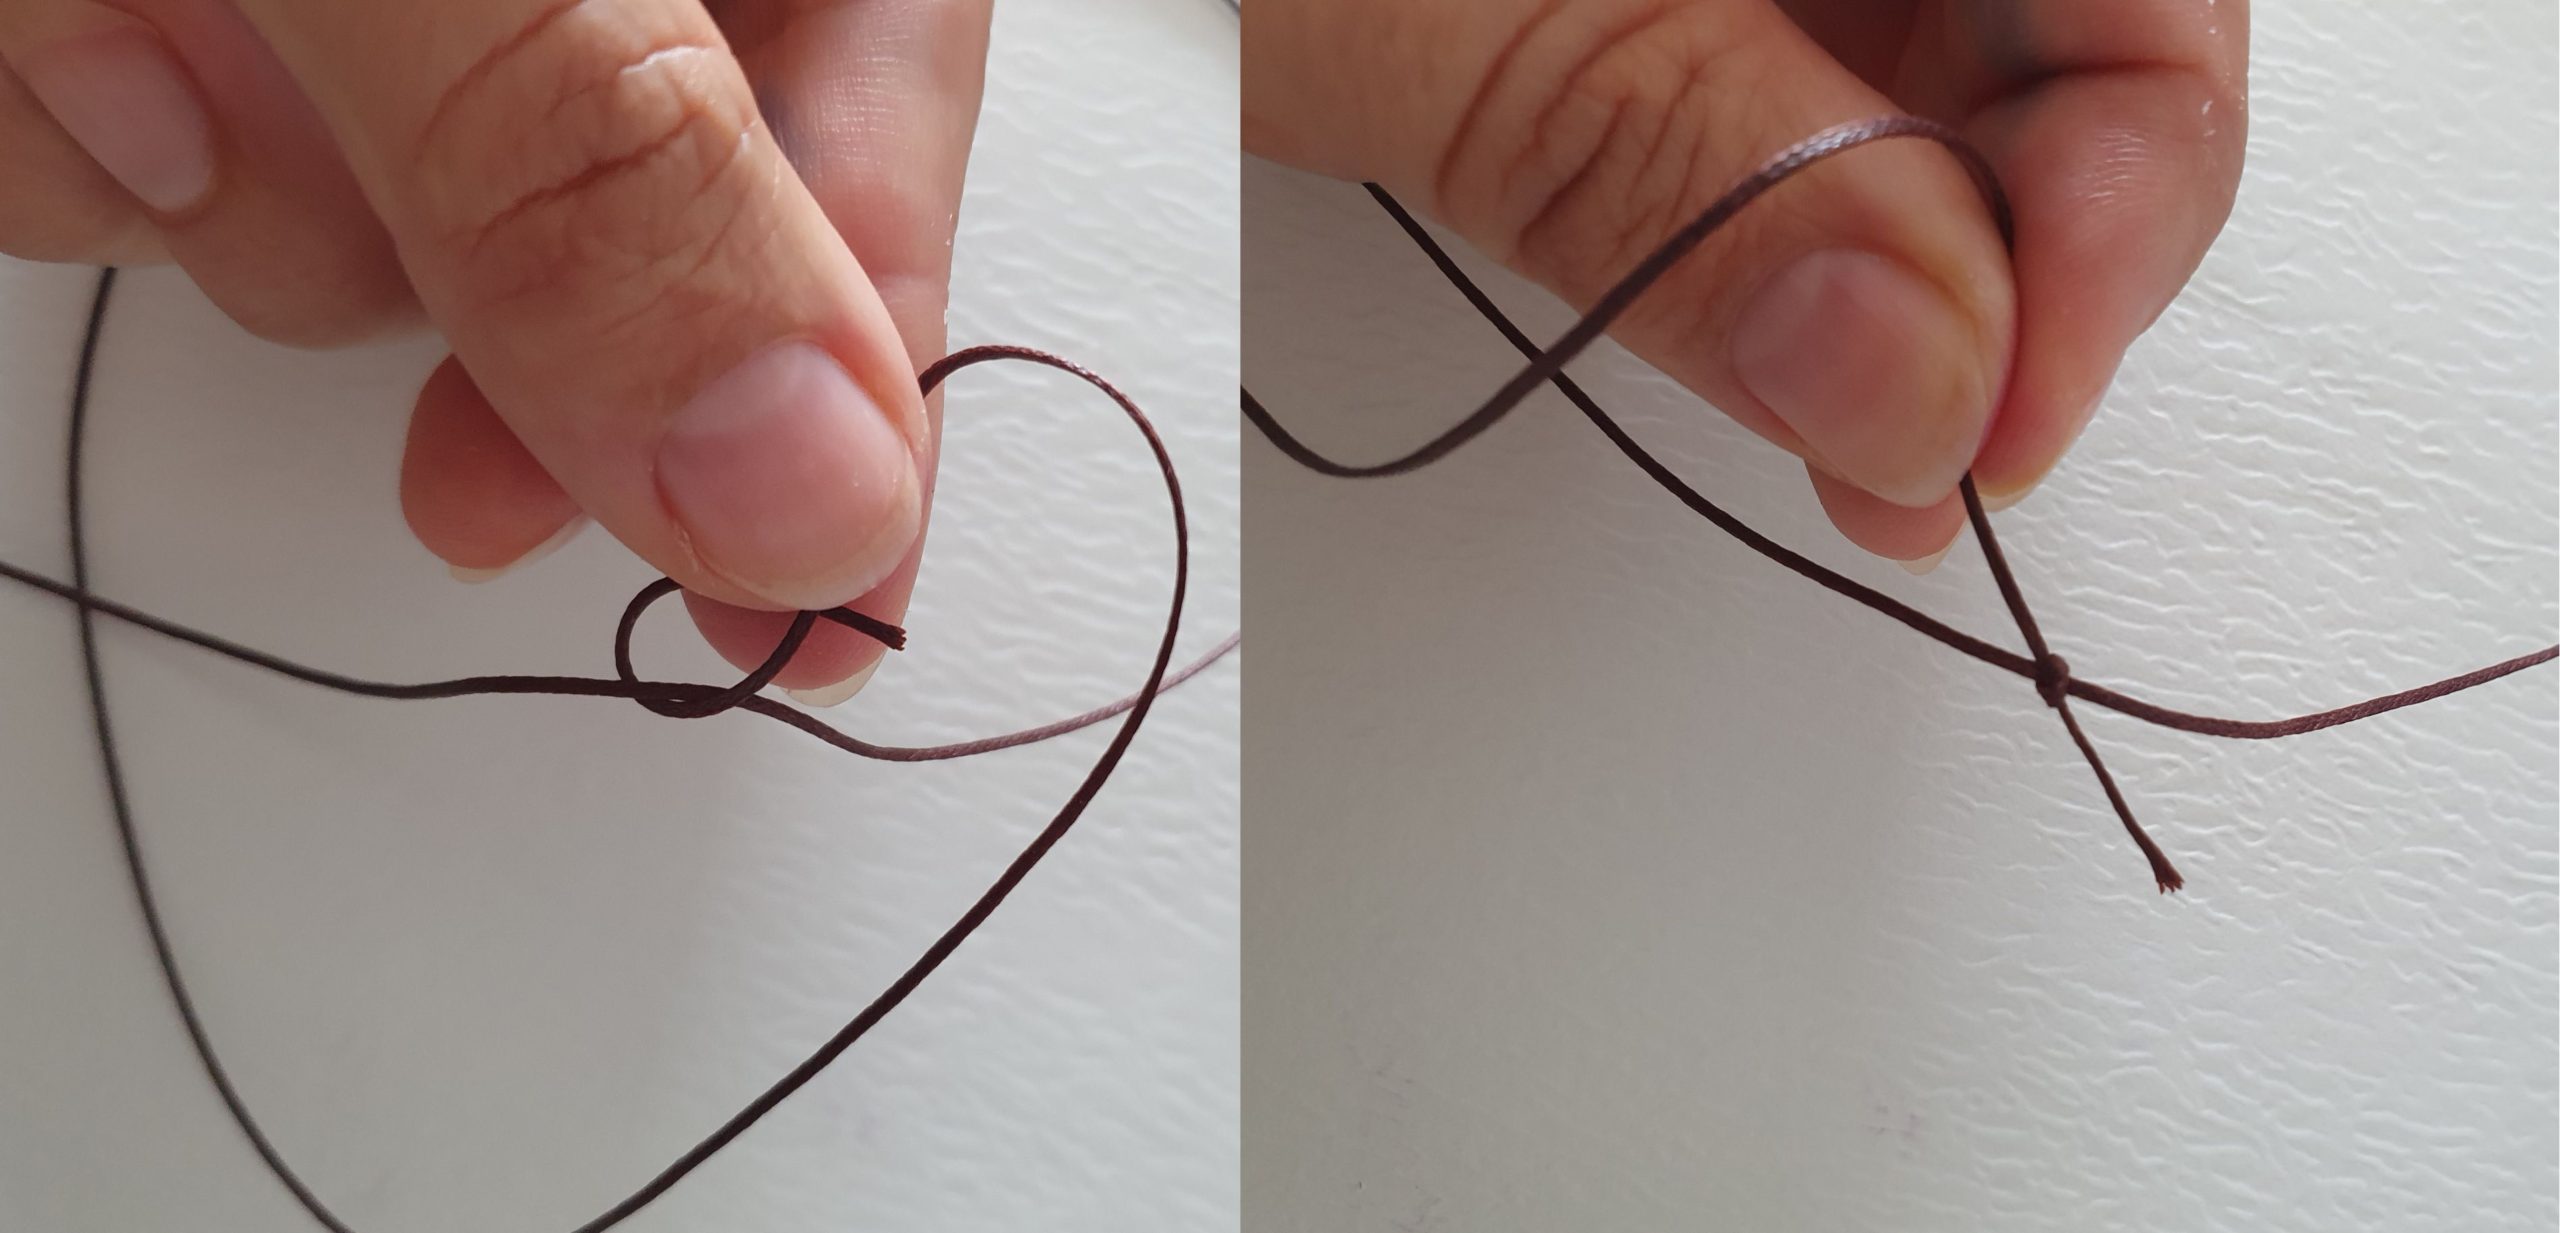
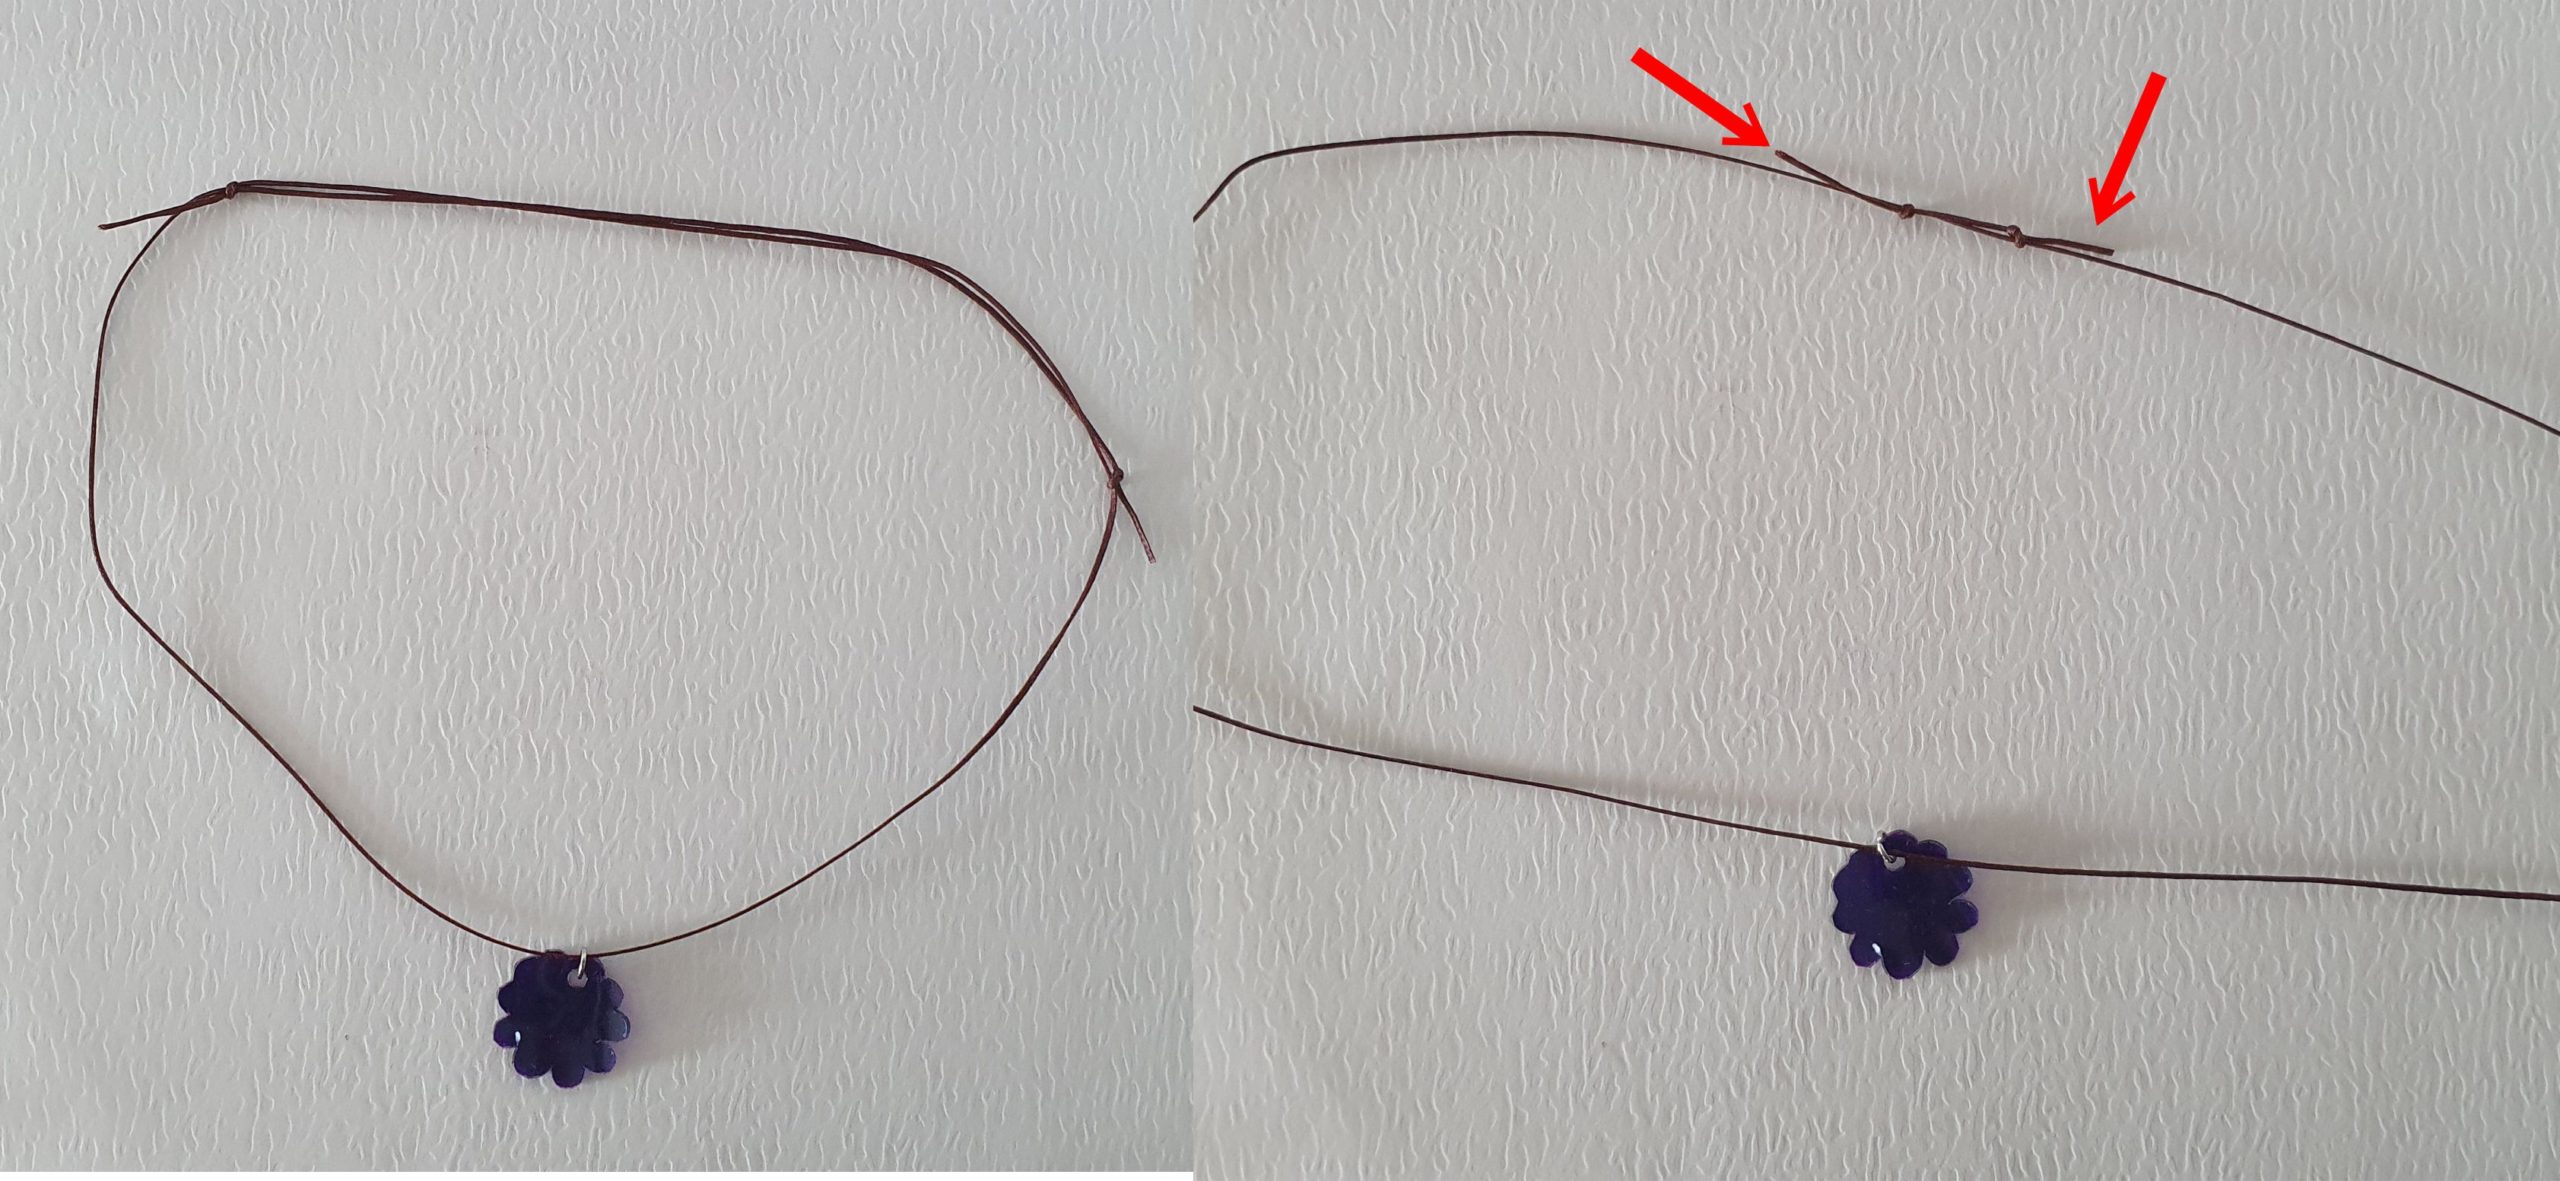
To make the adjustable necklace, start by putting the pendant on a leather or faux leather string measuring around 40cm and lay it like this
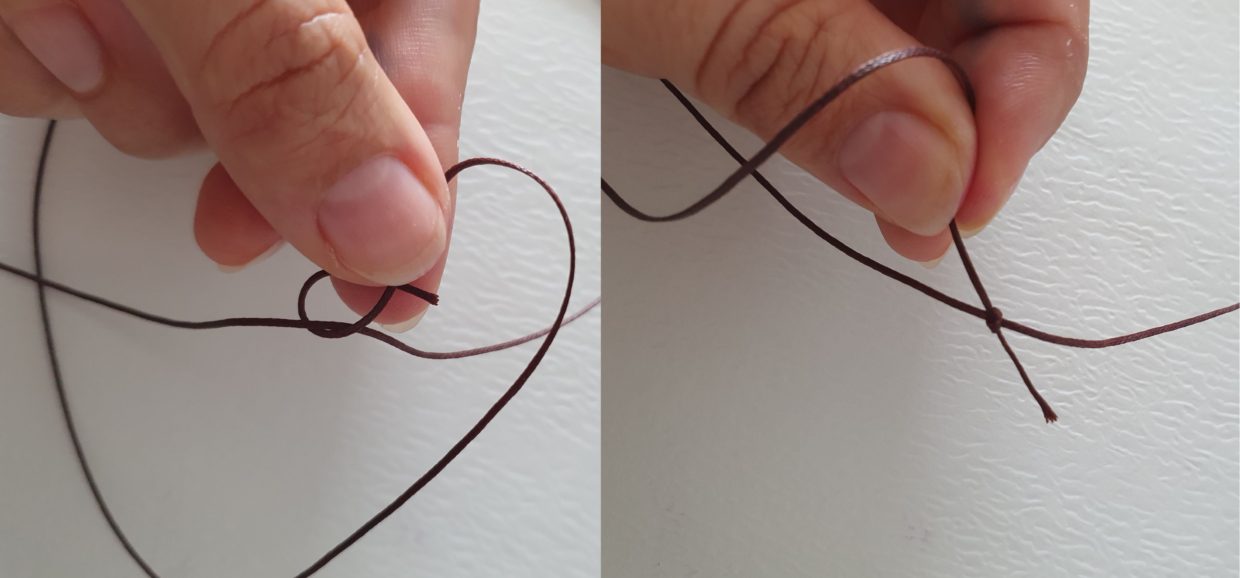
Tie the end of both strings with a simple knot onto the longer string
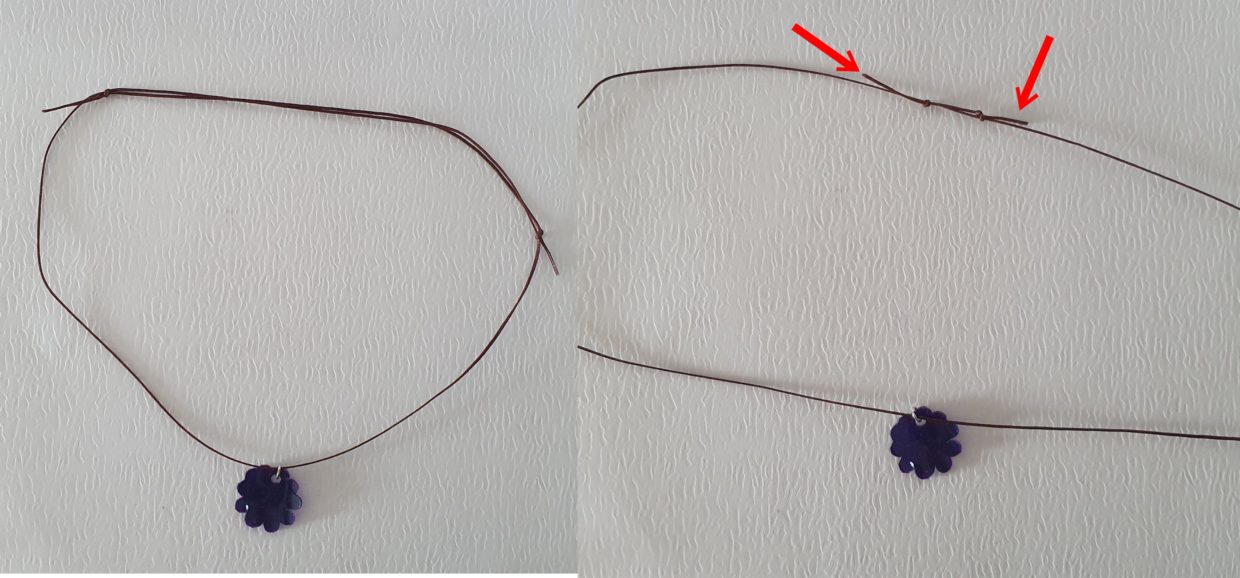
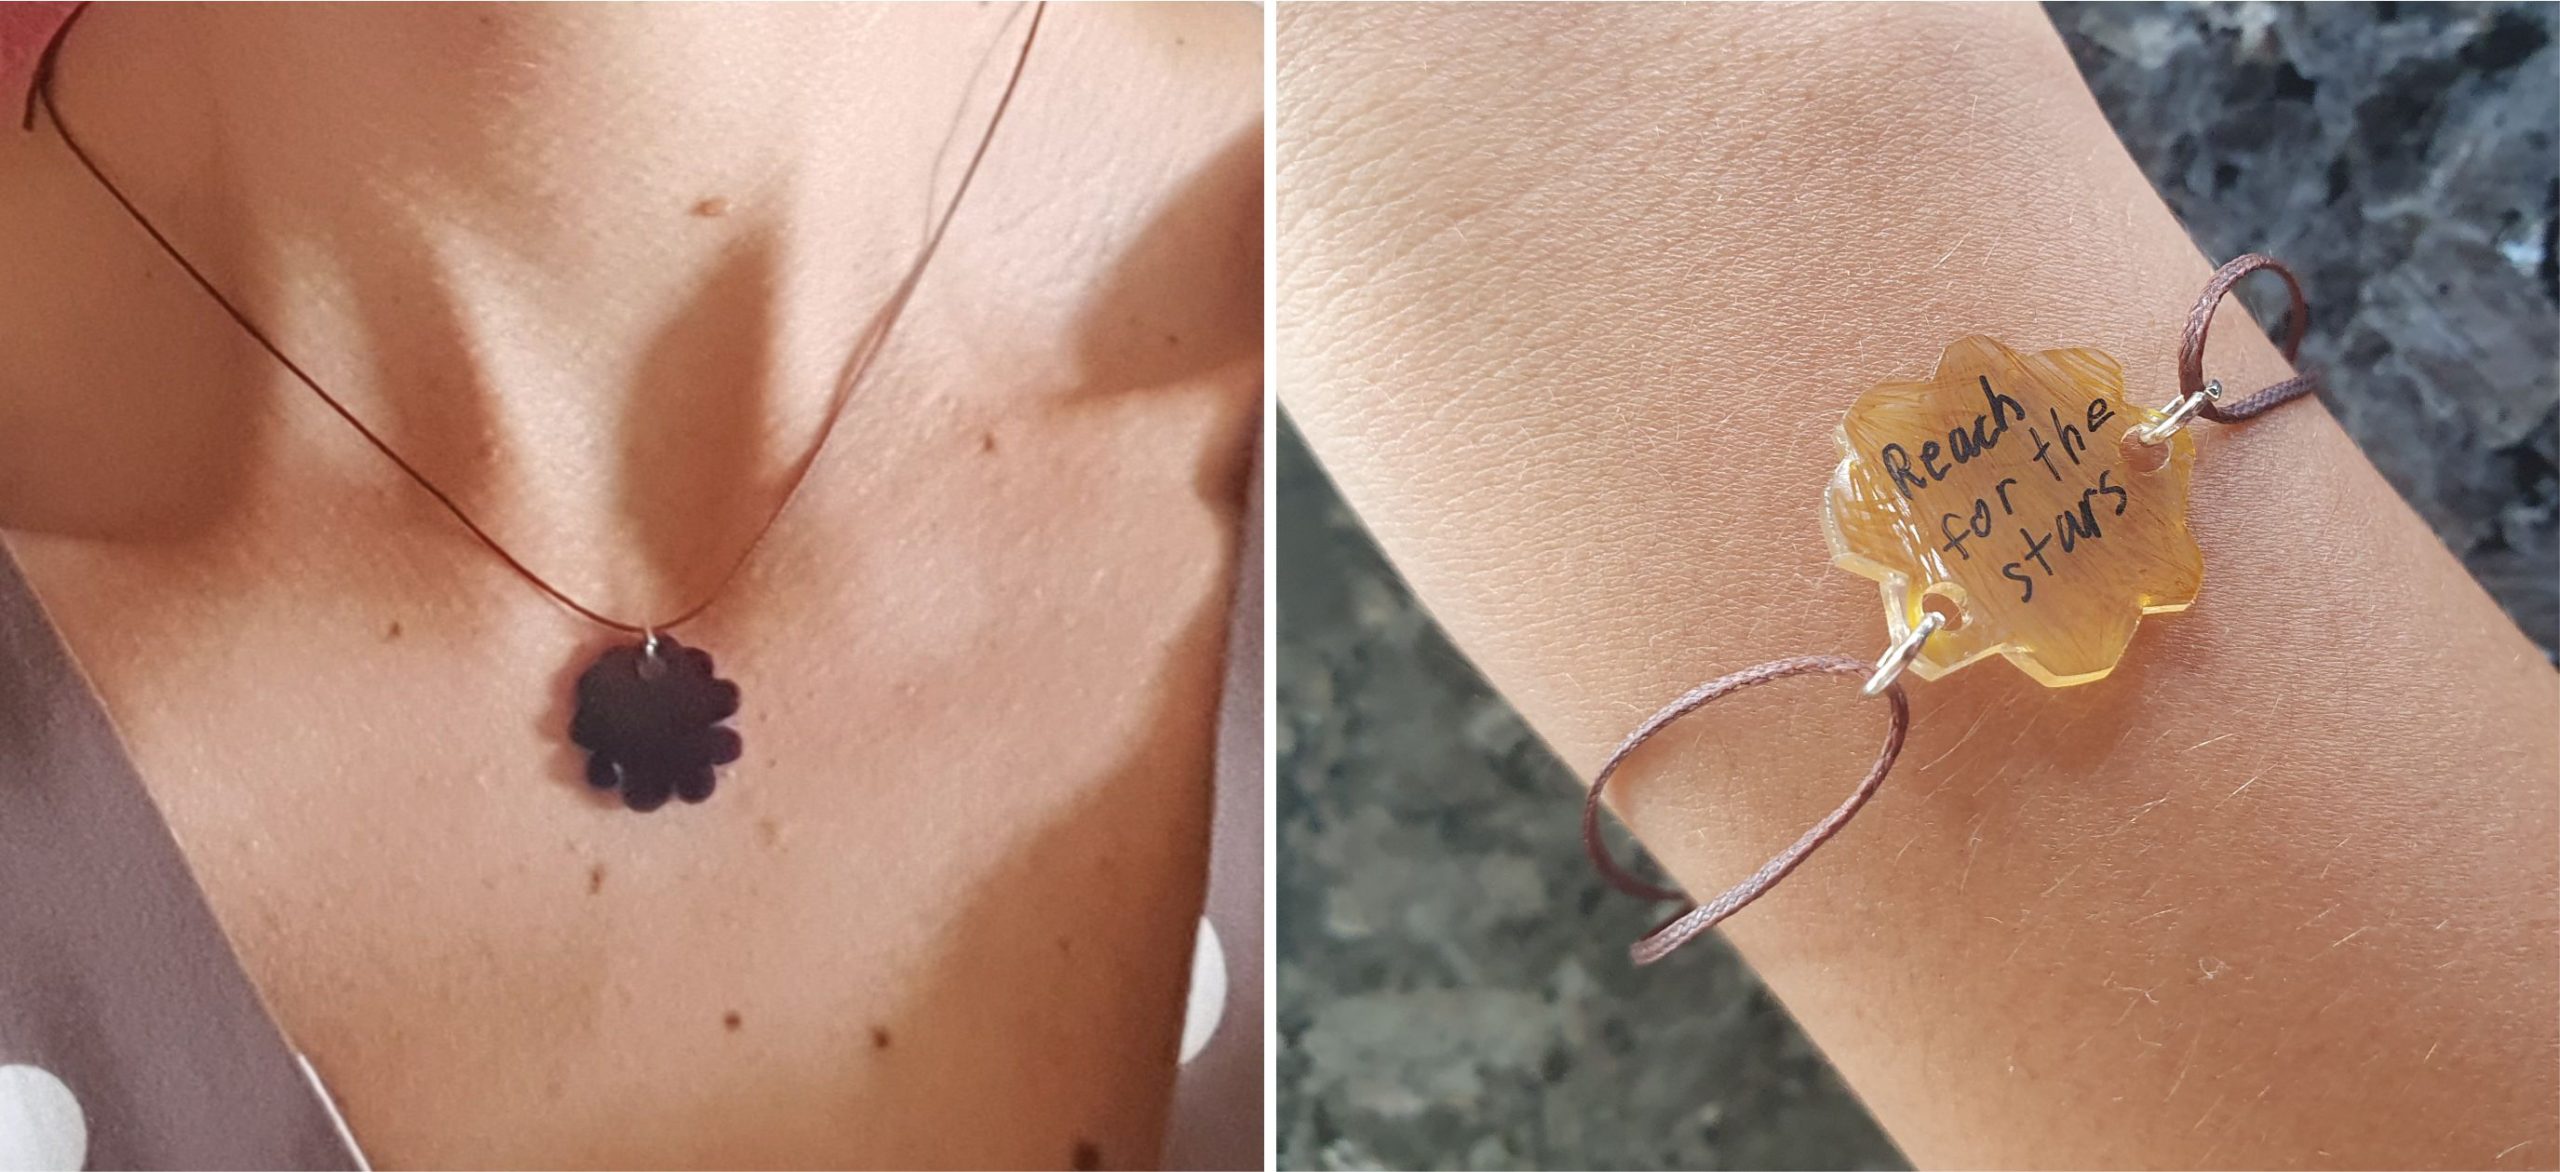
You will now have an adjustable necklace. Pull the string pieces marked with the red arrows to adjust the length.
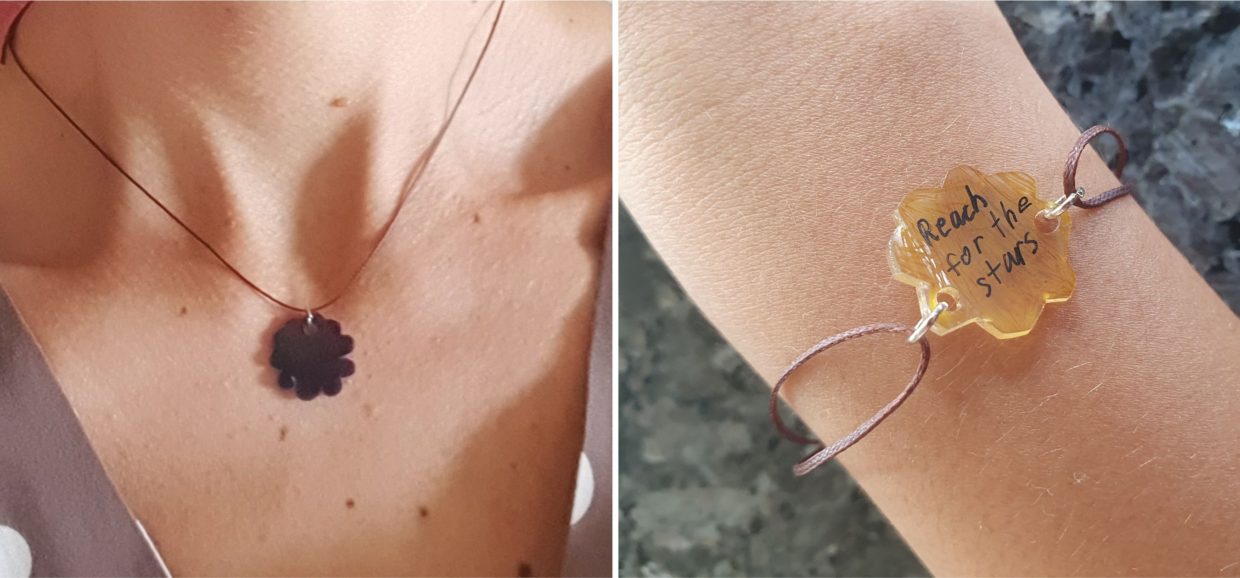
It’s a very simple design but works really well for both necklaces and bracelets.

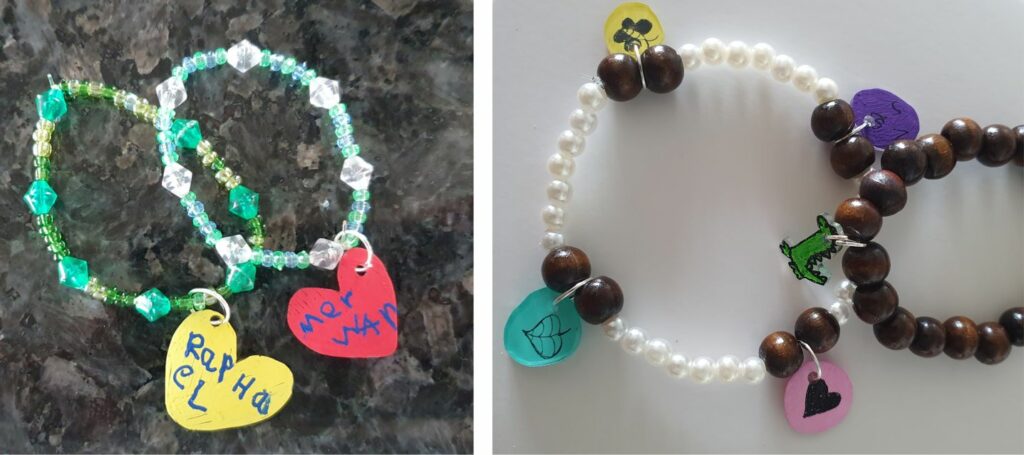
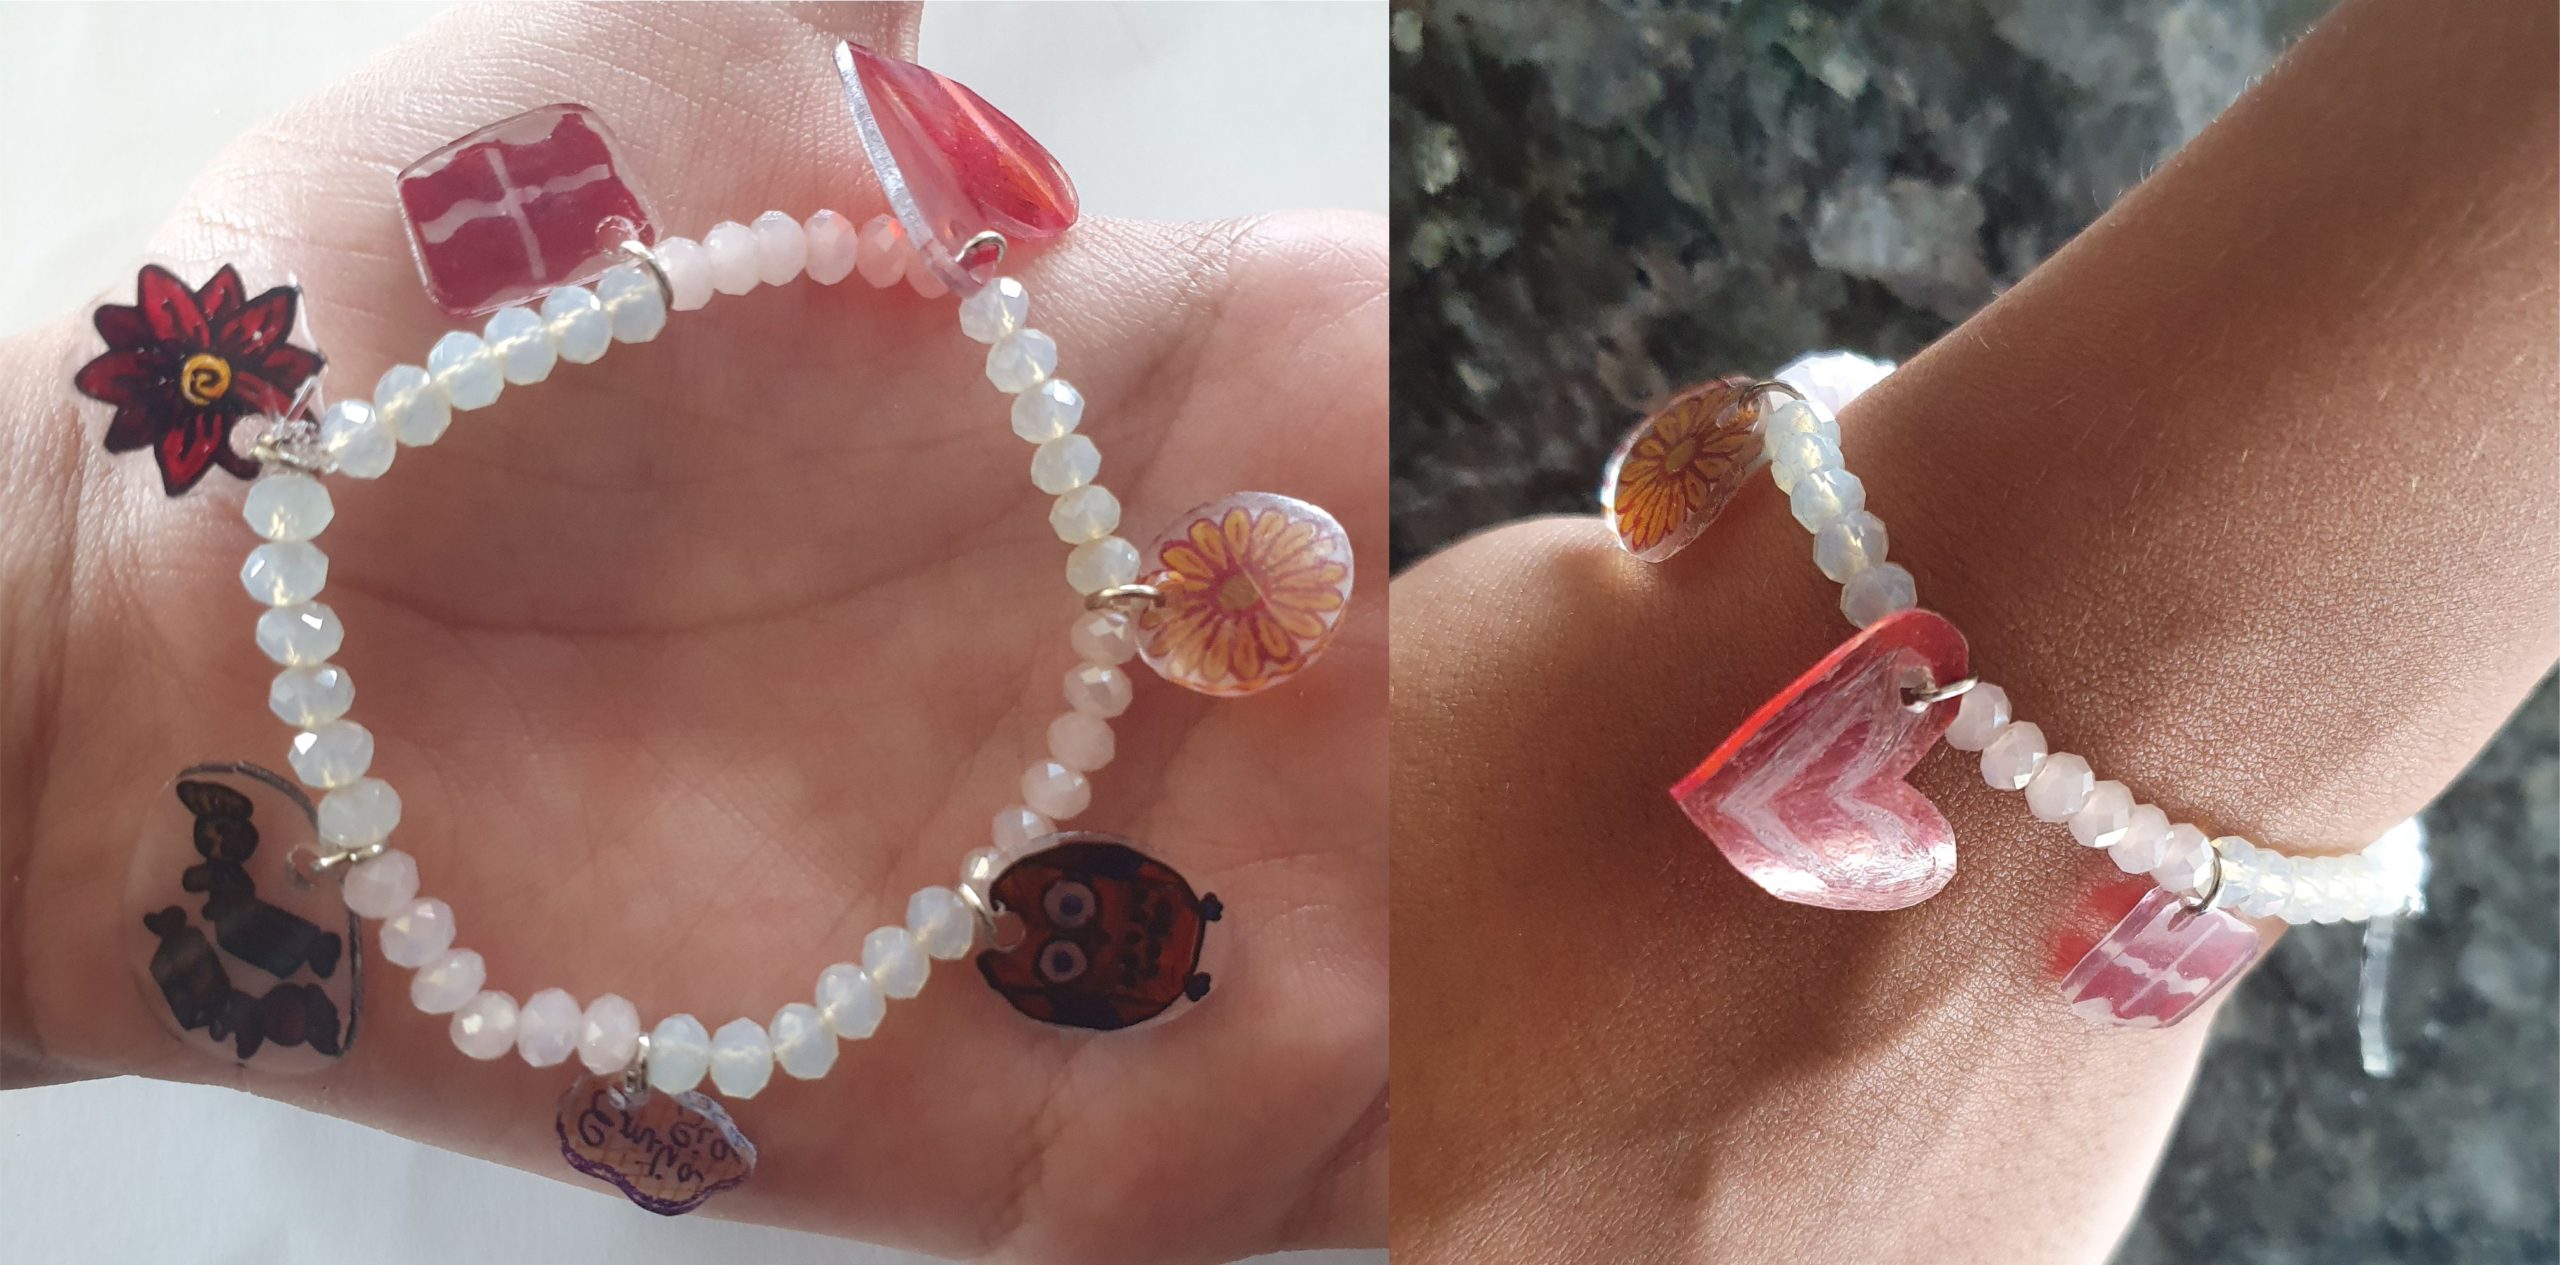
You can also make a personalized charm bracelet. Follow step 3 to add the jump rings to your Shrink Plastic charms. Use an elastic string for this, so it can easily slip the bracelet on to your hand and off again. Use your favourite beads and design. Hope you liked this post. Please let me know how you got on with it and don’t forget to share pictures of you own creations below. Happy crafting!


Leave a Review
You must be logged in to post a comment.