
- Prep Time3 hours
- Total Time3 hours
This DIY for kids: Lego Table is a great way to get the kids interested in using tools and making things by themselves. My kids (aged 5 and 8) were VERY proud to be working with actual tools -something I believe in teaching my kids no matter their gender. Boys should also learn to cook and girls should also learn how to drill a hole or use a hammer. Don’t you agree?
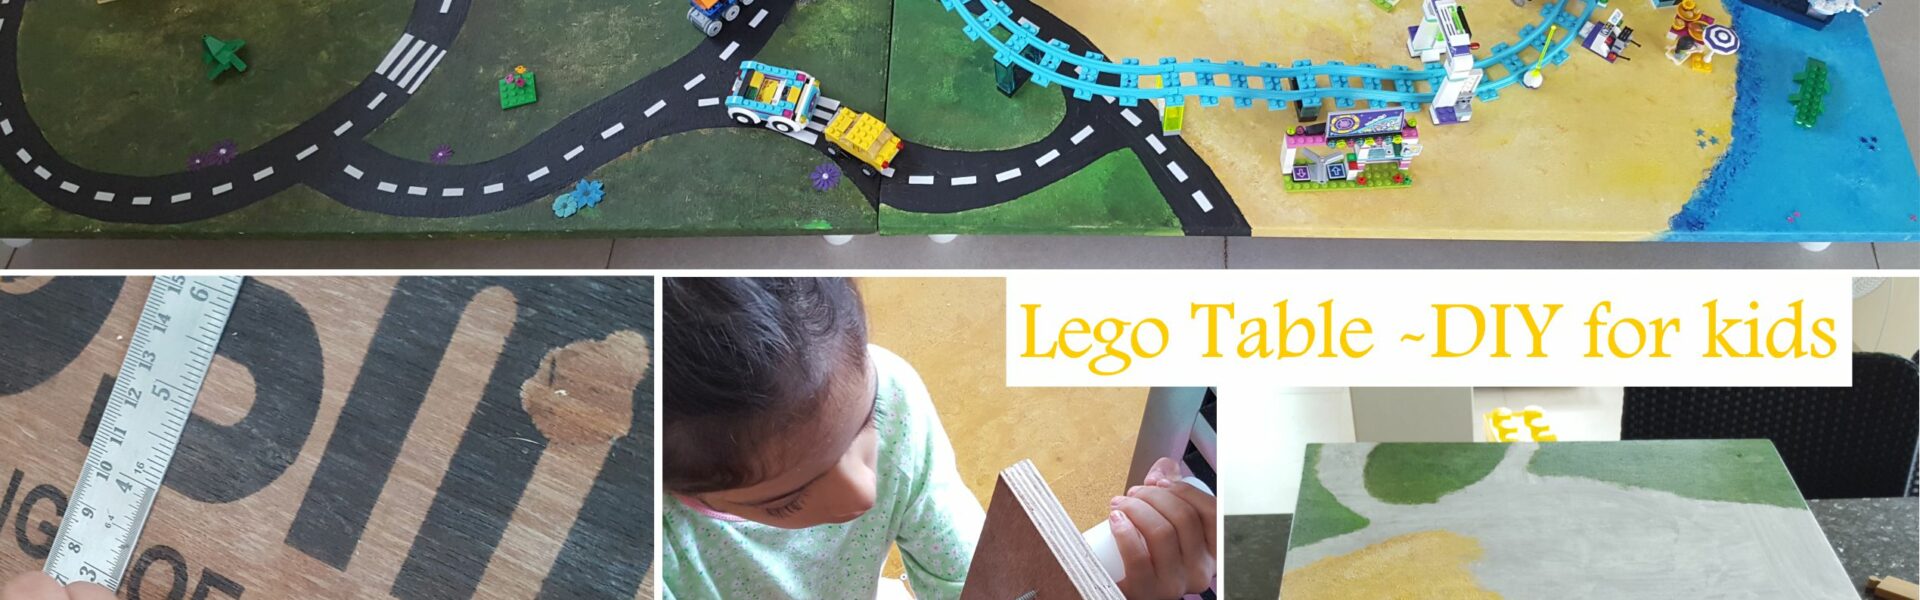
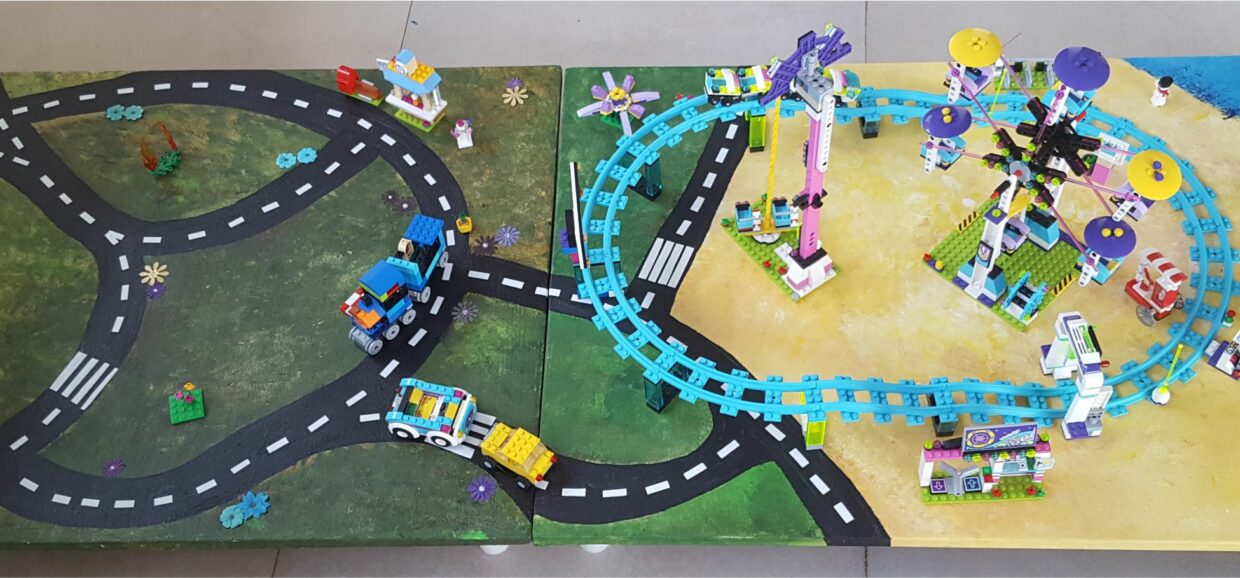
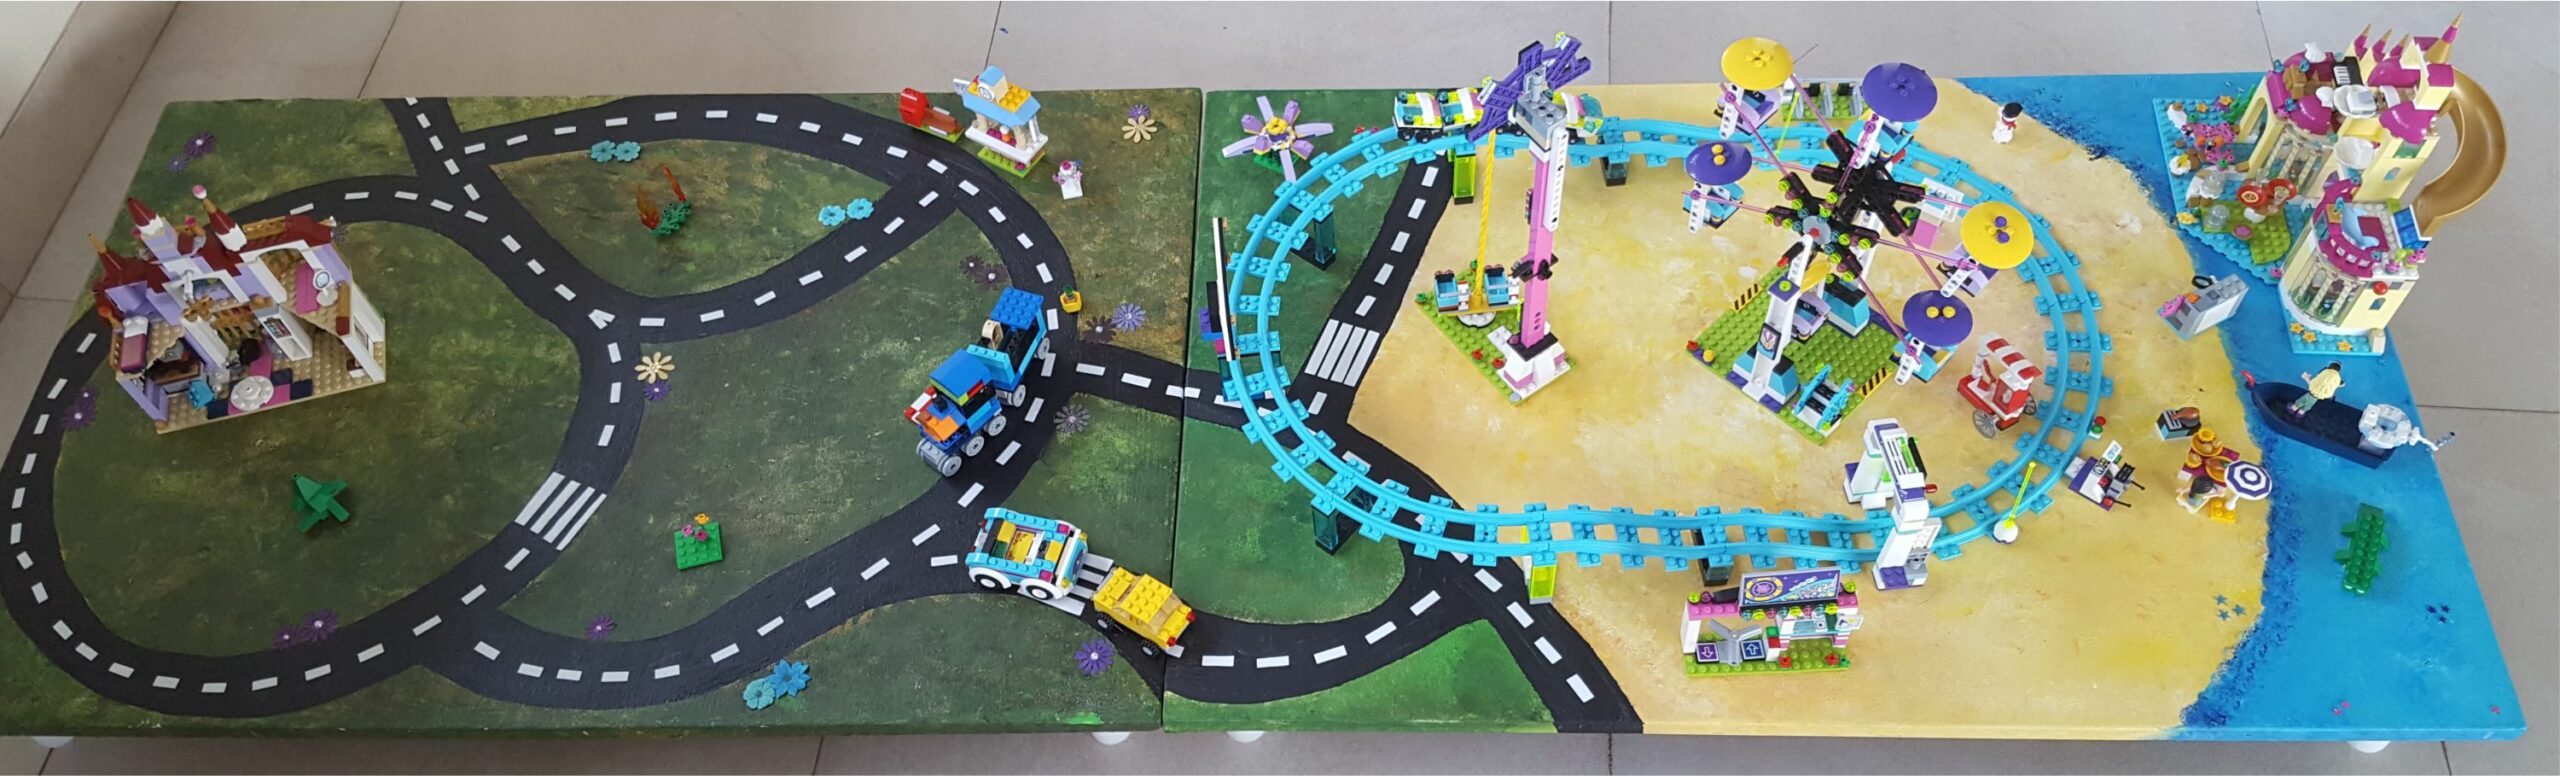
This table is also superb for a garage with cars or for a village with houses and trees.
The perfect DIY for kids: Lego Table from scratch
My kids love to build Lego or play with Playmobil. They can make an entire village on the floor. I love their creativity but it does make it harder to clean -mainly because “the village” is not allowed to be moved. And that usually means that all the stray small pieces end up under my feet. Ouch!
So, we came up with this solution; a very low table where the Lego can stay while the game is on. I can clean underneath and the Lego stays in one place. Everyone is happy! With the added benefit of having a super fun time making the table from scratch. It’s never too early to learn to use a few simple tools (under adult supervision of course!) and this was a perfect opportunity to do just that! You can also try out my other kids DIY projects by clicking here.
This Lego table is very low so it fits perfectly under a bed when not in use -if there ever is such a time 😉
My Top Tips for making this toy table with the kids:
Leave plenty of time for this project
We made two tables. The first one we did in stages over a week or so and the other one we did one morning. It took us 3 hours from start to finish. I recommend doing it bit by bit so the fun stays fun and doesn’t become too tiresome. This is especially important if you are doing this project with younger kids.
Get all the materials ready before you call the kids
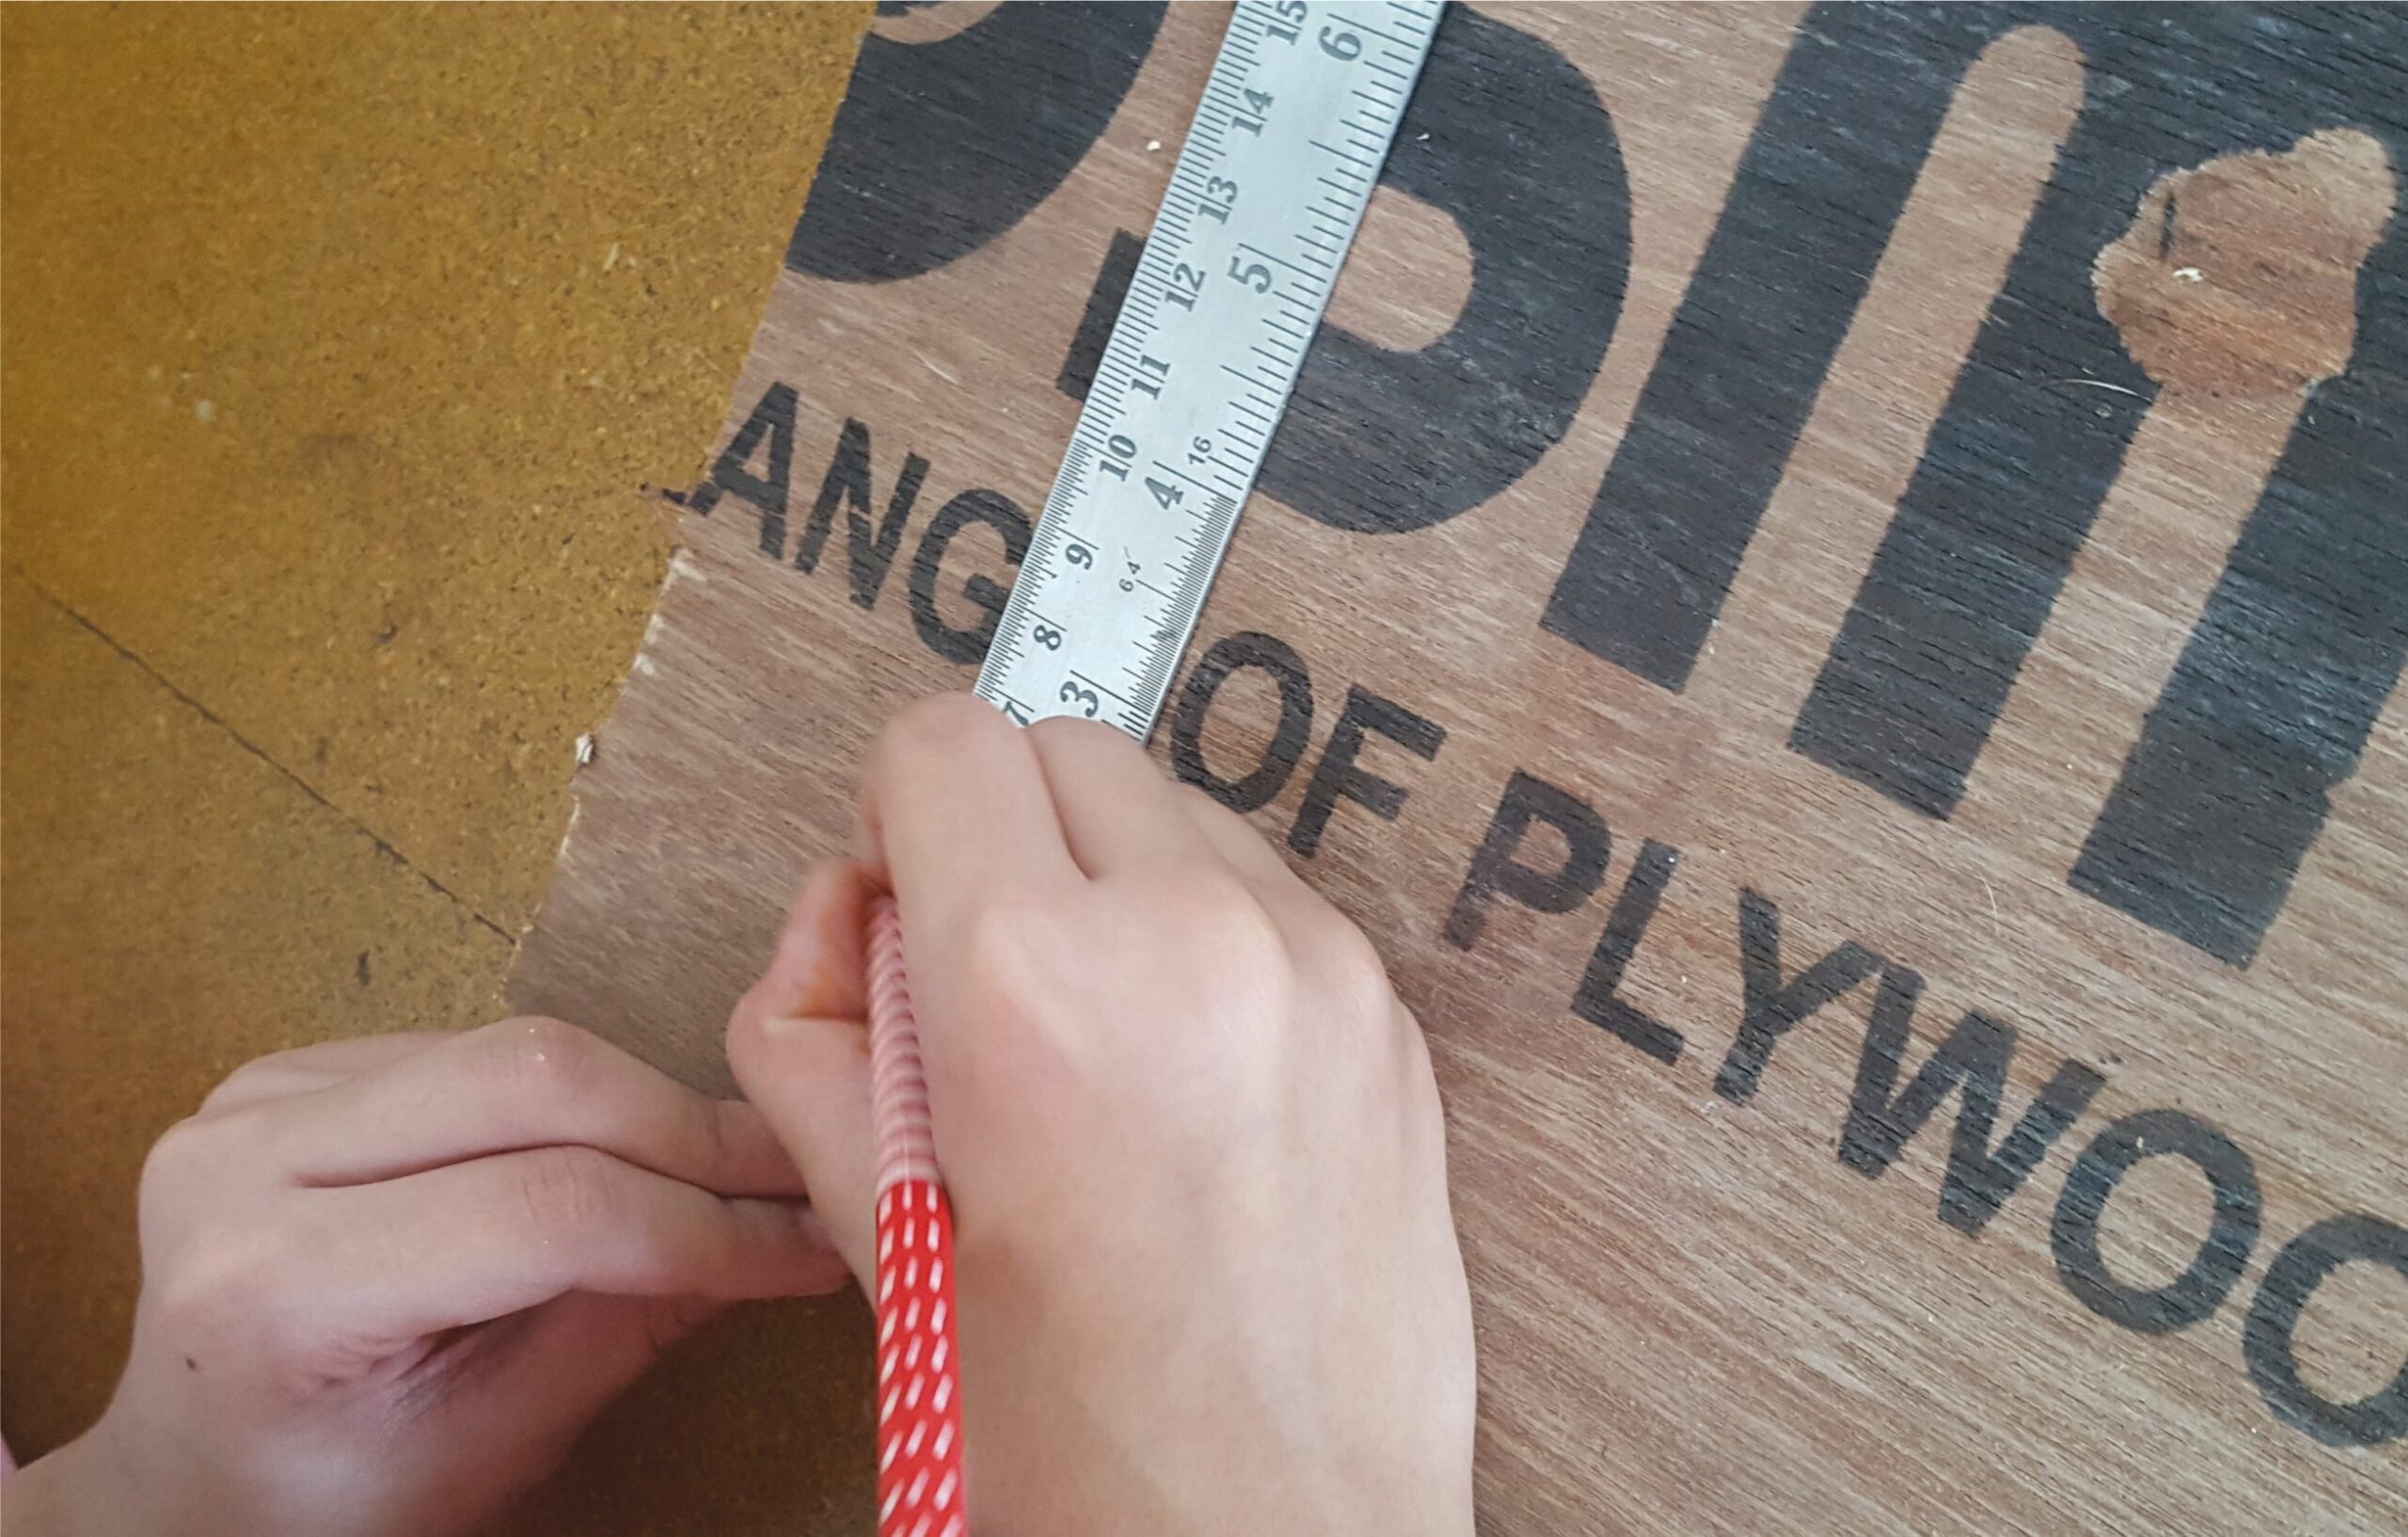
We used 1/2 inch plywood measuring 2 by 3 feet -but smaller or slightly larger could work too. I went to the local plywood store and asked for a discarded/cut piece as I wasn’t fussy about the size. I also got the legs, screws and fillers from the same shop. If your piece is longer, I recommend putting another 2 legs in the middle. My kids have a tendency to sit on it (and stand on it!) while playing and it would be a shame to see it break in half.
Let the kids do it
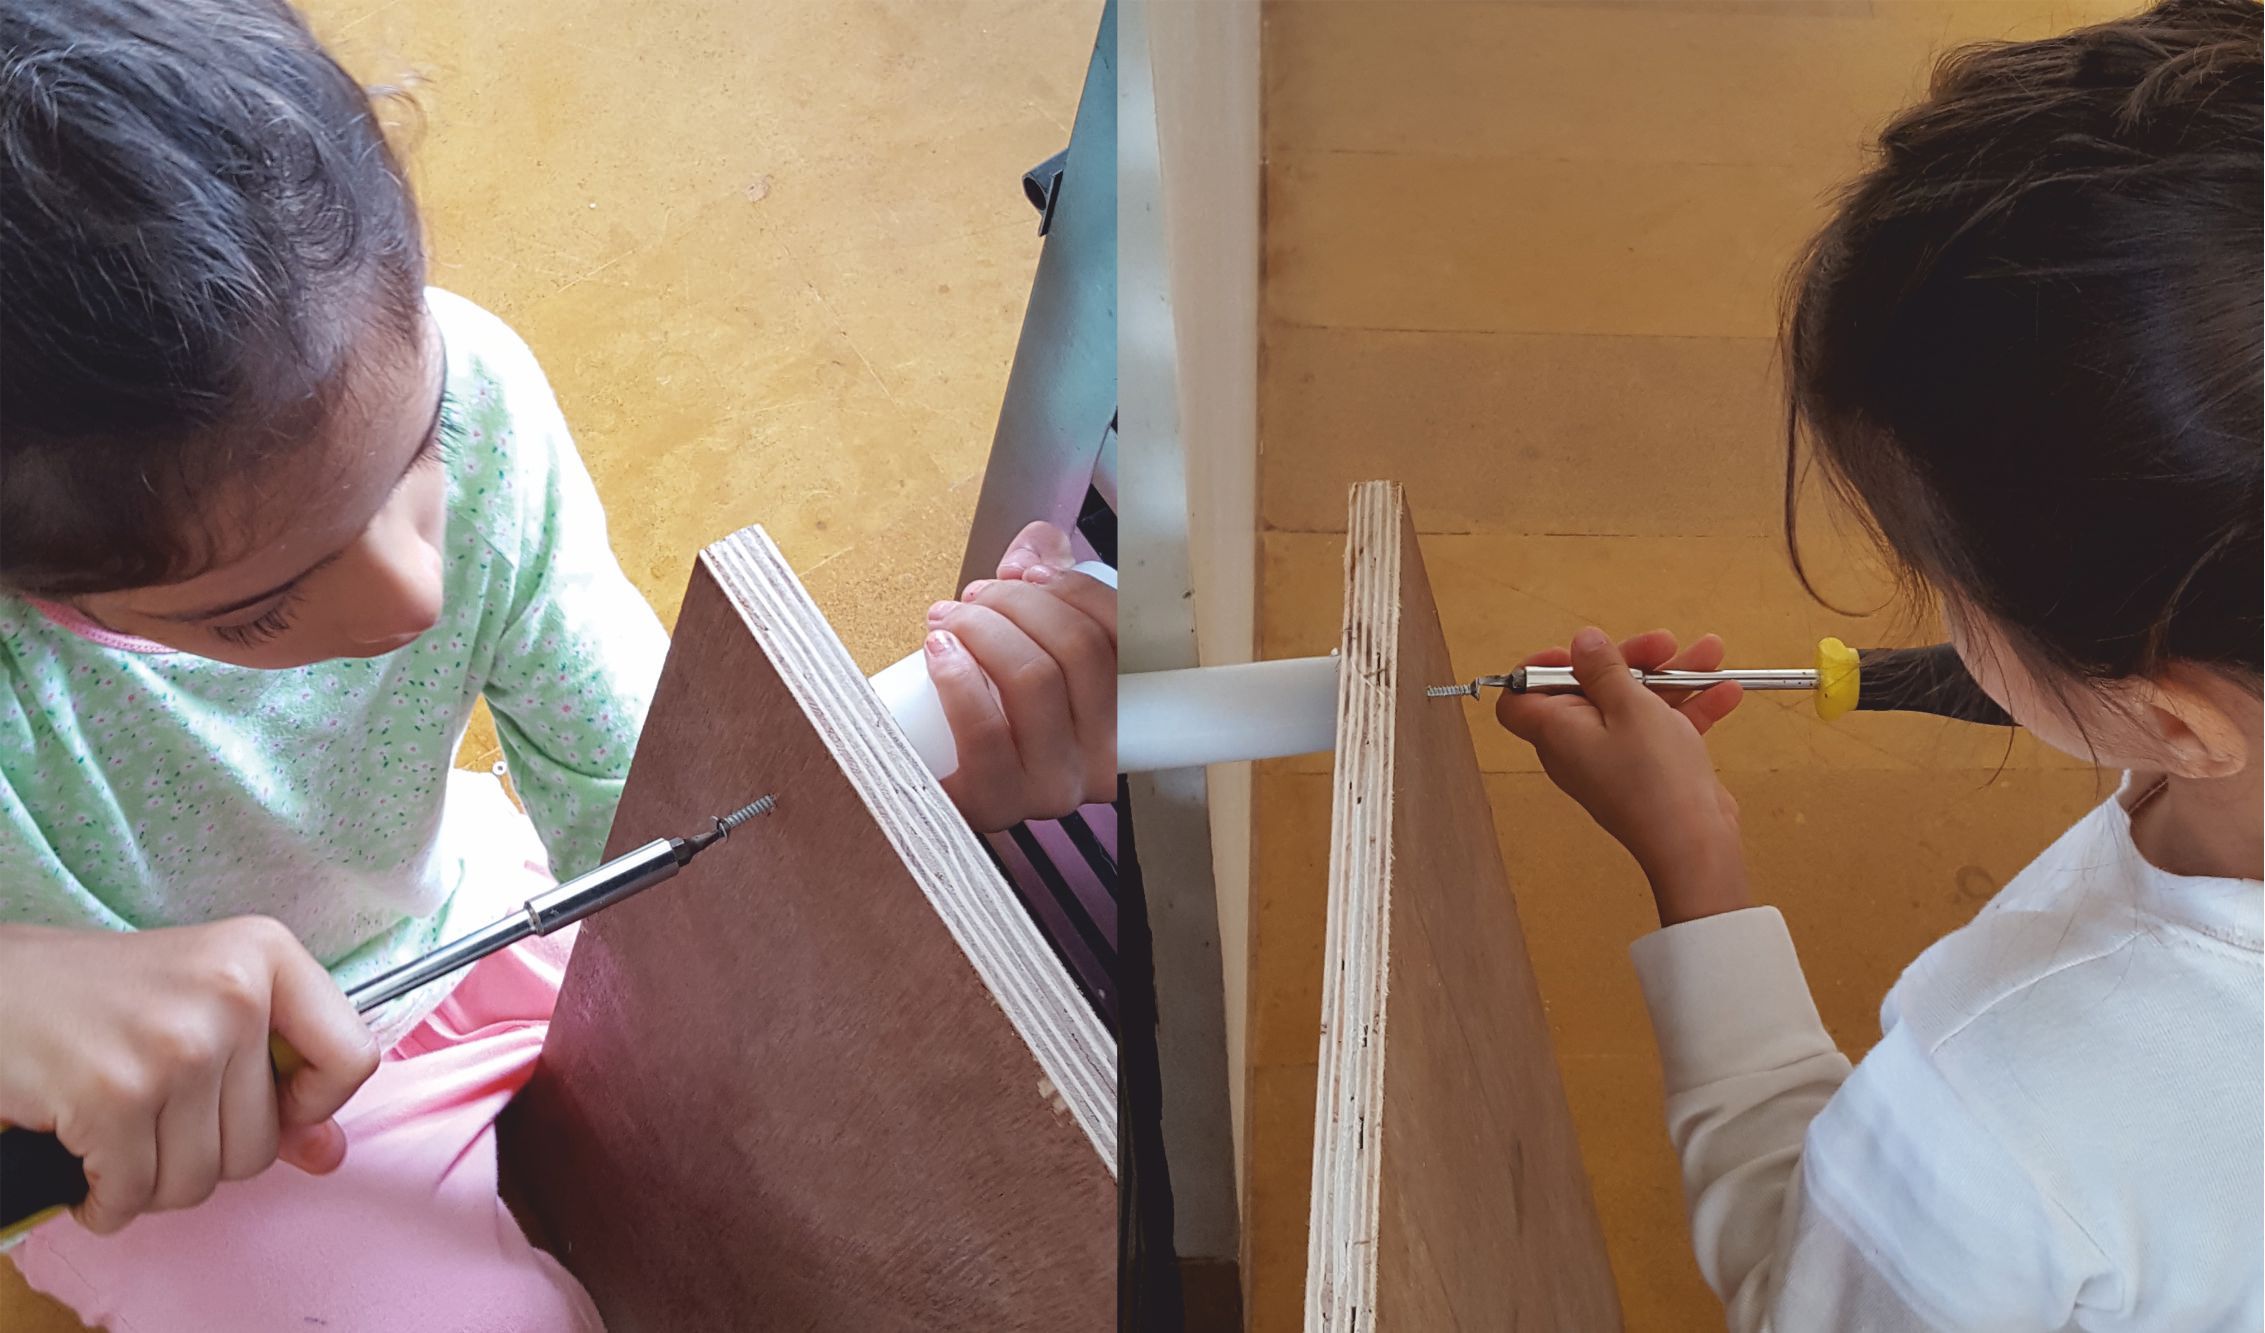
This is sometimes a hard one as we parents tend to “take over” when tools are involved. But try to take a step back, explain and let the kids get their hands dirty. I helped my kids with drilling the holes for the legs. O
therwise I mostly supervised and helped if they needed me to (like blending the colours of paint and such). I am sure that your kids will have a clear idea of how their table should look -so it fits in with whatever toy they plan to use on it. You don’t need to worry about that part at all! 🙂
Wear old clothes
Make sure you are all wearing old clothes as it can get messy. This applies to the full project as both the sandpapering and painting can mess up the clothes. I recommend using sponges for the painting. The effect is quite nice, it’s easier to blend the colours and kids can do it just as well as adults. Remember to dab and not stroke.
Get the right paint
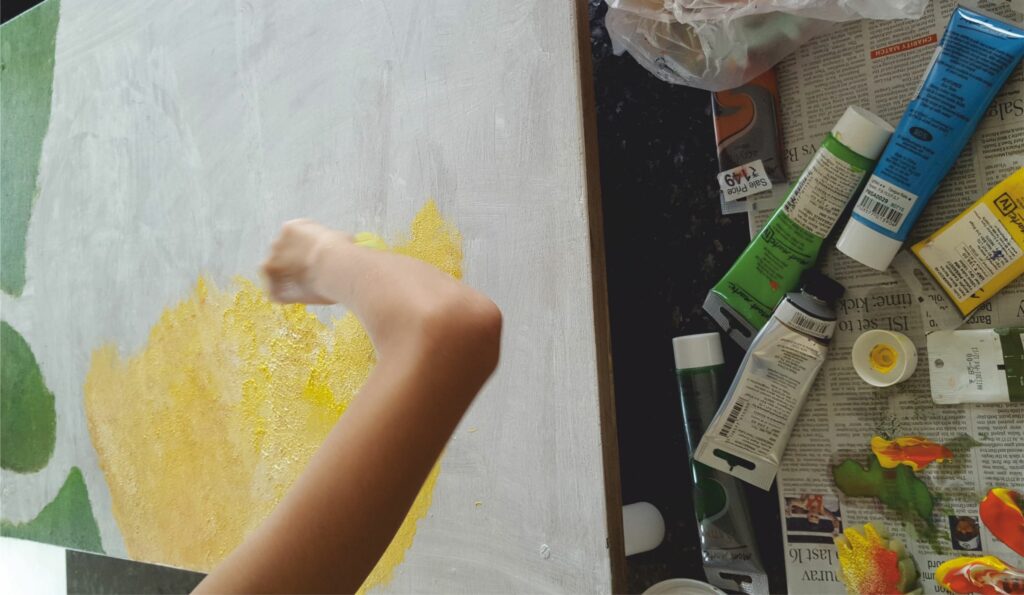
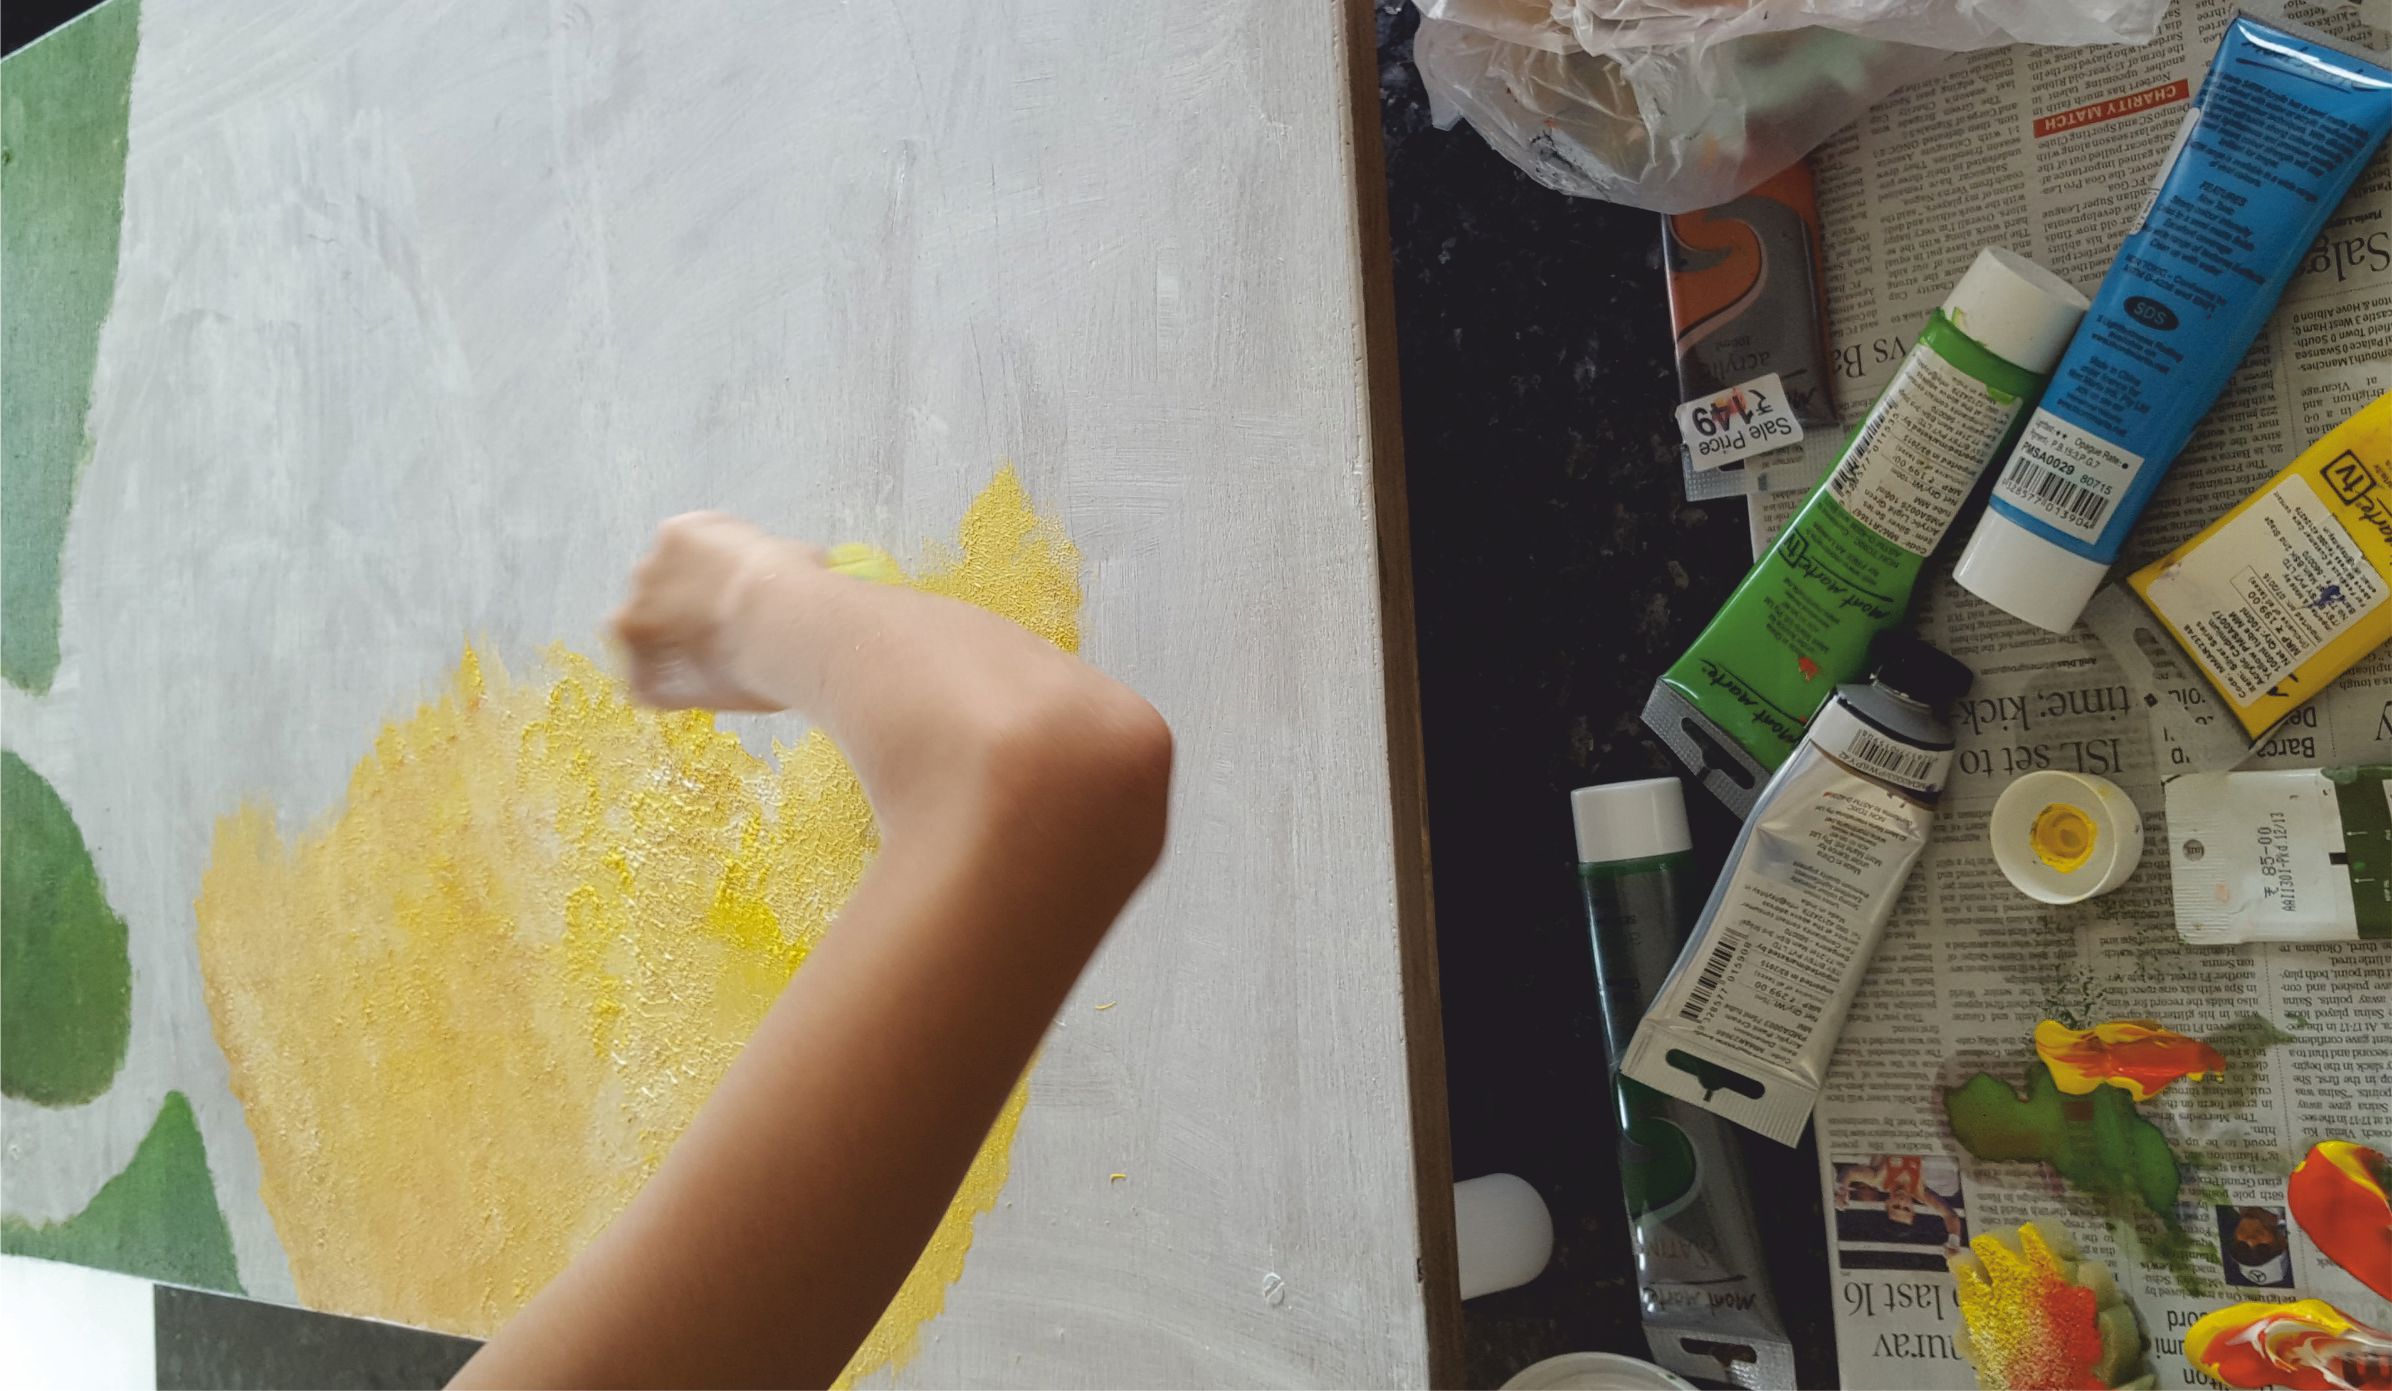
Use acrylic artist paints to paint the tables (not poster paints). The acrylic paints are easy to wash off the hands afterwards (not that easy to tackle on the clothes though!) and they last forever. You can wipe the table with a wet cloth time and time again without any changes to the colours. We used dark green, light green and brown for the grass. For the sand we used yellow, cream, gold and a bit of orange. And for the water dark blue, a lot of light blue and white.
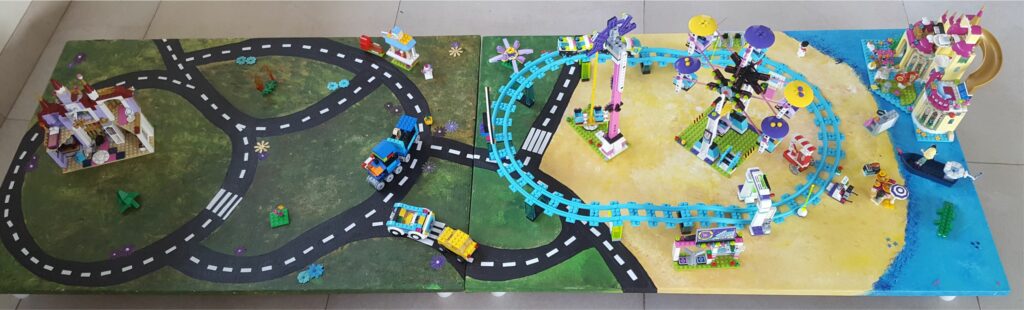
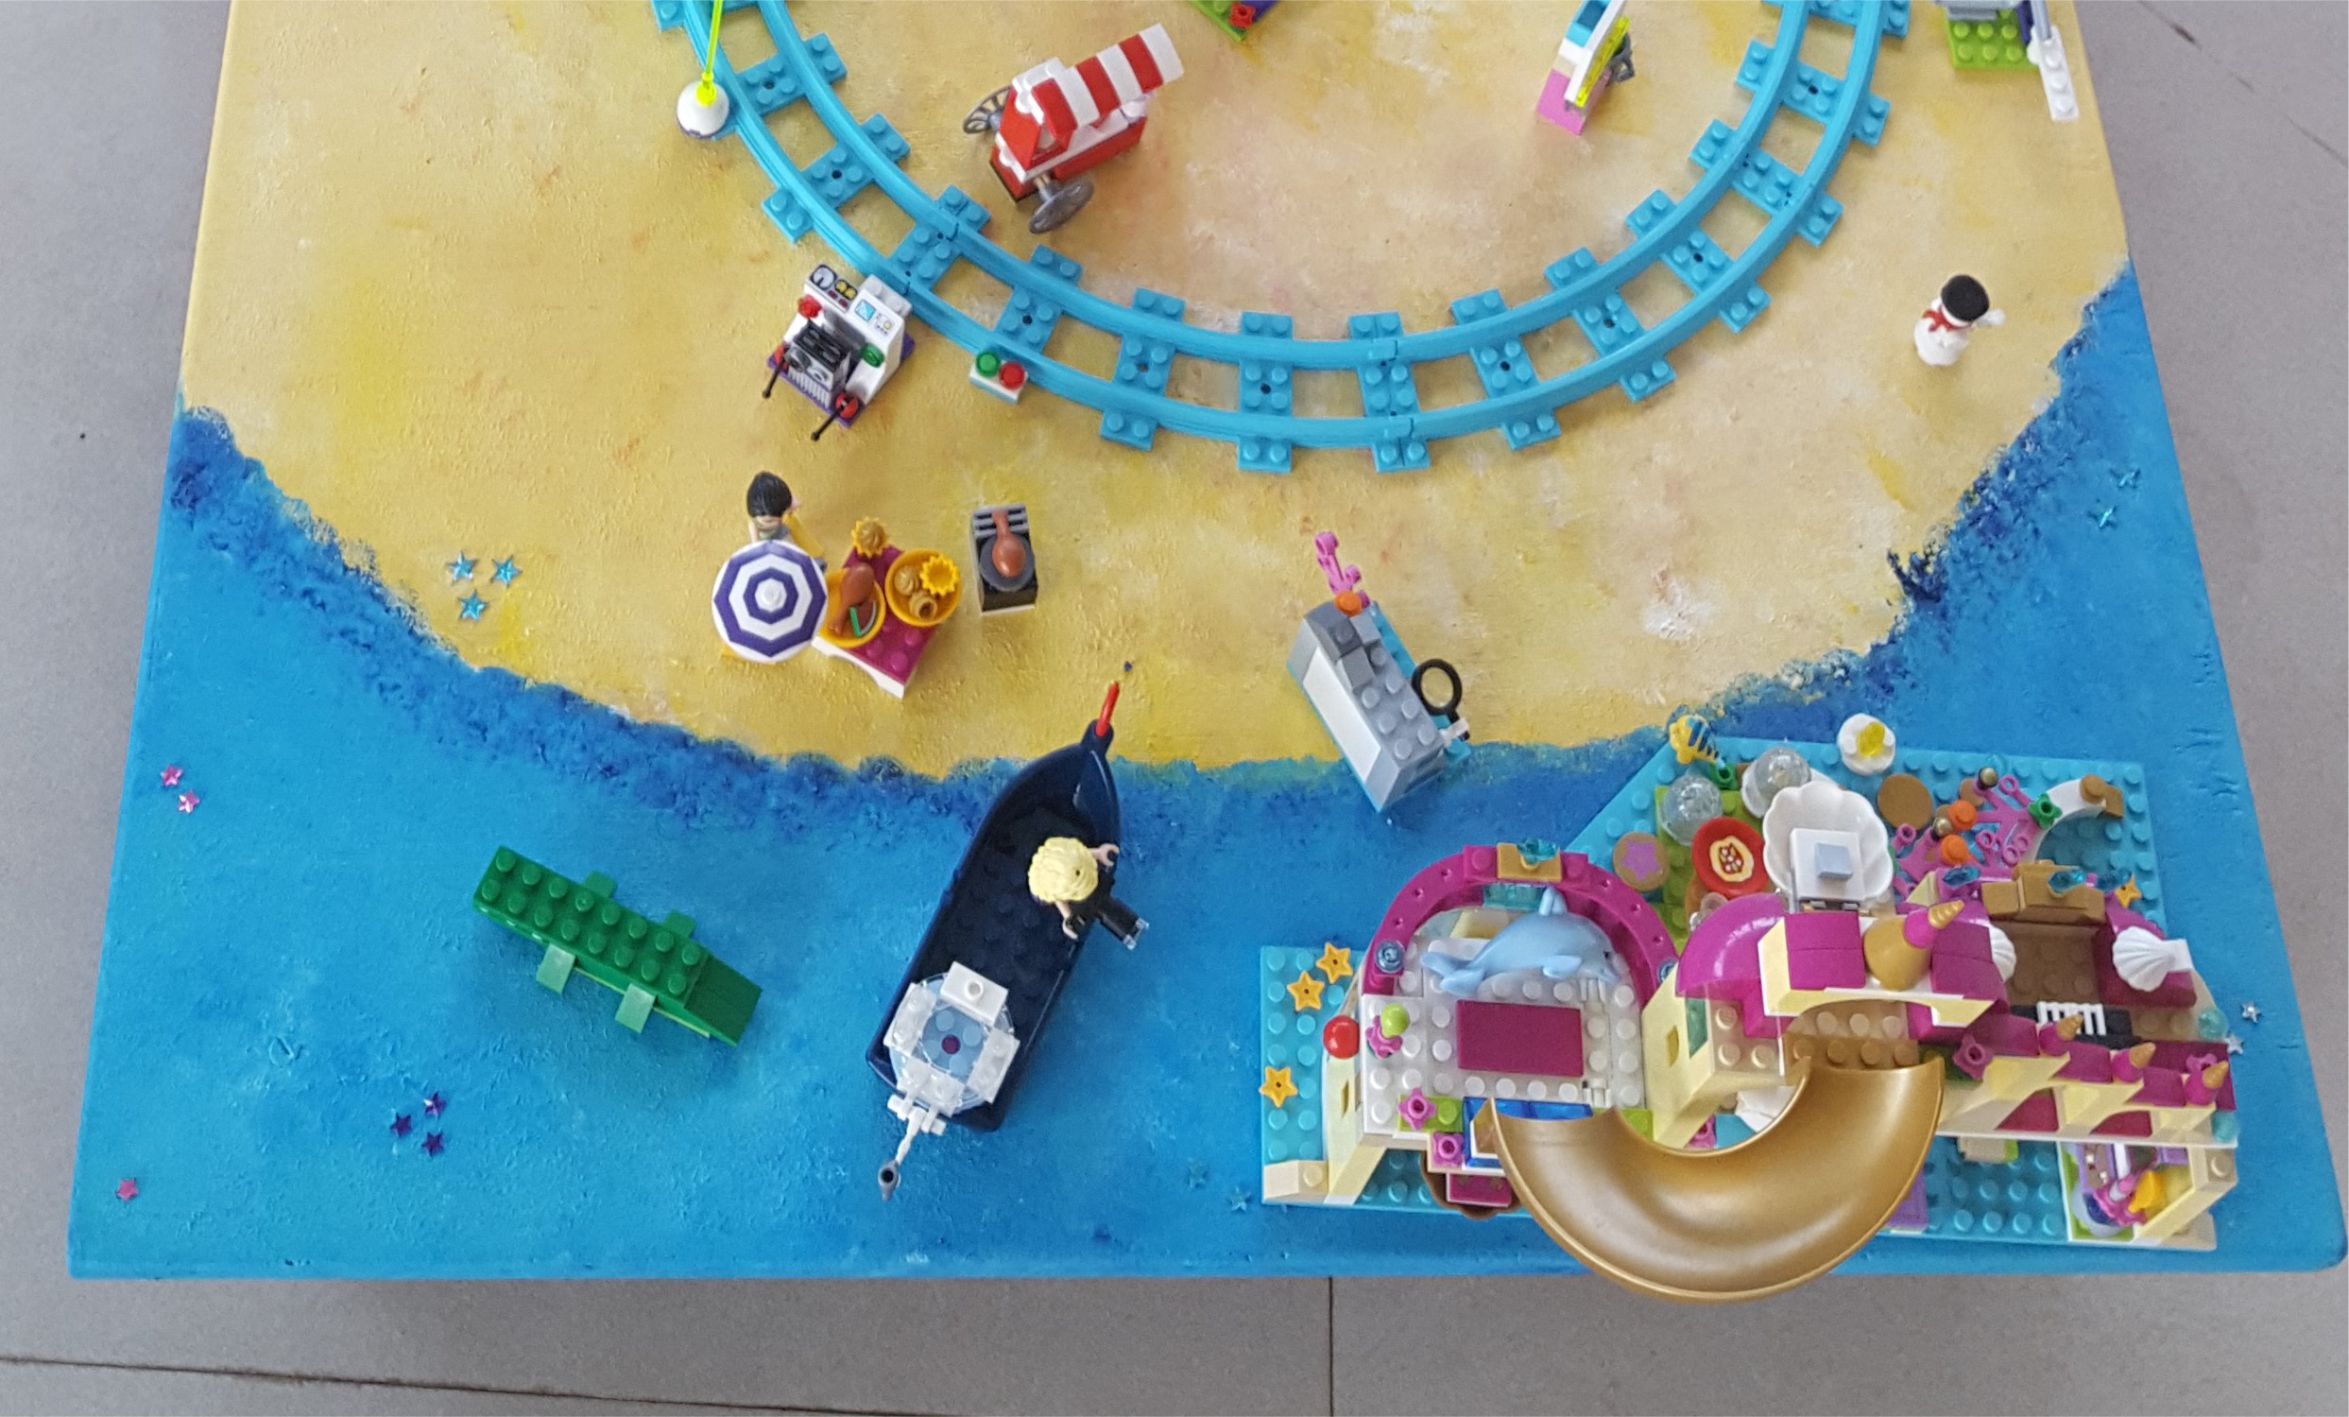
The pictures below in the step-by-step guide are all from the second table with little road, beach and water. My kids realized that they needed more than just a road (after making the first table) so we “had to” make a second one too.
My kids play with it every day and all our visitors go straight to it. Hope you enjoy making yours and don’t forget to send me the picture of your creations or tag me on instagram @mommademoments_
Update: We have now had the tables for 3+ years and they are still looking good as new and they are still in use every single day.
Ingredients
Directions

My daughter started off with measuring 5cm from both sides (2 inches) near the corner to mark the place for the legs. She did that in all 4 corners. I then drilled a hole through. That was my work done and it was time for me to observe again
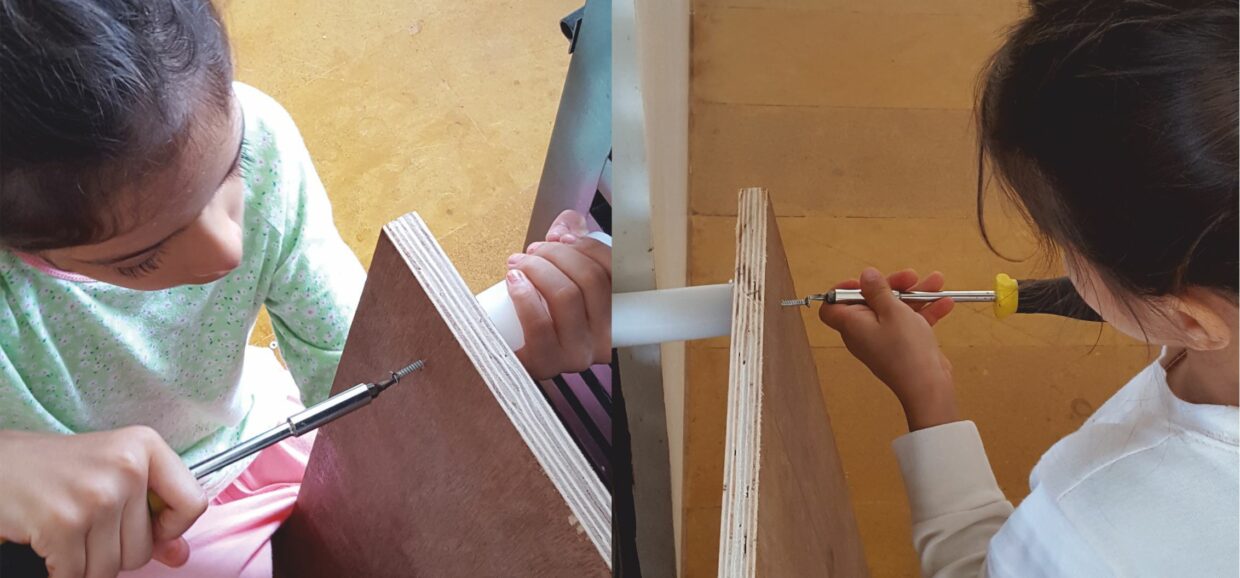
My daughters then screwed in the legs using the fillers and the screws (you might want to help to tighten the screws afterwards depending on their age -but generally they did it without any problems)
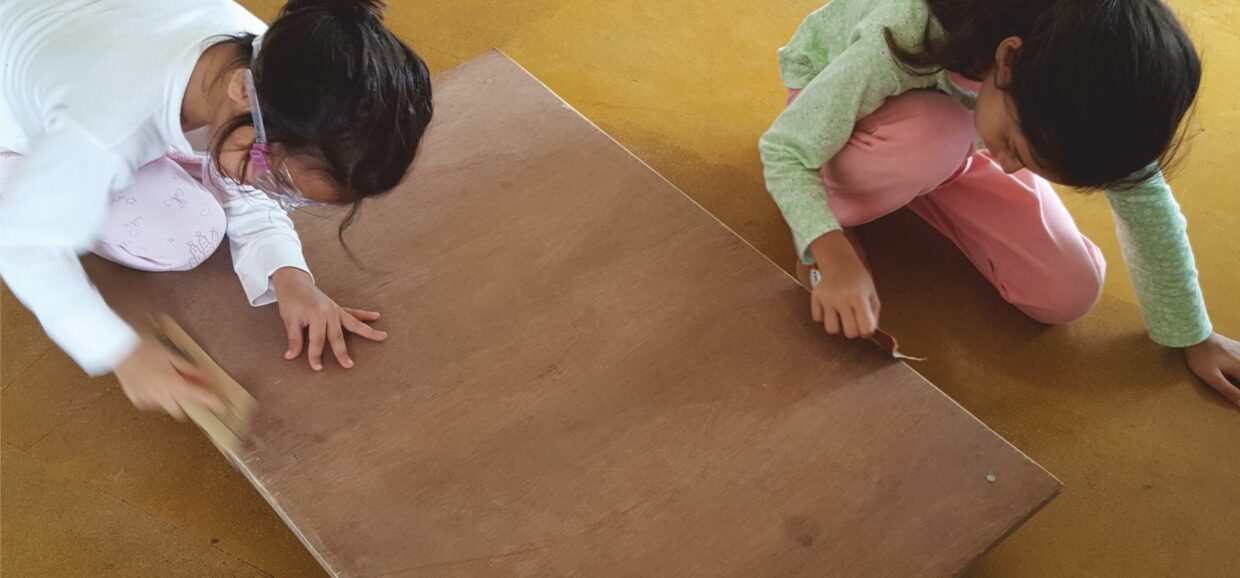
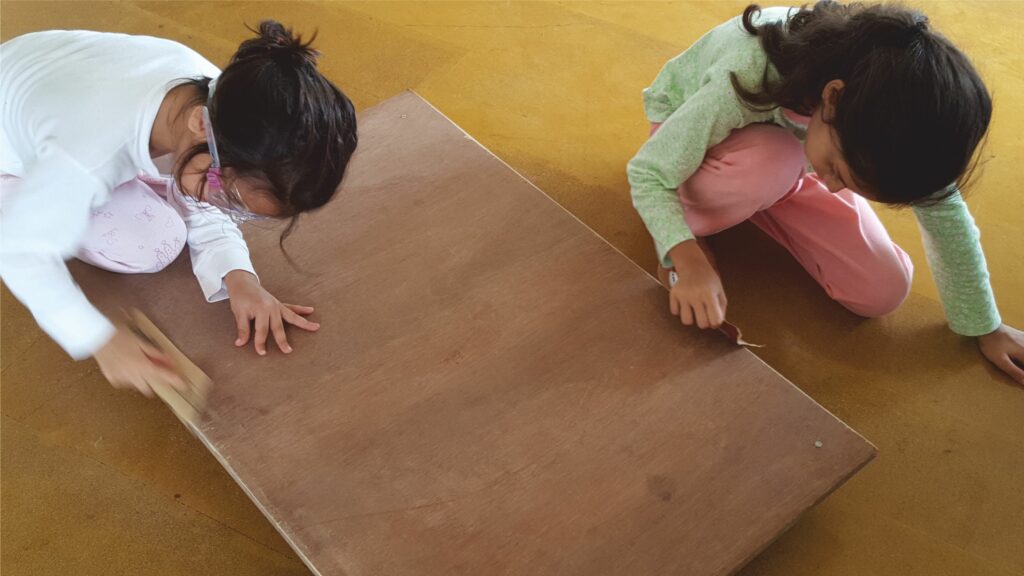
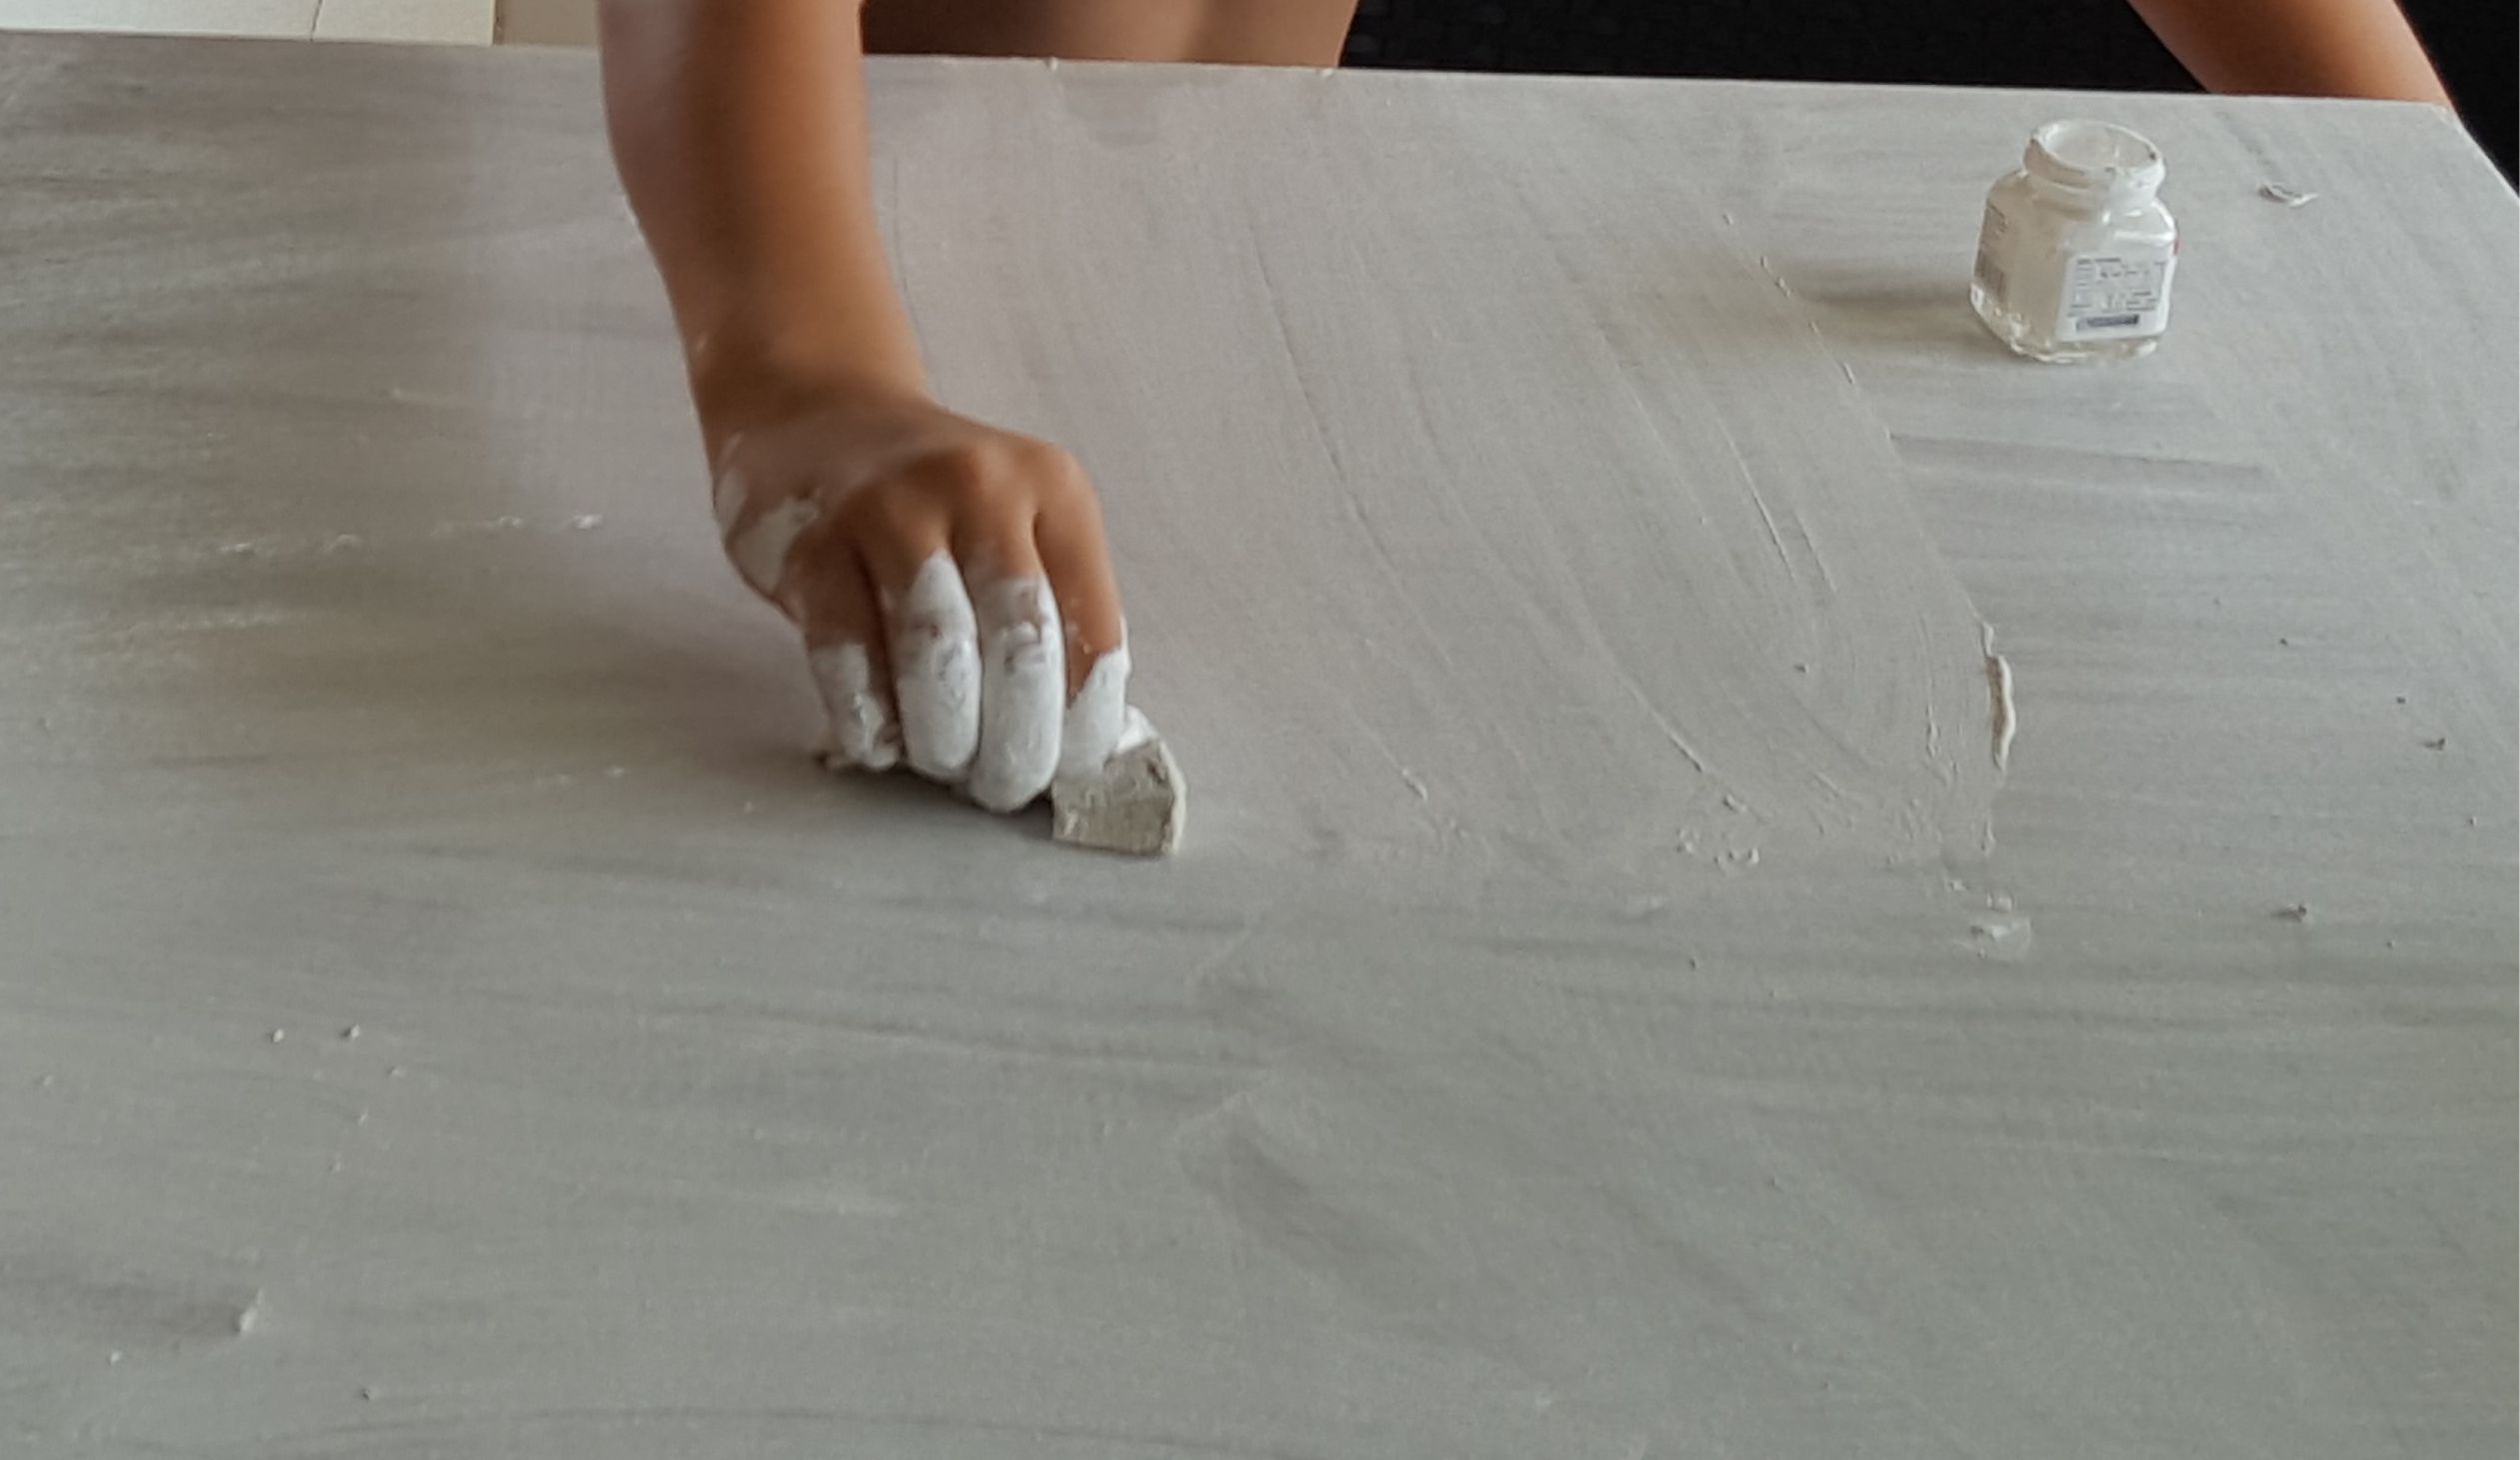
They then used sandpaper to make it smooth and remove any splinters. (I helped to make the corners and edges smooth)
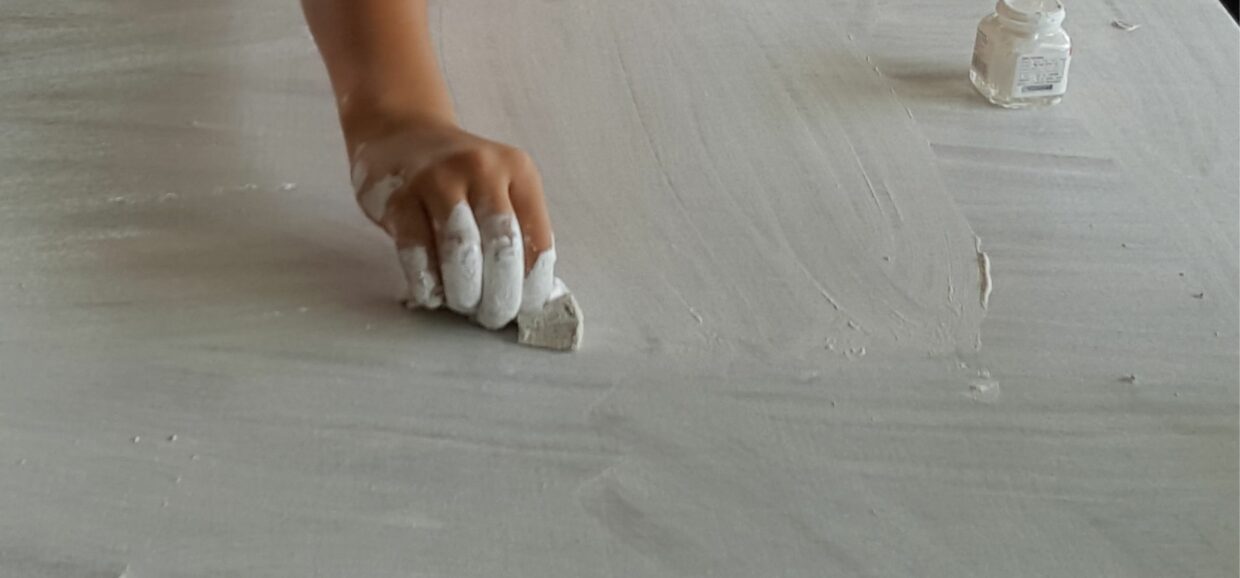
We then painted the entire table white. We used sponges as it's quicker, uses less paint and it’s easier for the kids.
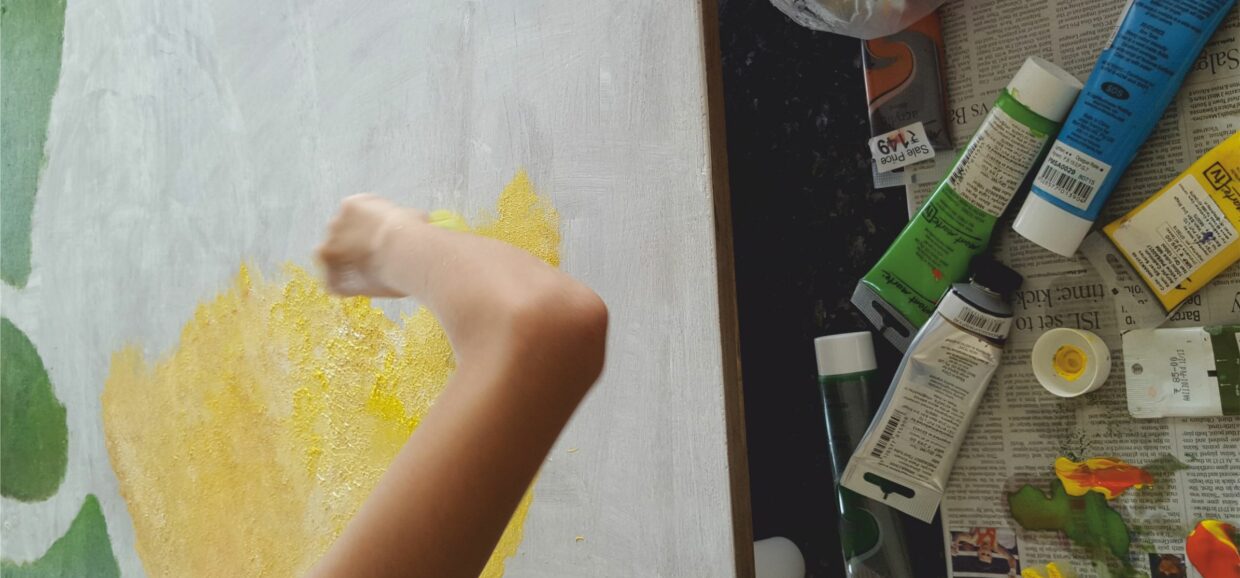
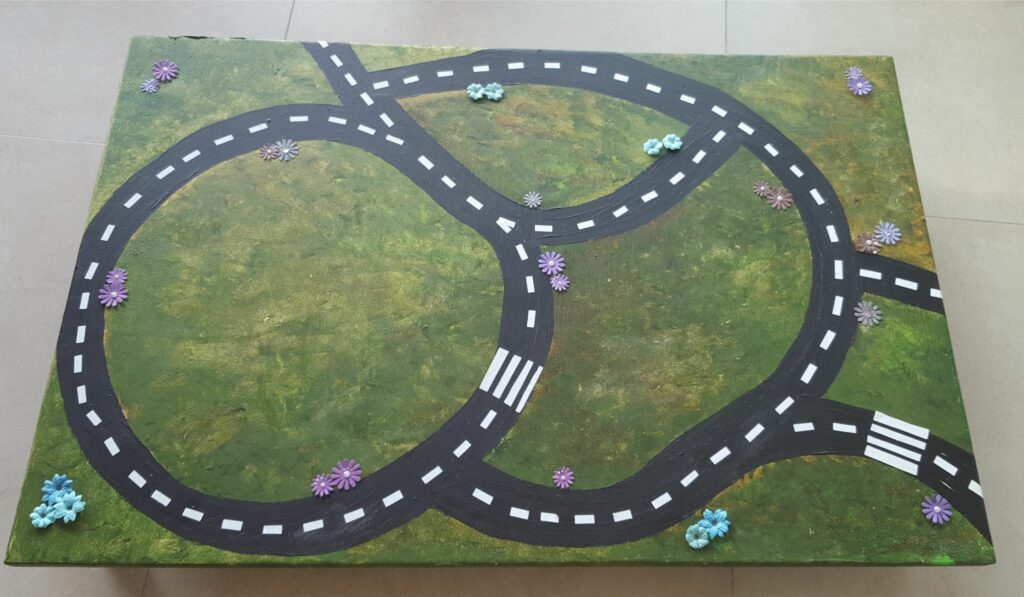
We then stenciled out the roads, the beach and the water with a pencil (don’t worry about this part, your kids will have a clear idea of how it should look) Use train tracks or similar toys for marking the roads. For the painting I again recommend using sponges as the effect is quite nice and it’s easier to blend the colours. Remember to dab and not stroke. We used dark green, light green and brown for the grass. For the sand we used yellow, cream, gold and a bit of orange. And for the water dark blue, a lot of light blue and white.
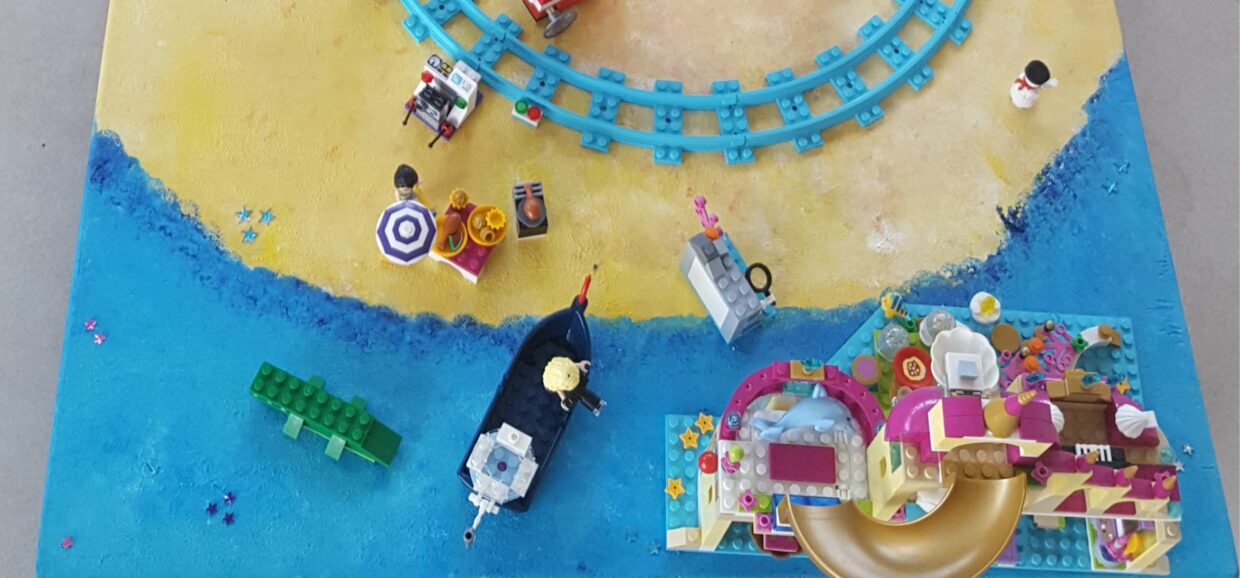
Wait for the paint to dry and then add the decorations of your choice. We added a few paper flowers on the table with roads and a few sparkly stickers near the water on the other -like these small stars that you can see on the picture. The white lines and zebra crossings are also made from white sticker paper. Make sure they stay in place by “painting” them on top with fevicol glue mixed with water (about 4 glue to 1 water). It looks white when put on but will dry clear -like decoupage. You will then be able to wipe the table with a wet cloth without taking off the stickers
My kids play with it every day and all our visitors go straight to it. Hope you enjoy making yours and don’t forget to send me the picture of your creations


Leave a Review
You must be logged in to post a comment.